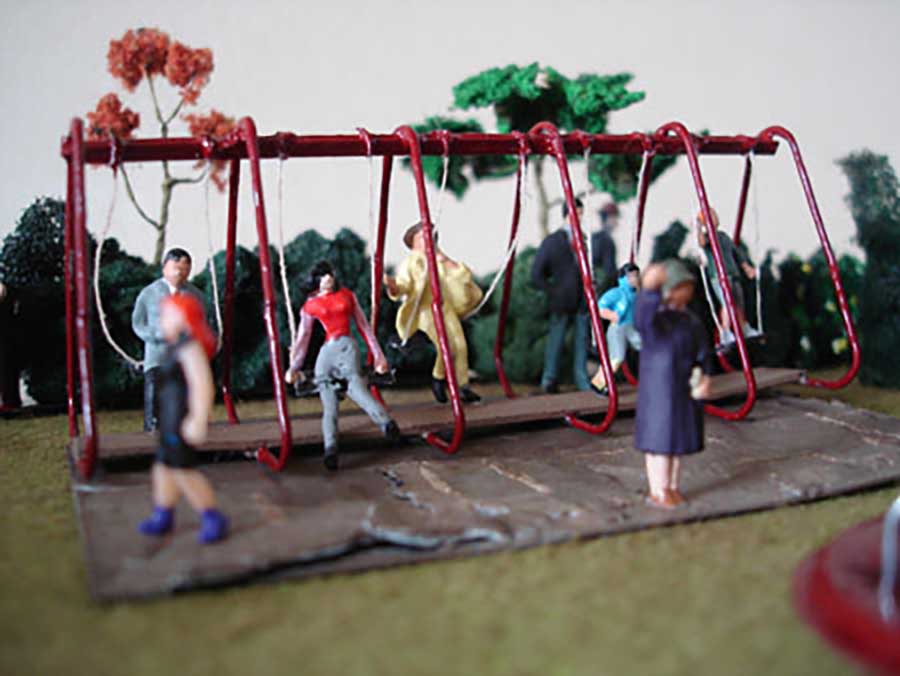
Roger has been in touch – he has scratch built his own model train park, using paper clips:
“There’s no denying it, Al. This one is outrageously simple and horrendously frustrating. But hopefully some may think the results worth the effort.
While experimenting, I had a number of disasters but, fortunately, have the patience of the gods.
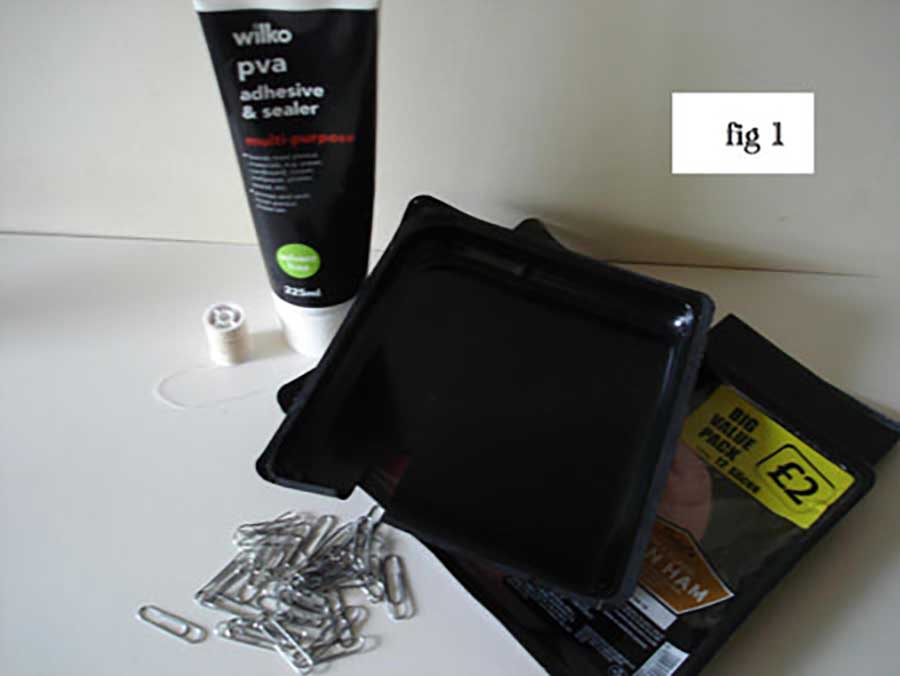
The photos are self-explanatory but here are some instructions, born out of experience, for those who would like them.
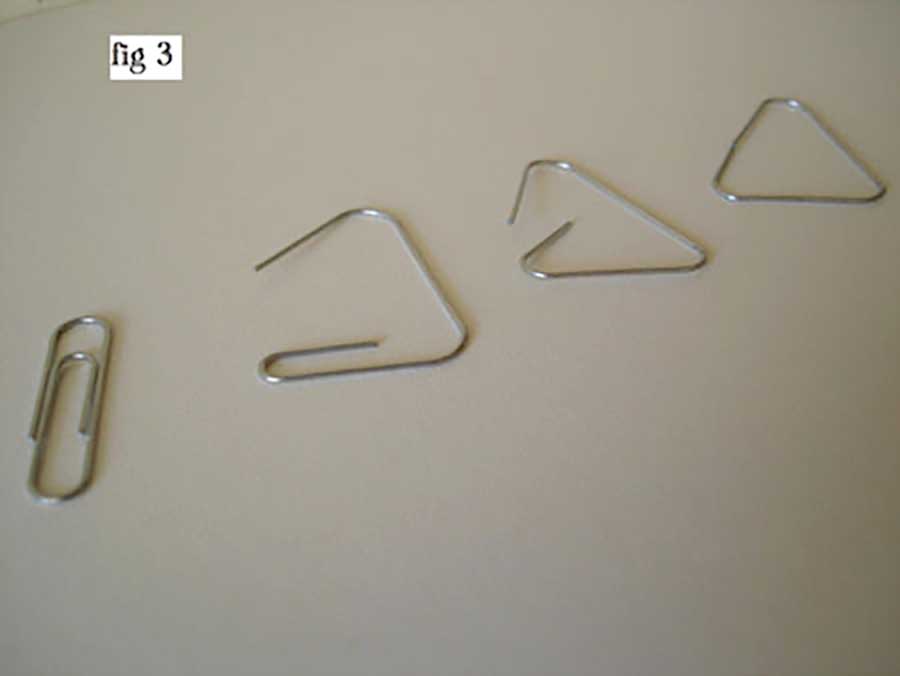
1. Unbend the paper clips to form triangles – so that the ends meet. Important that they match perfectly so lay them one on top of the other to make sure (Figs 3 and 4) Superglue the join.

2. With wire cutters or pliers, cut your three cross members (from other paper clips) – 2 cm long – match them up too (Fig 5).


3. Glue two to the base of an upright (Fig 6). Helps to use tweezers to handle them. Leave for a good old while.
WARNING – Despite its claims and its addiction to people’s fingers, superglue doesn’t care much for metal – but will do the job in the end.
Before gluing it helps to scratch your proposed joint with a craft knife or similar and make sure you apply tiny drops to both surfaces – hold the joint in place while it settles and LEAVE IT.
I learned this the hard way. Even after hours, your joint will still be fragile so handle with care during the construction – learned this the hard way too.
I never use the grotty, clogged up applicators supplied with superglue – pour a little into one of those blue plastic milk bottle tops (which I save in their thousands for this and paint jobs) – apply with a matchstick. And I buy cheap superglue in packs from Pound (99 cent) shops.

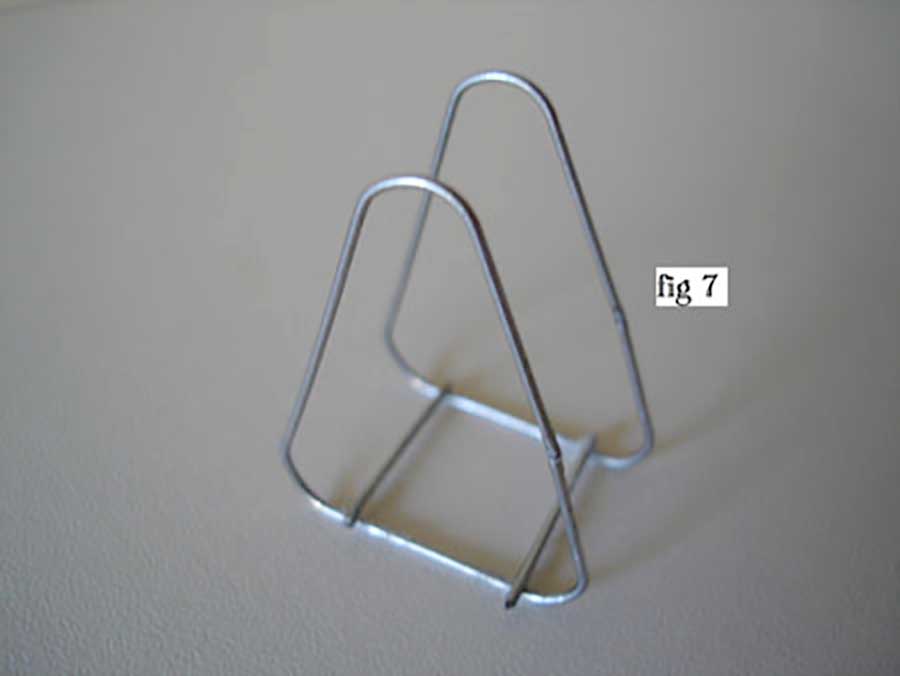
4. Glue the cross members to the base of the other upright (Fig 7) – make sure all is straight and vertical – helps to put a matchbox or suchlike next to the upright while it sets – to keep it straight. LEAVE IT!
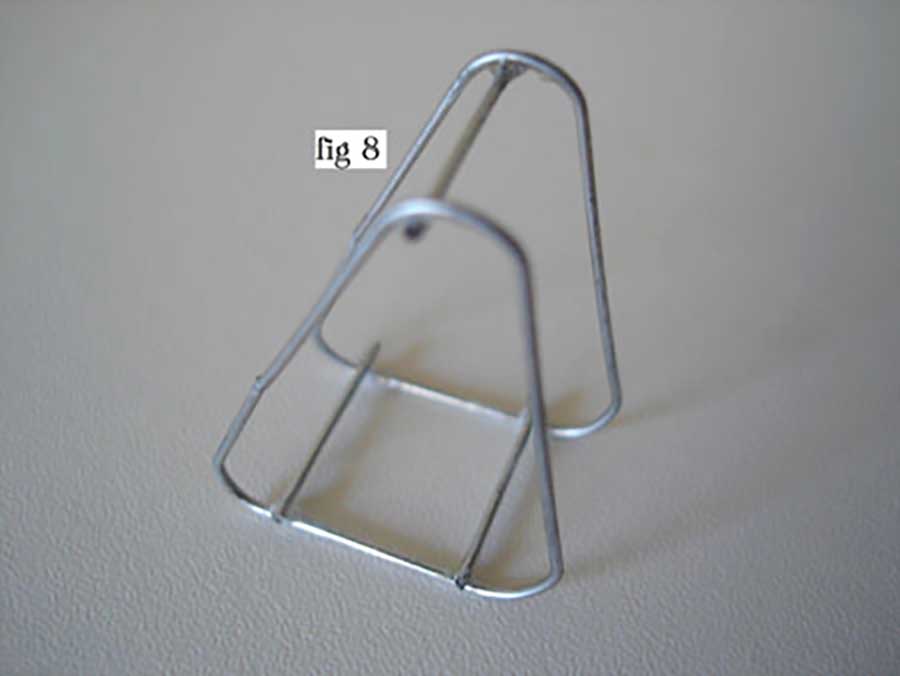
5. Turn your structure upside down and carefully glue in the top cross member (Fig 8). Hold down with a finger and LEAVE IT! Have a double whisky and leave the whole thing overnight.
6. When you awake, remember it is still very fragile. Apply superglue to all the joints, quite generously and … you guessed it … LEAVE IT!. When all has hardened you can gently scrape off excess with a craft knife – but it paints over okay. The structure will never be incredibly strong so handle carefully while working on it.
7. The two suspending chains to the seat of the swing were an unforeseen problem. Thread just flicked all over the place and wouldn’t hang. Fuse wire wouldn’t straighten.
The solution was to run a length of thread through a blob of PVA adhesive – then through my fingers to saturate it. It dried nice and straight and firm. Cut the lengths of thread. You need generous lengths – trim off excess when all is done. Tie a knot at one end of each thread. The knot will slot in UNDER the seat.
For the single swing mark each length 3 cm from the knot – the length of the drop.
For the multiple swings mark off 2.5 cm (I’m assuming a standard size paper clip – mine were 3 cm – top to bottom).
DO NOT CUT OFF EXCESS UNTIL COMPLETELY FINISHED.
8. I always keep a couple of OO gauge people close by while I’m making stuff – maintains a sense of scale. Cut out your swing seat from a sheet of that free plastic substance known as chilled food container (pictured). Should be just wider than an OO gauge bum.
You can use a piece of plastic sheeting as a base too if you wish. Cut two TINY nicks in the centre of each end of the seat. You can slot your thread into these – the knot under the seat. Glue the ends of the thread underneath the seat.
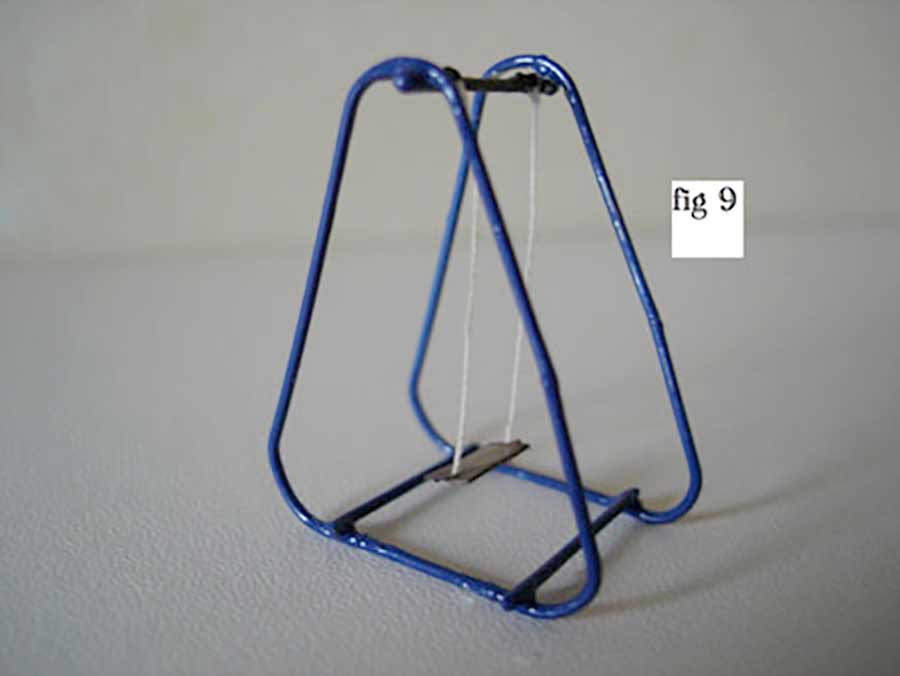
9. At the top rail, wind your thread round the bar at the mark – suspending the two threads from the upright. Glue parallel to hold them (Fig 9).
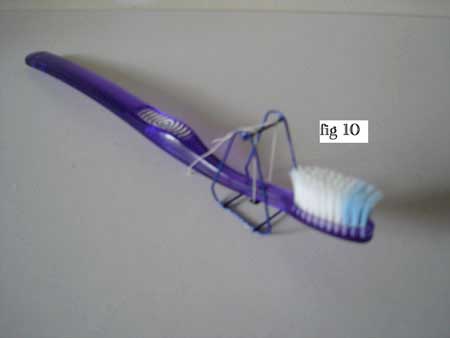
– The Toothbrush Test – Place a toothbrush (or similar) on the swing seat (Fig 10). You can check how parallel your seat is. Bit of wiggling at the top rail will sort out small inaccuracies. Apply a little more PVA to the thread – will help straighten and hold.
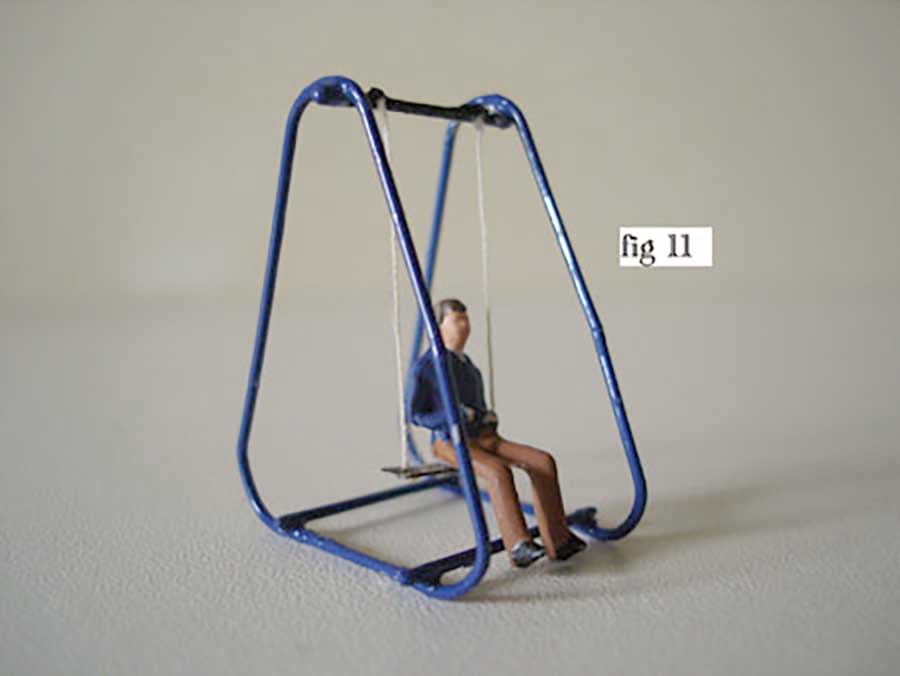
– OO gauge feet should just clear the ground. You may find that, when you put a person on the seat, he turns upside down with his feet in the air! Just glue his feet to the base (Fig 11).
– When you’re happy – cut off the excess.
10. Paint and admire your model train park. Have a double whisky.

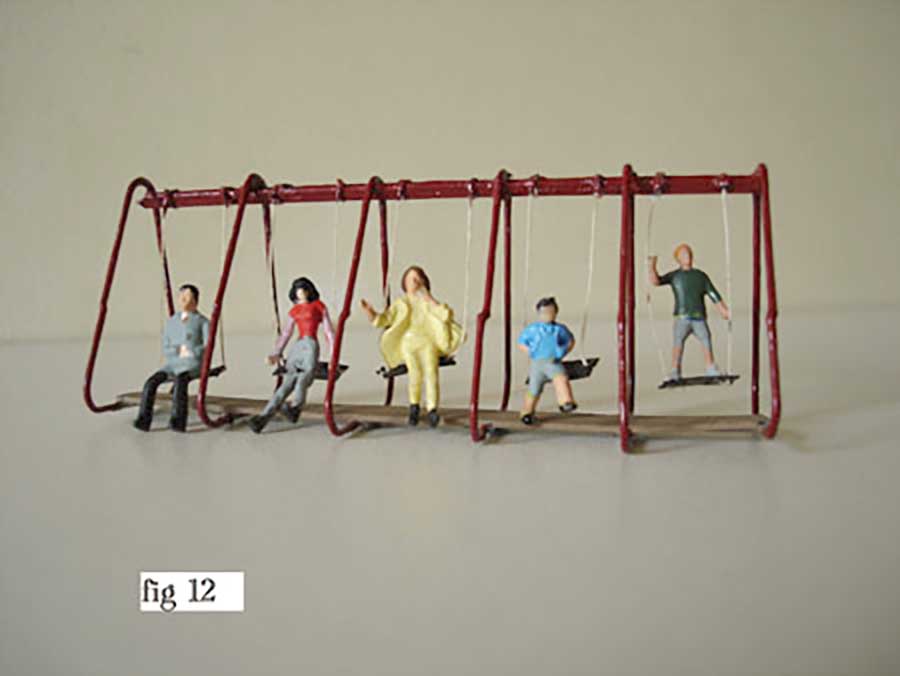

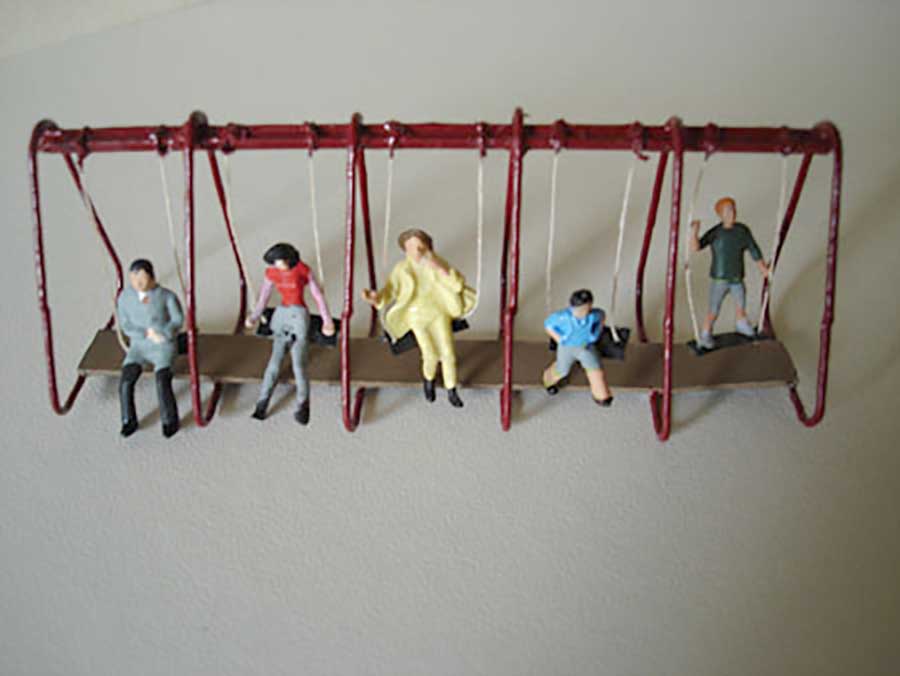
The row of swings (Fig 12) was actually easier to make than the single – same process. A length of plastic sheet (free – see above) joins it at the base – and a length of old Hornby rail at the top (you could use wood – anything).
When you’ve completed it – well worth while mixing up a little two-tube epoxy glue, spread it right across the UNDERSIDE of the base – so that the bottom lengths of the uprights set in it like rock. Really strong then.
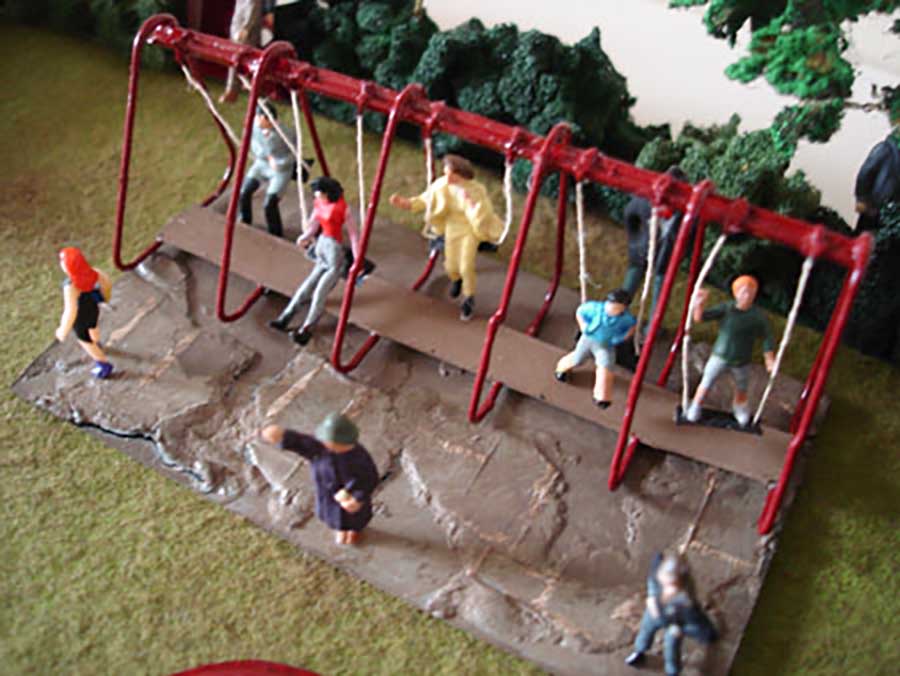
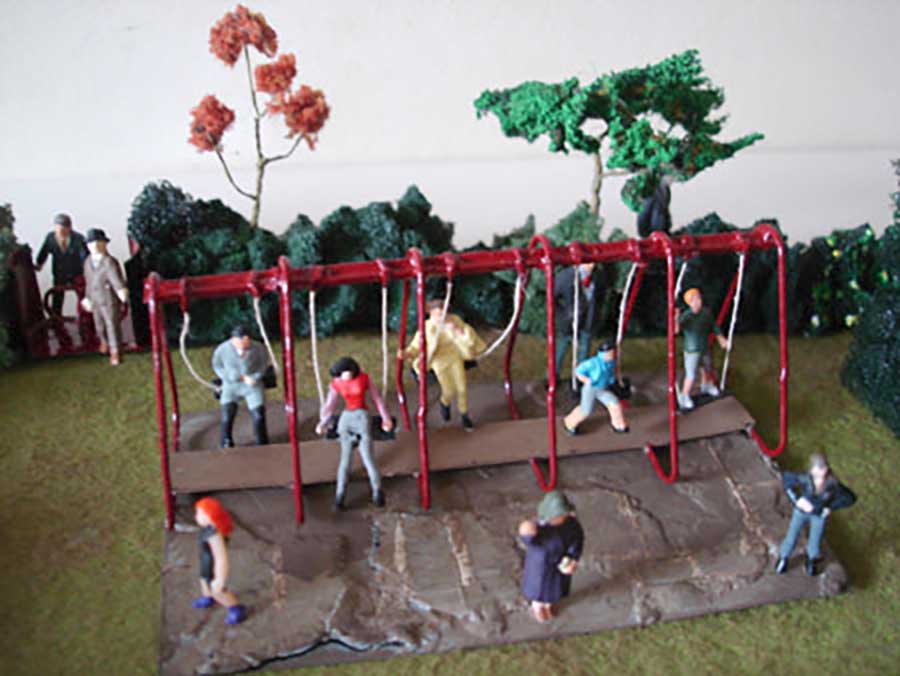
This is the first structure intended for what I’m calling PAPERCLIP PARK. More to follow if you can bear it. And yes – I know – the Park Keeper would have kicked those adults off the swings and fined them – but I didn’t have any OO gauge children for the prototype. Will get some when I make another.
Best wishes to all.
Roger.”
A big thanks to Roger for sharing his model train park ‘how to’.
It reminded me of Allen’s recent post: HO scale park.
Also, the people – which really make the scene come alive – made me think of Dan’s: Model train people.
Now on to David.
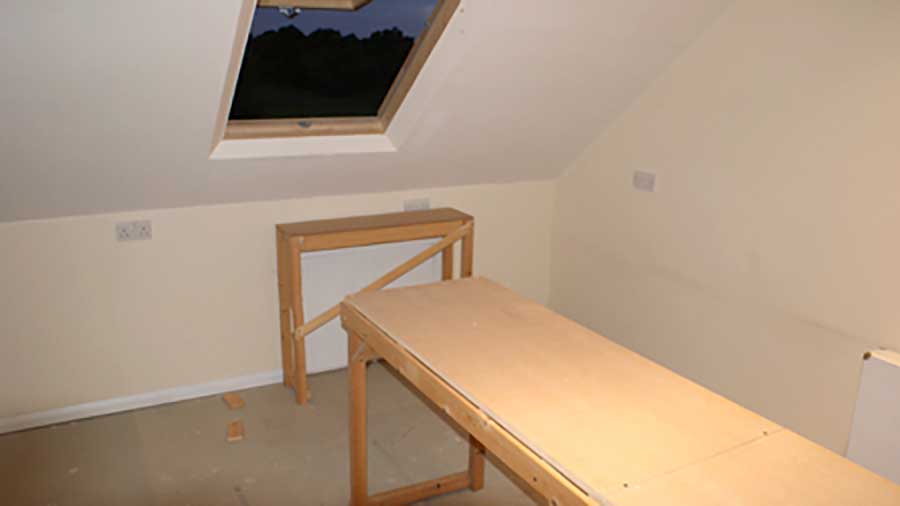
He converted his attic, made his benches, and got busy without even a track plan – he just got going.
Talk about making a start!
“Hi, AL.
Just a short email with a few pics, started this project in march on the day I retired, 67.
So 1 year on I thought you may like a quick scan of how it is now, hence the pic’s.
Built from scratch by myself including the loft conversion with stairs all the table work and model work never done anything like it before, but just got stuck in.
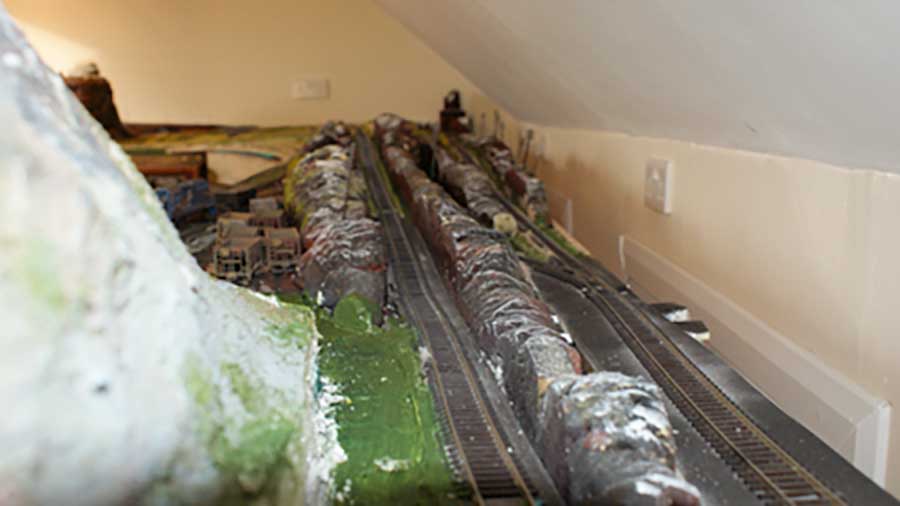
Built the staging around room 21’x18′ started off 2′ wide but has grown to 4′ in places, no track plan just bought track and laid it as i saw fit have had to change a few parts of track to get trains around the radius’s, but that was just fun.
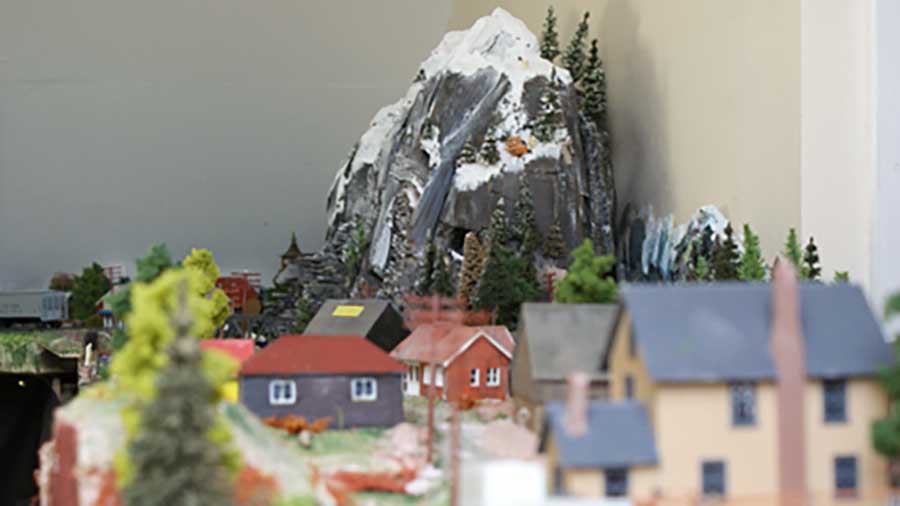
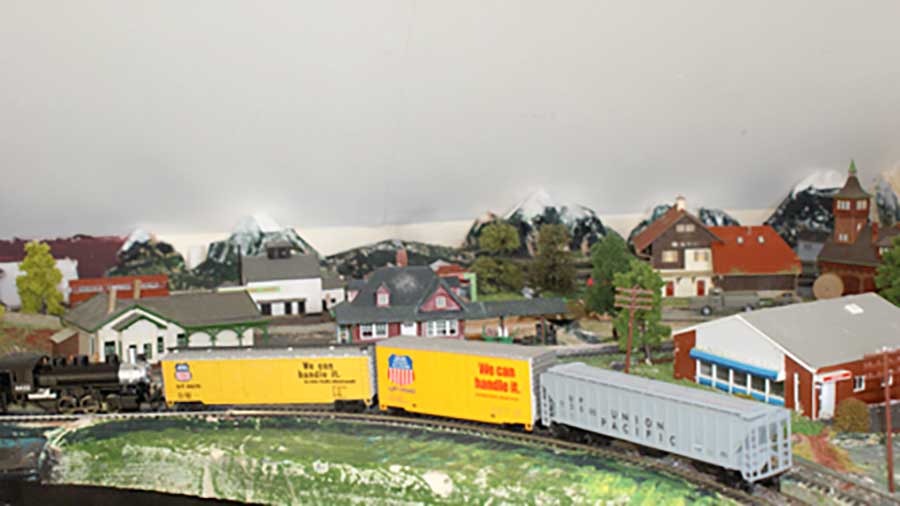
A couple of gradients (4) some mountains, hills, tunnels 4, desert, modelled on US trains but pure imagination on places, small town, industrial, gravel extraction, goods yard, valleys, farmland, did have a suspension bridge 3′ long but changed to a lift off entrance to get a better line connection.
Have put in the only part not made by me but my young grandson and that was a working volcano that he made for school and it fits in quite nicely.just starting to come together.
Cost so far including the conversion 18 engines, 120 trucks and models, tunnels 4, approx 320’line, $535 now I think that is a fair price for a few years enjoyment in the future,what say you.
Bought mostly off eBay some good bargains on there, 200 people $6.77 it’s still out there.
Cheers.
David”


A big thanks to Roger and David.
That’s all for today folks.
Please do keep ’em coming.
And if today is the day you decide to join in the fun, the Beginner’s Guide is here.
Best
Al
PS Latest ebay cheat sheet is here.


That is simply a brilliant play ground. Add a few grains of along baking soda to the superglue and the paper clips will stick straight away – 24 hours later rock hard
the swing sets were awesome & love the bridges that made the different layers on the landscape. great work.
Roger – What a good idea for a scratch playground set of swings and other playground items.
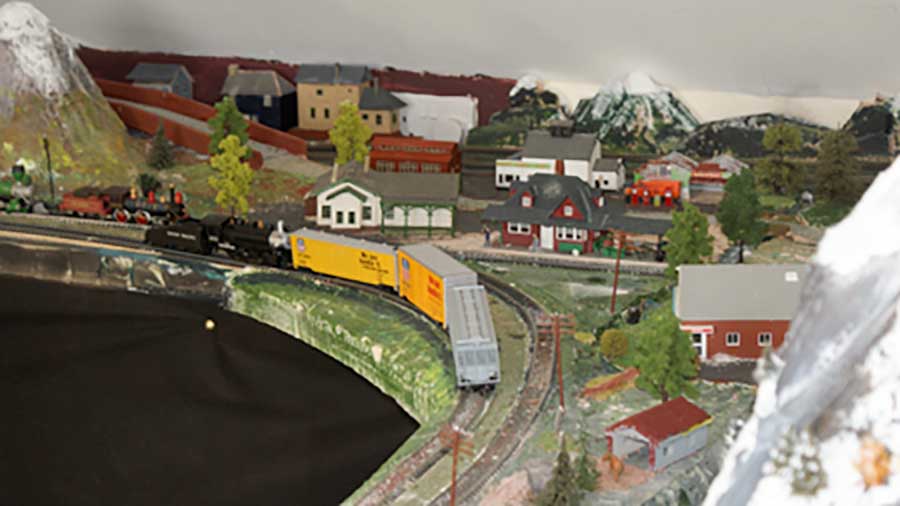
David – Nice loft conversion with plenty of space – layout taking shape with room to operate.
David. Well done with the conversion. I assume you calculated the bearing capacity of the original joists. You have added considerably to the weight on them with all the additional cross joists. I notice that you have tripled up some of the new joists. Normally one would brace the original joists by attaching additional Timbers to the side of the originals to strengthen them. There are of course may ways to do this
Really great work.
Roger
Very well prepared & descriptive narrative. The most important tip is how to use CA glue because it applies everywhere else.
Great park, clever stuff, & get more kids.
Dave
There are so many Daves it should be Dave from “”. I assume its HO and I’m so jealous of the space you have. You’re off to a great start and I hope your grandson gets involved.
Big Al
😁