Dan’s been back in touch, this time he’s put together a fantastic ‘how to’ on making model railroad rocks:
“For this series, I will use photos from the PowerPoint I used in a Clinic I did for the NMRA in Chicago some years ago.
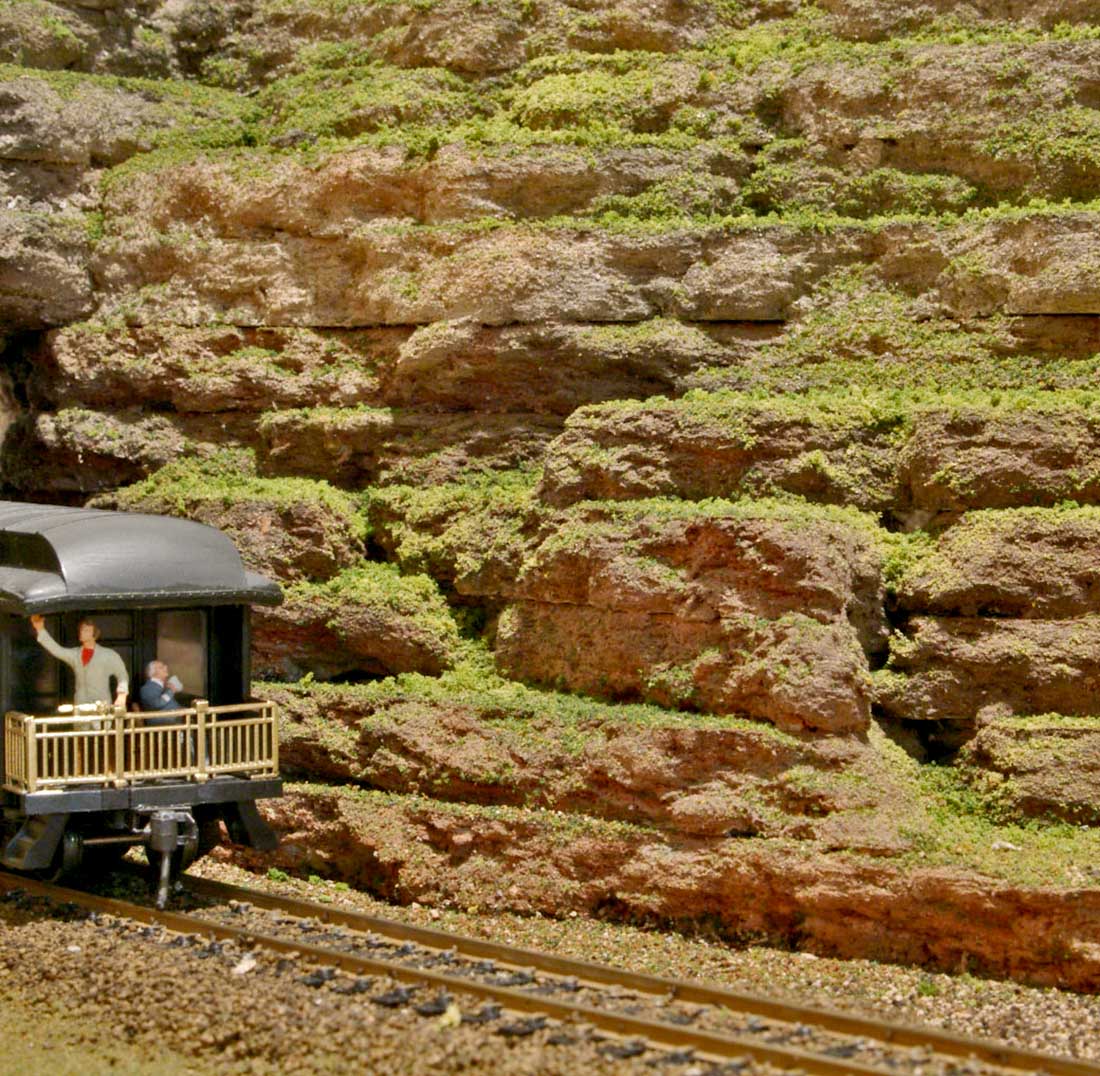
I had been posting photos of my layout for several years by then. I made a small tunnel scene that was portable. It has been to at least 5 clinics since then.
I will use captions to help explain the steps as I go along. But first, here are the basic materials for the project.
Obviously, you need ceiling tile. My school was an endless source for the tile. About twice a year the school would remove damaged tiles. Largely from stairways. These tiles had NO asbestos in them.
Building supply stores have the tile. If you know a remodeling company, they might have tile they have removed. The tile for model railroads needs to have a smooth finish. The tile with the pebbly finish is not good. They won’t make a smooth interface surface you need.
When using the tile to make your ‘rocks’ be sure the white side goes down and the dark side is up. The white side does not take watercolors well.
General materials you will need: Ceiling tiles, white glue (to glue the tile pieces together), basic craft watercolor paints, “wet water” which is water with a few drops of detergent added, India ink and alcohol mix, spray bottle with adjustable nozzle, one-inch medium bristle brush, a box knife and long panel nails (explained later).
This is a messy process so a drop cloth will come in handy when producing the rocks from tile. Keep the Hoover handy!
I will show the tunnel as made for the clinic from start to finish. After that, I will show how I made my layout and other people’s rocks. These will come as separate examples. Some were more difficult than others.
I will show the “little things” that make them look natural. Natural is the look we want. I was a double science major in college. Geology was one of the areas I studied. I have been to all 50 states, and I always look at the rock formations.
As such, the scenes I create are like many places I have seen.
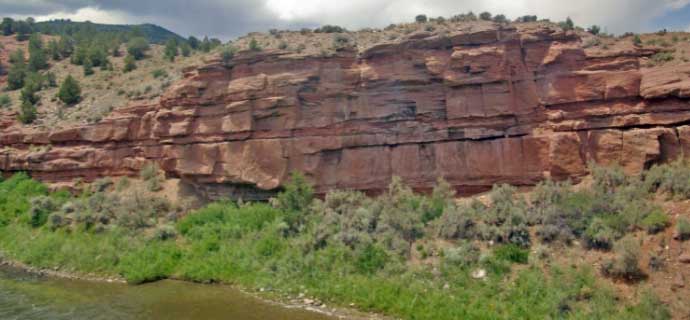
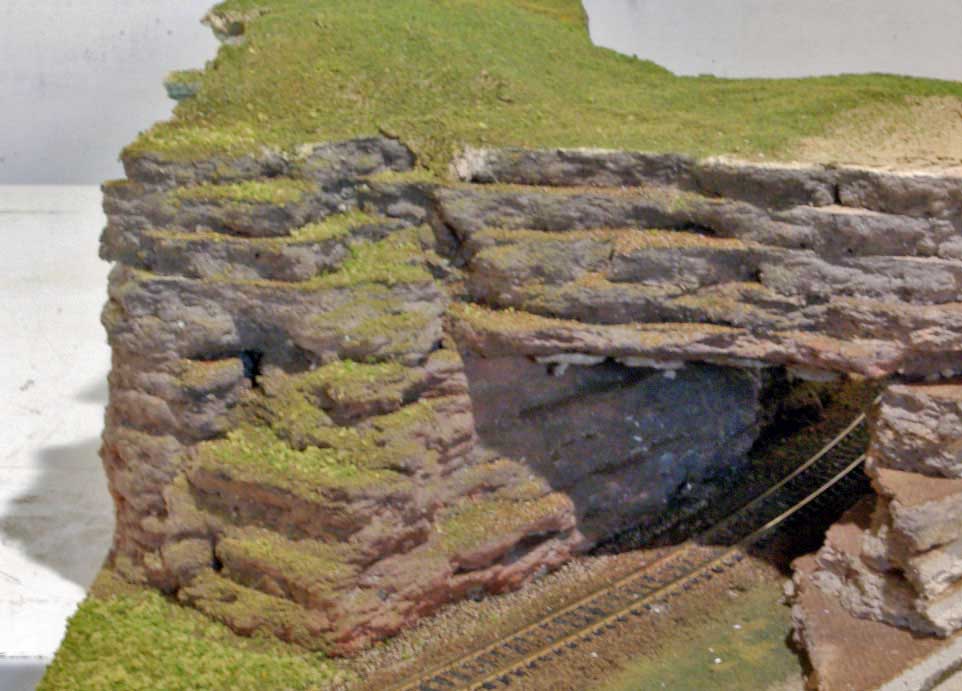
Some prototype rocks. One shows that if the rock is stable enough the tunnels do not need portals.

The other shows a normal sedimentary rock formation.
The basic part of making the rocks. A drop cloth for the mess. The (in this case a 2 foot by 2 foot) tile and a 2 by 4 board.
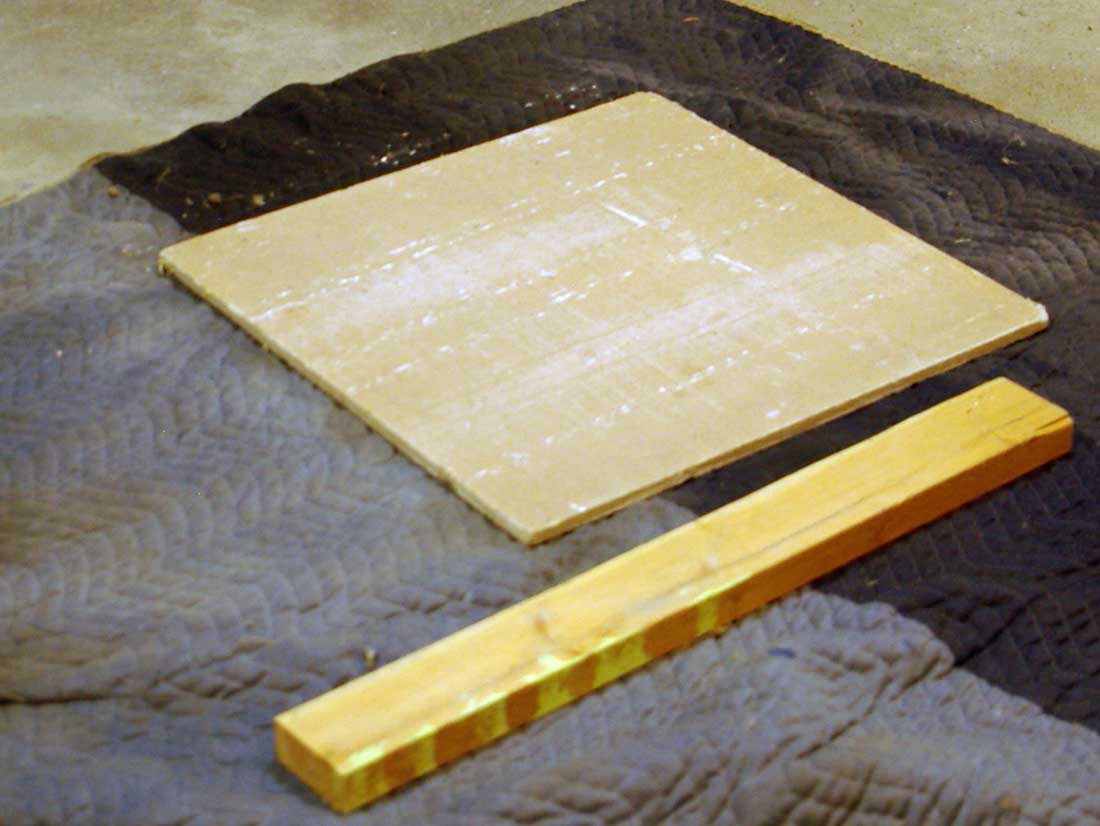
Place the tile so that a part of it is over the board.
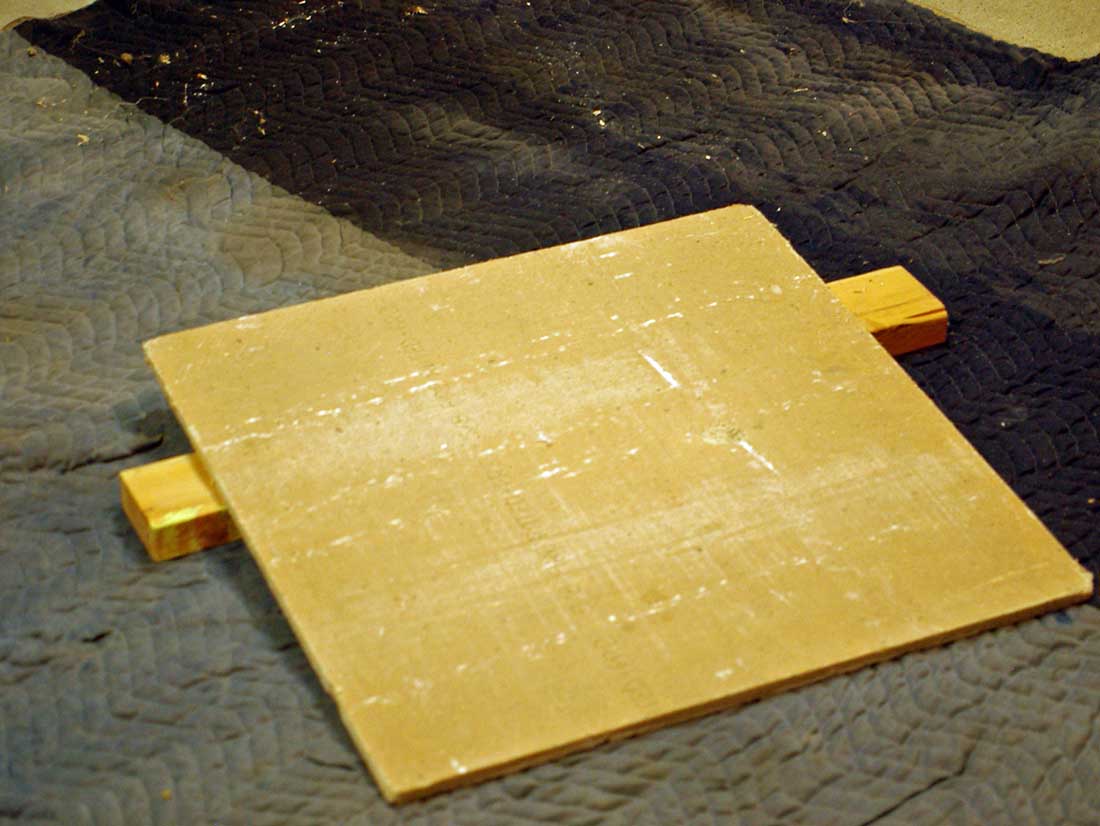
Using even pressure across the overhang, press down slowly. This creates rather straight line rocks.
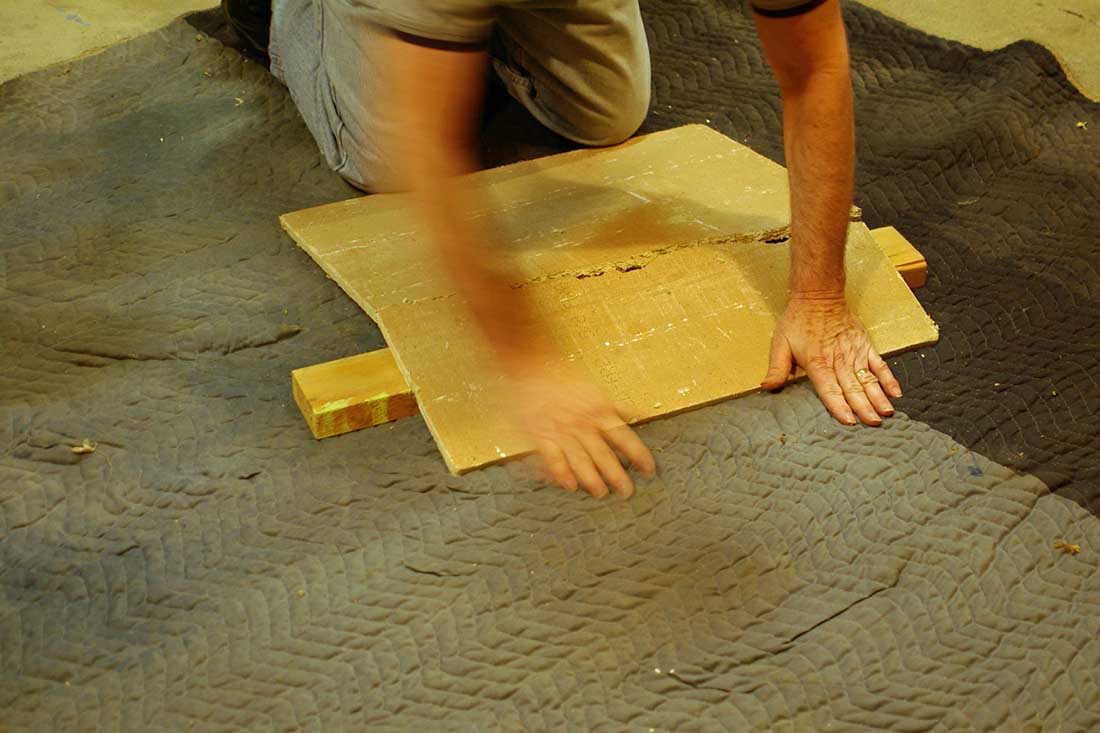
This time press down unequally and sharply while supporting a piece in the other hand. This creates the rounded pieces.
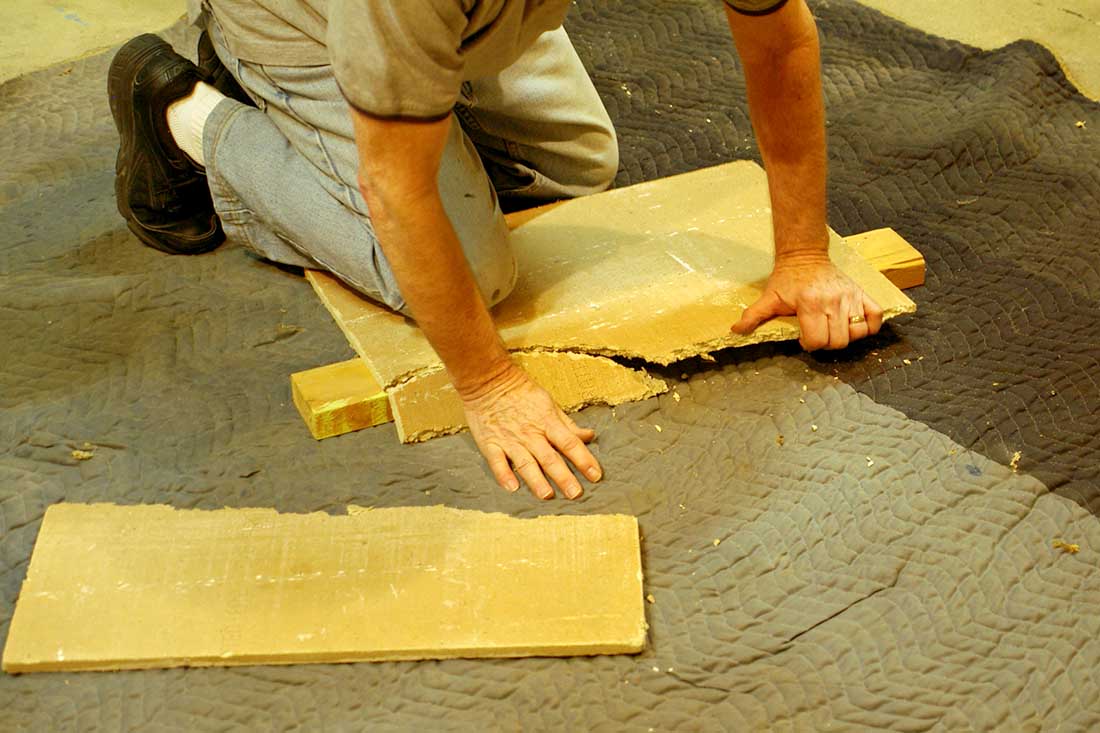
Put the pieces in a box for use once you have a lot of the tile pieces ready to go.
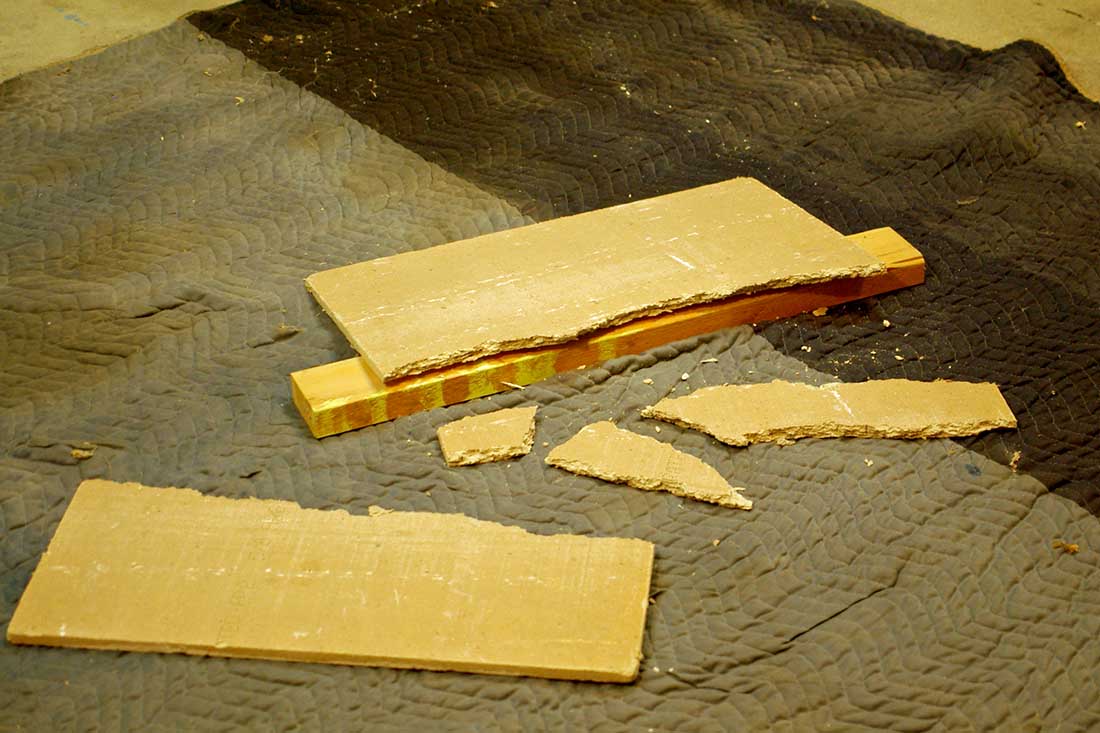
Using a box knife, trim off the larger piece for use later in making supports. The pieces of rock tile do not need to be more then 2 to 4 inches wide. You will see later where a wider pice3 might be needed.
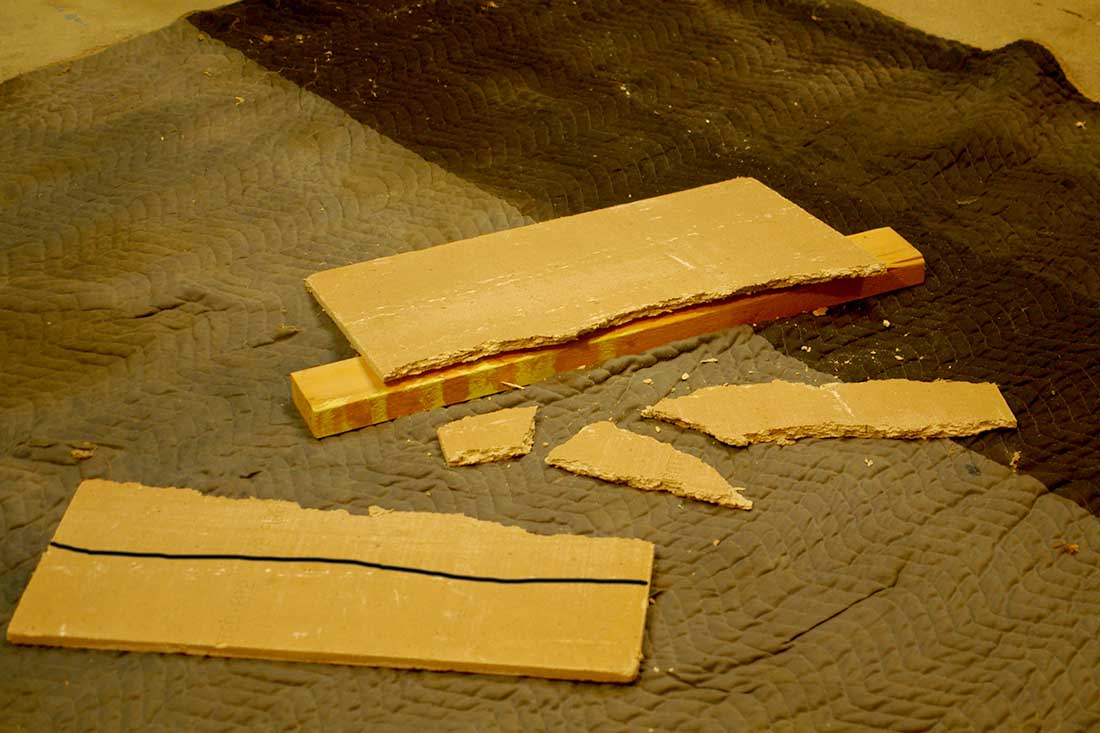
From this…
…to this!
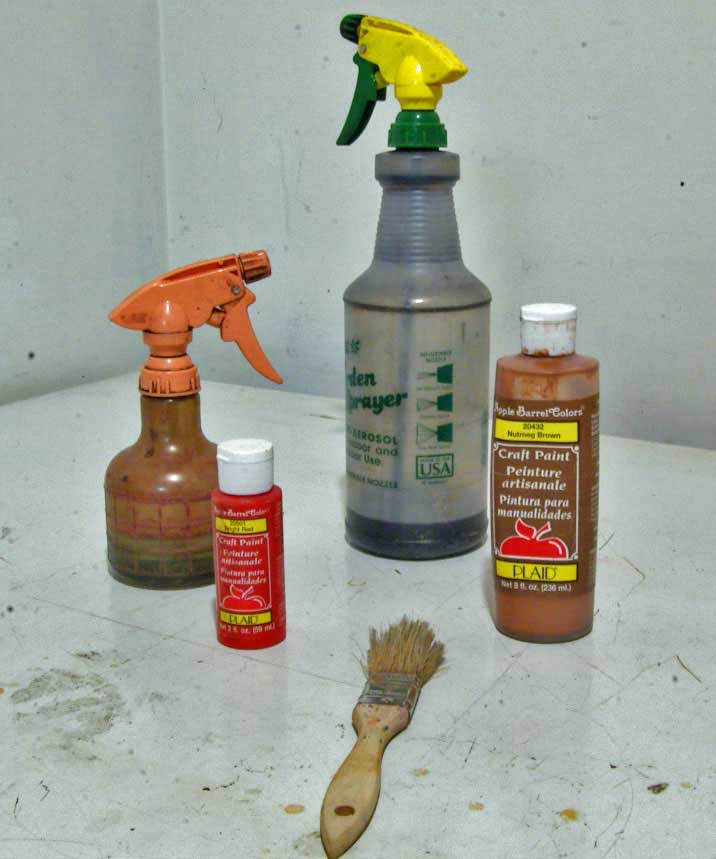
The basic tools. The spray bottle with the orange sprayer is for the wet water. The tall one is for the India ink and alcohol, the paints and a brush.
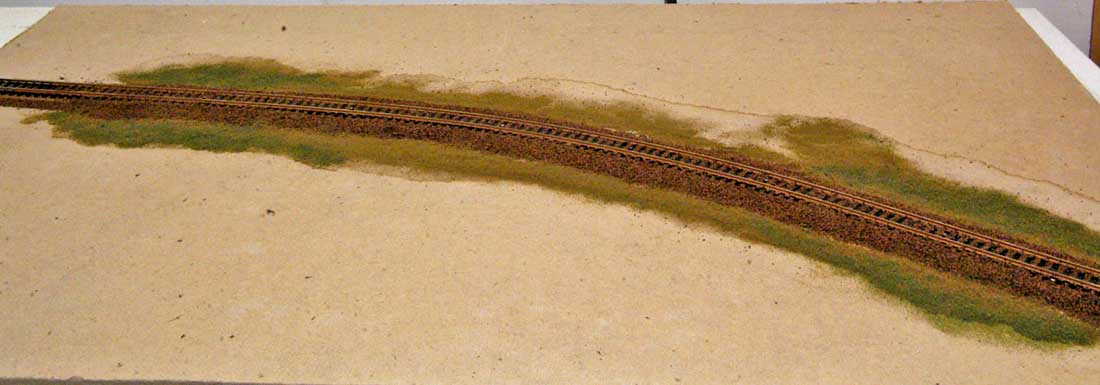
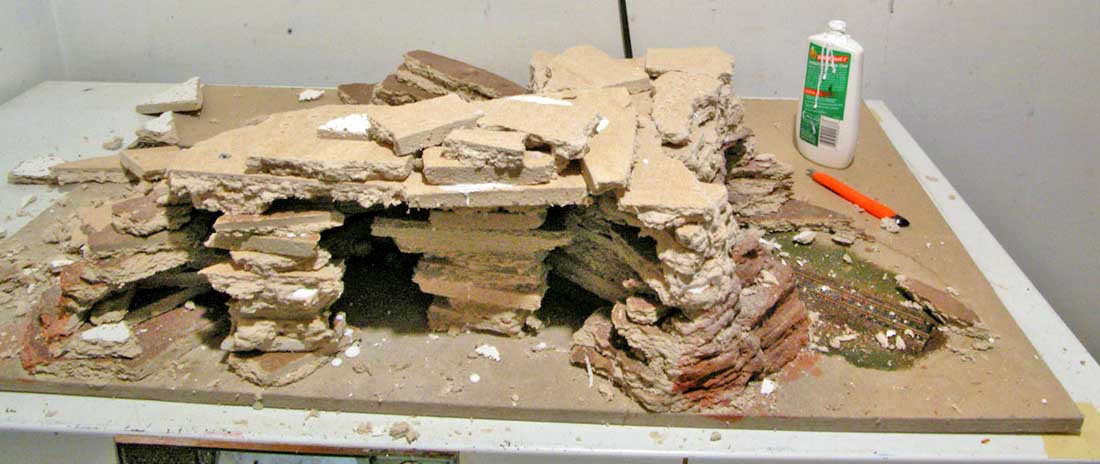
The part of the track that is going to be in the tunnel must be ballasted and finished before the tunnel work can begin.
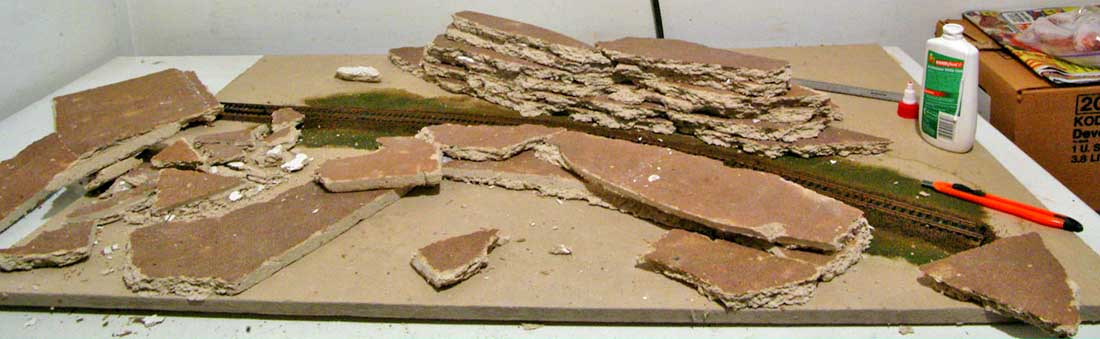
Begin by laying out and stacking the tile. Since this was a demo, the tunnel is short. Determine where the entry and exit must be and arrange the tiles. Begin by gluing the first layer and the next and so on. Once the stack has about 4 or 5 tiles high I used long panel nails to keep them in place. If you don’t do that you need to wait for the glue to set before moving on. (My base is Homasote. I don’t knew how hard that is to get in England.) The tile is soft and the nails just push right in.
The tunnel is beginning to take shape. The box knife was used to keep the width of some of the larger pieces of tile from getting too wide. NEVER USE THE BOX KNIFE TO CUT THE FRONT OF THE ROCKS. This causes a sharp cut and does not look good or natural.
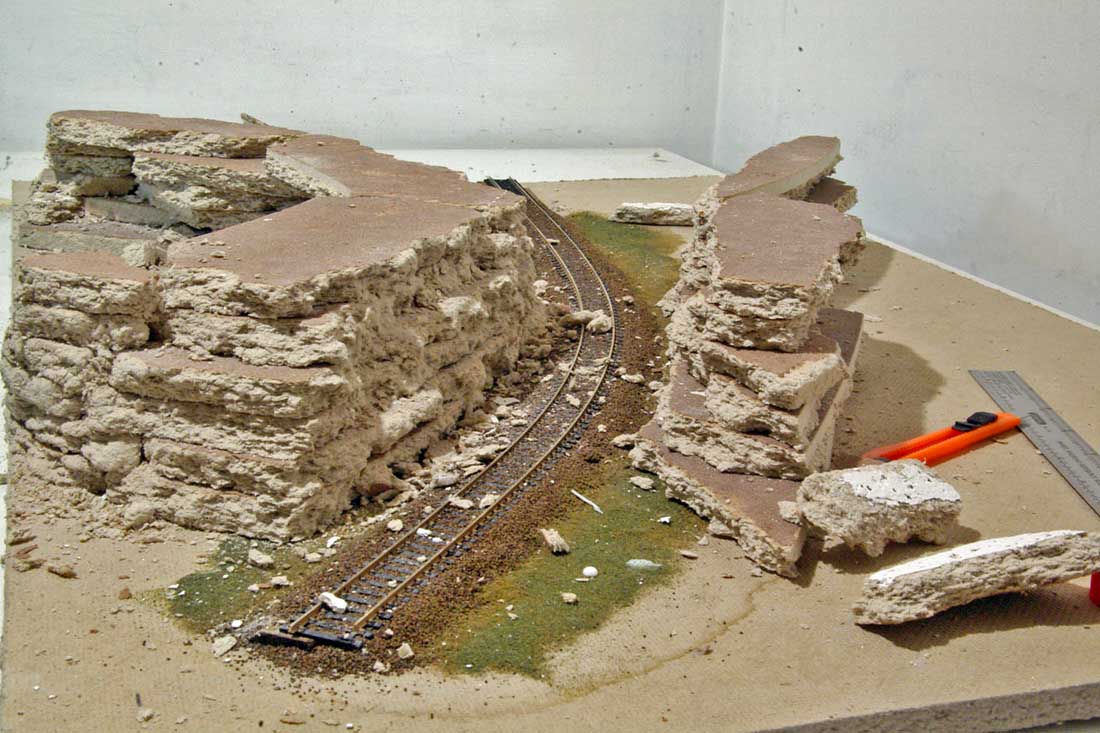
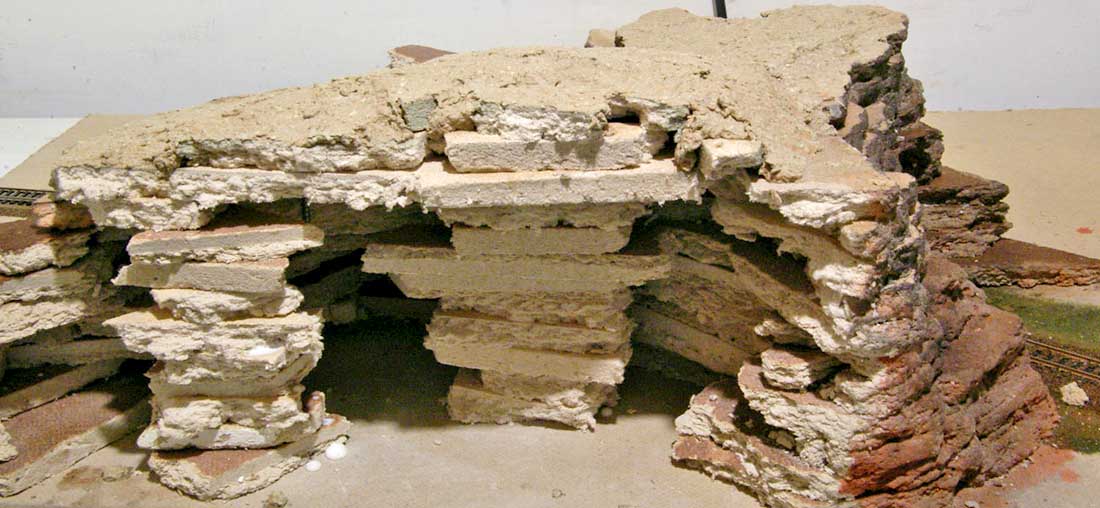
Now it is time to determine the clearance in the tunnel. The tile is about 1/2 inch thick. The cork road bed is about 1/4inch thick and the rail adds a little to the height of the top of the rail. In this case there are 6 layers of tile. The distance from the top of the rail to the bottom of the 7th layer is just at 22 scale feet. This just clears a stack train.
You can see that I have a temporary roof over the tunnel. Now was the time for any adjustments.
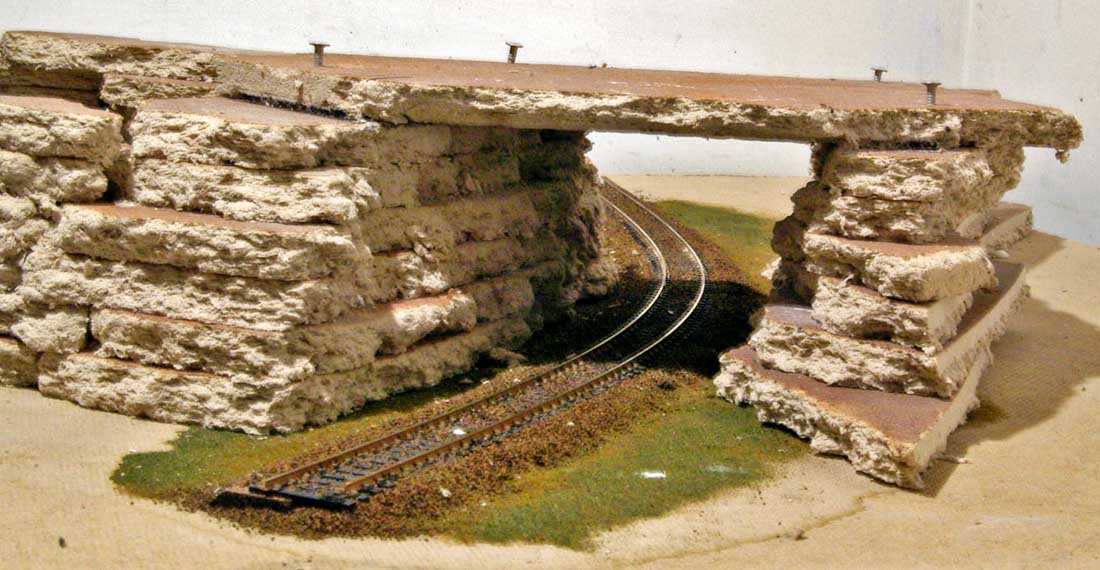
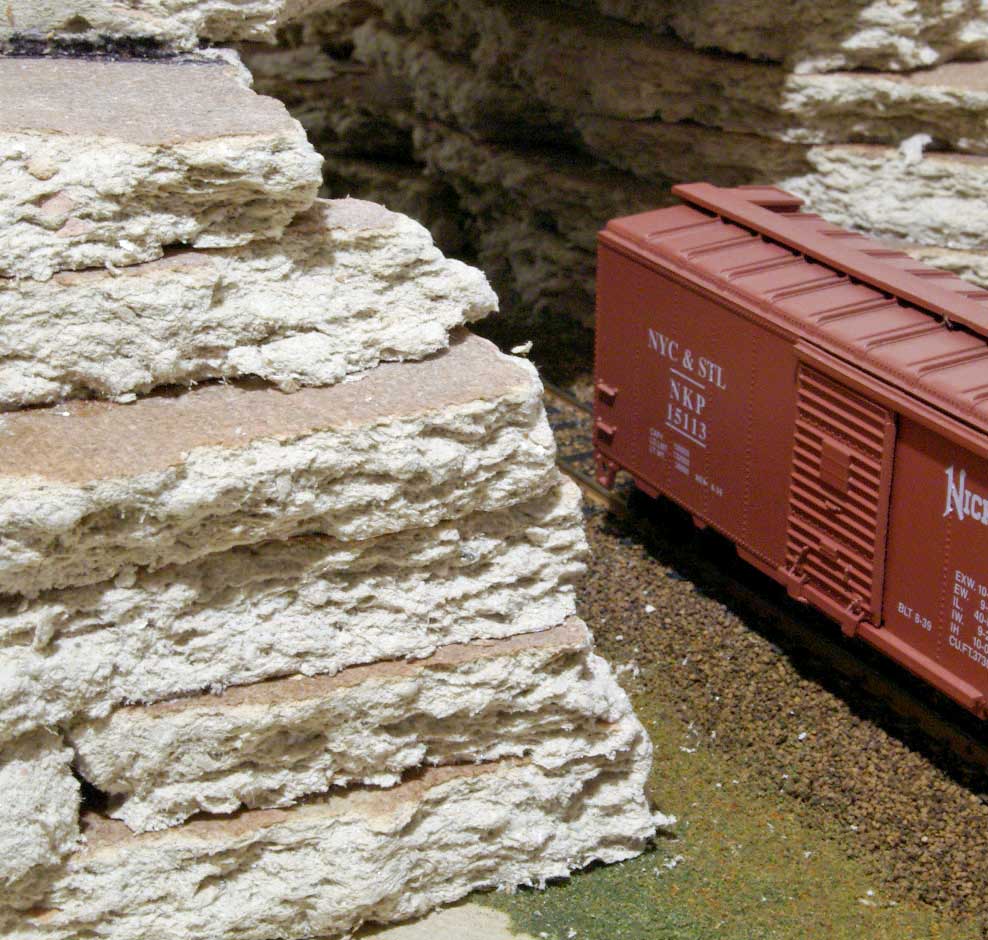
Make sure the tunnel sides also clear. Use your longest car to check.
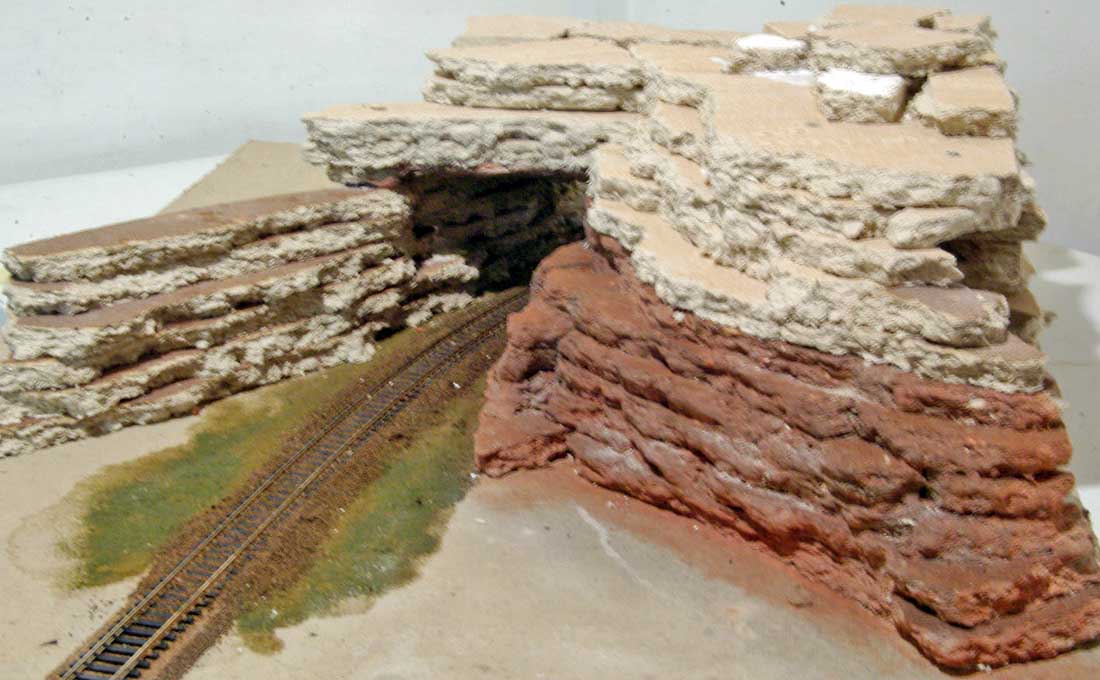
A lot has happened by this time. First, before the “Top” is permanently in place, paint the part that is going to be in the tunnel. If you are going to be able to see through or deep into the tunnel, finish the inside as far as you would normally be able to see. This depends on your point of view. Visitors always seem to want to see in the tunnels.
Put down some news paper inside the tunnel. Lightly spray the wet water where you are going to paint the ricks. Mix you color you want for your basic rock. Grey, black, or shades of reddish brown. Your choice. The paint does not need to be very thick. Just remember the paint dries lighter than when you put it on. Lightly brush it over the rock face. Do not press too hard. (Later I will show how to make “weathered and less weathered rocks.)
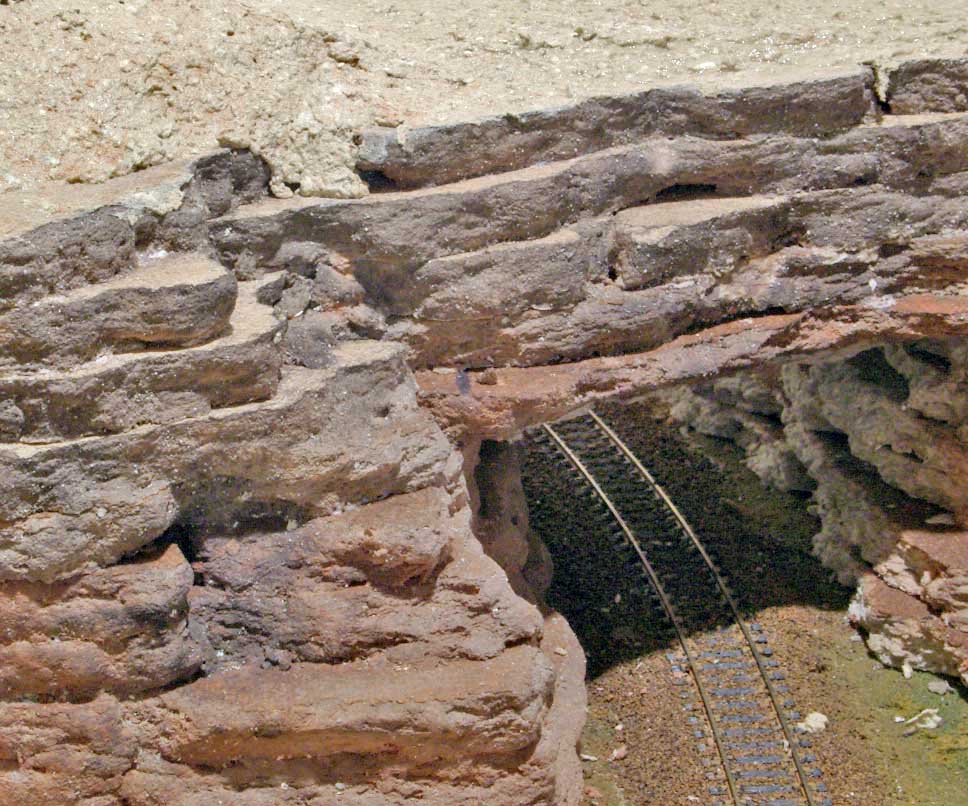
Notice I added small fragments of the tile (there will be lots of them) on the underside of the tunnel roof. Once they are very dry is will lightly paint them the base color. Then go back with the India ink and alcohol mix to make an exhaust soot look. I do this with the spray nozzle on the mist level.
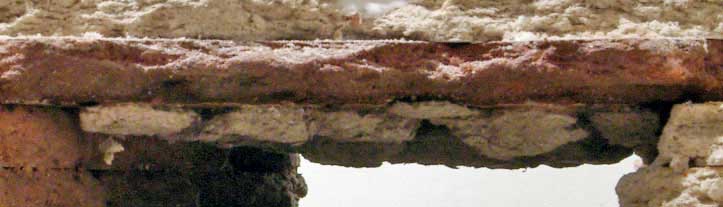
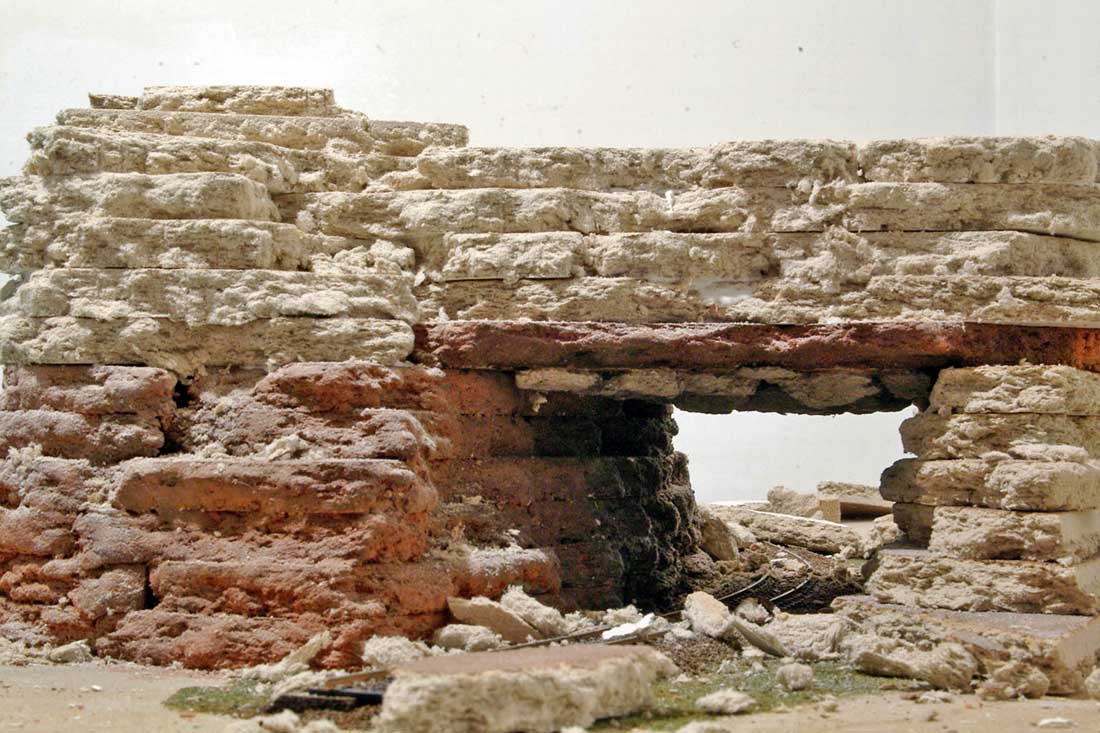
Remember, I mentioned the cuttings when cutting down the width of the tile? Here you can see how to make supports These pieces will support the top of the mountain for things to come. You probably always wondered what held them up!
Progress so far. I did this is steps for the clinic photos. Otherwise all of the rocks would be painted at this point. Sorry about the focus on this one. Notice the little bits now on top. This will become the uneven top of the mountain.
I add craft paint to the mix when I add the water to the Sculptamold. In this case brown. I have used shade of green where large areas are going to be covered. There is no need for plaster cloth here. Again, remember the color will be lighter when dry.
Note the “spill over” of the Sculptamold. This is just dirt that has filled in some of the rocks over time. This adds realism to the scene.
It is MUCH harder to do a scene in halves!
Sorry about the soft focus again. By now the project for the clinic is about done. For this scene I wanted a wetter look as oppose to my usual dry look. First, I finished painting all of the rocks with the brush. I sprayed some of the India ink and alcohol in the crevasses to deepen the look of them. I used a little narrower setting on the nozzle. (In upcoming sets I will show the effects of the deepening look.)
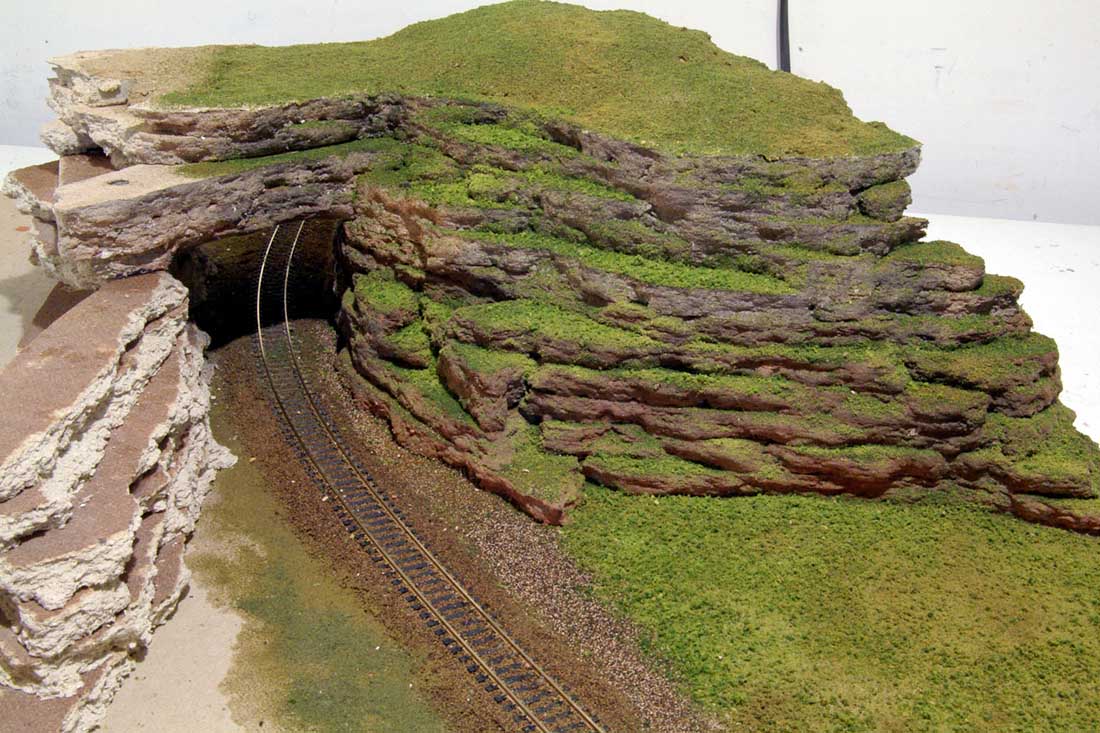
Next, I used a mix of about 75% white glue and water spread all over the Sculptamold. Then lightly sprinkled ground foam over the glue. Then about half an hour later I very lightly sprayed water over the ground foam. This will dampen the foam and draw up some of the glue and keep it in place for ever(?). It has made may trips so far.
Then, to get the mossy look it is more foam. I use a mix of about 30 % glue and 70% water for this. Where ever you want grass or moss to show, lightly brush on the mix. Especially the flatter places. Then, with ground foam on a stiff piece of paper, lightly puff the foam toward the rocks. This will spread the foam and you can do some directing of the foam by moving the sheet a little.
The End!

This is the basics of the process. In the upcoming sets I will show more difficult and pleasing results. All worth the effort. Difficult only because of the situation or need to engineer the underside of the mountains.
Dan”
A huge big thank you to Dan, for sharing how he makes his model railroad rocks. They look amazing.
It reminded me of Jim’s post (Jim’s stunning landscape, so I had a quick look, and yup, same technique. No wonder they both look stunning.
Here’s another one of Dan’s too:
Railroad ceiling tile scenery.
And there’s this one too:
That’s all for today folks.
Please do keep ’em coming.
And if today is the day you stop dreaming and start doing, the Beginner’s Guide is here.
Best
Al
PS Latest ebay cheat sheet is here.


well done a really good idea
Excellent presentation of this method. Thank you Dan for doing this on Al’s site. I will be referencing this one to do some and see if mine will look that good. Great entry. A++++++
Dick ( little r) from Hardin Mt.
i like the terrain. nice was to make it.
Now I know what I can use the broken pieces of dry wall for instead of putting them in the garbageThanks
outstanding, the whole thing looks so real, like you were really standing next to the tracks in the setting in the wild, incredible & every well done.
Dan, you’ve just given all of us a “clinic” on your method. Spectacular results in every photograph!
Dan
Bravo! I for one cannot thank you enough for your time & effort to present this awesome lesson for scenery making. Your previous submissions of your layout were always great and now we know why.👍
Big Al
Sweet!
So far this has to be the best and the least expensive way to get that original mountain view, I can’t wait to start and hope to get as close as Mr. Dan’s mountains they really look like if you were outdoors looking at them, great thank you and keep them coming they really help.
What a great tutorial! I wish I had this a few years ago. Nevertheless I can still use it to mod a few places that need help. Thanks for giving it to us.
Nicely done using ceiling tiles for rock strata. My choice as well for my layout. Sedona and the Grand Canyon are great examples for various layers of color. Thanks for sharing.
Jim AZ
Wow! I was just wondering what would be a good way to do this.
Thanks for the great “clinic!” I’ve used similar technique, with a couple of tweaks: (1) I softly brush the broken edges with a wire brush, and (2) I’ve not added sculptamold to the paint. After seeing your results, I will be doing so in the future! One final comment: by tilting the pieces at various angles, you can get the impression of tectonic pressure and upheaval.
Thanks again! I learn something from every modeler whose work I see.
Jim, I will be explaining my techniques next. As to the tilting. You choose the area you want to model. I have don some tilting on other layouts. West Virginia has some great cuts on Interstate 77.
Very nicely done.Says exactly as what to do and how to achieve it all. Very good photos
Looks amazing! But as Dan noted, geology varies by region. Any suggestions for a layout that would represent the mountains of Pennsylvania?
I’m wanting to model the area, but have never been there. Crazy right? But the layout is “anchored” by the need to include a coastal range light where my wife’s grandfather was the lighthouse keeper towards the end of his USCG career (Cherry Island Range Light on the Delaware River).