Steve’s been in touch – he’s shared how he makes his homemade model train ballast:
“Hi Al,
I enjoy the post, obtaining ideas from others, and watching the videos.
Due to scenery costs, I continually look for ways to make the hobby cheaper, without degrading the visual effects.
Here is a cheap method to produce your own ballast. The end product is about ¼ of the price of retail ballast
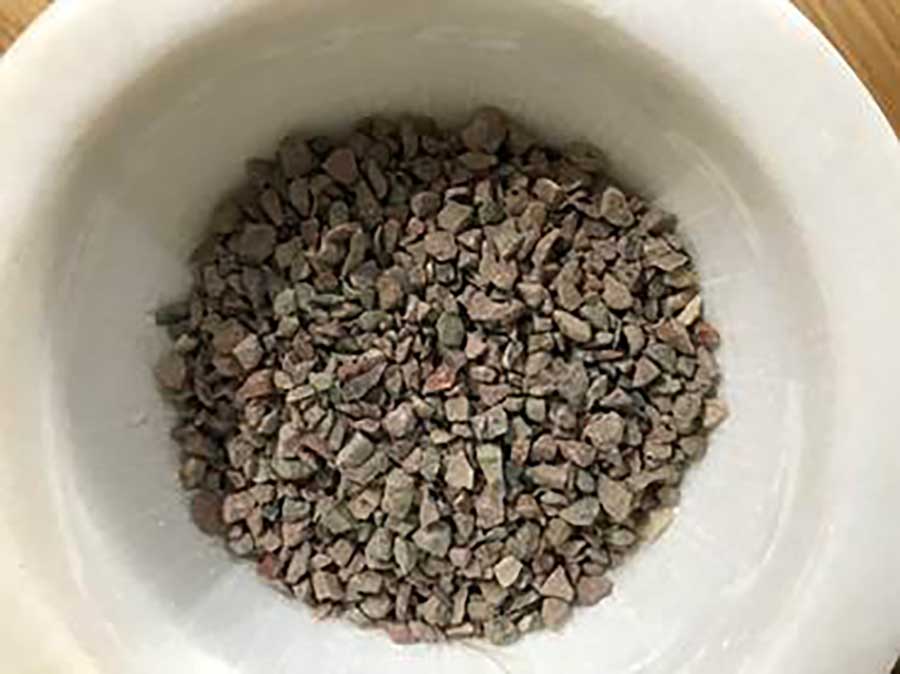
This idea uses ‘Bonsai’ Pebbles, which are easily available from garden centres.
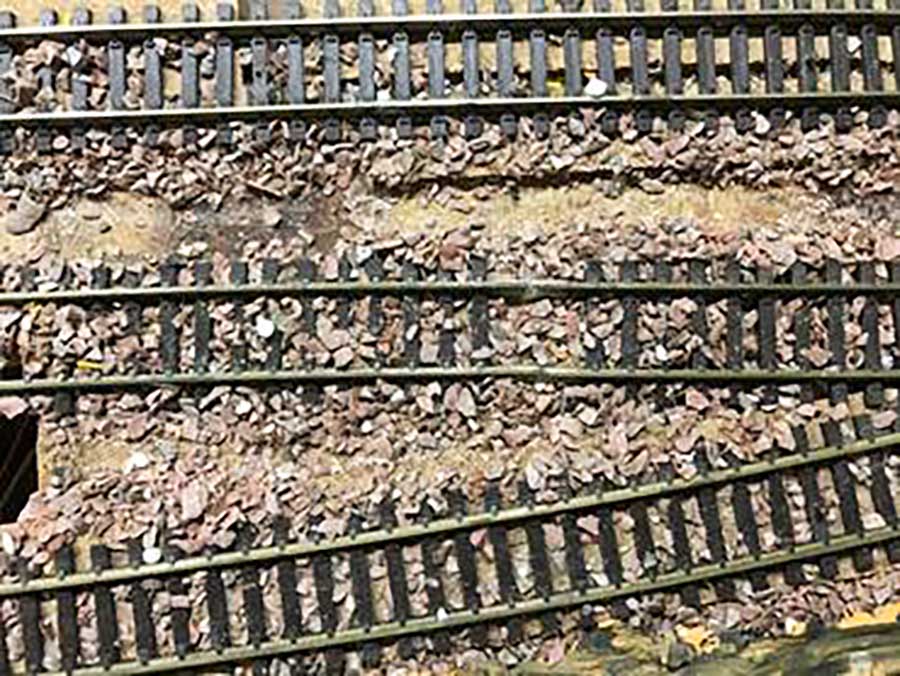
Compare my ballast with the ‘real’ thing:

Mine is bigger in size, but smaller product can be produced if required. Considering that retail ballast is labelled “HO & N” scale, there is room to move in size.
THE PROCESS
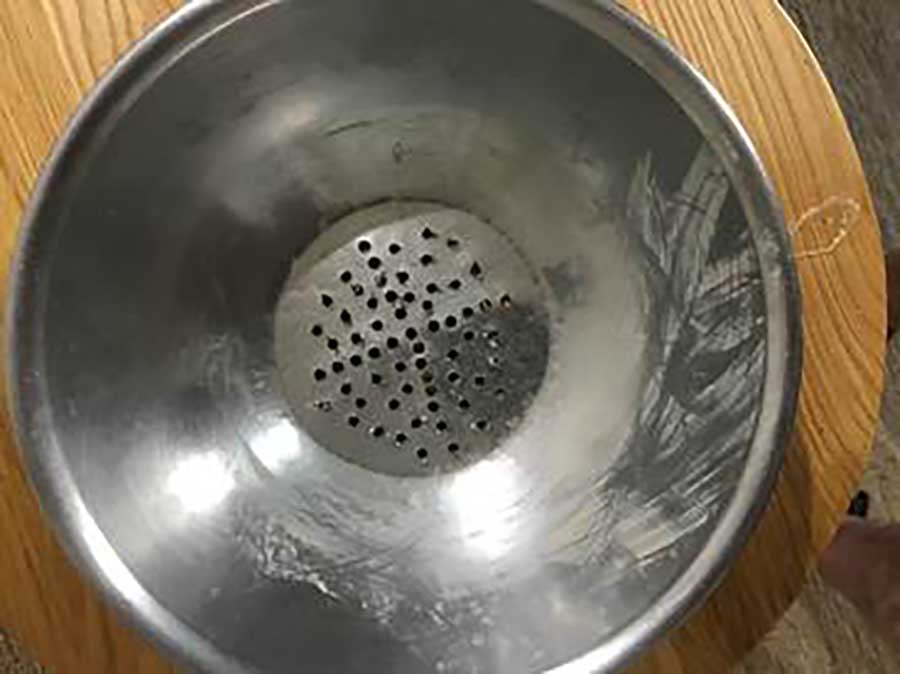
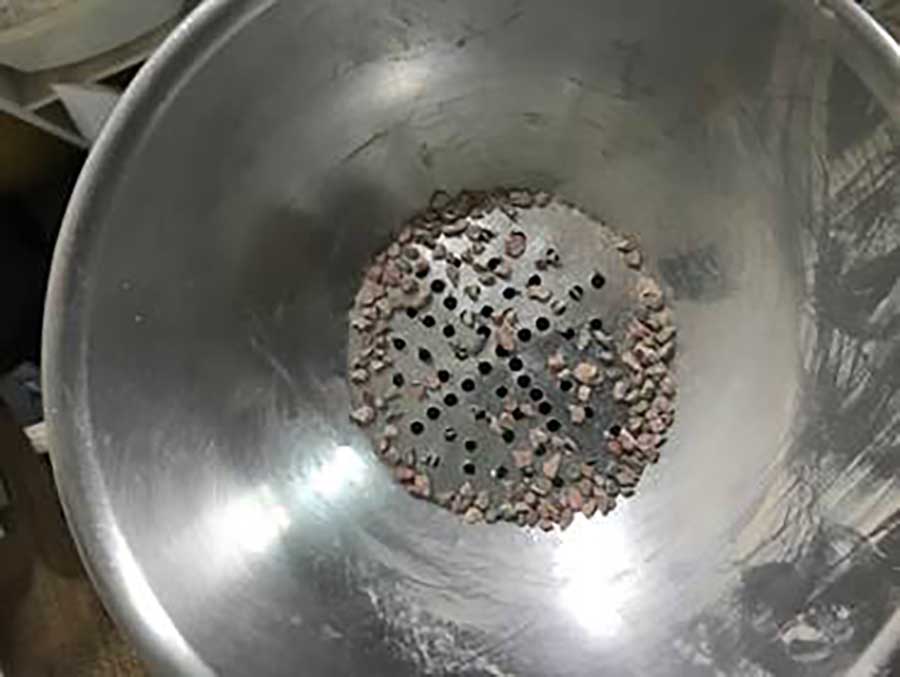
I purchased a mortar / pestle, and a colander. Don’t use the ones from the kitchen or you may NOT survive the day!
I then drilled 1/8” holes (make the size whatever you like) through the bottom of the colander, to act as a sieve
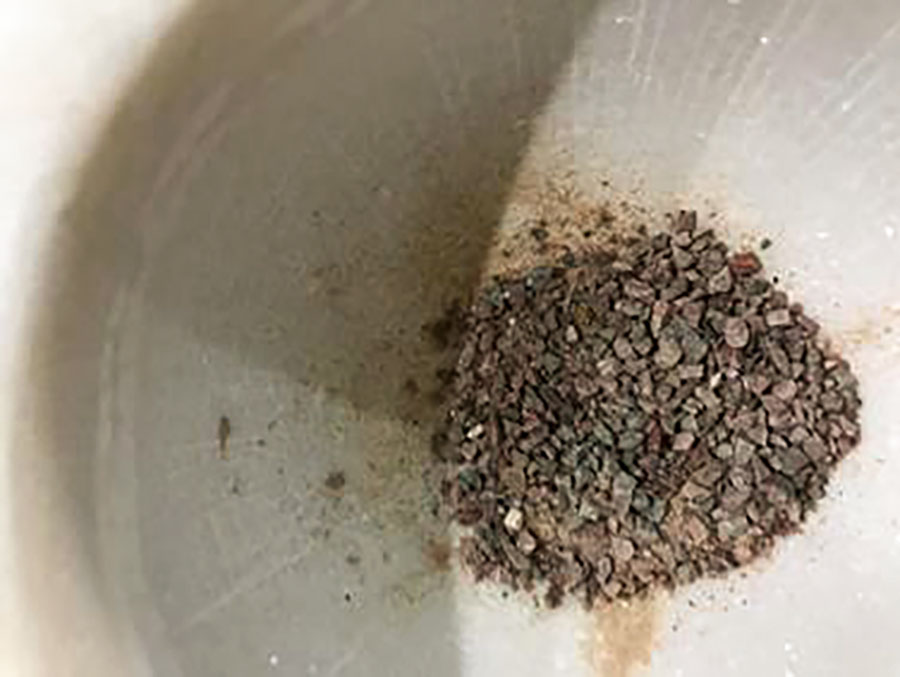
Place a small amount of the pebbles into the pestle and pound away. Don’t fill too much volume because the pebbles tend to fly away.
This was after about 2 mins. The longer you work at it, the smaller the result.
Then sift the pebbles through the sieve to obtain an amount of ballast.
I sometimes repeat the process to obtain more model train ballast.
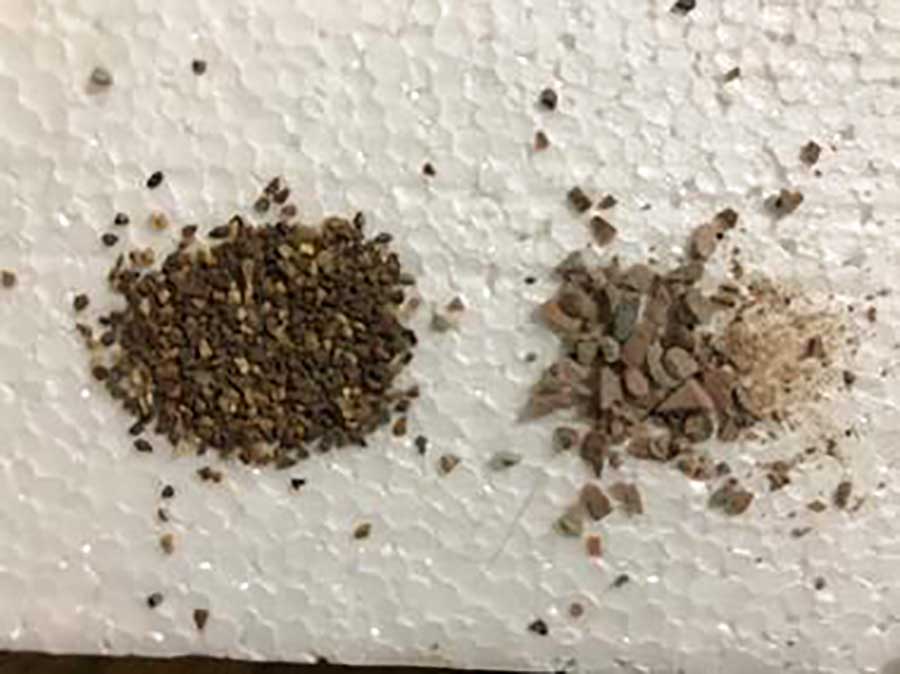
Comparing the two products, yes, mine (right) is about 2 times bigger than the retail ballast.
I apply the ballast in the usual way (not with Dave’s favorite tool, but a substitute could be built) :
Mix 50/50 water and PVA glue.
Place a liberal amount of the mix along the sides of the track, and down the centre.
Carefully apply the ballast.
Place another liberal amount of the glue mix on top of the ballast.
Allow about 6 hrs to fully dry.
Scrape up any loose pieces and re apply with more glue mix.
So, here is the result on the layout.

You could mix this result with retail ballast to improve the result, it’s up to you.
I hope you enjoyed the post.
Regards
Steve (Sydney)”
A big thanks to Steve for sharing his homemade model train ballast!
I know it’s not the cheapest hobby in the world, so every little helps…
Steve’s post reminded me of Bob’s:
How to ballast a model railroad track
And kaustav’s:
That’s all for today folks.
Please do keep ’em coming.
And if today is the day you get going on your own minature world, the Beginner’s Guide is here.
Best
Al
PS Latest ebay cheat sheet is here.


Hmmmmmm …. I admire the perseverance involved in that ballast-making technique, but that’s a lot of hard work. False economy, in my opinion.
I’ll happily pay the $10 or so for the prepared stuff. A single canister is sufficient for most layouts, and honestly, I prefer the size, colour consistency, and finished look of the commercial products I’ve used.
Ballast is a very important part of the model. Without it, a model railroad/railway will never look quite right. Real ballast is a mixture, a specifically engineered mixture, of several sizes of coarse crushed stone. It must be relatively hard and with fractured faces that will interlock when compacted. You will find different colors of stone usually because different stone yields different characteristics of interlock and to achieve the desired result they will mix whatever stone yields the desired properties. Think of it as engineered to a specific purpose the same as rail or signalling systems. Rob McCrain
Well every little bit helps , thanks for sharing your idea and method . I’m impressed with attention to detail you obviously put into your display . These are the things I’m learning now in my novice stage of the hobby … detail adds great perspective and life to the layout .
Great Idea…. the “Ballast” that size could also be used for River, Stream or Lake Bottoms as well… use it along trenches for directing water run off, at the bottom of Waterfalls. Etc. ~ Mike in N.H. U.S.A.
I think for a small layout or a little railroad scene this might be a good method, but as someone else pointed out ballast is not that expensive. Here in the US there is Woodland Scenics and they have numerous varieties of ballast in several colors that you could custom mix to suit your layout. I think they sell for about $15 US for a container,
Ok, so I got smashed, But, a small bag of Woodlands Ballast costs $AU 12-16. A medium bag is $AU 25-32. Thats about $US 8-12, and $US 18-24 …….as they say with this hobby,” You will run out of space, money, or both”!
Steve White
I have be getting pictures and ideas for years from modelrailwaylaysplans. Your idea is great about using a pestle, I just have to say don’t go to a store, go on a walk. You might find a small thing to add, that reminds you of the walk. I don’t wound to sound negative, I just would like your platforms to be a part of you.
an excellent idea