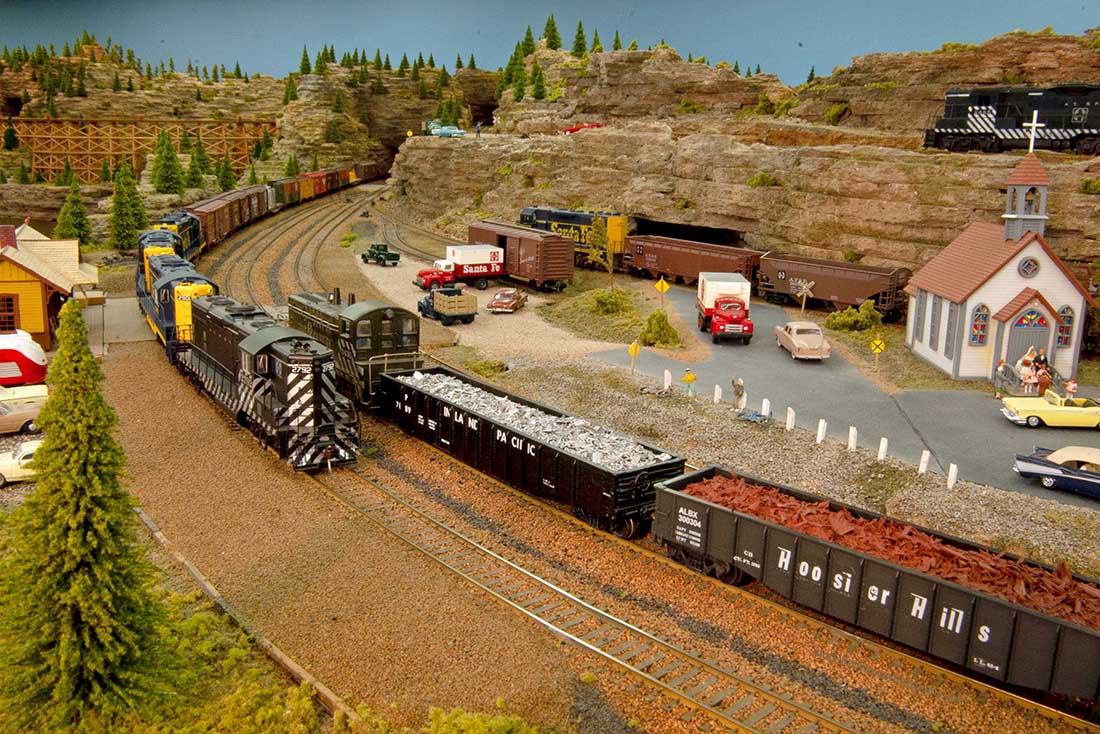
Brian’s been back in touch, and I’m glad he has too. There aren’t many Kato tram layouts on the blog, so I’m glad he’s added to the collection:
Firstly, thanks to those of you who gave some great feedback on my last report ‘Track Curve Radius’ regarding spider problems on Grandpa’s Wonderful Railway.
Like myself, many of you will have assumed that the spider(s) concerned were our everyday garden and household arachnids.
However, it turns out now, after a press embargo has been lifted, that it was the work of Doctor Olaf Spatula.
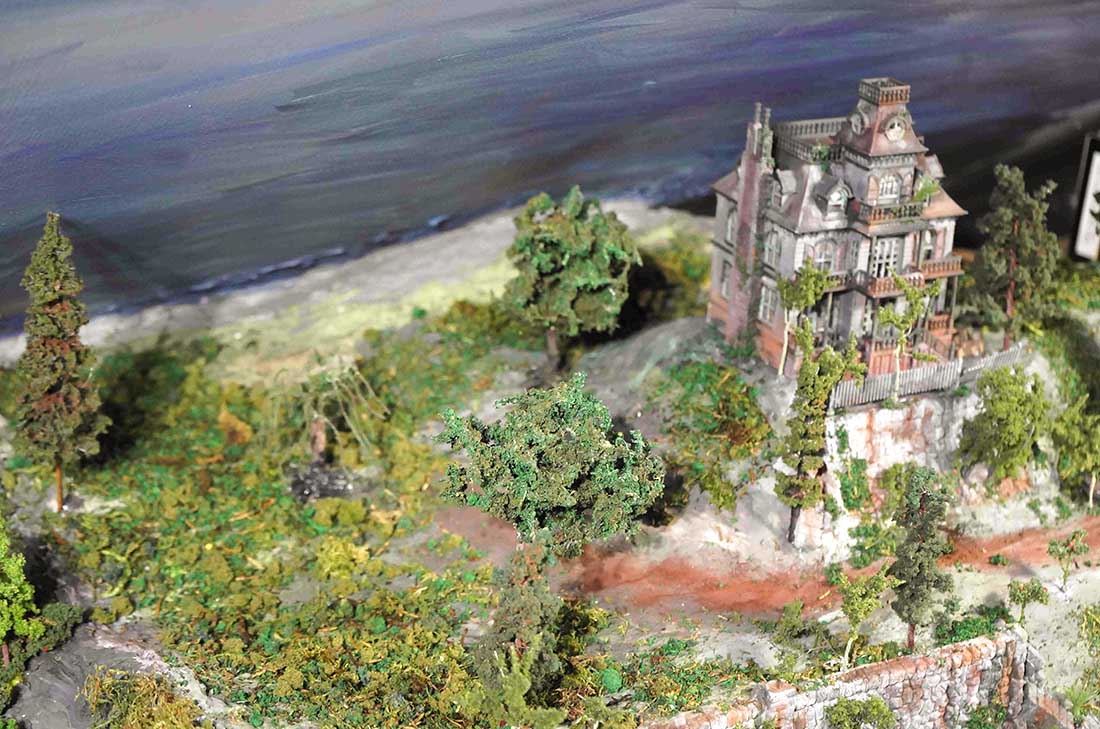
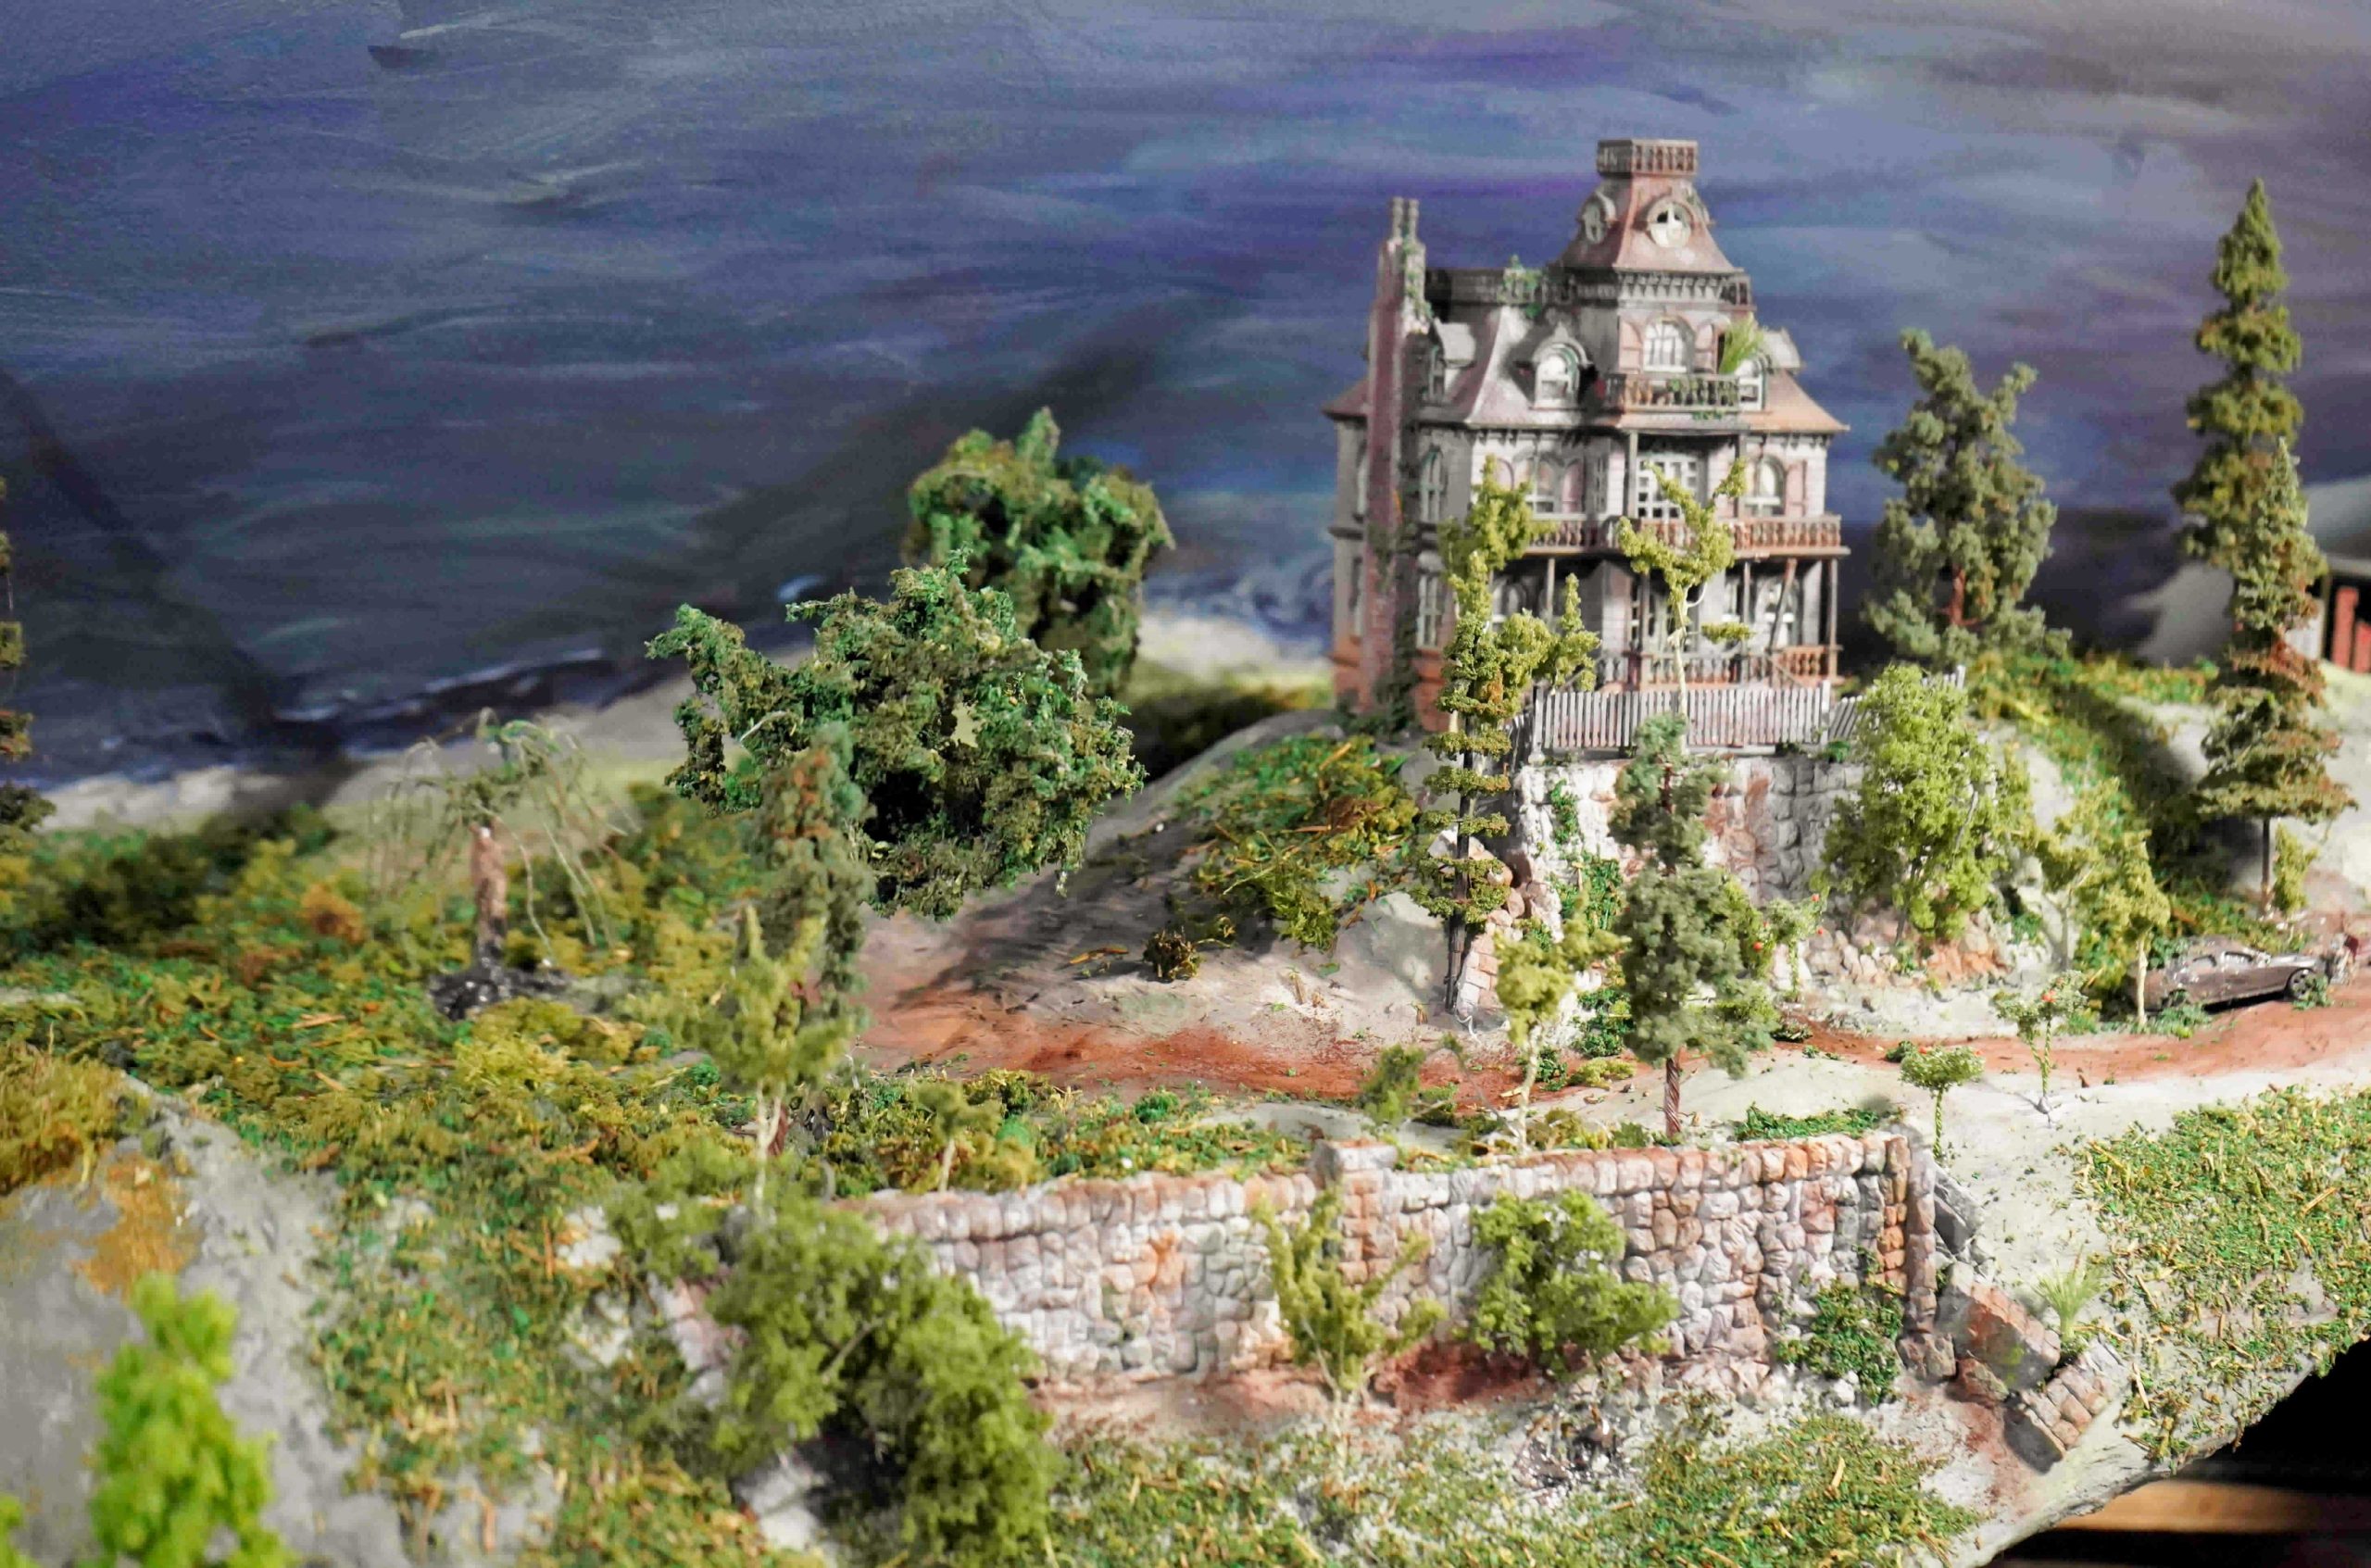
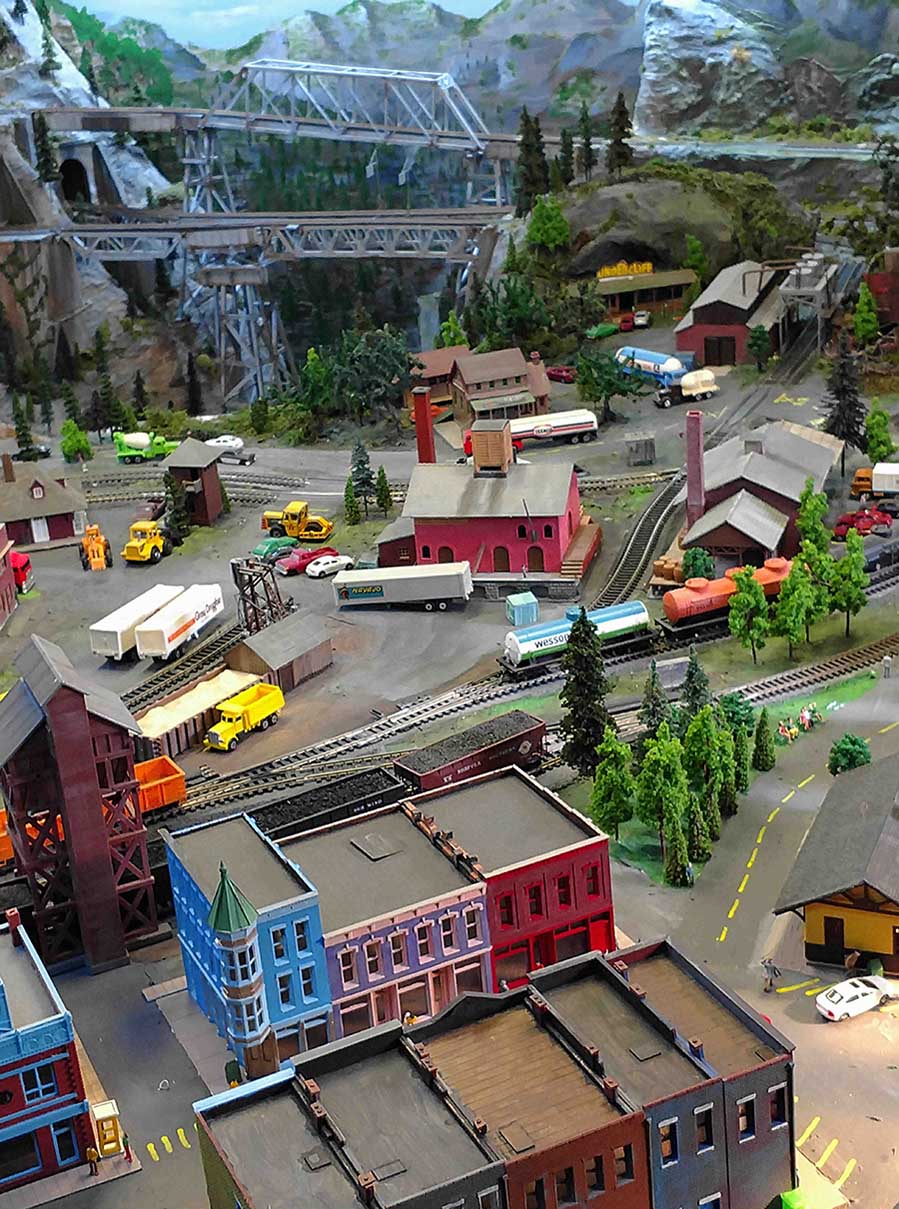
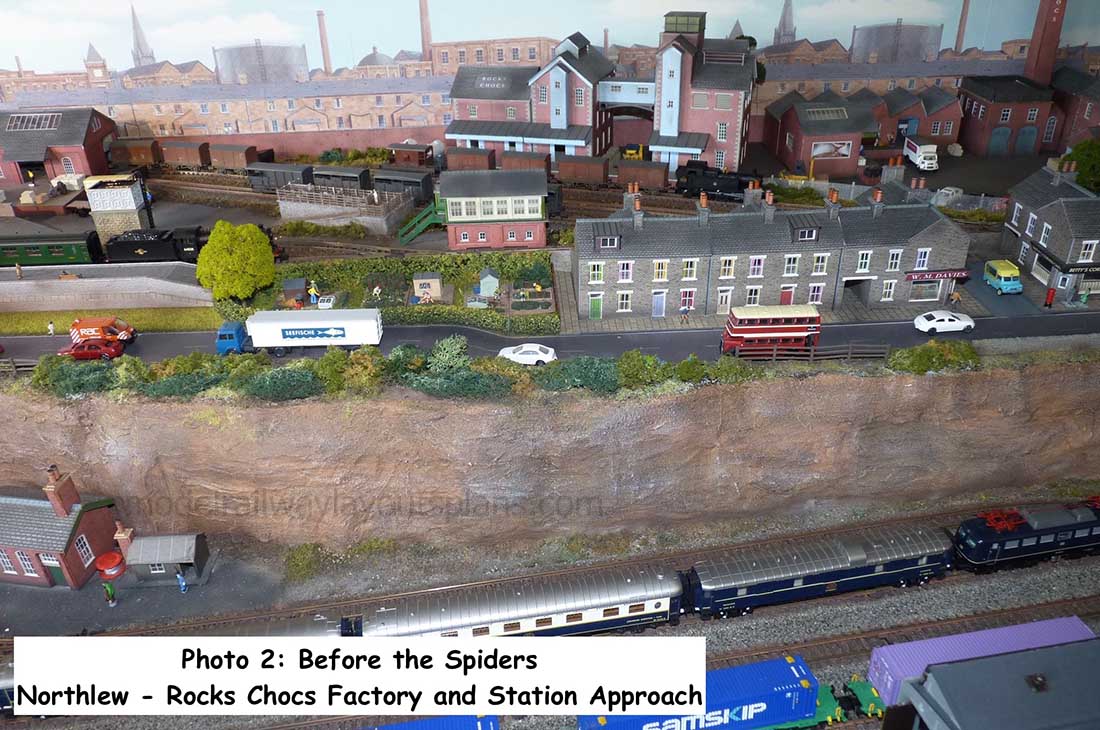
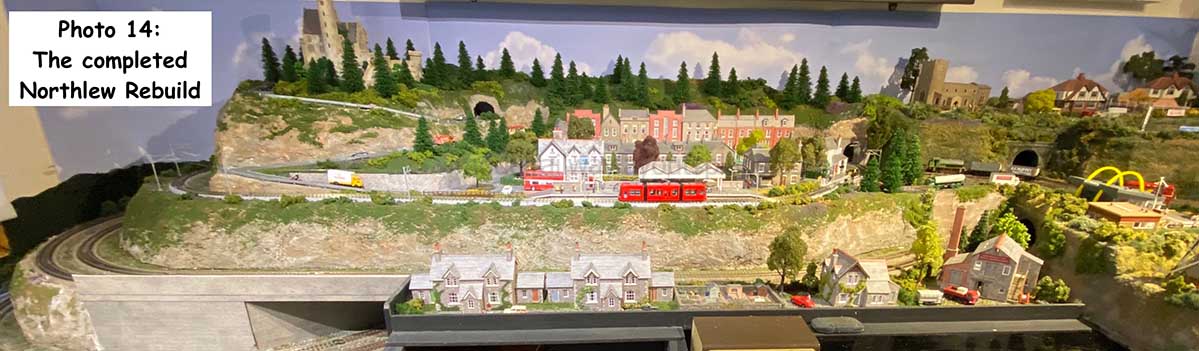
Some time ago, he had moved into the then unoccupied Castle Red Rock (not shown on my previous report for ‘literary’ reasons!) above the sleepy North Devon village of Northlew, home to the Rocks Chocs chocolate factory, and the GWR steam heritage line.
At one time, the strange Swedish born recluse, had been recognised as a genius in the developing science of neurological control of suburban wildlife and household pests (something very close to our own hearts suffering constant lawn damage from badgers and squirrels, and floral borders being demolished by deer!).
But, it would seem that during his experiments, which he had moved to the empty castle for reasons of privacy and fear of commercial espionage, things had gone terribly wrong.
The ‘Daddy Long Legs Spider’ or cellar spider (Pholcus phalangioides) that had been injected with a biochemical developmental drug had mutated terribly into a black hairy giant, many times it’s own size, capable of bringing a whole model railway to a standstill before you could say “Peter Parker”!
Thankfully, what could have been a clear and present danger from this credible threat was avoided when the beast was destroyed by a siege of its lair underneath the castle by SAS special forces.
After discovering suspicious material on the dark web traced back to the castle, Doctor Spatula was reported to have been secreted away, presumably to a high security ‘facility’!
The castle, including its contents of suspect substances, and, contaminated areas of the village, were made safe by specialists from the Starboard Down Biological and Chemical Weapons Establishment.
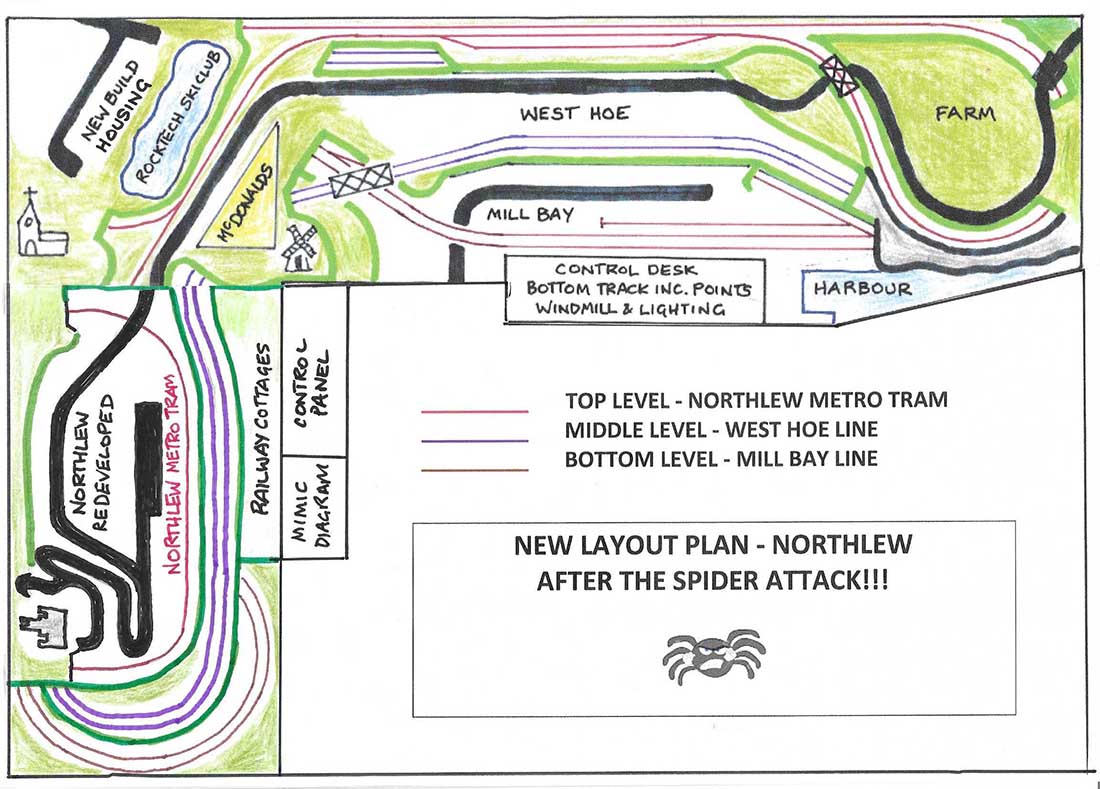
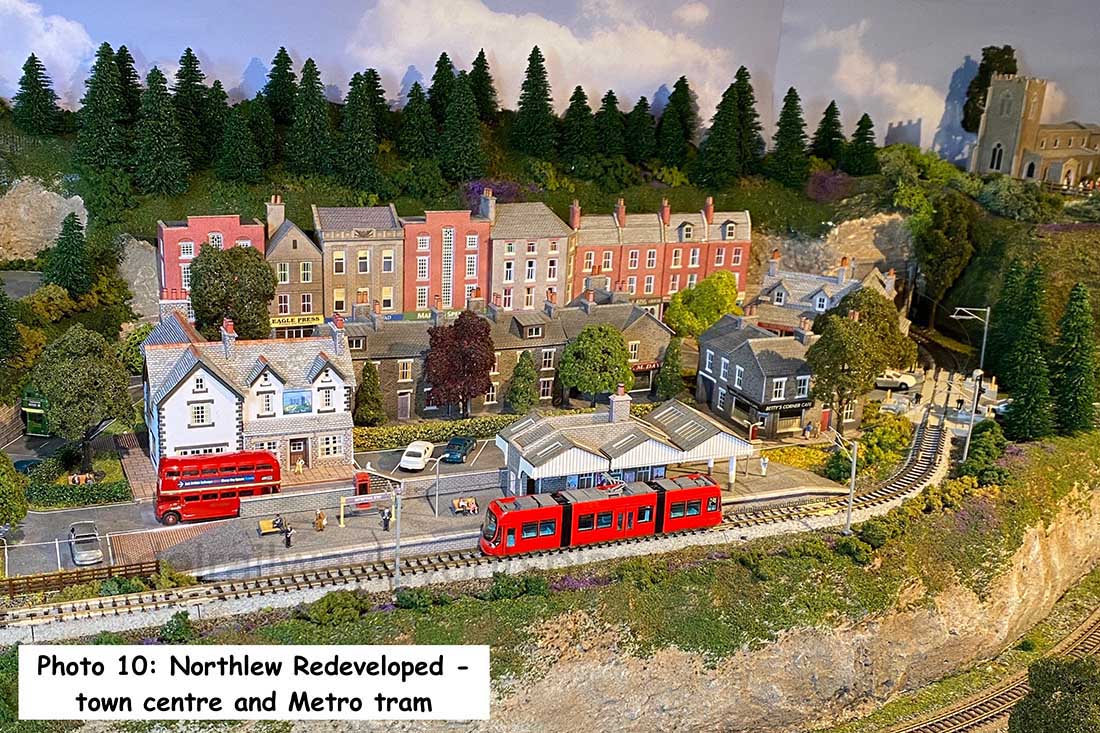
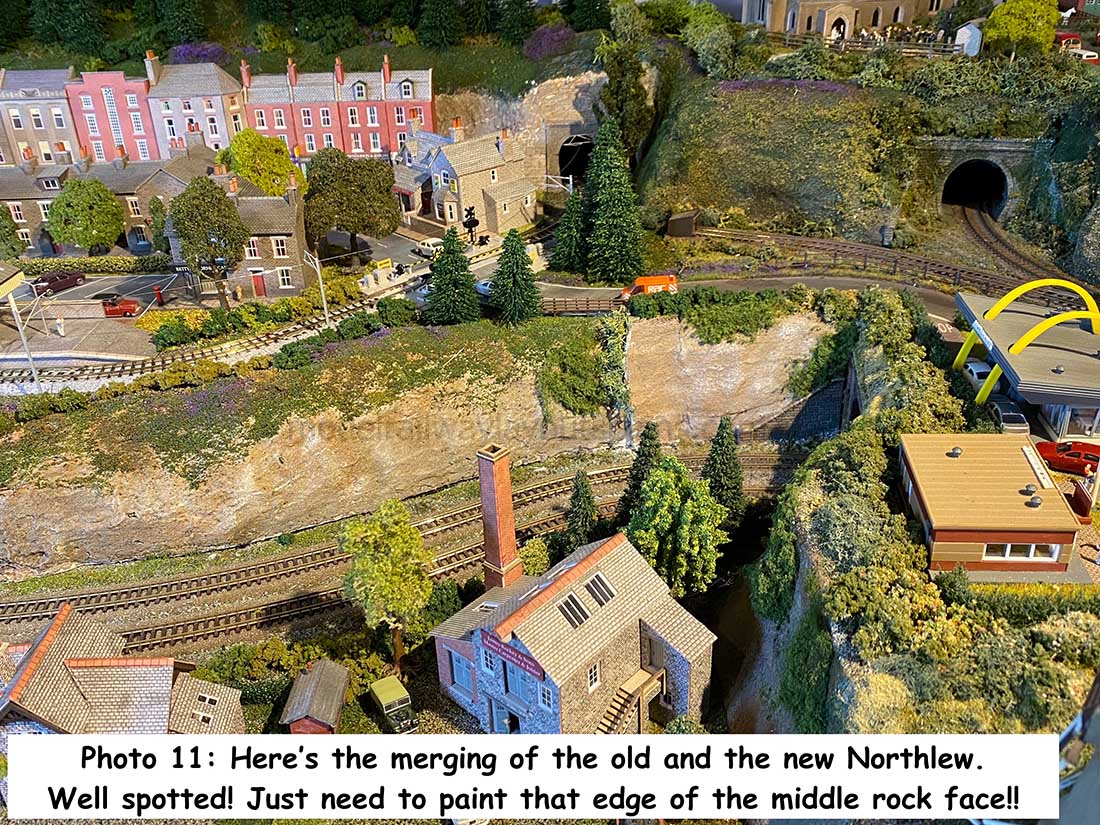
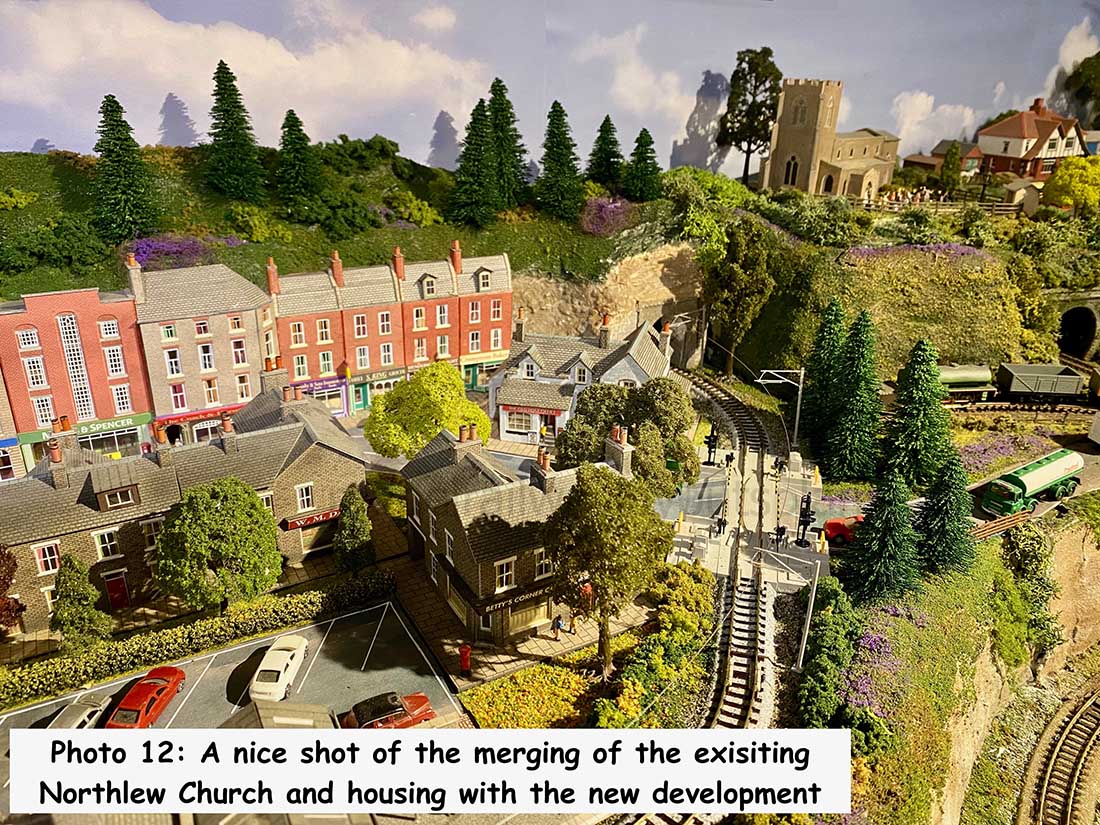
Since this major biological environmental incident, the village has become a tourist attraction which has resulted in major redevelopment for the village.
Rocks Chocs moved their production to a brand-new larger facility on the outskirts of the village after there being a massive global demand for their new themed products – Silk Tray, Wonderwebs, Venom bars, Fangtastics, Silky Bars and Spinnerets.
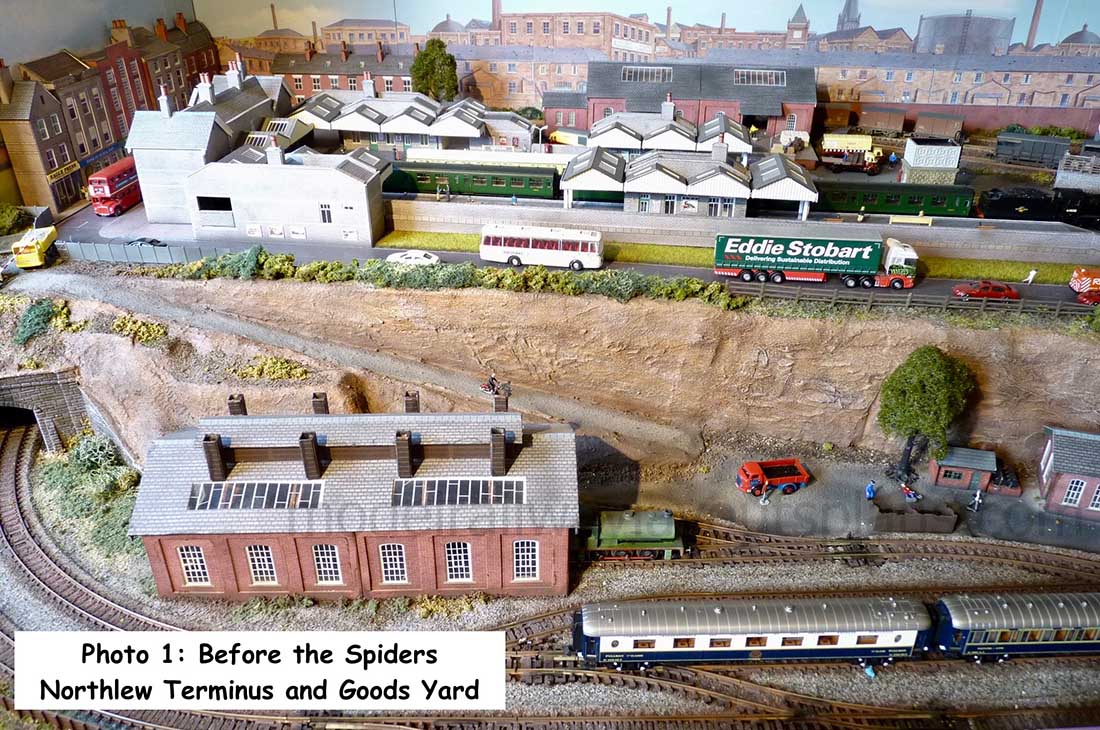
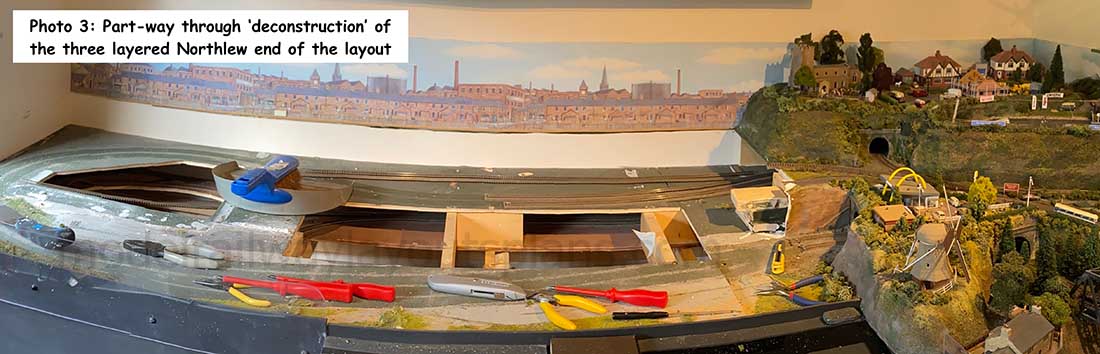
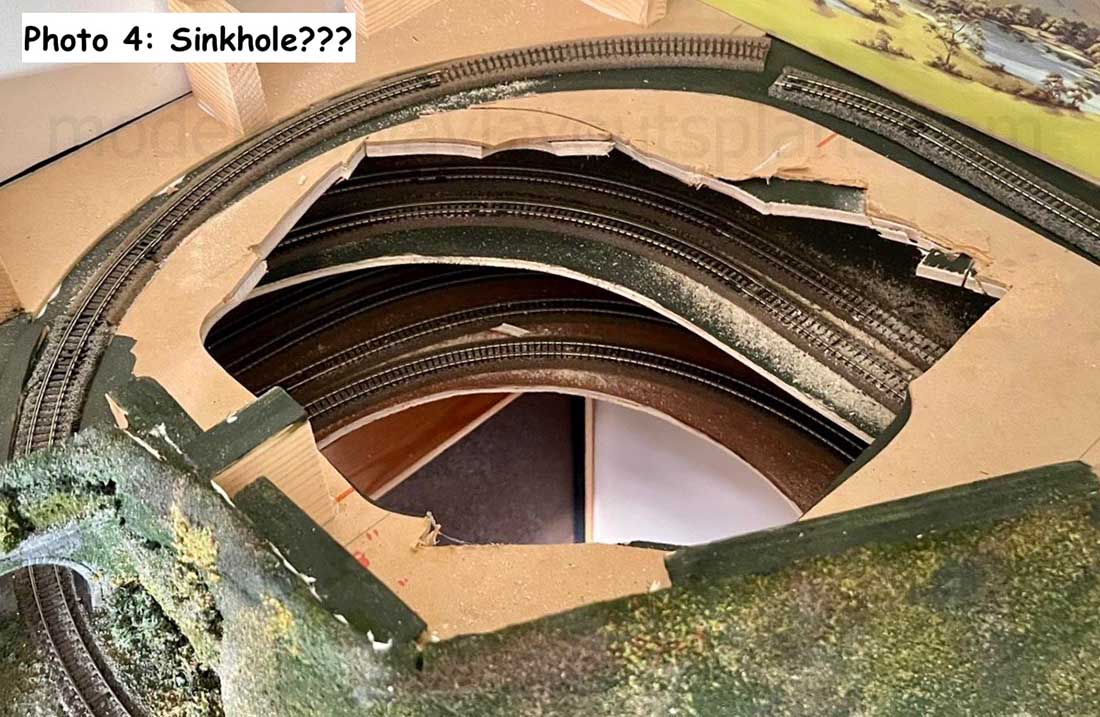
The heritage line’s Northlew Station and Goods Yard had to be relocated due to a massive sink hole caused by the giant spider’s underground nest.
On a positive note, the Director of the heritage line has reported a healthy increase in takings which he has put down to the huge increase in tourists to the area.
The land was cleared, stabilised and included new development with shops, Post Office, hotel and the Castle Inn.
The Bank of Mum and Dad moved into new premises in the High Street and specialises mainly in crypto currency (Great question folks – why do they need the expense of a bank building!).
Betty from the corner shop, Mr Davies the grocer and local residents of Station Approach, after staging a sit-down protest attaching themselves to fencing with residual spider’s webs, forced the local authority to allow them to keep their properties. The new Metro tram line was built to accommodate the influx of tourists.
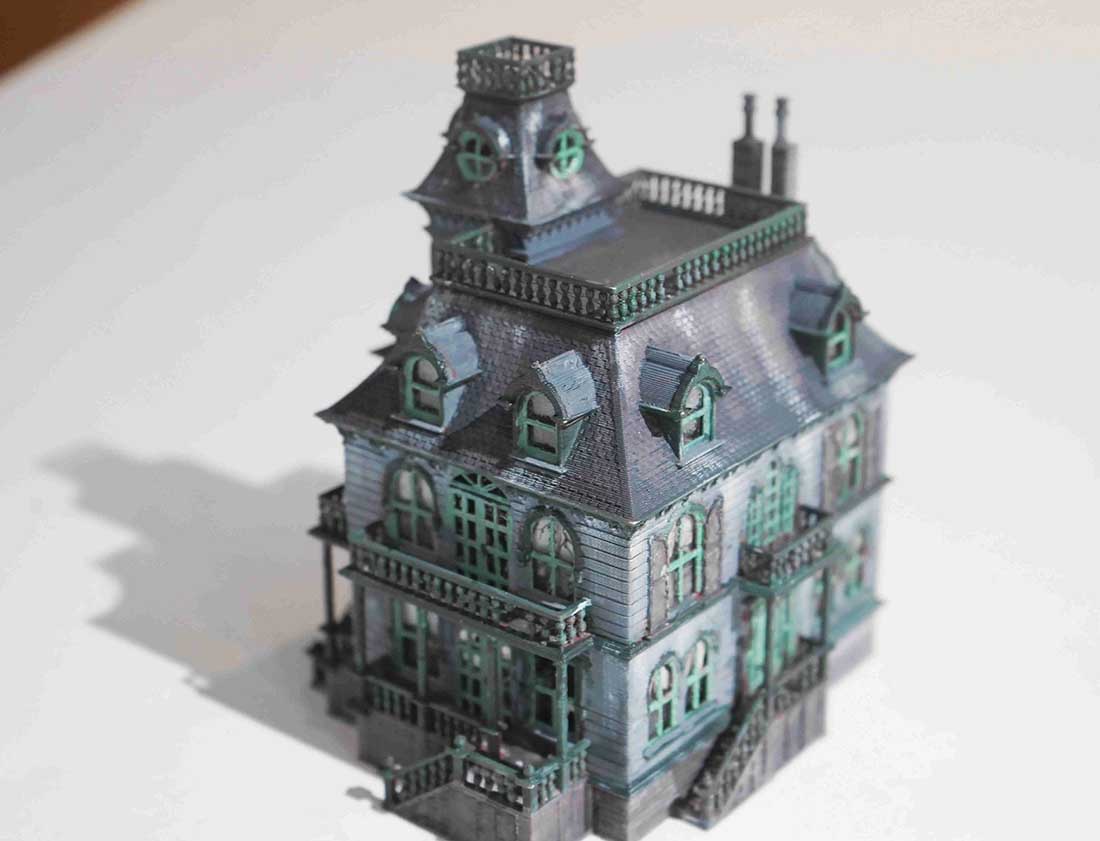
The castle ‘vacated’ by Doctor Spatula is now a luxury hotel – The Redrock. Renovations were funded by a wealthy philanthropist with the initials JRR, strangely the same as my wife’s. (Note: The castle/hotel is named firstly, after Red Rock Mountain a piece of music for wind band by Rossano Galante, which we enjoy playing, inspired by the mountain in Pennsylvania.
Secondly, the castle name is also a link to our holiday last year when we stayed in the wonderfully located Rimrock Hotel in the Rockies, Banff, Canada.
And, lastly, of course, the connection to our family name Rockey. Astute observers will have noticed that my ‘mountain’ is not particularly red – artistic licence!)
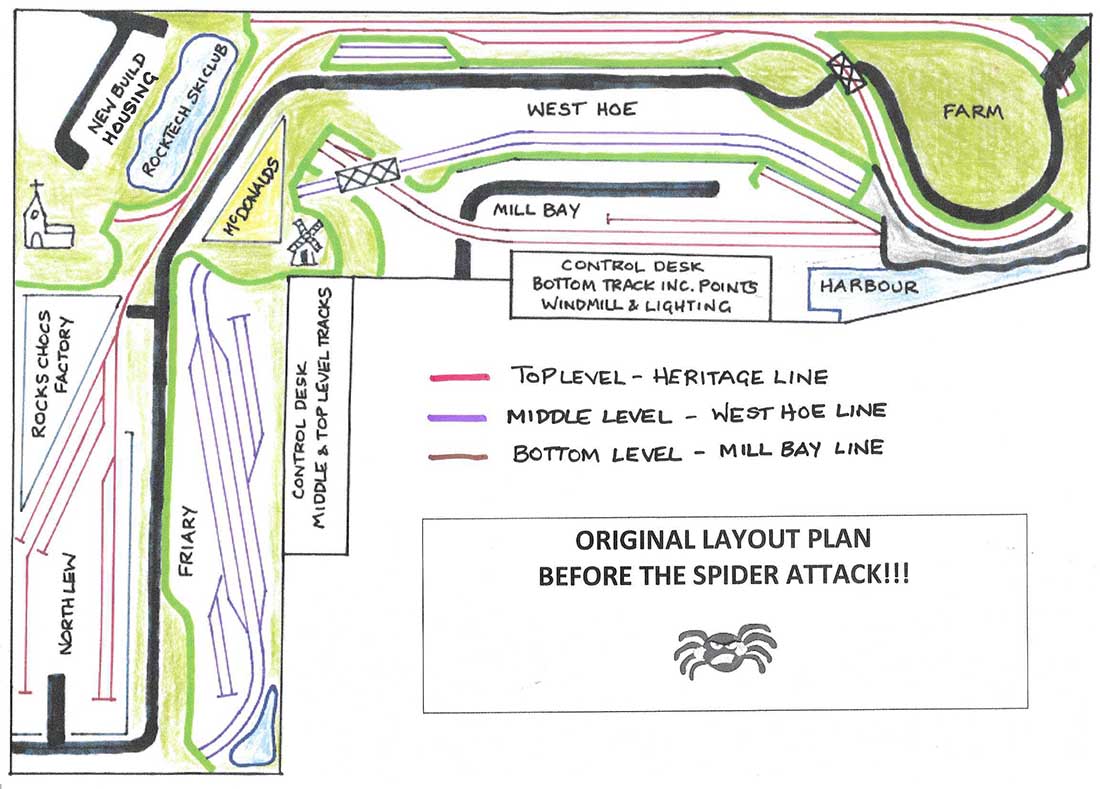
Post Redevelopment Notes of my Kato tram layouts track:
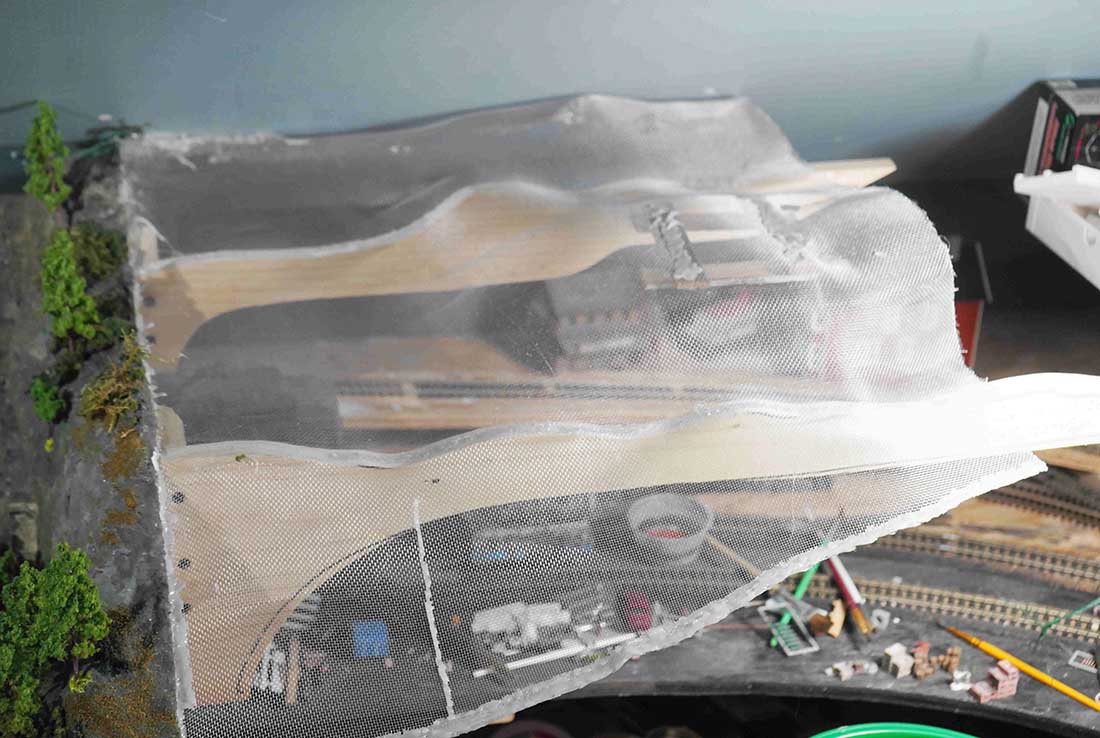
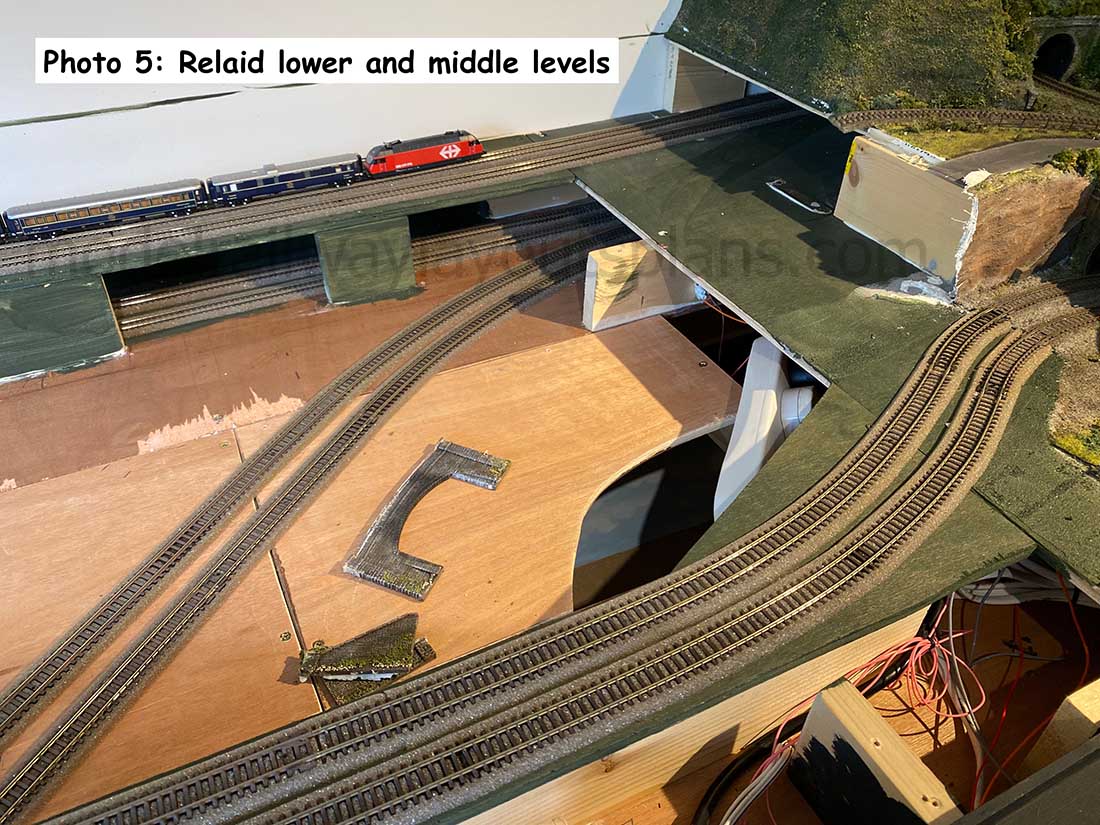
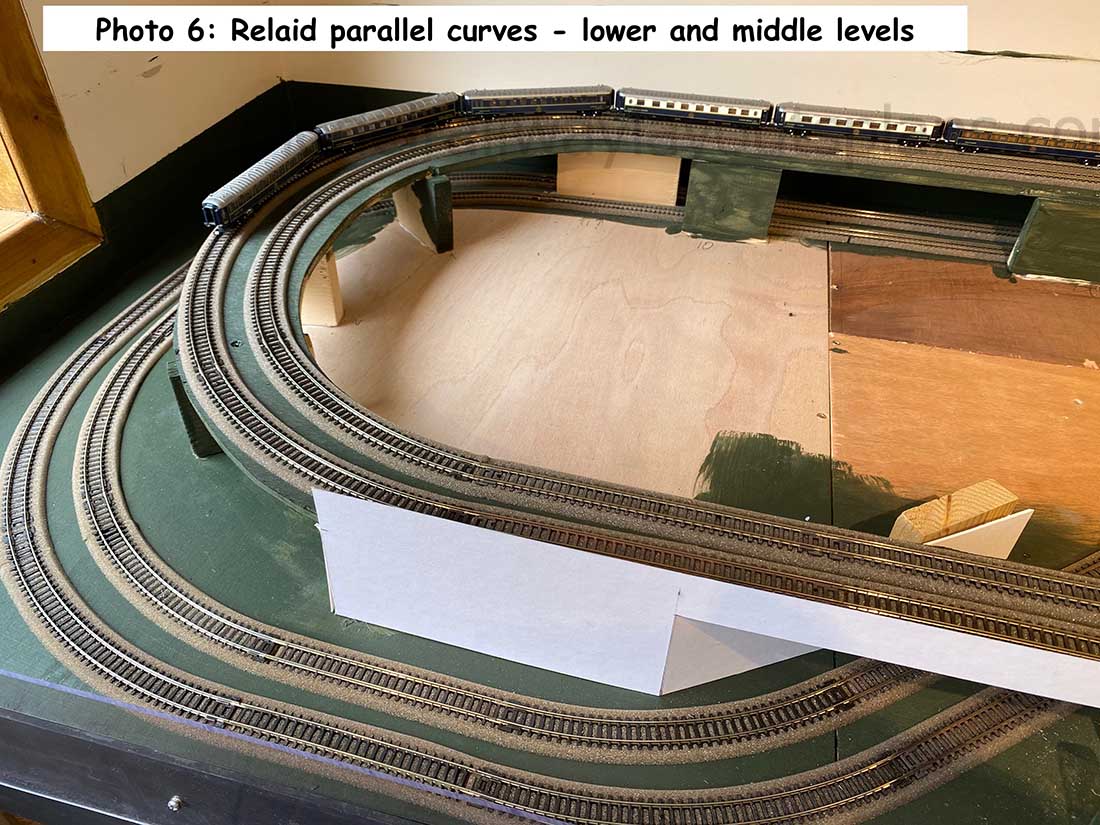
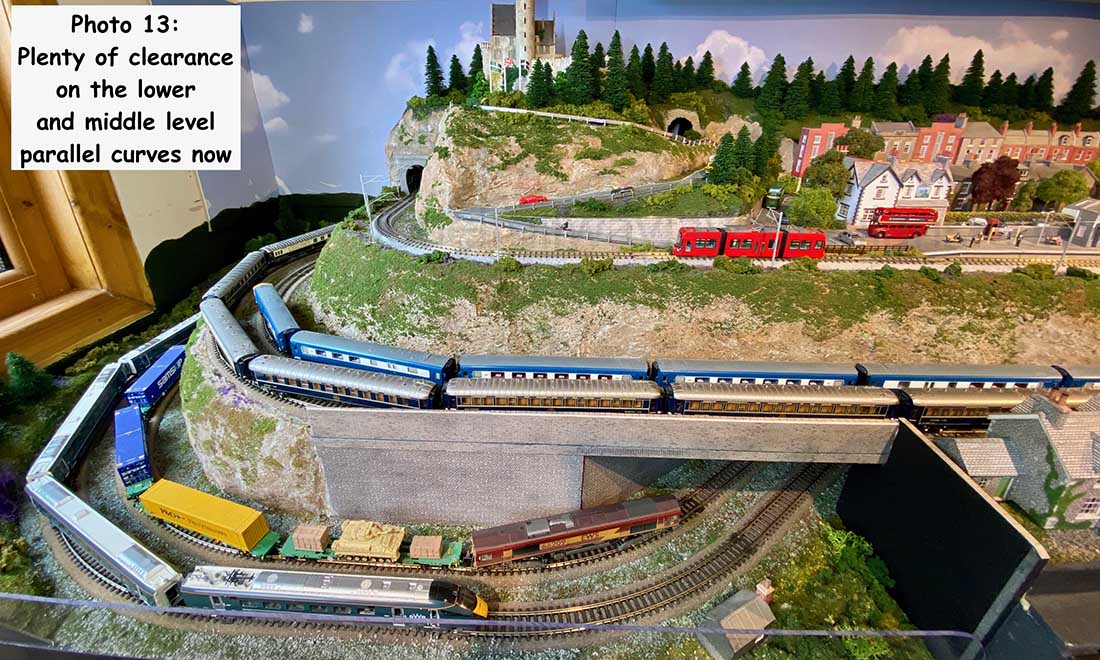
The re-laying of track on the bottom two double track circuits involved very careful measurement and testing before any scenery was built to ensure that all locomotives and rolling stock cleared on parallel curves.
I also avoided the use of flexitrack, by using Peco Set Curves. However, in joining the new tracks to the existing, two further breaks in flexitrack occurred!
Thankfully, to save my sanity, my wife Jeanette and nephew Josh both got very much involved underneath the layout in helping with the very trying task of re-joining the
tracks.
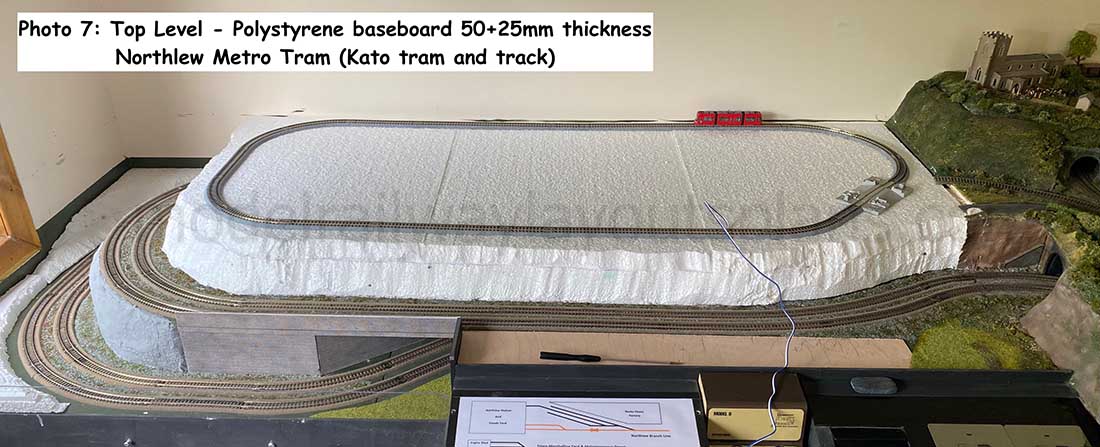
Readers may be surprised to know that the whole new area (including the tram oval circuit) above the bottom and middle tracks is built on a double thickness (75mm) polystyrene insulation board.
This means that if such a further catastrophe such as a derailment happened on any of the two bottom layers, access could be achieved ‘easily’ by lifting off the top layer.
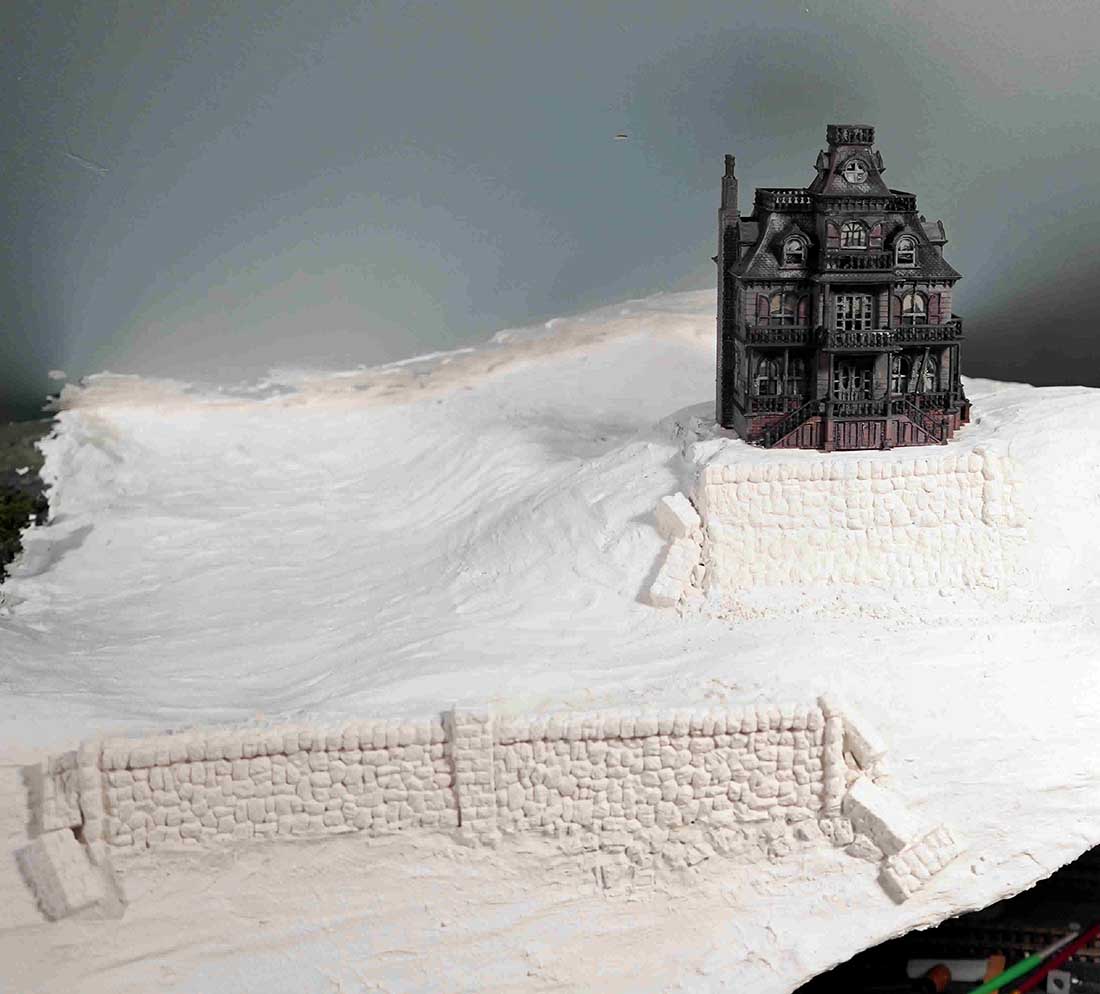
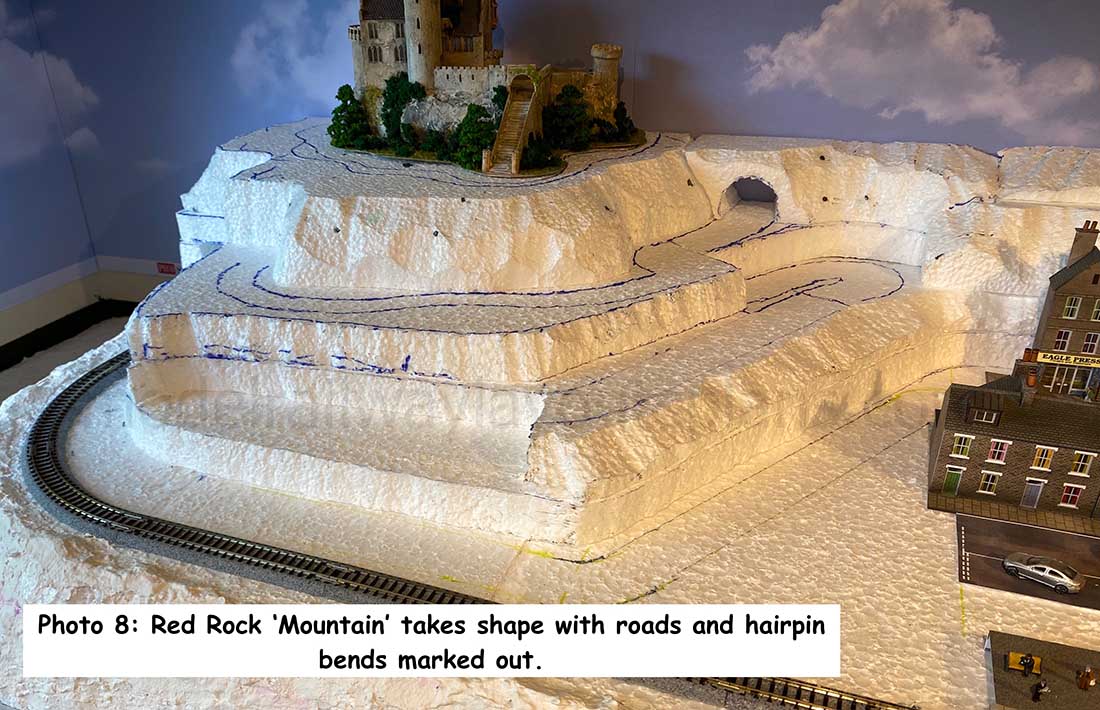
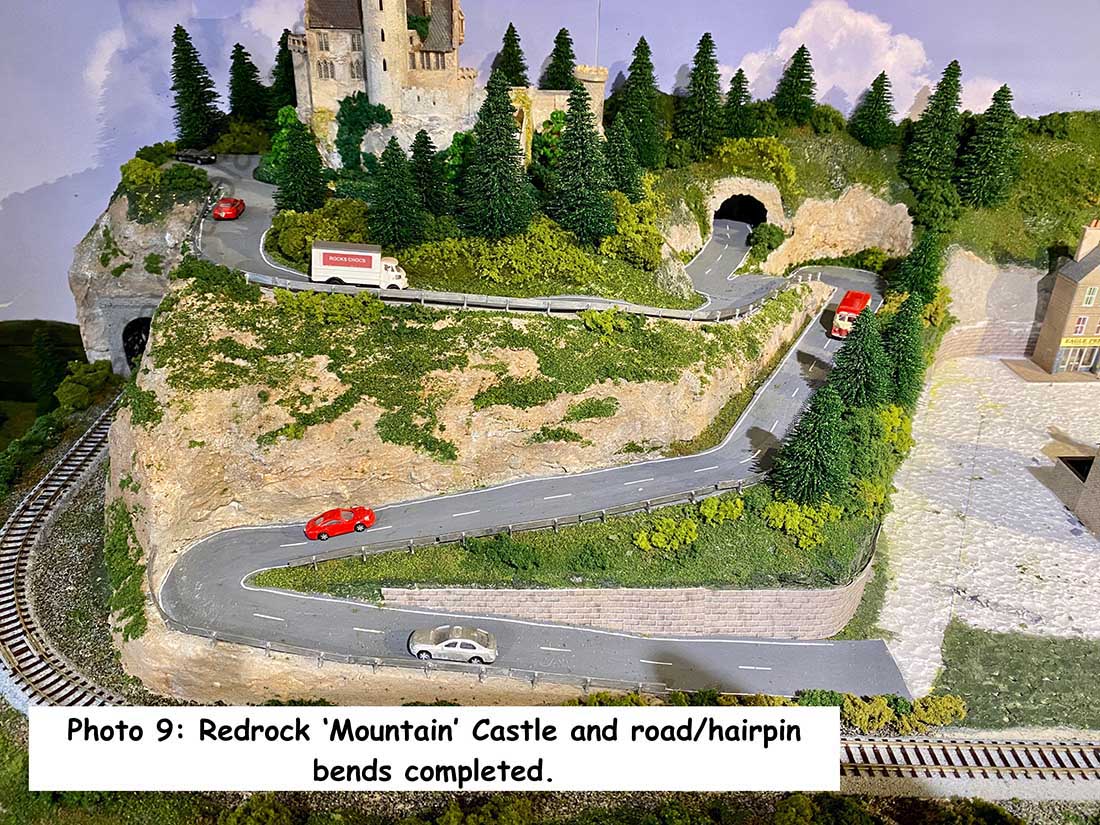
Scenery is polystyrene based with a layer of either plaster bandage or Sculptamold where appropriate to maintain minimum overall weight. The hairpin roadway to the castle is based on the Maloja Pass in Switzerland.
The castle itself is a modified Faller kit (232242).
The tram circuit is supplied by an electronic station stop module (SSM1 from Block Signalling) via an electrical connector to the power supply.
Tram detection is through two infra-red sensors under the track at the station. The tram and track are manufactured by Kato.
I’ve never used Kato track before but it was perfect for my Northlew Metro tram line based loosely on the UK Midland Metro which does run partly off-street on former railway lines.
The Kato track connects together well ensuring that the tram runs very smoothly. The catenary system was rather tricky trying to get the wire to follow the track profile! The catenary masts are Dapol and the wire is Ernie Ball Gauge 11 guitar string.
Final Note: I will be extremely careful in future removing spiders’ webs from those existing corners of the layout with flexi-track curve. Perhaps a fluffy duster rather than a vacuum cleaner nozzle!!
Thanks for reading, and constructive comments always appreciated.
Best to all
Brian, Wokingham, UK”
A huge big thank you to Brian for adding to the Kato tram layouts on the blog.
The castle reminded me of Rob’s post:
And the tram reminded me of these:
That’s all for today – a big thanks to Brian – I do enjoy the Kato tram layouts.
Please do keep ’em coming.
And if today is the day you decide to join in on the fun, the Beginner’s Guide is here.
Remember, it’s all about that start.
Best
Al
PS Latest ebay cheat sheet is here.
PPS More HO scale train layouts here if that’s your thing.
Need buildings for your layout? Have a look at the Silly Discount bundle.