Steve’s been in touch – he’s shared how he makes his homemade model train ballast:
“Hi Al,
I enjoy the post, obtaining ideas from others, and watching the videos.
Due to scenery costs, I continually look for ways to make the hobby cheaper, without degrading the visual effects.
Here is a cheap method to produce your own ballast. The end product is about ¼ of the price of retail ballast
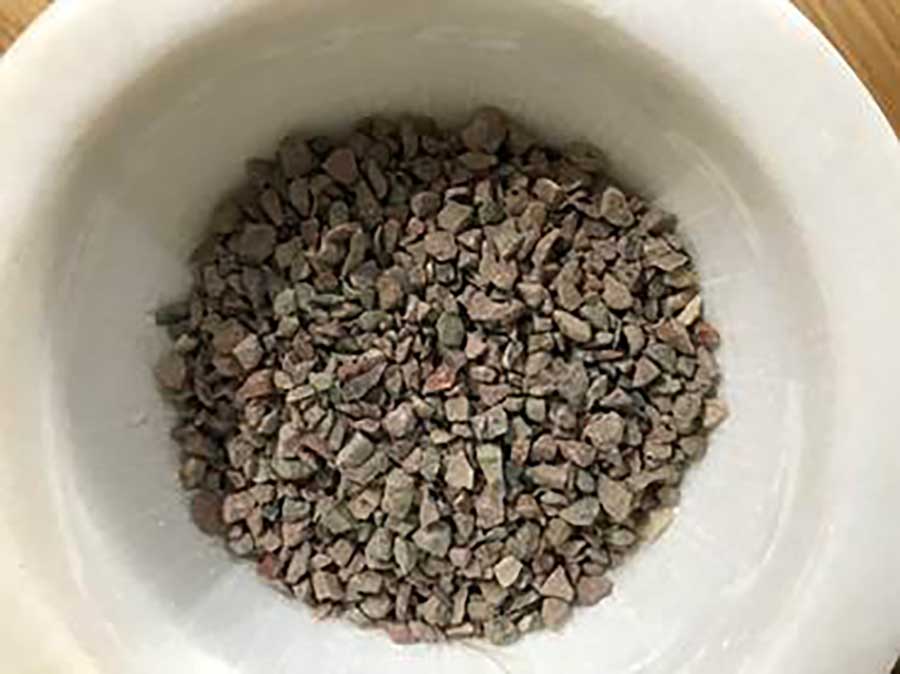
This idea uses ‘Bonsai’ Pebbles, which are easily available from garden centres.
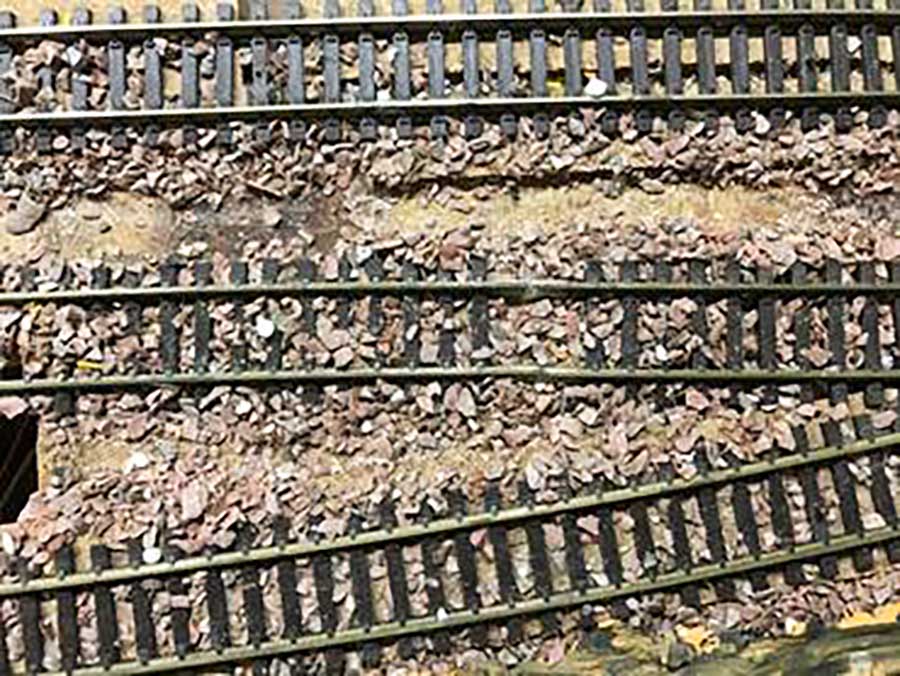
Compare my ballast with the ‘real’ thing:
Mine is bigger in size, but smaller product can be produced if required. Considering that retail ballast is labelled “HO & N” scale, there is room to move in size.
THE PROCESS
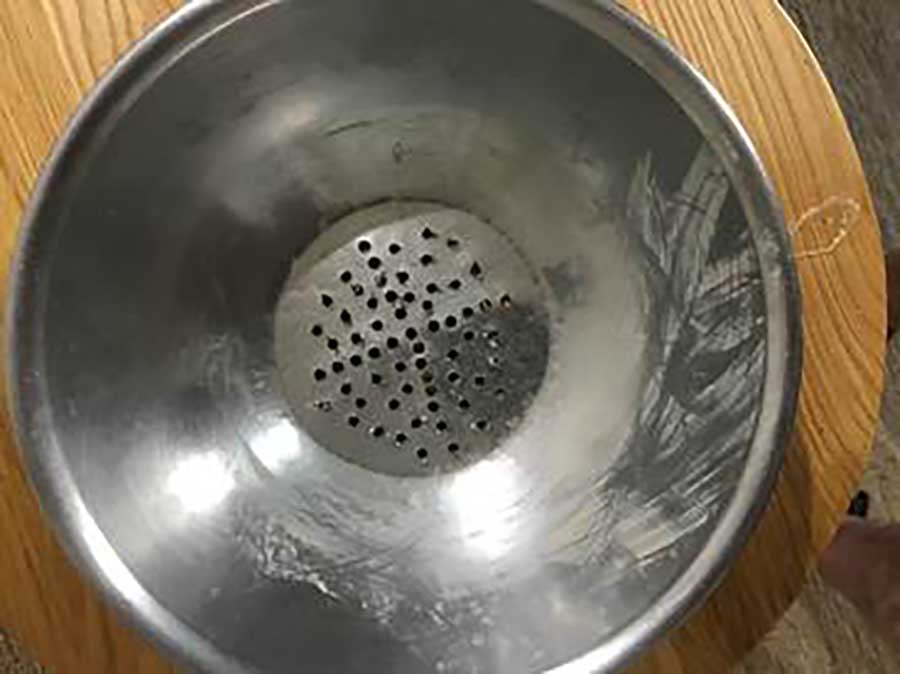
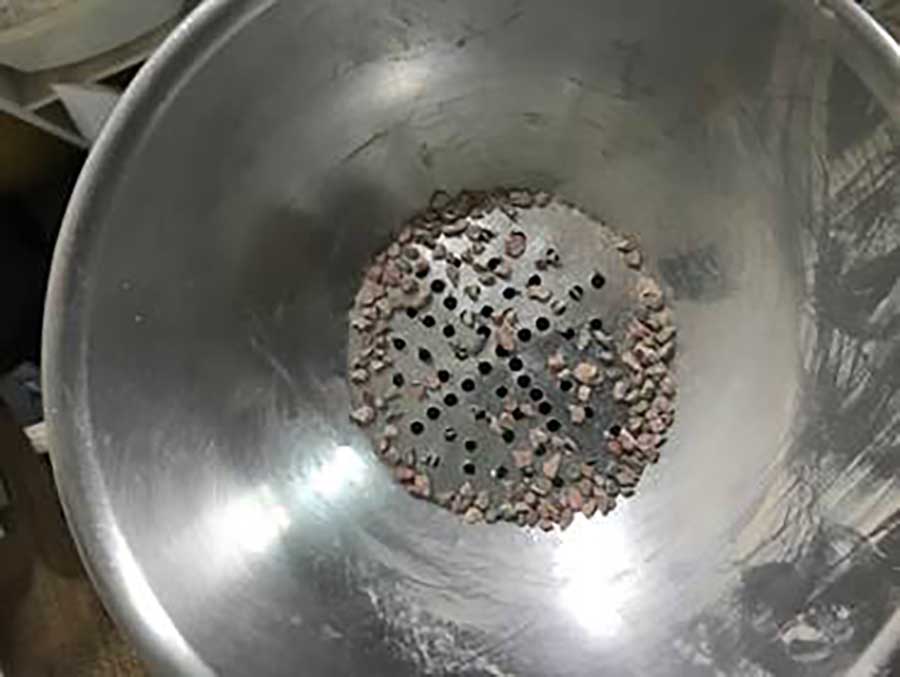
I purchased a mortar / pestle, and a colander. Don’t use the ones from the kitchen or you may NOT survive the day!
I then drilled 1/8” holes (make the size whatever you like) through the bottom of the colander, to act as a sieve
Place a small amount of the pebbles into the pestle and pound away. Don’t fill too much volume because the pebbles tend to fly away.
This was after about 2 mins. The longer you work at it, the smaller the result.
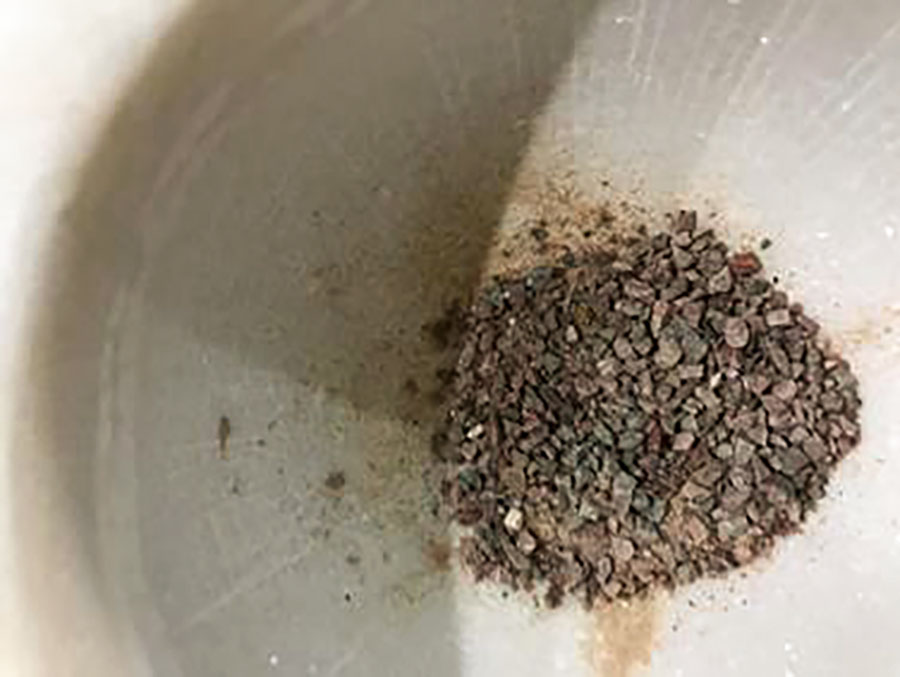
Then sift the pebbles through the sieve to obtain an amount of ballast.
I sometimes repeat the process to obtain more model train ballast.
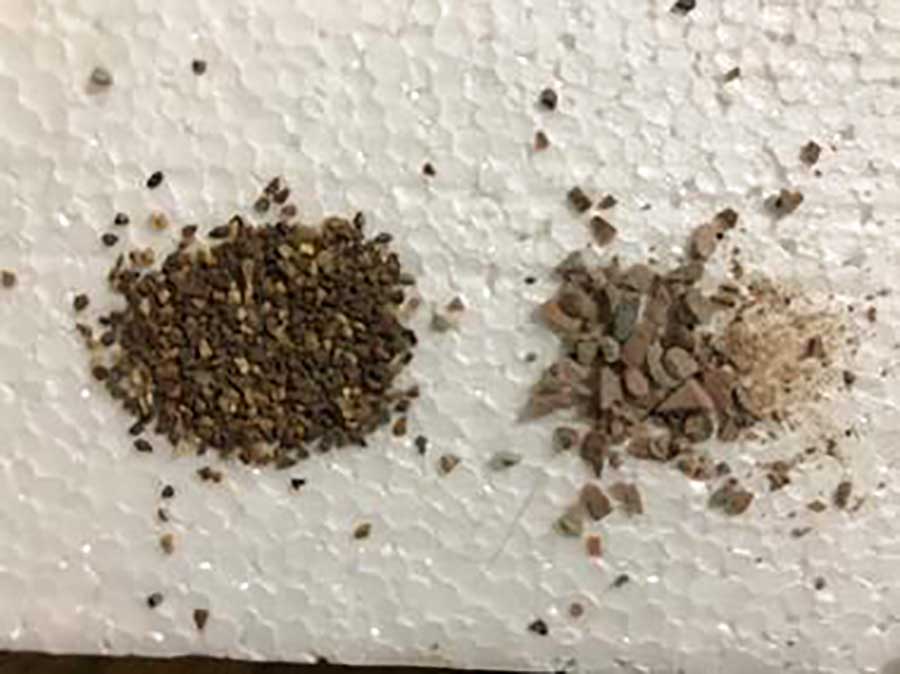
Comparing the two products, yes, mine (right) is about 2 times bigger than the retail ballast.
I apply the ballast in the usual way (not with Dave’s favorite tool, but a substitute could be built) :
Mix 50/50 water and PVA glue.
Place a liberal amount of the mix along the sides of the track, and down the centre.
Carefully apply the ballast.
Place another liberal amount of the glue mix on top of the ballast.
Allow about 6 hrs to fully dry.
Scrape up any loose pieces and re apply with more glue mix.
So, here is the result on the layout.
You could mix this result with retail ballast to improve the result, it’s up to you.
I hope you enjoyed the post.
Regards
Steve (Sydney)”
A big thanks to Steve for sharing his homemade model train ballast!
I know it’s not the cheapest hobby in the world, so every little helps…
Dan’s been back in touch, this time he’s put together a fantastic ‘how to’ on making model railroad rocks:
“For this series, I will use photos from the PowerPoint I used in a Clinic I did for the NMRA in Chicago some years ago.
I had been posting photos of my layout for several years by then. I made a small tunnel scene that was portable. It has been to at least 5 clinics since then.
I will use captions to help explain the steps as I go along. But first, here are the basic materials for the project.
Obviously, you need ceiling tile. My school was an endless source for the tile. About twice a year the school would remove damaged tiles. Largely from stairways. These tiles had NO asbestos in them.
Building supply stores have the tile. If you know a remodeling company, they might have tile they have removed. The tile for model railroads needs to have a smooth finish. The tile with the pebbly finish is not good. They won’t make a smooth interface surface you need.
When using the tile to make your ‘rocks’ be sure the white side goes down and the dark side is up. The white side does not take watercolors well.
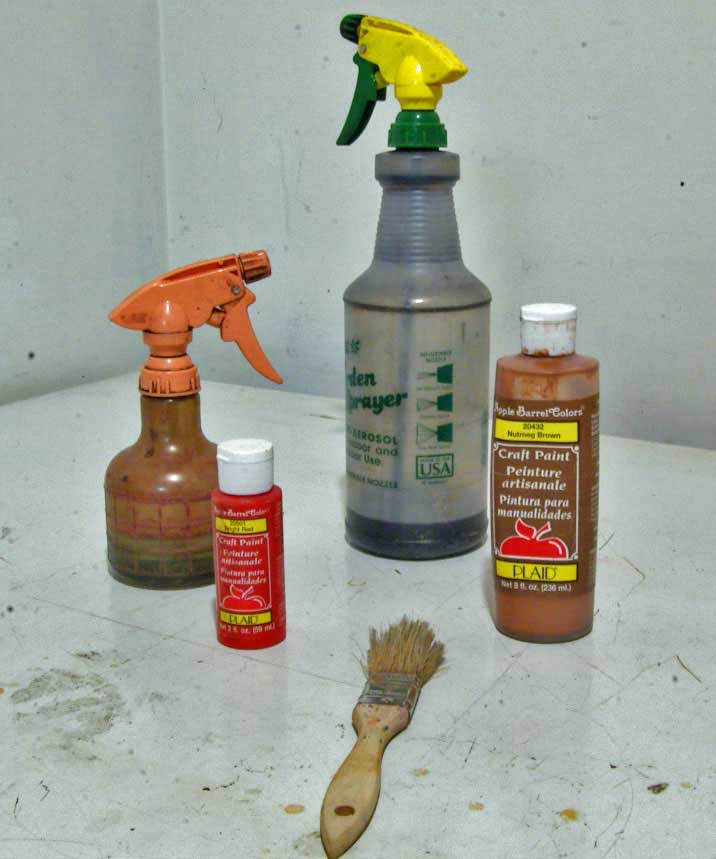
General materials you will need: Ceiling tiles, white glue (to glue the tile pieces together), basic craft watercolor paints, “wet water” which is water with a few drops of detergent added, India ink and alcohol mix, spray bottle with adjustable nozzle, one-inch medium bristle brush, a box knife and long panel nails (explained later).
This is a messy process so a drop cloth will come in handy when producing the rocks from tile. Keep the Hoover handy!
I will show the tunnel as made for the clinic from start to finish. After that, I will show how I made my layout and other people’s rocks. These will come as separate examples. Some were more difficult than others.
I will show the “little things” that make them look natural. Natural is the look we want. I was a double science major in college. Geology was one of the areas I studied. I have been to all 50 states, and I always look at the rock formations.
As such, the scenes I create are like many places I have seen.
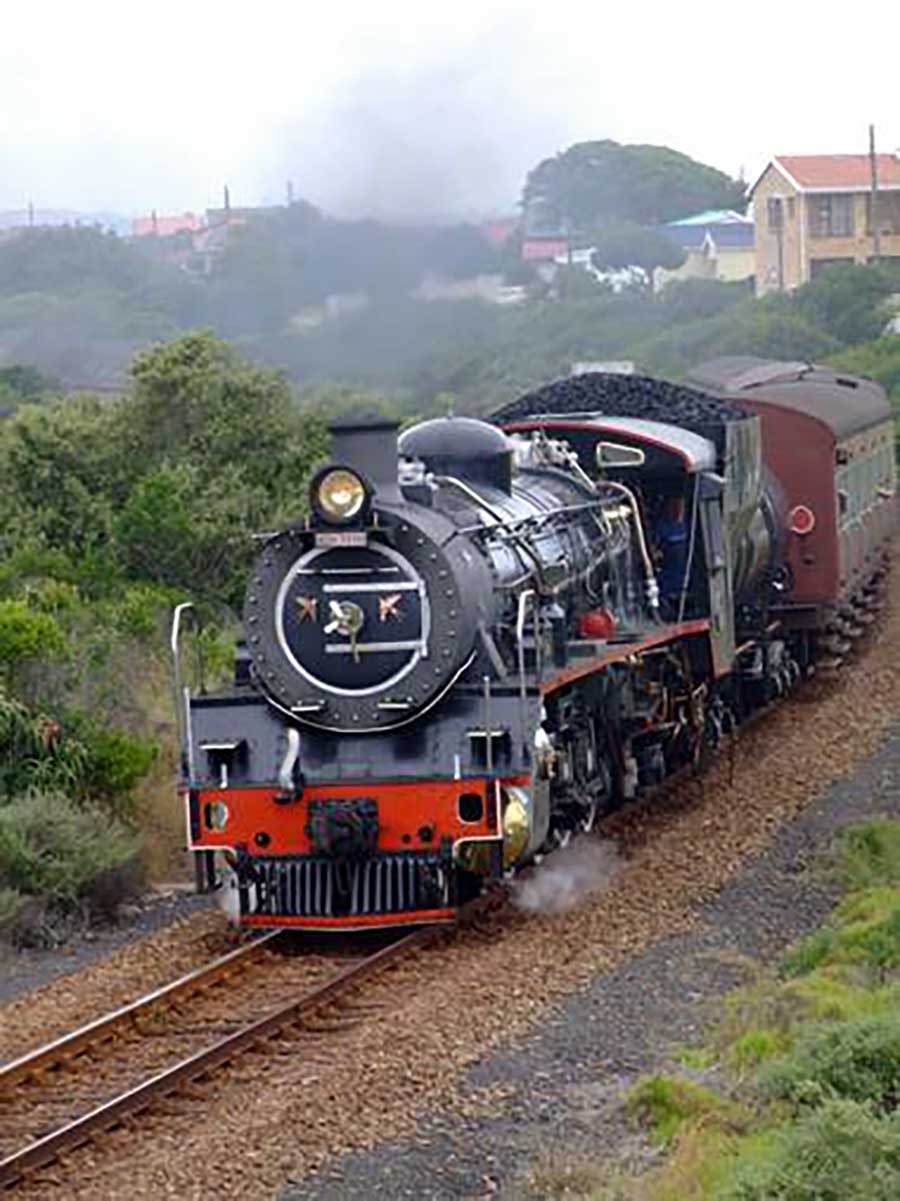
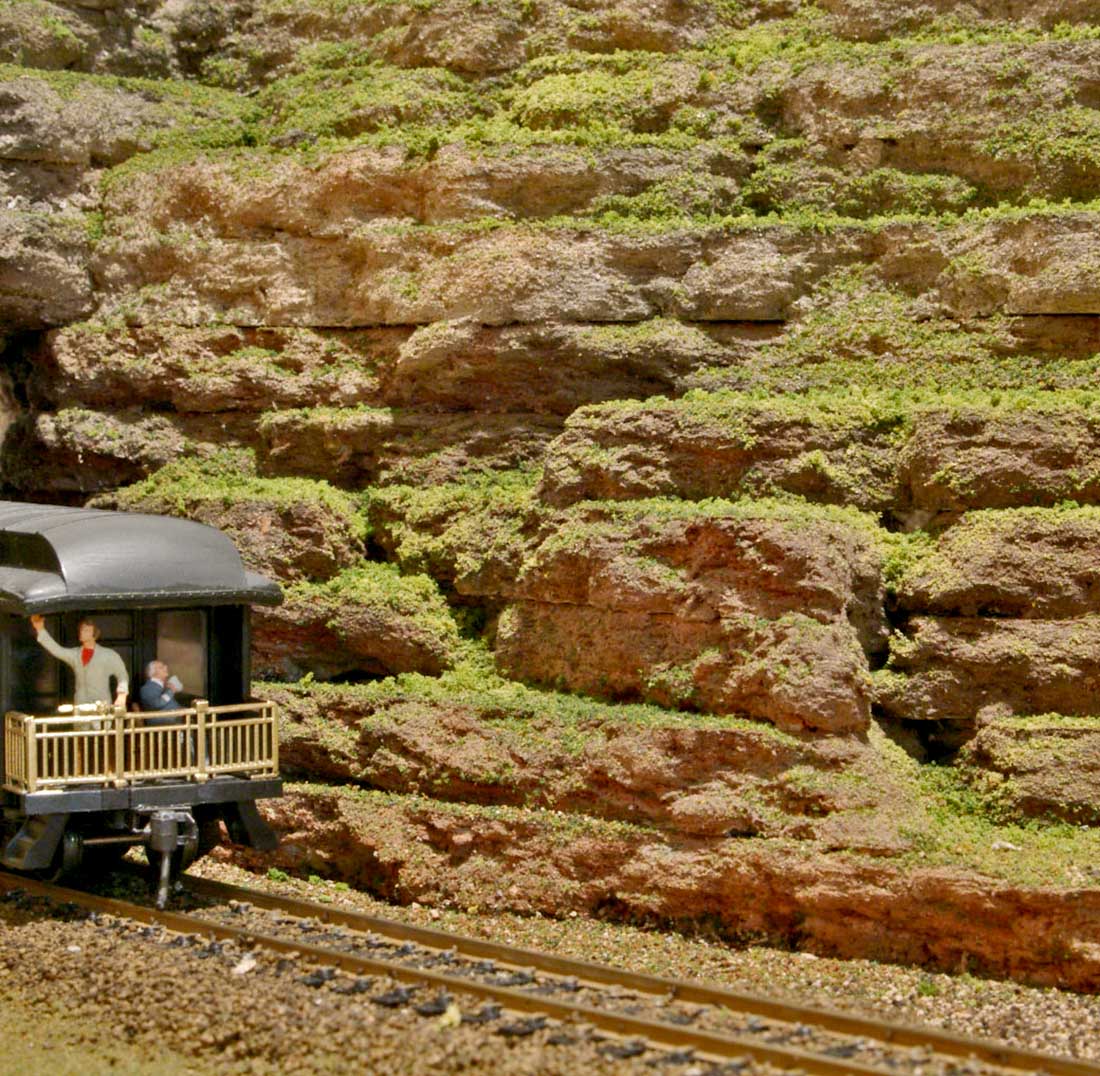
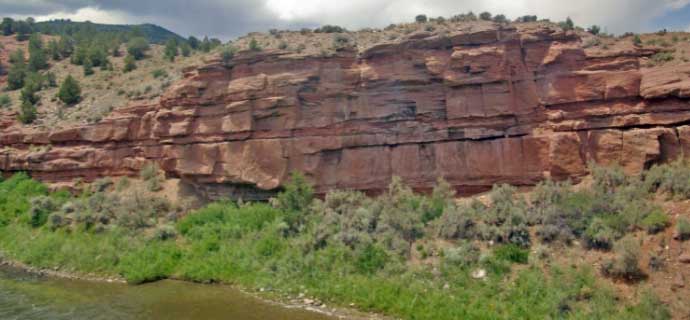
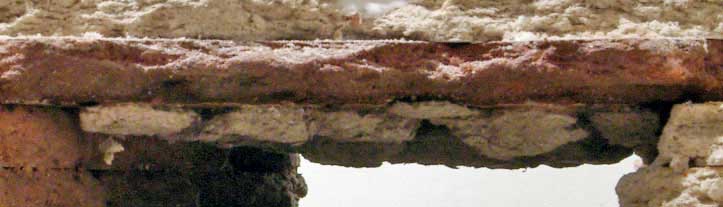
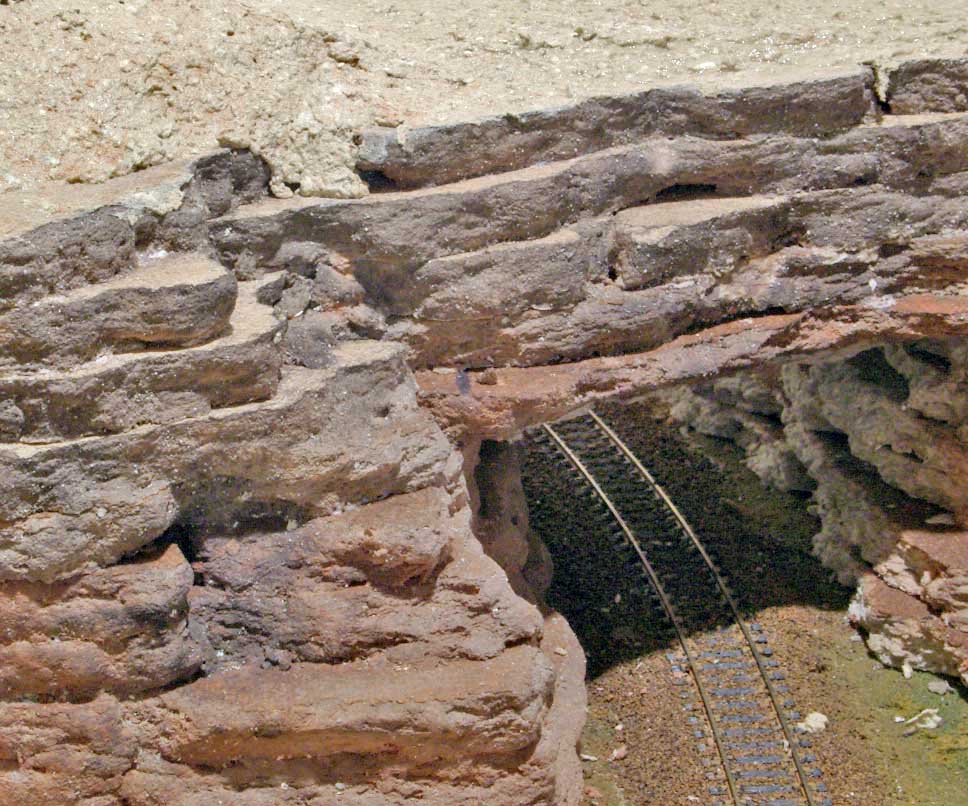
Some prototype rocks. One shows that if the rock is stable enough the tunnels do not need portals.
The other shows a normal sedimentary rock formation.
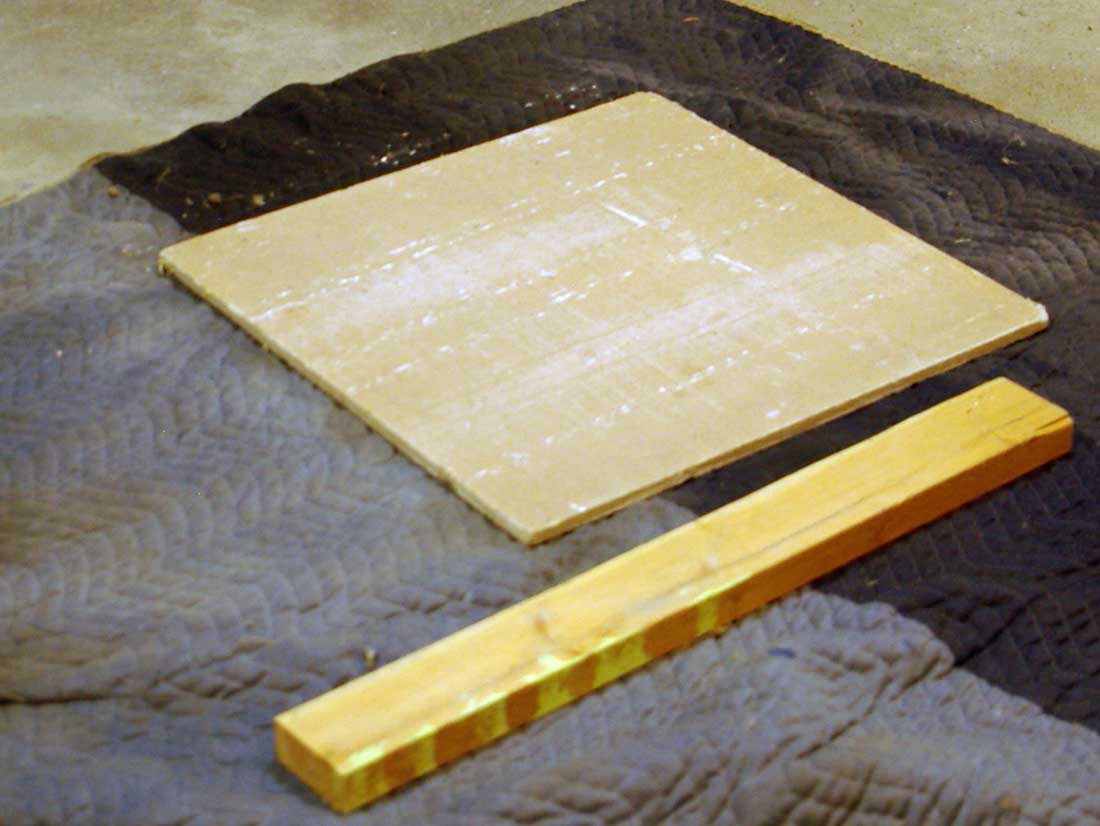
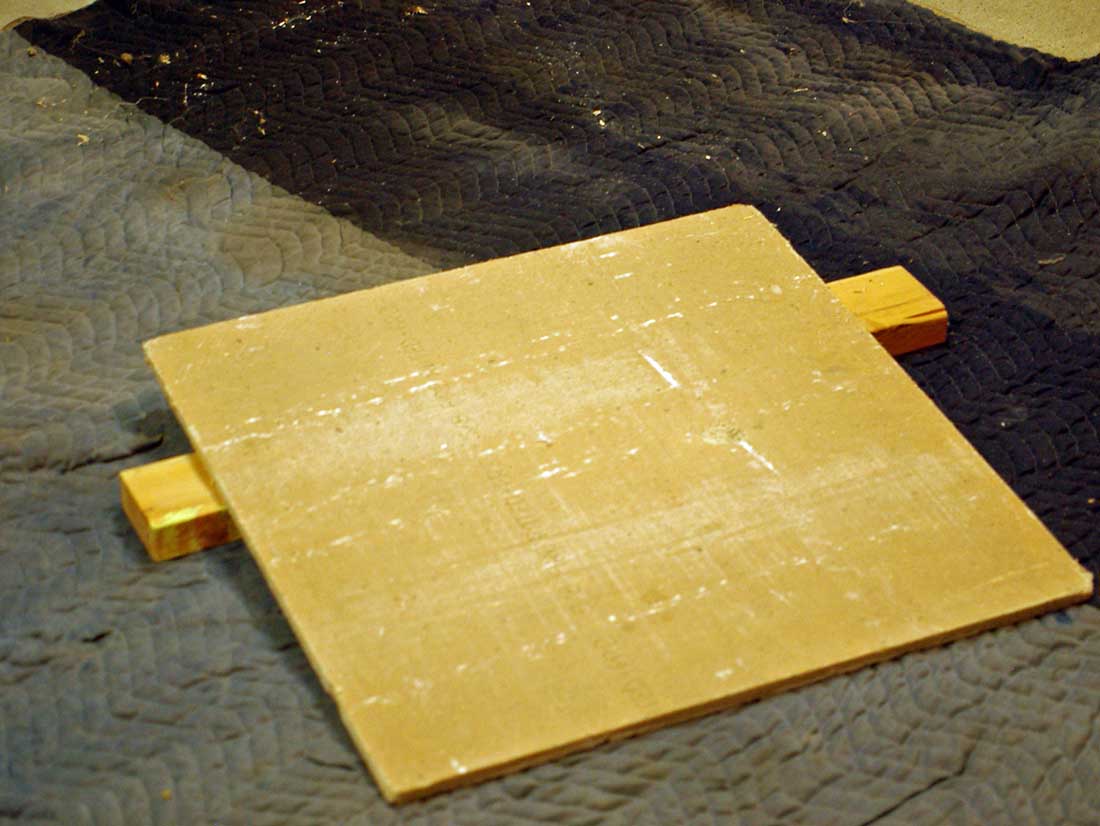
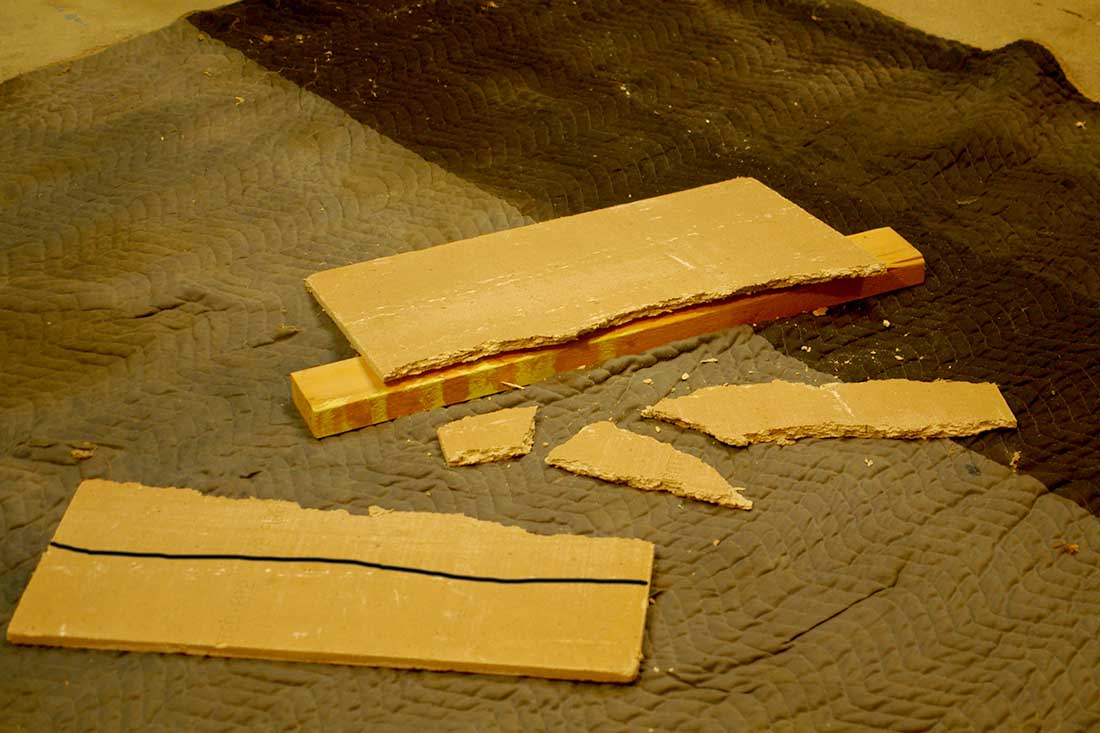
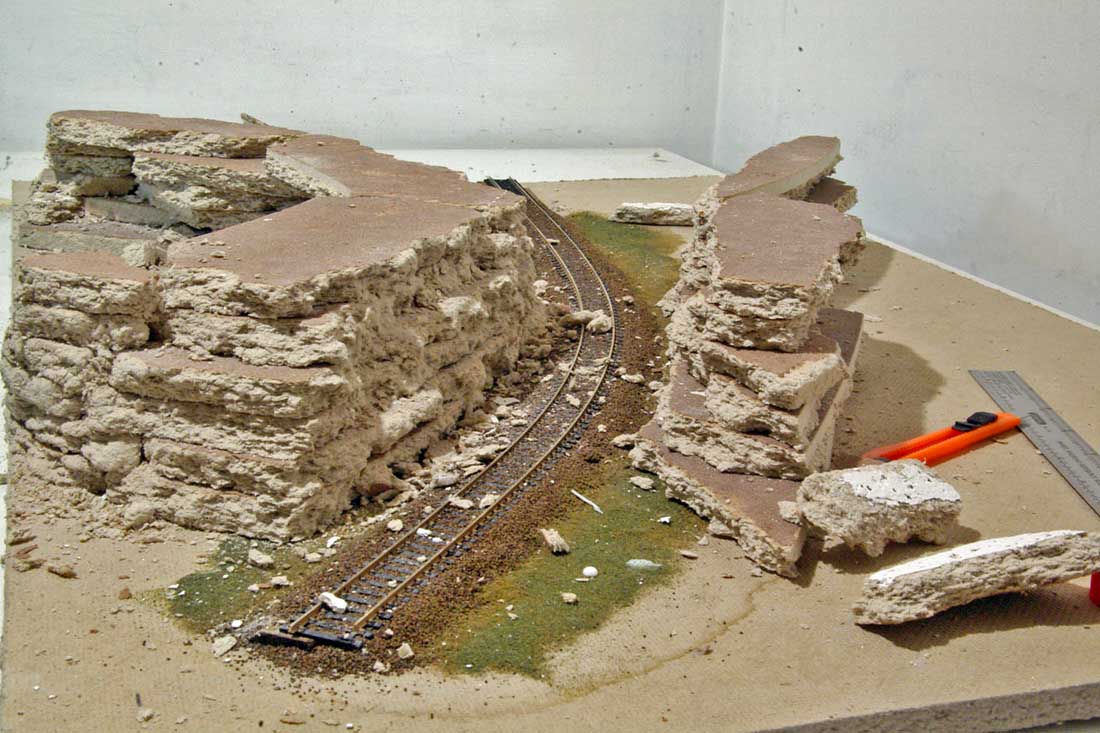
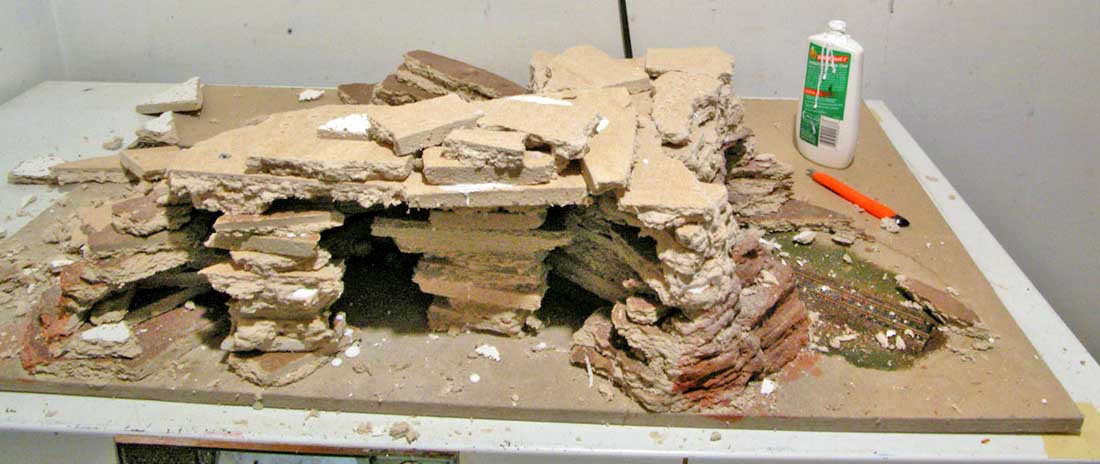
The basic part of making the rocks. A drop cloth for the mess. The (in this case a 2 foot by 2 foot) tile and a 2 by 4 board.
Place the tile so that a part of it is over the board.
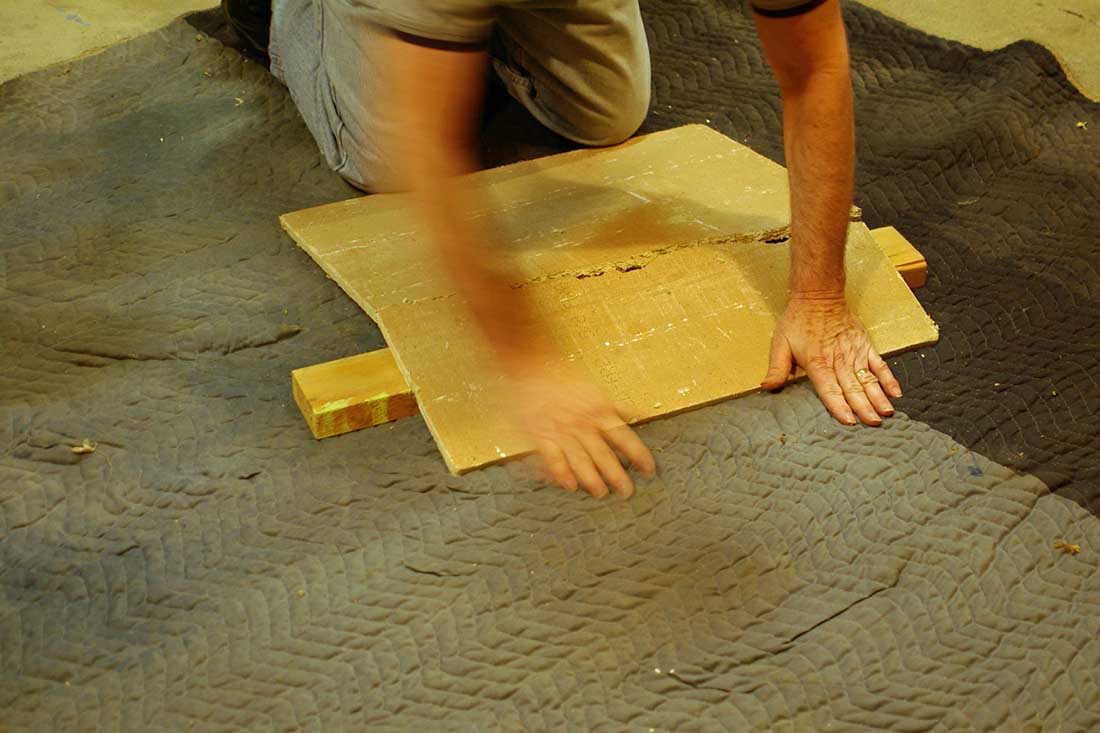
Using even pressure across the overhang, press down slowly. This creates rather straight line rocks.
This time press down unequally and sharply while supporting a piece in the other hand. This creates the rounded pieces.
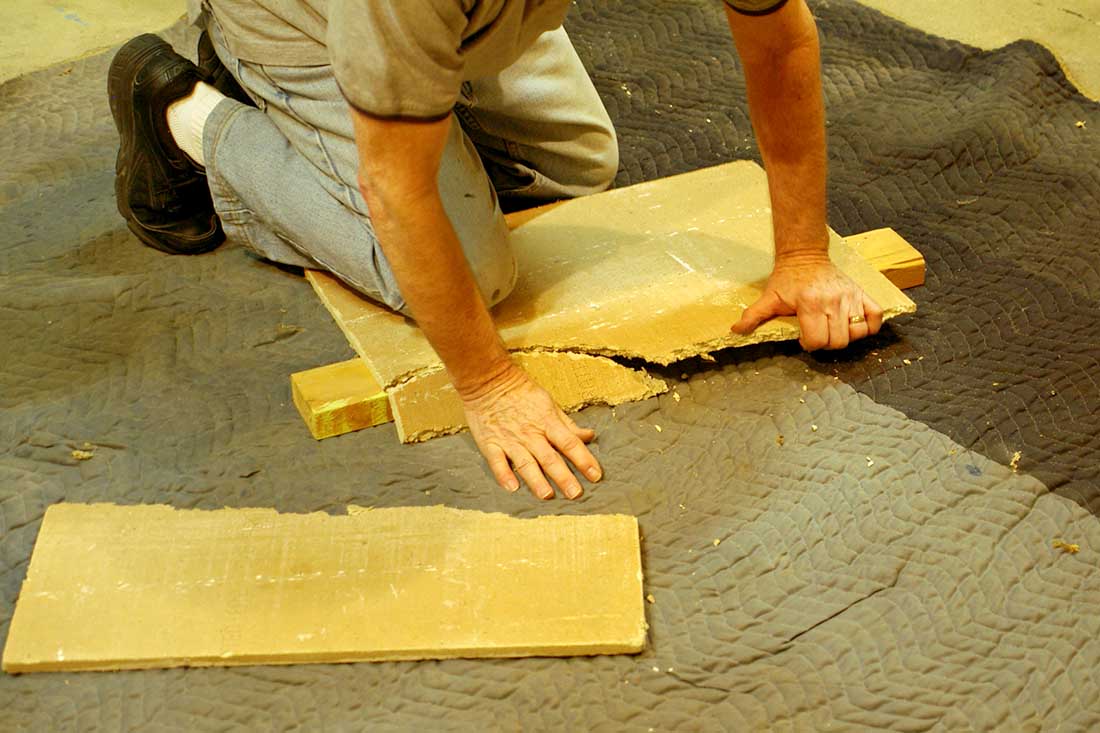
Put the pieces in a box for use once you have a lot of the tile pieces ready to go.
Using a box knife, trim off the larger piece for use later in making supports. The pieces of rock tile do not need to be more then 2 to 4 inches wide. You will see later where a wider pice3 might be needed.
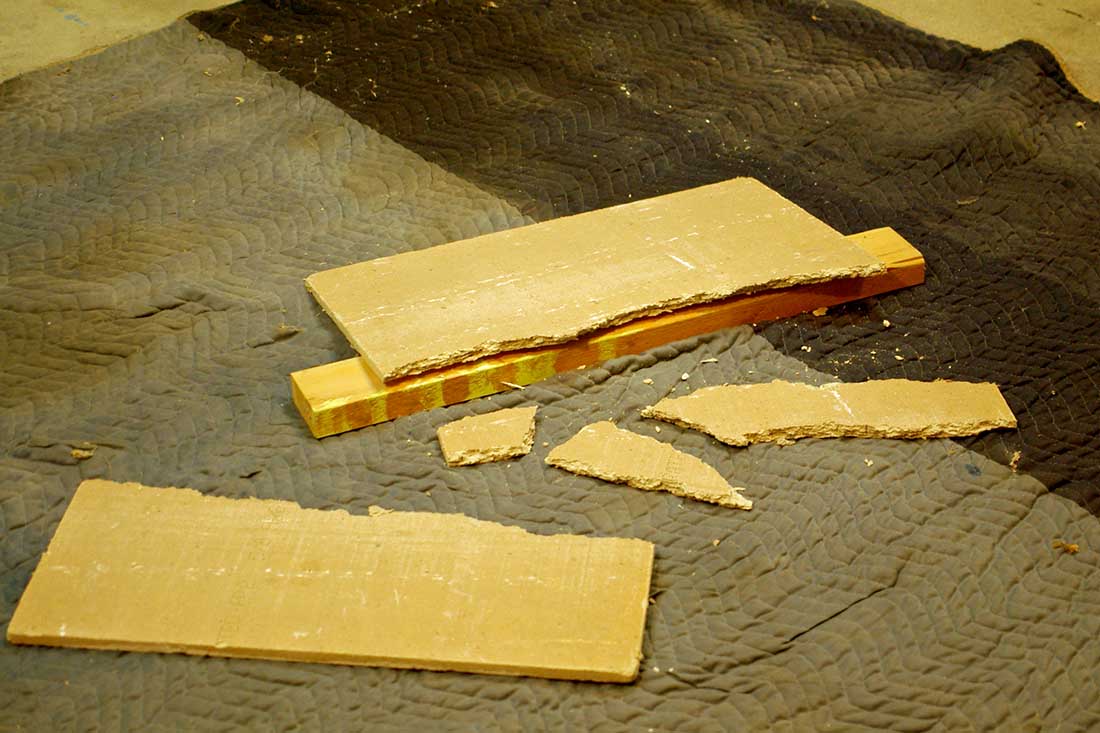
From this…
…to this!
The basic tools. The spray bottle with the orange sprayer is for the wet water. The tall one is for the India ink and alcohol, the paints and a brush.
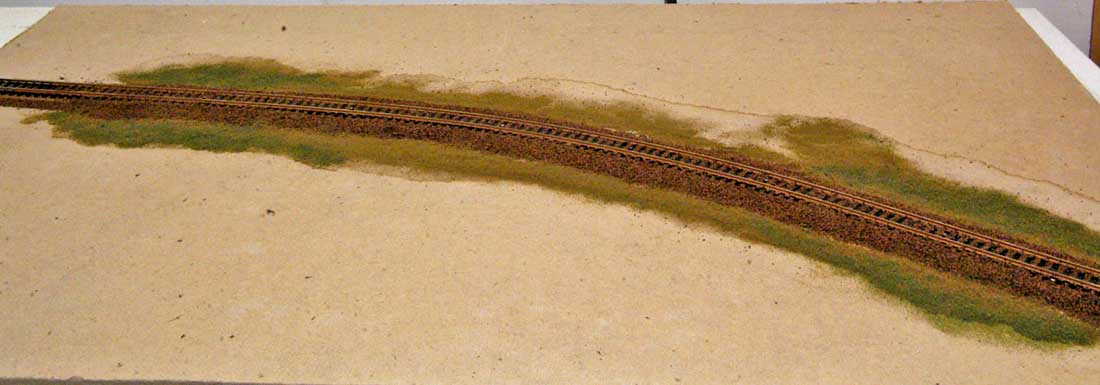
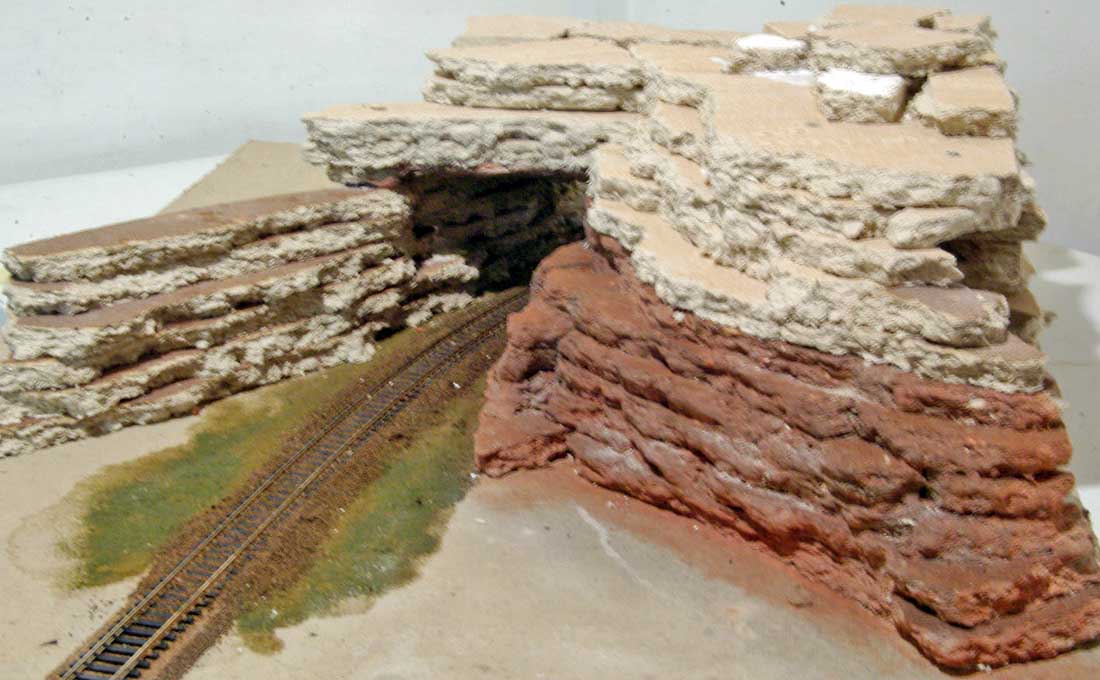
The part of the track that is going to be in the tunnel must be ballasted and finished before the tunnel work can begin.
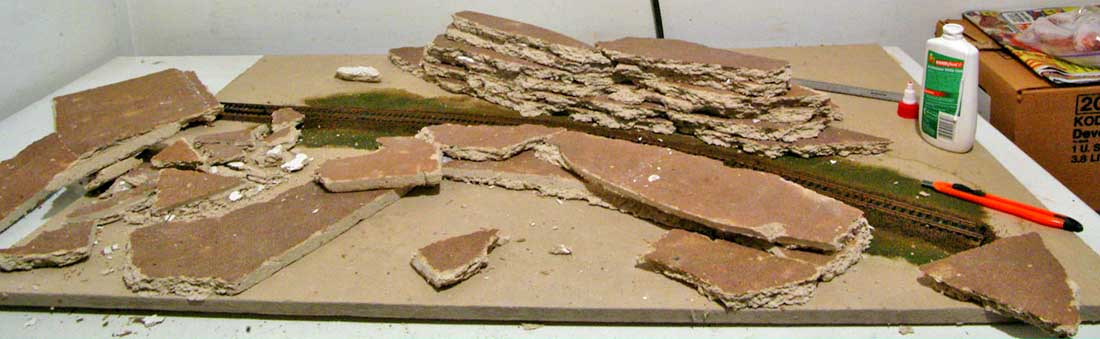
Begin by laying out and stacking the tile. Since this was a demo, the tunnel is short. Determine where the entry and exit must be and arrange the tiles. Begin by gluing the first layer and the next and so on. Once the stack has about 4 or 5 tiles high I used long panel nails to keep them in place. If you don’t do that you need to wait for the glue to set before moving on. (My base is Homasote. I don’t knew how hard that is to get in England.) The tile is soft and the nails just push right in.
The tunnel is beginning to take shape. The box knife was used to keep the width of some of the larger pieces of tile from getting too wide. NEVER USE THE BOX KNIFE TO CUT THE FRONT OF THE ROCKS. This causes a sharp cut and does not look good or natural.
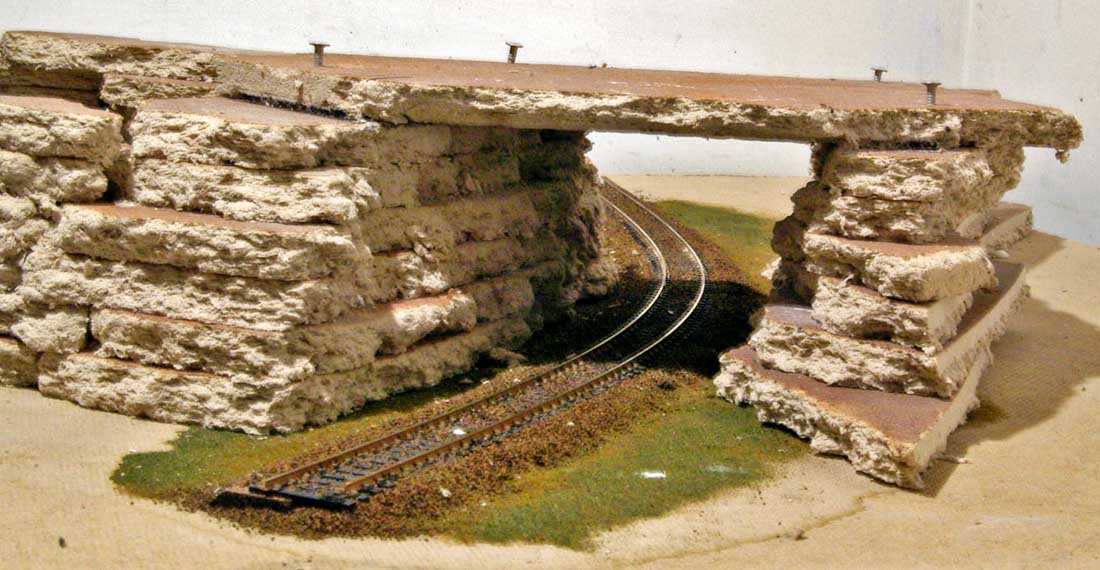
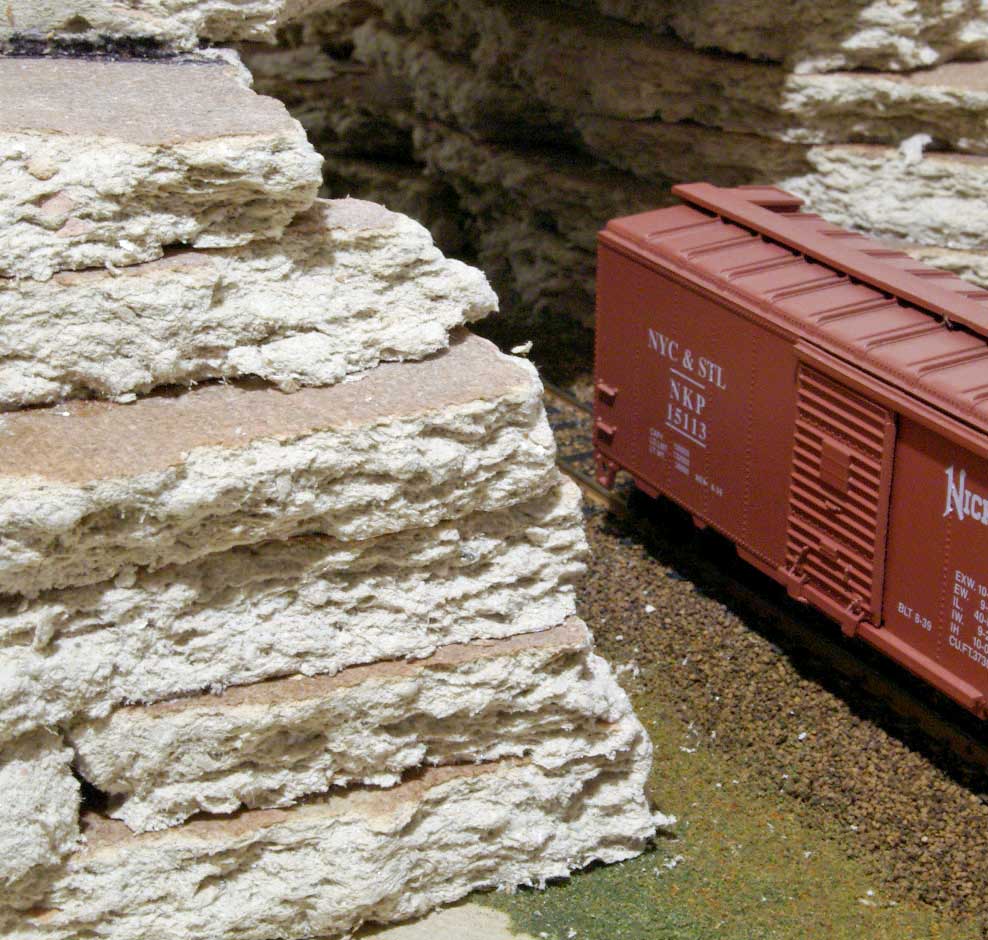
Now it is time to determine the clearance in the tunnel. The tile is about 1/2 inch thick. The cork road bed is about 1/4inch thick and the rail adds a little to the height of the top of the rail. In this case there are 6 layers of tile. The distance from the top of the rail to the bottom of the 7th layer is just at 22 scale feet. This just clears a stack train.
You can see that I have a temporary roof over the tunnel. Now was the time for any adjustments.
Make sure the tunnel sides also clear. Use your longest car to check.
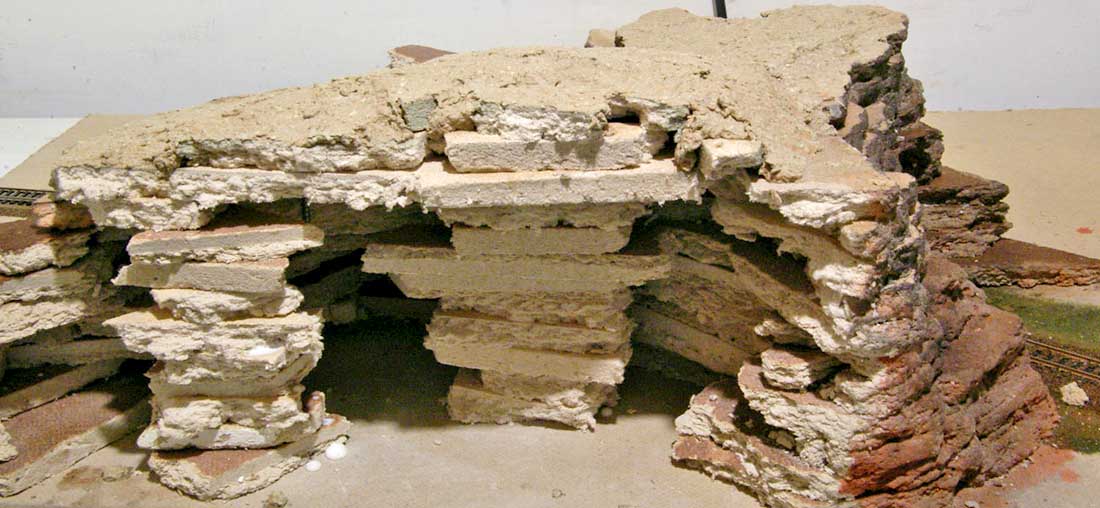
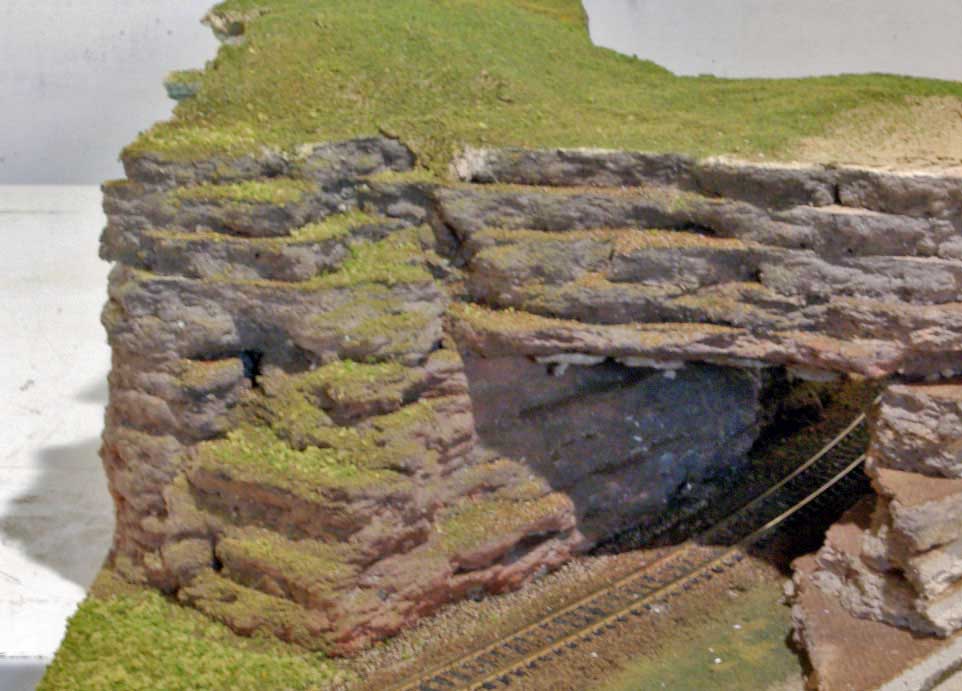
A lot has happened by this time. First, before the “Top” is permanently in place, paint the part that is going to be in the tunnel. If you are going to be able to see through or deep into the tunnel, finish the inside as far as you would normally be able to see. This depends on your point of view. Visitors always seem to want to see in the tunnels.
Put down some news paper inside the tunnel. Lightly spray the wet water where you are going to paint the ricks. Mix you color you want for your basic rock. Grey, black, or shades of reddish brown. Your choice. The paint does not need to be very thick. Just remember the paint dries lighter than when you put it on. Lightly brush it over the rock face. Do not press too hard. (Later I will show how to make “weathered and less weathered rocks.)
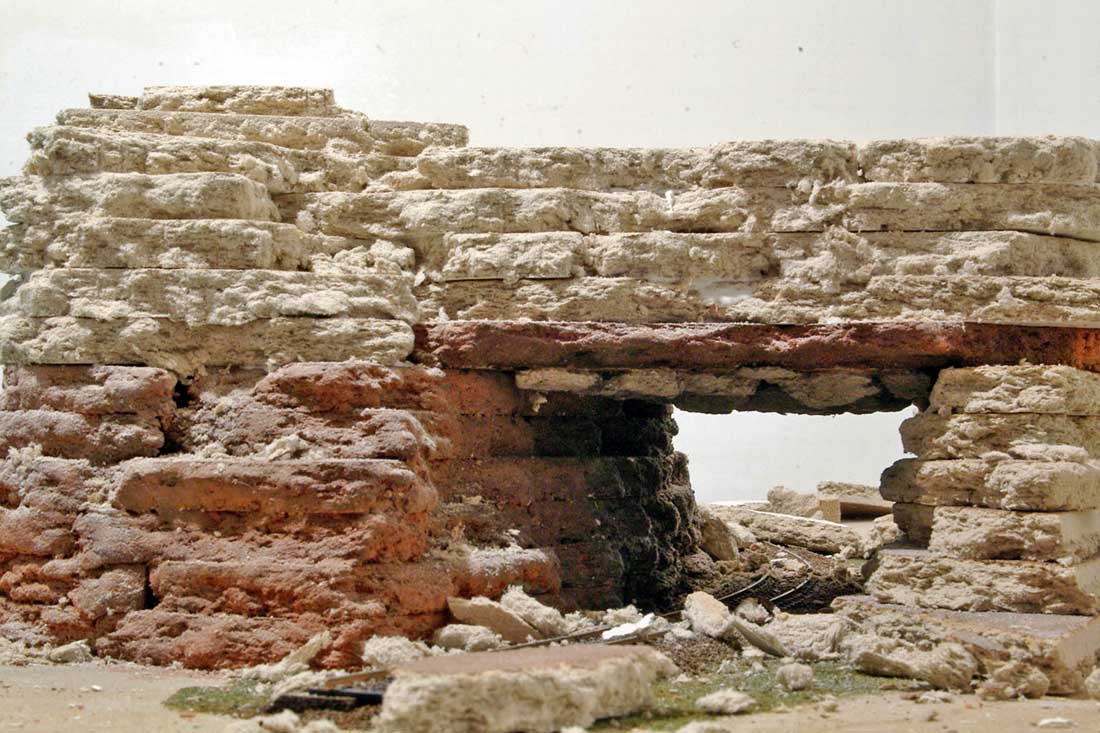
Notice I added small fragments of the tile (there will be lots of them) on the underside of the tunnel roof. Once they are very dry is will lightly paint them the base color. Then go back with the India ink and alcohol mix to make an exhaust soot look. I do this with the spray nozzle on the mist level.
Remember, I mentioned the cuttings when cutting down the width of the tile? Here you can see how to make supports These pieces will support the top of the mountain for things to come. You probably always wondered what held them up!
Progress so far. I did this is steps for the clinic photos. Otherwise all of the rocks would be painted at this point. Sorry about the focus on this one. Notice the little bits now on top. This will become the uneven top of the mountain.
I add craft paint to the mix when I add the water to the Sculptamold. In this case brown. I have used shade of green where large areas are going to be covered. There is no need for plaster cloth here. Again, remember the color will be lighter when dry.
Note the “spill over” of the Sculptamold. This is just dirt that has filled in some of the rocks over time. This adds realism to the scene.
It is MUCH harder to do a scene in halves!
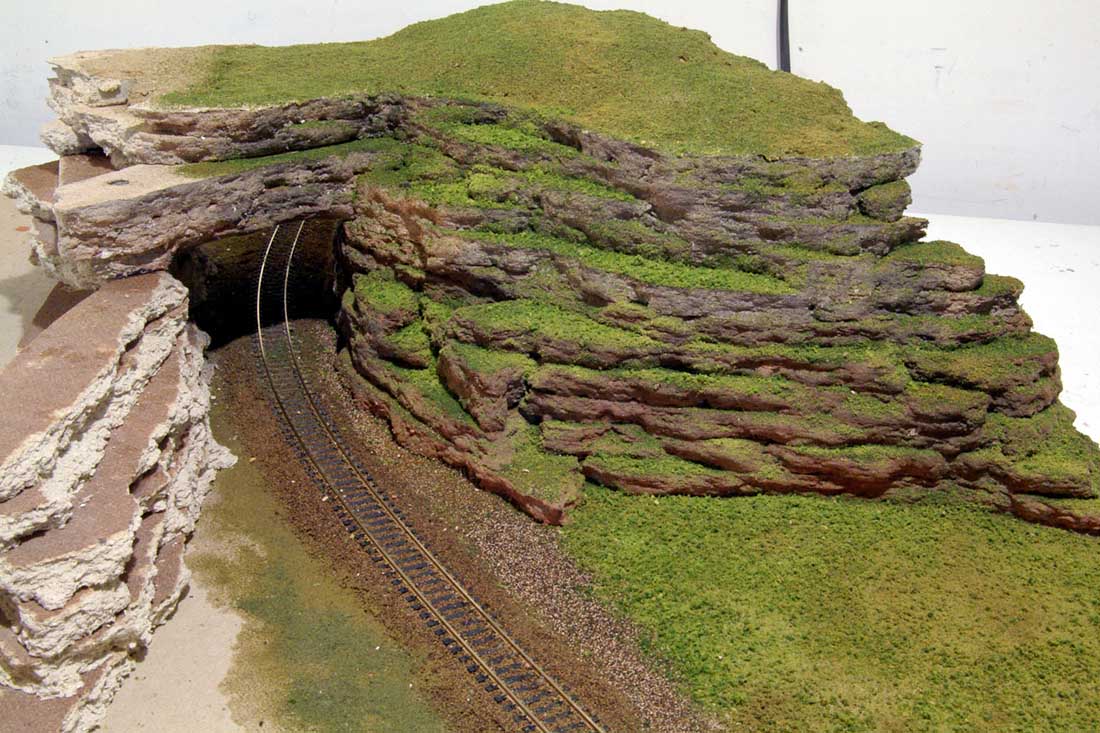
Sorry about the soft focus again. By now the project for the clinic is about done. For this scene I wanted a wetter look as oppose to my usual dry look. First, I finished painting all of the rocks with the brush. I sprayed some of the India ink and alcohol in the crevasses to deepen the look of them. I used a little narrower setting on the nozzle. (In upcoming sets I will show the effects of the deepening look.)
Next, I used a mix of about 75% white glue and water spread all over the Sculptamold. Then lightly sprinkled ground foam over the glue. Then about half an hour later I very lightly sprayed water over the ground foam. This will dampen the foam and draw up some of the glue and keep it in place for ever(?). It has made may trips so far.
Then, to get the mossy look it is more foam. I use a mix of about 30 % glue and 70% water for this. Where ever you want grass or moss to show, lightly brush on the mix. Especially the flatter places. Then, with ground foam on a stiff piece of paper, lightly puff the foam toward the rocks. This will spread the foam and you can do some directing of the foam by moving the sheet a little.
The End!
This is the basics of the process. In the upcoming sets I will show more difficult and pleasing results. All worth the effort. Difficult only because of the situation or need to engineer the underside of the mountains.
Dan”
A huge big thank you to Dan, for sharing how he makes his model railroad rocks. They look amazing.
It reminded me of Jim’s post (Jim’s stunning landscape, so I had a quick look, and yup, same technique. No wonder they both look stunning.
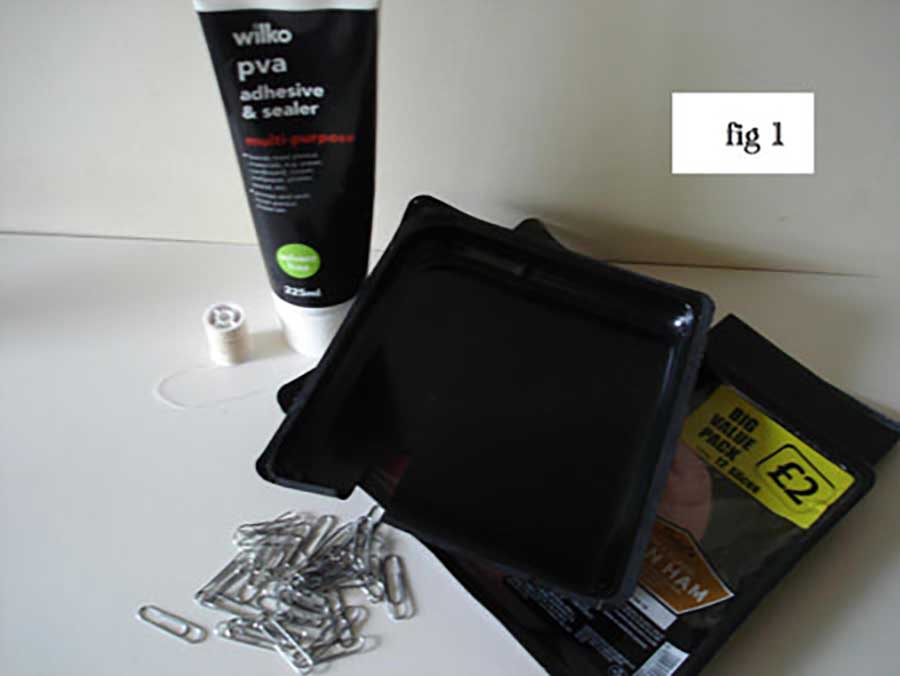
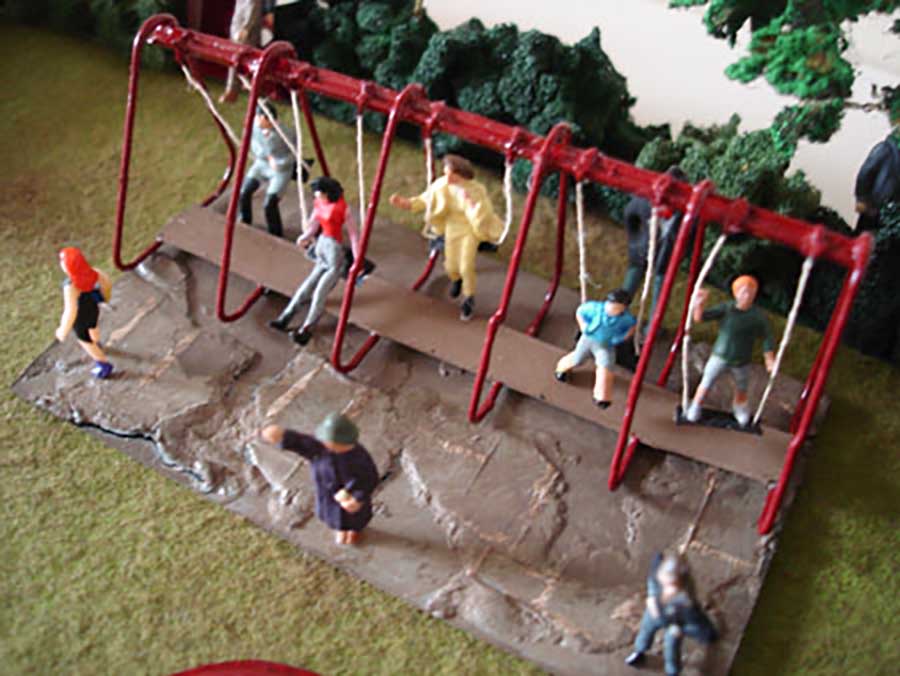
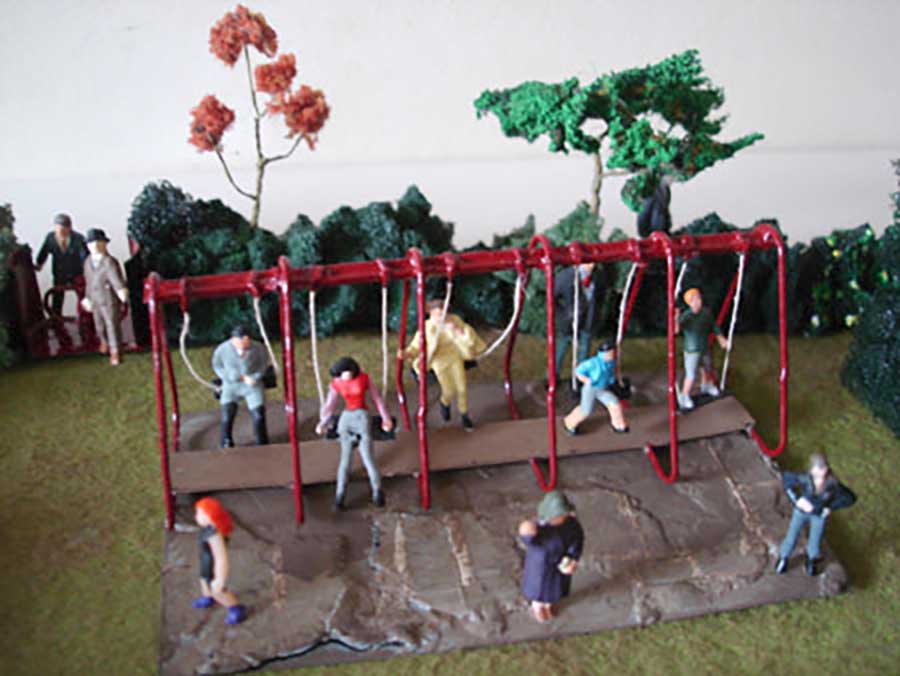
Roger has been in touch – he has scratch built his own model train park, using paper clips:
“There’s no denying it, Al. This one is outrageously simple and horrendously frustrating. But hopefully some may think the results worth the effort.
While experimenting, I had a number of disasters but, fortunately, have the patience of the gods.
The photos are self-explanatory but here are some instructions, born out of experience, for those who would like them.
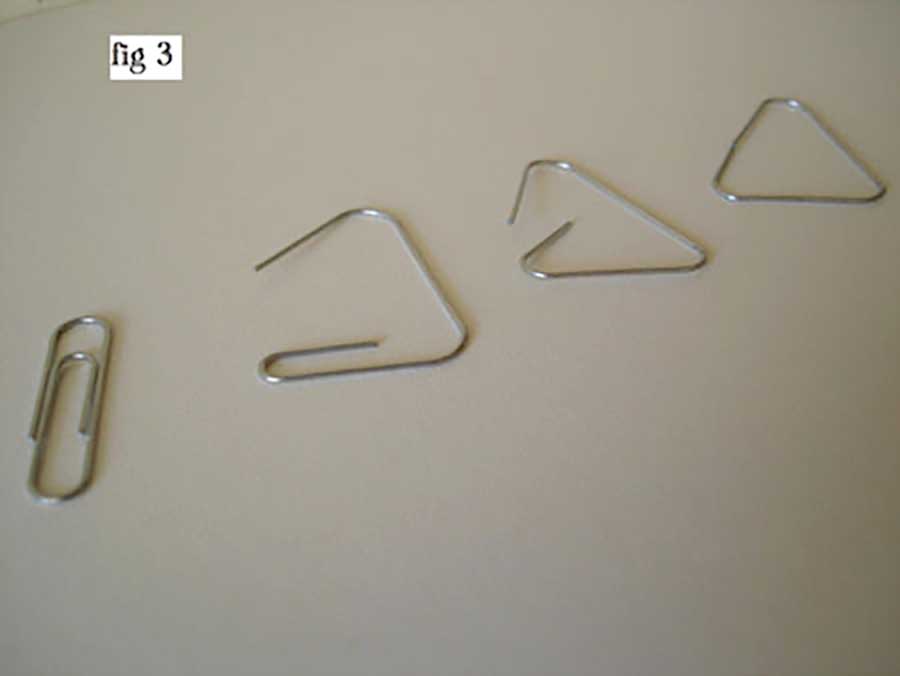
1. Unbend the paper clips to form triangles – so that the ends meet. Important that they match perfectly so lay them one on top of the other to make sure (Figs 3 and 4) Superglue the join.
2. With wire cutters or pliers, cut your three cross members (from other paper clips) – 2 cm long – match them up too (Fig 5).
3. Glue two to the base of an upright (Fig 6). Helps to use tweezers to handle them. Leave for a good old while.
WARNING – Despite its claims and its addiction to people’s fingers, superglue doesn’t care much for metal – but will do the job in the end.
Before gluing it helps to scratch your proposed joint with a craft knife or similar and make sure you apply tiny drops to both surfaces – hold the joint in place while it settles and LEAVE IT.
I learned this the hard way. Even after hours, your joint will still be fragile so handle with care during the construction – learned this the hard way too.
I never use the grotty, clogged up applicators supplied with superglue – pour a little into one of those blue plastic milk bottle tops (which I save in their thousands for this and paint jobs) – apply with a matchstick. And I buy cheap superglue in packs from Pound (99 cent) shops.
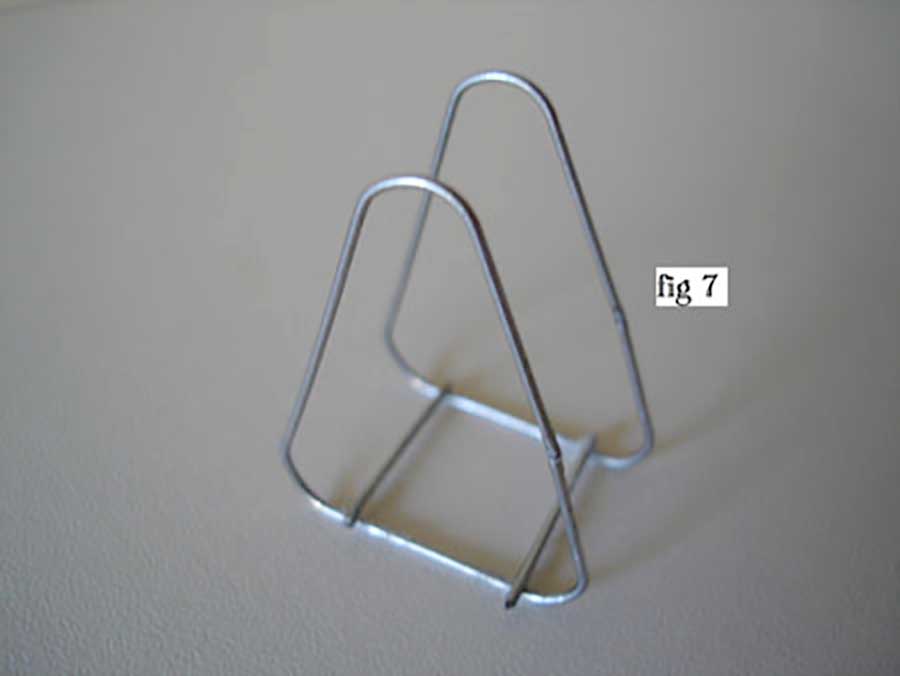
4. Glue the cross members to the base of the other upright (Fig 7) – make sure all is straight and vertical – helps to put a matchbox or suchlike next to the upright while it sets – to keep it straight. LEAVE IT!
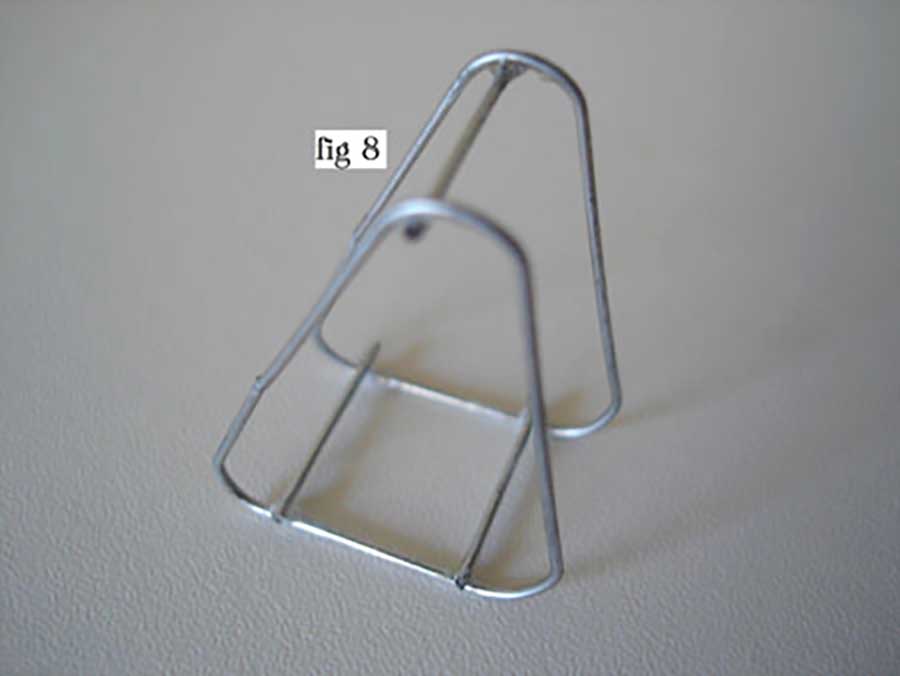
5. Turn your structure upside down and carefully glue in the top cross member (Fig 8). Hold down with a finger and LEAVE IT! Have a double whisky and leave the whole thing overnight.
6. When you awake, remember it is still very fragile. Apply superglue to all the joints, quite generously and … you guessed it … LEAVE IT!. When all has hardened you can gently scrape off excess with a craft knife – but it paints over okay. The structure will never be incredibly strong so handle carefully while working on it.
7. The two suspending chains to the seat of the swing were an unforeseen problem. Thread just flicked all over the place and wouldn’t hang. Fuse wire wouldn’t straighten.
The solution was to run a length of thread through a blob of PVA adhesive – then through my fingers to saturate it. It dried nice and straight and firm. Cut the lengths of thread. You need generous lengths – trim off excess when all is done. Tie a knot at one end of each thread. The knot will slot in UNDER the seat.
For the single swing mark each length 3 cm from the knot – the length of the drop.
For the multiple swings mark off 2.5 cm (I’m assuming a standard size paper clip – mine were 3 cm – top to bottom).
DO NOT CUT OFF EXCESS UNTIL COMPLETELY FINISHED.
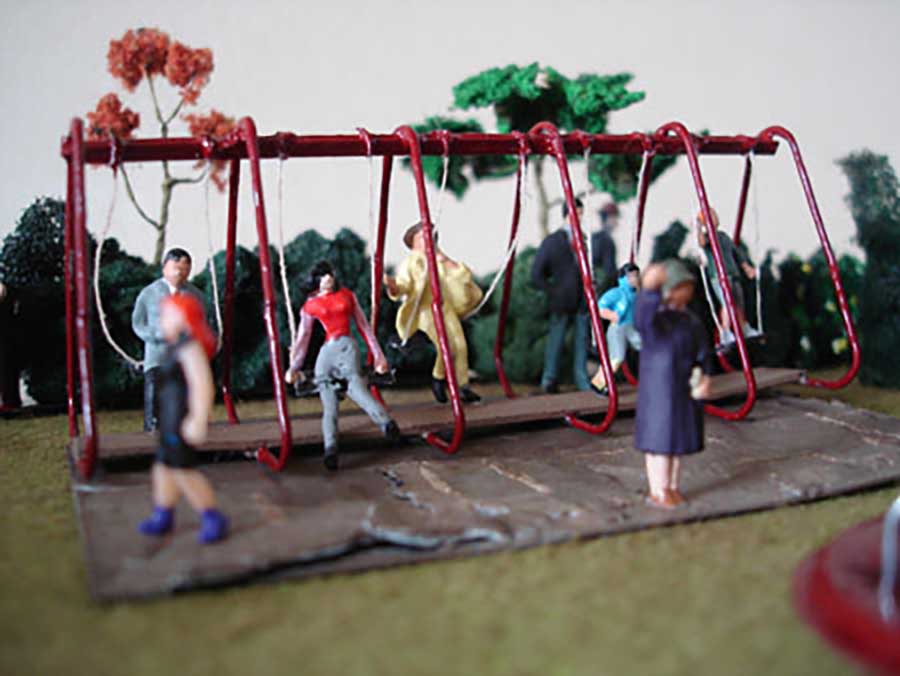
8. I always keep a couple of OO gauge people close by while I’m making stuff – maintains a sense of scale. Cut out your swing seat from a sheet of that free plastic substance known as chilled food container (pictured). Should be just wider than an OO gauge bum.
You can use a piece of plastic sheeting as a base too if you wish. Cut two TINY nicks in the centre of each end of the seat. You can slot your thread into these – the knot under the seat. Glue the ends of the thread underneath the seat.
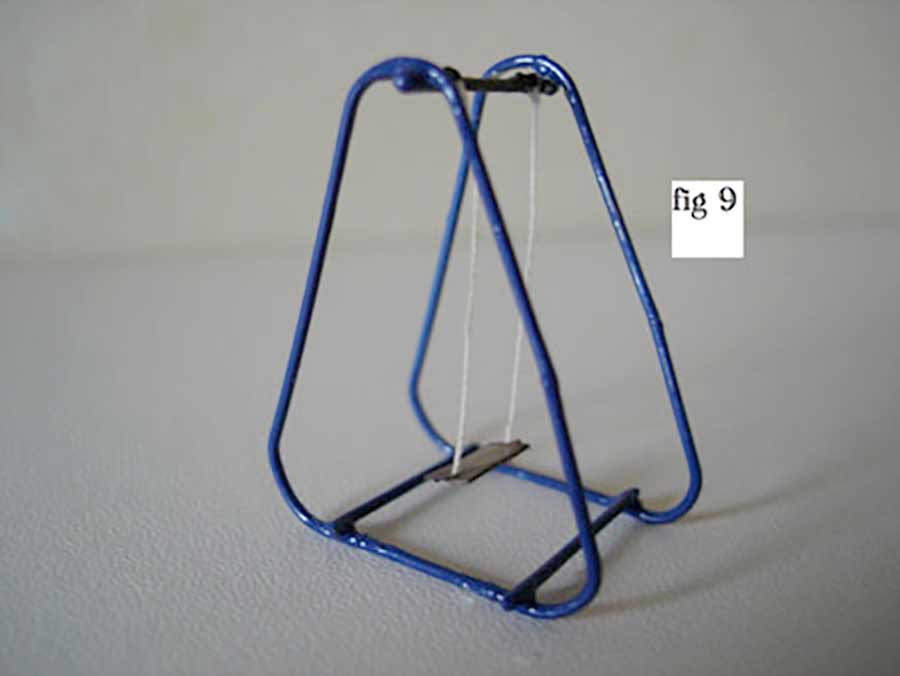
9. At the top rail, wind your thread round the bar at the mark – suspending the two threads from the upright. Glue parallel to hold them (Fig 9).
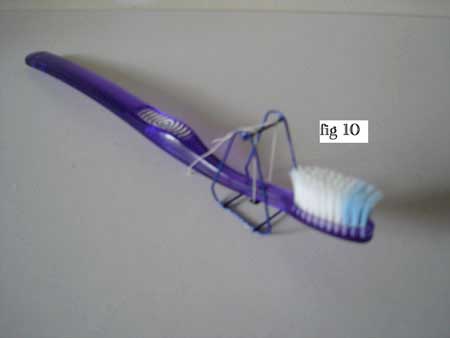
– The Toothbrush Test – Place a toothbrush (or similar) on the swing seat (Fig 10). You can check how parallel your seat is. Bit of wiggling at the top rail will sort out small inaccuracies. Apply a little more PVA to the thread – will help straighten and hold.
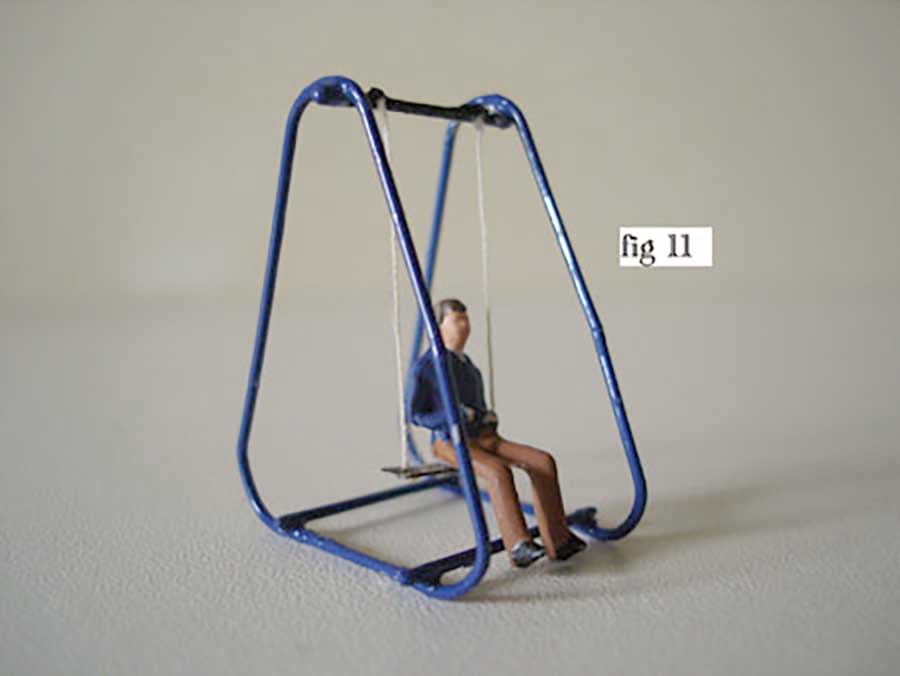
– OO gauge feet should just clear the ground. You may find that, when you put a person on the seat, he turns upside down with his feet in the air! Just glue his feet to the base (Fig 11).
– When you’re happy – cut off the excess.
10. Paint and admire your model train park. Have a double whisky.
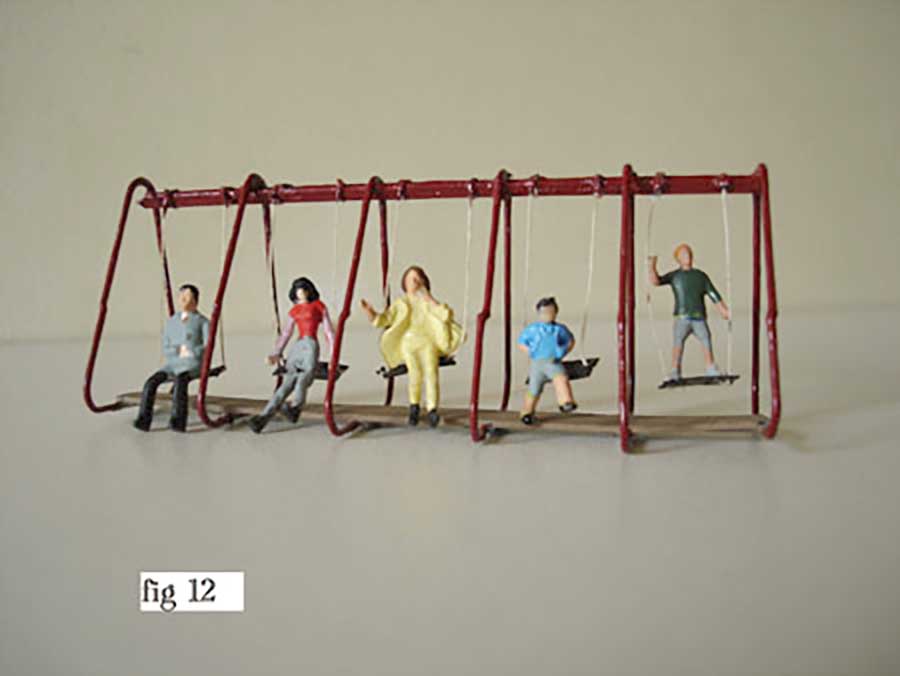
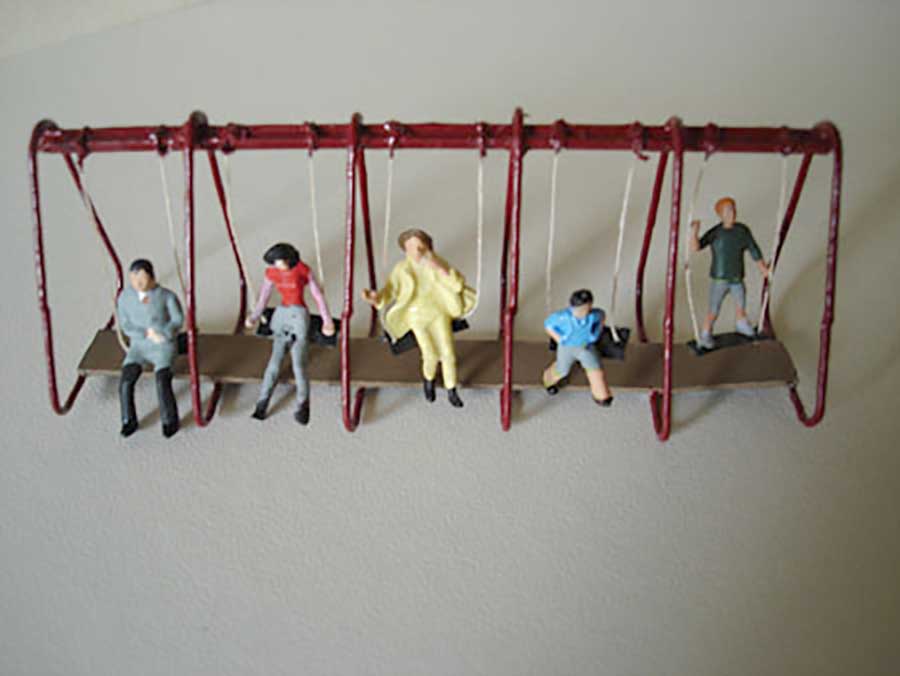
The row of swings (Fig 12) was actually easier to make than the single – same process. A length of plastic sheet (free – see above) joins it at the base – and a length of old Hornby rail at the top (you could use wood – anything).
When you’ve completed it – well worth while mixing up a little two-tube epoxy glue, spread it right across the UNDERSIDE of the base – so that the bottom lengths of the uprights set in it like rock. Really strong then.
This is the first structure intended for what I’m calling PAPERCLIP PARK. More to follow if you can bear it. And yes – I know – the Park Keeper would have kicked those adults off the swings and fined them – but I didn’t have any OO gauge children for the prototype. Will get some when I make another.
Best wishes to all.
Roger.”
A big thanks to Roger for sharing his model train park ‘how to’.
It reminded me of Allen’s recent post: HO scale park.
Also, the people – which really make the scene come alive – made me think of Dan’s: Model train people.
Now on to David.
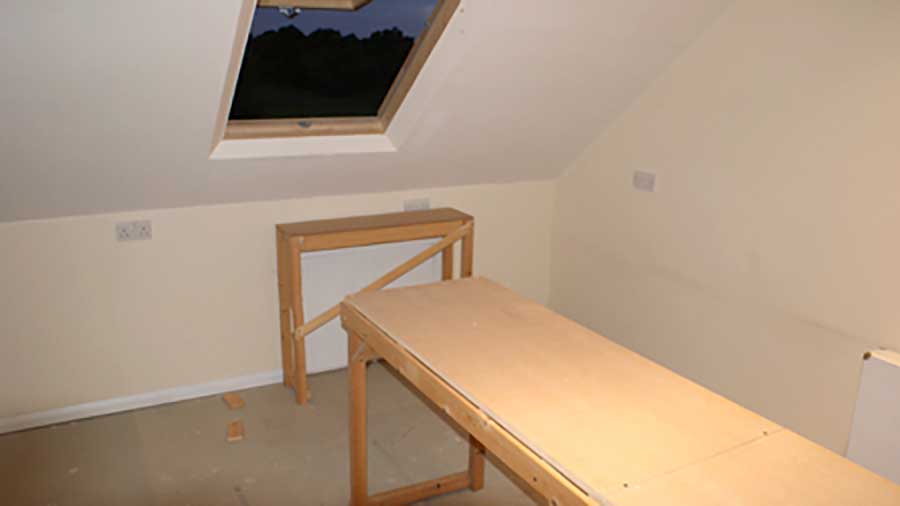
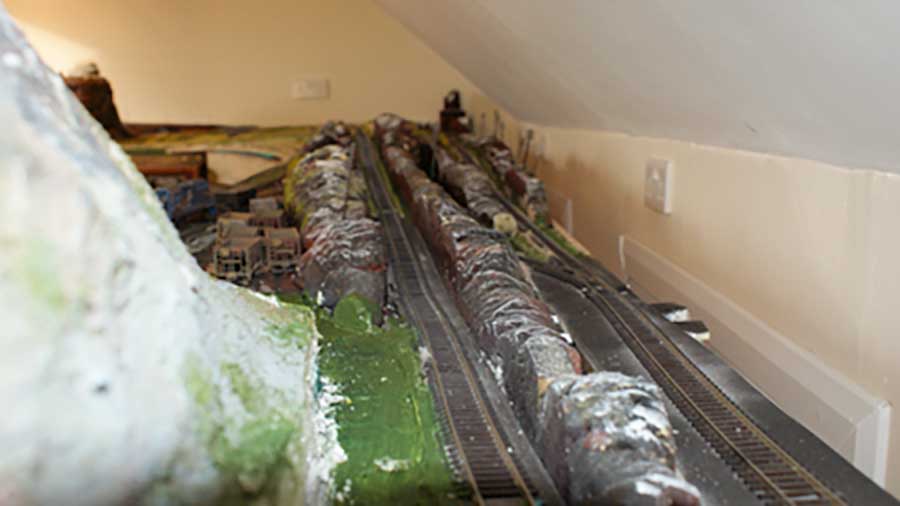
He converted his attic, made his benches, and got busy without even a track plan – he just got going.
Talk about making a start!
“Hi, AL.
Just a short email with a few pics, started this project in march on the day I retired, 67.
So 1 year on I thought you may like a quick scan of how it is now, hence the pic’s.
Built from scratch by myself including the loft conversion with stairs all the table work and model work never done anything like it before, but just got stuck in.
Built the staging around room 21’x18′ started off 2′ wide but has grown to 4′ in places, no track plan just bought track and laid it as i saw fit have had to change a few parts of track to get trains around the radius’s, but that was just fun.
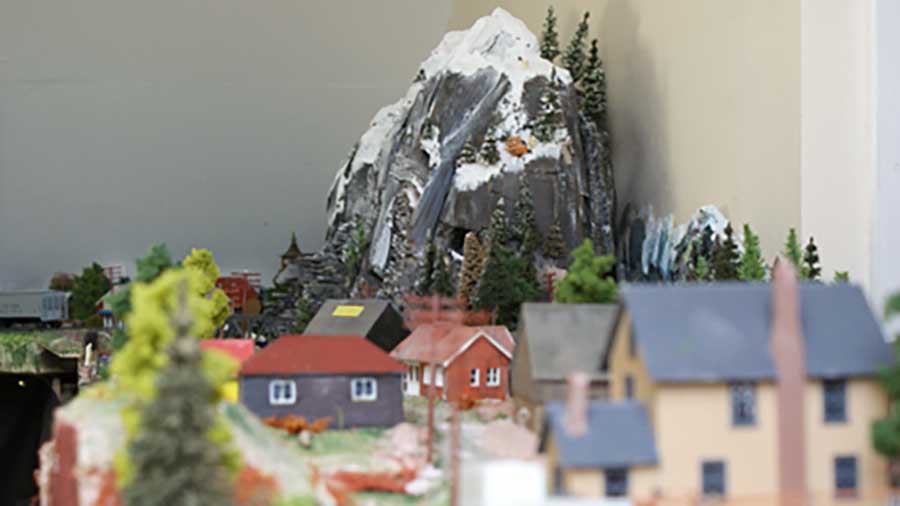
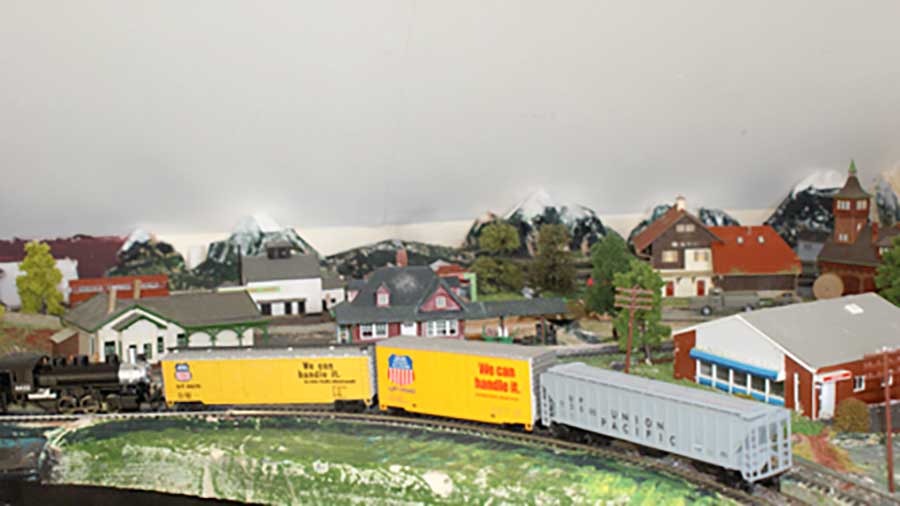
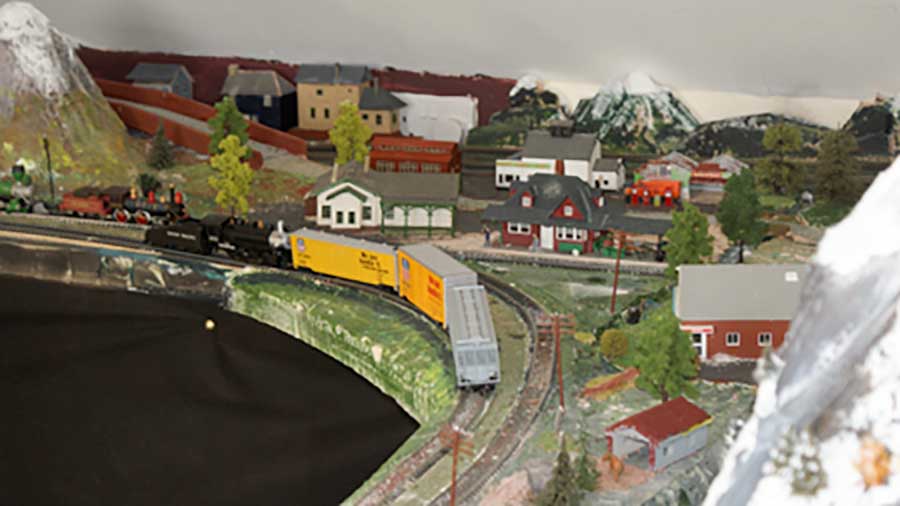
A couple of gradients (4) some mountains, hills, tunnels 4, desert, modelled on US trains but pure imagination on places, small town, industrial, gravel extraction, goods yard, valleys, farmland, did have a suspension bridge 3′ long but changed to a lift off entrance to get a better line connection.
Have put in the only part not made by me but my young grandson and that was a working volcano that he made for school and it fits in quite nicely.just starting to come together.
Cost so far including the conversion 18 engines, 120 trucks and models, tunnels 4, approx 320’line, $535 now I think that is a fair price for a few years enjoyment in the future,what say you.
Bought mostly off eBay some good bargains on there, 200 people $6.77 it’s still out there.