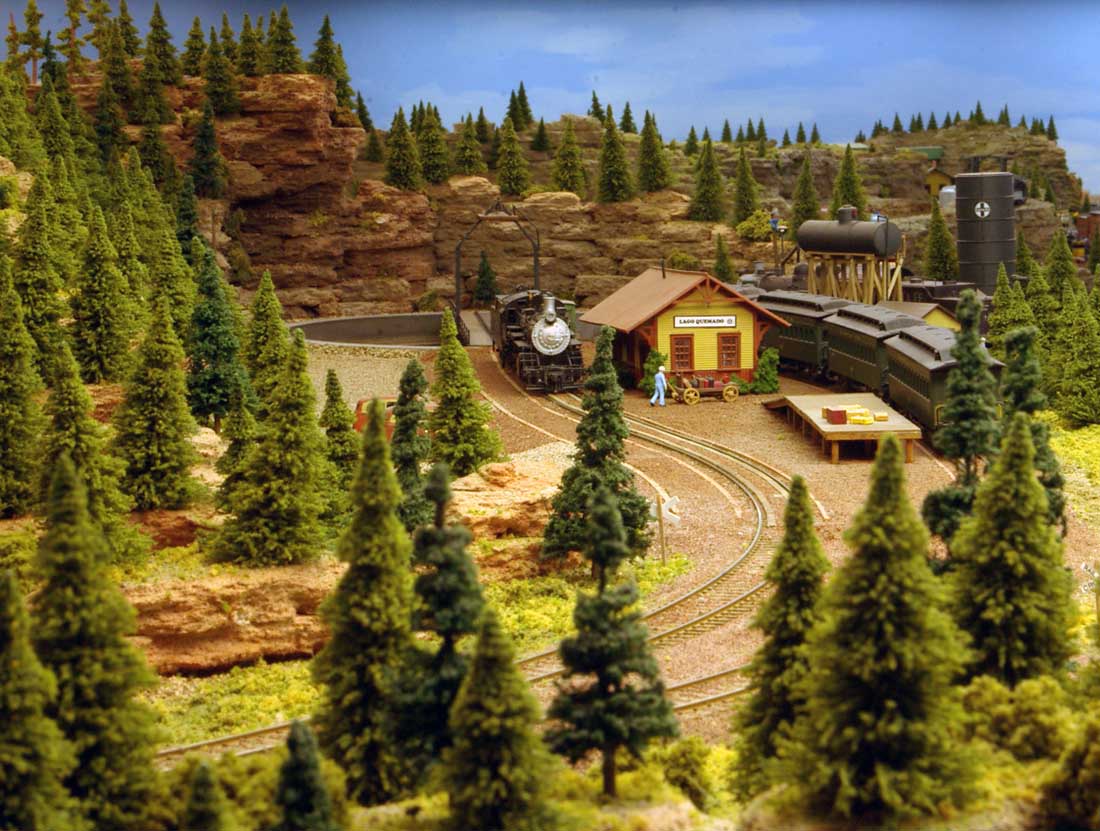
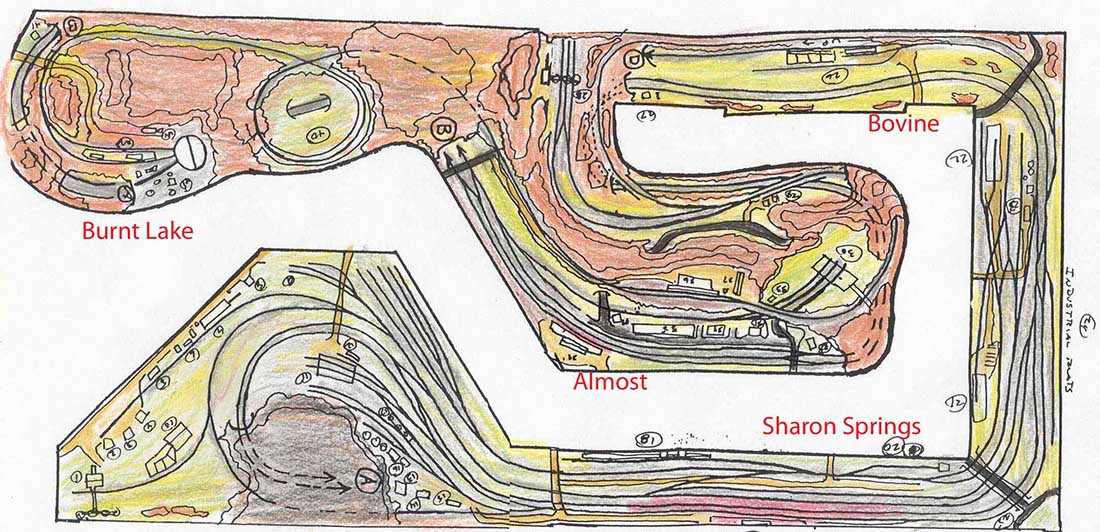
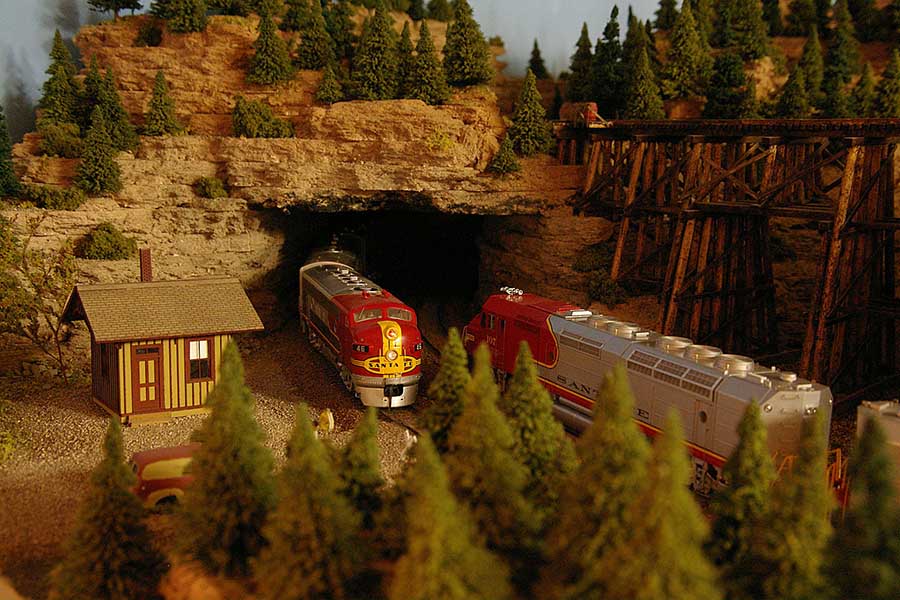
“Here are some views of my 1958 to 1960 Santa Fe layout.
It is 35 by 15 HO scale in and around the New Mexico area.
The layout is basically a single deck with run through and storage (staging) under neath. It is DC and not DCC.
I primarily like to run the trains with very little switching. (I get all the switching and operations on the other layouts I have built or done the scenery work.)
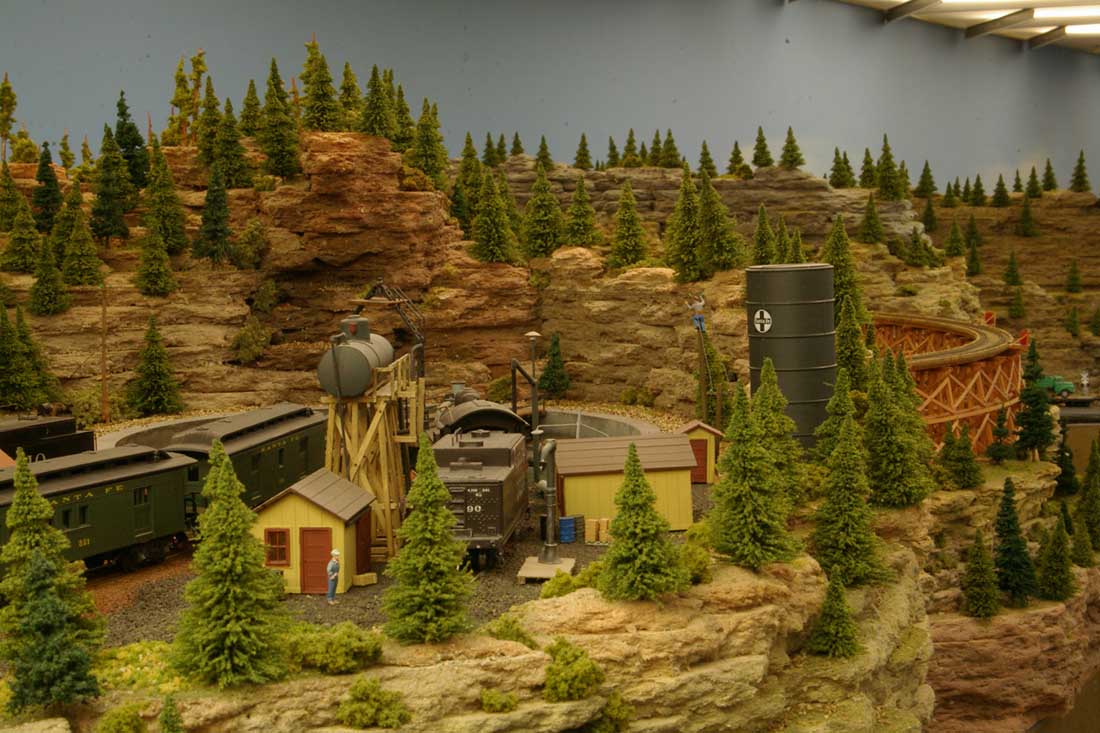
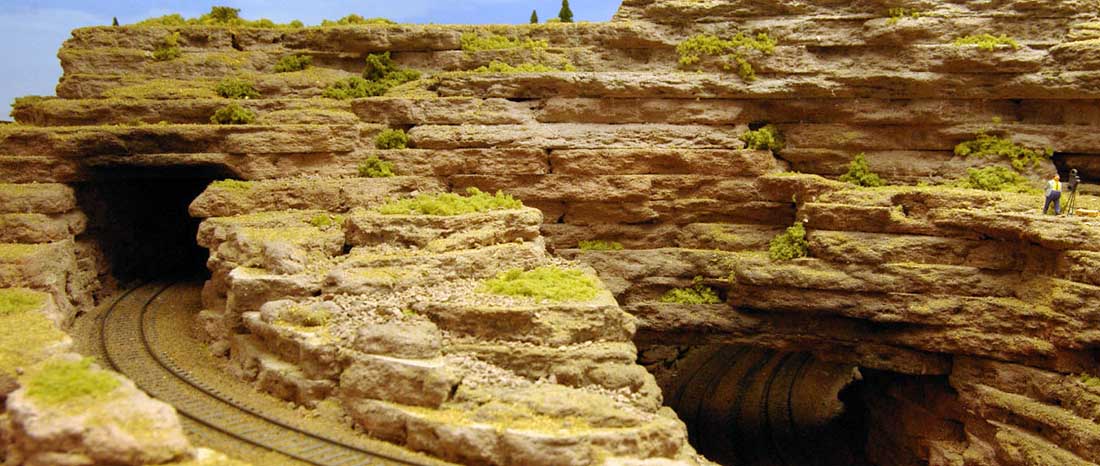
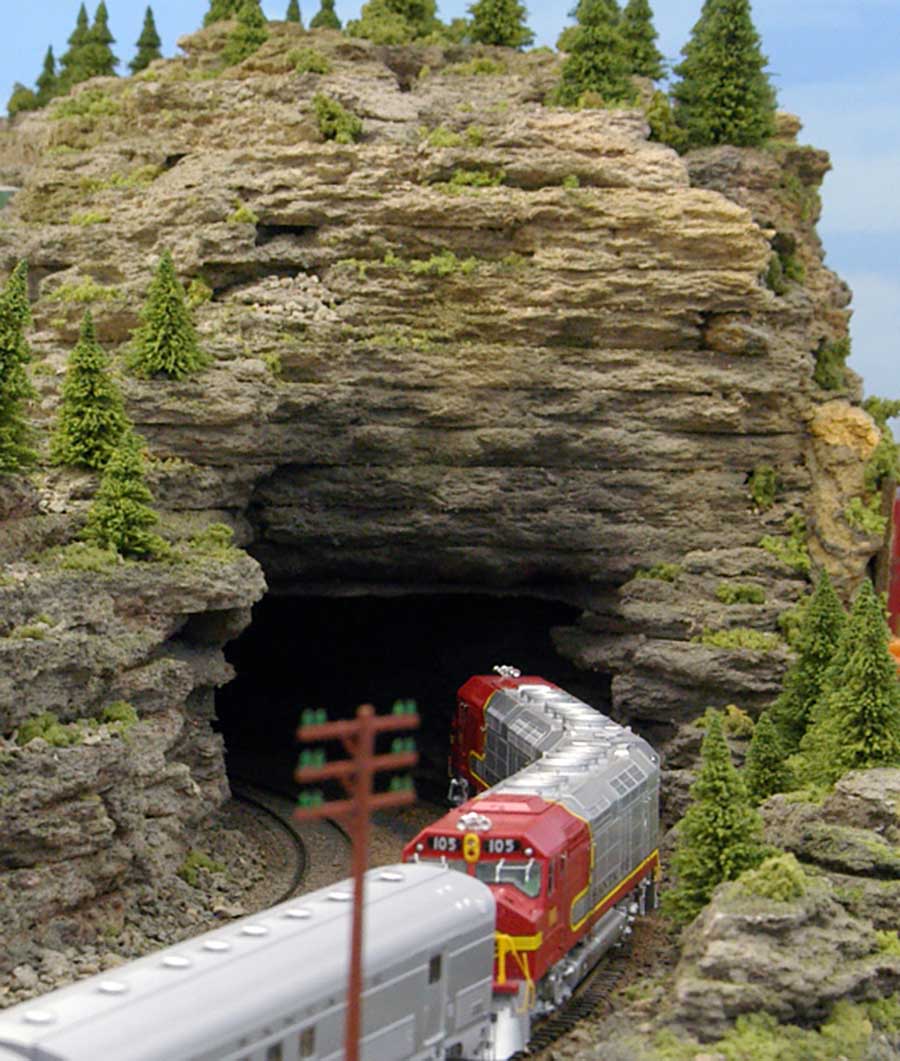
I use a lot of ceiling tile for the rocks because it is easy and takes coloration and scenery materials well.
As I do the southwest, it has a more colorful look and a dryer feel.
I will send other photos of much greener and wetter look later.
The rocks are easy to make and arrange for the natural look. It would take a lifetime to carve plaster to look like this.
Santa Fe Dan”
A huge big thank you to ‘Santa Fe Dan’. I absolutely love what he’s done to the tiles for his scenery.
Don’t forget, if you want to search through years and years of the blog. the Golden Key is here.
That’s all for today folks.
Please do keep ’em coming.
And if today is the day you decide to stop dreaming and start doing just like Dan, the Beginner’s Guide is here.
Jim’s been back in touch with his N scale steam layout:
“Hi Alastair,
I modeled the Pacific Northwest in the 1950-1970 years, so I could include steam engines authentically.
Since getting the layout far on the road to what I had dreamed of, we moved from Washington State to Florida, and the layout didn’t come with us, though I have everything except the scenery, of course.
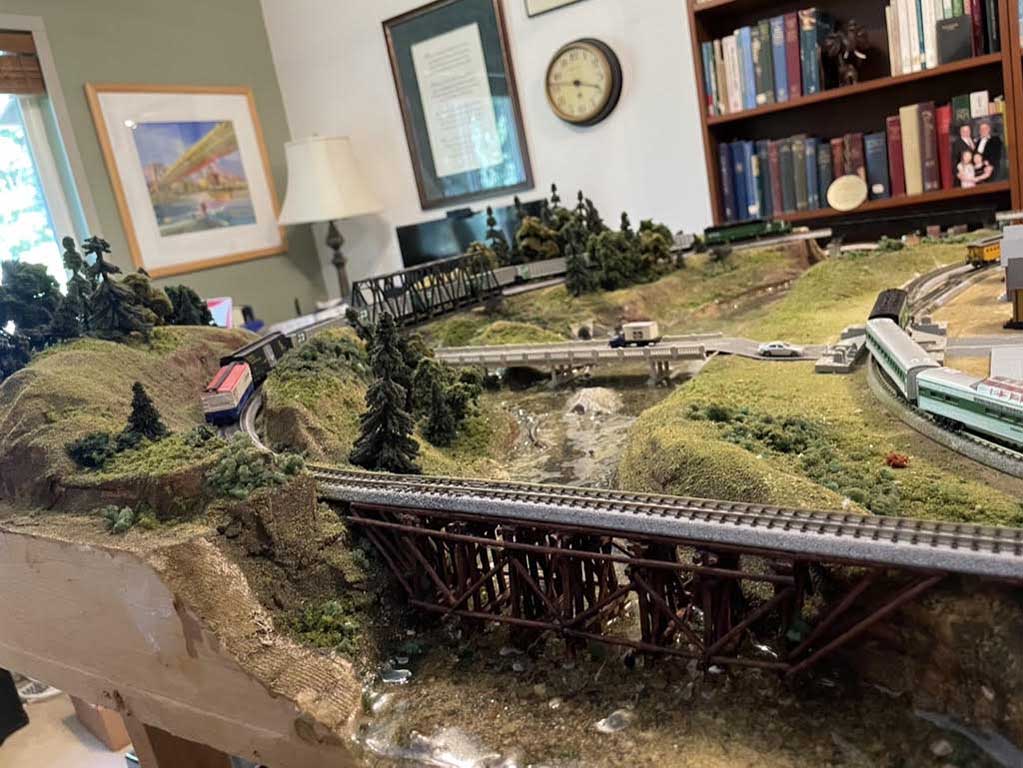
Here is the up to date picture of the hills and river that I showed in progress in my first post (in which I sent pics only and NO explanation—I apologize, everyone).
I built the trestle from scratch using small dowels and popsicle sticks I bought at a hobby store and am very pleased with how it turned out.
It was fun to build. All the trees were purchased, but in my next layout, I’ll make them using the great advice from other modelers on this site.
I am pleased with the way the river turned out, but I made a rookie mistake trying to make the river look deep by adding more and more of the water product to it. Total cost of all that water? About $150! Live and learn.
Another rookie mistake: I built this layout on 3/4 inch plywood, and to make the river be below the level of the town, I had to add more plywood about an inch below the rest of the layout. It worked, but was really kind of a mess. In my next layout, I’ll do what all the rest of you sensible folk do and put some kind of foam on top of the plywood. Sheesh.
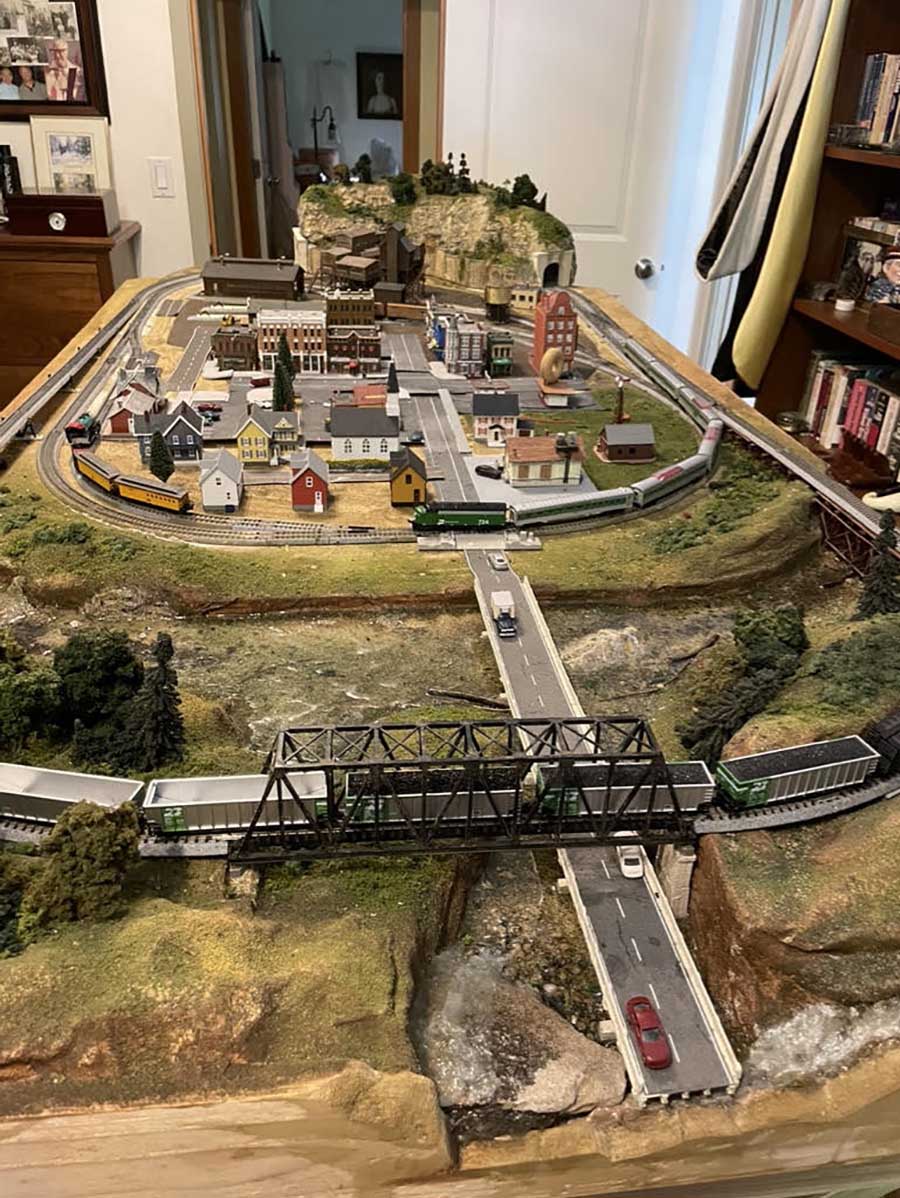
This is the whole layout, from the river end.
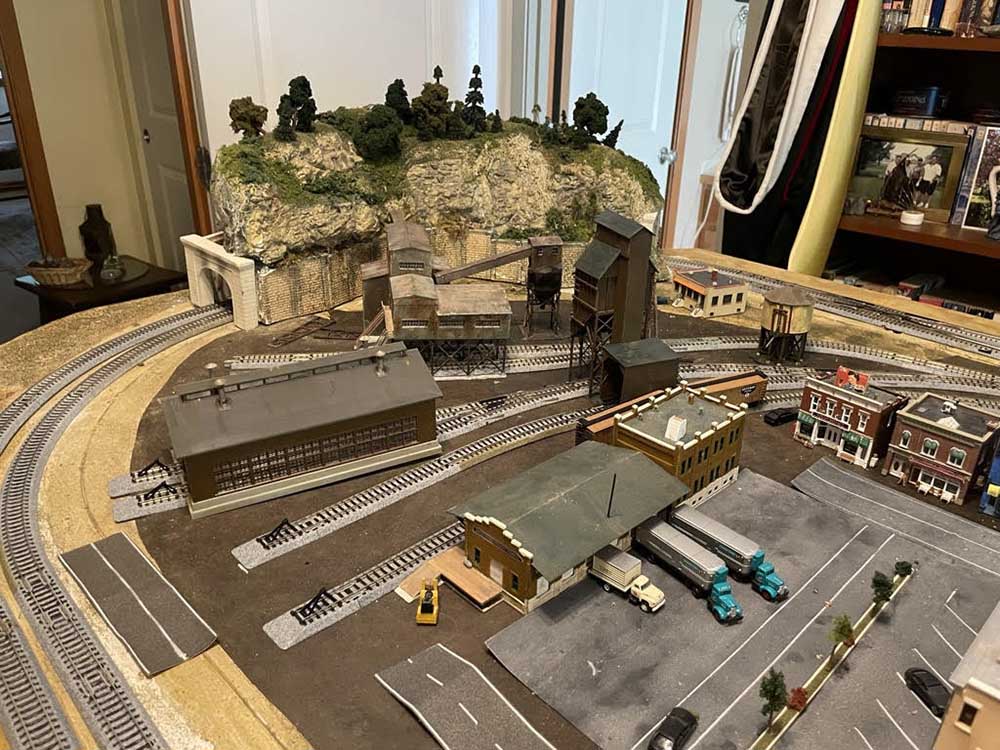
This is the “industrial” end of the layout. The road that was intended to run along side it, to the left of the photo, never got made.
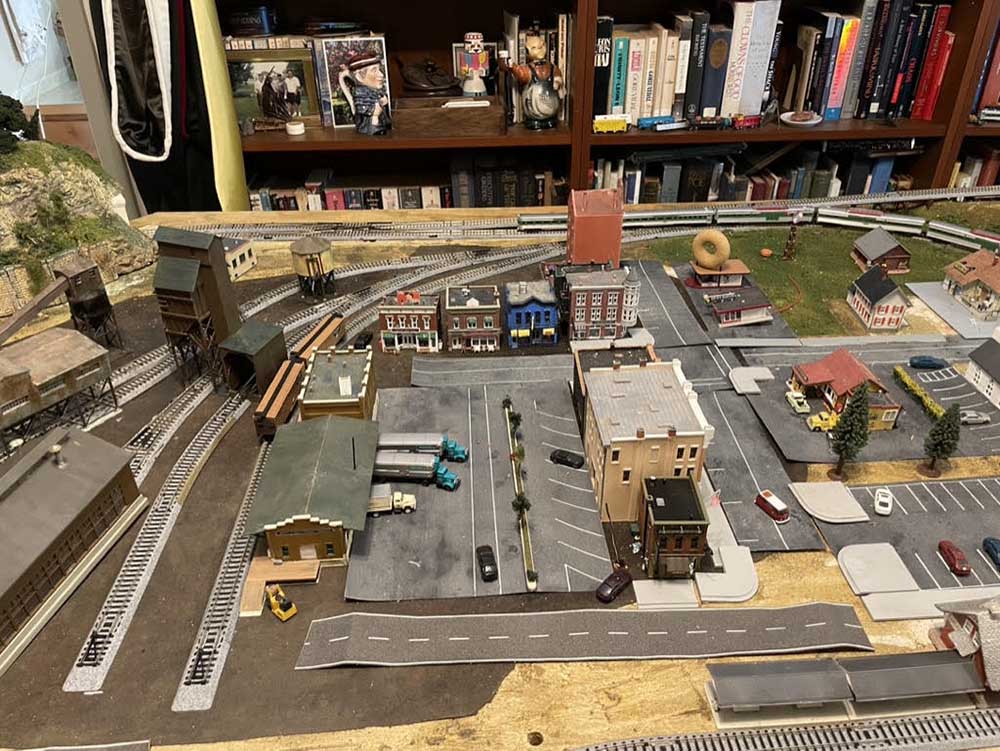
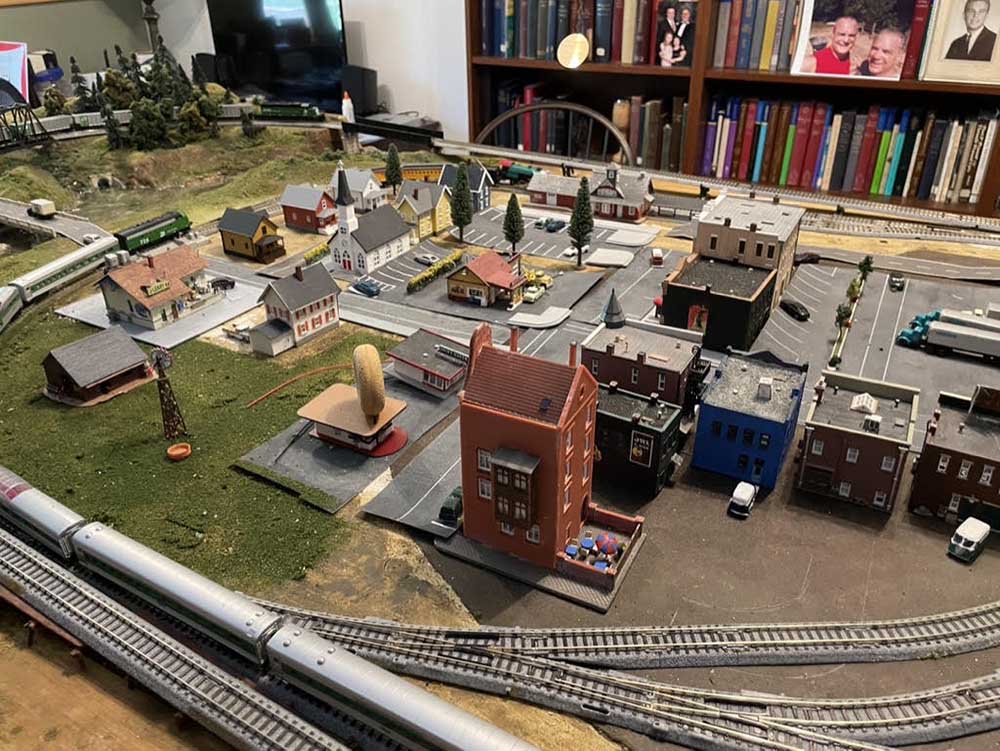
An overview of part of the little town and the business part of the layout. You’ll notice that the roads and the parking lots aren’t glued down—I wasn’t ready yet to commit to that step—and then we moved! Main Street isn’t captured very well, and I never took a picture of it, but its the street with the donut shop. to the far right is the church parking lot, with a milk farm above.
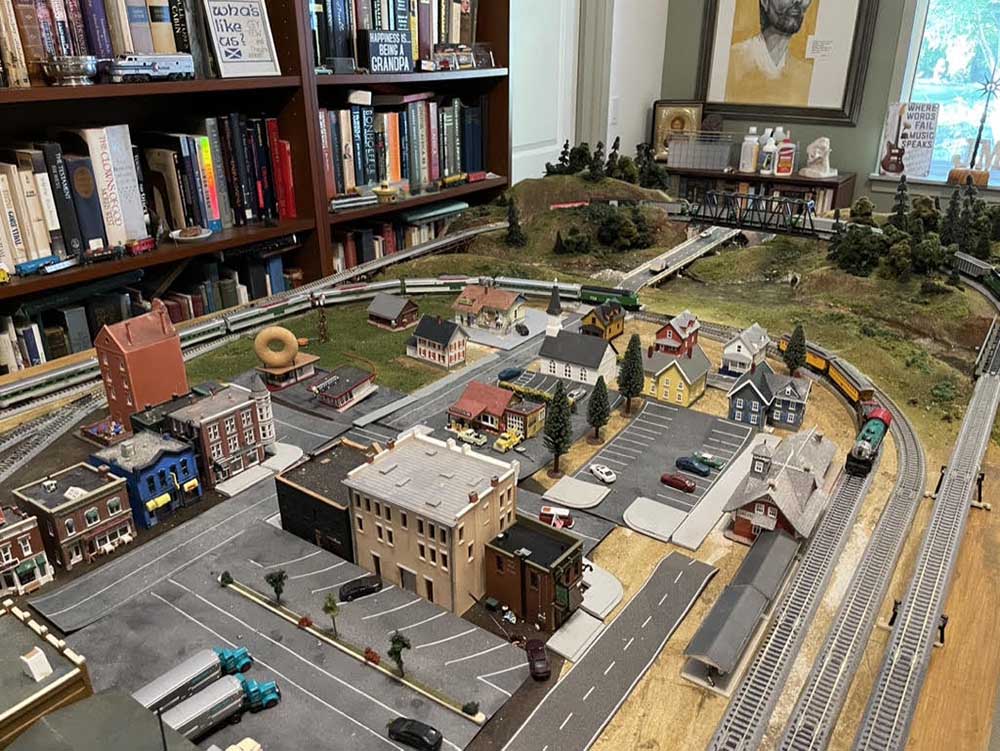
A view from the town to the river and hills beyond it.
Another view of the town, and once again, I didn’t shoot the store fronts of Main Street! It’s really nice and I’m proud of it, but can’t show it. On theleft is the milk farm and farm house and the milk store.
Notice the black paper that is under the buildings and roads. It’s roofing tar paper; I painted several colors of diluted paint on it to age it and make it look like black top—greens, browns, yellows, anything to keep it from looking uniform in color. Then I glued it down.
This is a part of the layout that turned out the way I wanted it to — though you’ll notice that the parking lot and the road behind it aren’t glued down. Again, not ready to take that step.
The parking lot and road are made from sheets of fine black sandpaper washed with paint — I just experimented with different mixtures of white wash and a very little bit of dirt color until I had a result that looked like asphalt to me, and then I brushed it on and rubbed it gently with a cloth to make it look worn, and to keep it from looking uniform.
The stripes for the parking spaces and for the roadways were made with a pen that dispenses white paint. Measuring was a stinker for the parking spaces, AND it was hard to get the stripes right the first time. I worked really slowly after a few attempts that went badly.
All the buildings were from kits—a very expensive way to go. Next layout I’ll try some of Al’s offerings.
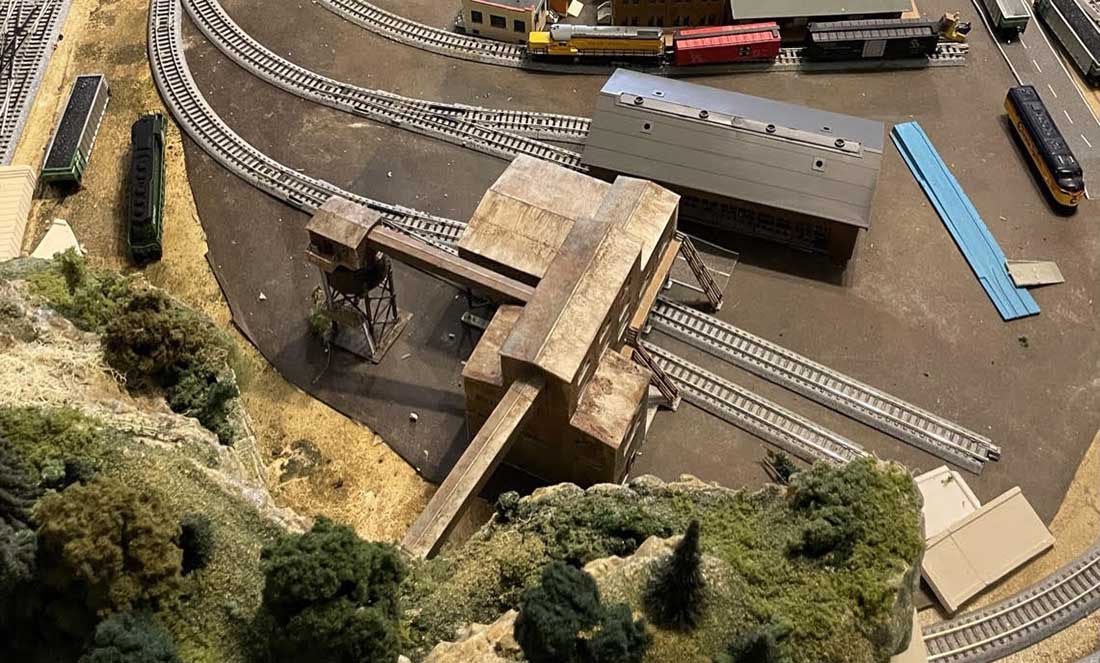
Last are two pictures of the coal mine building and the hill behind it. The kit was made of light gray plastic, looking like a brand new metal building. I weathered it with several layers of wash, including black, earth color, rust and a mix of a few browns and so on.
Then I used a tip I got, maybe online, suggesting that cinnamon would make a good rust color on a model. So, I went to my wife’s baking shelf, got cinnamon and applied it. It worked, and added a kind of very small texture that I find very pleasing.
The hill/mountain behind the mine was made from crushed newspaper and plaster strips—the way I prefer to do landscape (hmm–the only way I’ve ever done it, actually).
The rock formations were made with forms bought from Woodland Scenics–I bought each of their two sets—as well as all the ground cover materials. They work great. The key to it looking real is taking lots of time to look at real scenes, watch lots of YouTubes, get lots of tips from Al’s fans, and develop layer after layer with different colors and textures.
This hill was made for a previous model, and so doesn’t really look realistic—it just kind of juts up out of nothing. But, I really like the way it turned out, and I needed a tunnel SOMEWHERE, so it went on the layout.
Thanks for looking, and thanks for all I’ve learned from Al and everyone else. I’m hoping to start a new layout with my 10 year old grandson in the fall—after getting the garage in order first.
Like all the rest of those who receive your blog I am very, very grateful to you – and to all the other modelers you post – for all the good advice and beautiful work you pass along to us every day.
I read your blog first thing every morning!
God’s blessings on you.
Jim”
A huge big thank you to Jim for sharing his N scale steam layout.
Sharing the mistakes we all make is just as important as sharing the wins.
Hope you enjoyed Jim’s post as much as me – I think using cinnamon for rust is very clever, it really looks spot on.
Jim’s pics made me think of Tom’s post: 1950s N scale.
Steve’s been in touch with his model railroad signal wiring:
“Hi Al,
After seeing a recent post, it prompted me to send this description of how I wired my point signals.
I use this circuit to control my point signals. Its as simple as it gets, using the rails to control LED’s. It will work with DC and DCC.
This is because LED’s are actually diodes and rectify the DCC signal (square pulses of AC).
This circuit could also be used as a display to indicate position of points.
Please note that some points are labelled as “INSULFROG”. This means that there is NO electrical connection from the movable rail and the distant rail.
As this idea relies on such a connection, it will NOT work with INSULFROG points. If you have Insulfrog points, you can always wire a connection.
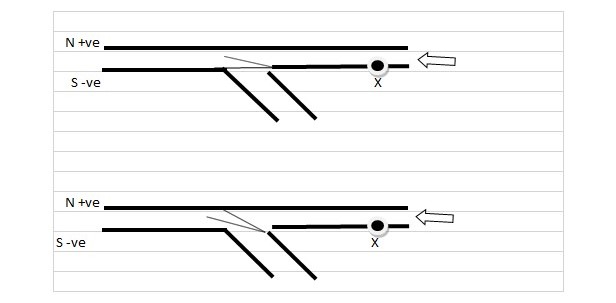
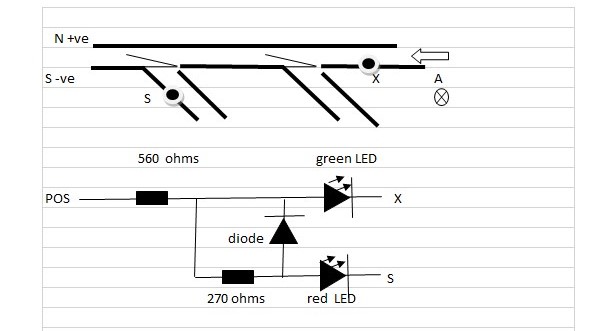
In the first diagram, the points are normal, and there is a distant rail that is connected to SOUTH at ‘X’.
In the second diagram, the points are thrown, and the distant rail at ‘X’ , will have NO connection to SOUTH.
I use these conditions to control LED’s.
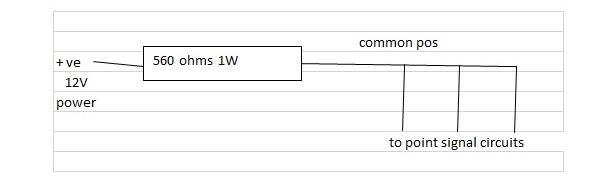
As LED’s work well with 20mA, they need to be protected from 12v with a resistor. A value of 560 ohms will do this job.
Here is the basic circuit.
If point X is connected to SOUTH ( 0v ), LED 1 is ON via POS and 560 ohm resistor to X at 0v. LED 2 is OFF because the diode shunts the 0v from X, onto LED 2 anode.
If point X has no potential, LED 1 is OFF. LED 2 is ON via POS and 560 ohm resistor and, 270 ohm resistor, to a permanent South rail.
POS is from the controller output (+12V). Do NOT use a North rail connection in lieu because the controller may be set at a low speed, meaning no LED’s.
Do not use the controller NEGATIVE in lieu of a south rail. This is because there may be a difference in potential, which could cause problems.
This circuit can be used for any points configuration.
I used a common resistive Positive to serve all model railroad signal wiring circuits, like this:
The ANODE (long lead) from the LED will be connected to a positive.
The CATHODE (short lead) from the LED will be connected to a negative.
Here are some examples of how to use the circuit:
ENTRY POINTS, SIGNAL at A
ENTRY POINTS, SIGNAL at B
MULTIPLE ENTRY, SIGNAL at A
FEATHERED POINTS, SIGNAL at A
Hopefully I have explained this idea well enough.
Enjoy your trains!
Steve (Sydney)”
A big thanks to Steve for sharing his model railroad signal wiring.
There’s been quite a few of you posting on signal wiring:
Now on to Dangerous Dave, has been been back in touch.
Unfortunatley he’s being living up to his name and he had a fall – but he’s on the mend now, and has managed to get back up into his loft to see run some trains:
“Hi Al…
well Im back in the loft again after my falls, its been shocking weather so thought it was time to get back with my Railway and get them running again.
I put to gather a video and uploaded it, hope it can give a few ideas to others for there layouts.