Model train 3D backdrop

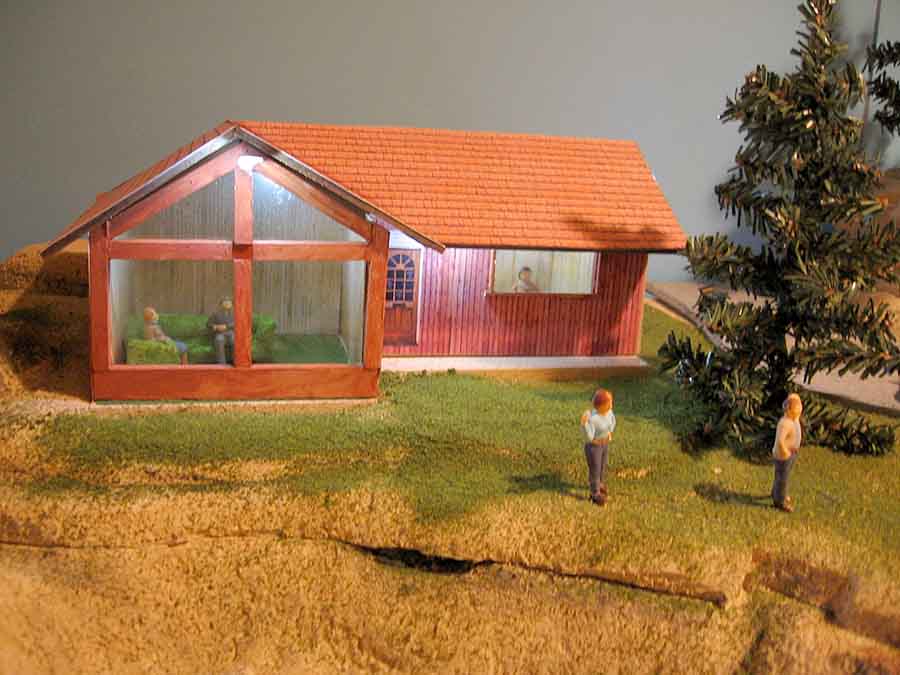
Jack’s been in touch with a bit of ‘forced perspective’, which reminded me of Ken’s model train 3D backdrop.

“After spending time under the layout wiring, I started to think about the backdrop.

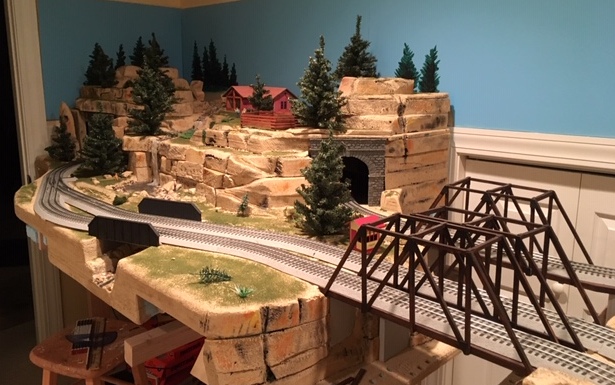
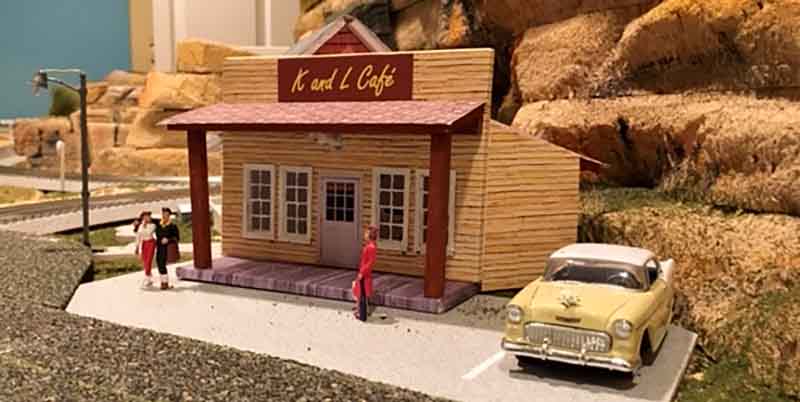
The easiest (I think) is to do mountains. The problem is that I have a street which terminates at the center of the back of the layout (see photo). Where is it going to go?

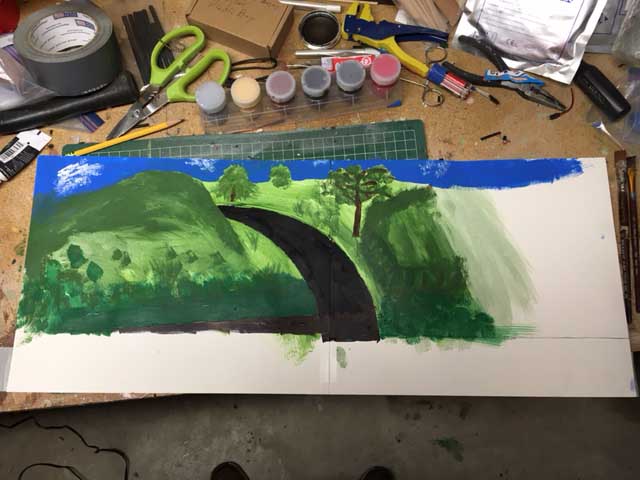
I got some of my granddaughters’ drawing paper and taped it to the back of the layout. I then drew a freehand road continuation, curving it to the left. I then used the edge of my paint palette to draw curved lines. I drew a hill in front of the curve.

There are two perspective issues. One is the parking lot and wall at the station. The other is the road. Using trial and error I adjusted everything until I got something I could live with.

I’ll have to transfer the scene to the Masonite backdrop. I’m not sure whether to try to paint the entire backdrop or to buy a backdrop and integrate the road into it. Any comments are welcome.

model train scenery

model train backdrop

painting backdrop

model train 3D backdrop

Continuing on the preliminary work on my backdrop I found another perspective issue.

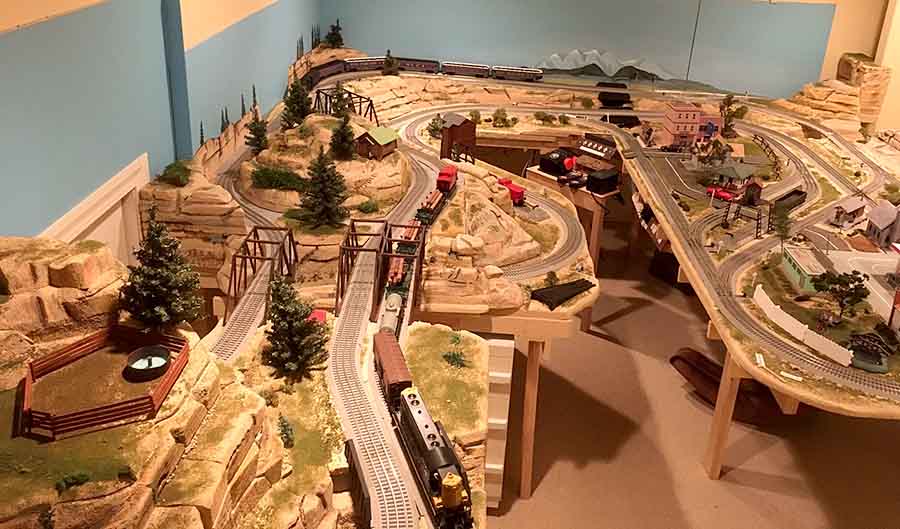
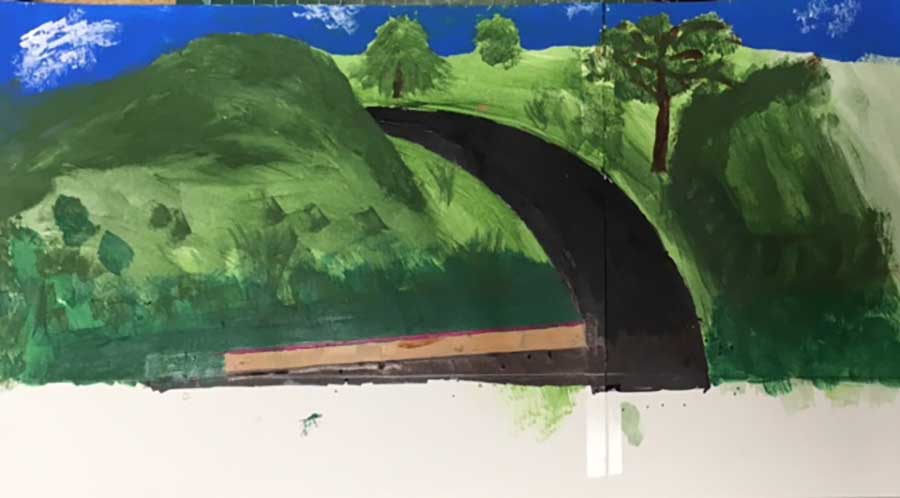
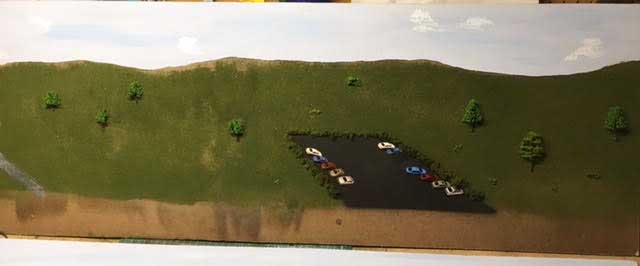
I have the beginnings of a parking lot at the edge of the layout, so I need to continue the parking lot onto the backdrop. I taped some tablet paper to the layout edge and marked the edges of the parking lot on the paper.

From the area where the scene is viewed I approximated the angle needed to continue the edges of the parking lot onto the backdrop.

I then took the paper down and from the point where each lot edge meets the background I drew a number of lines at different angles like spokes.

Reattaching the paper, from my viewing area I chose the lines representing the best angle for each side of the lot. I then drew the lot on the paper and quickly sketched in some scenery.


The photos show the final sketch and what it looks like from the viewing area.

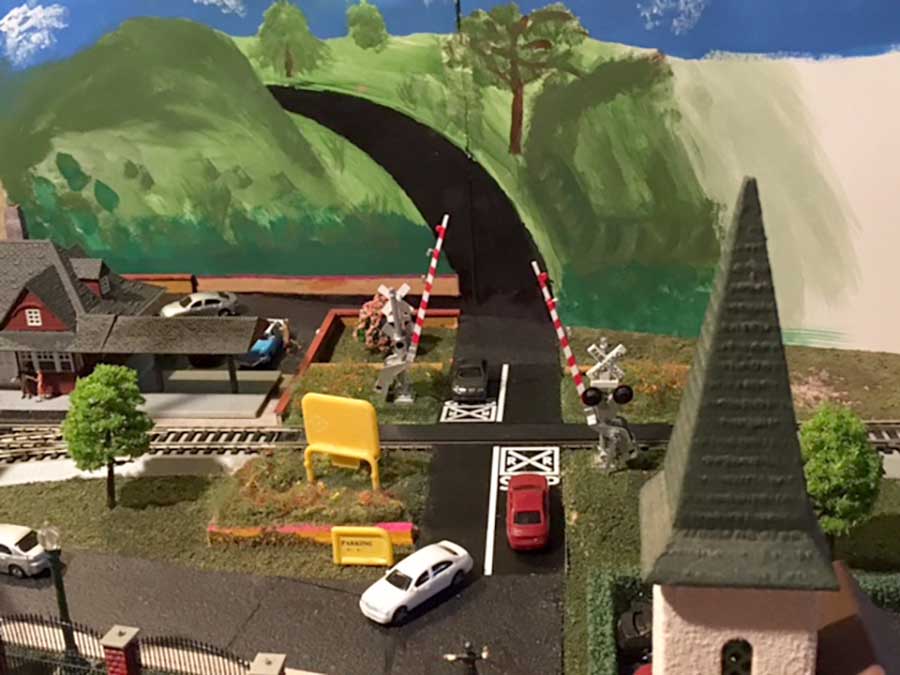
I transferred the parking lot onto the Masonite and sprayed it to match the blacktop on the existing lot. I photographed cars on the lot from the perspective of the viewing area, printed them out, cut them out and pasted them on the lot. They aren’t perfect, I may redo them, but it gives the impression of cars parked on the lot.

For the grass, I used spray glue and sprinkled Woodland Scenics blended turf on it.

I painted the sky blue, added some darker streaks and clouds.

model railroad backdrop

model train 3D backdrop

My real problem, and I could use some comments on this, is that I wanted to make it look like you were looking off into the distance. It just doesn’t look like I imagined it would. I think maybe my horizon is too high. Maybe I should start it just behind the parking lot.

Maybe I should start a hill just beyond the parking lot.

Any ideas would be helpful.

Jack”

A huge big thank you to Jack.

Perspective can play a big part in a layout, and there are lots of posts on ‘forced perspective’ and creating a focal point.

But do you know what? The post it made me think of most, was Tony’s.

And what a theme, and what a project too. He based it on a painting and recreated it:

model railway diorama

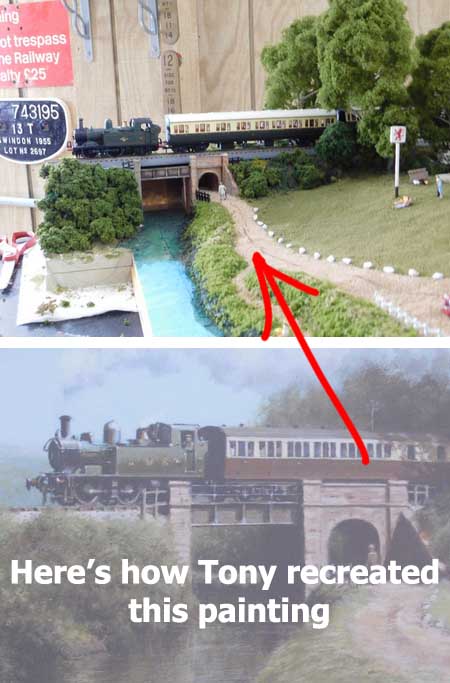
Have a look and see how he did it, step by step.

And there’s Ned’s too: Painting backdrop.

I thought it was really clever stuff.

I have no idea why Jack’s post made me think of Tony’s – there is no scenery melting into a backdrop, there’s no backdrop at all.

The same goes for Fred’s, again, it’s clever stuff:
Forced perspective model train backdrop
.

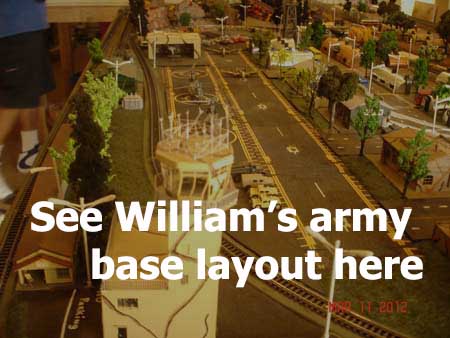
Another great example of making backdrops ‘less flat’, is Ken’s:

model train 3D backdrop

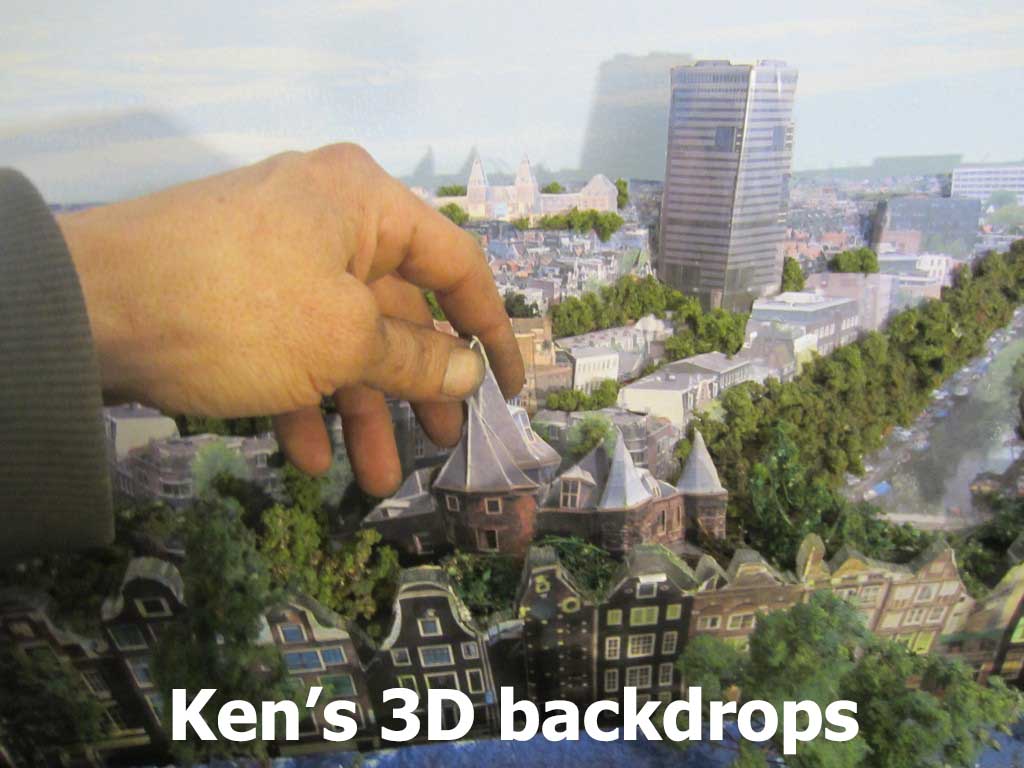
You can see Ken’s 3D backdrop, step by step, here.

Well that’s all for today folks.

It’s been a long old week for me, there seems to be one techical problem after another at the moment, but I’m determined to press on.

Please do keep ’em coming – it’s the easiest way to put a smile on my face.

Even with the technical gremlins tormenting me, I always look forward to see what’s landed in my email.

And if today is the day you get stop dreaming and start doing, just like Jack, Tony and Ken, the Beginner’s Guide is here.

Best

Al

PS Latest ebay cheat sheet is here.


Lionel track layouts – Bill’s

Bill’s added ot the Lionel track layouts on the blog, and what a stunner too:

“Al: I have been enjoying your daily emails for a number of years.

Many of your contributors have much better train layouts and more realistic landscapes than I do and they certainly have nothing to learn from me. Nevertheless I think that there are a group of model train enthusiasts who might benefit from my story.

In 1950 when I was 11 years old I received a much sought after Lionel 027 starter train set. Our family had no space for a permanent layout so I assembled and disassembled it many times. After I was married I sometimes set up a layout around the Christmas tree to entertain our children, but I took it down after the Holidays.

When my grandchildren were young I set up the train set at Christmas again. The second Christmas with grandchildren I put the layout on a couple of 4×8 sheets of plywood supported by saw horses in a spare room in the basement and added some rudimentary scenery.

For Christmas in 2007 my children (who always find it difficult to buy me presents) recognized my interest and bought me a new Lionel model railroad, the Polar Express set with Fastrack. For a while I had a mixed layout with part tubular track and part Fastrack. But the trains ran a lot better on the Fastrack and over time I replaced all of the tubular track.

The layout expanded until it filled the 15 x 17 foot basement room. I sometimes regret not taking the opportunity to switch to HO gauge so that I would have room for more train equipment.

Lionel track plan

Above is a SCARM diagram of my current Fastrack layout. I run two LionChief trains and occasionally a third conventional Lionel train. The layout is not meant to represent any particular time or place. The scenery however is typical of the sandstone cliffs in the Yellowstone Valley, where I live.

Although it is not clear from the diagram there are three tunnels, indicated with blue track, and the bottom left section is a level above the rest. The tunnel on the right is actually in a closet. (The closet door is open in Figure 02.)

Lionel track layouts

Lionel model railroad bridge

U shape track plan Lionel model railroad

I have wired the sidings in the closet with Azatrax’s D2X Exhibit controller with infrared sensors so that without human input two trains can run alternately in opposite directions around the upper loop.

Most of the scenery is carved from 2 inch sheets of insulating foam. The sheets of foam are supported by a simple framework as shown in Figure 05. No attempt has been made to conceal the line between layers of foam in many places, as it is meant to represent the layers of sediment in the sandstone cliffs. I found the best tool to carve the foam is a drywall saw, with a Shop-Vac handy to control the mess. (See the saw in Figure 06, next to the waterfall). The carved foam is painted and sprinkled with Woodland Scenics turf.

bench for model railrod

cliff rock face model railway

On the mountain side, the left side of the track diagram, the trees are mostly pine. They were meant to be table decorations. I purchased them in an after Christmas sale at Hobby Lobby. The deciduous trees are home-made … twigs from sage brush with bits of foam glued on (also from Woodland Scenics).

A few of the structures are Plasticville kits but most are scratch-built from 3/16 inch foam poster board covered with printouts from Evans Model Builder computer software. Most of the structures are lighted. I cut up strings of battery powered Christmas lights and use 3 AA batteries to power the lights. The asphalt roadway is cut from asphalt shingles left over from my recently repaired house roof.

Lionel track layouts

Lionel track layouts

Lionel house


Lionel house

Lionel track layouts:

Lionel track layouts store

Lionel track layouts loading bay

Lionel gas station

model train cafe

In order to provide more track power than the Lionel CW80 transformers I acquired with my LionChief train sets, I recently purchased an MTH Z1000 transformer from a local hobby shop. When I was in the hobby shop the other day I mentioned that the Z1000 was working fine. The salesman said “Lionel model railroads make you feel like a kid again, don’t they?” I think it was a rhetorical question, but I answered, ‘Yes!’

Bill”

A huge thank you to Bill for adding to the Lionel track layouts!

I hope you enjoyed this post as much as I did. Not only is it a wonderful layout, the narrative behind it makes this hobby what it is.

It reminded me of Mark’s: 10×18 Lionel layout.

And Rob’s:

O gauge Lionel trains.

That’s all this time folks. Please do leave a comment below, and keep ’em coming.

I leave you with this thought – if today is the day you stop dreaming and start doing, the Beginner’s Guide is here

Best

Al

PS More HO scale train layouts here if that’s your thing.


Need buildings for your layout? Have a look at the Silly Discount bundle.

Military trains

Paul’s been in touch with some pics of real military trains.

I don’t know what it is about them, I just found them interesting to look at, so I thought I’d post:

“Hi Al,

This is a bit off piste, but I spent the weekend in Warsaw and dropped into the Railway Museum there.

It’s a bit old and dusty and almost everything is labelled and described in Polish, making it a bit difficult to figure out just what’s being displayed.

There are some unique exhibits though (at least I’d think so) and I attach a few pictures of them. As I say, my Polish is non-existent so I can’t tell you what these are.

All the best,

Paul”

military trains

military trains

military trains

military trains

military trains

military trains


world war 2 train

steam train

steam train

steam train

polish steam train

steam train

steam train

Now on to Ralph:

“Hello Al

Thank you for the informative and inspiring newsletter.

The variety of wonderful layout ideas that people come up with is always amazing.

I have sent pictures showing you my interpretation of the stone house to show what is possible with the printed buildings.

Two views show the final build and a picture of it placed in the layout scenery.

The only thing I tried that has not shown up in the pictures was to dab varnish on the window panes to make them shiny.

Keep up the good work.

Kind regards

Ralph in Australia”

printable building stone house

printable building stone house

A big thanks to Ralph and Paul.

I know the printable buildings are a popular way to dip your toe in the water, and get back into the hobby, just as Ralph has done.

And Paul’s pics reminded me of a layout from many years ago, which I really enjoyed.

You can see William’s army themed layout here.

That’s all for today folks.

Please do keep ’em coming.

And if today is the day you stop dreaming and start doing, the Beginner’s Guide is here.

Best

Al

PS Latest ebay cheat sheet is here.