We’re starting with John’s mountain layout today:
“Hi Al,
I thought I’d opine on a subject that is sometimes overlooked as we build our miniature railroad worlds.
My article here is on “focusing” or “guiding” our visitors to a scene.
A little background. In the real world as we visit a park, take a walk in the country, or amble through a museum, most of us will not remember in any detail 90% of the day.
On the way home as we look back at our adventure, we’ll remember specific parts of the day’s journey. Very little or at best most is not pinned to our memory.
So then, what made the memory flashbulb go off? The scene had something to draw our eye and hold it long enough to imprint a memory. Museums are expert at this, we don’t remember the hallway to the dinosaur bones, but remember the bones.
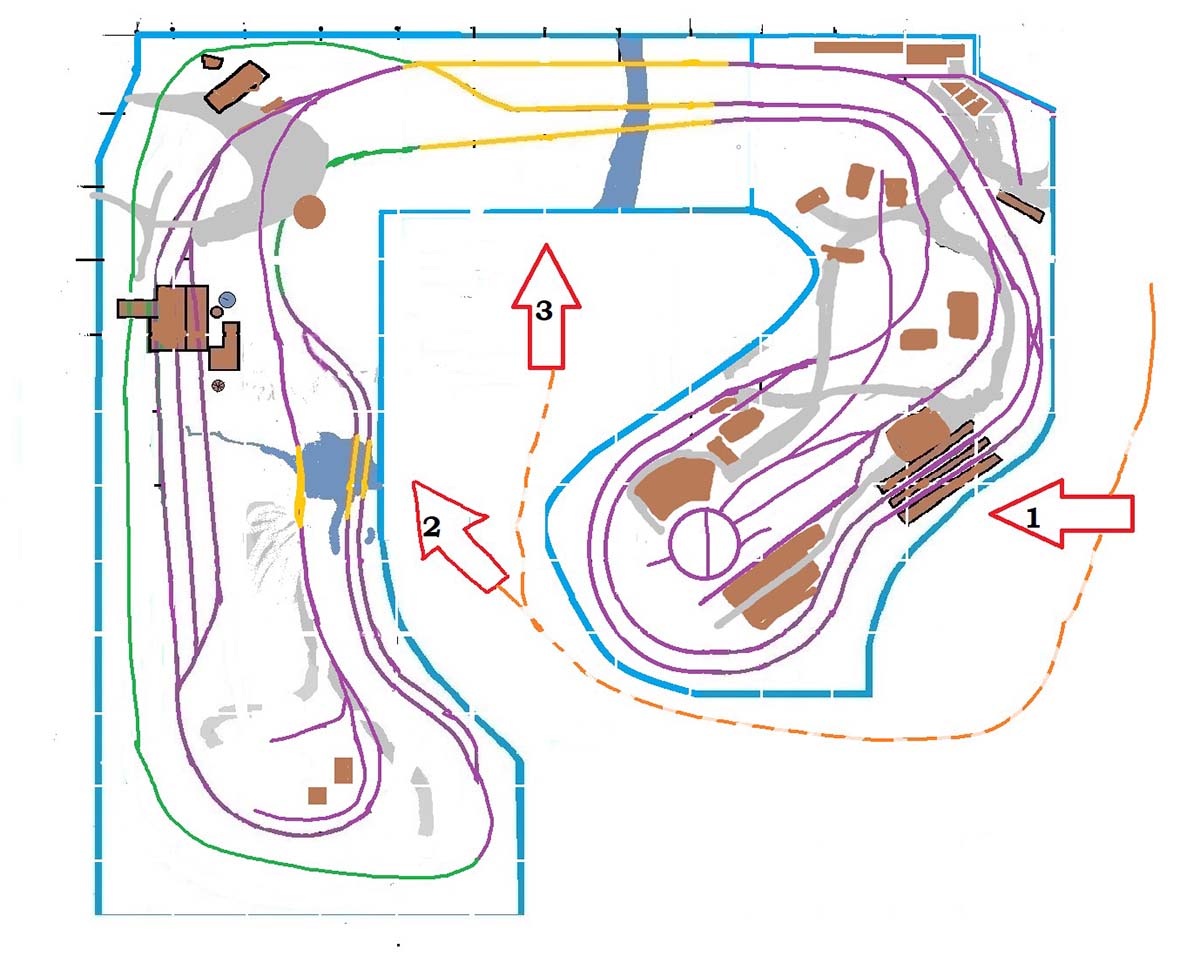
On my layout, I’ve tried to have 3 places where my visitors “take in a scene” as shown in the schematic picture.
In model building we often take great pride in the details of the model, place it on the layout and then have to mention those detail labors of love to our visitors as they are drawn to looking elsewhere.
In the pictures I have attached, I have taken from the perspective of the persons visiting my West Virginia mountains, and try to show how I’ve worked to stage the scenes.
Obviously since we are looking at the HO world from what would be equivalent to a helicopter window flying some 500 feet or more in the air, one will see a larger scene than if we were walking along the road in the real world.
That means some manipulation of space is required. I try to present the whole scene, then as one gets closer, mini-scenes of the total.
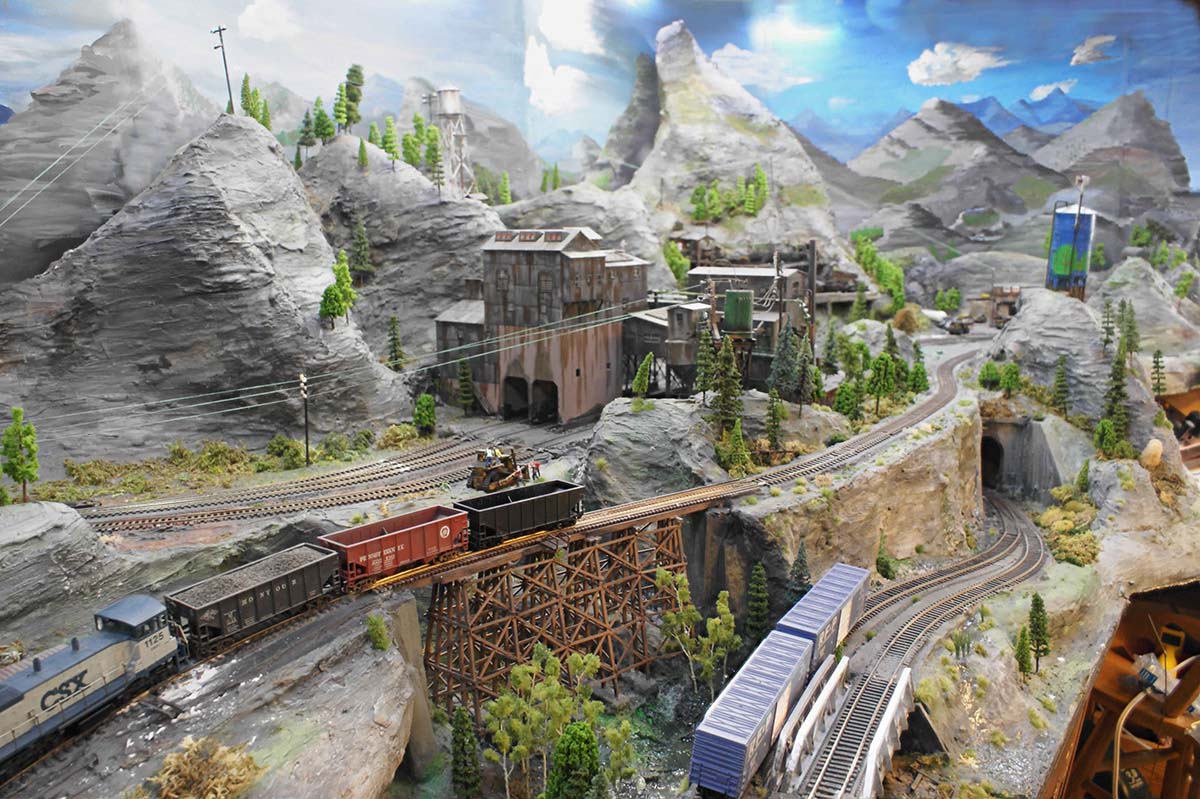
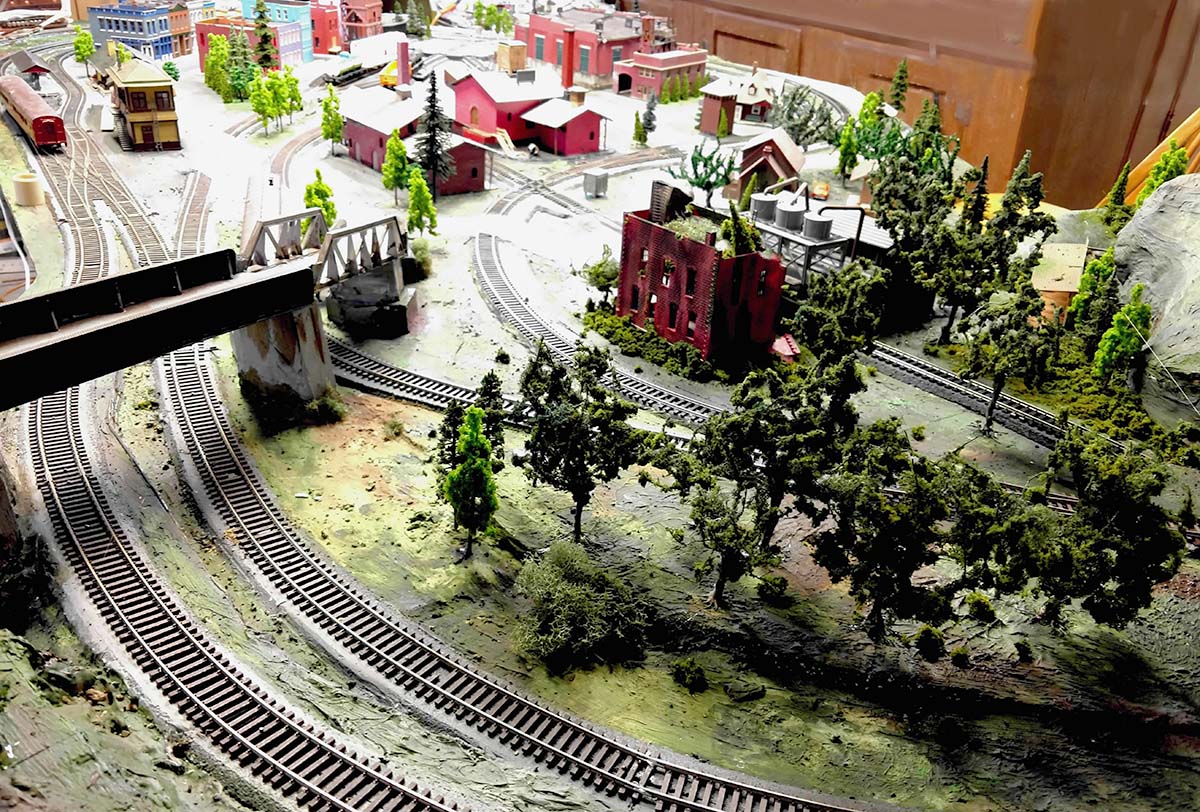
If my visitors are interested in details, such as in the “old mine” picture, I try to have some holes in the trees or places to look past the building to see those details. In the case of the old mine, I made a “funnel” in the hills to draw the eye past the new mine to the old one.
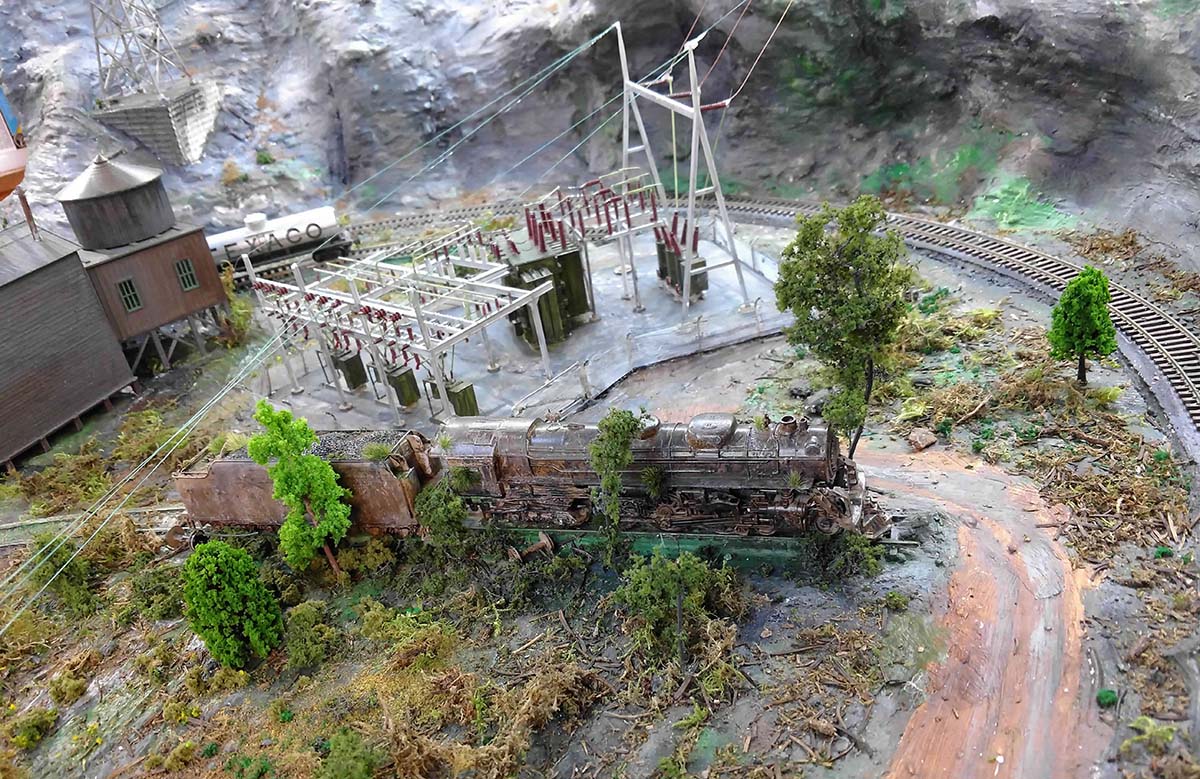
If I want to create focus, and I can, I provide extra light on a place, as shown by example the picture of my electrical sub-station.
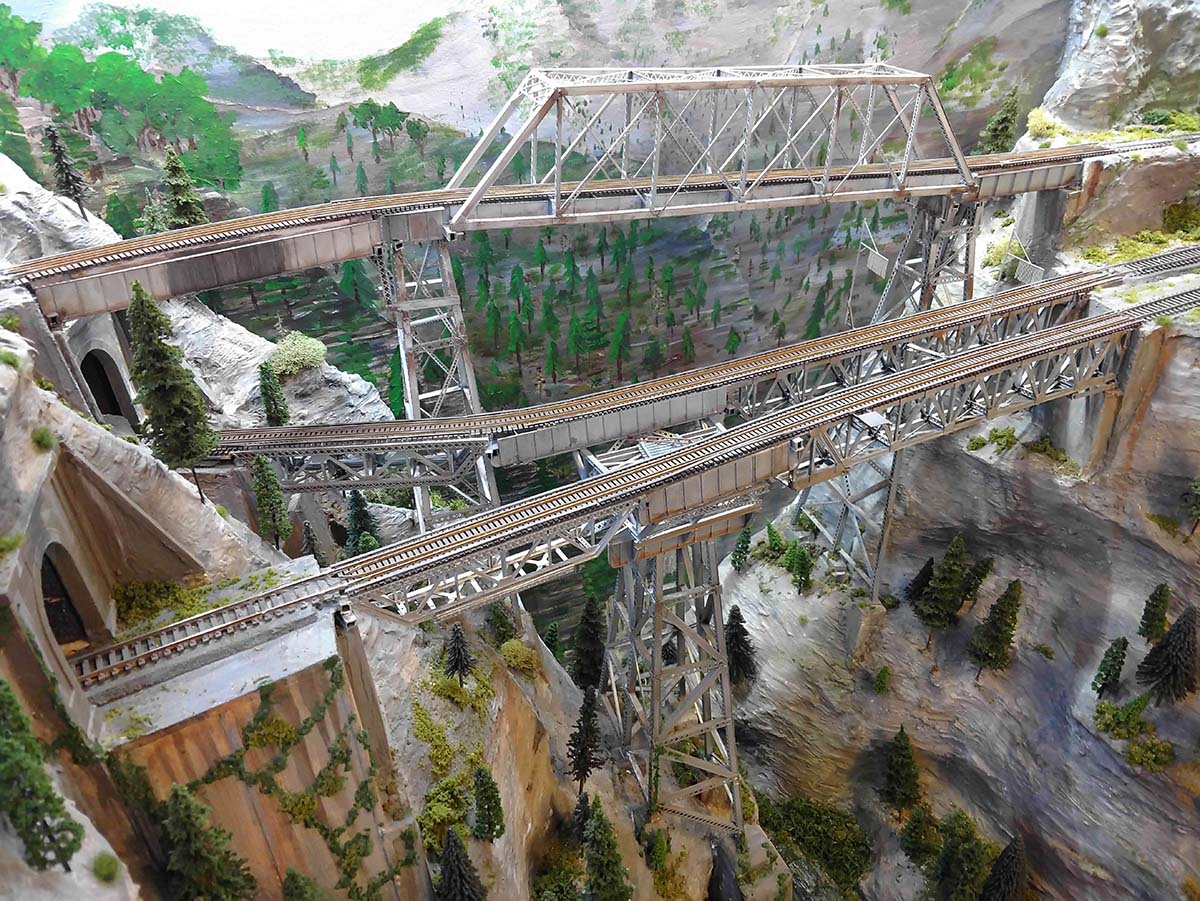
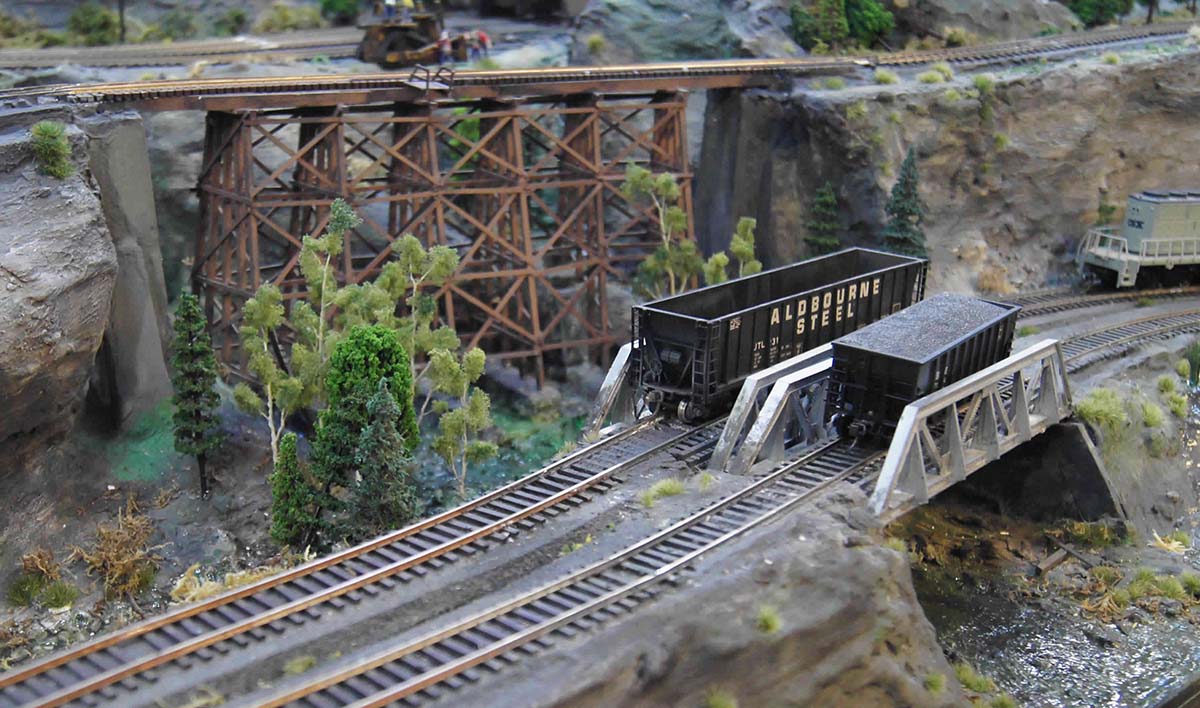
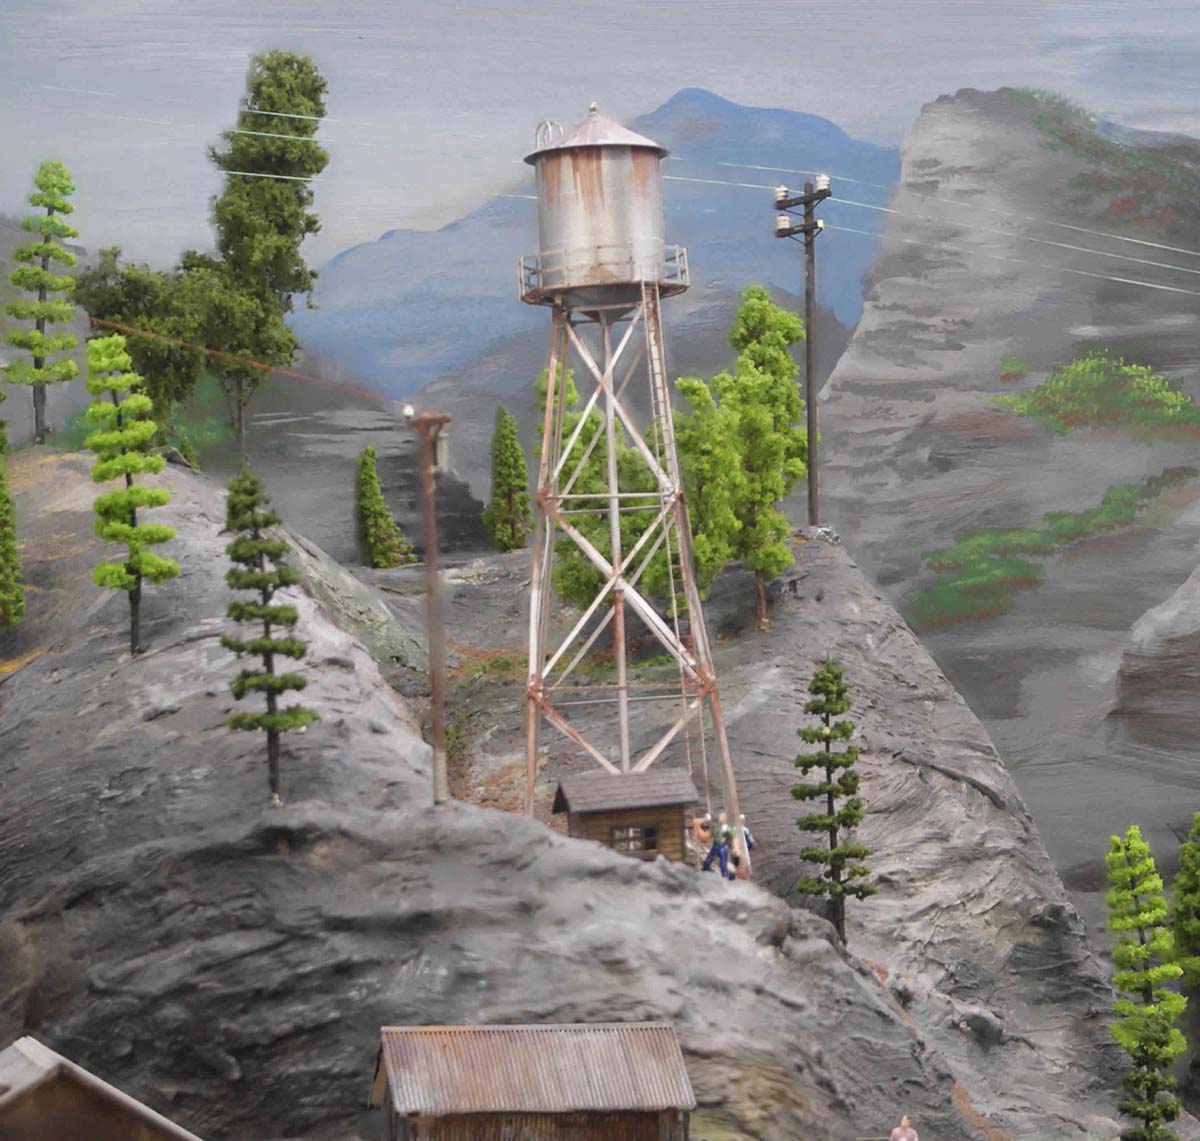
Since I’m modeling mountains in the coal mine sections, I have the advantage of adding details on levels. The picture of the old water tower above the mines supplying water to them is an example of elevating the scene to a different level, as is the picture of wooden bridge which is lower and more in the foreground. Going from eye level and continuing downward, I modeled a canyon under the bridges which drops to just 3” above the floor.
Most of what I have here has been sent in before in articles Al has been kind enough to post, but I thought I’d try to add a new perspective to what we do as we build our models.
I’m happy with the way this layout came out… but some of the radius of the turns are too tight, so I can’t run many of the locomotives and passenger equipment I’d like to have as part of the running environment.
So I’ve been slowing down on “new” construction as I’m going to be moving the layout to a new location. (groan) Starting in a month or so, I’ll be sawing the thing into pieces which I can move from the basement of the house to the top floor attic, some 3 floors (and 5 doorways!) up.
First job is to finish the upstairs room, put down a new floor, get lighting and power where I need it, paint walls and ceiling for background, and add some baseboard heat.
I hope to document the work on what will be very likely my last layout!
Regards,
John From Baltimore”

A big thanks to John.
If you want to read his last post, it’s right here.
Now on to another John:
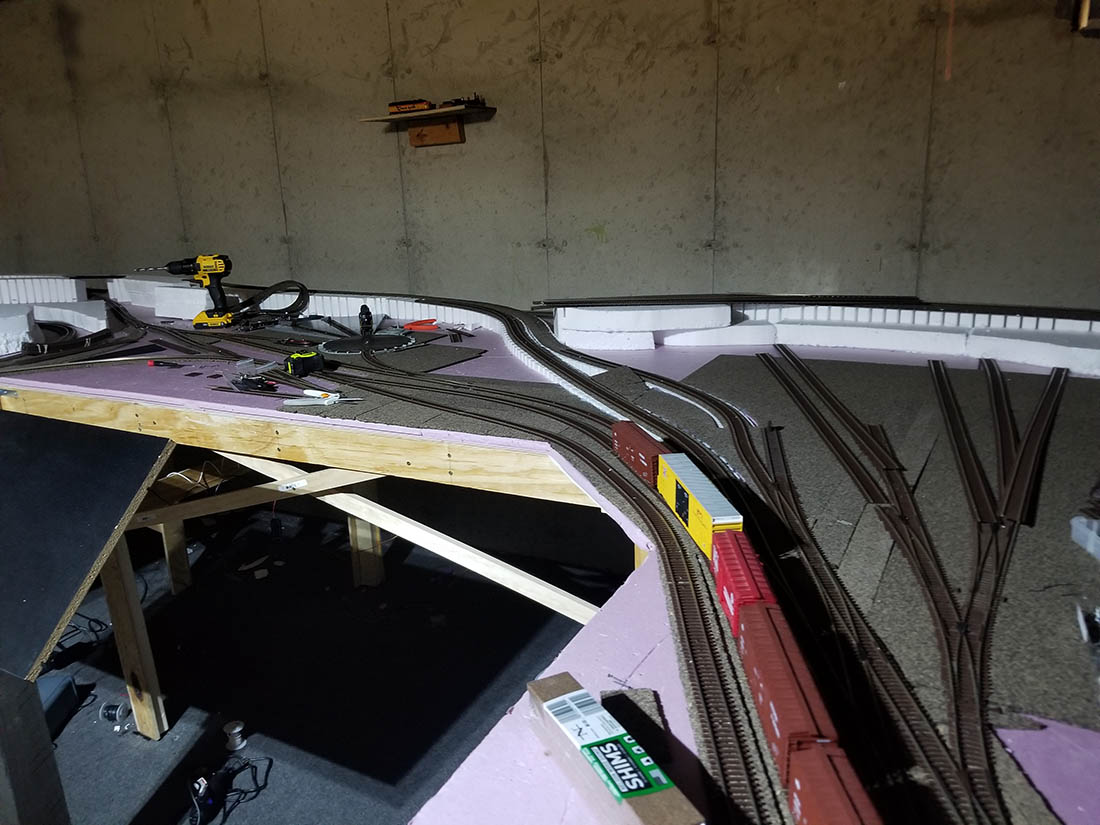
“I have been at this 20×16 layout for almost a year now and i think i finally got the first layer done.
I dont have a “plan” i just know what i want in my head.
My first layout was 4×8 and i realized that for HO this was way to small for everything i wanted and to incorporate the things my dad and i wanted to add to his layout when i was a tadpole.
2 mains lines merge to 1 in the what will be the country, a few sides and a lil train watching and switching, has a bit of everything i guess.
I am from Baraboo WI so the Barnum and bailey circus is in my veins and as a little kid, every day i seen the circus train.
One town over North Freedom has a RR museum and you can ride the old steams, in my mind how can you not love trains lol.
After double the size of my old layout this one seems small too, just never enough room for my imagination.
John”
Now on to Robert, who has sent in a good piece on something I’m always going on about: making a start.
“I have been working on a humble N gauge layout that serves two purposes.
It puts a train around our little Christmas tree, and the rest of the year there’s a mountain in the center with a lighthouse on top for the grandkids to amuse themselves with when they visit.
The whole thing sits atop my stereo cabinet. The layout had to be compact and lightweight.
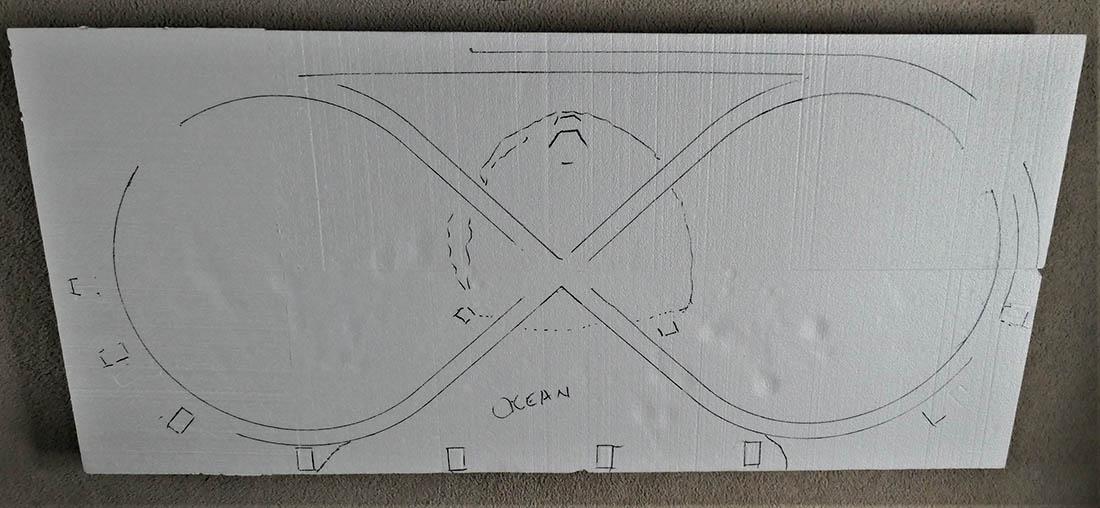
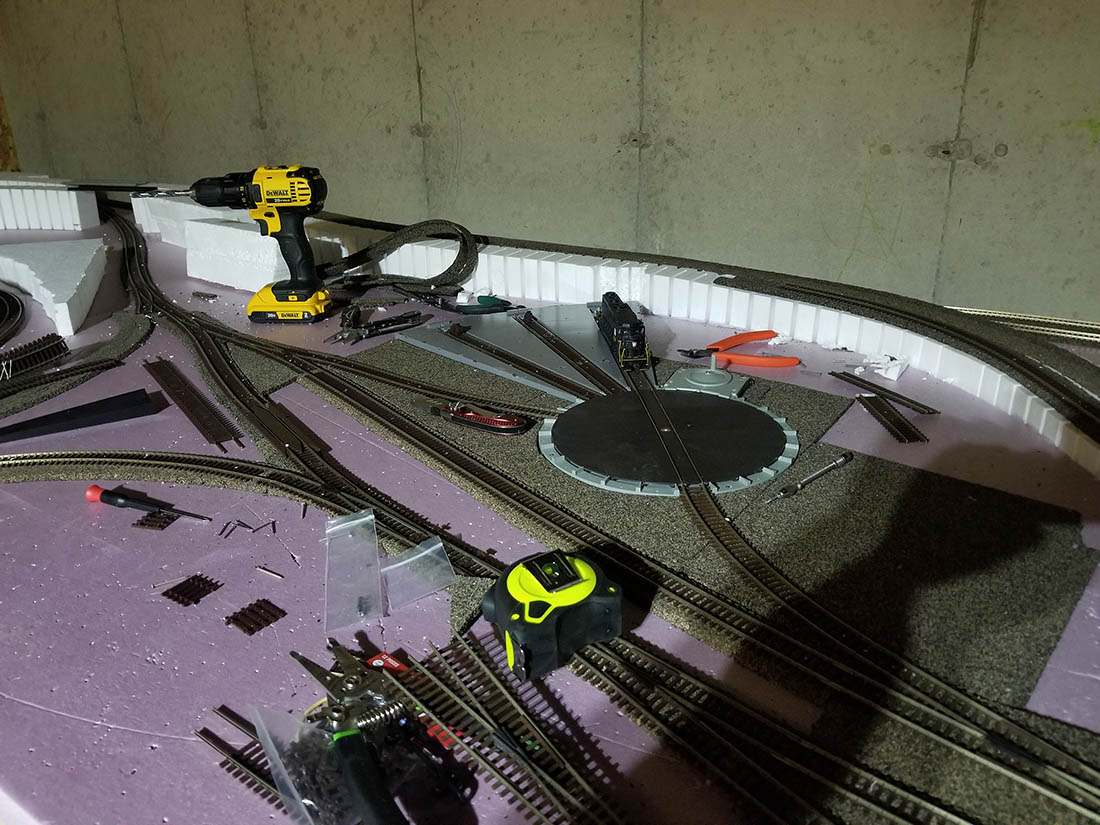
1. I started with Styrofoam insulation sheets. I used low-temperature hot melt along the edges to fuse the sheets. The finished foam base is about 2.5 by 5 feet. I outlined where the tracks would fall and sketched the position of the mountain. The inside track is a figure eight, and the outside is an oval with a trestle in front.
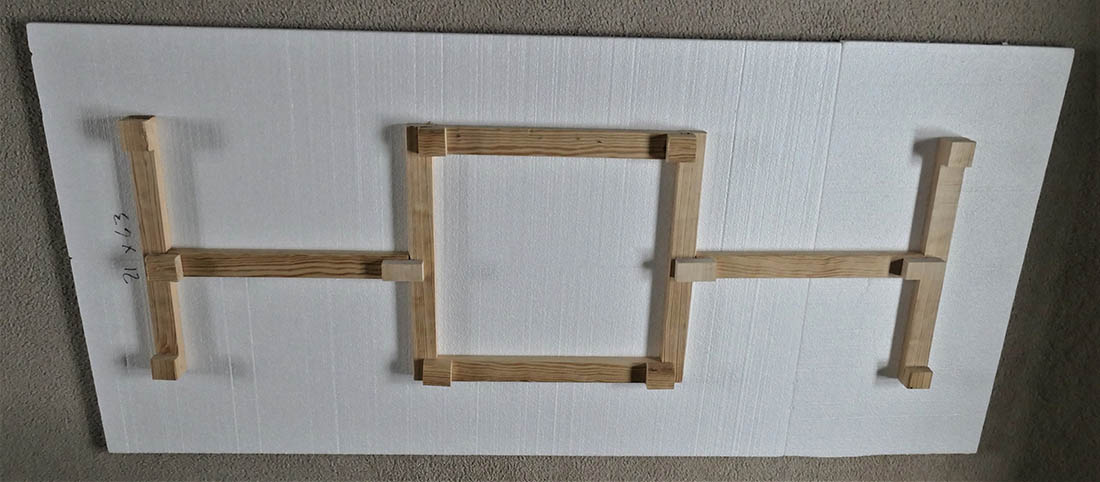
2. I braced the Styrofoam with furring strips and added squares of furring strips as standoffs to provide space for wiring.
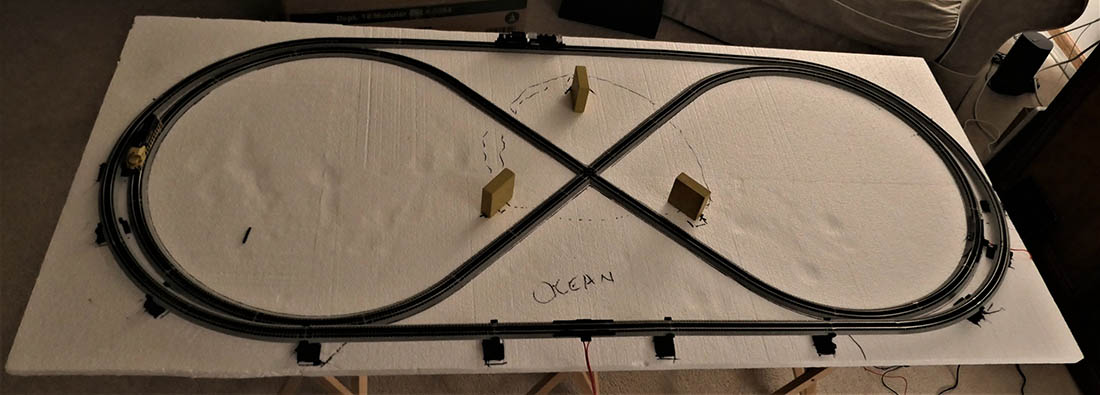
3. Next, I laid the track down, proved it with the trains, made adjustments, then glued it down using Loctite Power Grab construction adhesive. The three blocks in the center serve to hold the Christmas tree legs. They also serve to define the outside shape of the mountain.
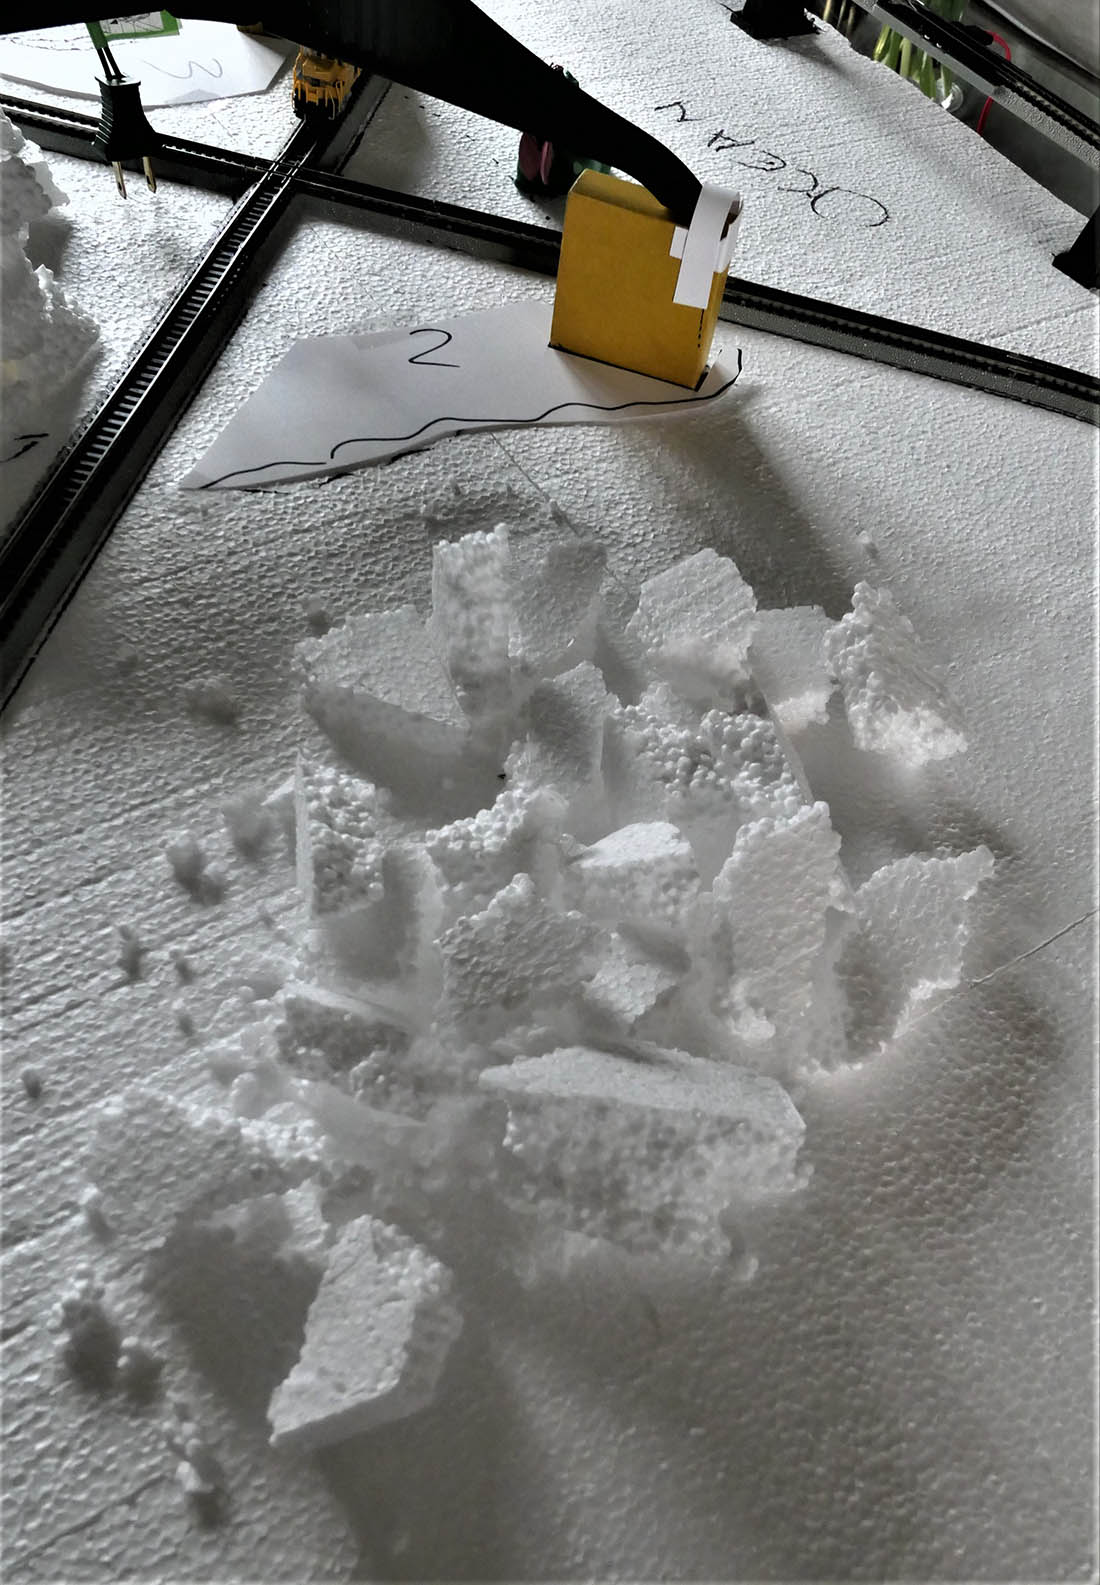
4. I outlined the shape of the walls of the mountain on cardstock, then broke up chunks of Styrofoam and used them like building blocks, gluing them with hotmelt on top of the cardstock outline. Notice the shoe I made from cardstock to hold the foot of the tree. I did this for two of the three legs.

5. Here you can see a partially completed wall. I numbered each of the wall outlines so I would not confuse where each one went. I then sculpted the wall with a razor blade and covered it with tissue and diluted white glue to make it appear more like rock.

6. After outlining the locations of the walls, I used diluted white glue and toilet paper to add texture to the tunnel floor.
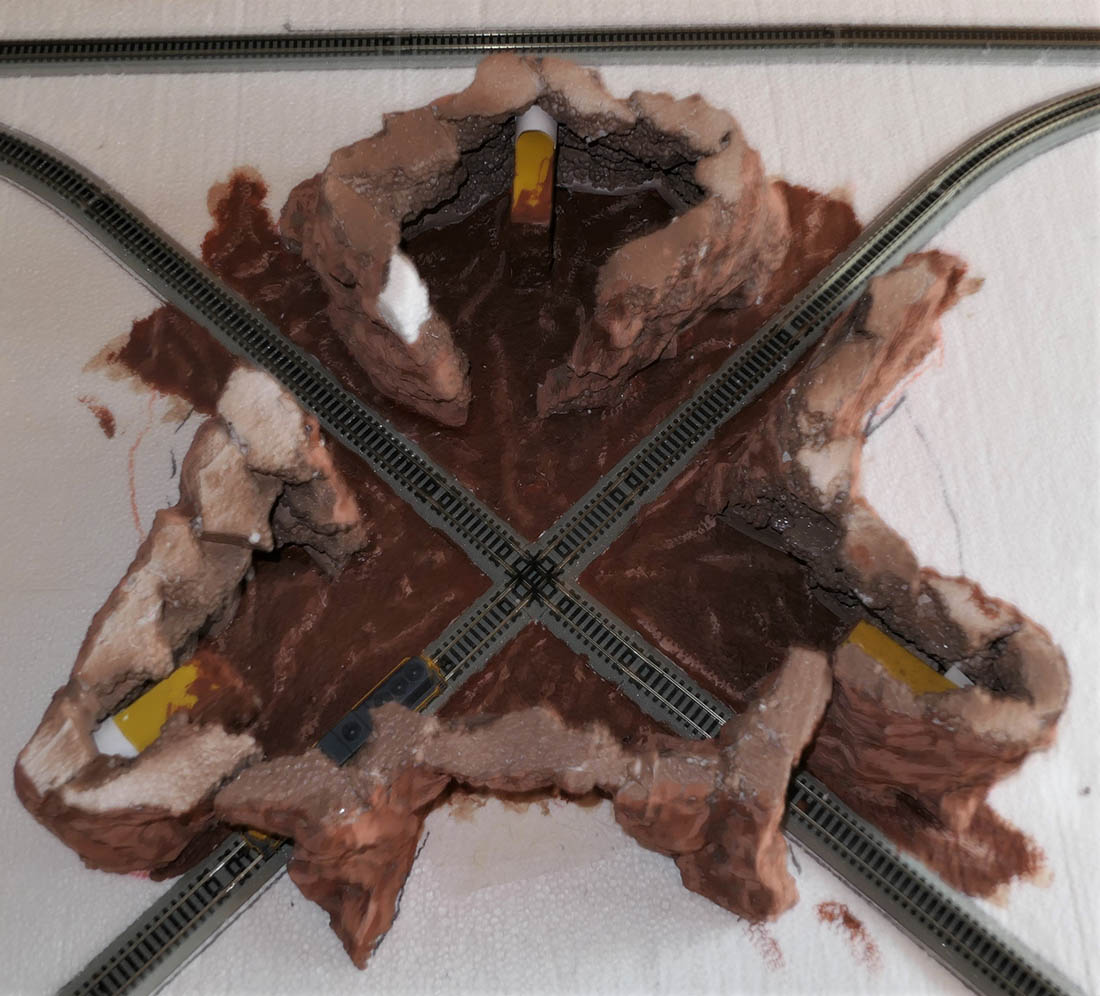
7. Here is a shot of the painted cave floor with the mountain walls glued in place.

8. Next, I cut foam for the tops of the entrances and a center piece for the top of the tunnels or cave. The entrance tops will be glued in place while the center piece is a friction fit.
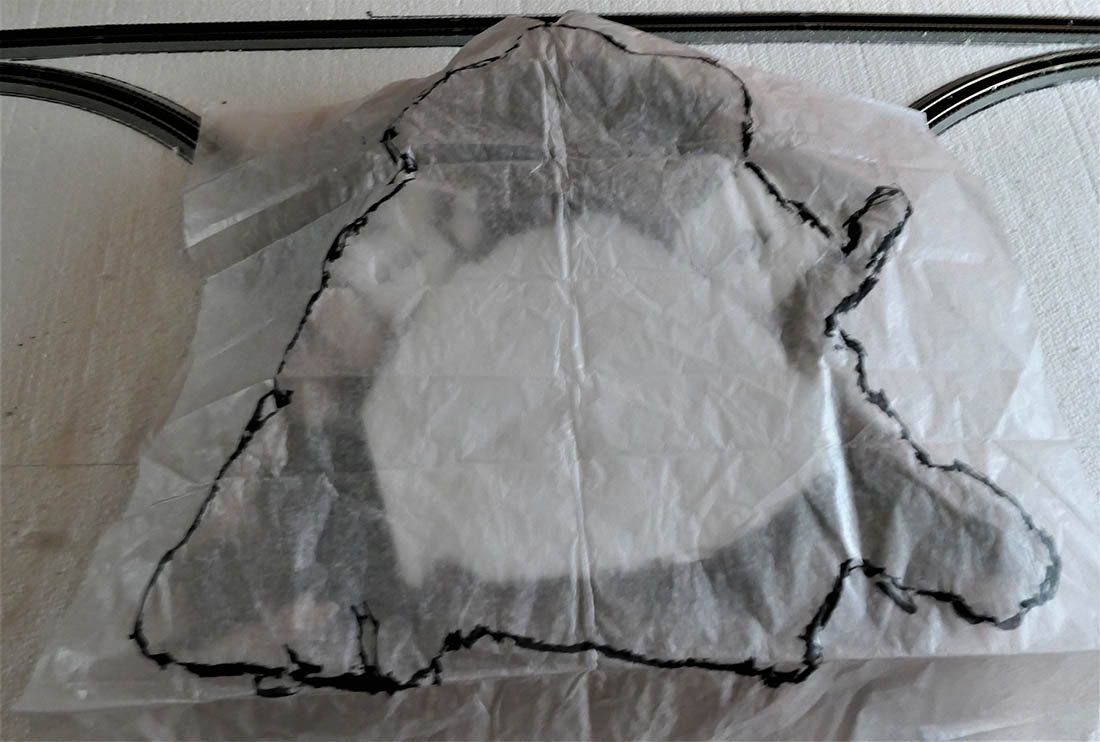
9. I used tissue to trace the outline of the mountain walls and then cut a sheet of foam to match the tracing.
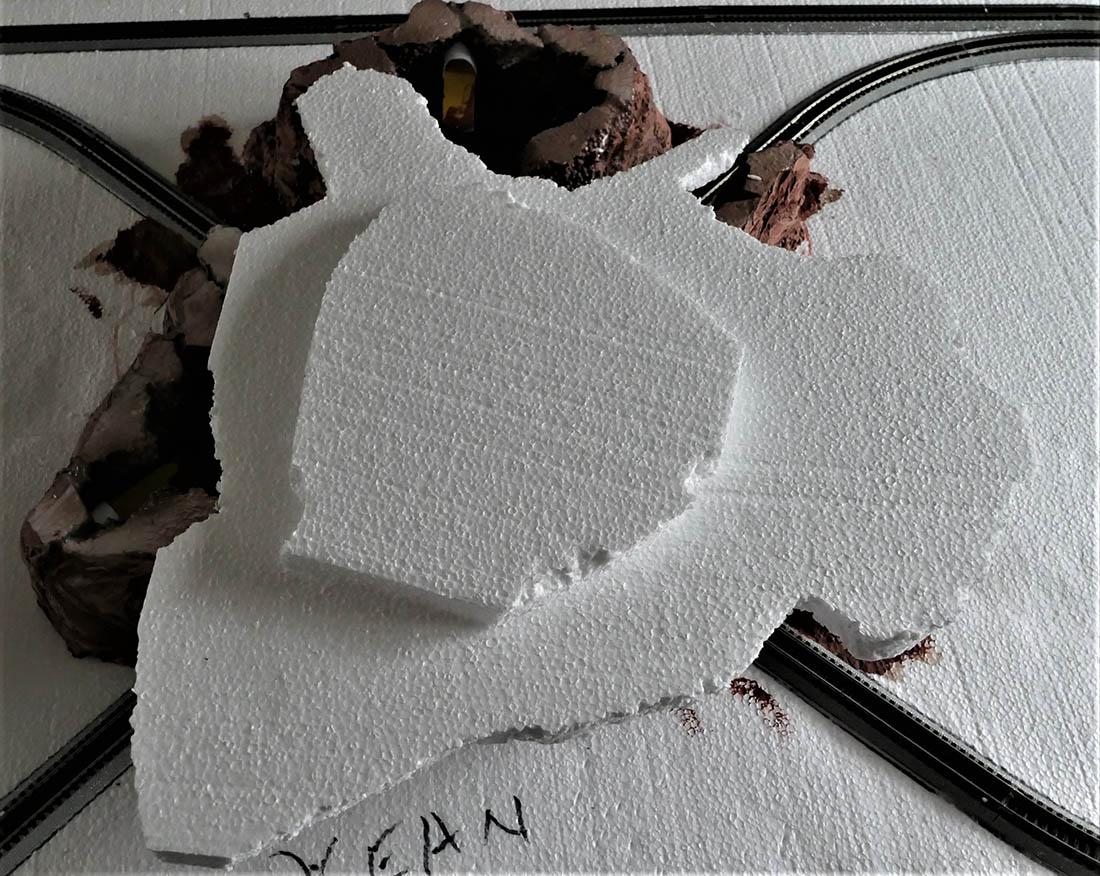
10. The piece that fits inside the mountain is then glued to the piece that serves as a base for the top of the mountain.
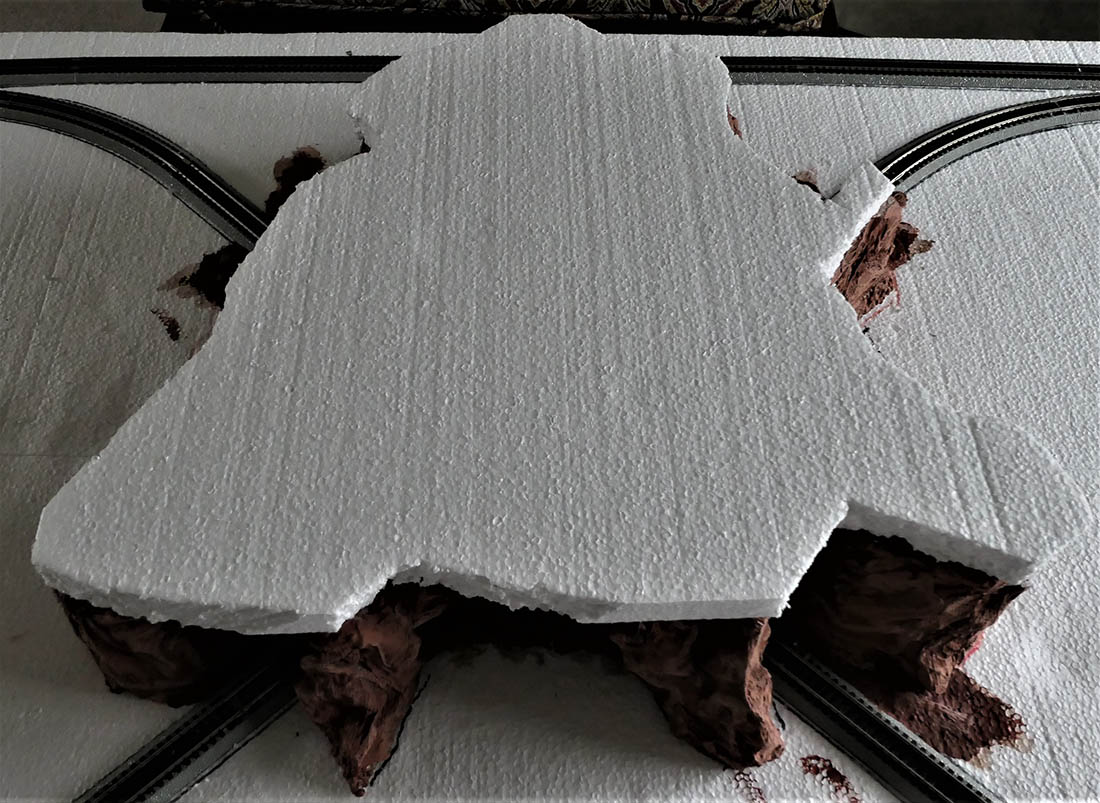
11. Turn the piece over and it fits snugly into the mountain base.
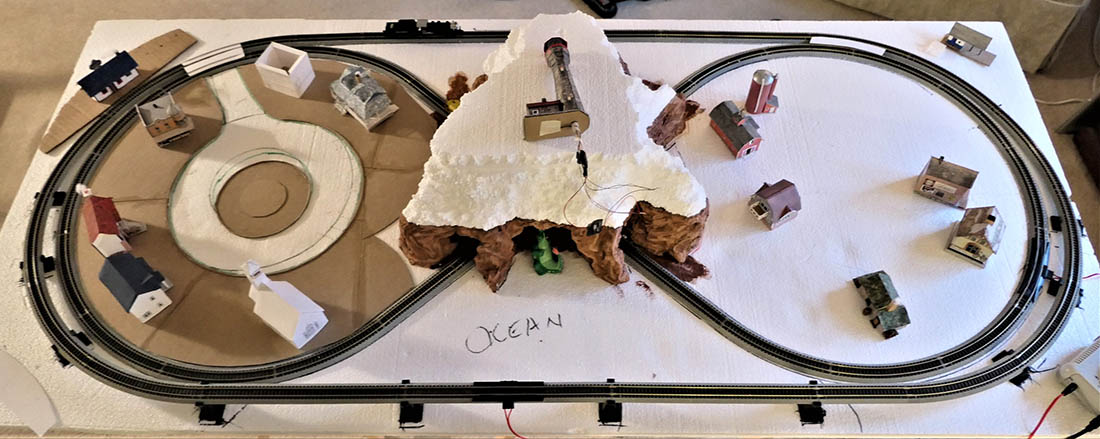
12. I built up the mountain top and prepared it for the lighthouse. The village to the left is Sunnydale, and the village on the right is Forest Falls. Pete’s dragon Elliott is sitting in his cave, anxiously awaiting his apples and a cocktail by the beach. Sunnydale, a happy little cul-de-sac, will have a gondola ride to the top of the mountain.
Much more to do…
Robert”
A big thanks to Robert and both Johns.
That’s all for today folks.
Please do keep ’em coming.
And if today is the day you poke boredom in the eye, the Beginner’s Guide is here.
Best
Al
PS More HO scale train layouts here if that’s your thing.

John from Baltimore. Where do you operate your layout from in its current configuration. You state that some of the existing curves are too tight for express trains. Do you intend to increase the radius of some of the curves. You will be taking a saw to the existing layout to move it. It appears to be an ideal opportunity to do any such like changes. If your going to change the design do you have a layout plan and if so do you intend to add additional viewing points.?. Thanks for submitting.
John love the first photo, so in depth and realism thrown in . Great layout !
The Critic
Fantastic detaill. And that electricity substation………wow.
John: First time I have ever posted a response but I just had to tell you your idea about creating 3 signature “scenes” was a really good one and well articulated. I am now planning my second layout which (coincidentally) is almost identical to yours (with the deep valley in the far wall). Yours is very well done and a real inspiration for me.
Thanks to Al for re-visiting this post. Yes the layout is in pieces and started on the move to the upstairs room. There are challenges, as the roof slopes so some of the mountains will be “truncated” and yes Colin, the minimum mainline radius will be 26″. Yards and sidings 20″. Nearly all turnouts #6. The control panel for the layout was just to the left end of the bridges, in front of the “old mine”.
Thanks for the comment Robert, gives me the opportunity to make a point missed in my article. In many cases a scene is destroyed by our lighting casting shadows on the backdrop. Originally my bridges were putting shadows on the “mountains” behind, so I had to add strip lighting close to the backdrop which took care of the problem.
I’d like to also mention Al’s Beginners Guide” which I’ve read and still reference from time to time. Beginners in the hobby would be wise to get and read it too!
John From Baltimore
Looks Good. But would like to see more.
One of the best layouts of a mining operation I have seen. Great job John !
Your layout is really great. Hope your move goes ok but I am sure after what you’ve shown us that you will tackle the the new challenges in a creative way. Thanks for sharing this it helps those of us not so far into the layouts yet.
Has anyone else noticed the face in the mountain on the right side of the picture of the old water tower in John from Baltimore’s pictures ?
That is a great layout. Everything looks so real and well done. Hope all goes well with your move, I’m sure your creativity will continue.
That is a awesome layout. I really liked the mining operation and the realistic colors and the mountains. I hope I can get some of my mountains to look as good as yours. I take it that the final backdrop is just painted on a backdrop? It still looks great. I hope the move goes as planned and you are able to increase your radius on your curves and “expand where needed”
Great layout, John. Fantastic attention to detail except for the trees. It continually amazes me at the stunning layouts that appear on Al’s site, that are perfect in every detail except for the trees. Scrawny, not-believable, trees, that are bent over at the top are too prevalent. I realize that some guys are not scenery-oriented, but it takes just little more attention to finish a great layout off right.
awesome layout & the at the beginning with all the bridges in the mountains & coal mine, excellent
terrific layout. love all the mountain scenery, trellises, everything.
Wow, to completely move the mountain layout? This will be as amazing as the entire layout itself. Please continue with posts on entire move project, developing a fan base here.
No comment on lighthouse RR as yet but appears quality of work present. The styro a good idea for platform and sound amplification when running train. Embankments look pretty good and figure 8 underneath is quite different to say the least… time will tell with this one.
I like the idea of focal points on a layout, one can then expand off those areas for extra detail.
WOW!, that mining operation and the way you layed it out was fascinating, hauntingly spellbinding. Love the tunnel portal and the way you landscaped around it, so realistically. You are an artist, a craftsman and superior landscaper.
Great job.
John #1, this is a awesome layout you have, it’s a shame to tear it down. As much work that you have to do to get the attic ready for the new layout ready to build, if it was me I wouldn’t be in a hurry to tear the old one down yet. I would keep it for running while you are building the new room and the new layout until your ready for it. That’s my thinking but it’s up to you. What an awesome layout !!!!!!!
Great layout and love the details of how it was constructed, thanks for posting this!
John
I like your attention to detail. If you really want to get detailed, the inside bed of your coal truck would actually be bright, shiny metal as the coal would polish that metal surface as it is dumped out of the truck.
Definitely a real looker , thanks for the ideas , simply beautiful with all those over passes .
John
Holy Joseph and Mary (or how ever the phrase goes)…. what a magnificent and detail layout. GREAT JOB.
Thee comment of what you remember is spot on. Been to many museums and know exactly what you are saying. My favorite ots are not my visitors. Frown.
Amazing detail. Beautiful to look at. Your skills are outstanding!
West Virginia John I liked the mountains always want to have great height in my layout but lack the room. Wonderful coal mine.
Baltimore John, I like your philosophy of creating memorable scenes that draw your visitors into parts of the layout that you want to showcase. You’ve done a great job in that respect. Also, running the valley below your fantastic bridges almost to the floor reminds me of the great John Allen’s Gorre & Daphetid that had mountains going all the way to the floor and dramatic bridges like yours. He was also great at creating viewing angles to emphasize certain scenes on his layout and used reduced scale in background scenes to create more apparent depth to the layout. The coal mine, power substation, and trestle scenes are all very nicely done. It’s a shame you’ll be having to cut up this fine layout to move it to the attic.
Three things I think would improve your new layout (besides broader curves): (1) The mountains could benefit from some rock castings, so they look more realistic. (2) The furnace filter trees around the water tower behind the mine look too uniform in size and spacing of the gaps between the branches. They would benefit from more irregularity (See Bill of Virginia’s furnace filter tree tutorial.) Finally, all the scenes would benefit from more figures to bring the scenes to life. I really like your hand-drawn track plan and how you planned the visitor’s path to your focal point scenes. Please send photos of your progress as you move your layout to its new quarters.