HO model train trees

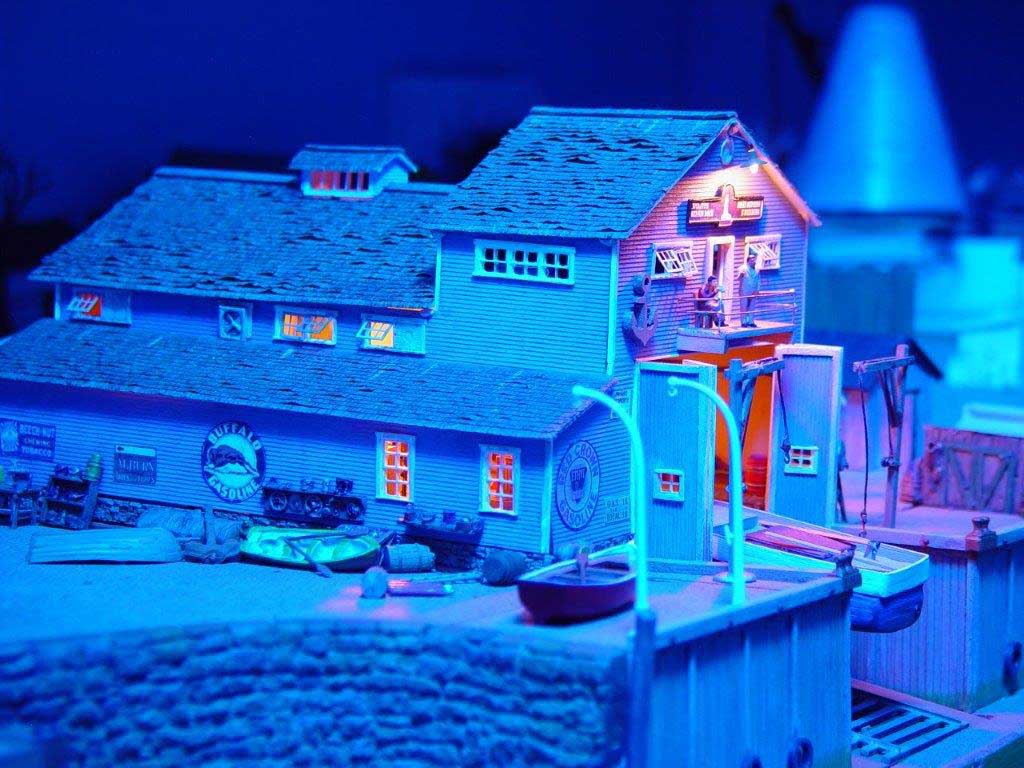
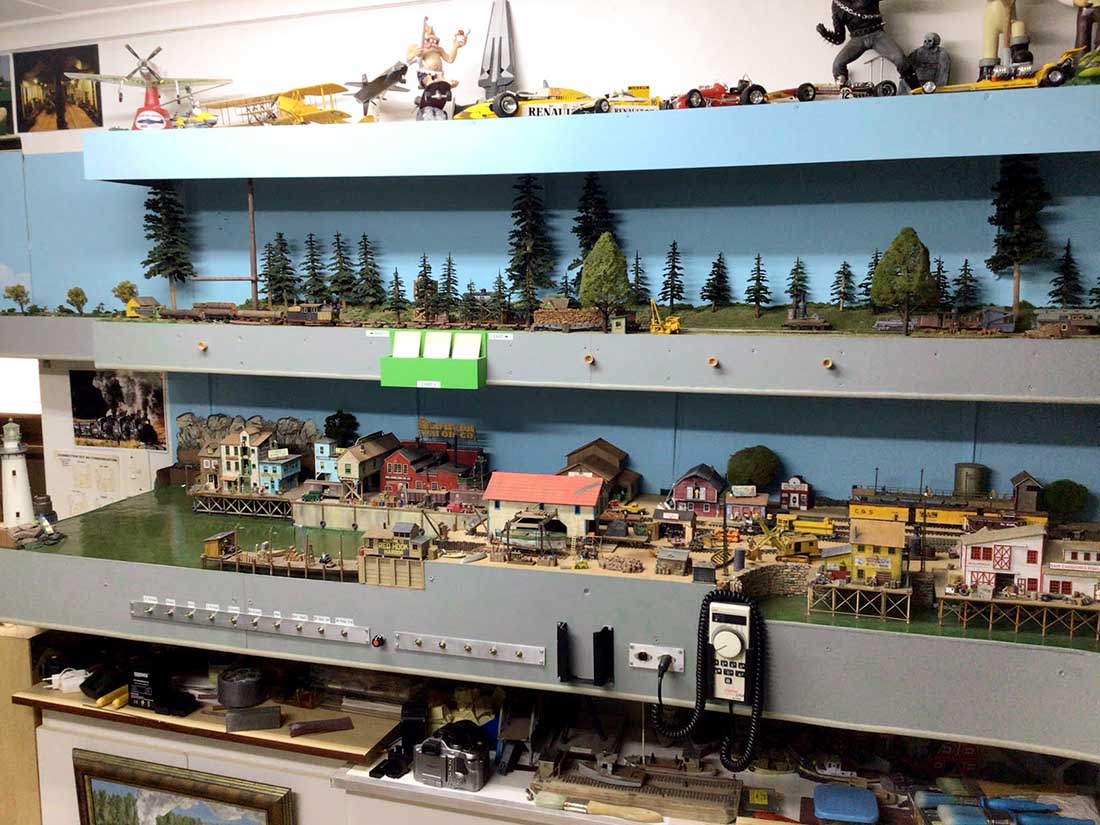
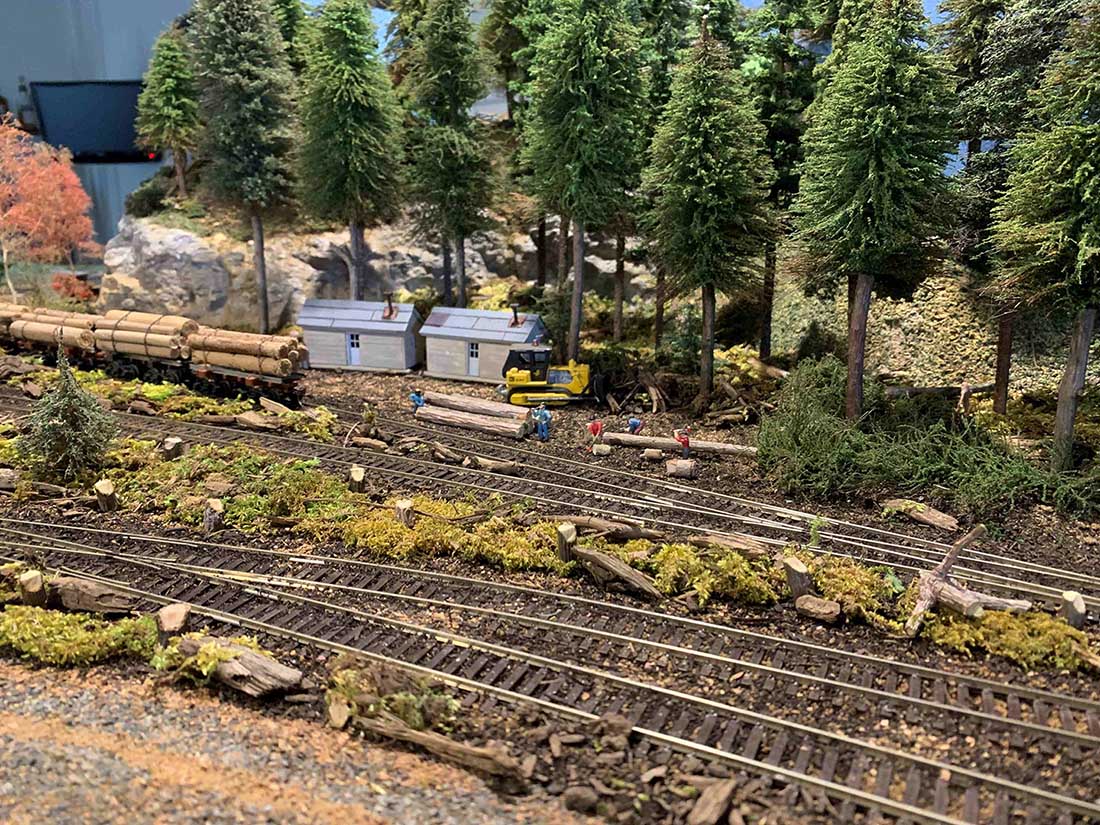
Boyd’s been back in touch, this time with his HO model train trees.

He shares how he makes his fantastic trees:

ho scale camp loggers

(If you missed his last post, it’s here: HO scale logging camp.)

“Hello Al,

A couple folks expressed an interest in how I make my trees, so since I had to make a few more, I took some pics as I went.

My method is basically bits and pieces of various techniques I saw online that I combined into a system that works for me.

The pics are not the greatest quality, but they should get the point across.

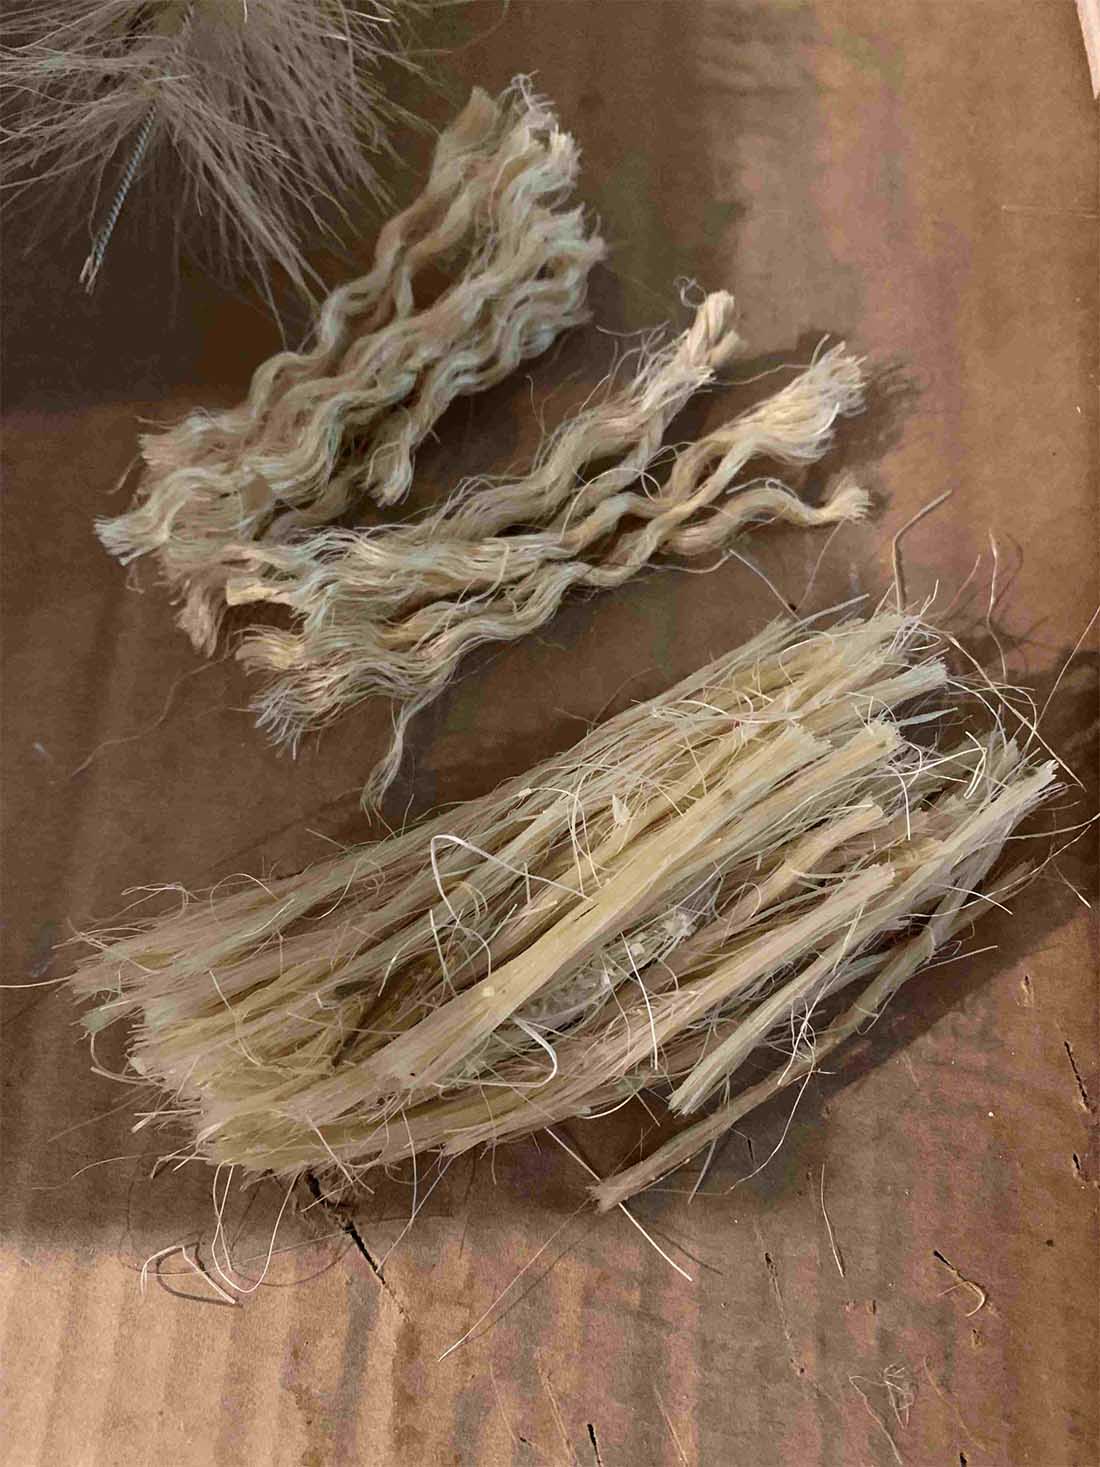
I start with sisal rope.

sissal rope for HO model train trees

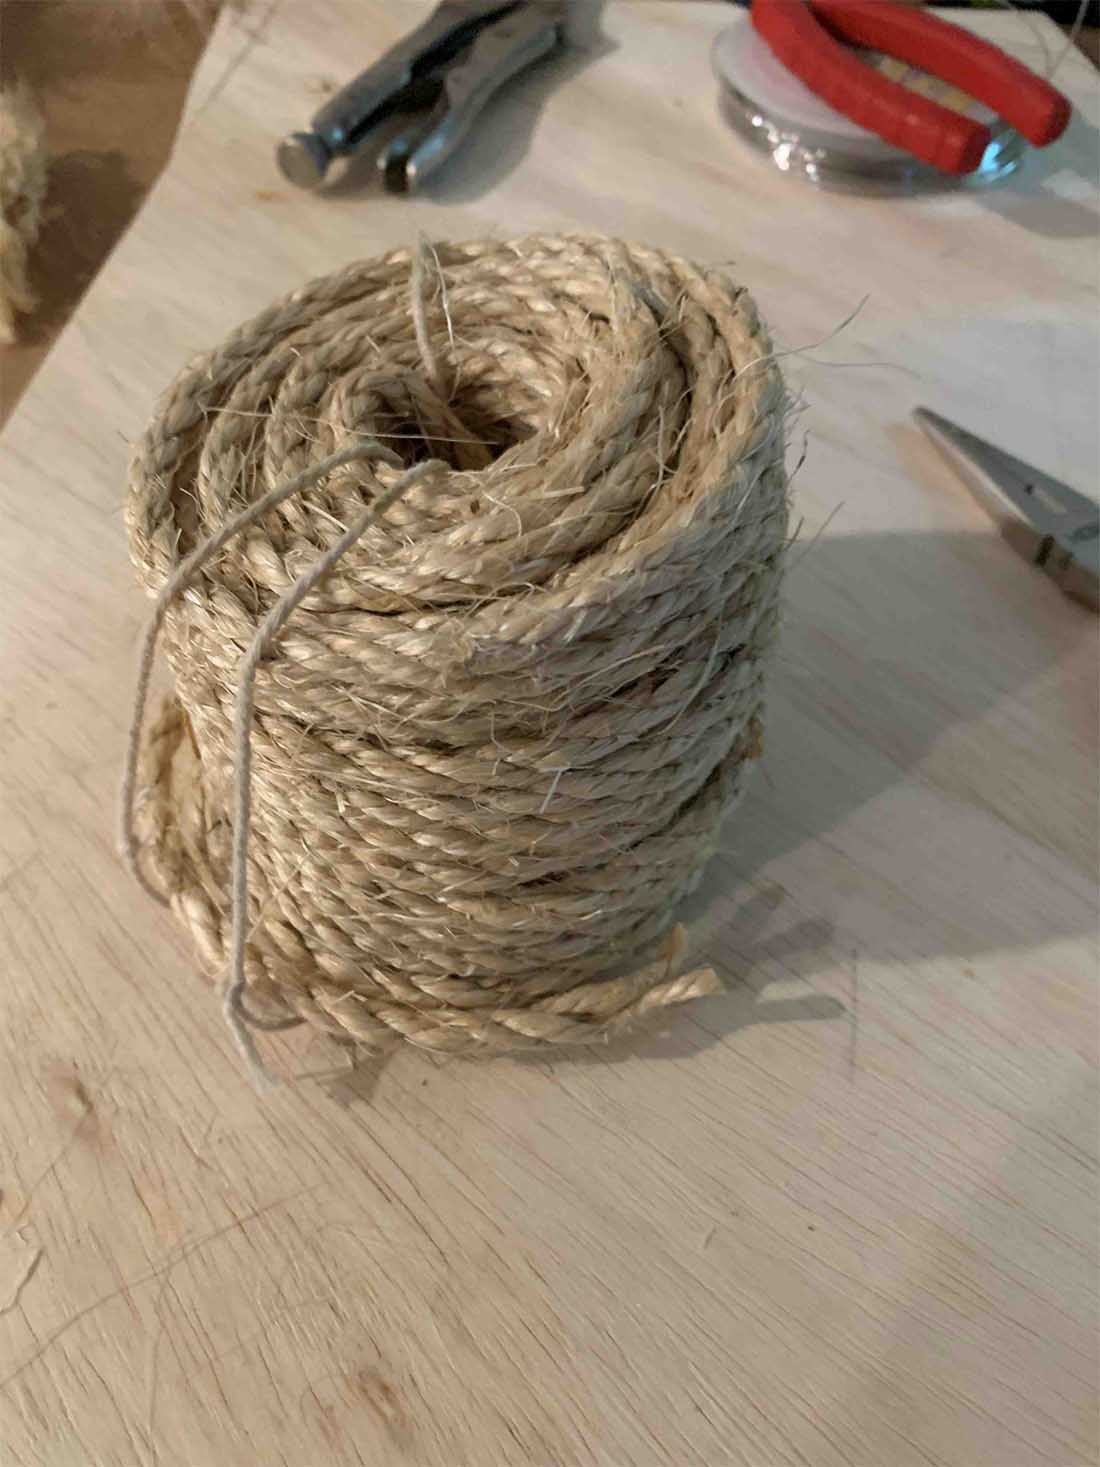
Depending on the type you will find it can be untwisted to yield some number of individual strands. In my case, the rope is untwisted into 3 strands, and each of those strands is comprised of another 3 strands.

HO model railroad trees from rope

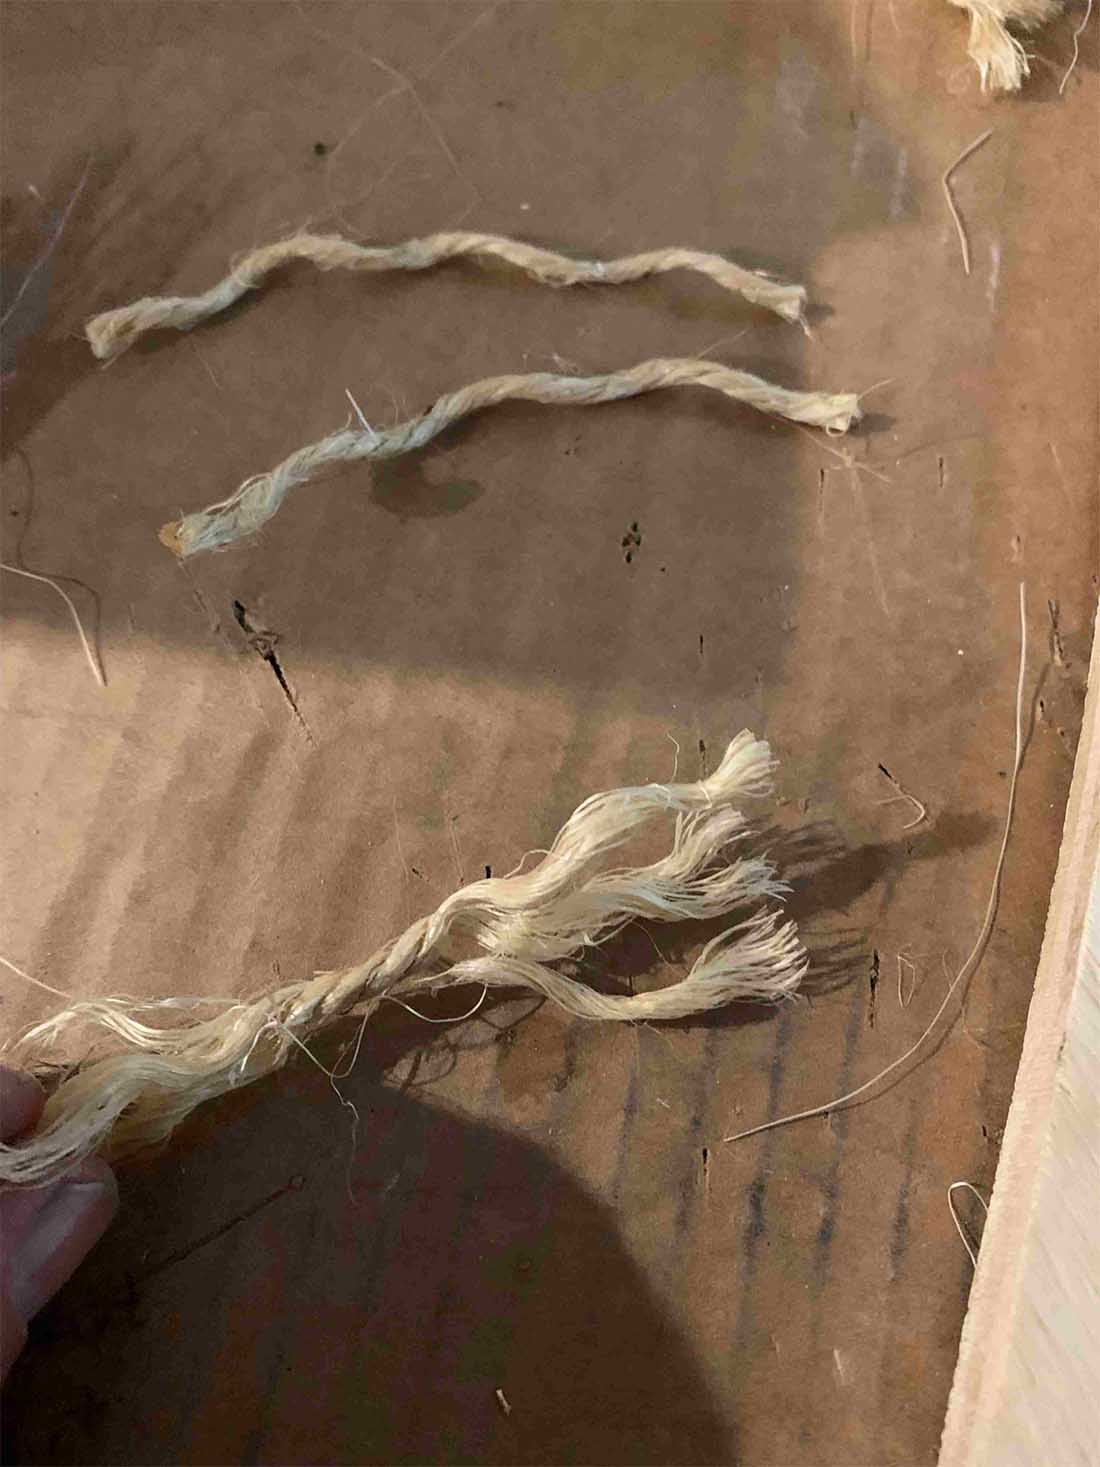
I use an old comb to finish separating the strands into individual fibers. The individual fibers are wavy, and I found them difficult to use as is. I stumbled across a video late one night that suggested soaking the fibers for a few hours, that is what I do now, and it yields straight fibers that I find much easier to work with. Below is before and after soaking.

making HO model train trees from rope


The next few steps are basic bottle brush tree making. Lay the fibers on a folded wire, hold one end with pliers and loop the closed end over a hook clamped in a drill chuck.

make model train tree

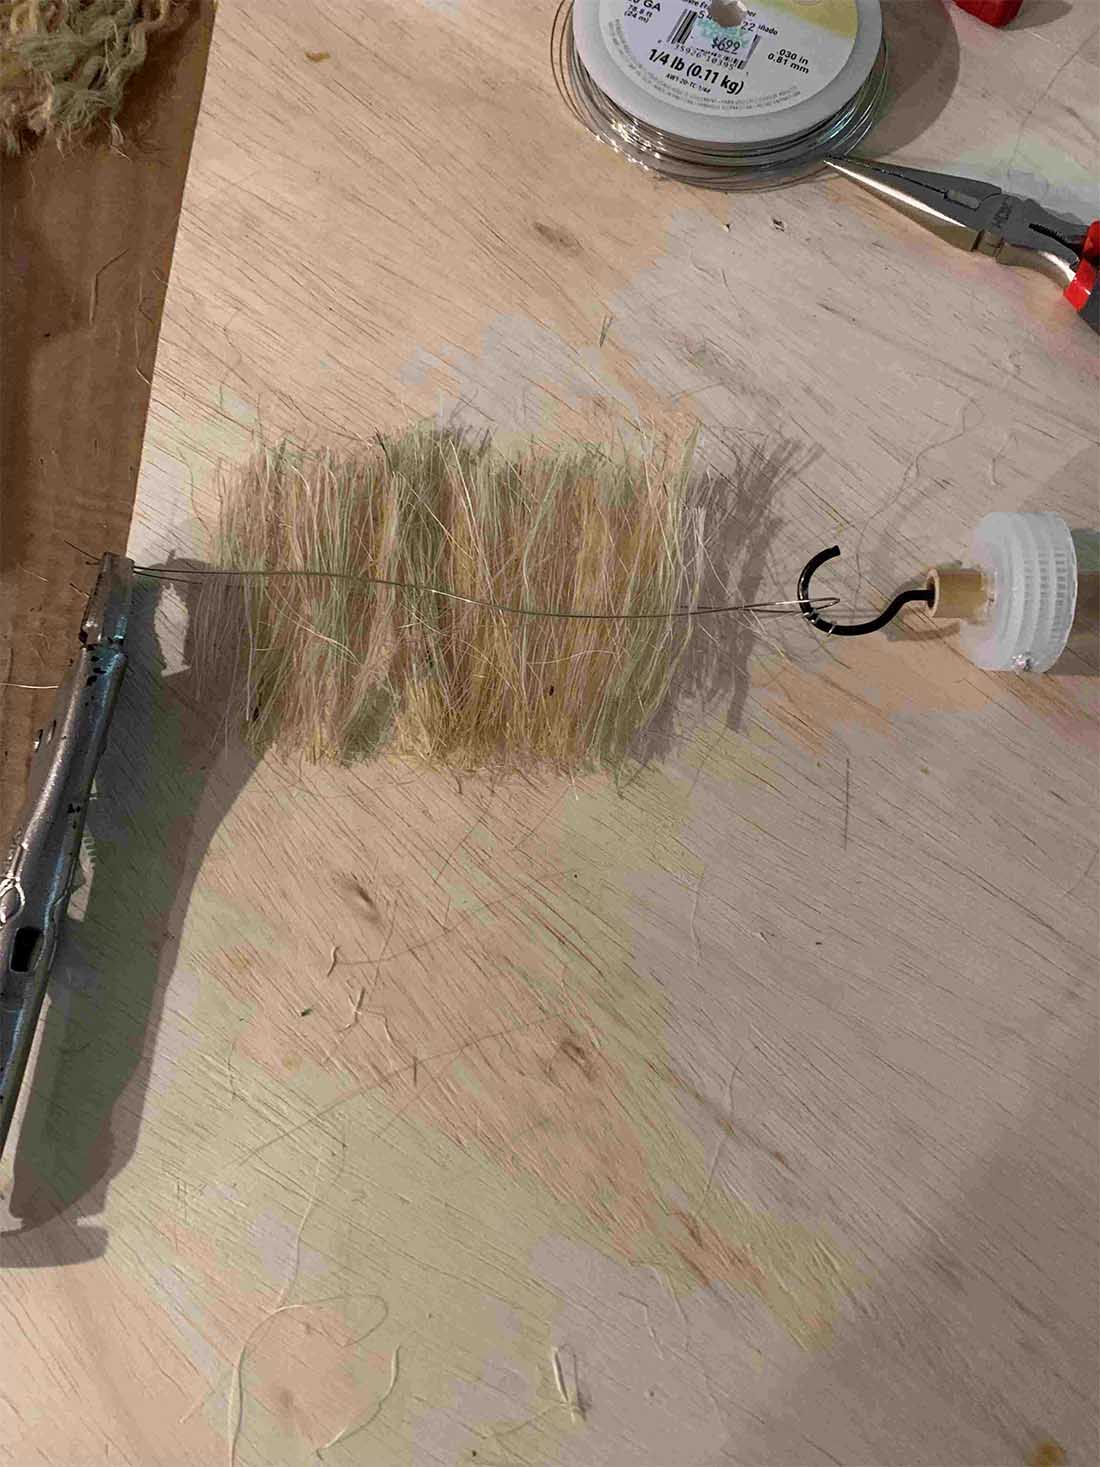
While gently pulling on each end, spin the drill until the wire is tight along its entire length. You will end up with a rough tree.

make HO model railroad tree

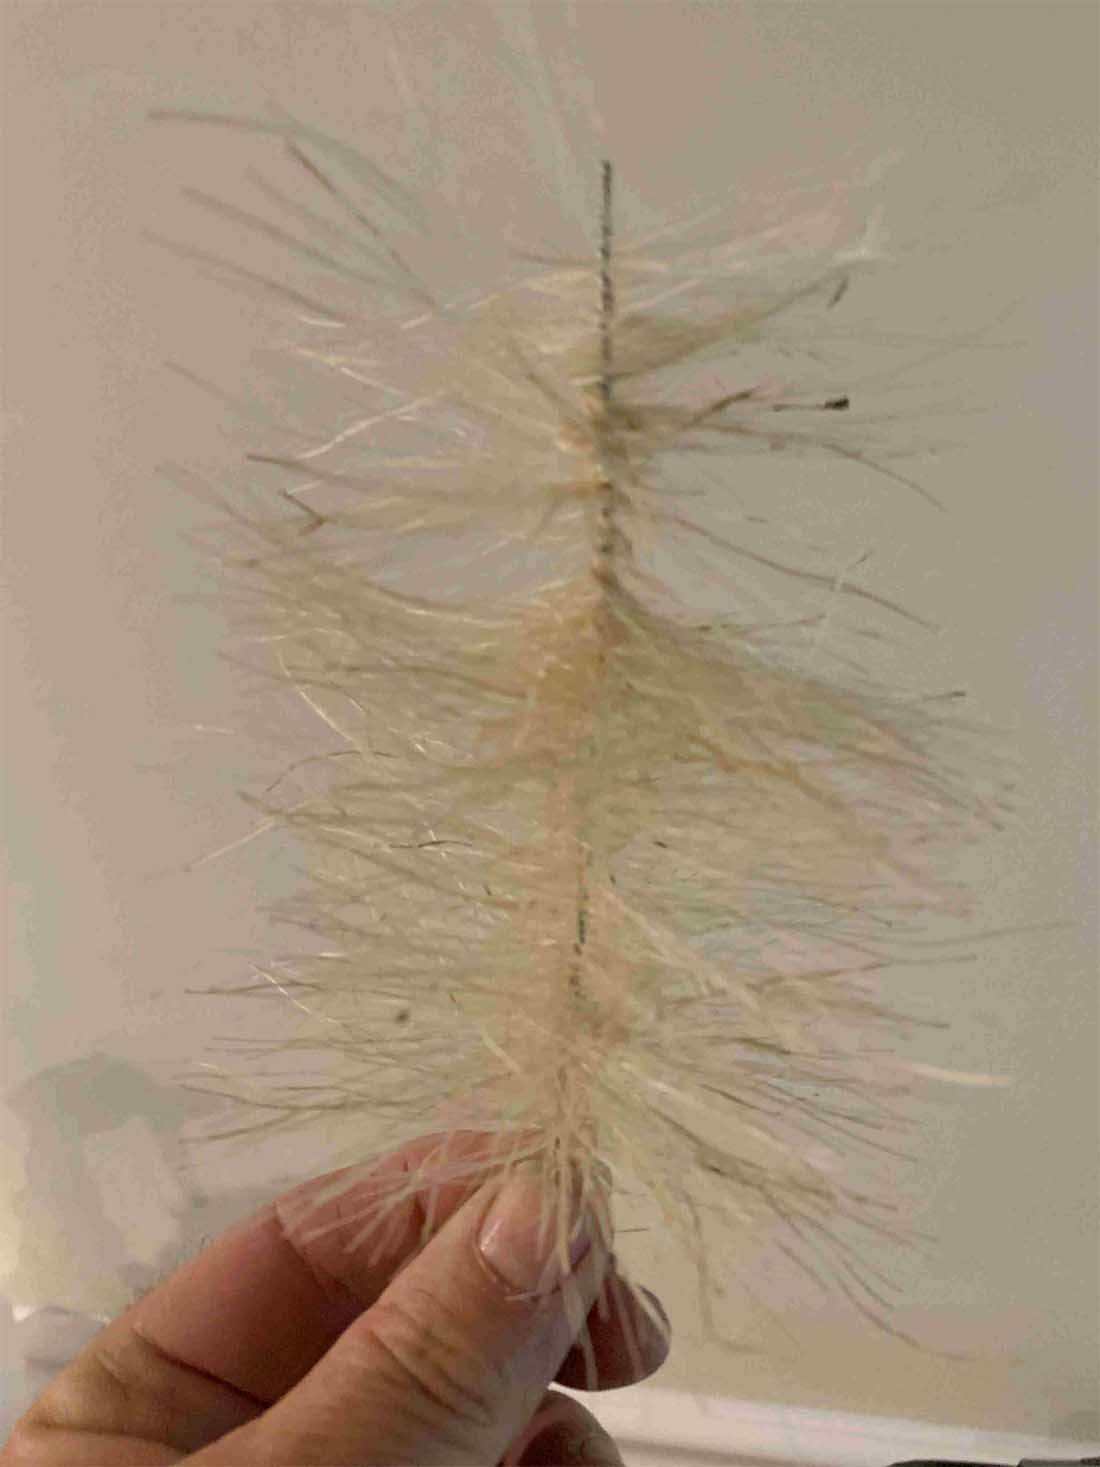
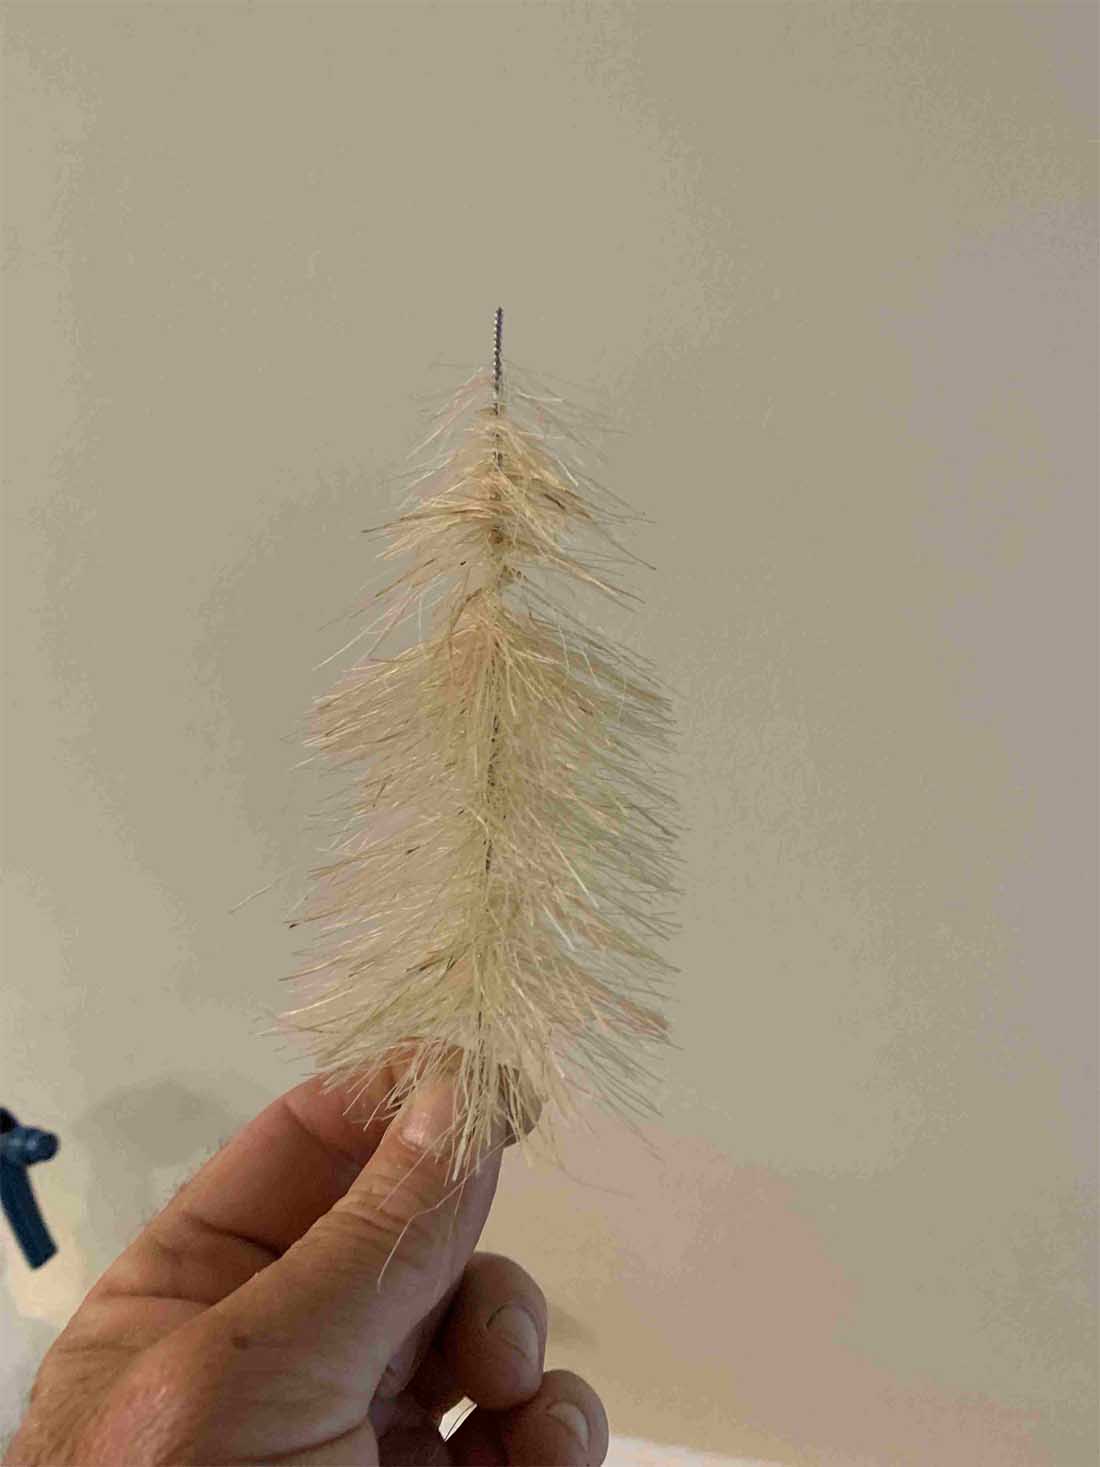
Trim it into a tree shape of your liking. I just try to make sure they all don’t end up looking the same, and that they do not look like Christmas trees.

make HO model train tree

After making as many trees as I want or need, I stick them in a scrap piece of foam board and spray paint them brown. I make sure the ends of the branches have good coverage as they will show through a bit when finished.

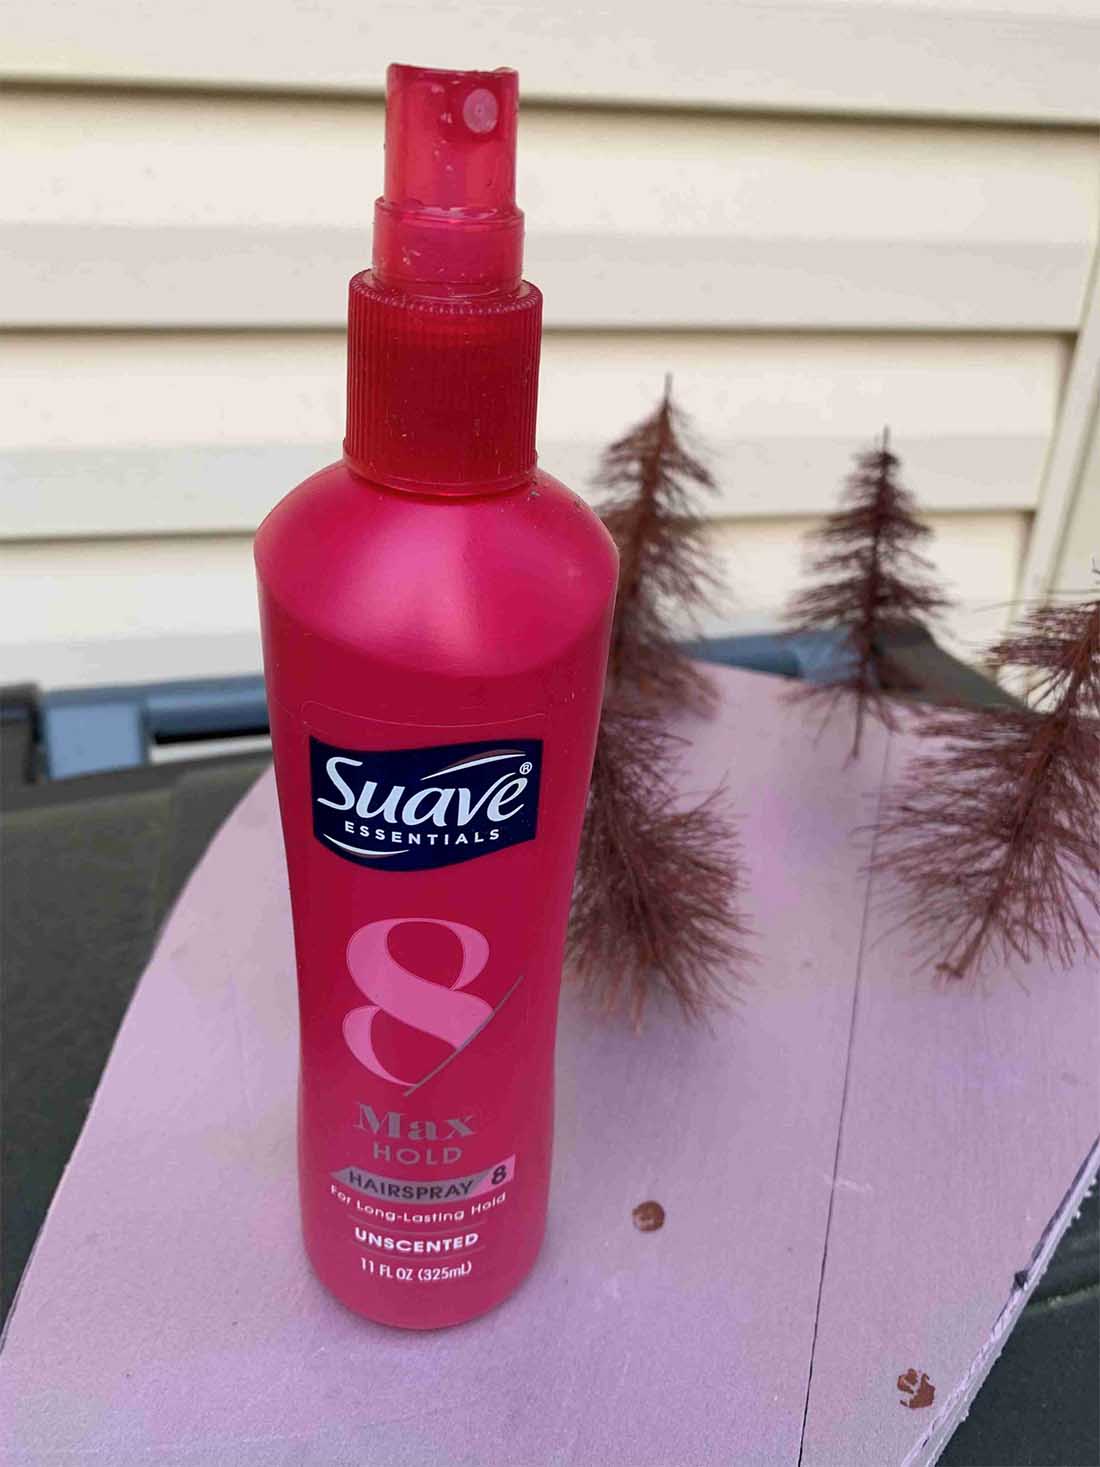
After painting, give the tree a good coat of hairspray. I tried a few different brands then settled on the one shown below.

For me, the important piece was that it be pump spray, as aerosol spray tends to be too strong for the 2nd coat, blowing off some of the flock you just added…

glue for model train trees

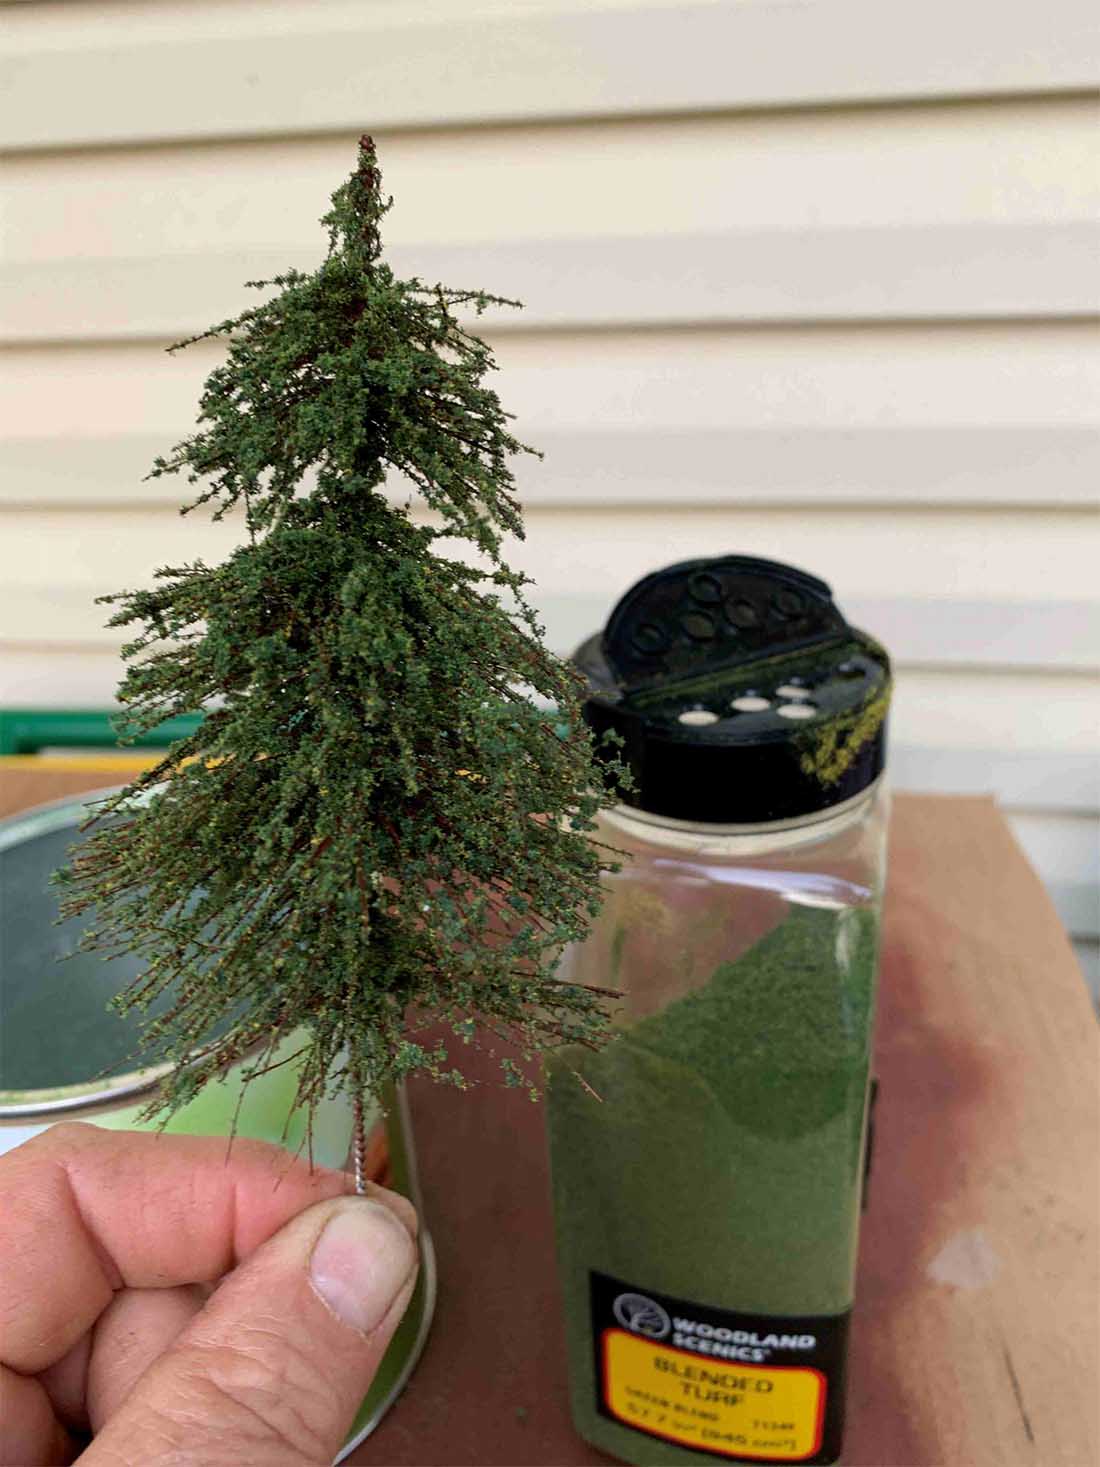
Next sprinkle on the flock of your choice. I use a coarse flock for the first coat, and a fine flock for the 2nd coat.

You can use as many coats as you want to get the fullness you desire, but try to use a couple different colors to create some shadow appearance.

Give the tree a good coat of hairspray before each application of flock. I use whatever flock I have on hand, some store bought, some homemade.

Once all the trees are done, let them sit for 5 minutes then give them one final good coating of hairspray.

adding foliage to model train trees

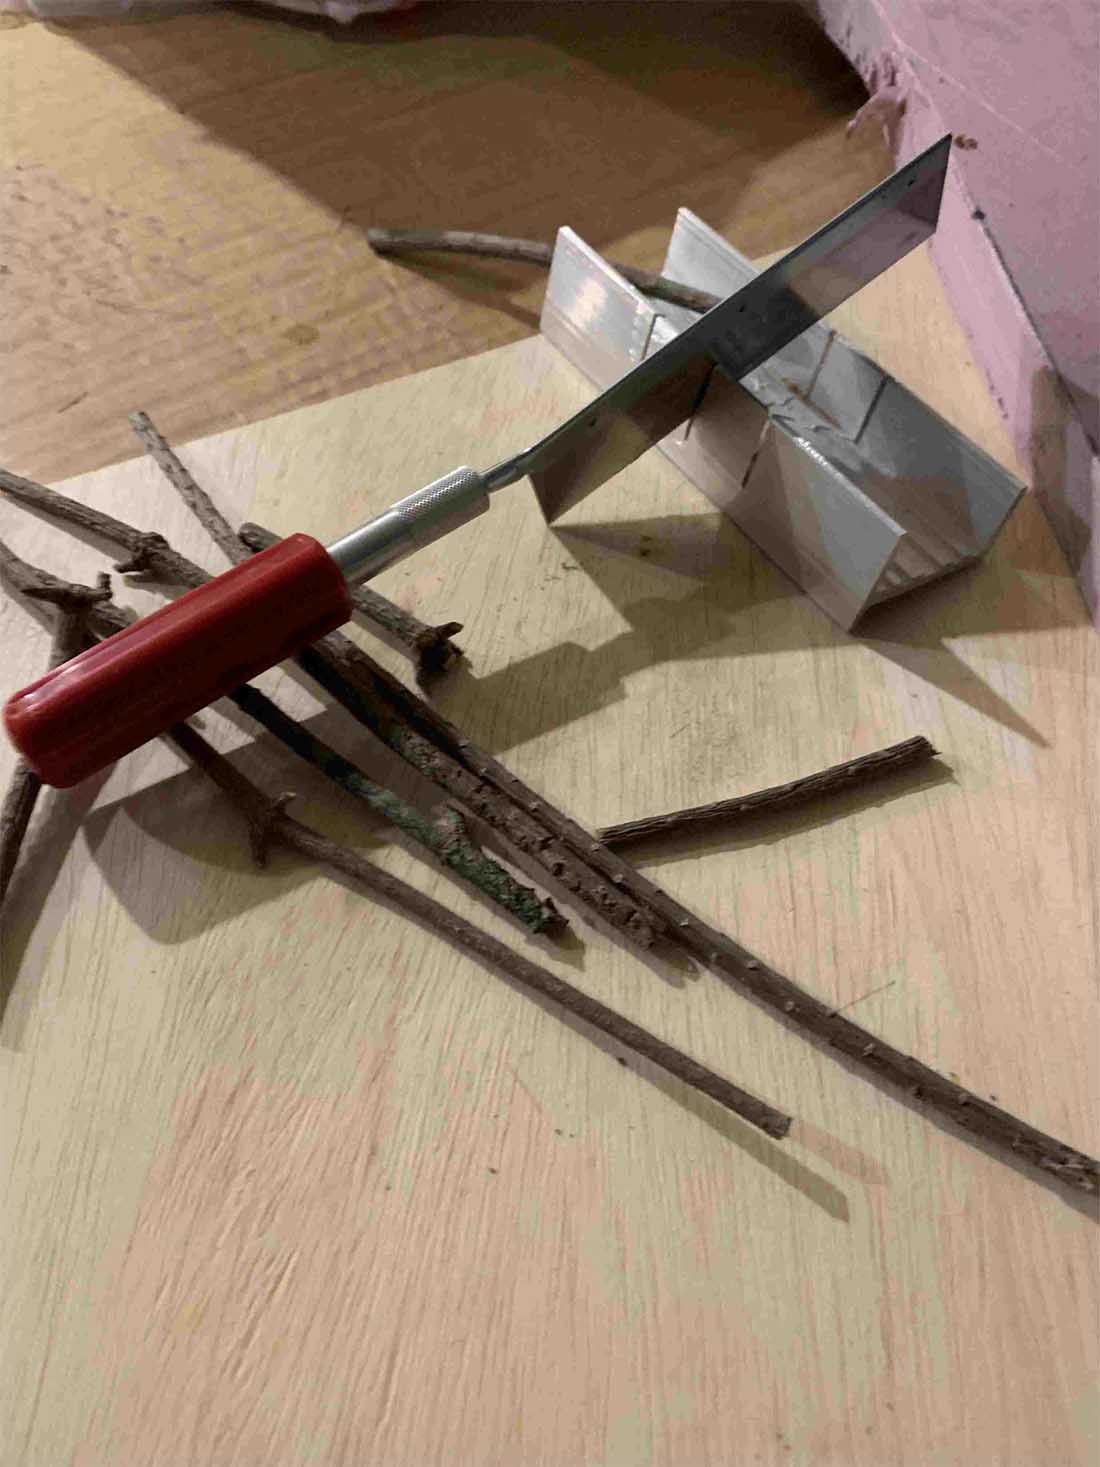
Next step is to add a trunk. I gather up small pine tree branches I find along the road or paths when out walking. I find the best appearance is when the trunk is one half as long as the branched portion.

Cut the twig to the desired length, carefully drill a hole in each end. Cut the wire from bottom of the tree, leaving ½ inch to insert into the trunk, then use the remaining piece as a pin in the bottom of the trunk to attach it to the layout.

cutting model railroad trees

HO model train trees

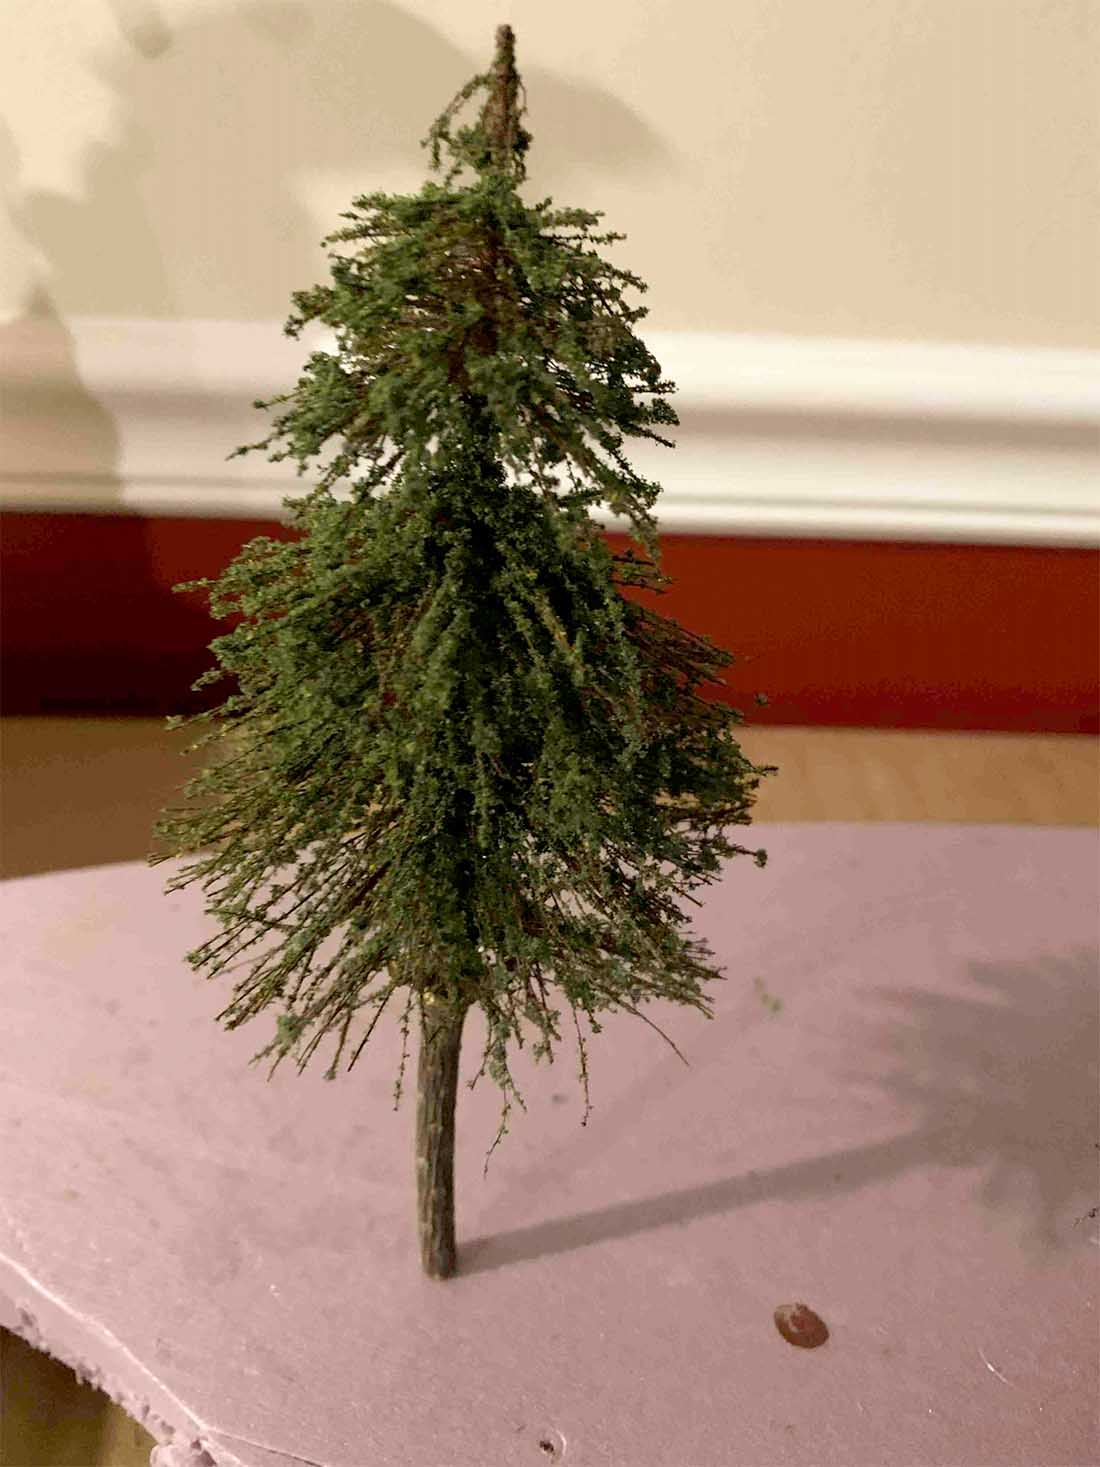
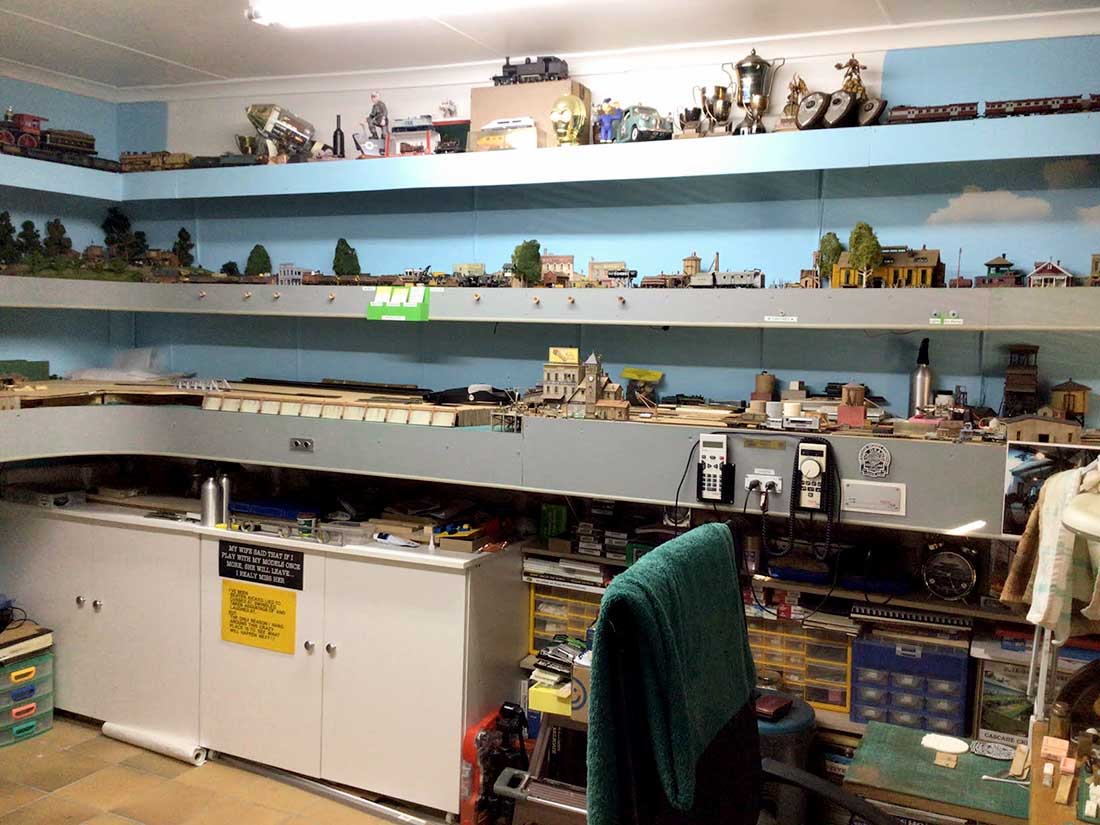
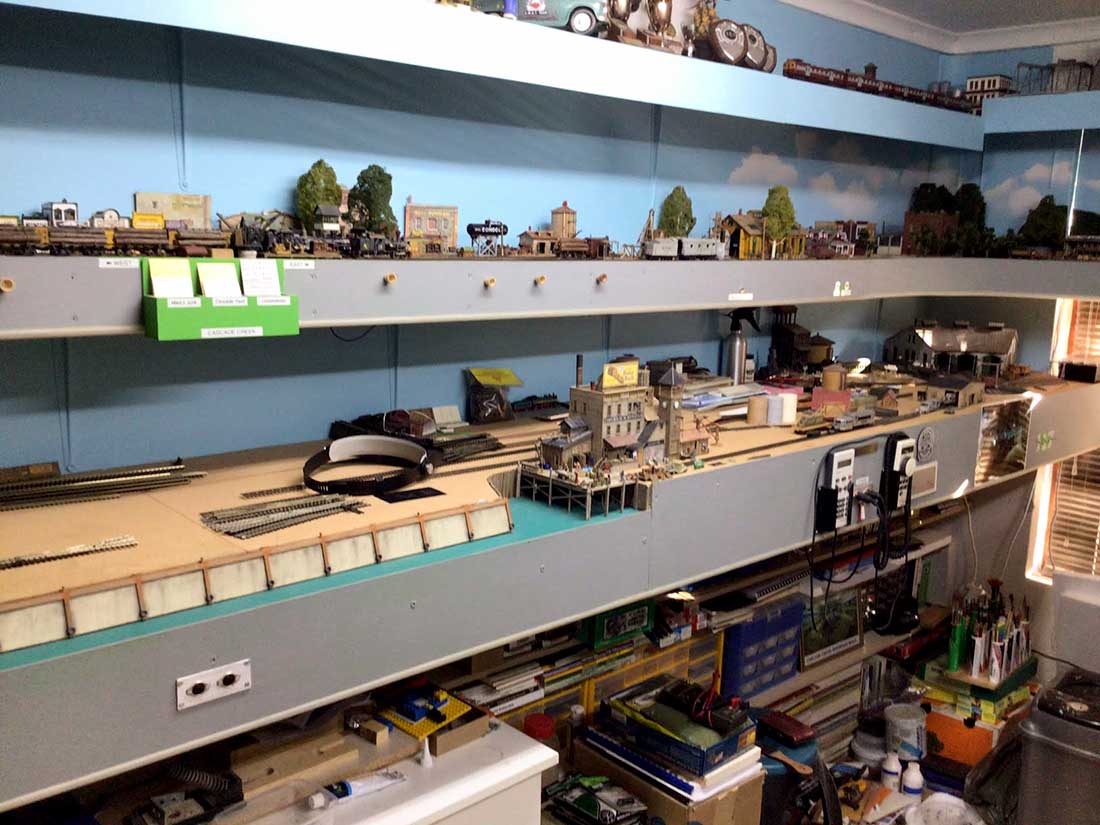
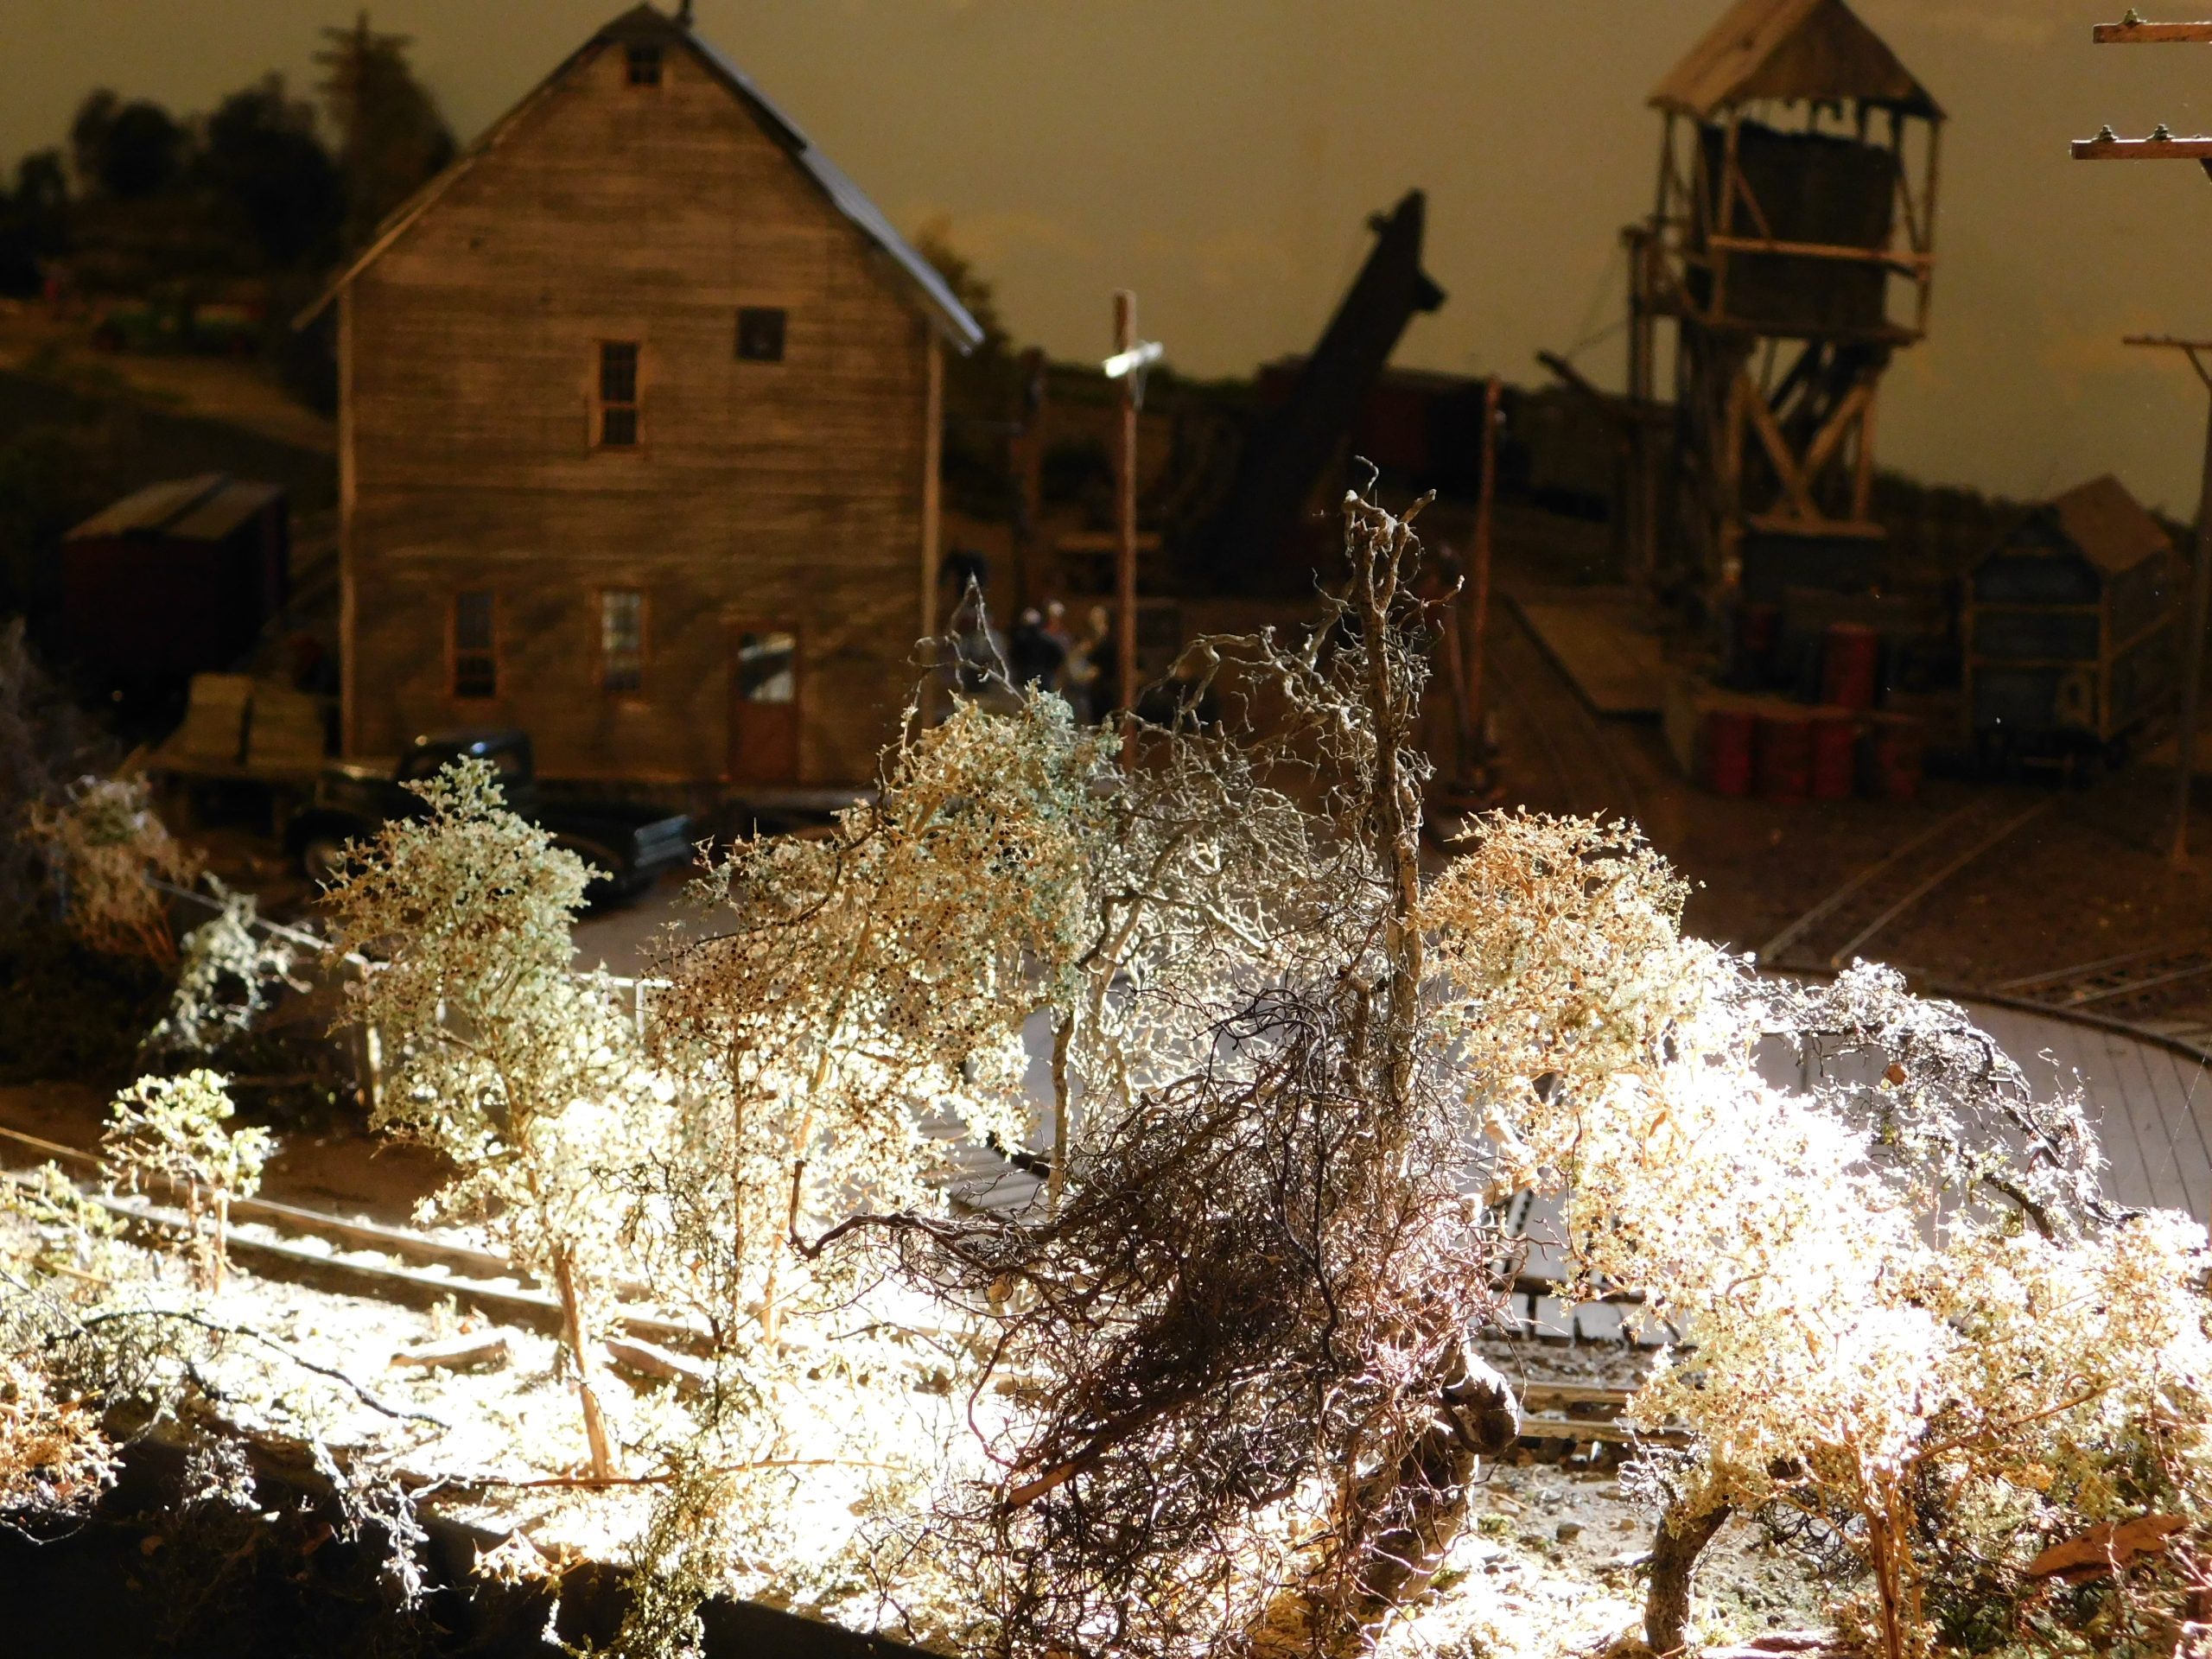
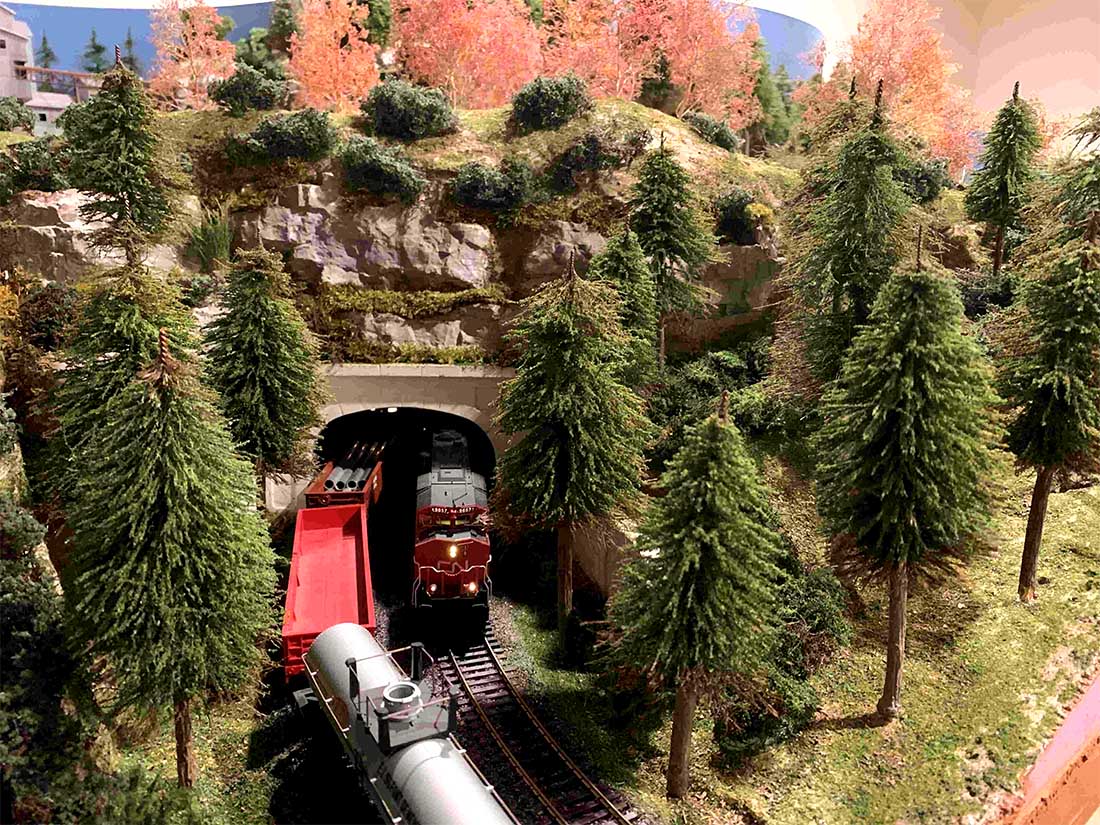
All that’s left is to plant them on your layout.

model train trees tunnel

A huge big thank you to Boyd.

If you’re new to the blog, it’s really worth having a look at Boyd’s first post – it really did create quite a stir. It’s the comments that make it.

See for yourself, it’s right here: Model train hobby.

model train HO scale freight

That’s all for today folks.

Please do keep ’em coming. It’s still very thin this end.

And if today is the day you get started on your layout, the Beginner’s Guide is here.

Best

Al

PS Latest ebay cheat sheet is here.


HOn3 shelf model railroad

Brian’s been back in touch with his his HOn3 shelf model railroad.

He’s answered your questions from his previous post: HOn3 boat house.

HOn3 boat house

“Nice work! Are the boathouse plans available? – Chris.”

“Hi Chris, I have had the plans of the kit for many years. I had the kit but it was stolen/missing in a move from one city to another.

The kit, (Builders in Scale) is no longer made but you could try EBay for it.” – Brian.

HOn3 boat house kit

“An excellent building! Although if it is possible some details on how you set up your lighting. – Peter”

Peter, I use 12 volt grain of wheat bulbs (from Minatronics Corp) and use them at 6 volts to get the correct ambiance for my era (1930s). They also last much longer.

A length of brass square tubing cut to the length required inside the building and then small holes are drilled at the appropriate places on the underside to thread the wires through.

These are fed through the tube to one end and then come out at at the back side of the building. They are then run down the outside (hidden from view) to under the layout to the power source (a transformer set at 6 volts).” – Brian.


“Your boat house is impressive. I have 2 questions:

1. How did you get the brick impressions on the office?

2. Any tips on how to make the precise cuts/openings for doors and windows?

Thank You,

Dave”

“1 – I had a section of a brick building left over from a kit that I did not use. I cut it to match the size that was required on the plans. Glued it together using a white glue (I found that this is the only glue that will stick plaster together). From there it was painted with a red acrylic paint, weathered and dry brushed to get the finish that I wanted.

2 – Precision cuts for windows and doors, I mark out on the reverse side of the wood using a pencil and then use a hobby knife with a number 11 blade to score and cut right through the wood working from corner to corner, this give the exact cutout for the doors and windows. (A tip here when doing these cutouts is to put masking tape on the underside where the openings will be, this prevents the wood splitting)” – Brian.


A big thanks to Brian – he also sent in the below.

I really enjoyed it because you get see more of his layout, and there’s just something about seeing a layout in a room that captures my attention.

I know we all enjoy the close up pics of our miniature worlds, but seeing them ‘as they are’ is an overlooked part of the hobby. I’m all for more pics that show the layouts ‘in situ’.

Anyhow, just my opinion, let’s carry on with Brian’s update.


“I hope the above answers help those that asked them. Some changes made to the facia boards.

After a long debate, I bit the bullet and painted the facia boards of the layout from the green to a more neutral grey. Now when entering the train room, one sees the layout features instead of the bright green. I think that it has improved the look much better. (Don’t know what I was thinking years ago when I did the green). Times change as we get older.

Below are two photos of the old colour (yuck!!!) taken a few years ago of my double deck HOn3 layout.

Hon3 backdrop

HOn3 shelf model railroad


The new look, a more neutral grey. – Much better.

HOn3 shelf model railroad

HOn3 shelf model railroad

HOn3 shelf model railroad

HOn3 work bench

Till next time – keep modelling.

Brian – the HOn3 guy from Knysna RSA”

And now on to Don.

You may remember him from this post: Don’s HO scale.

He’s busy on a new layout and sent in this tip which I rather liked:

“Hi Al,

You recently posted photos of my first ever HO layout, and now I am preparing to dismantle it to build a larger one.

I have learned much more about DCC, and because I have both DC and DCC locomotives, my plan is to have both running on one layout.

It will be about 8′ x 12′ with a fairly simple track plan running both voltages independently.

Still not too good at creating mountains or cliffs, but going to give it a try on this one. Have to get started on it before I find myself looking at the roots instead of the grass!

I can offer a tip that I found useful in my modeling venture. If you place a piece of household parchment paper on your work surface while using any type of glue, the glue won’t stick should you use a little too much on your project.

I had a habit of over-gluing sometimes, and had trouble lifting it from my work surface without it adhering to it while drying. I found that almost any type of glue I used will not stick to parchment paper.

Many of your readers probably already know this, but it always takes me awhile to learn things.

Thanks for your service to the hobby, and keep it up as long as possible.

Don R

Port Saint Lucie, Florida, USA”

Lastly, Tom’s been back in touch.

He sent in a pic that really demonstrates how much of a difference lighting makes when you’re taking pics:

“One shot I just caught in time, talk about making it look real?

Early morning sunrise on the Narragansett RR.

Enjoy this one Al.

Tom da ole guy”

(If you missed Tom’s stunning layout, it’s here: On30 model trains.)

That’s all for today folks.

A big thanks to Don, Tom and to Brian for sharing the pics of his layout.

Please do leave a comment below if you’d like to see more ‘in situ’ pics of the layouts. I’d love to know what you all think.

Keep ’em coming. It’s still jolly quiet this end.

And if today is the day you stop dreaming and start doing, the Beginner’s Guide is here.

Best

Al

PS Latest ebay cheat sheet is here.


8×12 HO scale layout

Paul’s been in touch with his 8×12 HO layout:

“Hi Alastair I thought I would send you some progress photos of my new 8 X 12 around the wall layout.

It is constructed using 3/4″ plywood to form L Girders and the baseboard.

The mainline layout is a three times around over-under track. There is a liftout which has 3 tracks crossing it.

The liftout uses copper pads and contacts which I made to continue the electrical circuit when in place.

The layout also uses Woodland Scenics inclines to create a 2 degree incline and decline throughout the layout.

There will be a steam flowing to a lake which runs under the three small bridges.

I cut out the foam using the Dremel tool seen in the photo. It works great by allowing you to slice off the foam in small layers until you reach the desired effect.

Essentially the layout is blowup or dissected version of an old 4X8 layout I found in an old Model Railroader magazine. What you do is cut a copy of the layout into 4 pieces, or quadrants. You separate the pieces and then draw lines connecting the tracks to form an around the wall layout.

I finished the basement room this past summer and started construction of the L girder baseboard in September. The trick I am learning is that you have to plan all your moves so as not to make any parts inexpressible. That’s the fun with an 8×12 HO layout.

So right now I am building a small hill to fit in a corner of the layout that will be hard to reach in the future. It is removable so I will landscape it on the workbench and then put it in place.

I have also built a temporary bridge over some of the layout so I can sit on top and not crush my work.

I will send more photos as work progresses.

Thanks for all the great tips you forward to us via your blog.

Paul”

8x12 HO scale polystyrene incline

HO scale polystyrene incline

HO layout wiring

HO scale polystyrene incline 8x12

8x12 HO layout foam board


8x12 HO scale layout foam board

8x12 scale HO layout polystyrene risers

8x12 HO scale layout polystyrene risers

8x12 HO scale layout polystyrene risers

HO instructions

8x12 HO layout polystyrene risers

8x12 HO layout polystyrene risers

8x12 HO layout polystyrene risers

HO scale instructions

8x12 HO layout polystyrene risers

8x12 HO layout polystyrene risers

A huge thank you to Paul. An 8×12 HO layout!

It just goes to show how a little planning can go a long way. Can’t wait to see an update from Paul, his layout reminded me of Jeff’s: HO scale layout 8×15.

Dominic’s springs to mind too: Scratch build a HO scale trestle bridge.

That’s all for today folks.

Please do keep ’em coming.

And don’t forget the the Beginner’s Guide if Paul has inspired you to stop dreaming and start doing.

Best

Al

PS More HO scale train layouts here if that’s your thing.


Need buildings for your layout? Have a look at the Silly Discount bundle.PS More HO scale train layouts here if that’s your thing.