Bob’s been in touch with his 4×6 layout:
“Hello Alastair,
My first train set was given to me in 1949 when I was 5 years old.
It was a Marx 027 oval layout with steam engine, tender three cars, and a caboose. It had the red lever throttle. You changed direction by operating the lever quickly on and off.
When I was about twelve I graduated to an American Flyer S gauge Sante Fe Chief passenger set. Had that until high school when we moved into an apartment so no room.
I was away from model trains until 1974 when my mother bought my son a Tyco set for Christmas. Use to set that up ever Christmas until about the mid 80’s. Again I have been away from model trains until this past January. I have been receiving you emails for a while and decided to take the plunge again.
I have an 10.5 by 11.5 spare room that I decide to use for a 4×6 layout.
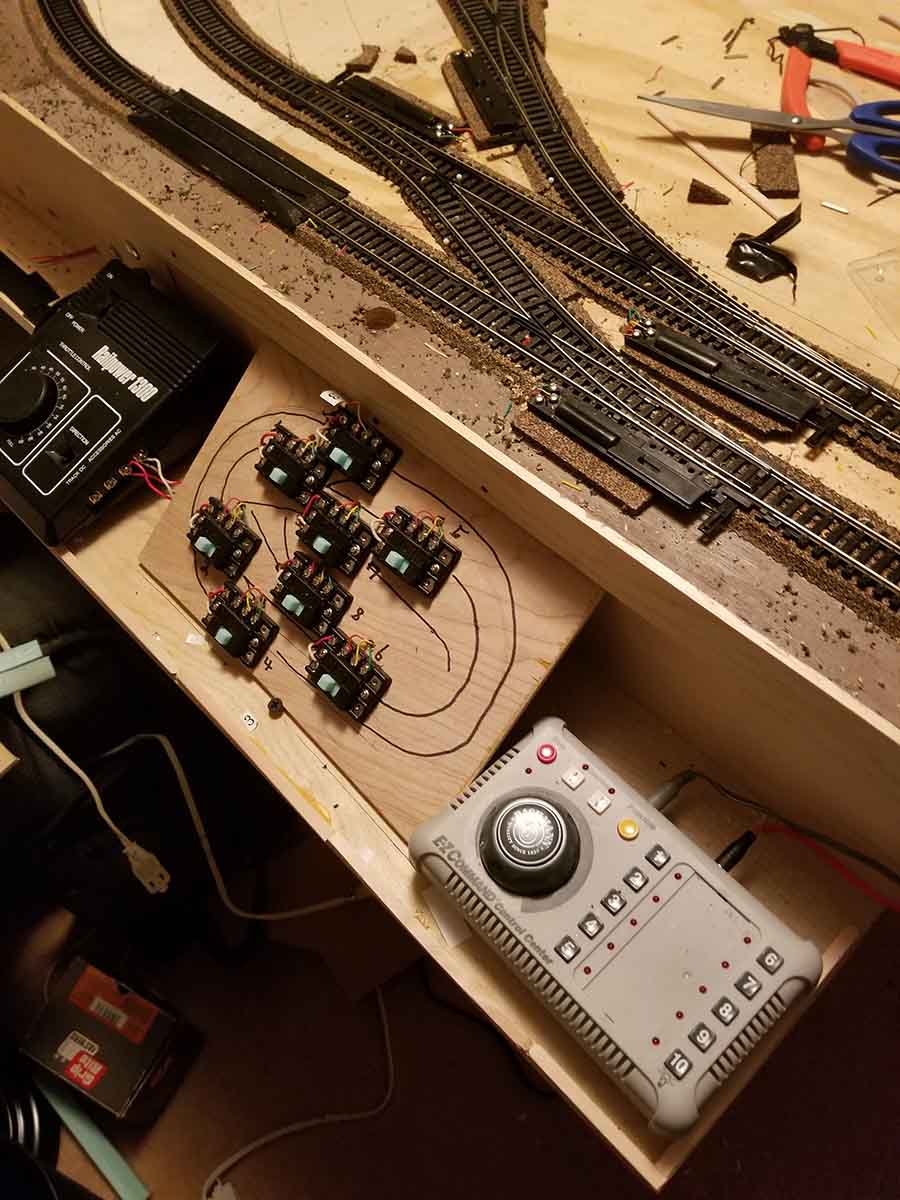
I bought a Bachman DCC starter set with EZ-track and bought some expansion packs for the EZ-track. I setup a double 0val with cross overs.
I also bought a second DCC Diesel Locomotive and some in expensive ( $5.00) cars. I had trouble getting the switches (points) to work in both directions when using the cross overs. After trying everything I found online, I gave up on the EZ-track and decided to go with Atlas Code 100.
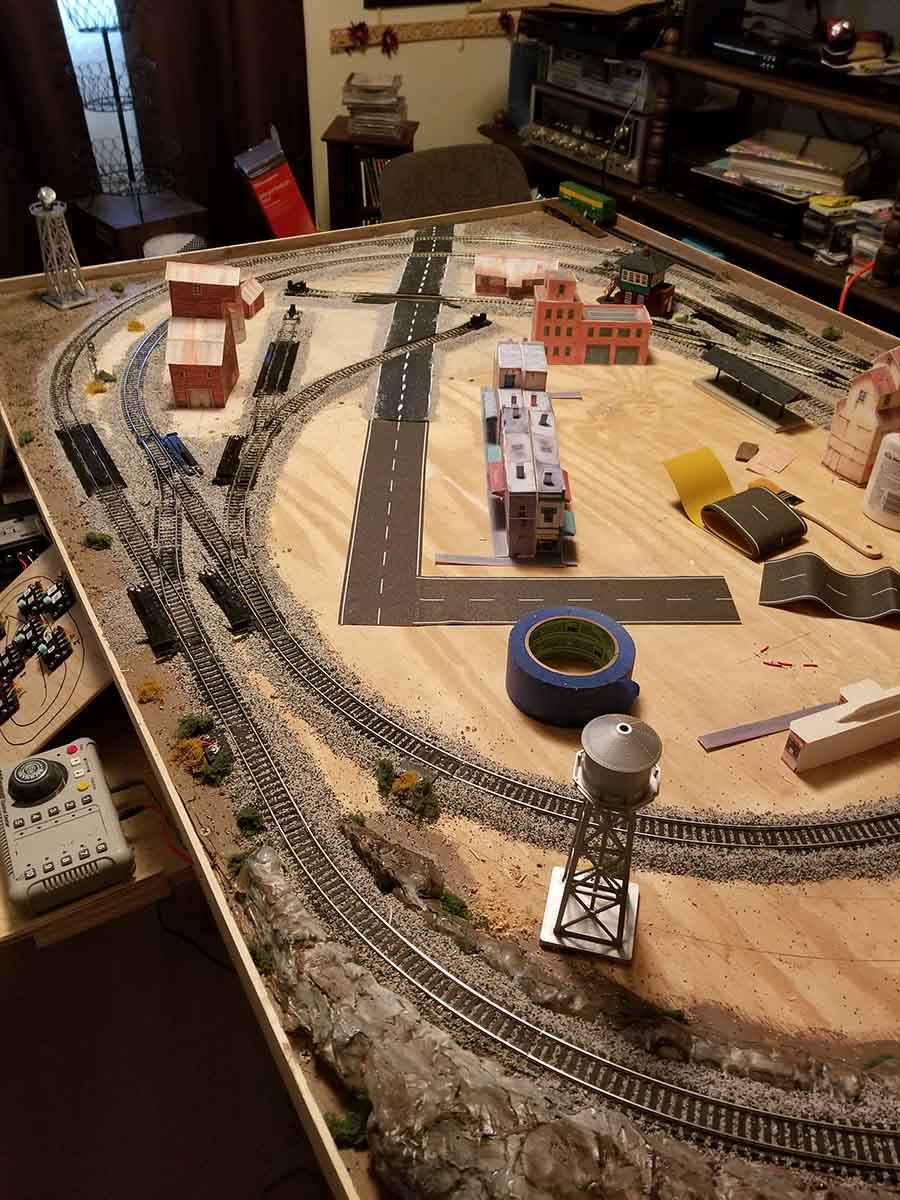
I had no theme or period in mind just a general plan in my head. I used Atlas Track planning software to come up with my first plan.
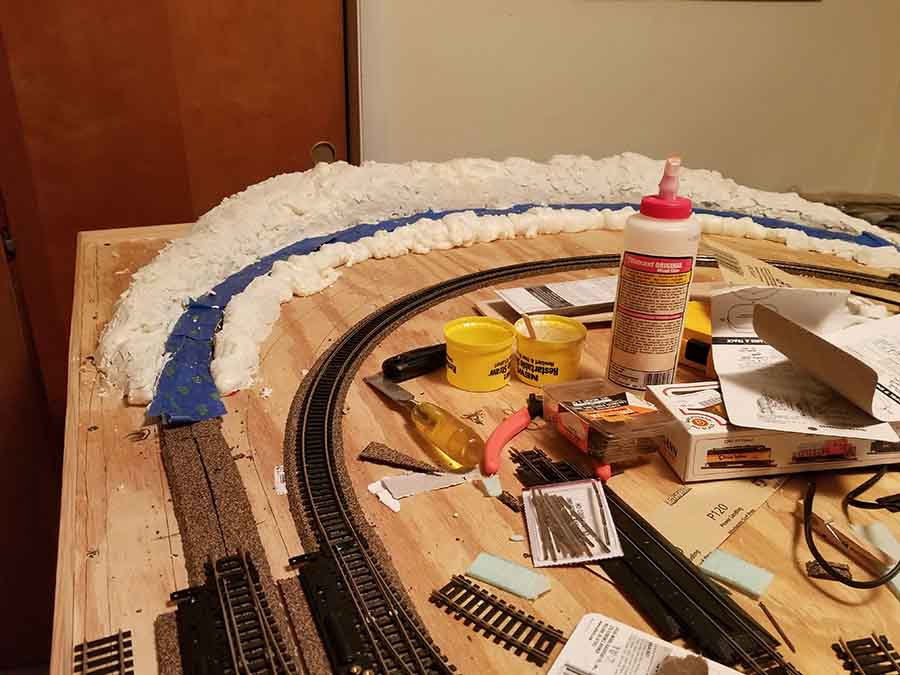
I also wanted to have an incline. So I cut the base for the incline from ¼ in plywood and used blocks cut from 1×3 lumber to support the base. Once in place, I used spray insulation and spackling compound to form the basic rock structure. Then I used black, white, green, and brown all surface water based paint to get the effect I want and added some greenery.
Next I created the initial panel for the switches. I made test runs and then had to decide what scenery to add. About that time I decided to buy the big kahuna package of printable buildings.
I started assembling some buildings and still didn’t have a real plan. I built the diner, the storefront with the Antique Store, Barber Shop, etc., the grain elevator, and the corn storage. Then I tried to figure where to put them on the layout. I built a second storefront to use back-to-back. I will send another email with the next phase of the build.
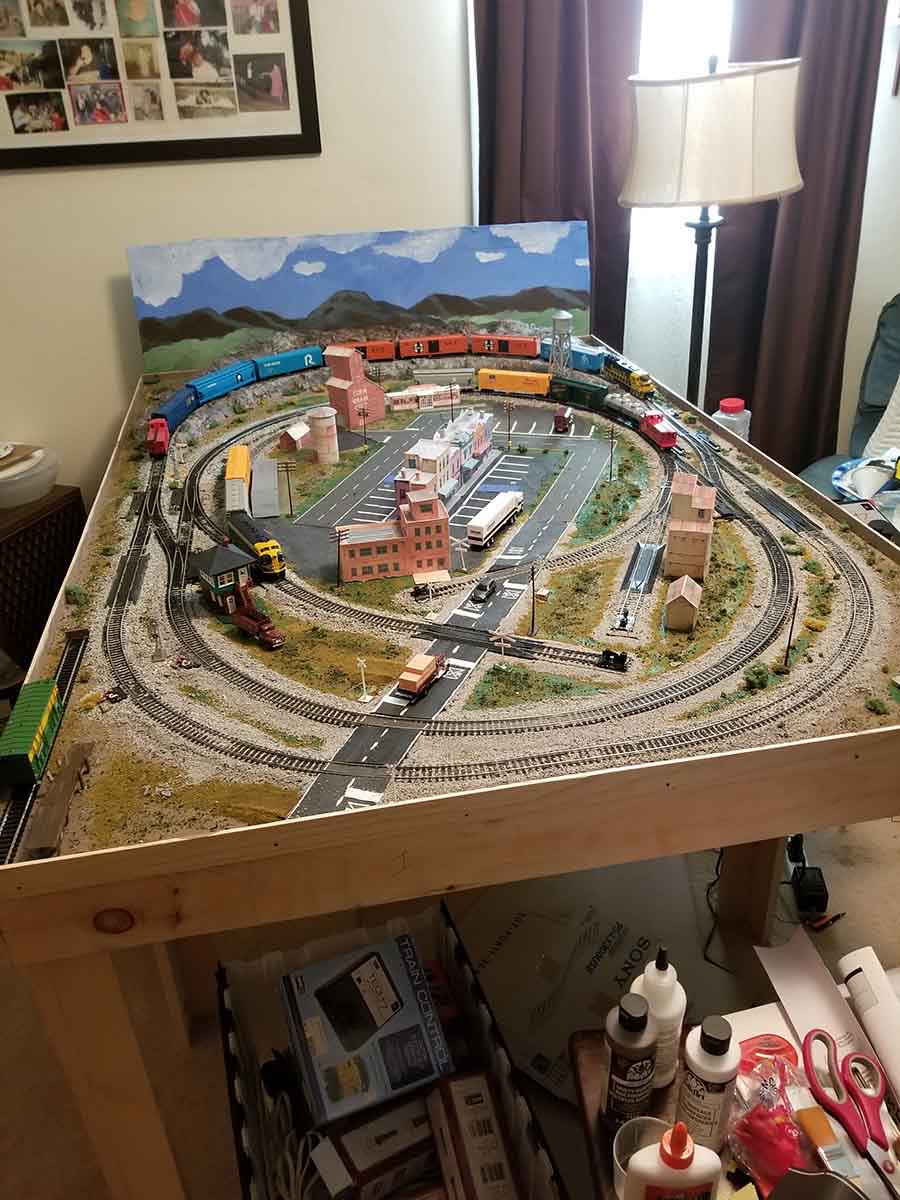
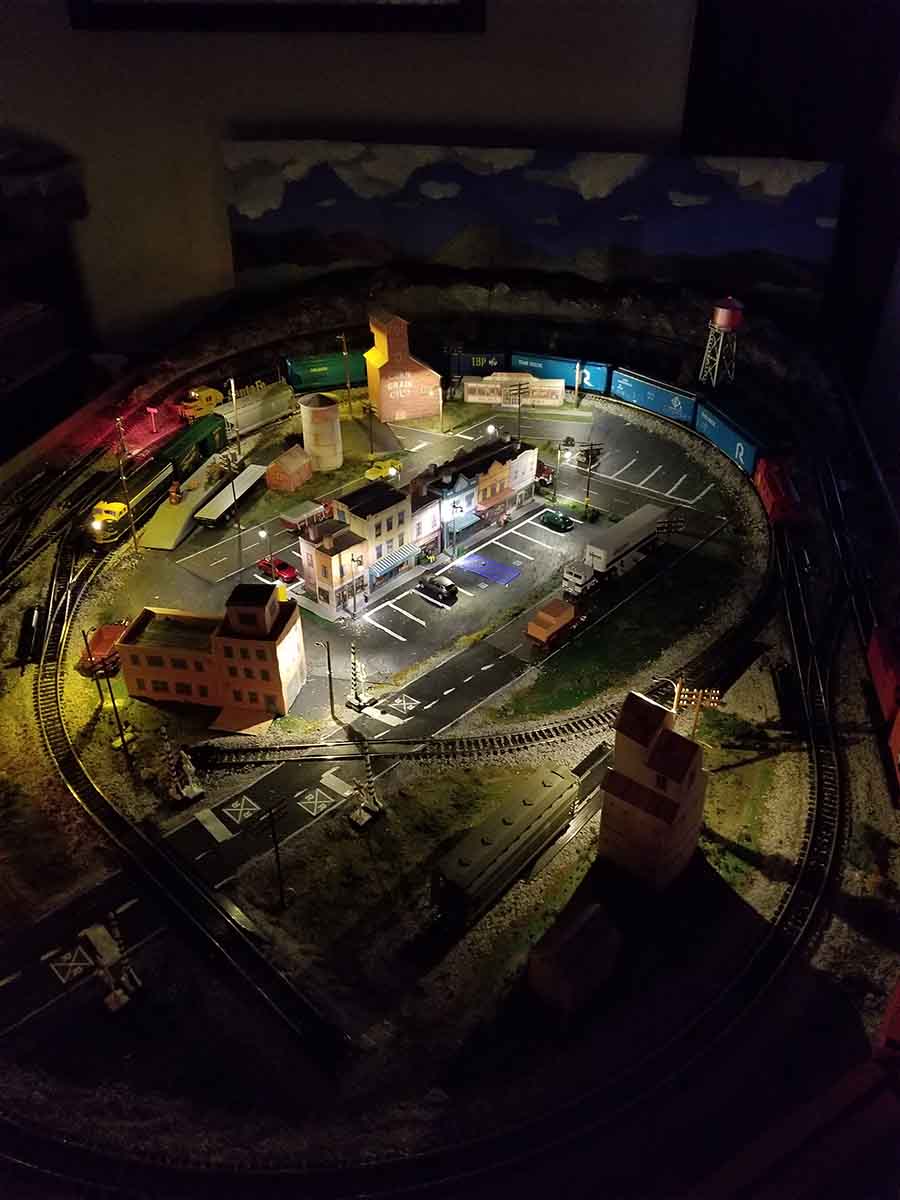
I decided to create a town center in the middle of the layout. I also build the printed factory and an Atlas switch tower. I put the store fronts in the center and started laying out the roadway. After painting the base, ballasting, and adding power poles, I freehand painted a background.
In the next phase I add another locomotive and some lighting.
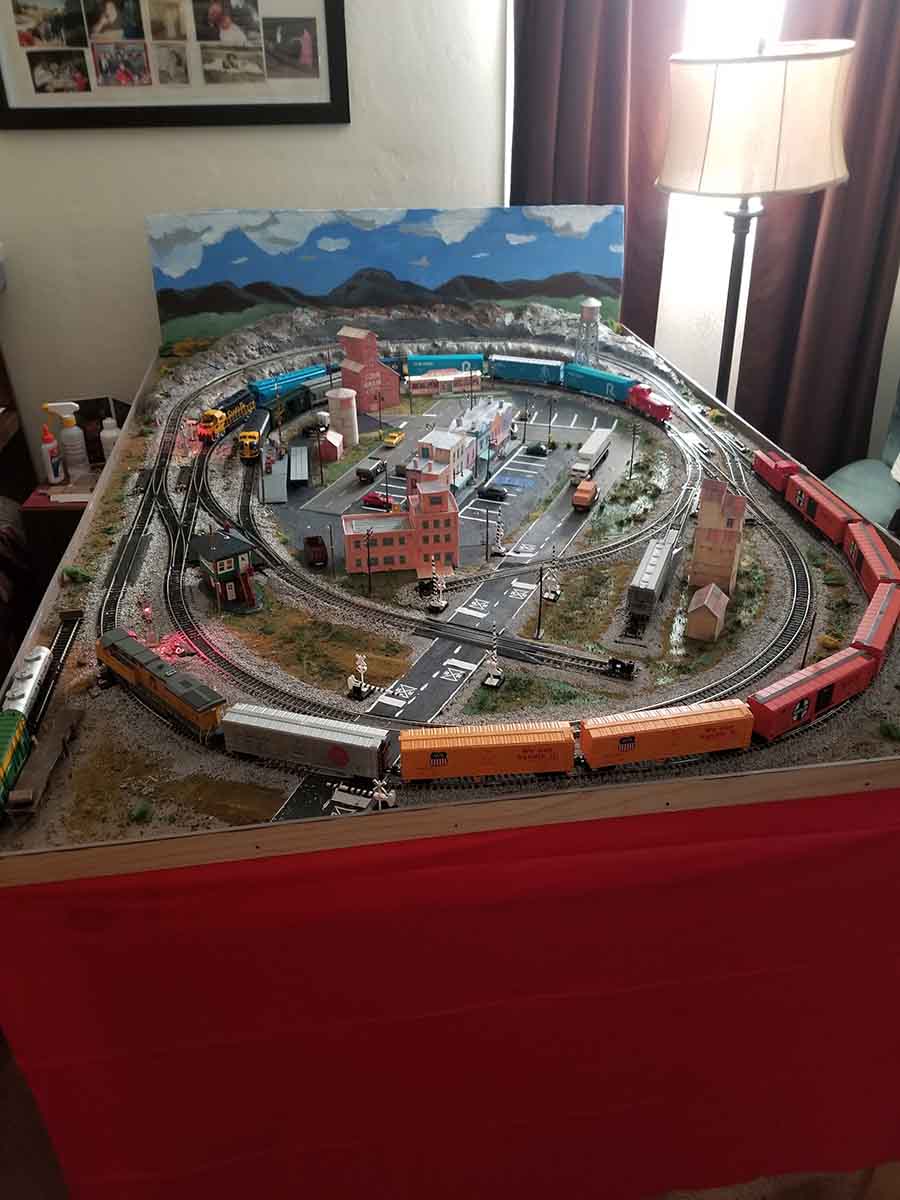
I felt limited in how I could operate so I acquired another DCC locomotive, a Union Pacific GE EVO and some more cars. This allowed me to run two trains and have one loco to fiddle the hoppers and the box car.
My next project was to add some lighting. So I added some Just Plug lights. I placed light with extensions at the switch tower, the two grain buildings, and the loading platform. The other light are standard height.
Continuing on my expansion, I added two sets of flashing crossing signals with two controllers. I will provide pics in the next installment. Since the grade crossings for both ovals are close I installed the flashing signals to cover both ovals at the same time. The only problem with the signaling is that the Walther’s Controllers use light sensors and they don’t work in the dark but I still am satisfied with what I had accomplished.
I enjoyed my 4×6 layout for about a month and then I guess I caught the Dangerous Dave bug and decide to expand my layout.
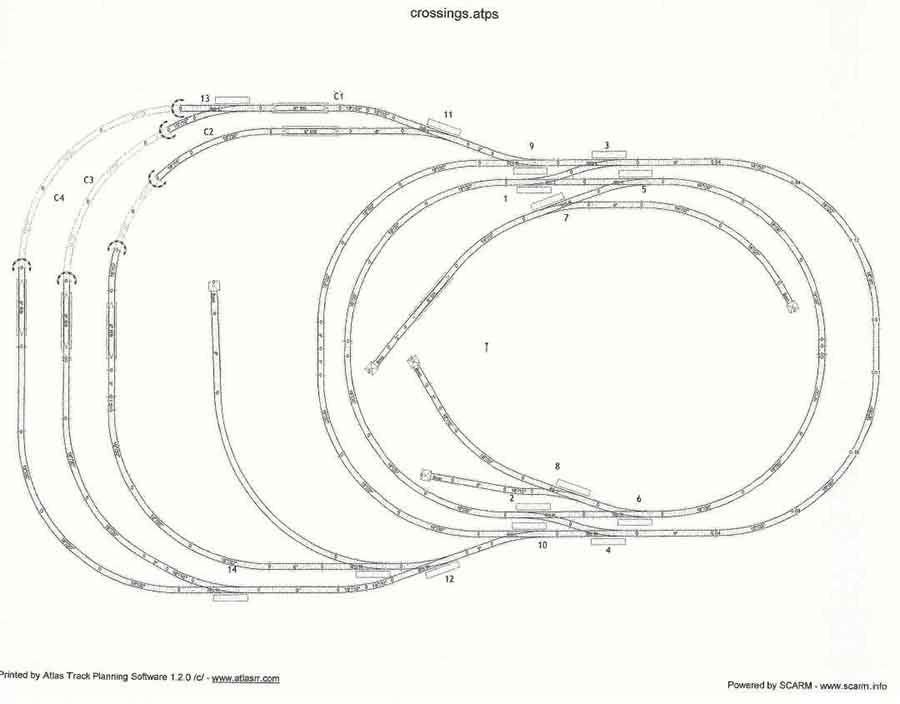
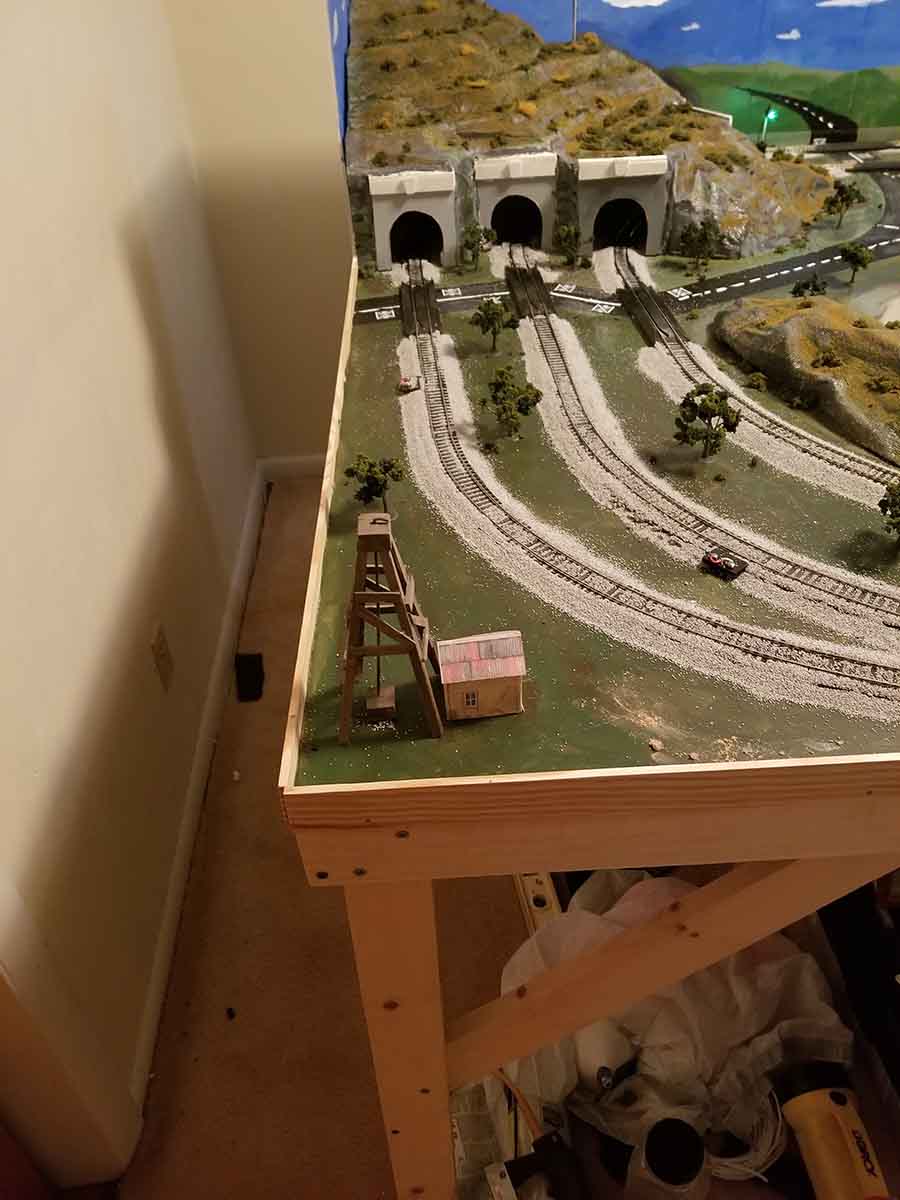
I came up with an expanded track plan and I turned the layout 90 degrees to accommodate the 4×5 addition. In addition to expanded run lengths I wanted to try my hand at tunnels. Note: the C1, C2, C3, C4 indicate controllers for the Cantilever crossing signals that will eventually be added.
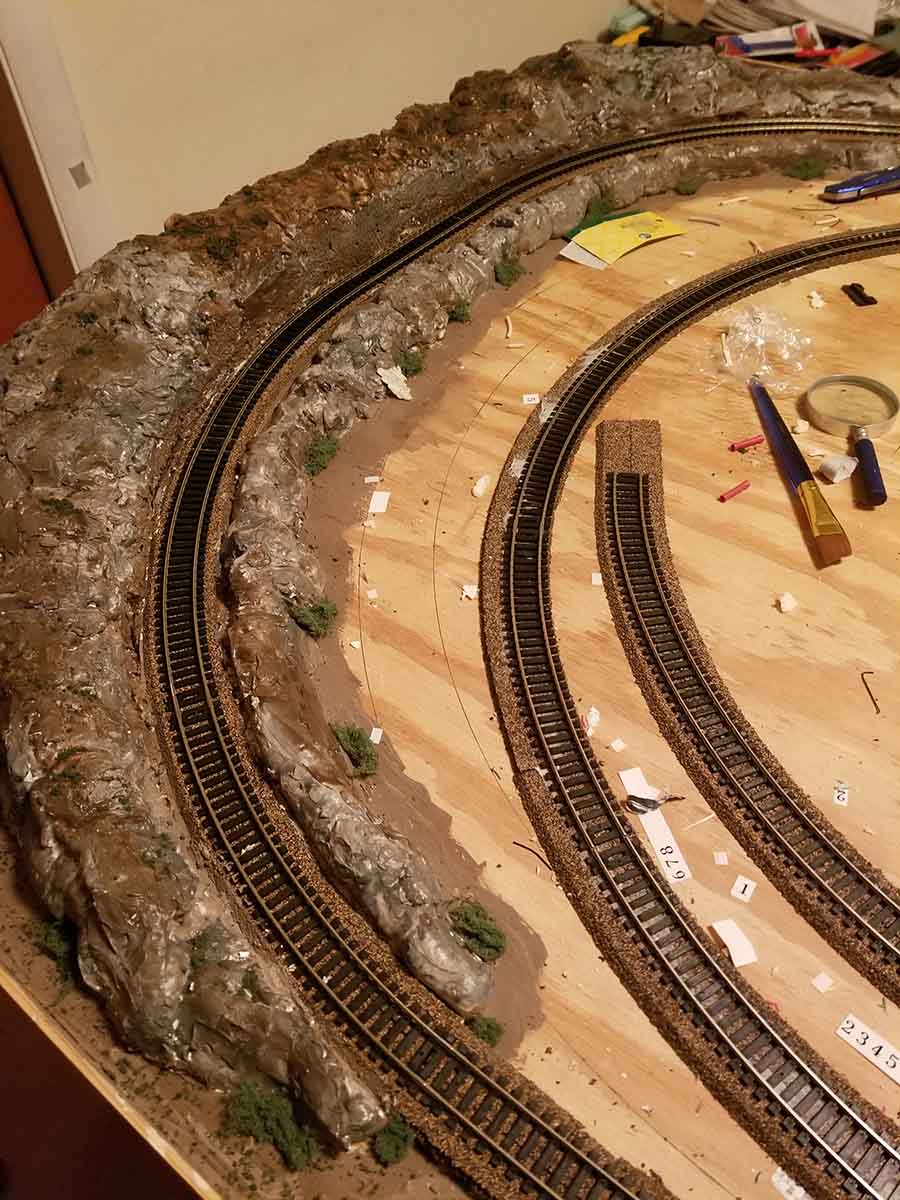
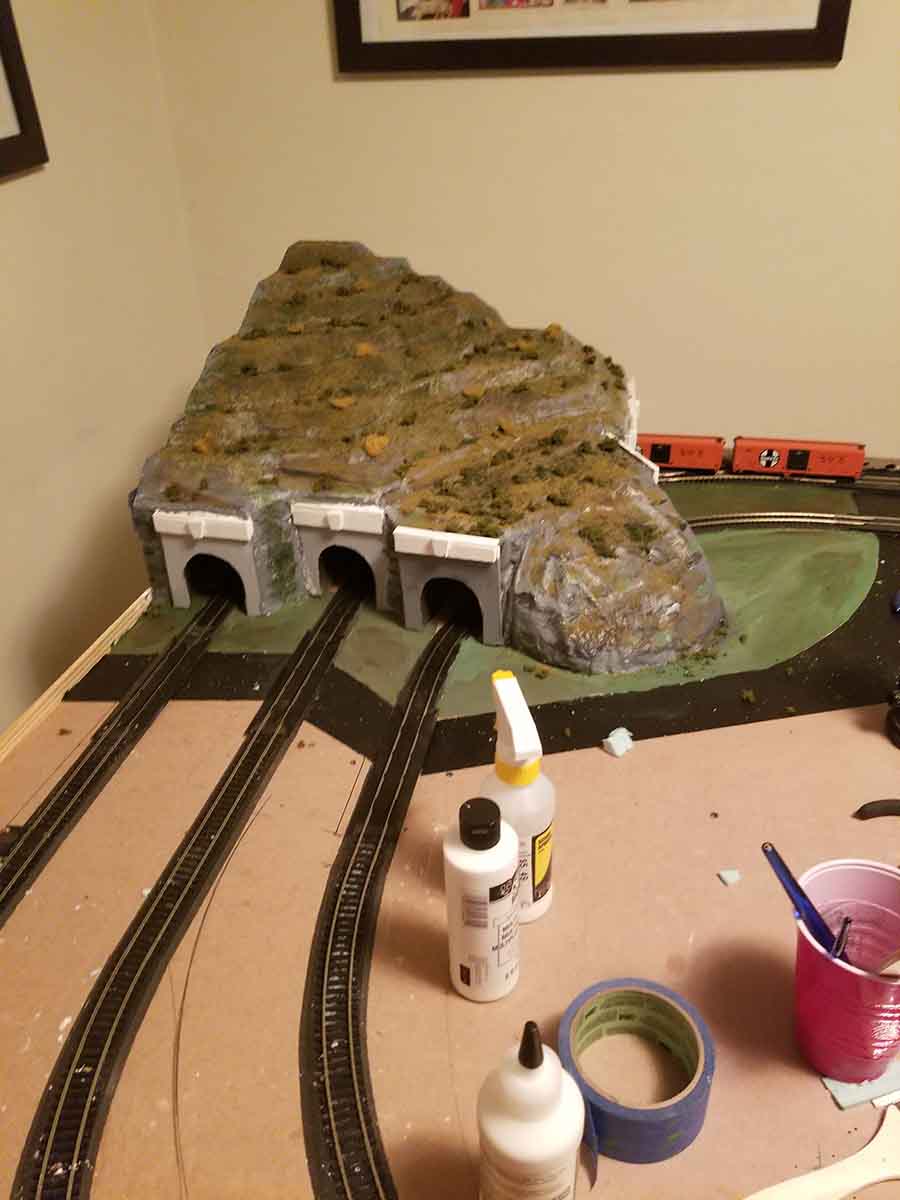
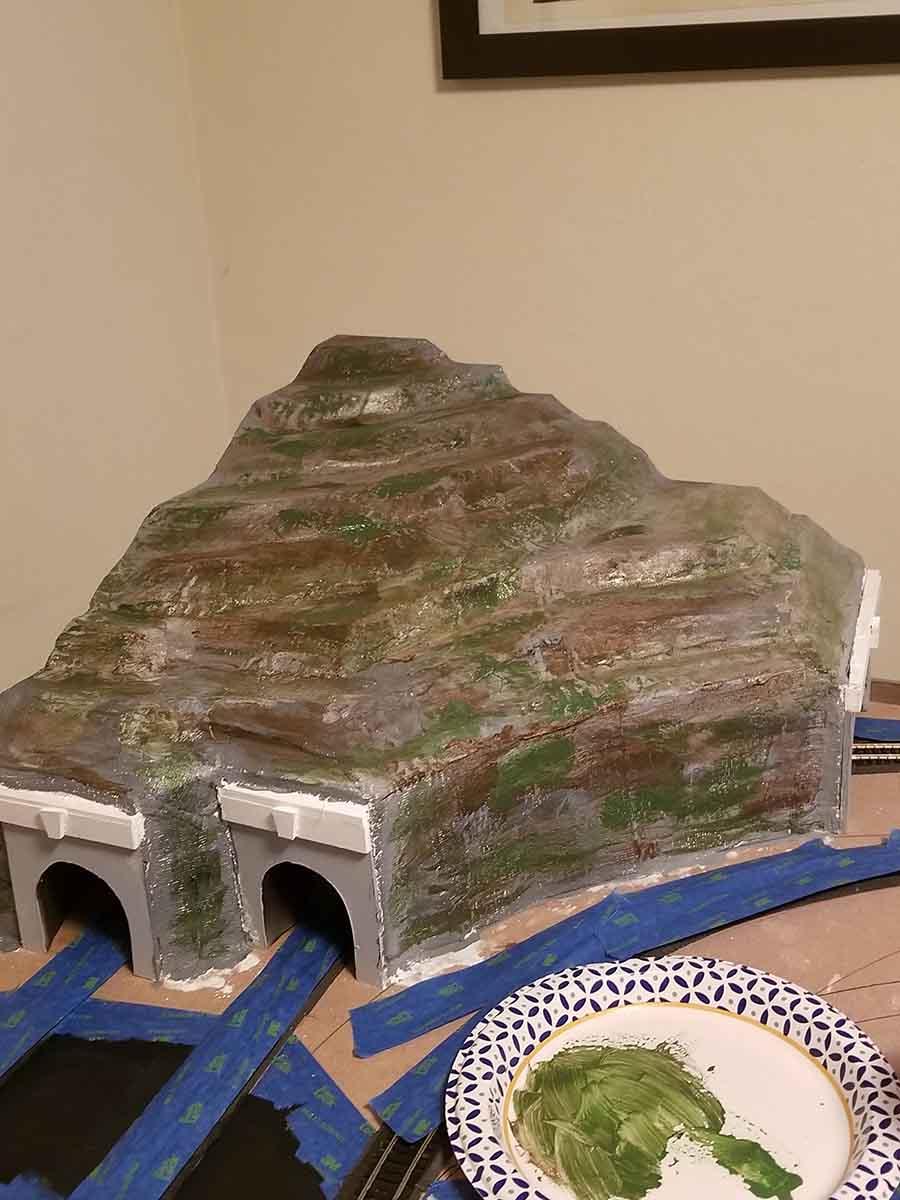
I made some portals from ¼ in plywood and used 2×2 1 in foam to created the mountain. I started with two tunnels but they just didn’t look right so I added a third tunnel. This time used plaster cloth over foam supports for the portion in front of the added tunnel.
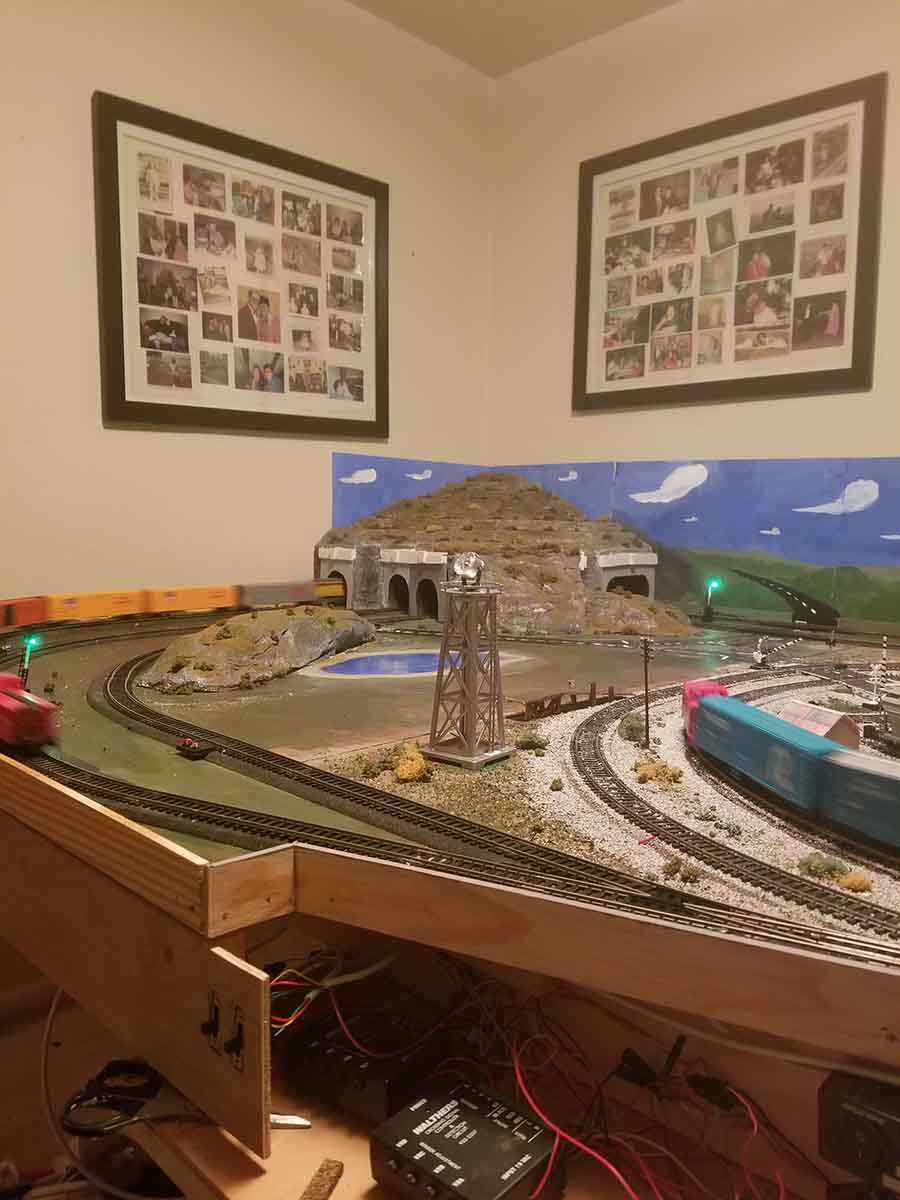
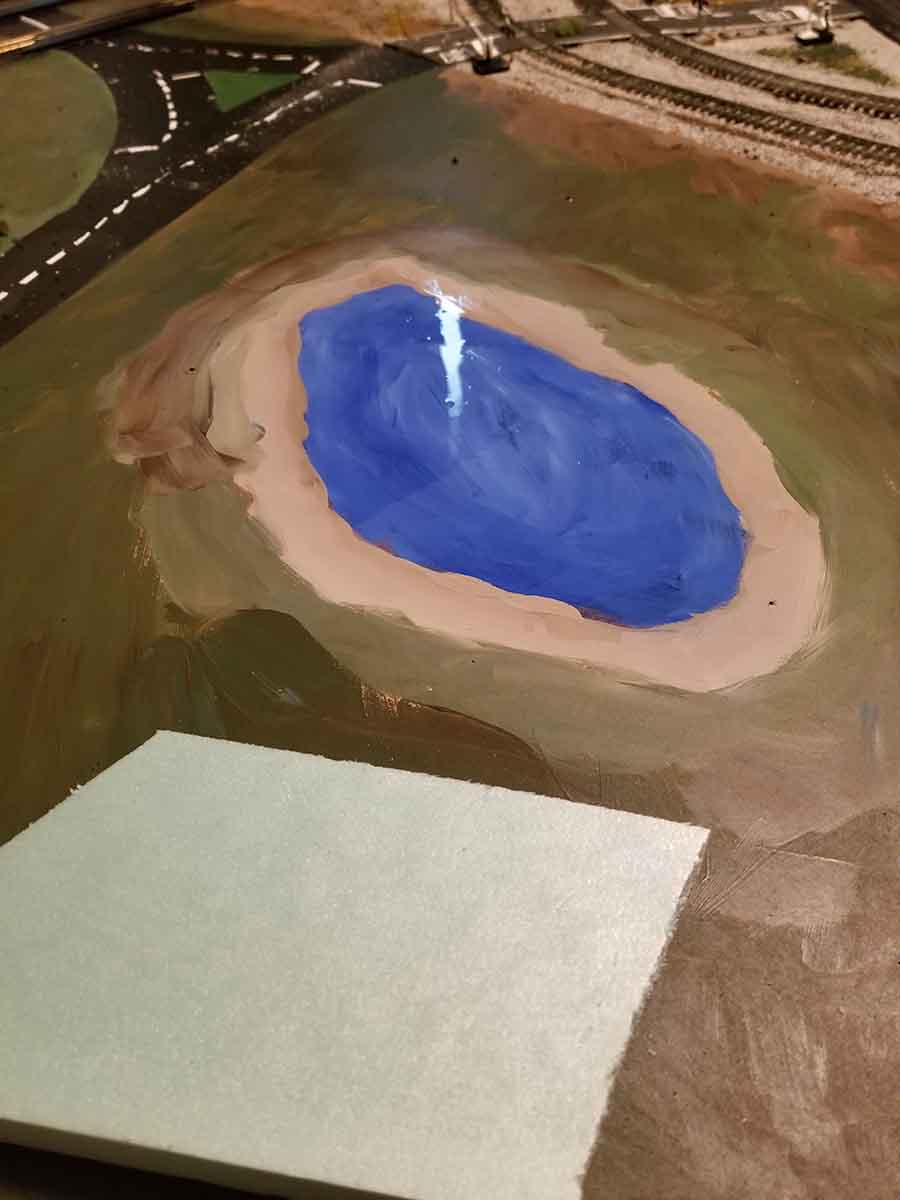
I still didn’t know what scenery I was going to add to the expansion so I decided to try a water feature. I painted the layout with shades of blues with tan around the edge and then used high gloss clear polyurethane in several coats. I am happy with the results. Because the mountain appeared to just stick out of nowhere, I decided to add an outcropping between the water and the inner track.
I still didn’t know what I would put in the rest of the expanded space on the 4×6 layout. I decided to try my hand at scratch building. In my next submission I will provide pics of my attempt at an oil well and a oil pump with storage tanks.
The crude oil well was made with stir stick, balsa, and a piece of hanger. The pump is made of balsa and some hanger wire. The storage tanks are made with empty paper rolls, 1.4 in dowels, balsa, and some fuel line tubing.

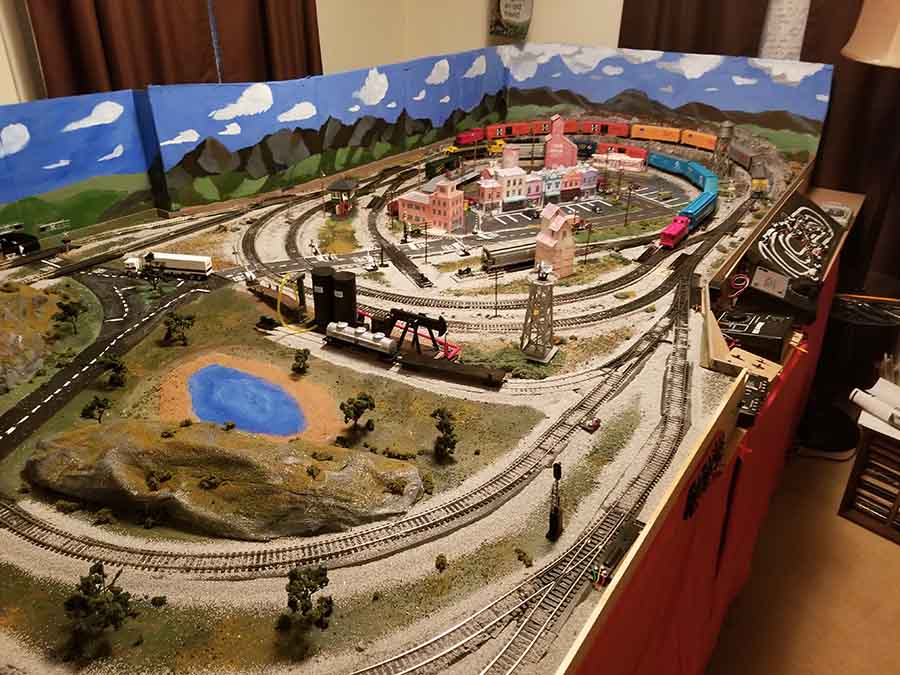
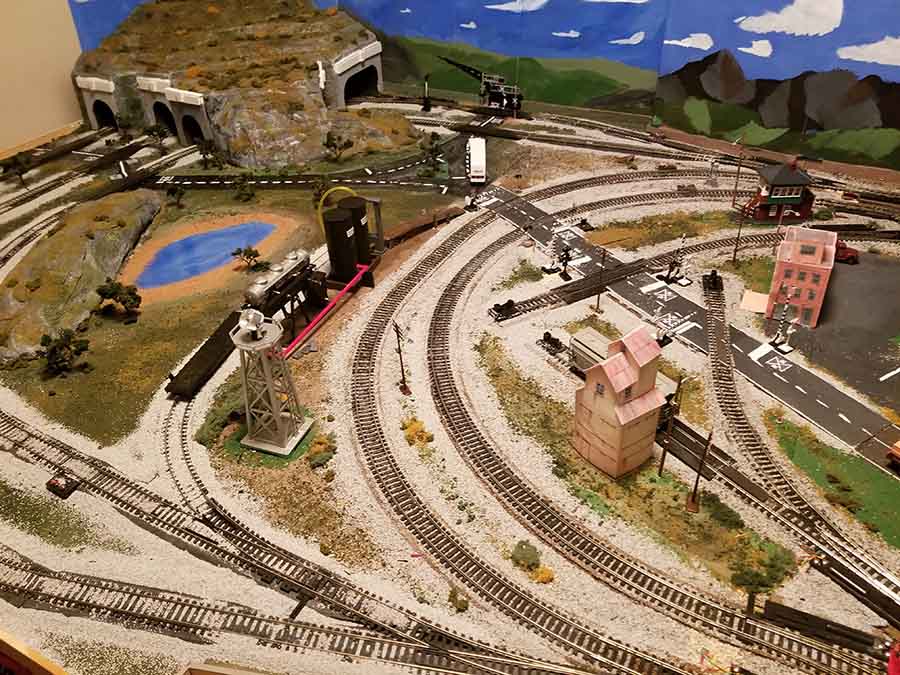
These last two pictures show the status as of now. I expanded the background and that was fun painting from behind which made me paint upside down. You will also notice one set of cantilever crossing signals where the road goes into the background. I still have to get three more controllers and eight cantilever signals to finish.
That is all for now. Not as good as a lot of what gets posted but I am happy with it and enjoy it. I hope it will convince people to start regardless of what skill they think they have or don’t have. The fun is in the doing and trying.
Thanks again for a great site.
Bob, VA USA”
A huge thanks to Bob for sharing his 4×6 layout – a wonderful narrative and great pics too.
Hope you enjoyed it as much as me. it reminded me of Jim’s: 4×6 train layout.
Great to see so many of the printable buildings on the layout too.
And Charlie – a real whizz with Anyrail – has sent in a clearer track plan. If it’s not identical, you can bet it’s very, very near:

You can see more of Charlie’s track plans here.
That’s all for today folks – don’t forget the Beginner’s Guide is here if you want to get going on your layout.
Keep ’em coming.
Best
Al
PS More HO scale train layouts here if that’s your thing.
Need buildings for your layout? Have a look at the Silly Discount bundle.

You have really nice layout. I wish I had room to build one. I have some steam
locomotives and about 70 some cars.
Web
It looks like you are having fun adding more track and scenery keep up the great work guy ! and have fun !
Be well and stay safe Sir !
George
Need some figures in on the layout. Like the look of the printable buildings. Great satisfaction when it all comes together!
Nice job. More greenery would be good and the telephone pole is facing the wrong direction. I came up with a good idea for planning a layout rather than struggling to learn the track layout software. I took a printer copy of all my tracks and switches and then copied them multiple times (as needed). I then laid them out on the house floor to see how it would look before building the supporting structure in the shed. If I am still alive by the time I finish I will send photo(s).
Nice 1, I dont have much room these days, making 1800×1200 layout, we have structural Eco ply just AU$34 is 2400x1200x7, found an office desk in the street will mount on hinges enabling wiring as I cant get under any more, will do some pics. I have made Arduino DCC++ now need track laid. I needed something to emanate, thanks
Very nice at the layout in expanded sage. I had to chuckle at the passing lanes at grade crossings. Could have some interesting results! 🙂
Thanks for the comments. I do have a few people in front of the shops and there is a work crew with forklift I have added to the loading platform. I didn’t bother with no-passing lanes at the crossings because is seems around here people ignore them anyway. Once I get all of my cantilevers installed then I will work on more greenery and adding more figures but they will have to be ones I don’t have to paint.
Passing lanes at RR grade crossings were for tank trucks to pull over for their required stop and then accelerate back into traffic.
Glad to see the bug is still out there and continues to infect people!
I have some equipment stashed, but the life of a full time RVer doesn’t include layouts, no matter what scale you favor.
Hello, love the layout would you be willing to send me some details?
From a fellow Virginian, that is very nicely done.
I have a fairly large layout in our basement and I work on it as much as I can.
I get some great ideas off of this site.
GOOD JOB.
Loved the progress pictures It was cool watching it develop and WOO HOO a track plan included
I really liked this layout. His situation is very similar to my experience and layout.
Some day I will submit my layout for review.
Very nice…You are very busy….lol….
Great looking layout. Looks to me like you’re having a lot of fun with it.
One solution to your problem of getting the flashing signals to work at the grade crossing because of low light, would be to install a couple of street lights near the walthers light sensors. They should provide enough light to allow them to work.
Love the layout. I’d love to duplicate it for my grandkids. Can you send me a copy of it?
looking good
Hi Bob,
Thank you for a great presentation of a superb layout. If the street light over the walthers sensors doesn’t work you could try setting up IR emitters and sensors (a couple of led sized components) so as the passing train will break a beam across the track and trigger the crossing lights that way. I liked the Oil Pump – very unusual. Keep up the good work.
All the best from across the pond,
Ant. UK
Very nicely documented layout. Looking forward to seeing it progress.
Mal
Wales.
I really like the reflection you created on the water. And, the overall look of the mountain texture. I am planning to use large wood cedar mulch on a slight angle to represent the carving of the rock strata.
great layout bob
keep em runnin fellas
Nicely done. I’ll bet it continues to grow.
50 years ago, faced with space for only a 4×6 foot layout, I made the decision to limit myself to the then new N-scale format. It allowed me so much more than HO would have in my restricted space. A half century later, it remains my only recommendation to all space-restricted model railroaders. I still collect my favorite “O” and “HO” scale models for case displays, but for me, twice the scale-space has always resulted in twice the model railroading satisfaction.
it looks like you have had some great times building this layout great pictures thanks for sharing.
Great job! Your lighting is excellent. I also like the out loop – inner loop. Looking forward to more.
hey Bob, your layout is a job well done. I liked a lot your ideas and plan. I maybe doing some changes on my layout. Your layout looks great. Keep up the good work.
Great looking layout and fantastic narrative. You got a lot done in a short amount of time. That is impressive.
Well done Bob – a great job and of course you’re enjoying yourself – that’s what it’s all about.
Regards to all.
Brian, Wokingham, UK
Well Bob it looks like you got the bug. You will never be done with it. changing and adding more. what you have done so far looks grate. You will never stop thinking of things to do. Have Fun with it.
Oldtaz
I love the layout but where is the staging yard?
Nice Layout. Glad to see you stuck with Santa Fe!
great little layout, hope to start a 4′ by 6′ layout real. just ran into some money, so my excuses are gone. Says my wife any way.
It’s all good this A.M. Today’s showings are with real world, not the exceptional or extreme. Mountain not bad with imagination that it is way huger and takes up entire corner/backdrop. Blue painted lake… so lt worked in the 50’s? Sprinkle on those artificial mica snowflakes with paint wet… instant iced over pond. Most RR’s need a robust overnight snow-storm. Did it several times 1950’s, different degrees with my “O”. Hell of a job vacuuming up for Spring.
Rich
Bob
I really like your layout and I hope you believe in the theory that a layout is never done so we can see more of your efforts.
Big Al
You’re doing 2 a day now. Sucker for punishment are ya.
Bless you. 😊👍
Great layout Bob, looks really nice
very nice layout.