Bob’s been in touch with his small N scale layout:
“Hi Al!
Thanks for all the work you put into this worldwide blog for us model railroaders! There are sure plenty of great tips for us all!
My love of trains started at about 4. My dad bought me an American Flyer and a few accessories.
Trains were our time together for me to learn construction and electrical skills. We set it up around the tree at Christmas, then eventually the layout grew to fill the 5×9 ping-pong table.
For some reason (not enough accessories perhaps?), that was soon replaced by Lionel, and it grew to fill the ping-pong table and a 3×4 piece of wood that was supposed to be a basketball backboard.
I had that train until my teen years, when we started on an HO layout, first a 4×8, then adding a 2×12 leg to form an L, quite the expansive layout (plenty of stuff to work on). Even had a brass loco, don’t recall which model, but it sure pulled plenty of cars!
So then I got married, and when mom and dad moved from Michigan, where I grew up, to California, I was asked if I wanted any of the trains, both Lionel (in boxes) and the HO layout.
Well, I was in an apartment, nowhere to put the stuff, so without thinking longterm, said No. Big mistake of course! So no trains for 4 years. Then wife and I bought a condo, it had a basement. So I asked the ‘older’ men I worked with if they had any train stuff.
Oh boy, I started over with HO again, built my dreamed-of layout Gizmo Gulch by Jack Mamula in the November 15, 1951 issue of HO Model Trains. I reduced the size slightly from his layout, but it was still 6×10, table built in sections so I could take with when we moved.
I avoided Norm’s issues since even the plywood top and landscaping was buiIt with a small space for separating.
I had that layout from 1974 until we moved to our retirement home in 2011(no basement or spare room for that size). So that layout was dismantled, all the buildings and trains given to my son, who has an HO packed away from when he was young.
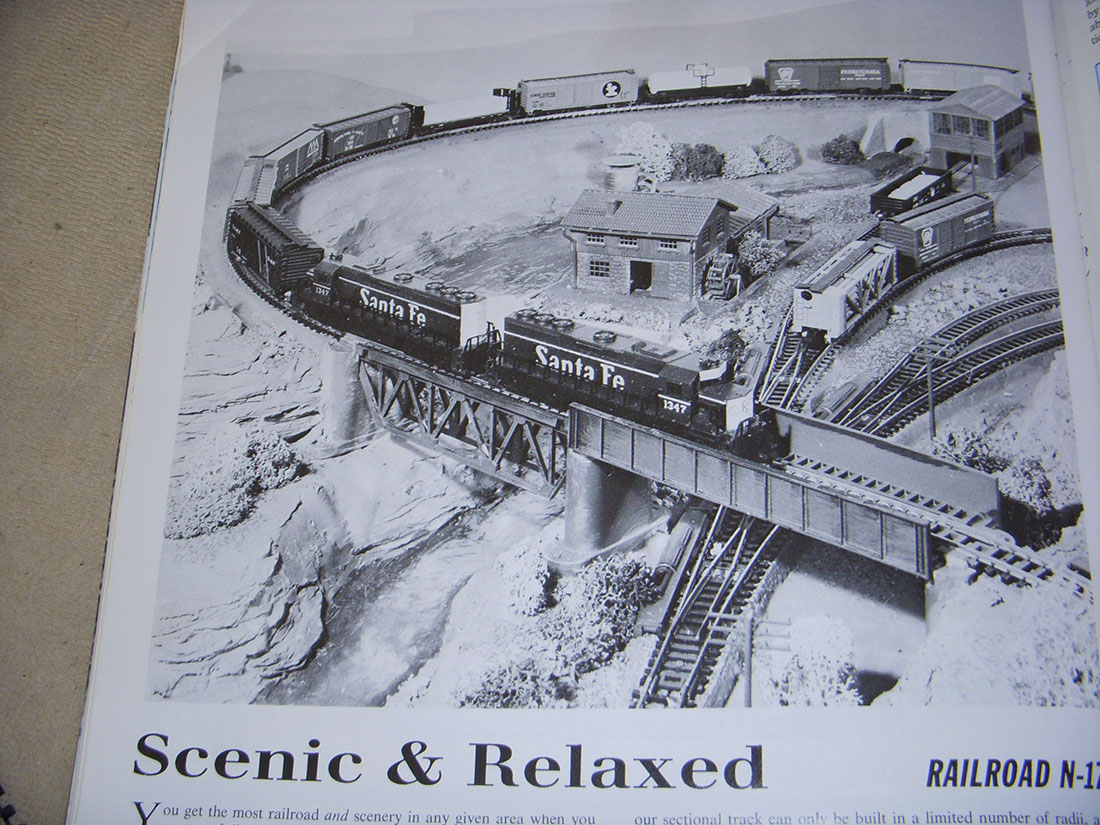
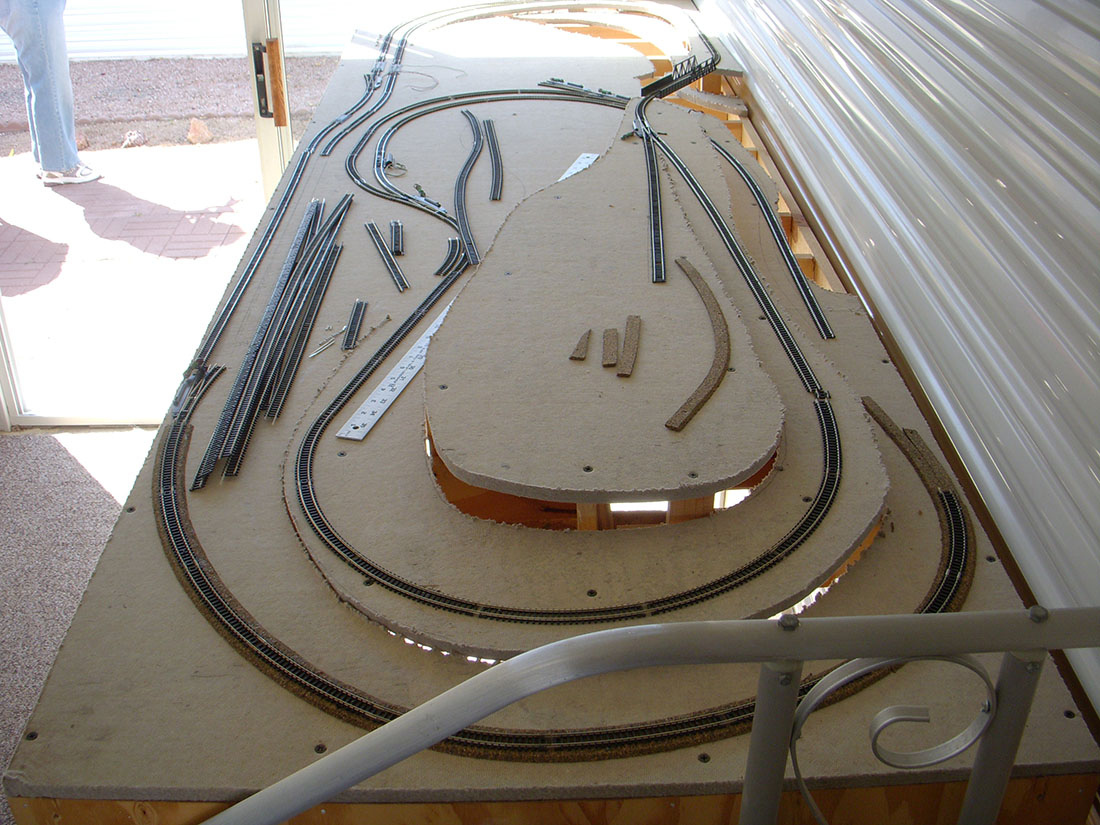
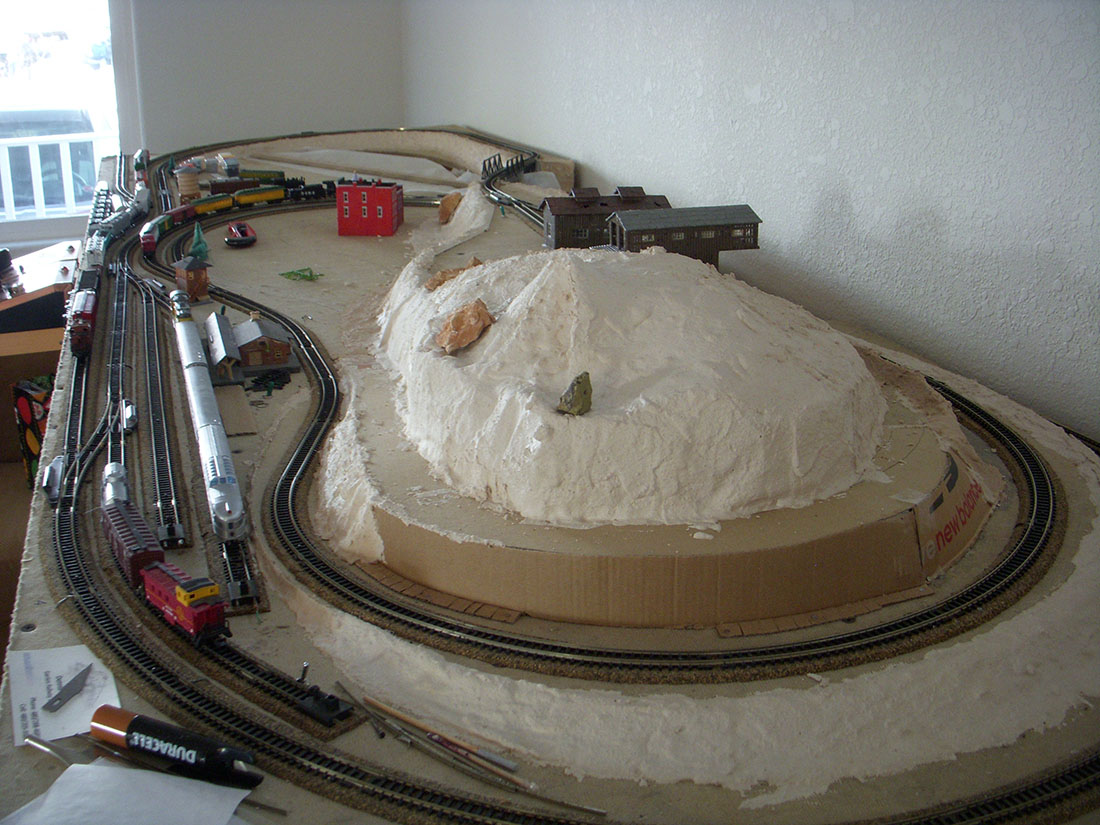
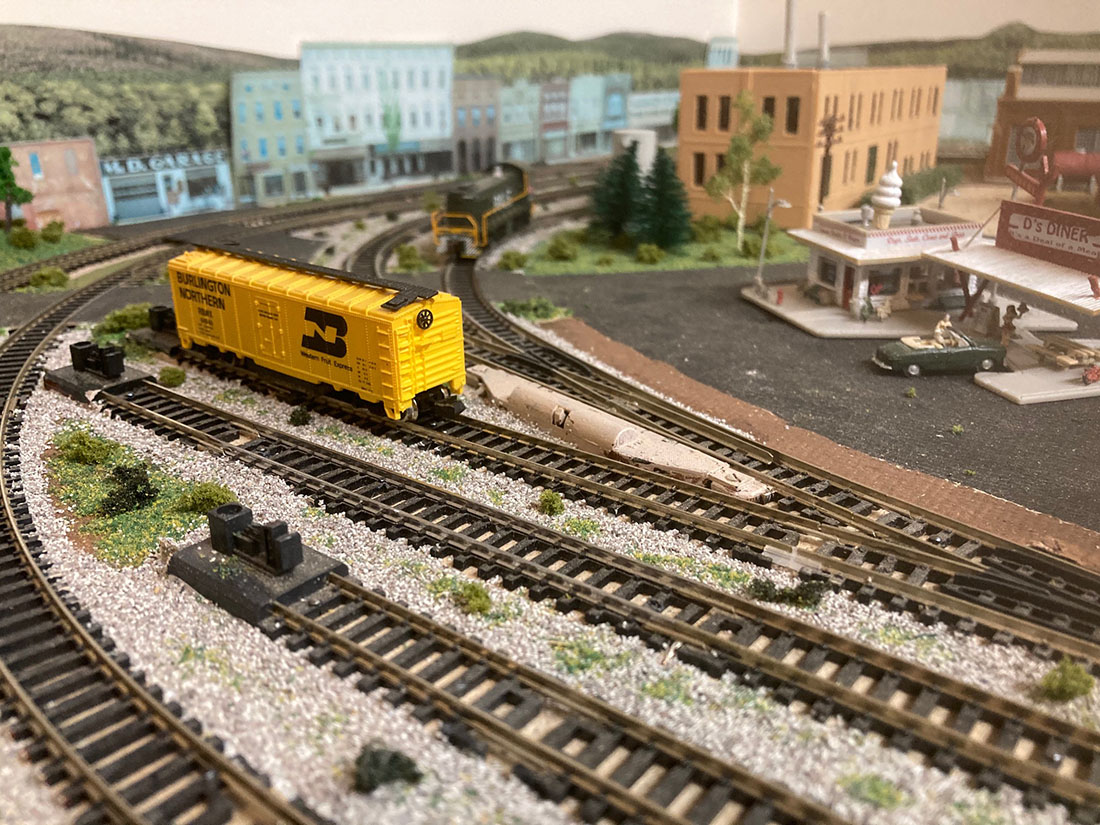
Meanwhile I had started an N scale in AZ where we winter, a reversed version of Scenic and Relaxed in Atlas Nine N Scale Model RR’s, and had a 31″x 8ft table, top is Homasote, and had plenty of stuff left over.
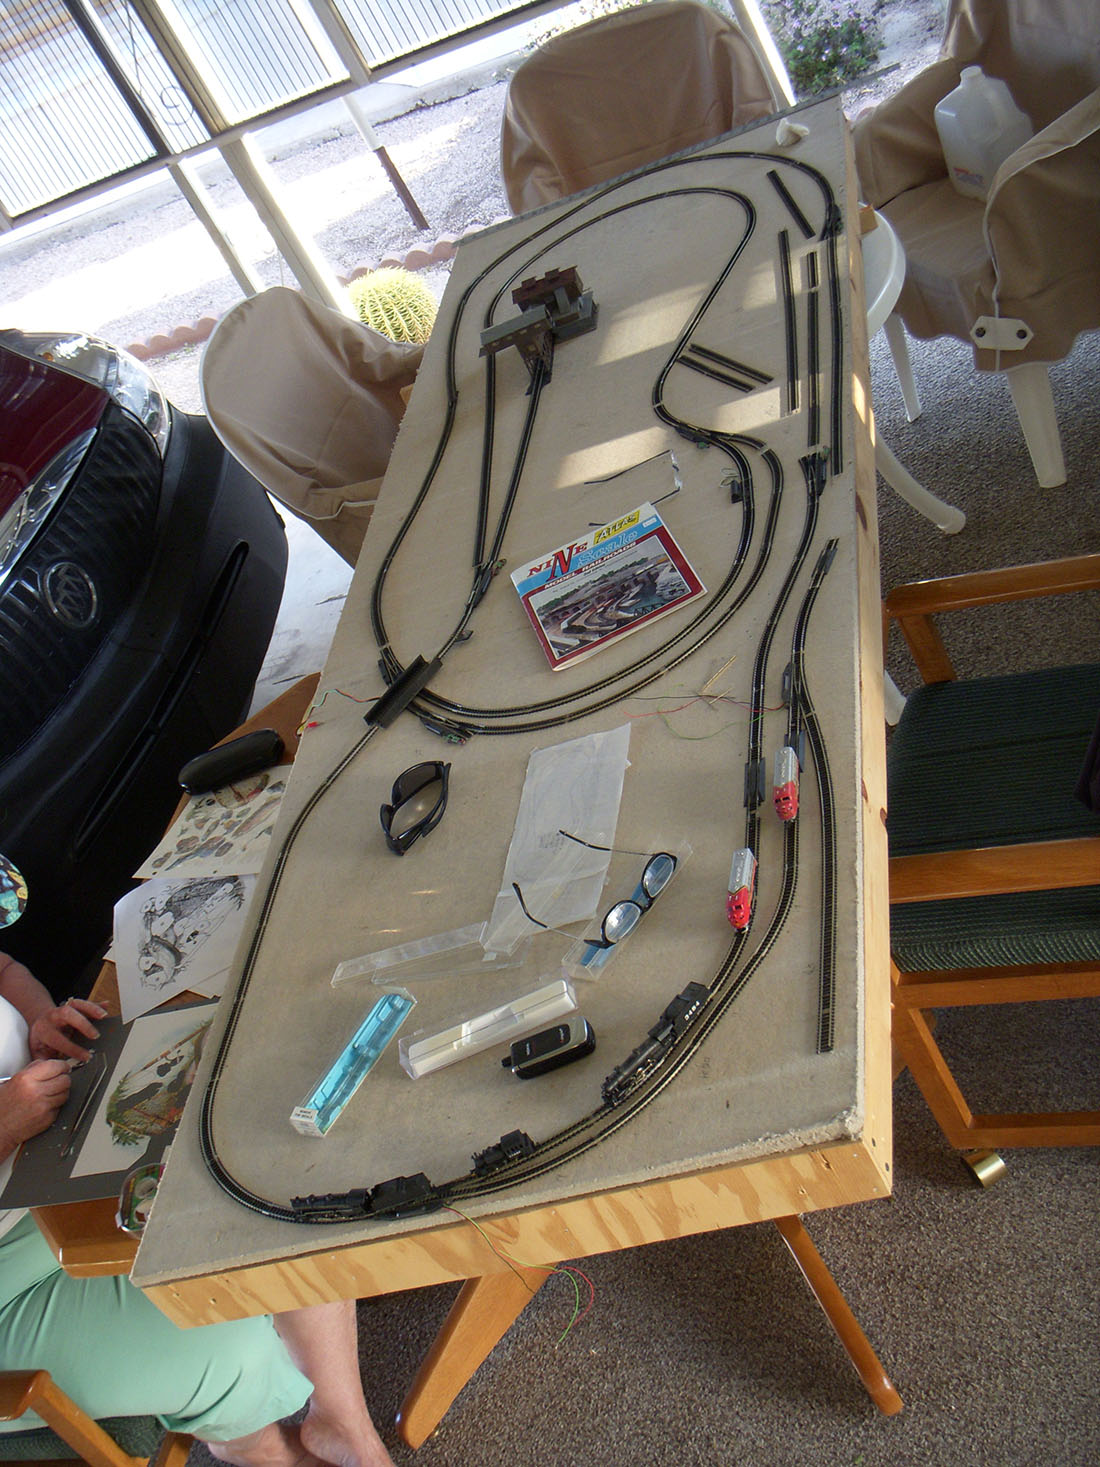
So I brought the leftovers to MI and also started a 34″x48″ small table(leftover Homasote from AZ) in the garage (my basement!), but still had room for two cars in the garage, a requirement!
That RR is based on a small N scale layout I found on the Web. Well, the builder in our community had dumpsters of good stuff, wood molding, blue foam, etc. that I was collecting, and I had an idea.
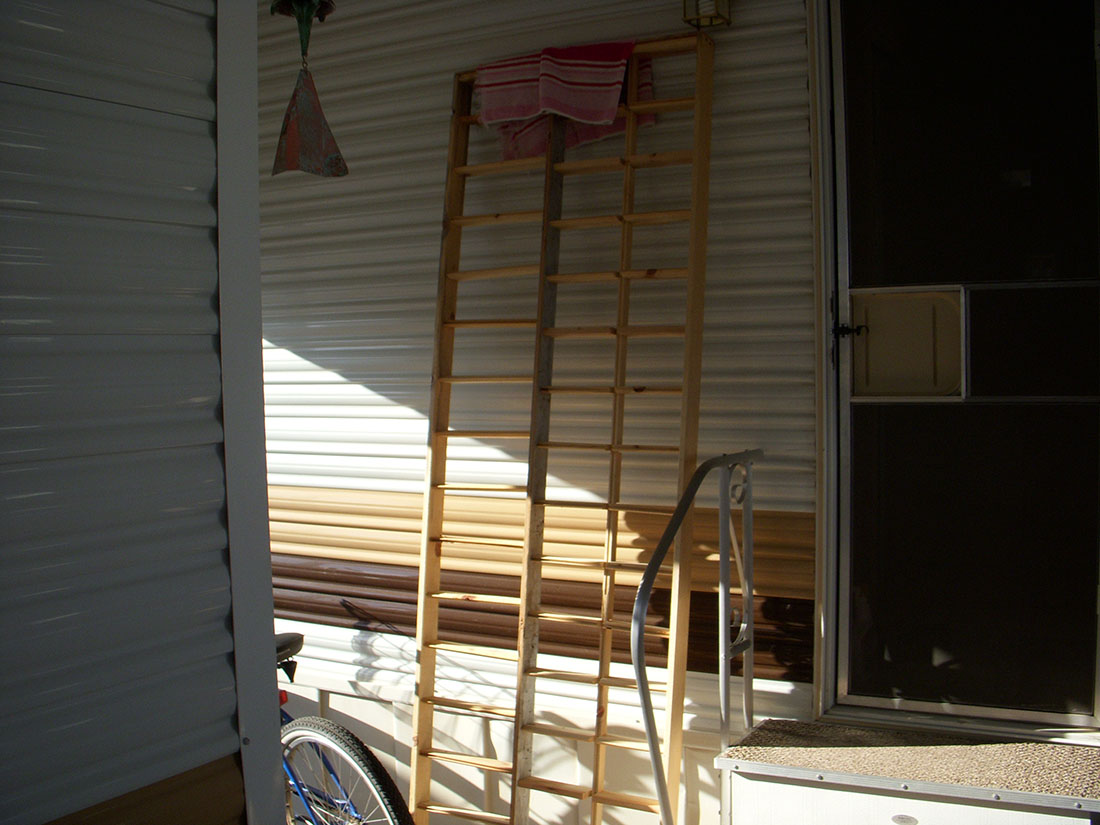
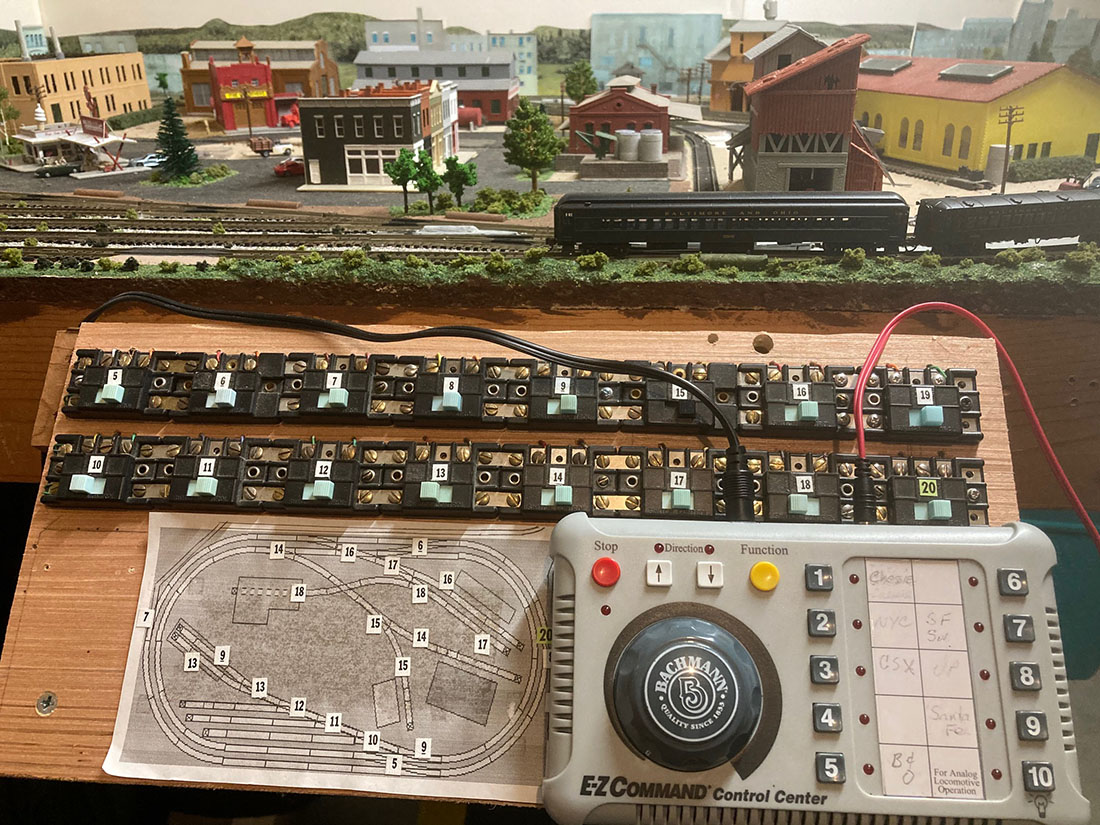
Currently, the little table now has a 10 inch wide shelf extension from the front(back?) of the garage, along the wall to the garage door (15ft or so), with a 24×24 piece at the end to allow a down and back loop with a couple of sidings.
Both cars still fit in the garage since I made sure that the shelf and wide end of the table by the garage door is high enough so the car’s sideview mirror goes under the table. IKEA angle brackets support the shelf and end piece. Where there’s a will, there’s space!
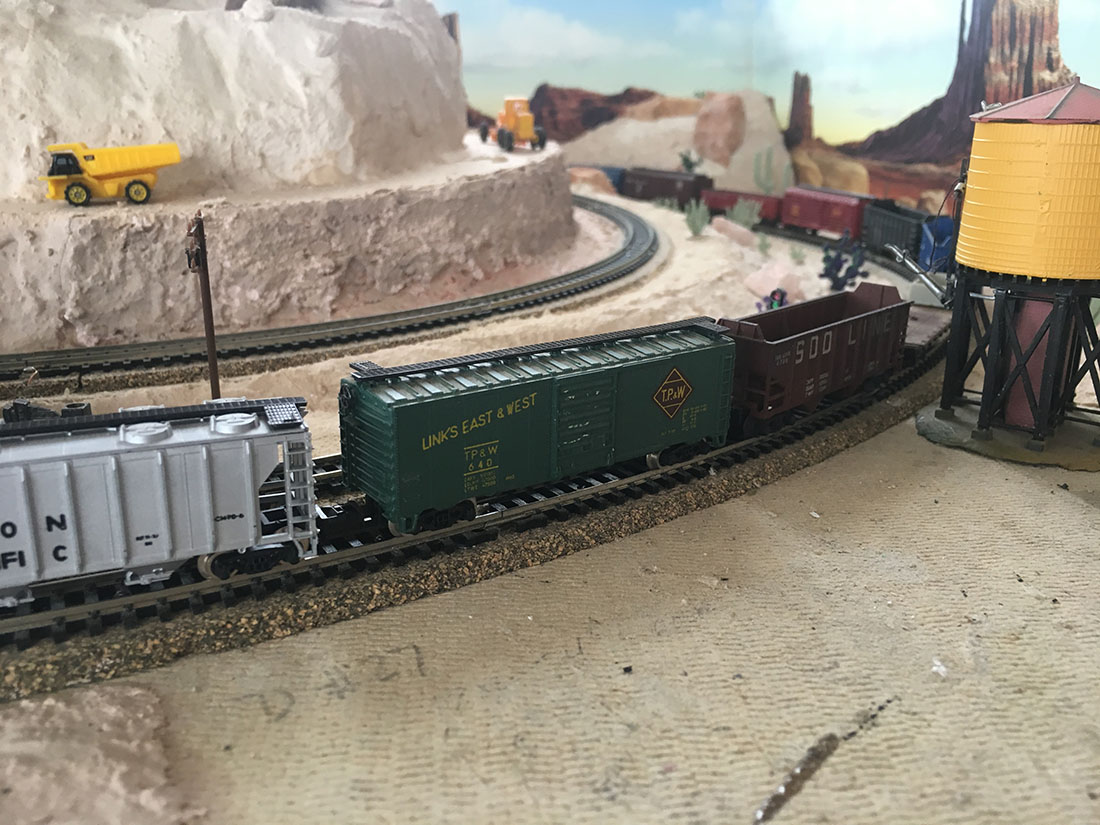
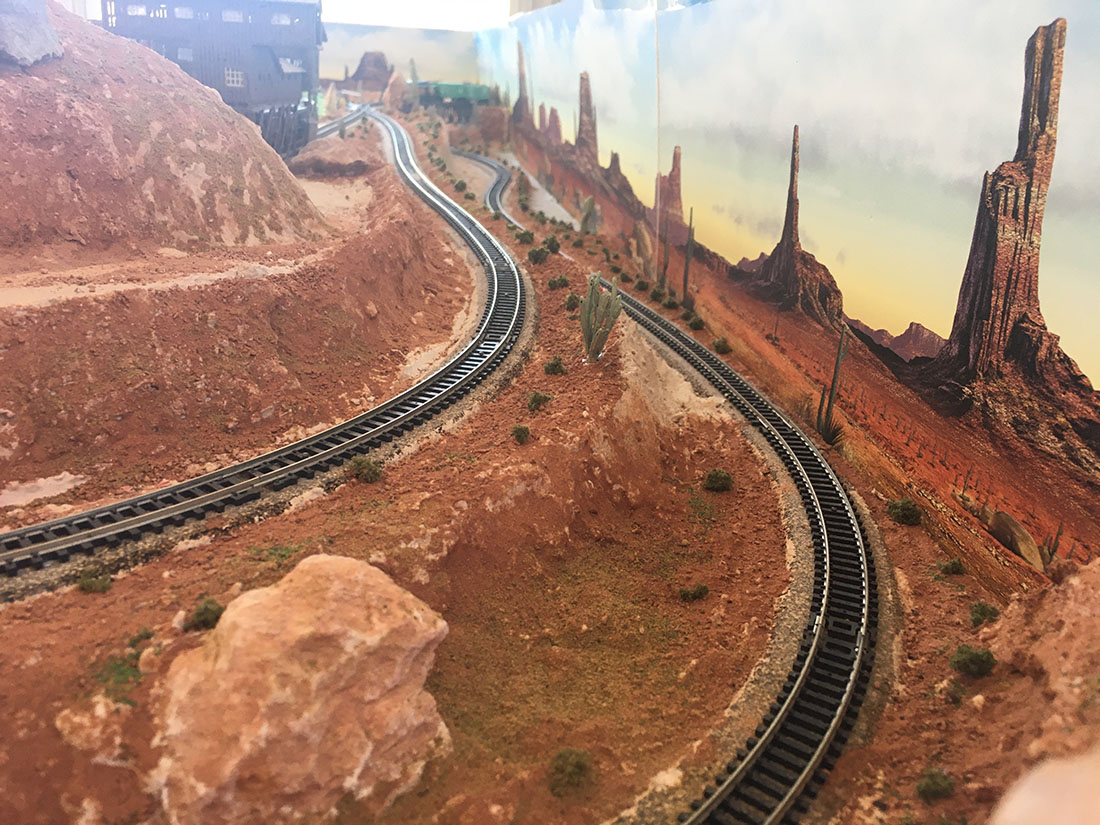
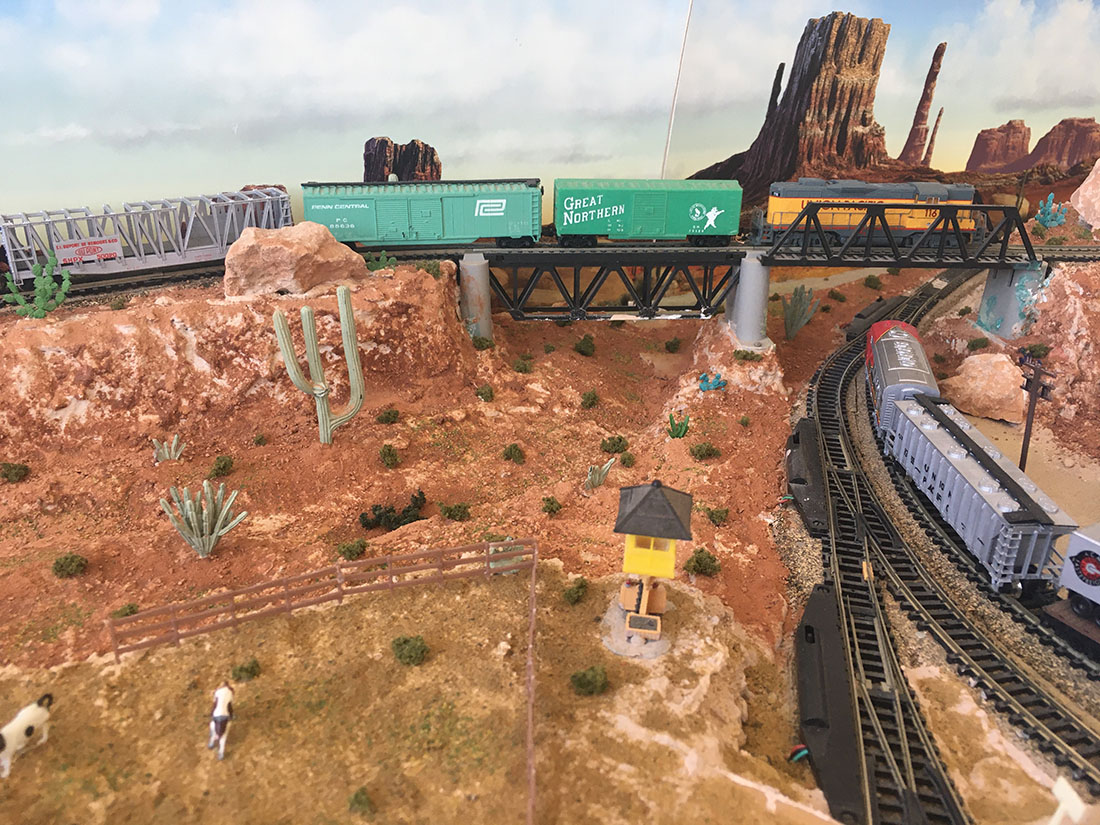
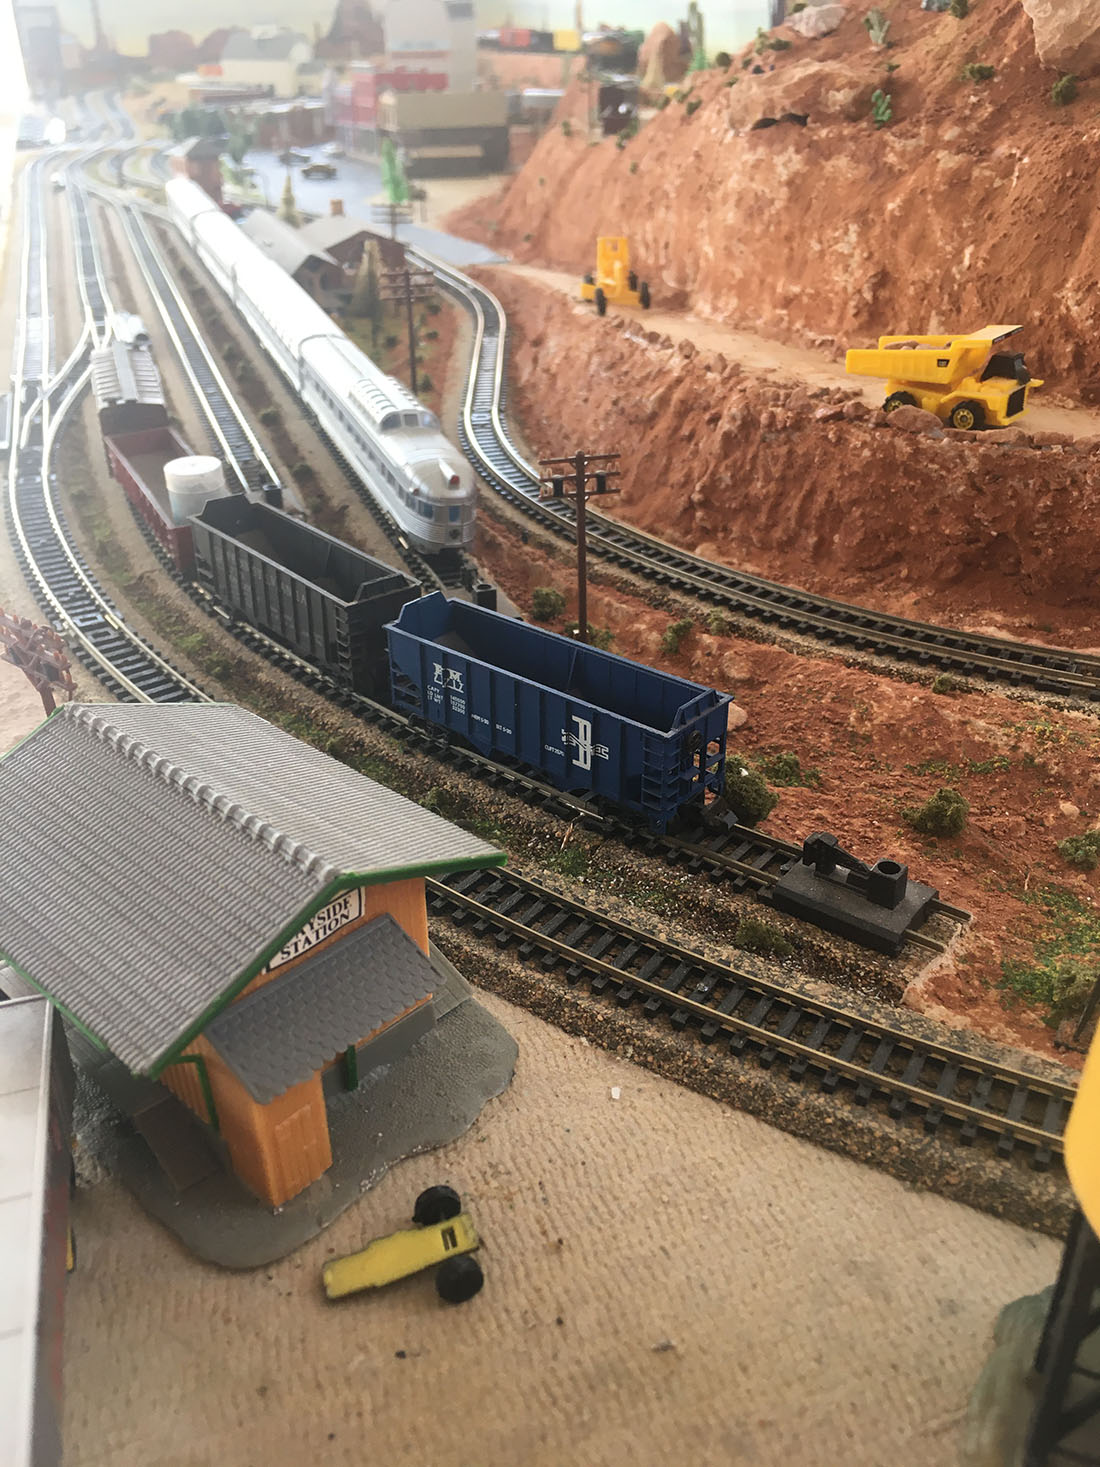
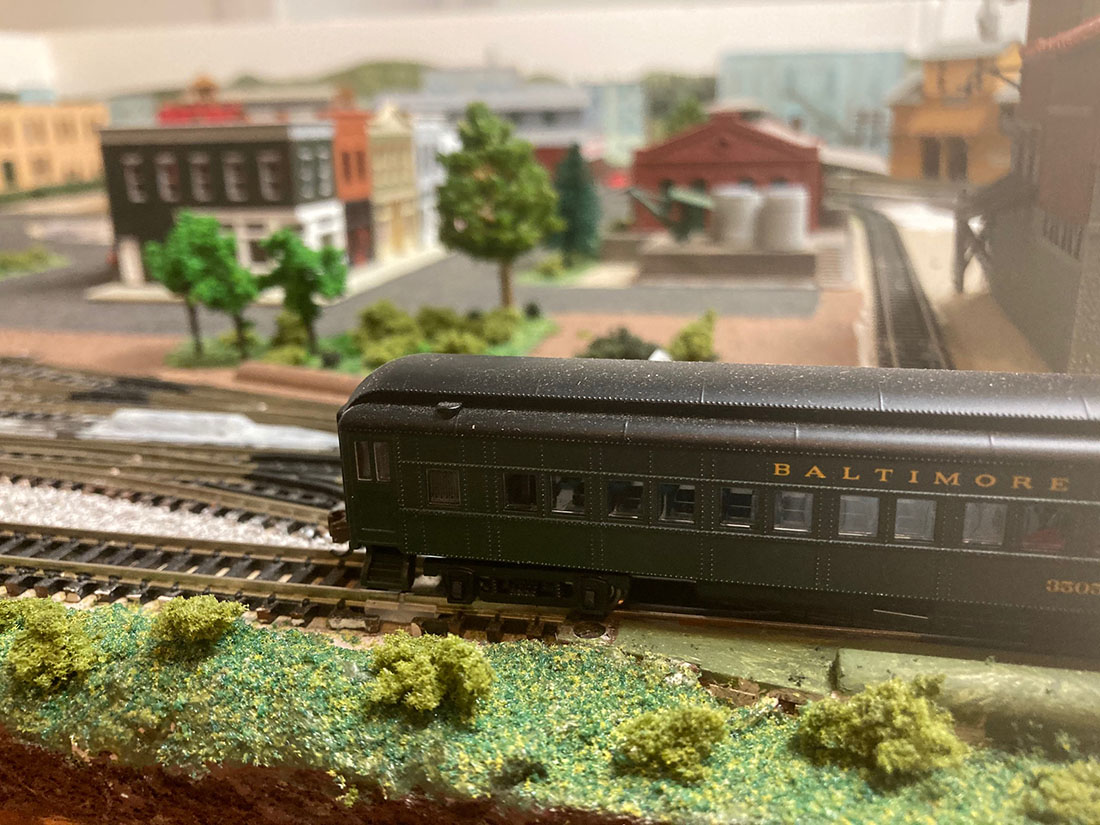
Neither layout is any particular period but newer era with diesels, except for the ‘restored’ Doodlebug for scenic tours, but the AZ (Copper Canyon RR) layout is definitely Southwest, since the groundcover is sifted AZ dirt as you can tell by the photos.
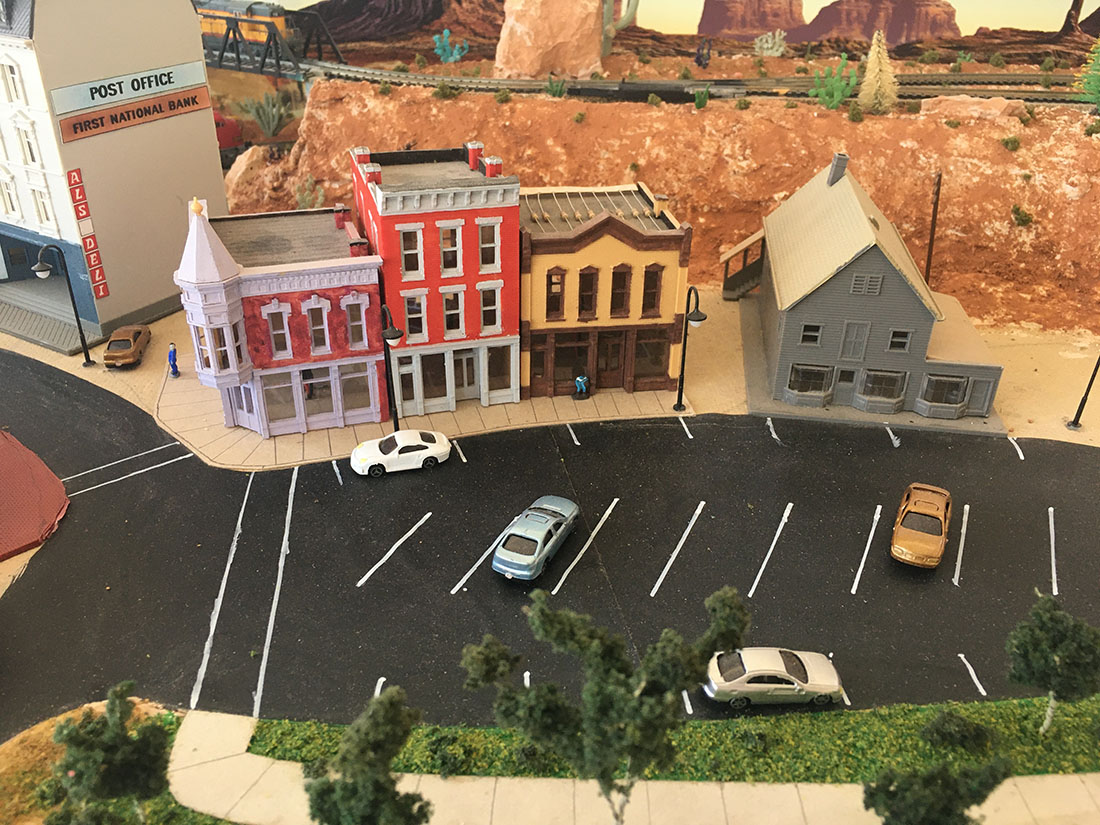
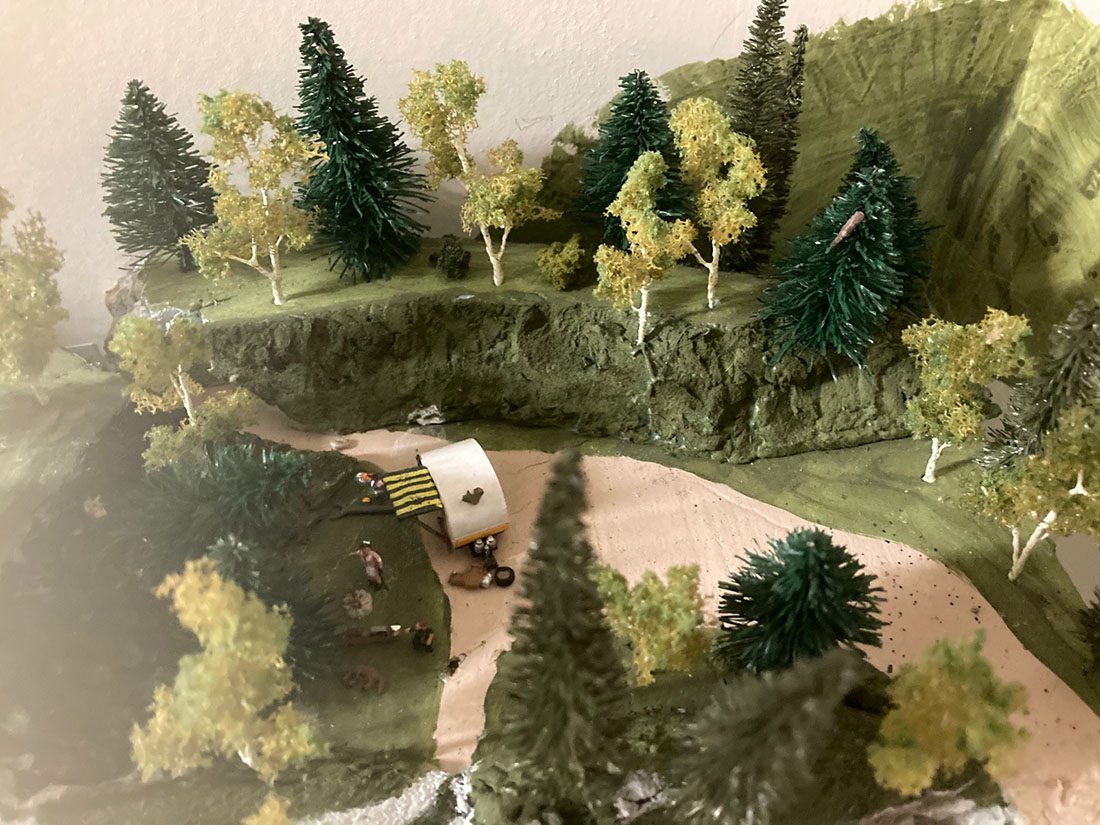
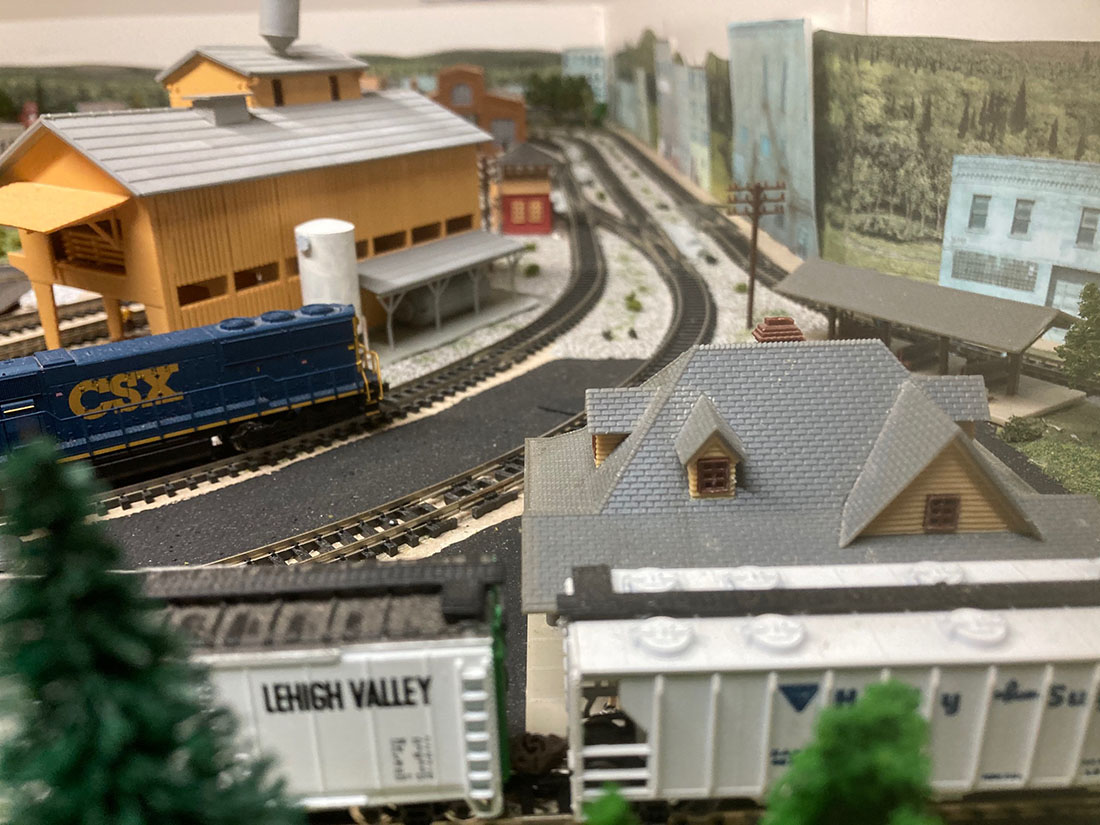
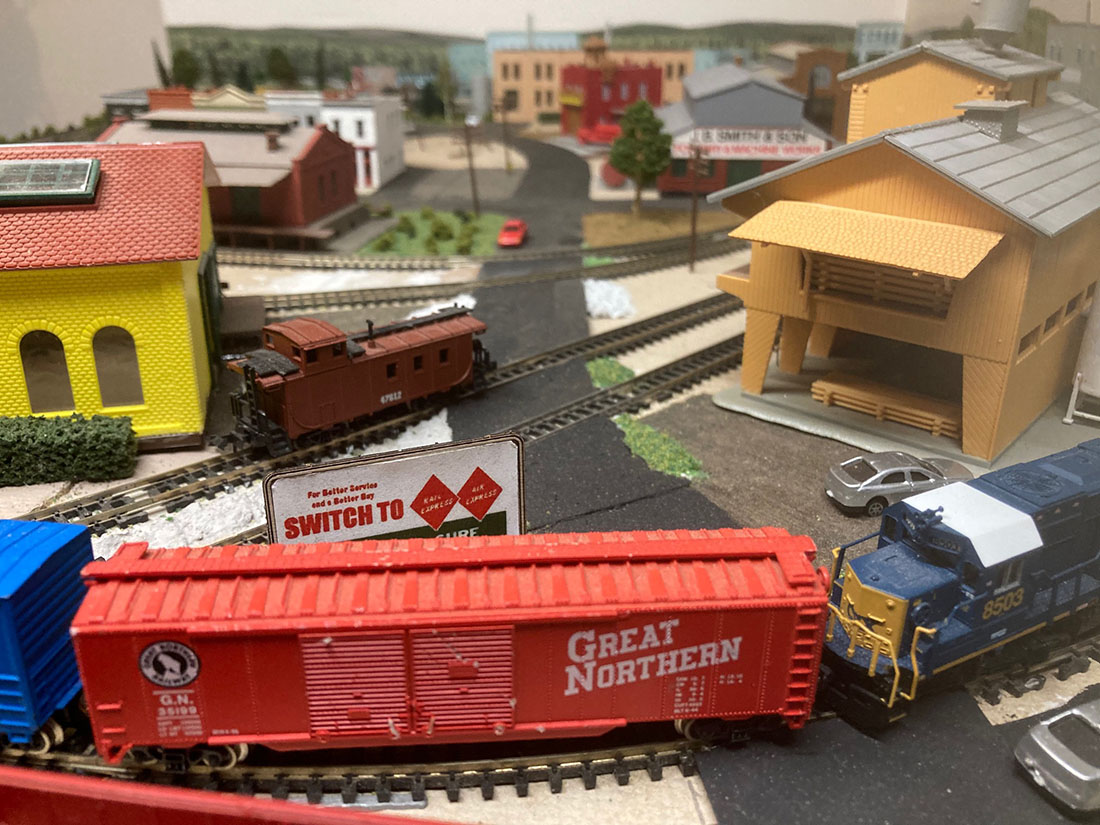
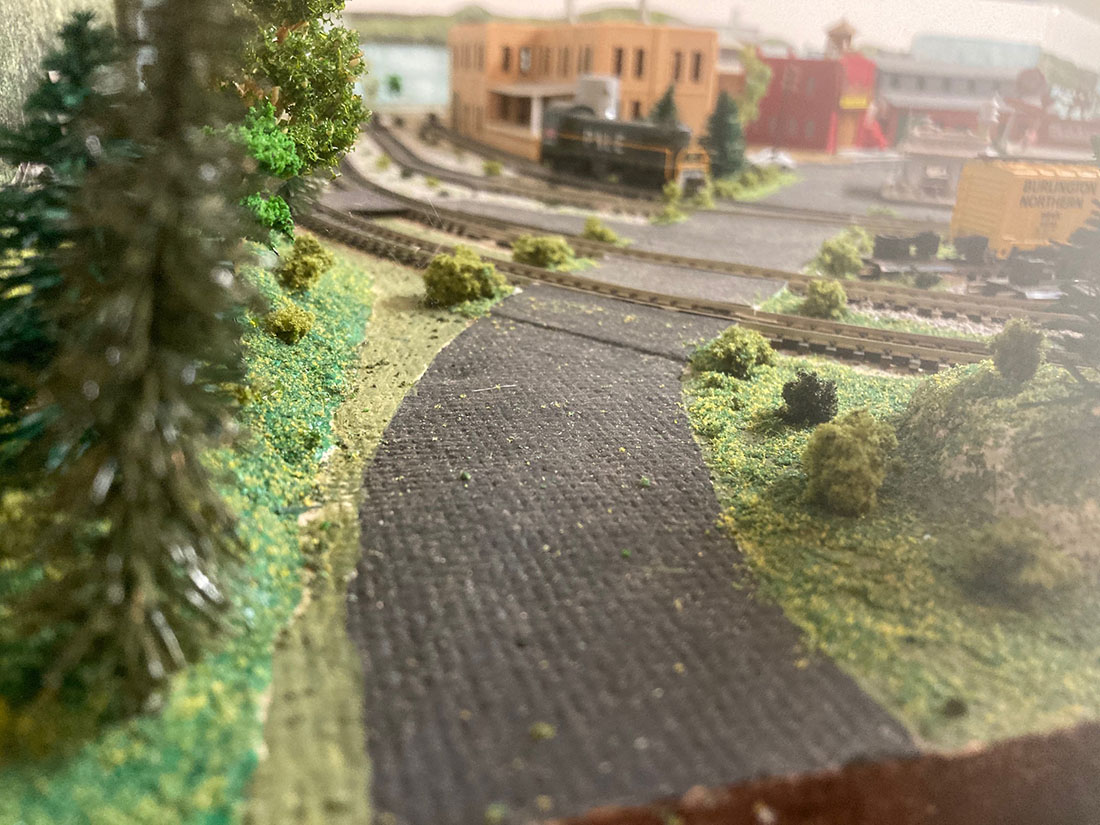
The Michigan layout (Central Michigan RR) is mid-state industrial in the 34×48 end, with the run along the wall out to the country station and Ma and Pa camping on the bluff. Wish I had the space for the Durand station, but alas, no room, even scaled down.
Of course I still made changes along the way – upgraded to DCC, good idea, bought new engines which cost less than converting old ones. Didn’t want to tackle that myself. Converted couplers to Kadee, don’t like the outcome, holes too big in the new trucks for the pins or screws, needs a collar to tighten up the sloppy pin. Anyone have a suggestion for that issue?
I’m farther along on both layouts than I ever got on Gizmo Gulch – work and kids kept me from ever having any time to really get anywhere. But…I did just find a copy of the November 15, 1951 HO Model Trains on Ebay and bought it! So you never know…..but there’s plenty of small details on my two RR’s yet to go.
I bought 100 painted people, and need more cars, trucks, crossing gates, streetlights, landscaping to go, so I don’t think there’s another Gizmo Gulch in my future. At 74, I’m blessed with good eyes and steady hands, so the N scale is great – lots in my small space!
I have another question for the model railroaders on this site. I bought that Doodlebug not many years ago. It now runs very poorly, I think I read somewhere that the problem may be a cracked gear that mates with the metal worm drive gear? Bachmann is out of Doodlebug production, and drive trucks are no longer available from them.
Anyone else have this issue and the solution? Or a broken doodlebug without the same problem willing to sell at a parts price?
My couple of suggestions for others is –
– if you don’t like soldering the small wires under the table (such as street lights in N scale) use Wirefy 22-18ga (red) connectors, you have to crimp connector on after threading wires through table top, or
– use conductive glue such as Board Silver conductive adhesive glue. Just wrap wires and coat with the glue.
Many Thanks to you Al for the great blog, and Thanks to all my fellow RR modelers around the World for all the great tips! Hope you like my small N scale layout.
Bob with Arizona and Michigan N scales”


A huge thanks to Bob for sharing his small N scale layout. Sometimes I get sent a layout and I can’t help but think they had a lot of fun creating it – and this is certainly one of those.
It reminded me of Eric’s post, a very small N scale:
That’s all for this time folks.
Please do keep ’em coming.
And if you want to stop dreaming and start doing, the Beginner’s Guide is here.
Remember, it’s the start that stops most people.
Best
Al
That’s all for this time folks.
Please do keep ’em coming.
And if today is the day you get started on your layout, the Beginner’s Guide is here.
Best
Al
PS More N scale layouts here if that’s your thing.
Need buildings for your layout? Have a look at the Silly Discount bundle.

What a wonderful, personal story which I enjoyed reading as much as seeing the layout. That is one of the most heartfelt aspects of model railroading- the journey, the quest – as much as the destination.
Talk about a work in progress, WOW great photog and layout. Loved to have seen it running, Maybe next time.
The Critic
Bob the company you want to get in touch with for replacement gears is Northwest Short Line ( NWSL.com) They make replacement gearing for many locos. I have the same B&O Doodlebug as you but in HO. I got gears from NWSL for it. The cracked gears are very common in that loco. If you hear a thumping sound as it runs around the track that is your signal for cracked gears. Great story and nice layout. Congrats for working in N scale I have a hard enough time with HO.
Bob that is a wonderful layout! Great fun looking at the pictures from start to current state. I’m sure you enjoy running your railroad
Amazing and indescribable! What a fantastic story and photos. Thanks, Bob!
Very nice layout Bob! A job well done!!
Great story and layout. I wonder how many of us have boxes of various scale REs in our garages and basements.
This is a great layout design and well constructed. Visually it is great and holds great interest. Great job on putting it together.
Hi Bob where are you in AZ? I am in Tucson and just starting a HO layout it would be nice to talk to someone local for advice.
Thanks
Jim Tucson AZ
“use conductive glue such as Board Silver conductive adhesive glue. Just wrap wires and coat with the glue.” Has anyone used this to attach wires to the track? I’m struggling with soldering to brass rails without melting plastic ties. Please, no disparaging comments about brass track.
Great Layout……love the detail…….
Nice job well done
A very nice story and especially nice layout. I like evry bit of it, nice work.
Bob, I have a neighbor that has repowered some of his N scale locos by buying new power units but I can’t remember the brand name, Kato perhaps?? The power units are really reasonable, he used one to repower a galloping goose also.
This article and layout to me is another inspiring one that keeps me going on my N scale layout.
Dick from Hardin Montana USA
Excellent detail and Thank you for sharing.
Impressive– as many of us have learned — a lifetime hobby, with many variations but always a creative challenge to enjoy. Using the natural soil certainly captures that Arizona reddish hued landscape — well done!
I enjoyed the journey that Bob described from a 4 yo to now. I always felt that once the RR bug hits it never leaves and there are always stories along the way. Mine starts with growing up in Reading, PA, yes the home of the Reading RR. BTW it is pronounced redding. My grandfather (Pop) lived just across the street from me and had been a crane operator in the car shops until a work injury landed him on disability in 1935. His brother Floyd worked from age 15 until mandatory retirement at 70. He ran a crane in the loco shop. My uncle repaired boxcars and my great grandfather was a track inspector in the late 1800’s. I lived close enough to the shops that on quiet nights the sound the couplers clanging together was easily heard. From 1920 until 1970 Pop put Christmas train layout up under the tree. He was 79 in 1970 and the next year the leg he injured at work had to be amputated. I have his original train from 1920 along with the buildings. I also have the O scale train my dad bought for our first Christmas in my parents own house in 1955. My cousin started me in HO by giving me an A-B set of Pennsy diesels in 1960. Sadly they all have been stored since 1995. The good news is I am retired now and have a room about to become mine for a year-round layout.
May God bless you!! My favorite theme and your wonderful reason for a push forward. Looking forward to the finished product.
Thanks for all the positive comments! And Thanks to Paul for the input to repair my doodlebug, To Roger wondering about gluing the wire to the track- try it. But you might also try soldering the wire to a rail joiner instead of the track.
Roger,
This is counterintuitive, but use higher heat on your soldering iron. You can solder faster, with less collateral damage. Be sure to clean the track before soldering. Also, you can melt a small dab of solder on the rail and “tin” the wire first. Then they go together even faster.
Tom in Mississippi
Bob, nice layout and good story. If you haven’t discovered it yet, there is an extremely valuable website for N scalers called the spookshow. www,spookshow.net The Spook has owned or personally tested and reviewed virtually every N scale North American prototype locomotive and rolling stock ever made and has a searchable database with his reviews, and the good the bad and the ugly about each, he assigns each a rating and also rates the ease of conversion to DCC. If there is a recognized problem he will tell you if and how to repair it, or which were manufacturer’s stinkers that should be avoided at all costs.
Bob hope this helps u to fix your Doodle Bug train!
Shape Ways & James’ train parts
Have replacement gears to fix it
Also the have different types of couplers and a lot of other parts too!
Thank you for documenting the evolution of your layout!
Just be mindful of the wingmirror height if you change your car!
nice of over and under. nice layout altogether.
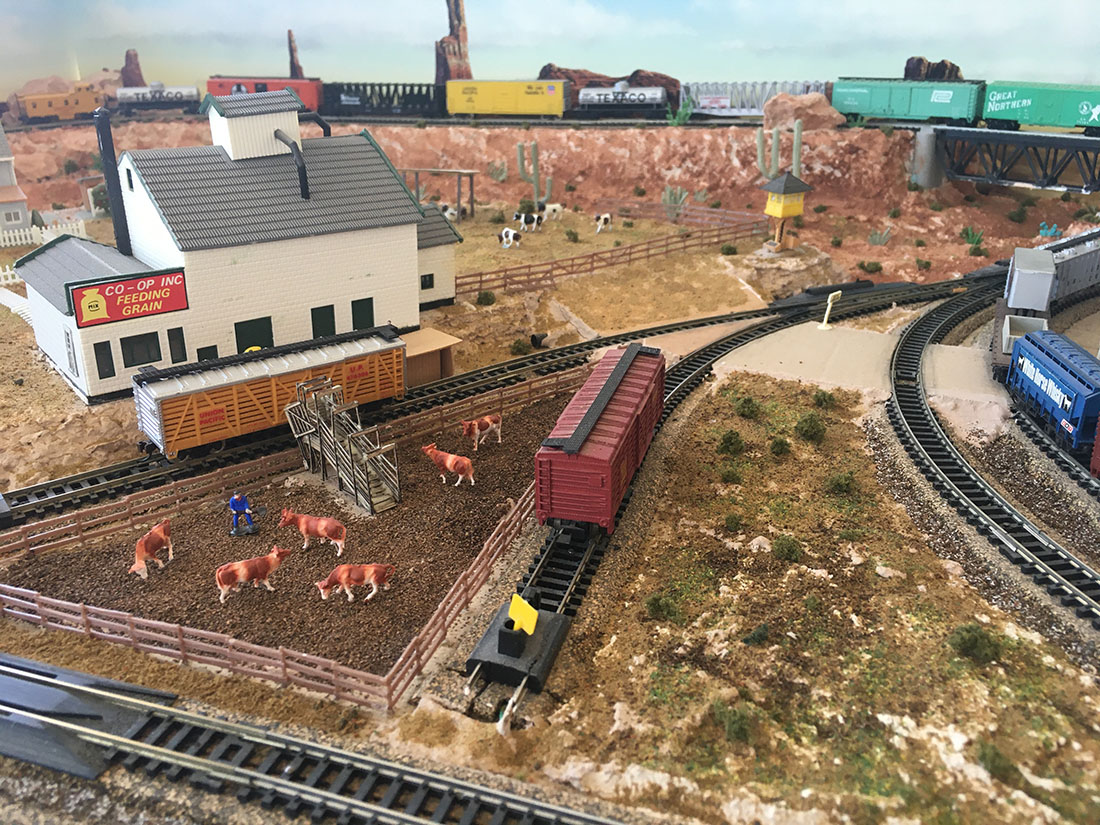
well done, like the cattle yard
Nice layout, excellent detail
Hi Roger, I didn’t know that there was such a thing as conductive glue. I solder mybfeederscwith solder. To keep from melting the ties. I use alligator clips attached to the rails, one on each side of the feeder. The clips work as a heat sink and prevent the plastic tie from melting. Pretend your wire and feeder so that when you put solder to the wire touching the Raul. It will attach quickly.
Great story and great layouts. Your mention of Durand caught my eye. I grew up in Owosso. I have a vague boyhood memory of riding a train between the two before service was discontinued. Keep up your good work.
If you have room you can extend the siding into a mine under the scenery so it connects to a siding at a power station, preferably the other side of a ridge or other scenic divide. That way you take take coal from the pit to the power station and have empties go the other way.
Thanks for all the nice comments! To Rod- thanks for that great idea! Under the Ma and Pa campsite is a tunnel to nowhere, so I can queue up coal cars coming out of the tunnel!
Bob with N scale RRs
Steve Aimi- I did find Shapeways aka James Train Parts. He did have 3D printed parts(gears) for my Doodlebug, along with many other parts. My engine works like new!
Thanks for passing this on to the world here on Al’s great website!
Bob with the N scales
I really like the workmanship and methods used with this. Using Homosote and cookie-cutter technique is a forgotten system used by the ancient ones (most of them anyways). The 3/4” plywood isn’t really required lmao, HS is also fire proof…
I don’t see any scale soccer ball scale size gravel sprinkled all over the place either or bright blue stagnant swamps. Some are naturals with scenics and others forget it… if a RR looks like it should be set up in the “coal bin”, they really need to know. Not doing anybody a favor by inferring they’re all the best thing on the face of the earth. Too many “goodie 2 shoe” remarks here, not the real world.
Don’t cut and paste my comments as usual, just hit “delete”…
R
bob wheree are you in arizona? i live in scottsdale. hope you are nearby. a great story.
bob c
Bob, an interesting personal story and two great layouts. Most of us would be proud to have built just one of your layouts. They’re both wonderful but, having grown up in the southwest, your Arizona layout is my favorite. I like the southwestern backdrop, though I’ve never seen so many tall spires in one area. The colors on your scenery are spot on for the southwest’s red dirt. Very nice job! Keep us posted with your progress.
Bob
How about a photo backdrop of the Durand station? I think I’ll file that idea away for my own layout.
Will in NM is spot on. Your southwest scenery is amazing. Great representation of color and landscaping. Only one comment regarding some of your rolling stock. The B&M coal car, Penn Central box car and the PRR box car must be happy wanderers. 😎
Jim AZ
A very nice layout and it is very scenic and lot of detail. And it must be fun to run once in a while to relax after all the honey do’s.
Thanks to all for the comments! To Jim AZ is still on Al’s blog…yes some of the old cars haven’t been ‘home’ in years. To Bob C in Scottsdale, and James S in Tucson…my AZ layout is in San Tan Valley, SE of Phoenix.