Gary’s been back in touch with his folding train table:
“A while back I saw that you reposted my first submission which reminded me that I haven’t sent an update.
I haven’t made as much progress as I’d like to. I’ve got lots of excuses, none of them good ones, except for getting pneumonia which kept me down for almost 2 months.
In my haste, I forgot to include some information the first time around. The layout is HO scale layout and I’ll be using a DigiTrak DCS 52 DCC controller.
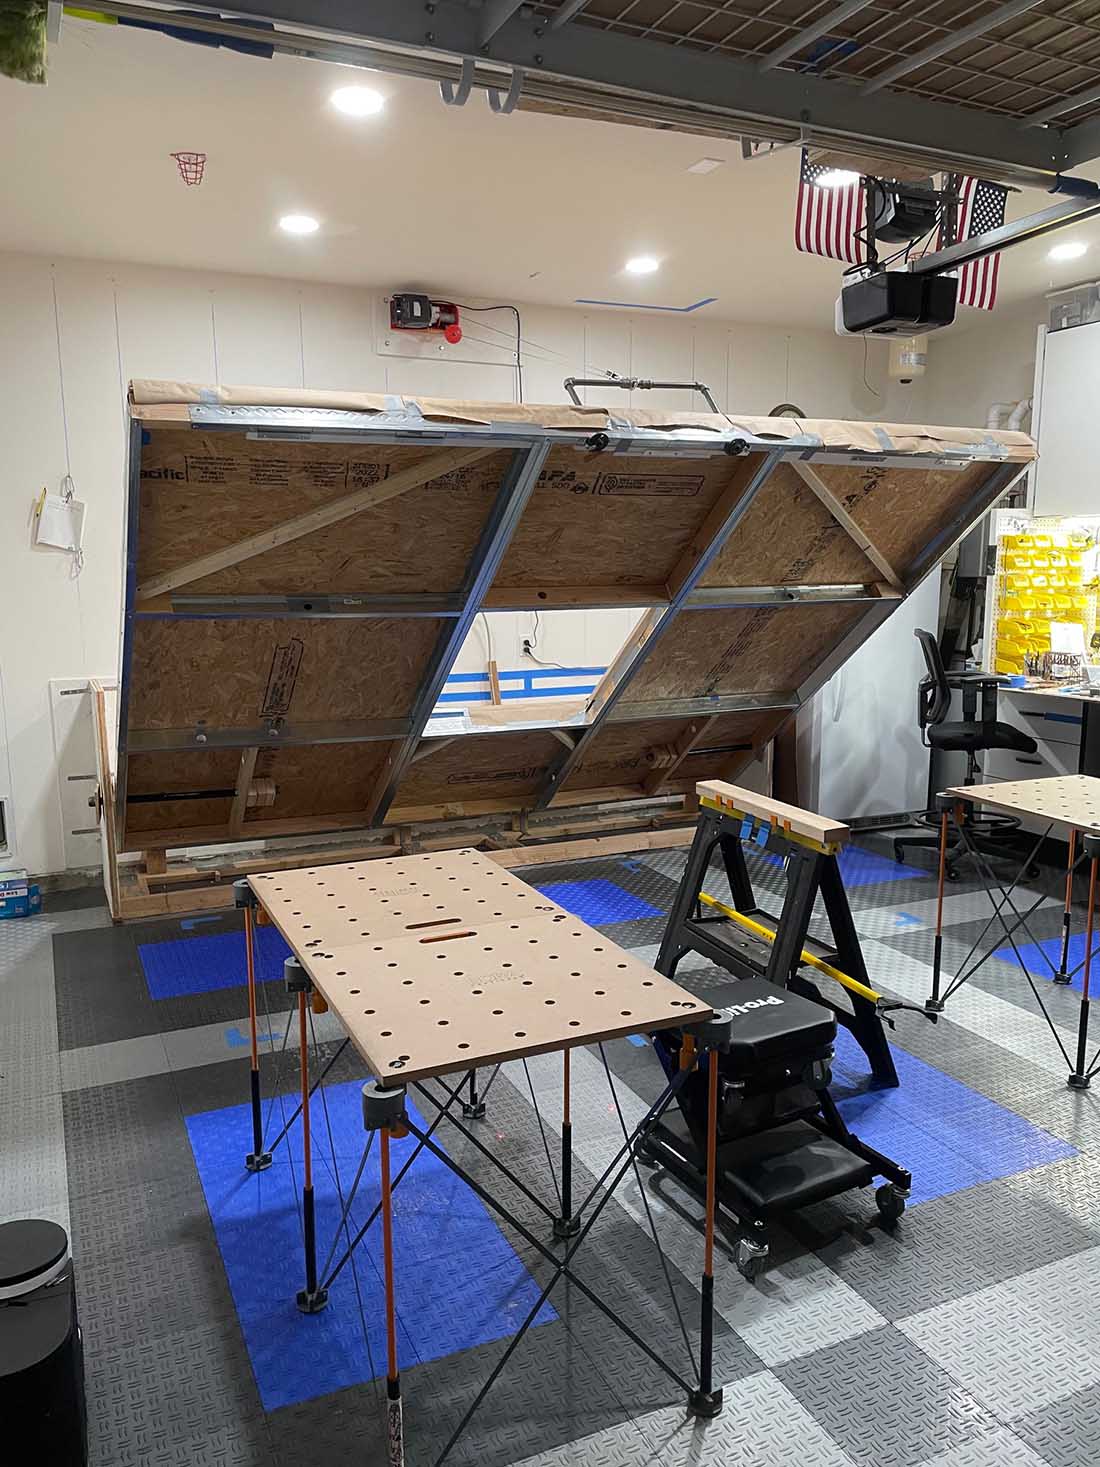
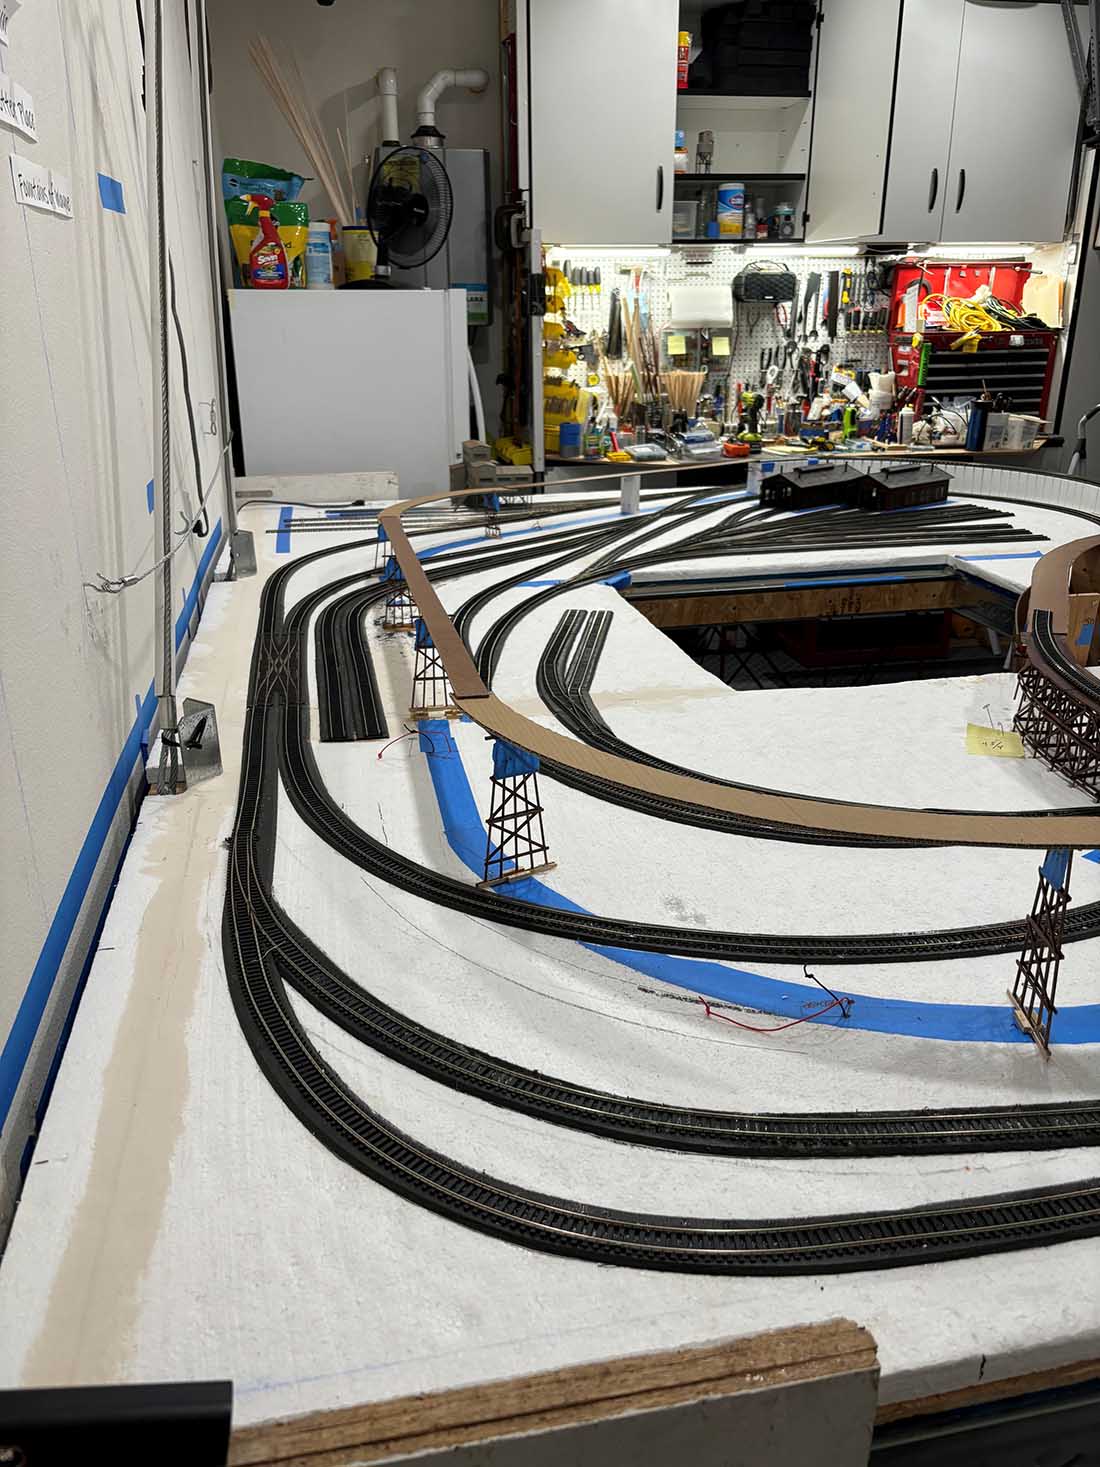
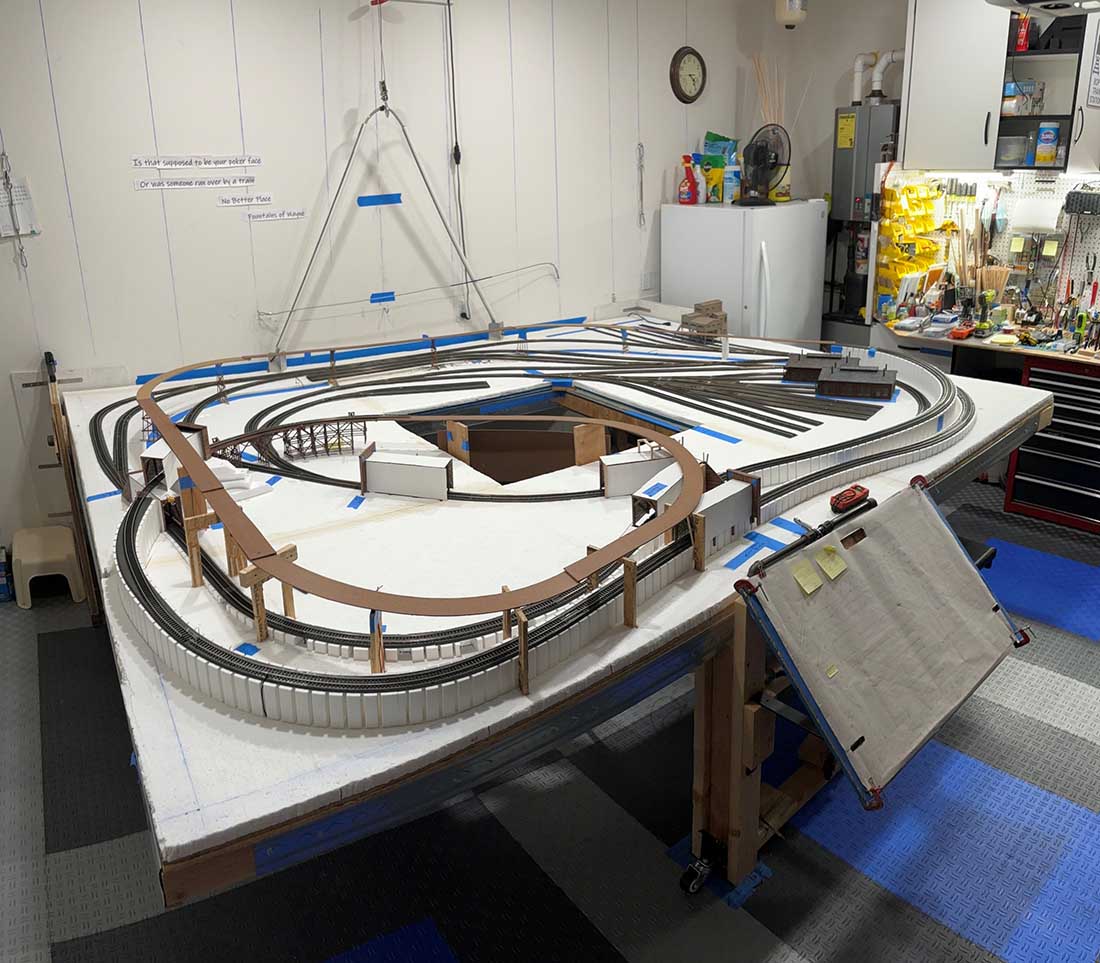
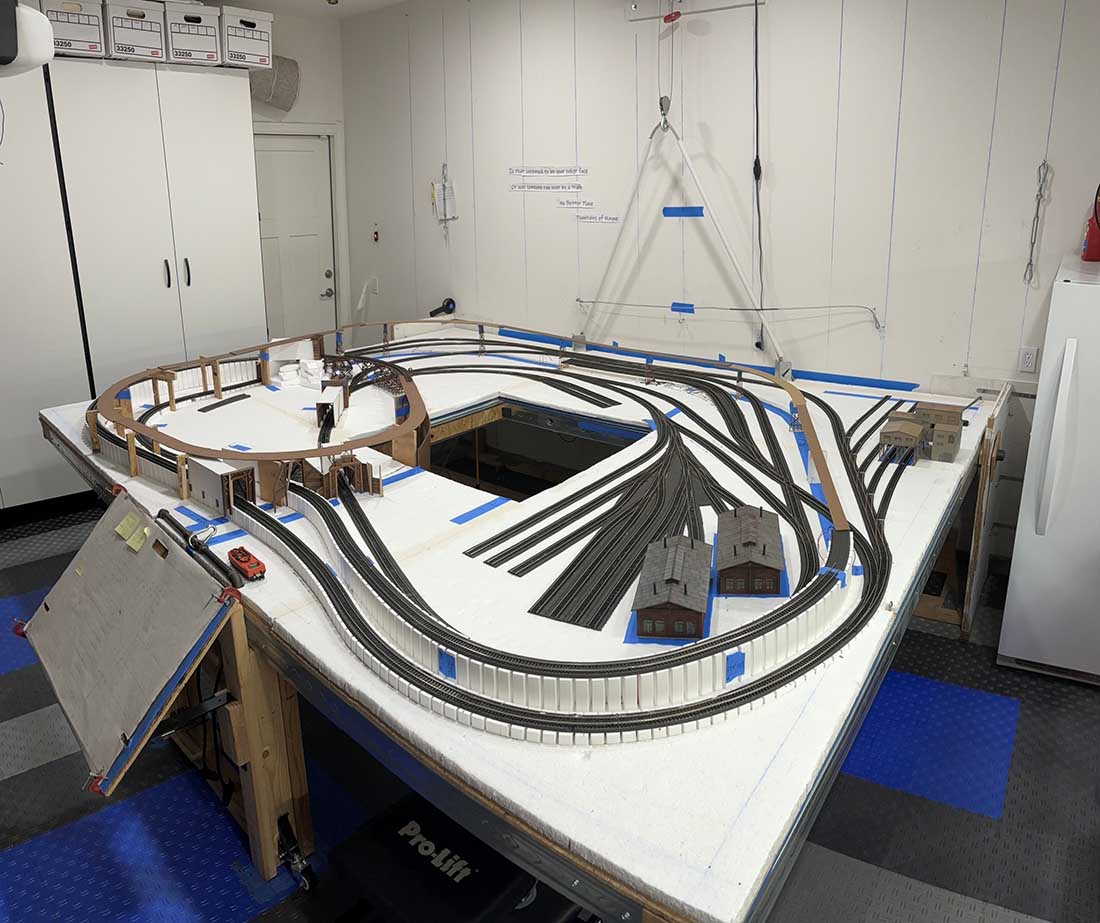
The table is 9’ by 11’ and there’s 14 inches of clearance between the top of the table and the wall when it’s in the upright position.
The table is framed with galvanized steel studs with wooden 2” x 4” s imbedded within them in strategic places. About 50% of the table is framed in wood and I’m using two overlapping layers of 7/16” plywood to help keep it rigid.
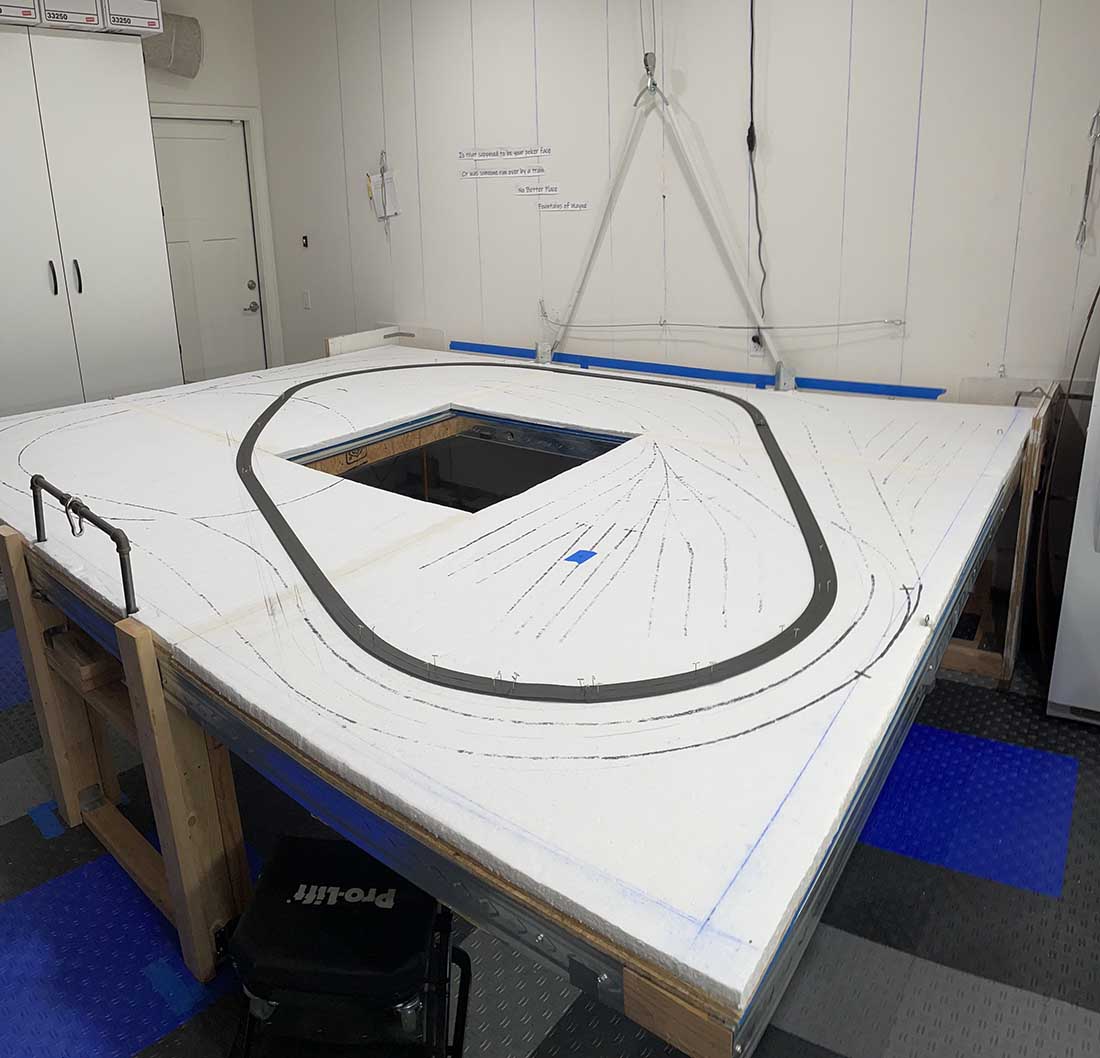
I made a rookie mistake and used the wrong type of foam board. Hopefully, this won’t hinder any construction or scenery processes as I continue.
To lower the table, I’m using an electric cable hoist with a double cable pully hook. The hook clips to a carabiner that is attaches to a 1/2” “U” shaped galvanized pipe that extends from the front of the table.
Once the table is down, it rests on the Control Panel support that’s made of 2” x 4”. After that, the pully hook is transferred to the rear lift cable. The table is then lifted enough so the Centipede work benches can be slid into place and then the table is lowered onto work benches for support.
All this is done using a wireless controller for the winch while standing in the center of the access area. It kind of makes me feel like Buster Keaton in “Steamboat Bill, Jr.” where he’s standing in the street, and a storm rips the front of the building off behind him and it falls around him. He’s unhurt because he’s standing where there’s an open window on the building.
Anyway, to get in and out of the access area I use a foldable creeper to move back and forth, which reminds me of The Great Escape where the POWs lay on a trolly cart as it travels through the tunnel. Okay, enough movie references.
From the time I walk out into the garage and get the table lowered, it takes about 15-20 minutes. At this point, I have no idea how long it will take to get three locomotives and all the rolling stock in place once I’m done.
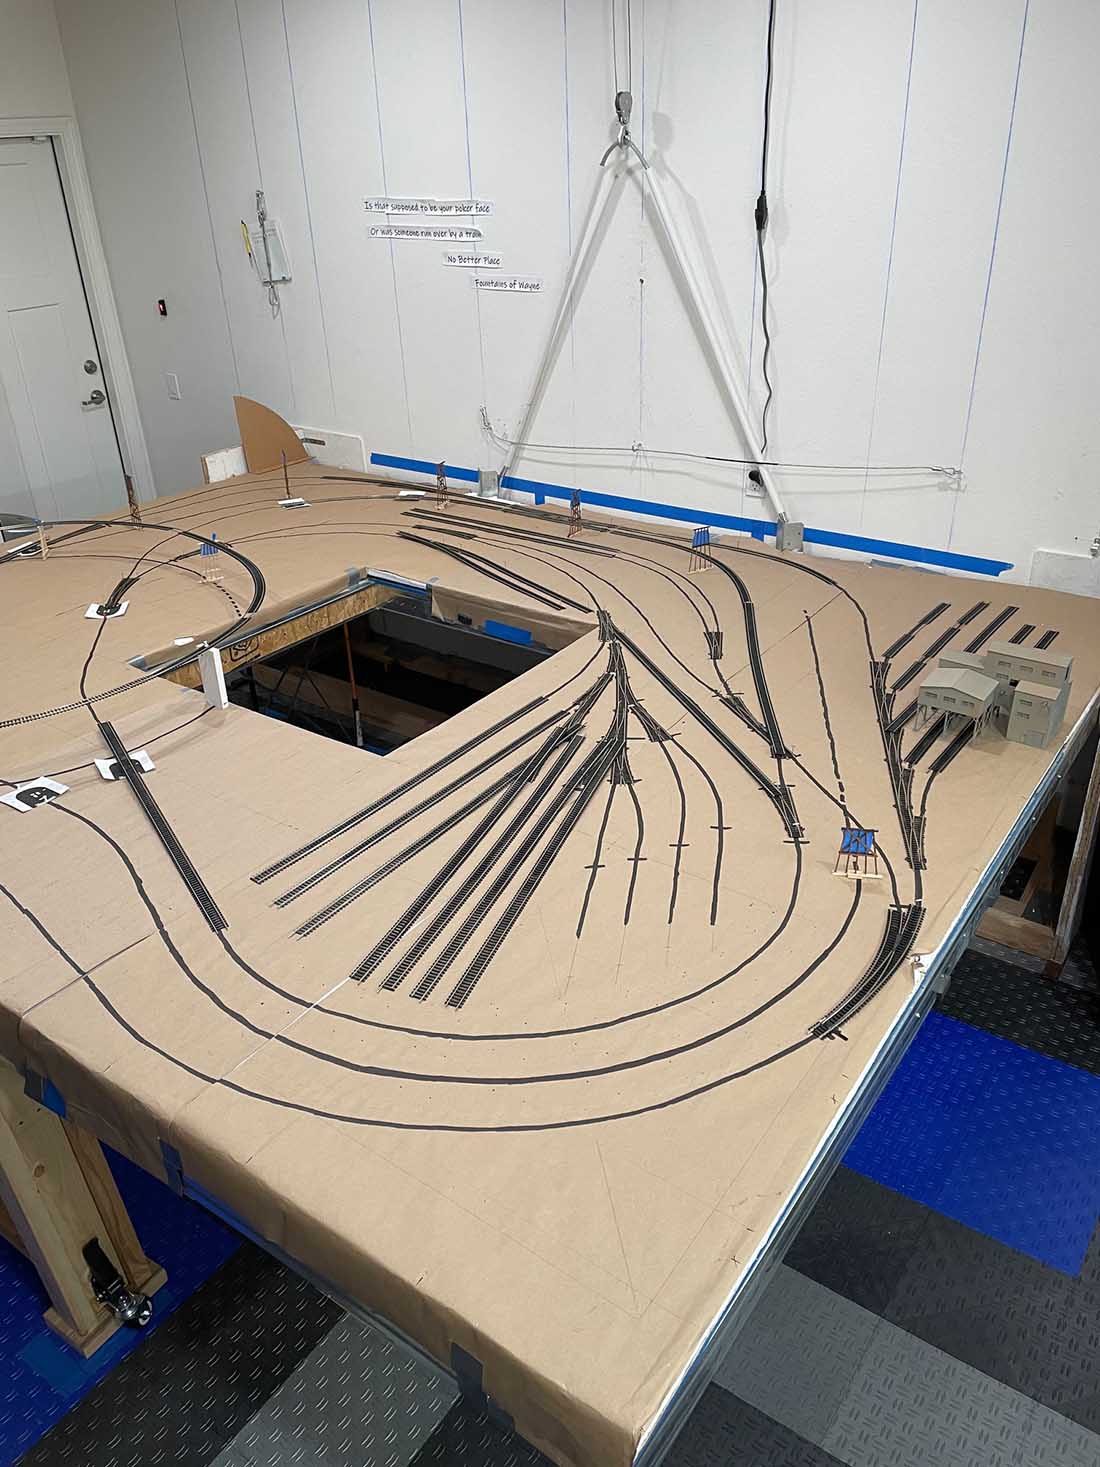
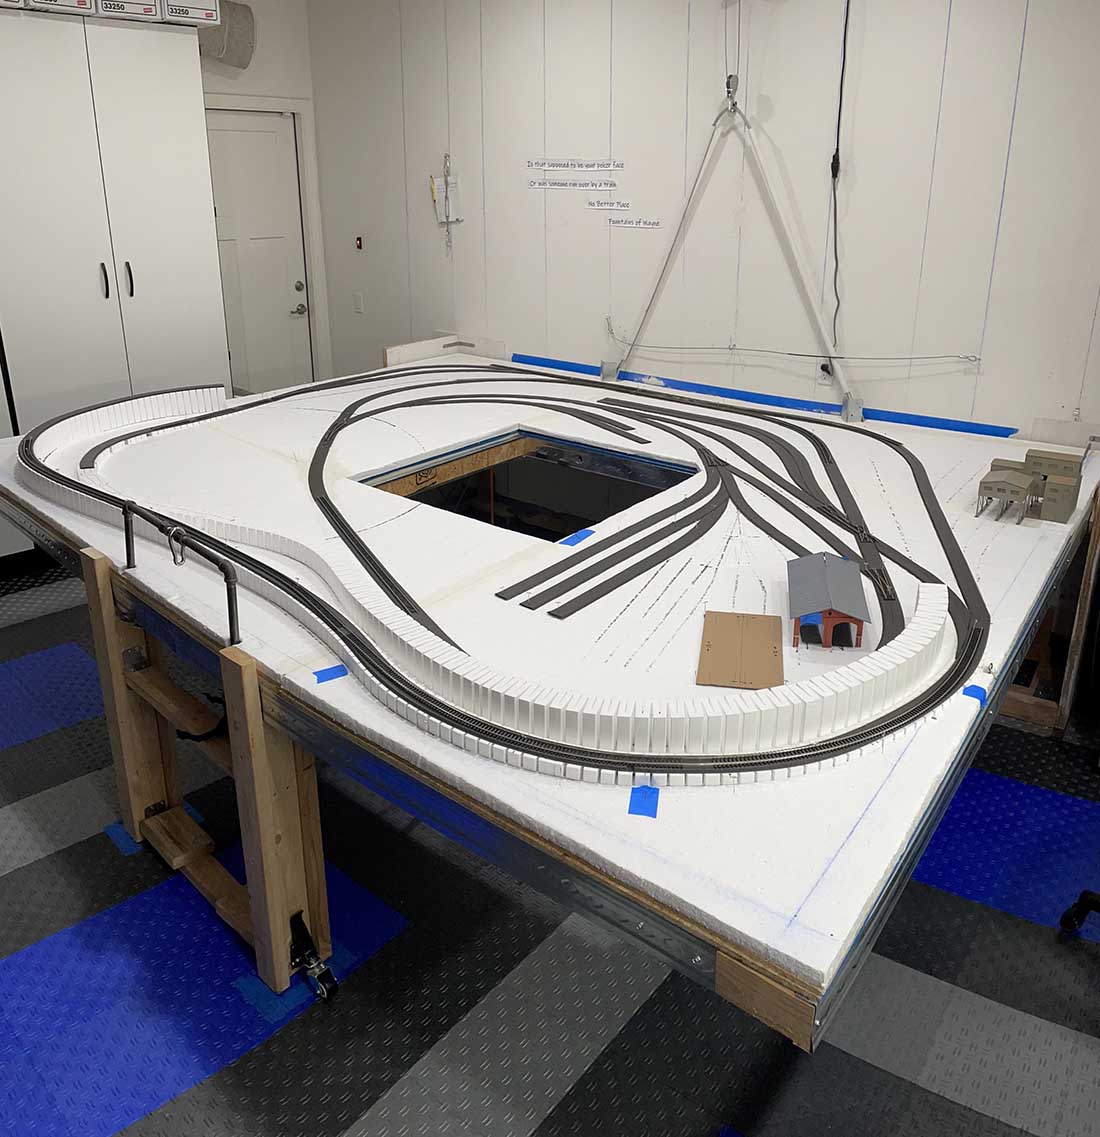
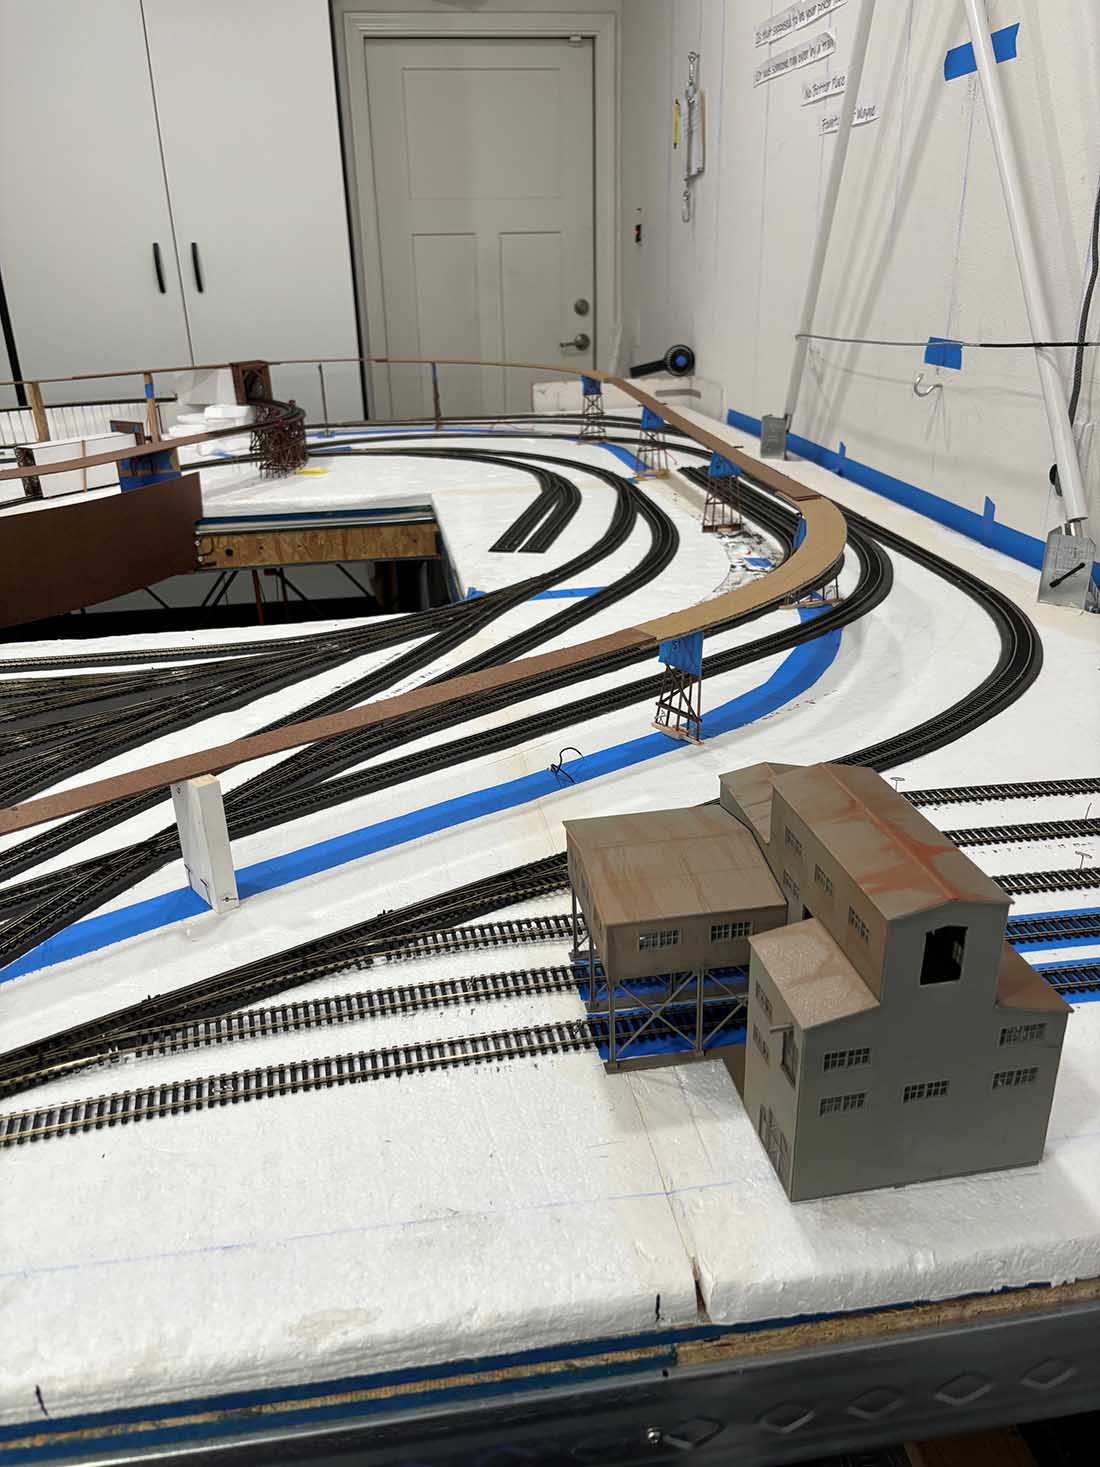
I’m going to build all my own tunnel entrances and two wooden trestle bridges. I’ve already completed one bridge that’s about 2’ long. So far, I have about 90% of the track laid, the remainder of it is elevated plus I still have a 14’ wooden bridge to build.
I’m using Atlas Code 100 Nickel Silver flex track. All turnouts are Peco, twenty-eight of them, twenty-three being #4. The rest are 60/30 double curve turnouts. I have one 24 degrees crossing and a Walthers Code 83 double crossover.
I’ll be working on my wiring next and plan to use Walthers Switch Machines using DPDT switches.
Gary”


A huge big thanks to Gary for sharing the update on his folding train table.
You can see his first post here: Folding model railroad table.
That’s all for this time folks.
Please do keep ’em coming.
And if today is the day you get started on your layout, the Beginner’s Guide is here.
Best
Al
PS More HO scale train layouts here if that’s your thing.
Need buildings for your layout? Have a look at the Silly Discount bundle.

Very nice update Gary. I made the same mistake of using the white beaded foam board on my first layout too. It’s OK but gets messy if you need to carve out riverbeds or shape inclines with a sure-plane tool. Using the Woodland Scenics risers works pretty well on the white foam, but the hot glue will melt right through it if you’re not careful. I’m sure you’ve figured all that out by now.
It looks like you’re using the WS Track-bed under as your roadbed: how is that working out for you? I have a bunch of it I bought for that layout but haven’t gotten around to laying any of it yet. Did you glue it down with PVA or something else? Anyway, I commend your efforts to make your layout fold up along the wall. It looks like a real engineering project to get it all working. Keep us posted as it progresses.
Nice job Gary. Amazing use of your space.
Great design on the table and lift mechanism. As you mentioned: the fun part is just beginning and subsequent development of the layout. My efforts on raising a board to the ceiling in our basement met with some issues that proved insurmountable at the time so the chouce was made to construct a shadowbox style foldup with the addition of storage on the wall and using window weight chain for the lift/support mechanism.
Great use of a space saving design. I’ve seen other layouts using this technique but the scenery was minimal with mostly terrain and some caverns and bridges, no structures. Sure hope everything stays in place when you raise your layout.
Jim AZ
Having tried this space saving technique all I can say is good luck and I bet you’ll have it in the “down” position longer than flush against the wall. LOL.
in a lot of the similar layouts I’ve seen there is a storage track that is at the rear of the layout (where your blue tape is in figure #2) that does not move. That allows rolling stock to be stored and eliminates having to put the trains back on the track every time you want to play. It would appear you could use one of the tracks from the industrial structure in the next to last picture as access to that storage area with a removal joint when you fold up the layout.
Terry /Idaho USA
To “Will in NM”
I’m using WS Foam Tack Glue for just about everything, so far. It’s worked well for the risers and track-bed. I’m happy with the WS track-bed. It’s flexible enough and I just cut it down the middle when doing the curves to make it fit.
Gary, Thanks for the info on the Foam Tack Glue. I think I have some in my train room that I’ll try on the layout. You also solved another problem I was having with my layout where one track is directly or nearly directly above another track that will be in a tunnel. Your U-shaped supports and the use of what appears to be 1/4- or 1/8-inch Masonite for the top tracks is a better solution than I’d tried to build. I had to eliminate an entire third level of the layout because I couldn’t figure out how to support the top level over the two lower levels. Do you think the Masonite will be strong enough once you add the scenery?