John’s been back in touch, this time with his garden railway.
It’s quite a project:
“Hi Al…
That story about Larry’s garden railway is a heartbreaking one.
Glad to see he has the energy to make a new start!
Given that, perhaps someone might be interested in some pictures of my latest effort.
As I may have mentioned, I have an On30 under construction at my old home… Just something to keep busy.
On the other hand, I have my “garden railway” under construction at my new home.
It was both a pleasure and a heartbreak to see Larry’s (Olaf’s) garden railway.
The pleasure was both in the original layout and in the fact he is rebuilding it.
The heartbreak was hearing about his health issues and seeing what happened to his layout while both he and his wife were convalescing after some serious surgeries.
Seeing Larry’s Deere friend John helping him made me wish I had a similar friend to help me with my layout. This hobby can get very interesting when the scenery was installed well before the track was.
Most of my life has been spent living in Southern California. About one year ago, I purchased a home in Nevada, I had intended for it to be a vacation home for a few years until I was ready to retire. 2020 changed those plans. Sad events made that purchase possible and stressful events have encouraged me to choose to retire sooner than my original plan.
Al has shared many of my micro layouts on these pages. Al has also shared many of my model railroad structure builds that began with his wonderful print out kits. Currently I am building an On30 layout to relax a bit from the stress of packing and moving. It is light, small, and very portable. All that said, at this time I want to share my latest layout, the “Garden Railway” that I am building at my new home.
I have wanted a garden railway since I was very young. G scale was of interest but I really wanted something a little larger.
By accident (or fate), Facebook introduced me to something referred to as “Minimum Gauge” railroading. I already had some 7.5 inch track gauge and I already had the dream, so with my new place I decided to give it a go!
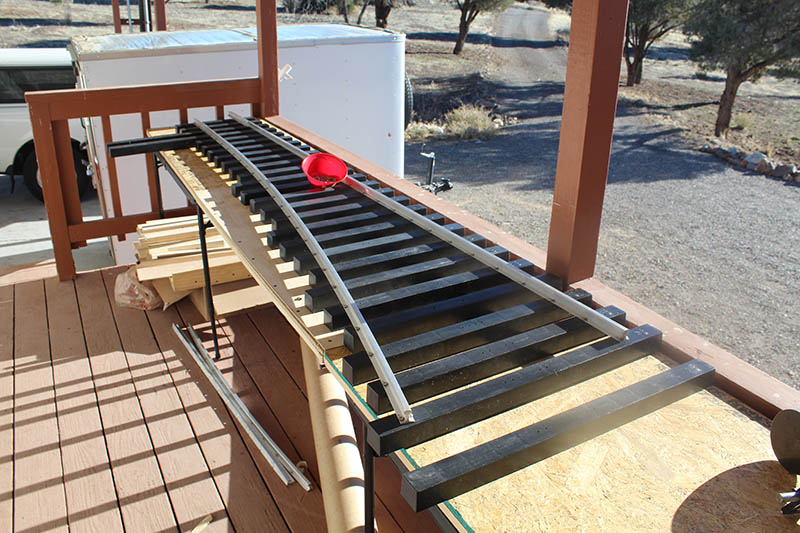
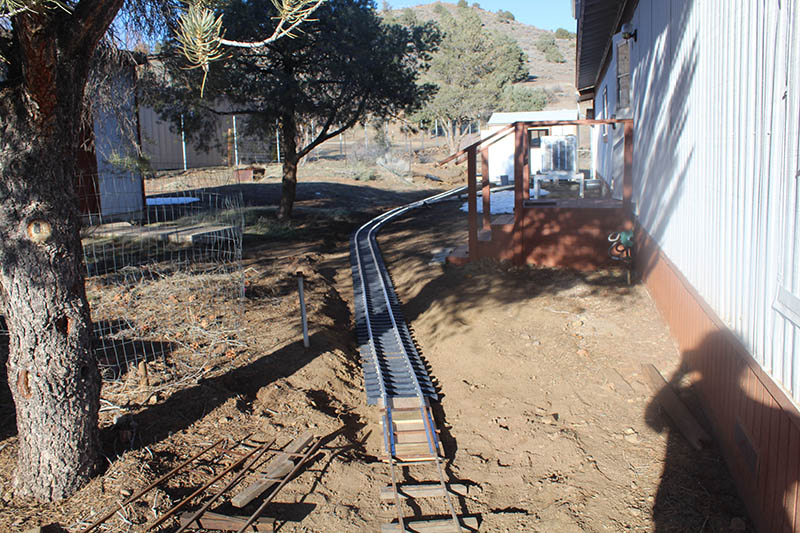
The first track I set down was some panel track that I purchased used. This was portable track and it was great for helping me develop a track plan and test the feasibility of what I had in mind.
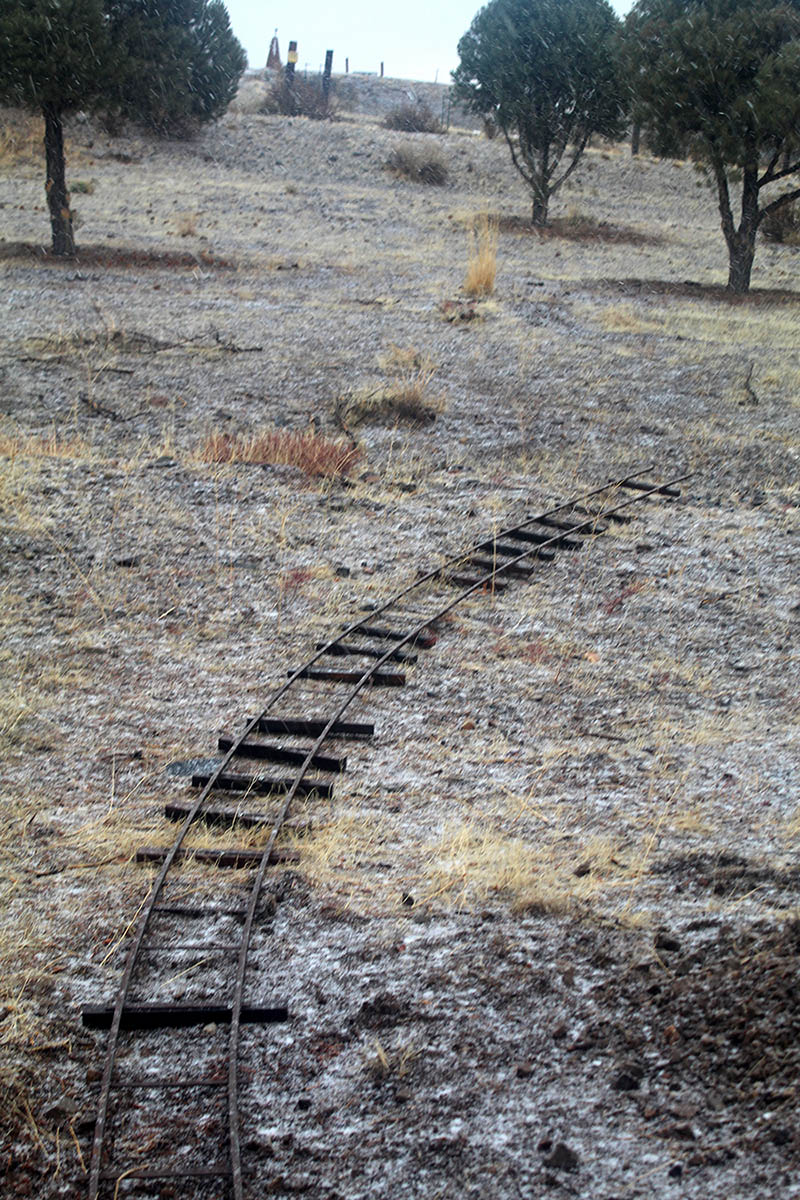

This is a little more of the early effort with the portable track.

The flat car in this picture was built by my father in 1971 or 1972.
A “Minimum Gauge” railway is 1:1 scale and designed to do “proper work” but on very slim gauge track. One may want to consider this extreme narrow gauge railroading!
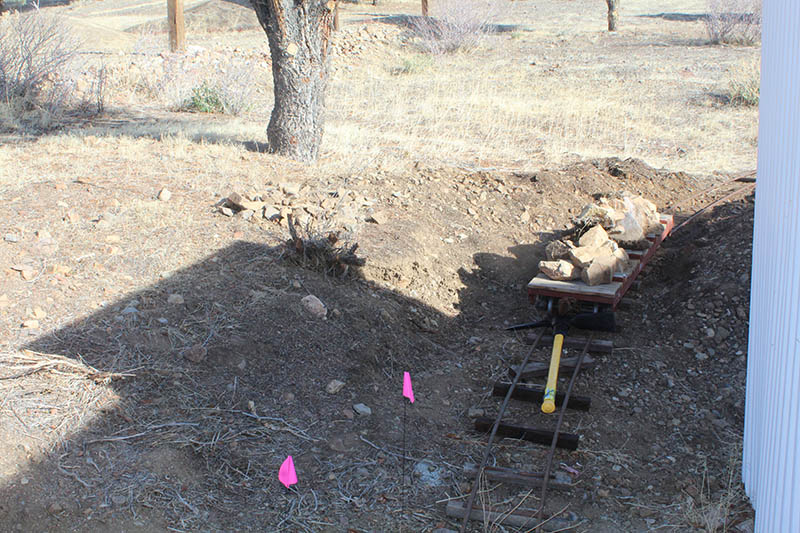
With some work done and the proof of concept working, the time had come to begin building a proper railway with proper equipment!
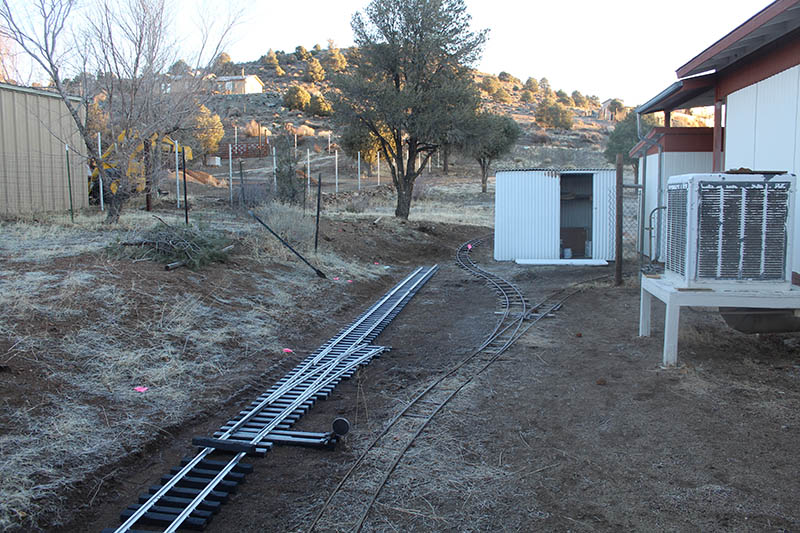
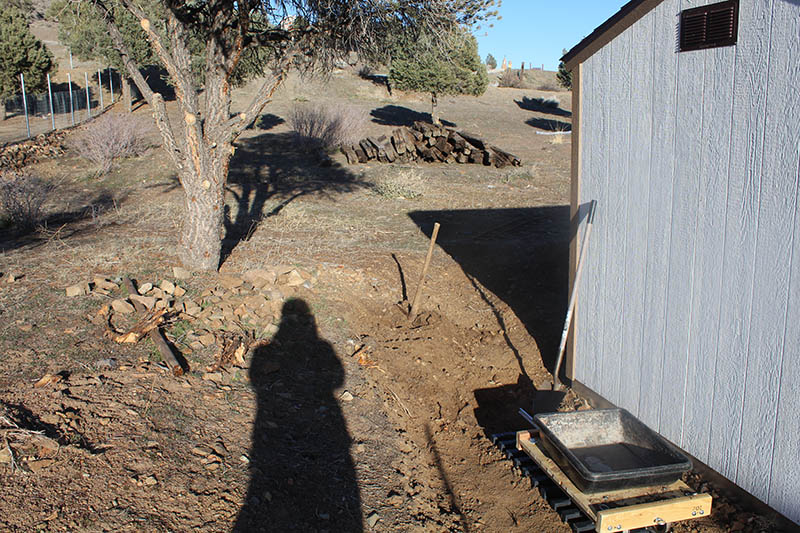
This is some of the NEW track…
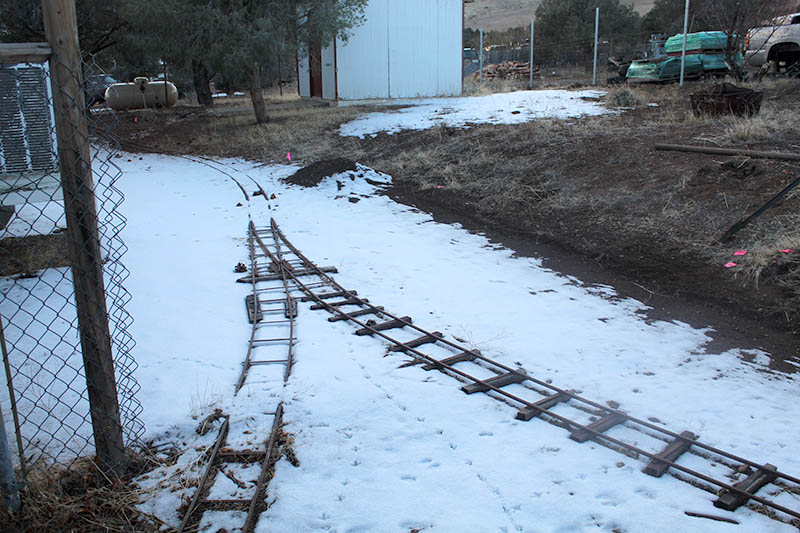
While Southern California is known for sunshine, my new home does get some snow.
Fortunately for me, I am much more comfortable in the Winter cold than the Summer heat!
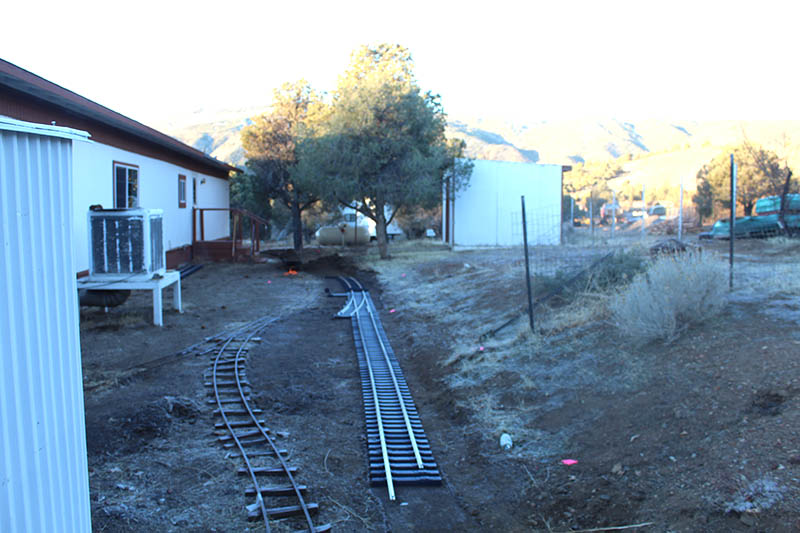
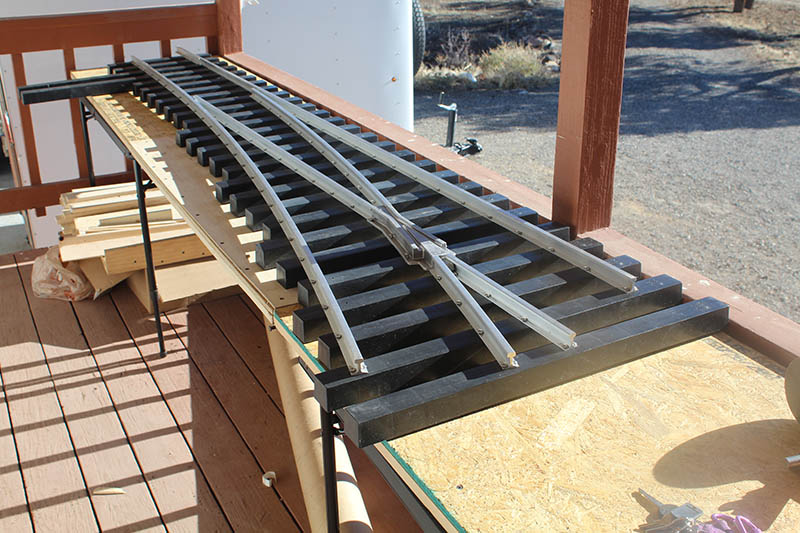
Track work continues…
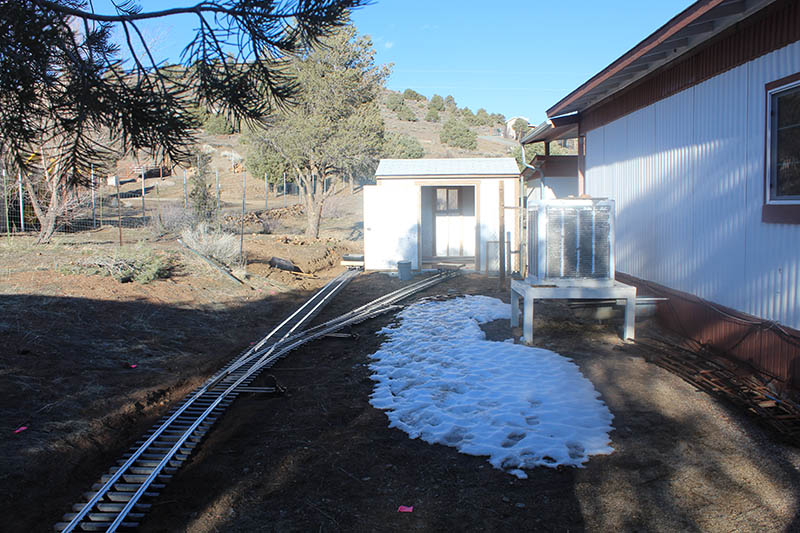
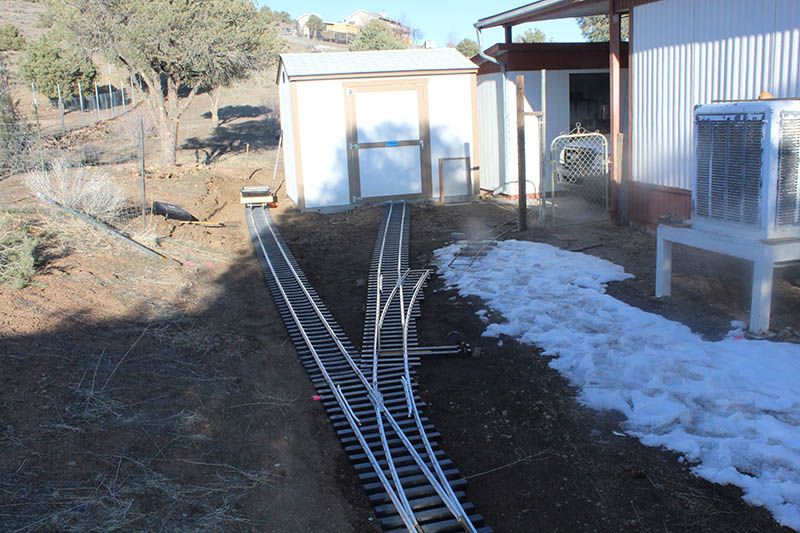
These photos show a switch under construction on my porch and then in place on my new railroad.
Right now, I only get to work on the railroad one or two days per month.
The current arrangement uses both the new permanent way and the old portable track with some really ugly but practical connections between the two.
When the scenery came first, the railroad building gets harder.
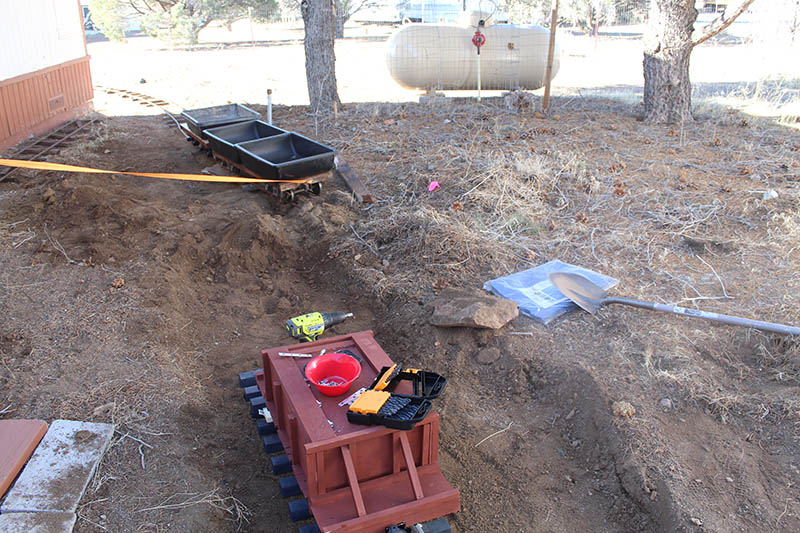
This is also one of the first “Minimum Gauge” cars that I built for this line…
My other cars are “scale” for the gauge and go with equipment that I have had since I was a young lad in my early teens. The engine that goes with the “scale” equipment is being restored right now but will be joining the new railroad soon.

Here are some final pictures of the railroad as it currently is.
Once I have an operating locomotive and can figure out how to use Dropbox, a video will be in order.
There are only two switches at the moment and only one spur (snow and frozen ground slowed the other one), That is changing soon.
Sincerely,
John
California but soon to be Nevada”
“Hi all!
You may remember my last videos ‘Changing the Guard’ and Poirot.
Well, always looking to add interest for the Grandchildren, I thought a hot air balloon set-up would certainly do that!
But, for ‘today’s children’ it needed to be moving which would be a challenge. I originally envisaged the balloon rising up, and then moving horizontally, but after various failed experiments, I settled on just a vertical up/down motion.
I chose the Faller Promotional Balloon set 190161 which includes two balloons. This doesn’t include LEDs for the burners, so I bought some on eBay. I tried various types and colours and settled on 3mm white flashing. The static balloon in my display has a white flickering LED which isn’t as bright.
I didn’t want an electrical supply as part of the support wire, so I opted for a flat button cell battery in a holder inside the balloon, with a switch fitted in the rear of the balloon.
The battery holder is accessible through the top of the balloon. The support wire, fishing line, although not invisible does a good job.
It took me two attempts to get the motor/gearbox/pulley combination right at 10rpm to achieve a realistic rate of ascent/descent.
The limit of the balloon’s travel is determined by two reed switches, one in the clouds, and one buried in the ground cover. These are activated by powerful magnets on the balloon basket and the rear side of the balloon. Siting of these is absolutely critical!
The direction of travel is achieved through a relay circuit (shown in the video).
Balloon Assembly:
During assembly a flashing white LED was fitted to the burner assembly of the kit and wired with super-flexible enamel insulated wire to a single pole miniature switch fitted to the wall of the balloon and supplied from a 3V button cell battery/holder hidden inside the balloon but with enough spare wire to make it accessible via the hole in the top of the balloon (to change the battery).
Small but strong circular disc magnets (Neodymium M42) were Blue Tack’d to the wall of the balloon and the underside of the basket. These operate the reed switches.
A 10mm long plastic tube (stripped from a piece of electric wire) was Blue Tack’d to the opposite side of the balloon to the side being viewed, so that it is hidden from view (the same side as the switch for the LED).
A fine line (I use fishing line) is fed through this and anchored at the baseboard and the motor mounting platform. This line stabilises the balloon and stops it from swinging around during ‘flight’!
Reed Switch siting
Positioning of the reed switches is quite critical, especially the top one, or else your balloon might try and break through the motor baseboard, which of course it won’t, the line it’s suspended from will break first, and your balloon will come crashing down.
You will need to experiment with both the bottom and top to get them right, especially if you want to hide the bottom reed switch under the baseboard terrain. I mounted the top reed switch to a piece of board attached perpendicular to the motor base board and covered with a cloud (quilt batting!).
Principle of Operation
Note: I would recommend marking the 2-way switch to indicate UP and DOWN as appropriate – a test run will determine that.
With the balloon on the ‘ground’, and the circuit switched on, switching the 2-way switch to ‘UP’ will make the balloon ascend until it reaches the top reed switch when it will stop.
Switching the 2-way switch to ‘DOWN’ will make the balloon descend until it reaches the bottom reed switch when it will stop.
Burner LED
This is switched on and off as required by the switch on the hidden side of the balloon.
Well, due to lockdown, the grandchildren haven’t seen the balloons yet, but if all goes well here in the UK, maybe in a couple of months time!
Keep safe
Brian, Wokingham, UK”
A big thanks to Brian and to John for sharing his garden railway. Minimum gauge looks alot of fun!
John’s post really does put things into perspective – if John can start his G scale, you can start an O scale, HO scale, or whatever scale.
It’s all about making that start.
That’s all for today folks.
Please do keep ’em coming and don’t forget the Beginner’s Guide is here if you want to get going on your own layout.
Best
Al


“G scale” is Garden Railroading for #1 gauge track. #1 gauge is very old. “G Scale” was made popular by Lehmann in Germany during the 1970’s — The “G” for Lehmann Gross Bahn or Lehmann Garten Bahn.
My layout is a wee tad larger. It is ride on size. 7 1/2 inch gauge.– On Al’s side of the pond, it would be 7 1/4 inch gauge. The minimal ethos is that the railroad must do real work — In my case it is moving dirt. This is the kind of work a small garden tractor could do but I believe my yard is too small for that kind of investment even if it is too big for a wheelbarrow! Besides, a real working garden railroad is a lot more fun!
Two fantastic posts …
One from the States, where everything is “supersized”, and unfortunately cannot be reproduced across the pond. Unless you are Rod Stewart of course !
And serious creativity and craftsmanship from much closer to home. I have been considering a very similar setup for a “rising” dust cover/box for my 8×4 …
I’ll let you all know if I’m successful !
Wow, model railway with hot air balloon – truly the depth of originality and creativity within the model railway world is truly extensive.
Also the history and now the progression of the Nevada layout shows the variety of scale within the hobby.
Hot air ballon is very cool!
7 1/2 inch. Damn. I’m jealous. If I were your neighbor, I’d be over every week with some beer and elbow grease. What kind of locomotive (or engine) do you have? Steam, battery or diesel?
A couple of responses…
For Roger Vipond: Of all things, my real inspiration for my outdoor railroad comes from “across the pond”. The first is from two Facebook sites — “Scamp Owners Club” and “Minimum Gauge Railways”. The second is from a delightful and a bit eccentric lady from the Netherlands, Rosie Bongers — Her YouTube videos are will worth the watch.
For Greg Schaefer: The locomotive under restoration is a very small electric. It will show up in an update around July as will another locomotive (or two) that are being purpose built for this line. I hope to get a Scamp which is Petrol-Electric by the end of the year.
I always wanted a outside railroad but was afraid of the weather outside.
I love Larry’s garden outsized railway. It will be so much fun and looks to be fun outside exercise in the meantime. I am not jealous. Tee hee. The balloon ride feature is also wonderful. How clever Brian. Rob McCrain – Farland Howe
I see Darth Vader has called in to help John
Electric hot-air balloons. Now that’s original and very well done.
Great start on that outdoor Nevada railroad. It makes me take a wishful look at my 5 acres here in the lower California desert. My G-scale, currently under construction is 1/2″ scale and covers a small portion of my yard. Keep us posted on progress.
WOW… Quite the undertaking. When I saw your first couple of picks I was thinking “hmmm interesting track??” then I realized John was using a working/preliminary track to start construction.
Then he goes the extra mile, not only is his permanent track impressive on it`s own it appears that John is building his own points/turnouts.
I`m looking forward to see more as john`s layout progresses.
OLar
I am in the process of selling my 7 1/2 inch trains the track is up and the live steam engines are gone . have 2 engines and a couple cars 2 caboose’s- engines are gasoline motor driven w hydraulic powered to the axles about 400 feet of track and 5 switches . wish you lived closer I’m in Marion Ohio . A man was to have come fotr the track and switches last Sept but due to this Covid thing i guess he changed his mind .