There’s quite a few HO gauge track layouts on the blog now – many of them are Dan’s.
He’s been kind enough to put together a post to answer the questions on his last post, which is here:
“Al, I am going to answer some of the questions from last blog post.
This one had several wanting to see more of the layout views and some of the wiring.
Dan*”
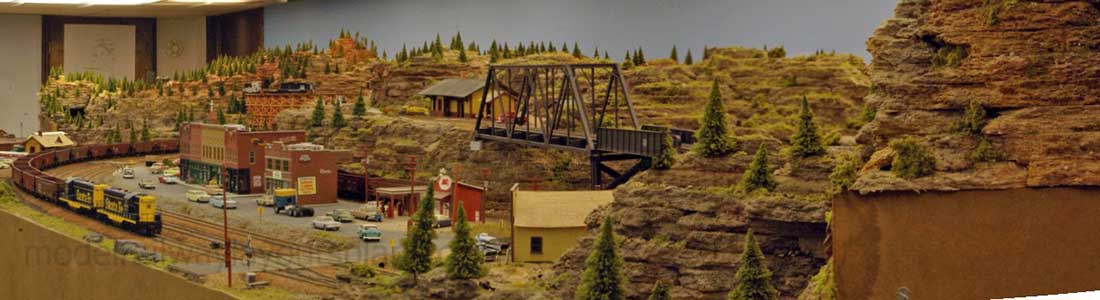
Panoramas of the layout.
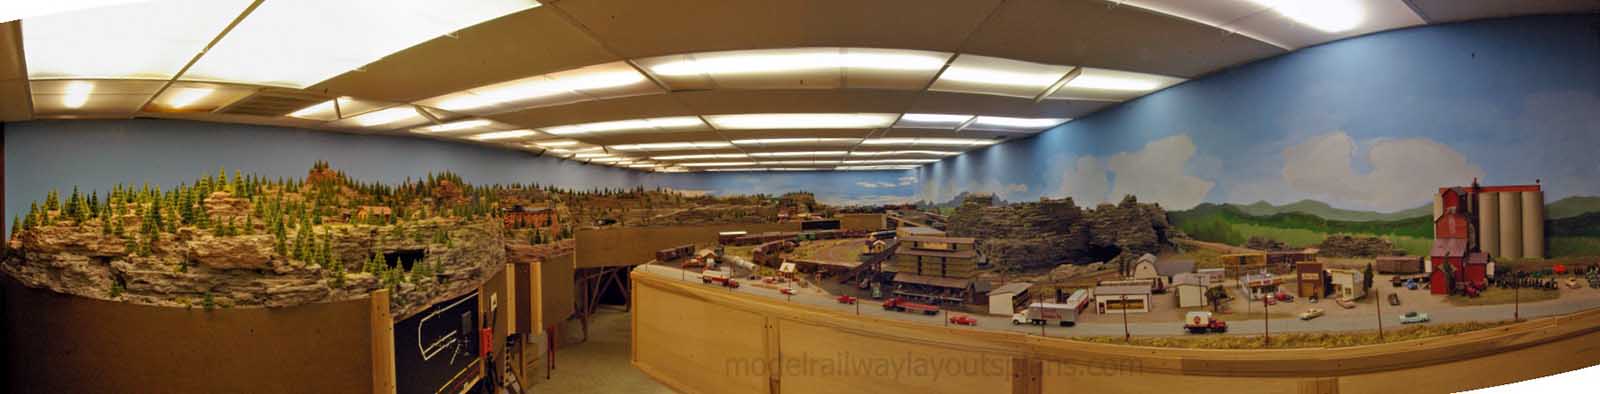
The over all view of the layout.

A cleaner look. The room is 35 by 15.
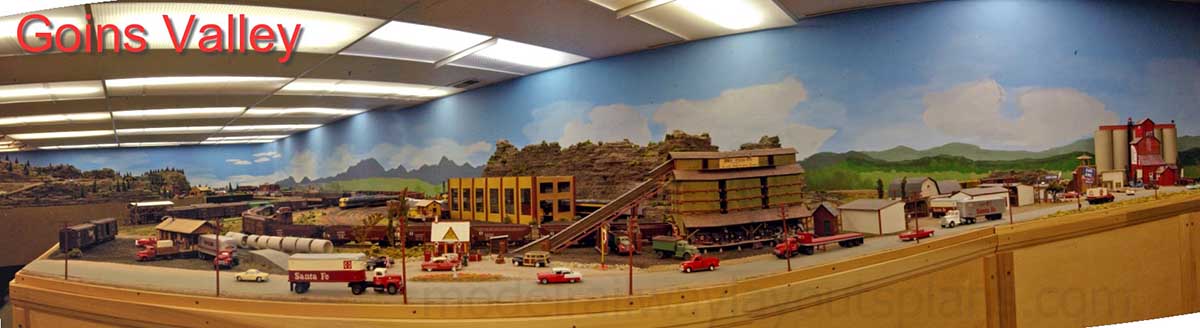
Grain elevator and coal yard
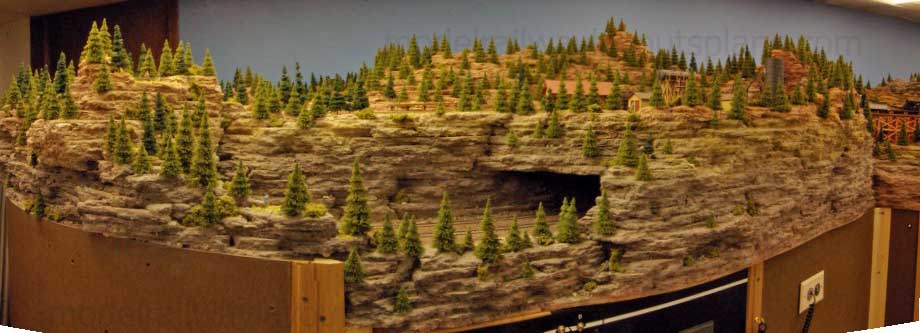
Burnt Lake and the tunnel to the lower level

Rainbow Canyon trestle
Almost part 1
Almost part 2
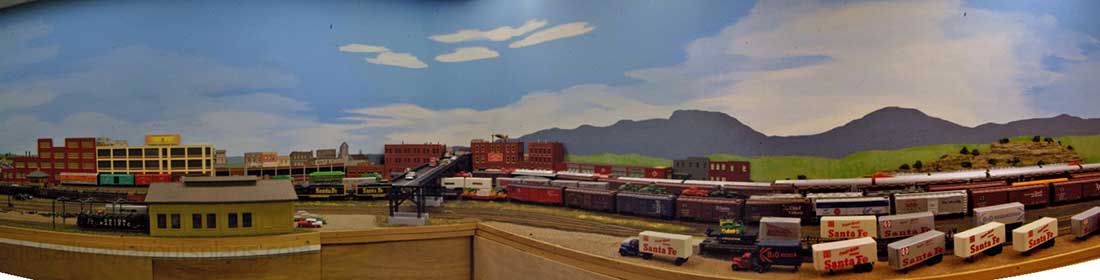
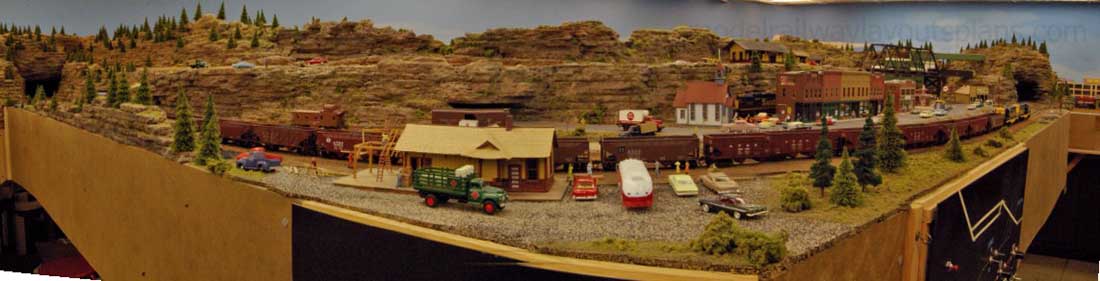
Sharon Springs.

Thunderstorm at Bovine

Chromite mine in the distance

The overall track diagram.
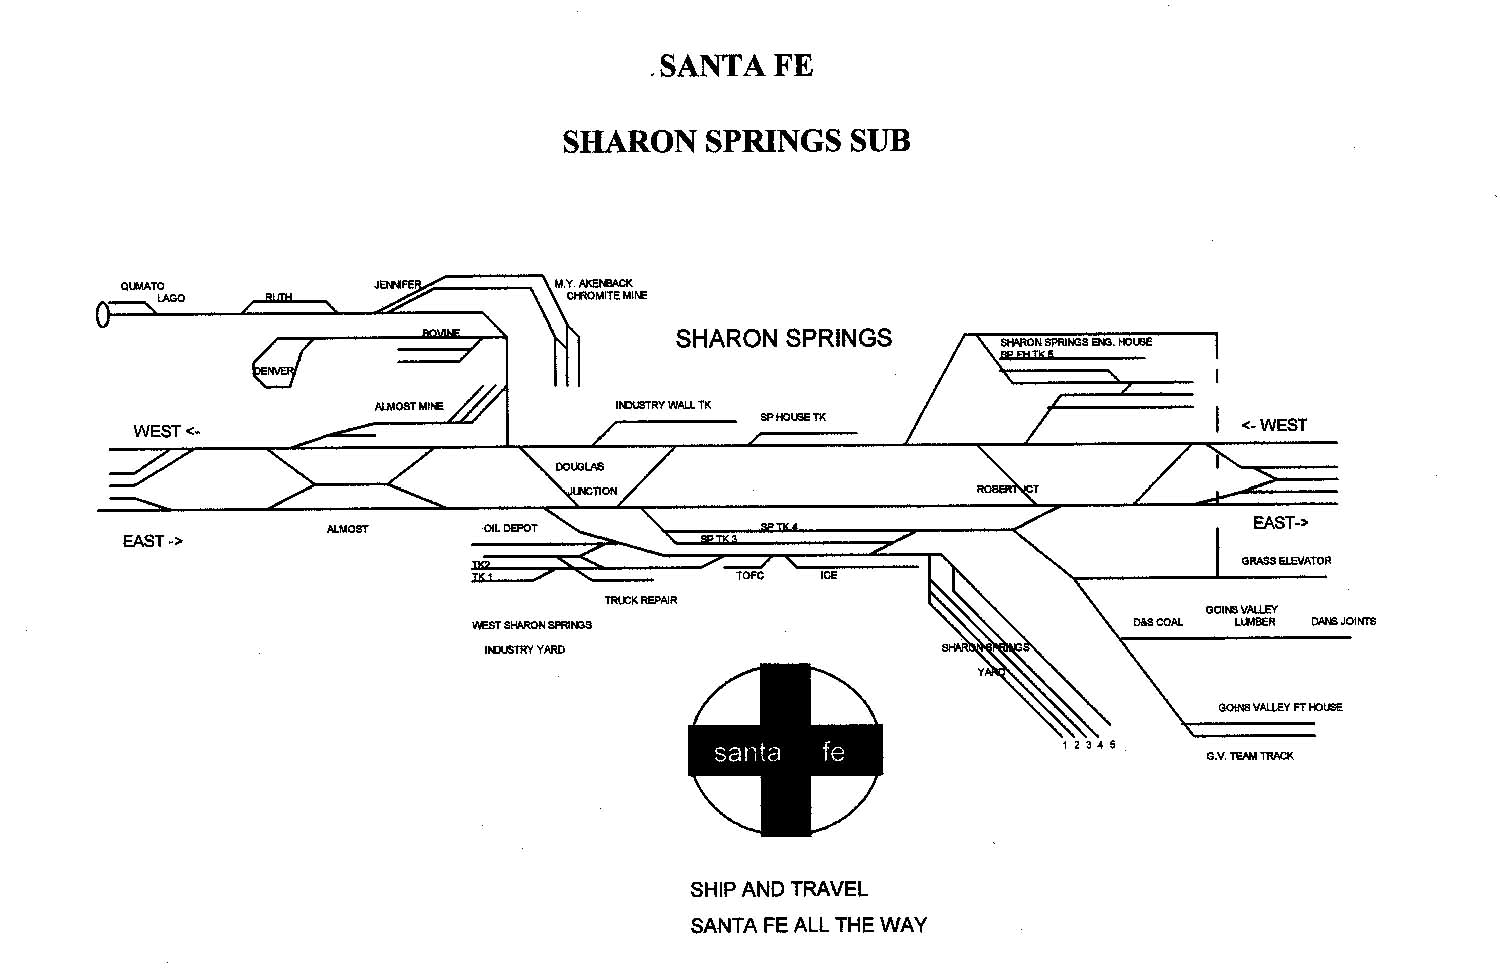
Actual track plan with locations marked. To the left and right the tracks go to the lower level and reconnect to really make a giant oval. The dashed line on the right is a run around track to turn trains behind the engine terminal. You shoud be able to follow the train through the colored track plan.
HO gauge track layouts:
Now for the “messy” part. Various panels and the wiring.
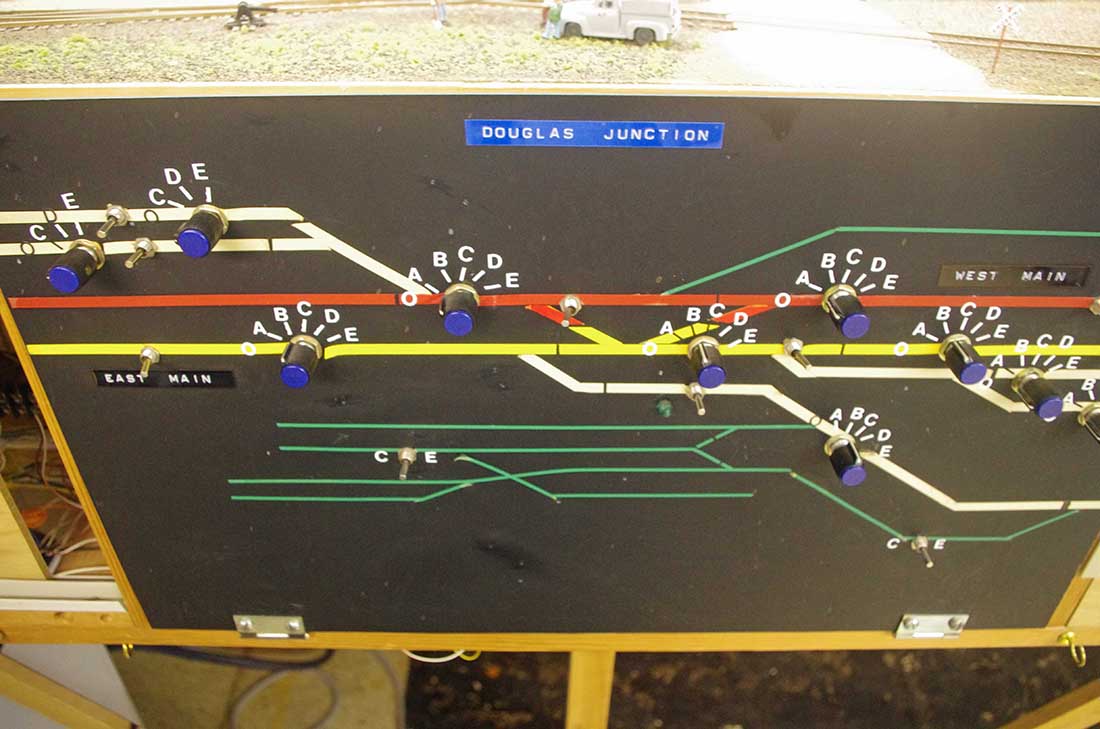
Douglas Junction panel. There are 5 power packs running the layout. Photos in a bit. The selection of power is from rotary switches assigning power to the various blocks.
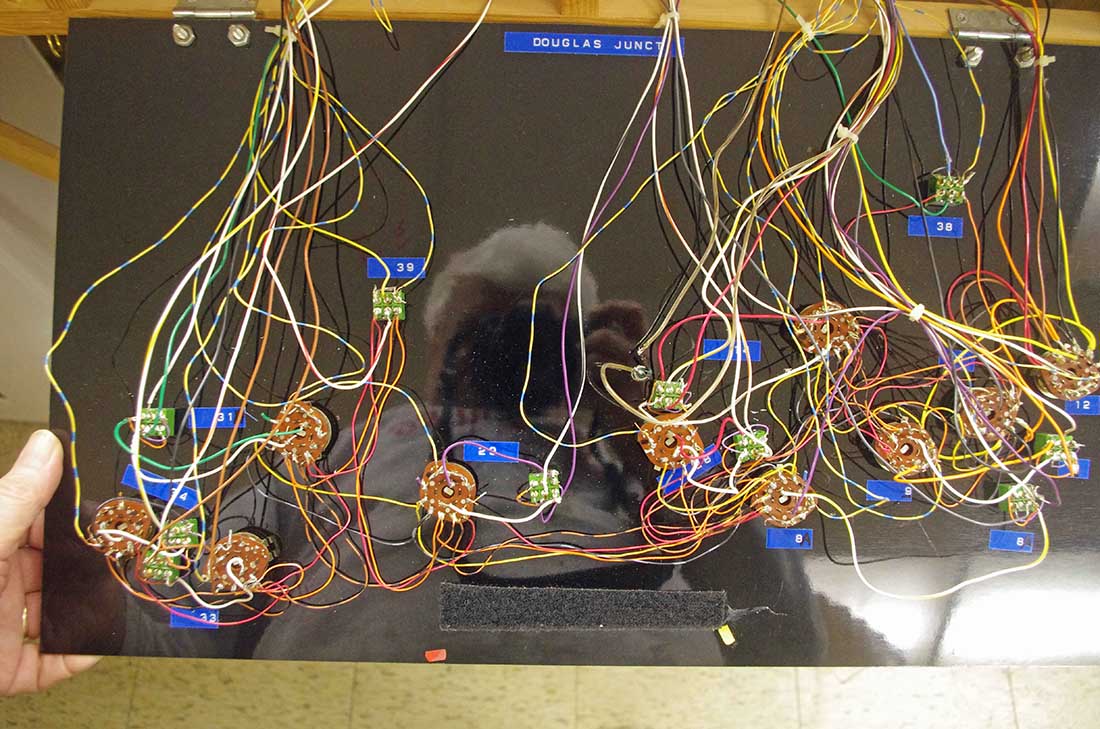
Back of the panel. It is all color coded and really is straight forward. I was able to do each switch in about 45 minuets. One down side to wiring, you work for hours and then you can’t see progress, it is al hidden.

The terminal strips and distribution to the track.
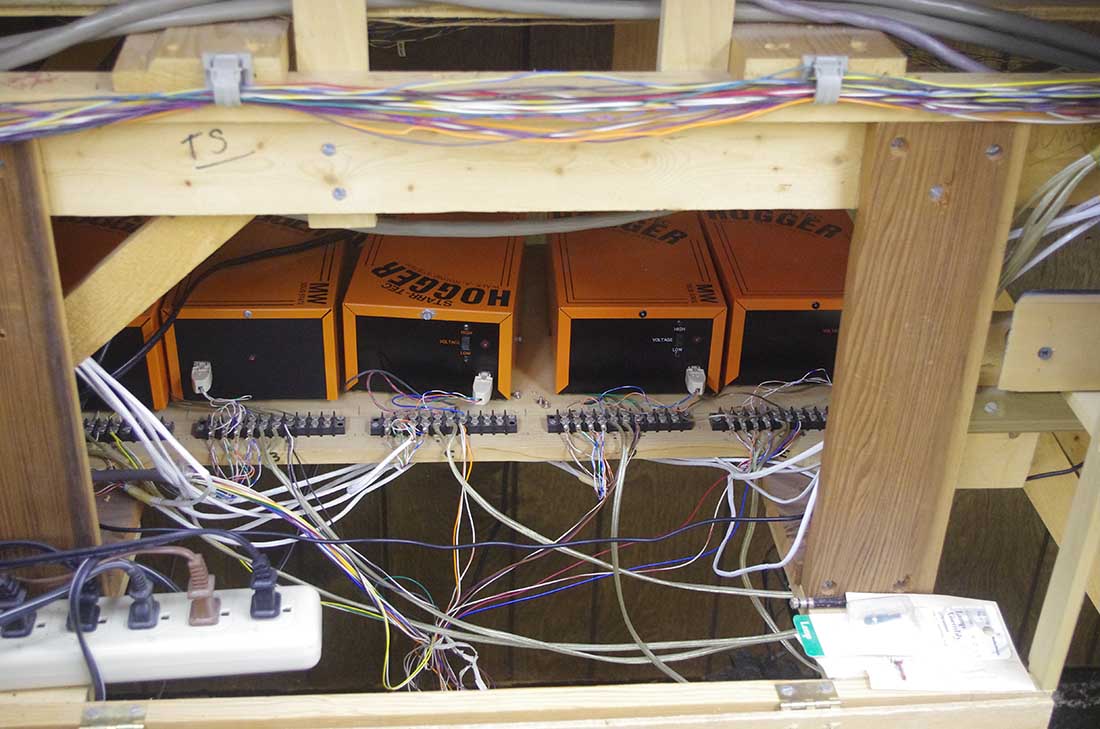
The “Power Plant” for the layout. The Hogger power packs were around for a short time. They were expensive. I never cut corners for things that were very important. Where quality was needed I spent the money. These have lasted 35-40 years!
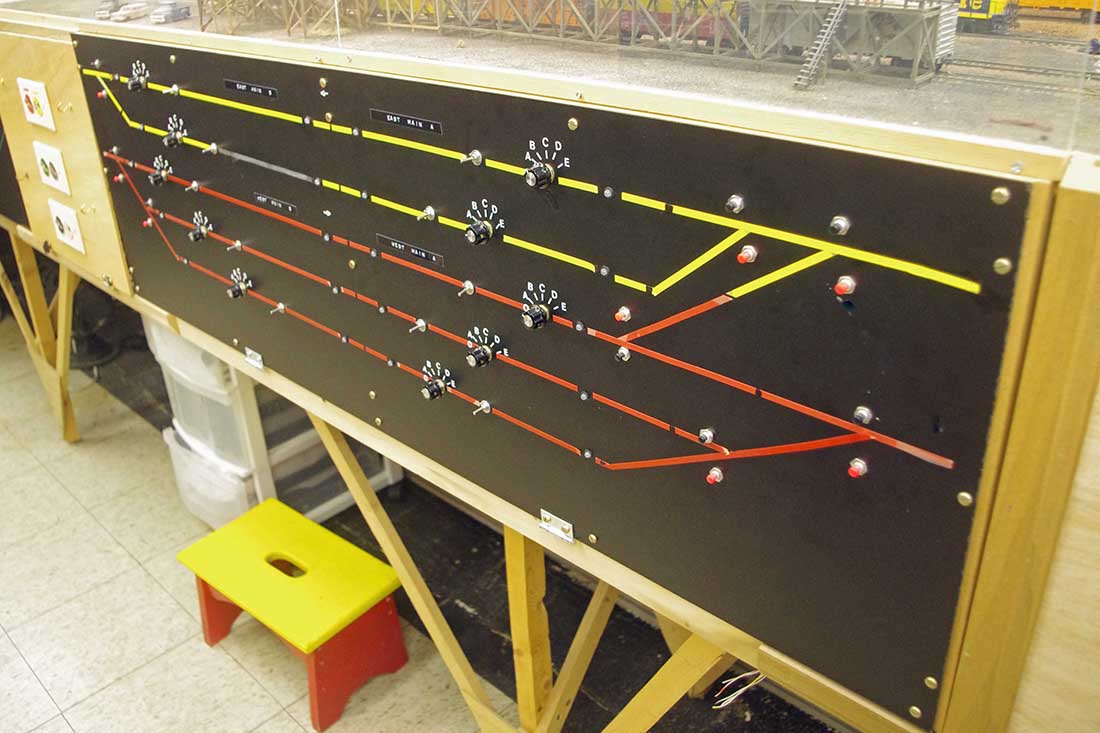
The panel for the lower level. I can store 6 complete trains for staging and the two main lines run here, too. LEDs show occupancy. I have bulbs at each end of the track so it is easy to know where the train is. I use magnetic reed switches and powerful magnets on all locos and cabooses to spot the trains.
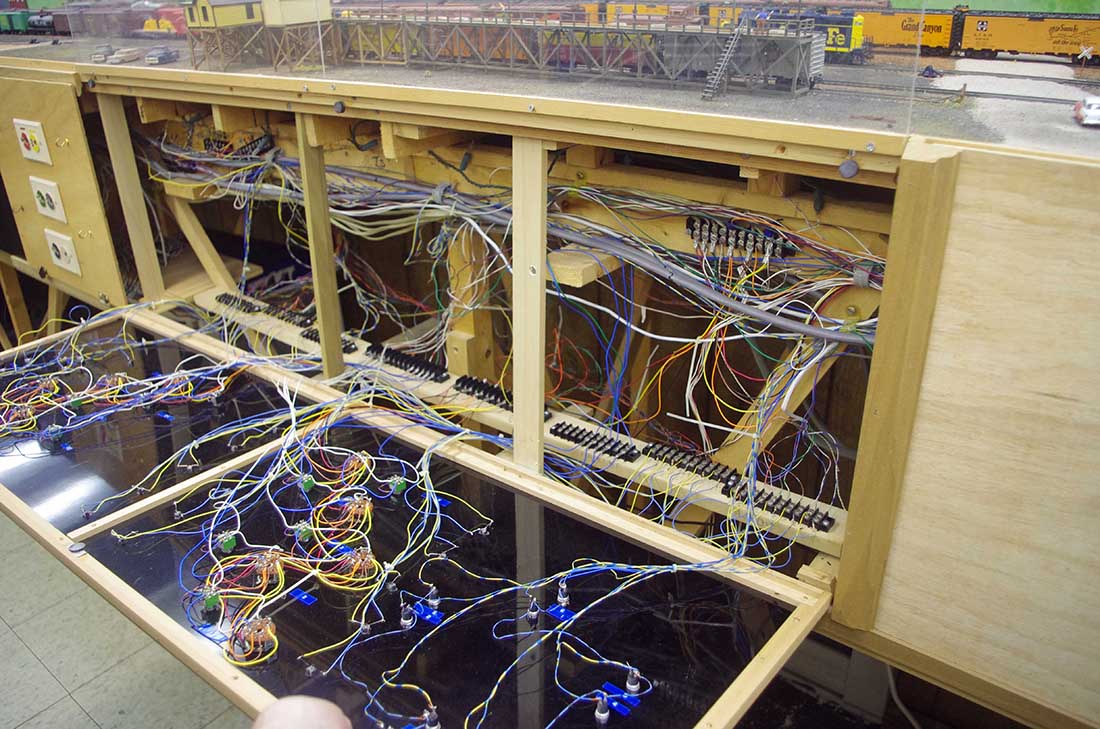
Back of the panel.
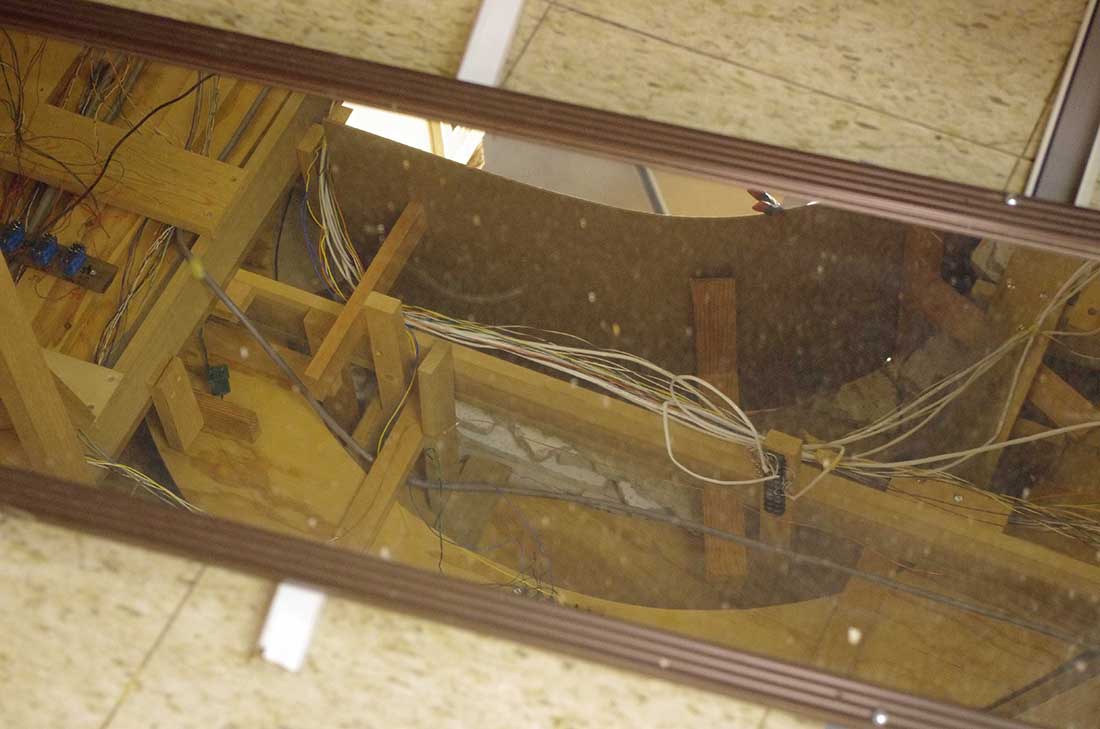
I have a mirror on the floor for visitors to see what the wiring looks like under the layout.
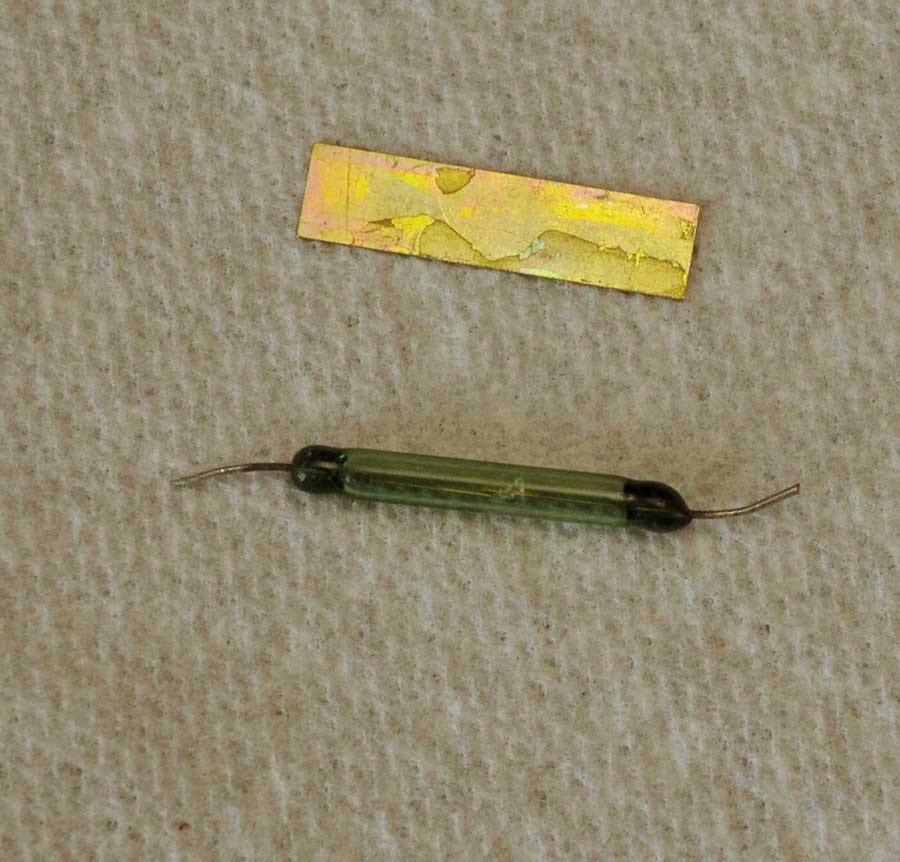
A magnetic reed switch. The metal piece is the “keeper” that is under the magnet. These never fail and the magnetic reeds are sealed in a vacuum.
Enjoy,
Dan*”
A huge big thank you to Dan for adding to the HO gauge track layouts – again!
Dan’s pics reminded me of Peter’s: HO gauge layout.
That’s all for today folks.
Please do keep ’em coming.
And if today is the day you get started on your layout, the Beginner’s Guide is here.
Best
Al
PS Latest ebay cheat sheet is here.
PPS More HO scale train layouts here if that’s your thing.


I hope these answer some of the questions. The layout is 35 by 15.
My word, I’m flabbergasted. Looks like a telephone exchange behind the scenes. Never mind me building a mirror layout lmao, am glad to know such as this even exists- a home project, one man; not railroad club or similar? Guinness Book of World Records contender, seriously.
Regards, Rich
Nic e bit or wiring …better than an Indian call centre …thats for sure ..
Rich, all of the wiring is documented, color coded and organized. What you don’t see is that EVERY SECTION of track has a connection.
Hmmm. On a scale of 1-10 I give it a 1000.
Wiring for model railroads is a tough subject. Even with the best intentions by the time you get to 1000 wires, they become difficult to manage in a neat and orderly way. You have done a great job with them here. You have a fabulous layout. One that most people can only dream about. Rob
Dan
A layout of the century. Takes a bit of learning just to run some trains but the Wow factor prevails. Much thanks for the missive. It was very much appreciated.
I truly hope all runs as great as it looks and it would be great to see some beauties roaring around ( your fan club is demanding more of you- Hey! you started it.).
Big Al
Mind boggling- right? I’ll be shaking my head all day. How’d he do it??
” You’re a better man than I am- Gunga Din “
Dan, truly a master piece. Beautifully executed. Rich K
Money aside this beautiful layout could use a little DCC.
I converted mine years ago and eliminated what seemed like a mile of wire.
I love running my trains much more than throwing switches.
Again this layout is one of the best I’ve seen so far…
Well I’ll just say THANKS for the pictures, wonderful layout. Someday maybe all our layouts will have. Wi Fi no wiring.
This work of art is amazing and well above my pay grade. My wiring is rather basic with DCC but still looks like spaghetti on a wall. Again, I like the use of ceiling tile for your rock faces. And the coloration looks quite realistic.
Jim AZ
Wow, every modeler’s dream layout!!! Love it
wow, awesome job & mountainous area with all the trees is just beautiful
I love the work you have done. Am impressed with wiring. That is my bugaboo. Several people have mentioned somebody having to move the RR, have you designed your table to make that move? It greives me that did not. As mine would have to be destructed to move out of basement. Just a thought for every in process of starting their railroad .
Tim, no it it can’t be moved. I am 81 and not planning to move it to the nursing home. 8+)
Is That Tehachapi Loop just East of Burnt Springs? The real one is just East of Kern.
Very impressive layout above the track level and below. Mine is wired for DDC rather than DC cab control, so much less wiring there, but then I started adding wiring for block occupancy and operating signaling and my wiring is starting to look like yours. It’s a lot to keep track of and document well for later troubleshooting, but worth the effort in the long run. Yours looks outstanding and the mirror helps show that off to visitors. Keep up the good work.
what a layout, very nice. the wiring looks like spaghetti.
It’s been a long time since I’ve seen your layout, I’d love to come over and run some trains when you’re up to it. One of the things that I admire about your layout is that it’s all just DC, just straight forward vintage train running. I wish I could find the picture I took of your train going through the tunnel to the right of Burnt Lake, but it’s on a digital phone somewhere…anyway, I just wanted a picture because I really liked your design and that you can only see a couple of cars at a time as the train reenters the tunnel just a few inches from where it emerged, so I snapped a quick pic, and I got the Caboose between the two openings! One in a Million pic!