Ray’s been back in touch with his 3 loop HO layout:
“Hey Al,
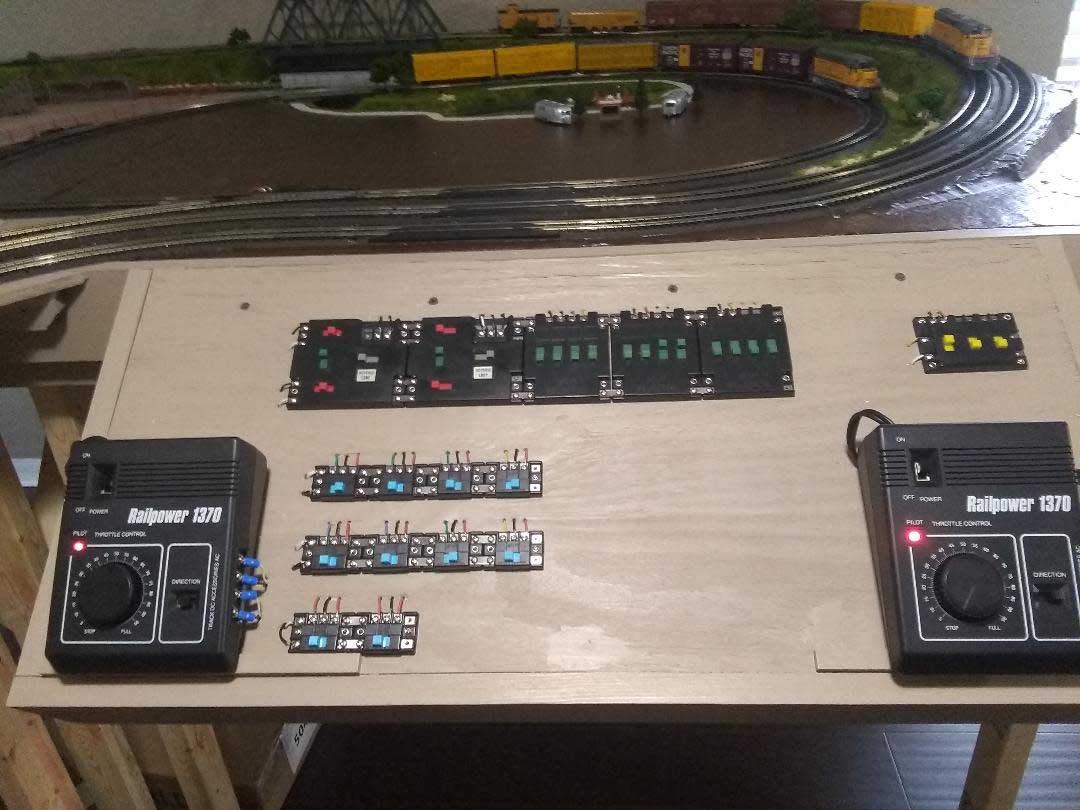
Here’s some updated pics on my 3 Loop HO Layout. I’ve made a lot of progress over the last 2 months. The control board is complete along with the wiring. I can now run 2 engines independently.
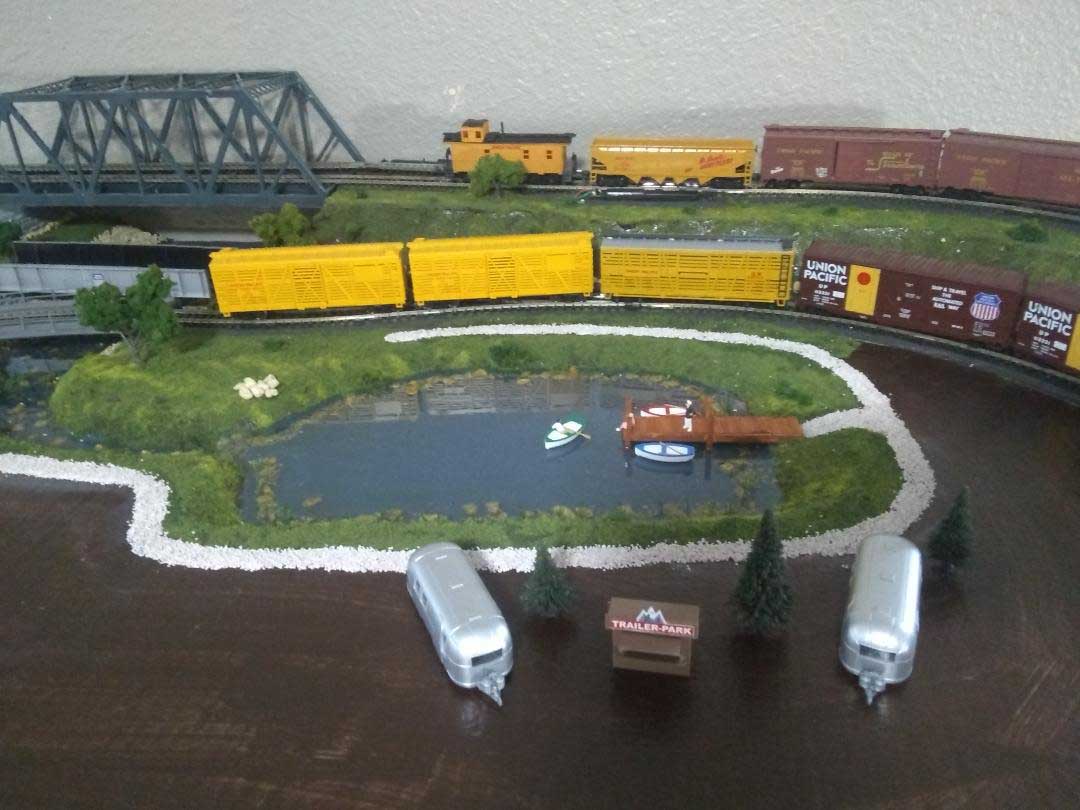
I’ve done a lot of work on my pond and river and have started putting in some ground cover.
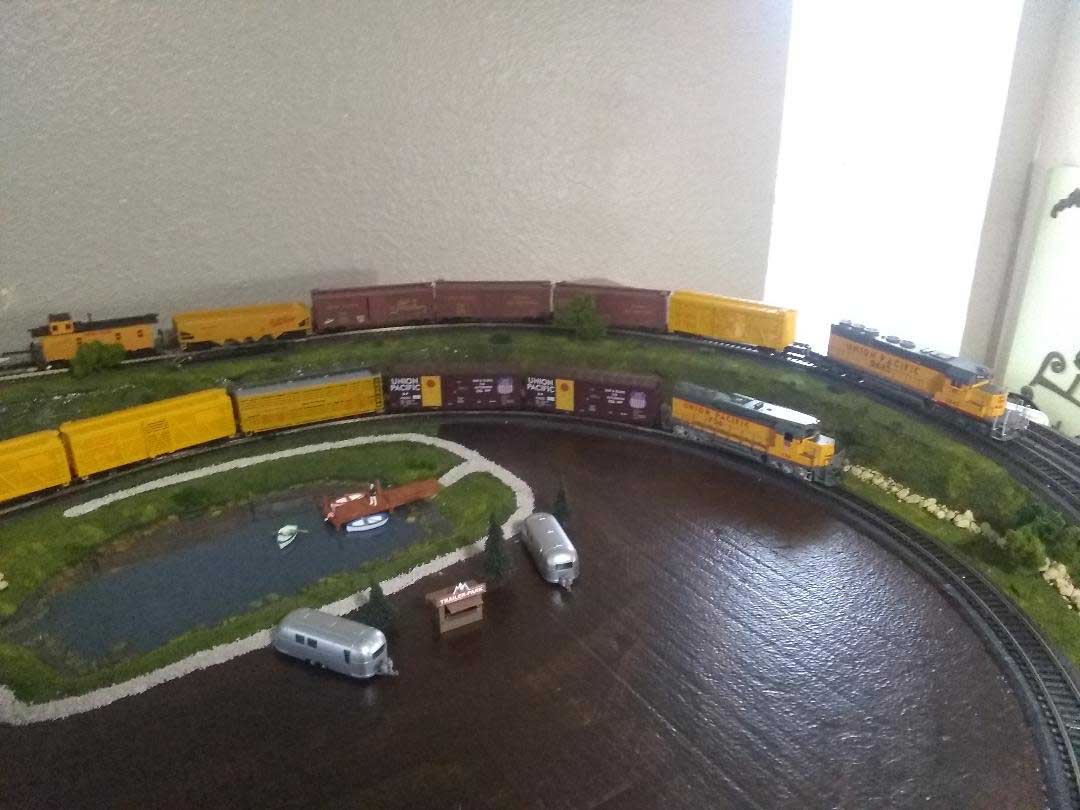
I have the started laying out a corral but need to get lots of cows to fill it up. I did this because I have a lot of reefer cars and this is supposed to be Nebraska.
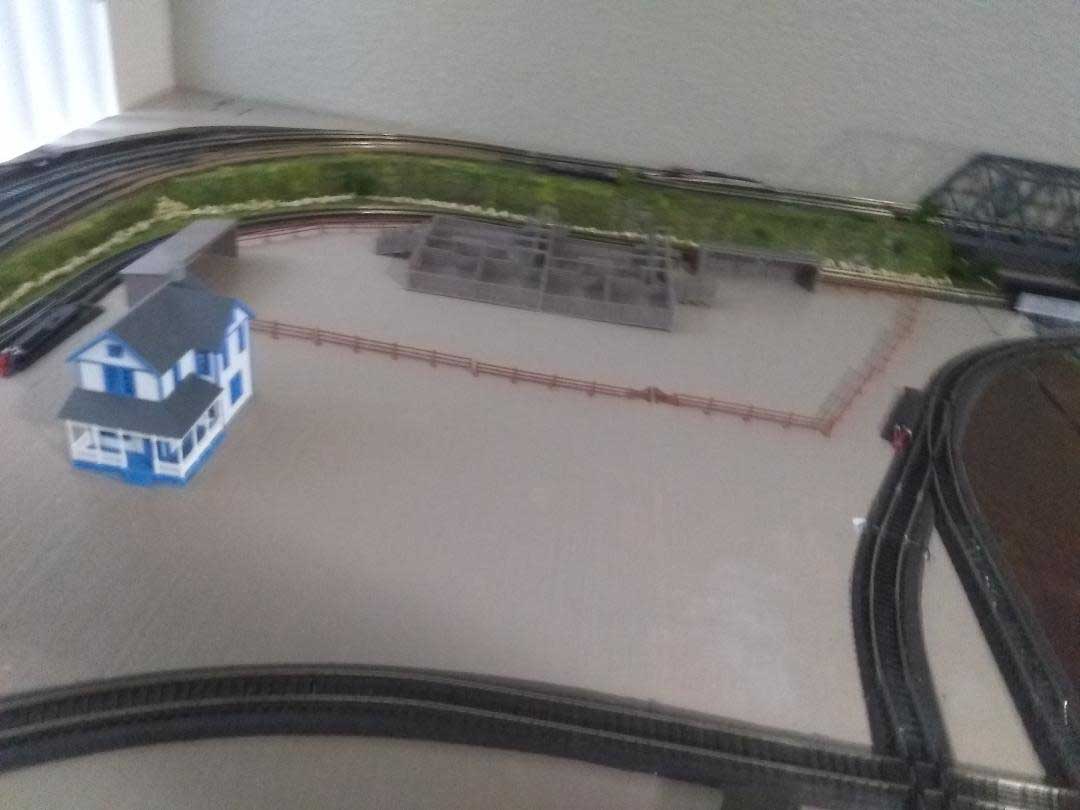
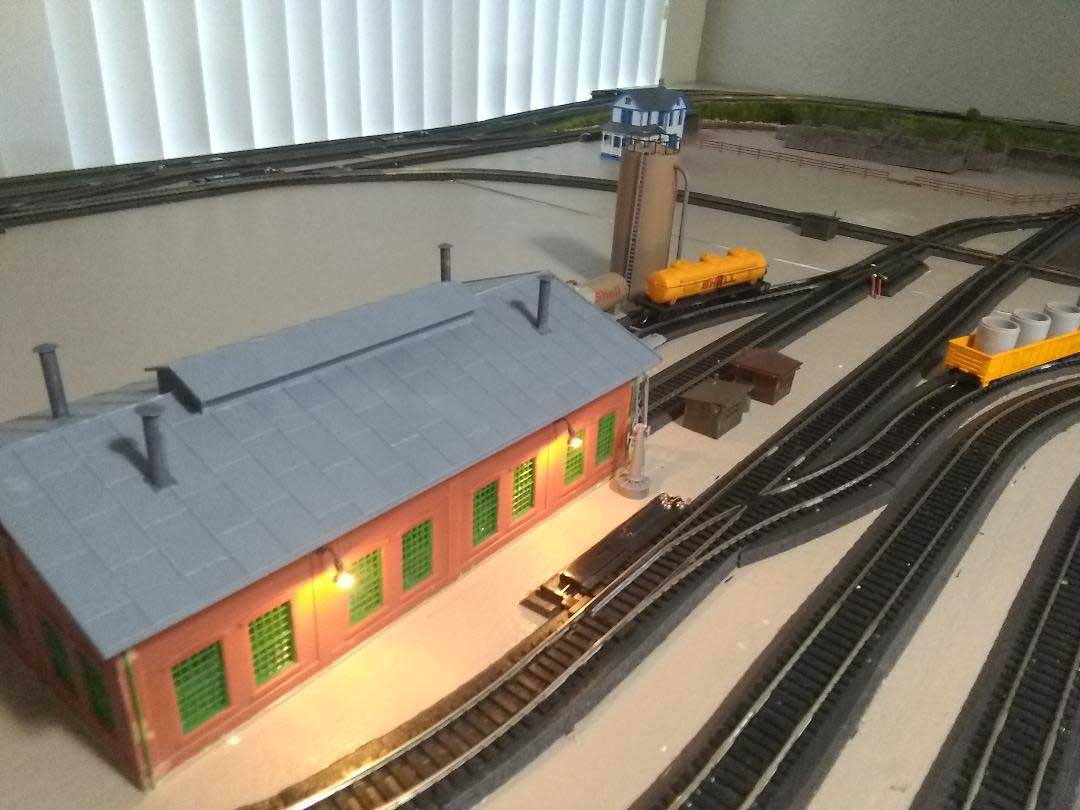
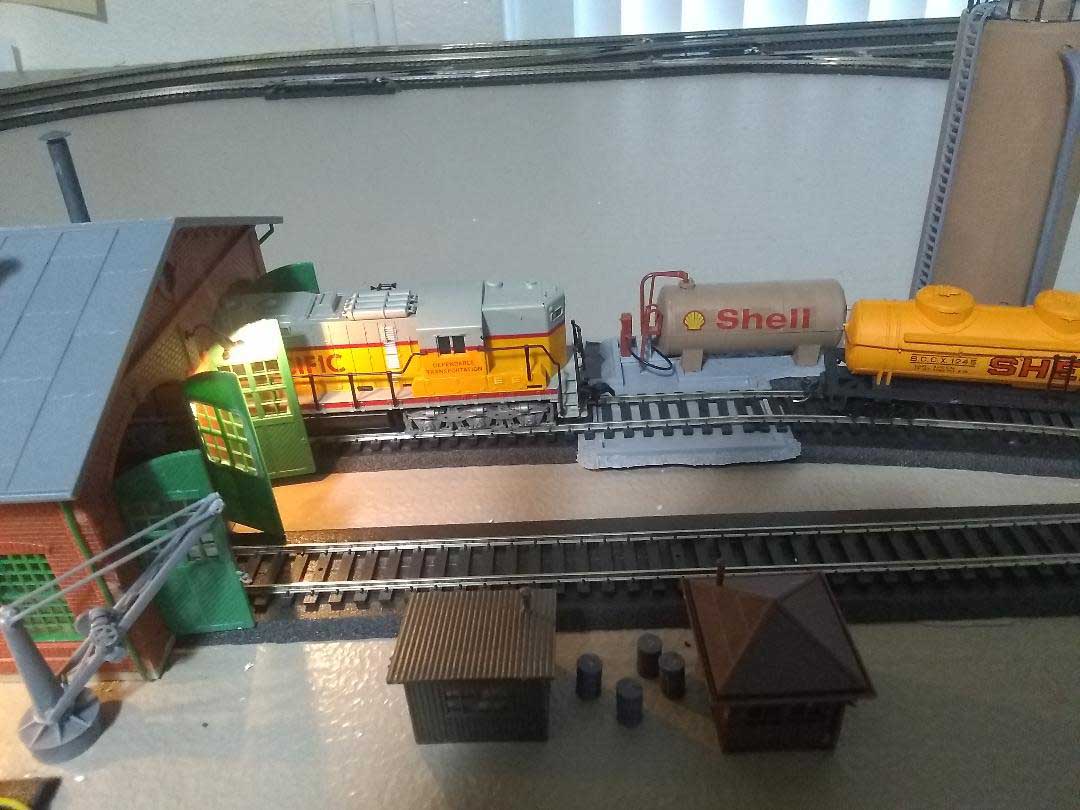
3 loop HO layout:
My engine house is in place along with some diesel storage tanks.
Things I will be working on:
Finish gluing down the track, work on the corral and ranch, install more ground cover and landscaping. Ballast.
Brainstorm the rest of the layout. Basically I have 3 areas, the one with the pond (I think I will make this a residential area). The area with the corral (this will be all farm/corral). The area with the engine house (I am thinking commercial/industrial)
Things I am having issues with:
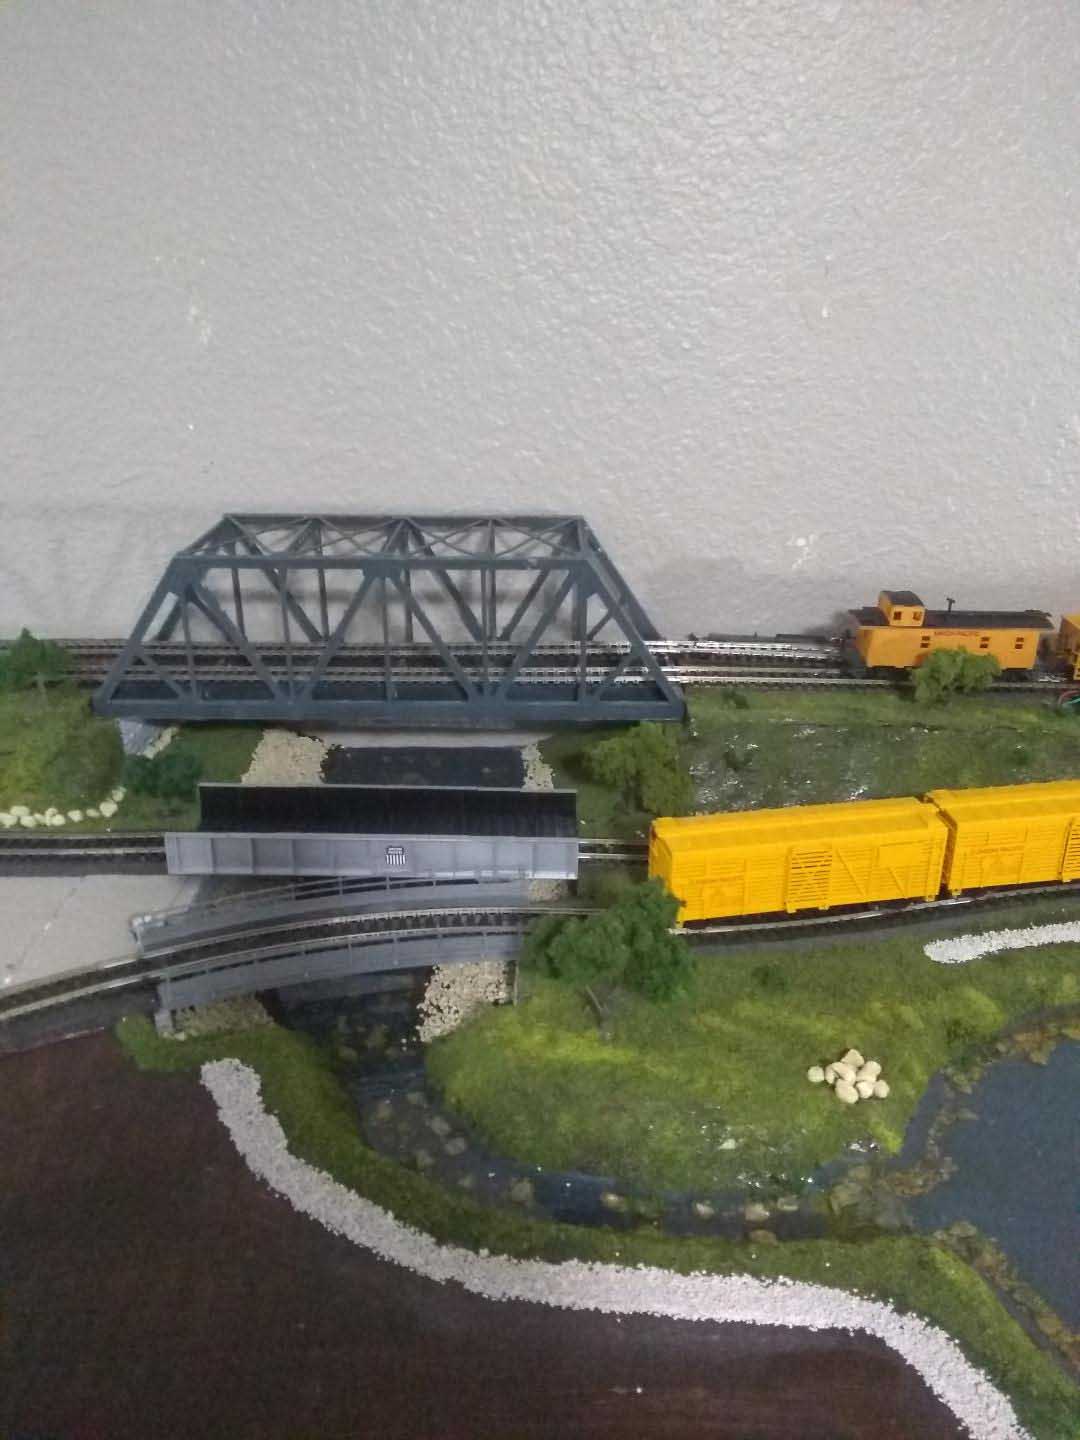
I have two Atlas turnouts along the back wall on each side of the trestle bridge were my engines derail about half the time. I have inspected them up close and cleaned them of debris, but still….. I don’t have any issues with the other 12 Atlas turnouts.
Some of my rolling stock does not stay coupled on my 3 loop HO Layout. I use the knuckle style (Kadee). This I know I can fix, I just need time to work on them. I didn’t realize that these could come in two different sizes (to scale and slightly smaller, then there’s the offset up or down and length to consider). They all need to be attached at the same height, some of them are too low and get caught on the ties! I think there is a learning on changing these out! I’ll get there!
I appreciate all the comments, they were very encouraging. One comment asked about the grade on the right side of my layout and yes, it may be a bit steep and I should have paid closer attention to that! I am open to any suggestions as they are always appreciated!
Thanks for reading!
Take Care & God Bless,
Ray”
A huge big thanks to Ray for sharing his 3 loop HO layout update. You can see his first post here:
Or if you want to fast forward to his next one: How to run multiple trains on one track.
That’s all for today folks.
Please do keep ’em coming.
And if today is the day you stop dreaming and start doing, the Beginner’s Guide is here.
Best
Al
PS Latest ebay cheat sheet is here.
PPS More HO scale train layouts here if that’s your thing.


very nice. good work.
Sure, nothing wrong here. Pond is perfect, looks finished. Only thing I would do there is bottled spray trail(s) with mix of diluted Elmer’s white & water. Keeps stones in place, too many have those bolder size gravels in roads, on grasses, parking lots & sidewalks. Elmers also excellent for window glazing, stretch across openings like a soap bubble. Dries translucent…
Take time, do everything else first on list and that’ll be going places. Should see me trying to put in new CCTV camera using that philosophy, do have Ring backup ha, ha. Might finish today, things just getting worse in NE U.S. Batten down the hatches- immigrants and crime way out of hand in towns, spreading.
Rich
had the sane problem with couplers. Have to be same size
and height. shim as necessary. Did you check the level of the
switches? Push a car slowly thru the switch with a close
eyeball to see.
Ray
I really hate saying anything negative regarding model train stuff but Atlas switches are the reason my HO is idle and i’m building a new S scale & ON30 layout. I cannot do a proper HO yard switching exercise without the “O shitz” ( or worse) & frustration factor ending a session. The switch solenoids are too small to adequately throw and keep the points and your stats are about right- 2 out of 14. That setup of a momentary control that works tiny solenoids at the turnout is not reliable enough for me. I’m sure there are guys that will strongly disagree but they got lucky and no more.
Since you’re committed to that setup you must fine tune your turnouts to assure those points are not protruding a thousandth of an inch out. File away the notch in the main, adjust the point if not perfect, and make sure the train wheel flanges dont catch. Make sure that everything is working smoothly. Make sure the turnout is level & the track too. You have them before & after turns & severe elevation changes which make the engines do strange & twisty things and a turn out makes it worse. Do you have to have the turnouts there?
Lets us know the outcome.
Big Al
Much thanks and pull a silly prank on someone today- its fun. 😊`
Hey Ray, I use Atlas turnouts exclusively on my flex track layout and I’ve had to replace a few turnouts myself. I had one at the back of my layout that was within a foot of a trestle. When the turnout was closed it worked fine, but when I’d throw the turnout to bring the trains through town I’d have a massive Norfolk Southern experience! I couldn’t find anything wrong with it and ended up replacing it with the same thing, and I haven’t had any issues with its replacement. Uncoupling can be a huge frustration but that occurs much more when going into a grade or cresting a grade. If you feel the height is fine with the couplers, you may have ti turn your cars around or mix the up to arrangement to get them to play nice together. If one car has a lower coupler and the the car connected to it has a high coupler, then you’ll probably see them disengage either at the bottom or at the peak of the grade.
Hi Al, You stated:
“Things I am having issues with:
I have two Atlas turnouts along the back wall on each side of the trestle bridge where my engines derail about half the time. I have inspected them up close and cleaned them of debris, but still….. I don’t have any issues with the other 12 Atlas turnouts.”
Are these turnouts on any up or down elevation leading to your trestle?
If so, that may very well be the problem. NEVER have a turnout on any elevation.
Both sets of switches on the back of the layout appear to be at grade transitions. From experience I can say that they will derail engines because of the change in grade. If they need to be there I would relocate them to a straight section of grade at least 9 inches from the transition from grade to level track. I lay my track with a vertical transition radius between the grade track and level track. this helps some with derailing and uncoupling but doesn’t resolve it completely. The transitions will also cause couplers to uncouple. I use ‘lower shelf SE’ model 119 Kadee couplers on my longer cars to prevent uncoupling at grade transitions. I also check all of my couplers with a Kadee 206 height gage to ensure they are all at the same, correct, height. I haven’t had any trouble with Kadee scale head couplers mixed with Kadee No 5 size couplers. I use scale heads wherever possible since I prefer the smaller heads. My last layout had tow switches that could reliably derail steam engines as unwanted. One at the bottom of a grade and the other at the top of the same grade. The upper switch wasn’t too bad after I put Kadee 119s on my longer cars and locomotives but the lower switch seems to have a sharp transition at the grade and nothing helped. I was not sorry to them taken up for reuse on another layout.
Everything else looks very good.
Good luck and Have Fun, Ray from South Bend.
The new Mark VI Atlas turnouts are supposed to be much improved over the old Mark IV and Mark V. Walthers has also introduced new track and turnouts that have major improvements. Both are DCC friendly. On the coupler issue, two tools to have are a coupler height gauge and the trip pln pliers to adjust the pin so it clears the track, particularly through the turnouts.
I simply replaced my Atlas turnouts with PECO branded ones with great results. Can’t remember a single turnout related derailment since I made the upgrade.