George has been in touch – he’s shared his HO scale bench work tips, all found out the hard way.
I always think it’s an overlooked part of the hobby.
Get it wrong and it makes the rest of the project an uphill battle:
“Hi Al,
I thought I would share my thoughts on my HO layout after it has been around for some time and has proven structurally that it is a viable solution for all HO and smaller scales.
It consists of a baseboard frame of 1×4 with minimum framing, 2×4 legs (6) & a minimum 3/8” to ½” plywood top, and it is only 2’-6” high.
My layout is 5’x12’ & requires some thought how to frame it with 4×8 ply & I am not going to into those framing details here.
On top of this frame is another one made up of the white compressed fiber board, 1 ½” thick, with 9” high fiber board joists on 16” centers.
The total height of the assembly is 3’-4 ½” which is OK for me. DO NOT use the pink insulation it is not strong enough. Use pink for scenery on top.
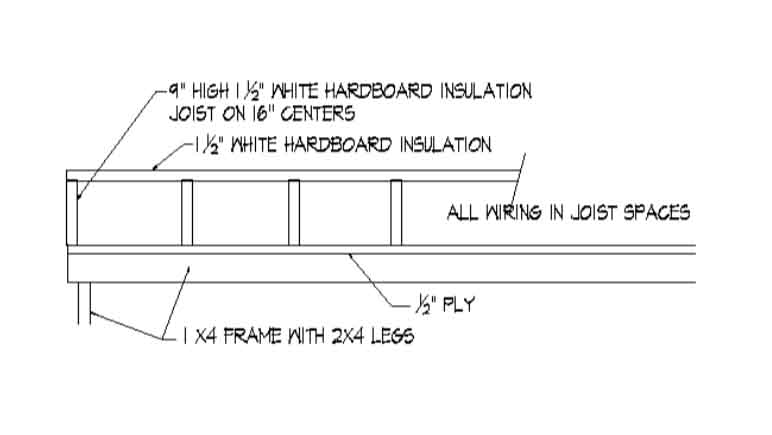
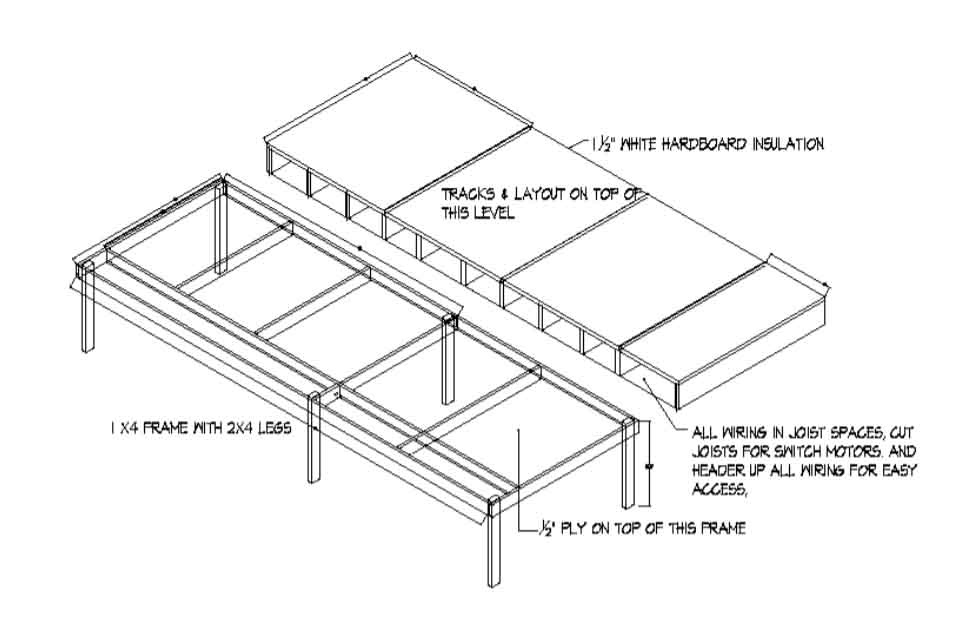
The reason for all this is that I don’t have to crawl under the ply for wiring. The under switch motors wound up close to edges and are do-able and cut the joist where you have to.
Pros:
This HO scale bench work easy to install track, wiring, devices, and adjust heights for more complex schemes.
Light but strong enough that warping was not an issue.
You have a space below the track for transformers and complicated stuff.
Cons:
-
Not strong enough for anything larger than HO.
U shaped layouts need some thought about access.
After a long time to prove this system is strong enough for a layout with mountains and stuff on top I can safely say this is one of my achievements against many failures.
I have abused this system enough and it is standing up well.
Here is an old pic to show the concept of a fiberboard structure on a baseboard. The cut out- lower right is the water front one level below.
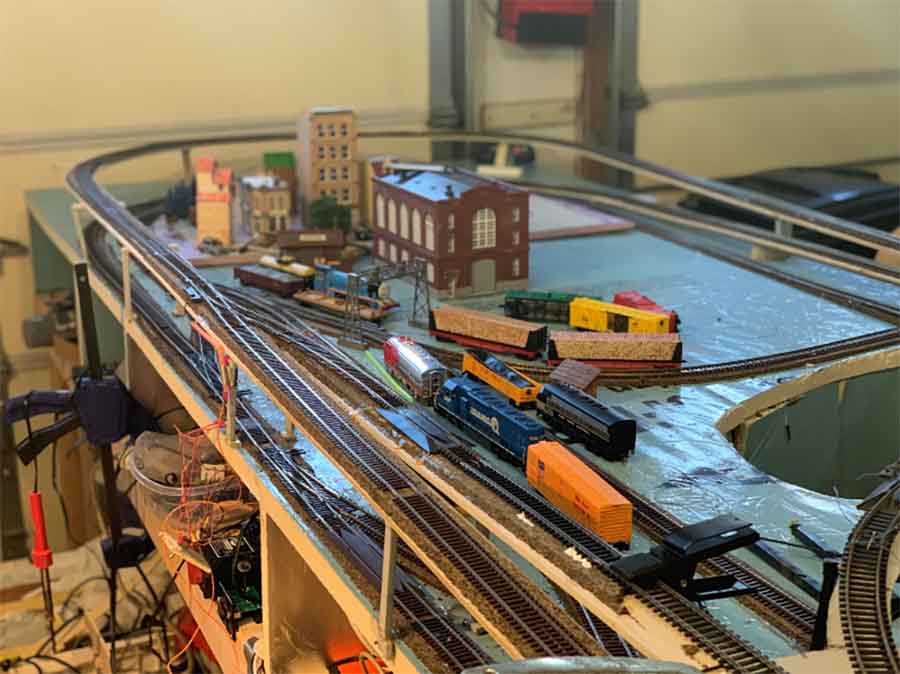
This layout is the old over & under loop that is fabulous for running long trains but brutal for scenery work.
My fat gut destroys the track when I lean over and since I am really bad at scenery work the layout suffers.
As time moved on more stuff got into the “Storage space” but that’s OK when you have limited space.
Again the wiring was so easy to do. Perhaps there is a little more wire but it’s worth it.
Latest schemes demand higher tracks in the middle, S scale which is too heavy for this concept, and more scenery access.
So much to think about but it keeps old brain cells alive. Slow but alive. LOL.
Thanks for all your hard work!
George from LI, NY”
A huge big thanks to George for sharing his HO scale bench work tips.
Now on to Dan:
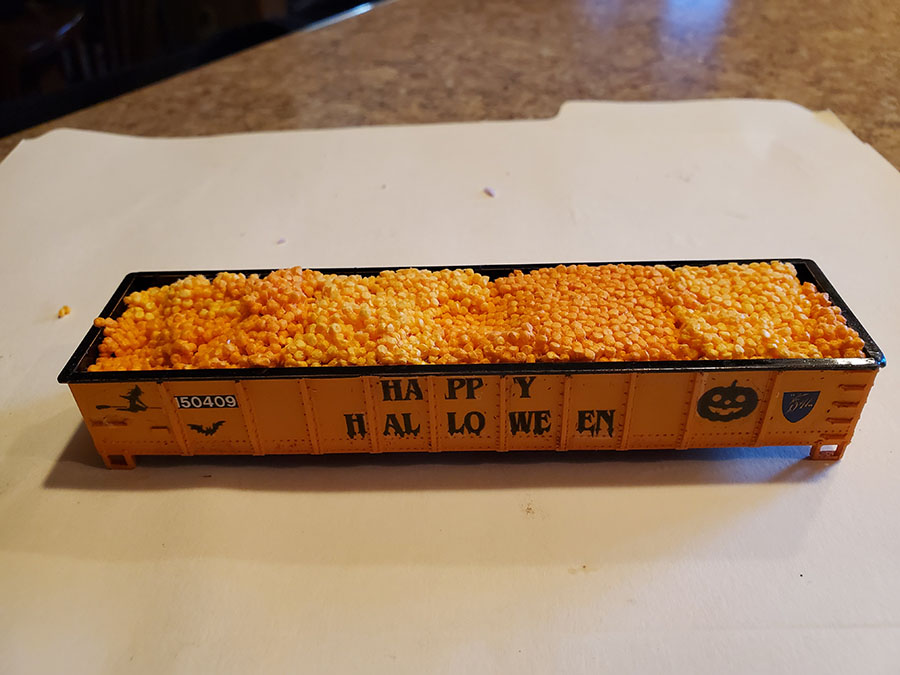
“Dan’s had fun with this project. He’s turned one of his freight cars in to a pumpkin shipper:
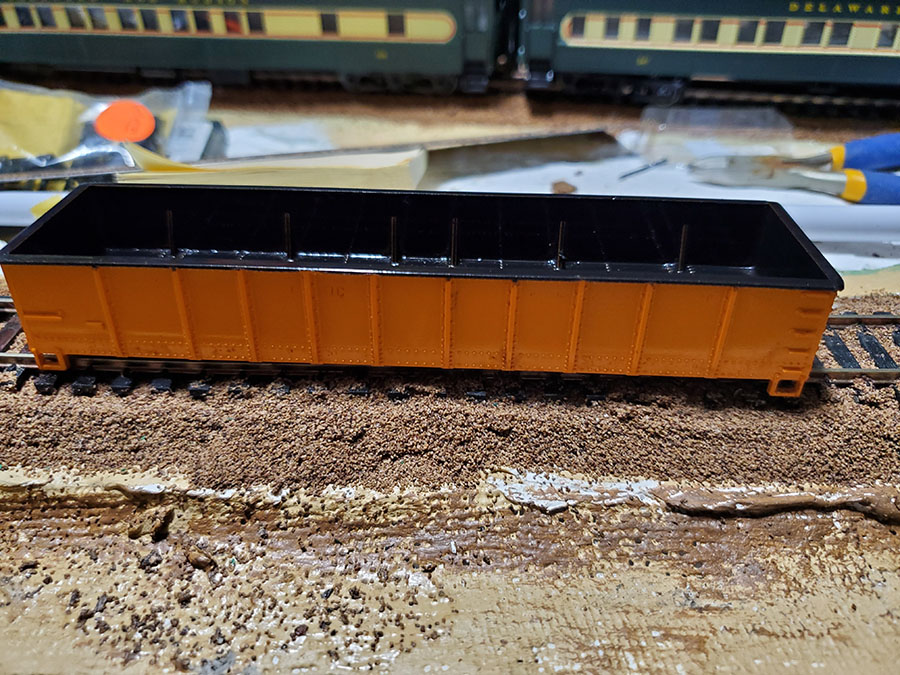
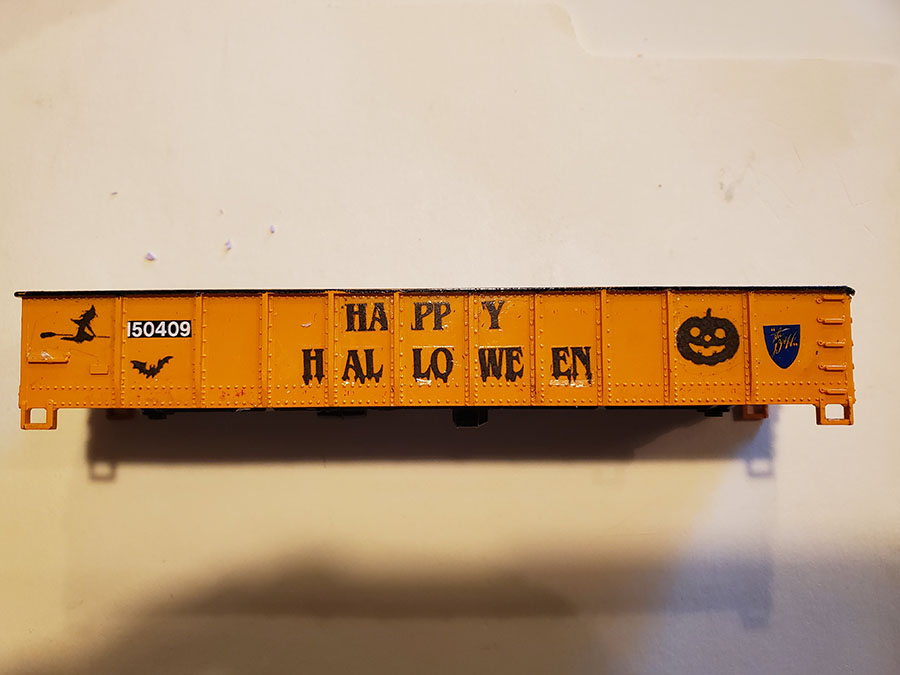
“It is pumpkin time and I came across a 1960’s Mantua gondola car that was Union Pacific orange and looked to be the perfect customer to turn into a pumpkin shipper. Some 91% alcohol and a Q-tip took care of the UP MOW markings.
The next step is to mask the sides with painters tape, being sure to burnish the outer posts so no paint seeps in. I primed the interior and upper sill then followed up with black gloss enamel. I wanted a color break between the car and the pumpkins.
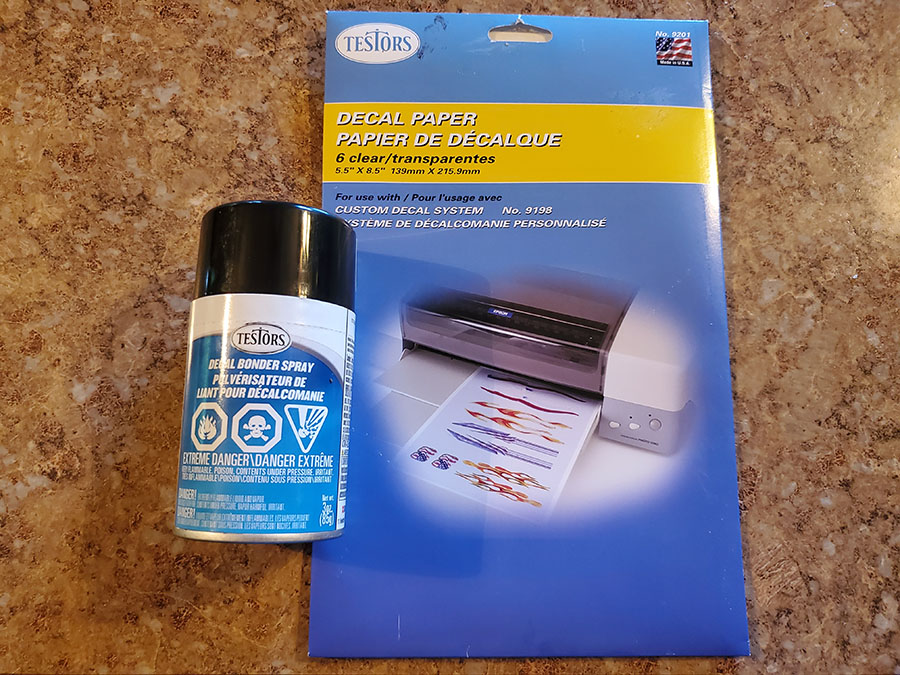
Now to the new stuff. At Hobby Lobby I purchased TesTors decal paper for inkjet printers. I used my 40% coupon for this. Once I got home and opened it up I realized I should have also bought the TesTors decal bonding spray. Don’t try this without the bonding spray. Fortunately, my wife had to make a trip, so I followed along to pick up the spray.
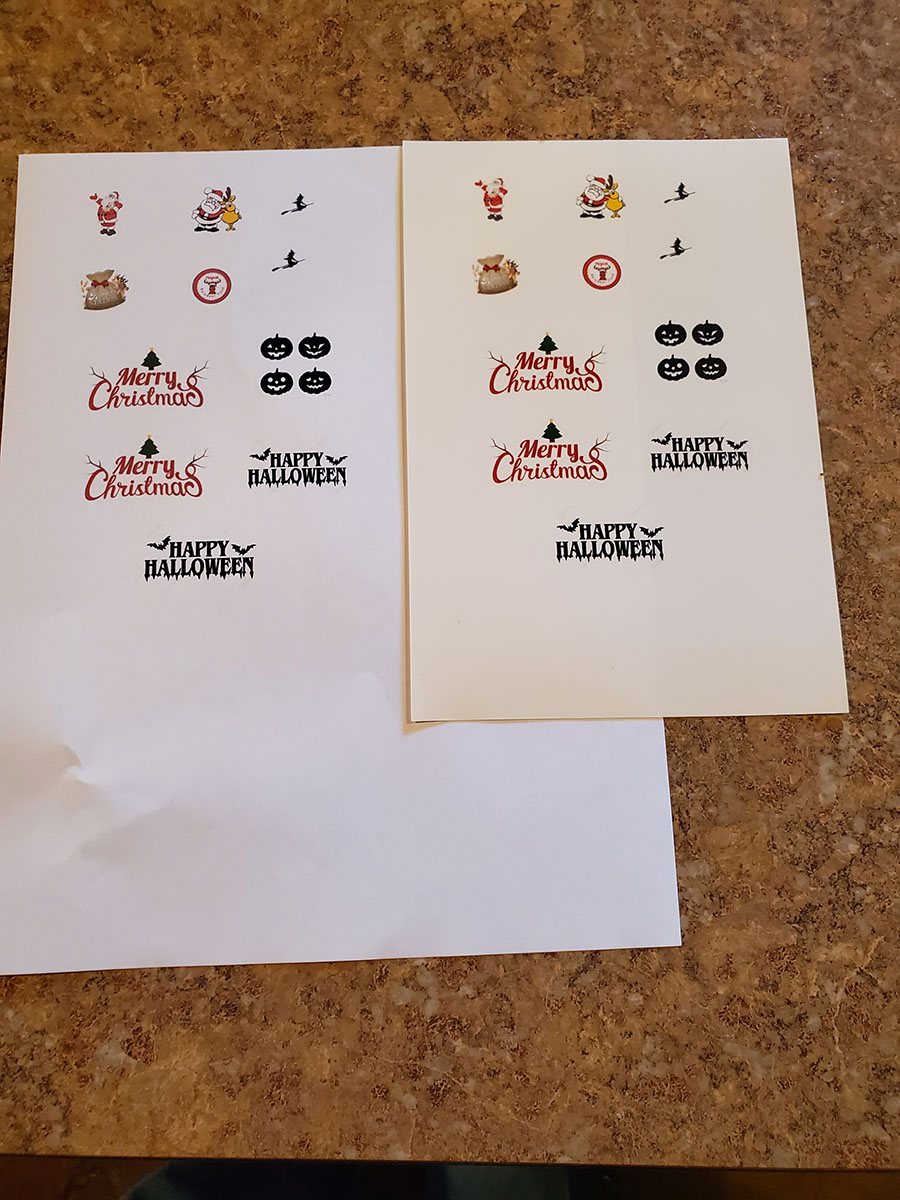
I pulled some likely clip art from the internet and played with the sizing in Word so they would fit on the car. You do some dry fitting, just printing on regular paper.
As with any decal project, it is a good idea to wash the car in warm soapy water and let it dry. Once dry I sprayed the sides with a glossy coat. These TesTor decals require that kind of finish, as do most decals. Then wash your hands and glove up. There was a question a week or so back about the need to use gloves. It is just that the same oils that leave fingerprints for the CSI folks can also spoil paint and decal jobs.
I printed my decals, ganging them so they would fit on the smaller decal paper, and when dry, gave them 2-3 passes with the TesTors bonding spray. I let this dry overnight.
The next day I followed the instructions on the decal pac, cutting and soaking for 5-7 seconds in water [I use distilled] then placing it on a paper towel. I also dabbed a drop of water on top of the decal after placing it on the towel. 15-30 seconds later the decal would slide off the paper. Using tweezers and a very small straight cut brush I placed the decals where I wanted them. I put a dab of water on the spot before placement. I let it sit for a bit, then dabbed with a Q-tip very carefully to pick up excess moisture. Then on to the next decal. As the photos show, a smooth-sided car will make this process easier and faster. My next holiday car (Christmas) will have this advantage.
Now I needed some railroad markings, so I pulled out my D&H decals and dropped the seal and car reporting # on the car. These decals were followed up by a setting fluid as normal, but the printed decals only really needed a good gloss surface.
I was very happy with how they turned out, and actually, I found them sturdier than the decals you buy at the store. With this product, you can make any decals you want with your inkjet printer.
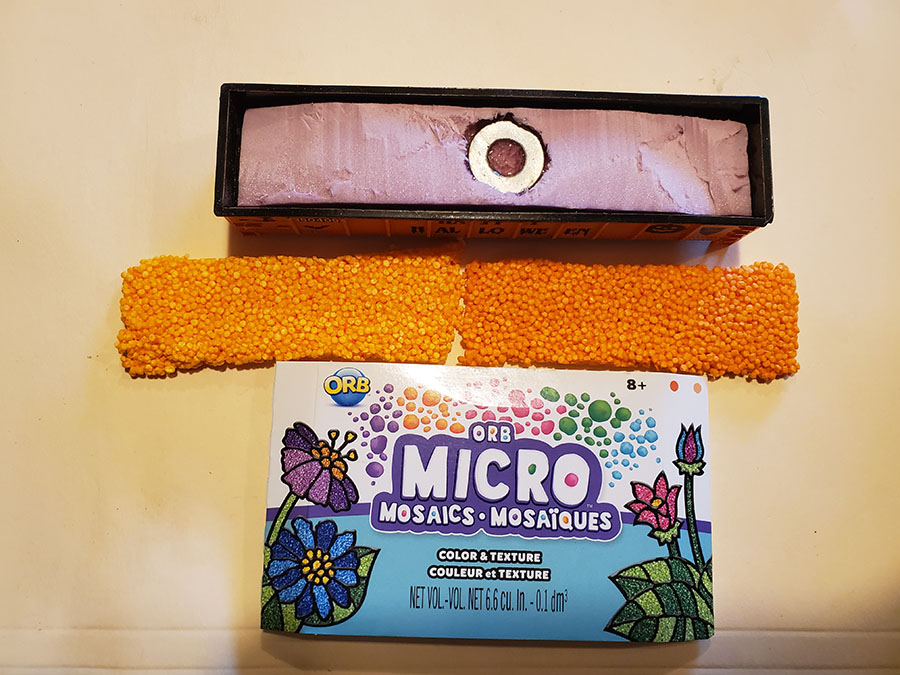
Now to the “pumpkins.” I found this ORB Micro Mosaics also at Hobby Lobby in a variety of colors. The black makes for good coal, and this material is malleable with a sticky back. One pack had two different orange colors and the scale seems to work for HO scale pumpkins. I dummied the gondola with foam, inserted a steel washer for a magnetic release if needed, then pulled apart the mosaics and placed them in the gondola, mixing up the colors.
The final step, a dull coat application, trucks, couplers and on to the produce distributor.
I did not weather the car, as this car had just been repainted at the shops in Oneonta. That is my story, and I am sticking to it.
I hope this provides some useful info for you folks.
MN Dan”
That’s all for today folks. A big thanks to George for his HO scale bench work and to Dan for sharing his pumpkin freight car.
Please do keep ’em coming.
And if today is the day you get going on your layout, the Beginner’s Guide is here.
Best
Al
PS Latest ebay cheat sheet is here.


Re your wiring idea of creating a work space under the layout and at the level aged fools like me could actually get to and reach without crawling all over the floor.
What a terrific and simple idea. wish I has thought of it before I had started.
The ‘raised access floor concept’ is a good idea to try solve the access and routing to wires in analogue but won’t work fir deep wide boards point motors unless you surface mount the switch/Point motors and hide under buildings if near middle of board and just use to wiring route . Or have l misunderstood …. anybody in uk remember MERCONTROL steel spring wire in micro bore copper tubes run to a mechanical lever frame . Re discovered a 009 hoe Layout of 40 years back in loft and it still works
In several places where it’s inconvenient to place the switch motor near the turnout I have used the piano-wire and brass tubing method of fishing the actuator wire to the points. In one case over 4 feet under some mountains. I made little L shaped brass “legs” soldered to the tubing and hot glued to the base board under the scenery. Worked well and probably will have some on my layout, now in the process of being moved to a new and bigger room.
Another trick I use is to run a cable with multi connectors to several places I can easily get to, and connect them to a terminal block. I use 20 gauge thermostat wire, 16 conductors. This gives plenty of wires for switches, track power lighting and so forth in several key locations around the layout. Color coded wires help and both ends have the wires at the same terminal location (red on 1, brown on 2 etc.). anything to keep from crawling around under the layout!
This is an interesting concept of leaving a void. This would produce a very rigid frame for the layout. It would seem to be relatively light too. One could, with help, pick it up and move it around, lay it on its side, etc. It would be difficult to reach into the center of it to do wiring, however. in my case, I have a little stool on wheels I use to move around under my train tables so going under has never been a bother. I like the surface up at 52 inches too so there is plenty of room underneath for wire routing and moving around. It is a very unique and creative way of doing things, my hat is off to you, George. Rob McCrain – Farland Howe
Look awesome? I would Like know were you got lettering for car. I hope mine comes out that good.
Great looking rail car Dan. I was thinking the pumpkin material lokef small, but the final product was outstanding.
The orange car looked great painted and the decals but the orange styrofoam beads didn’t look right to me I think you could have bought pumpkins to put in a car the styrofoam Bass was okay in the gondola .