Dean’s been in touch with a useful post about model train inclines.
The transition from incline to flat track can be troublesome at times, here’s what Dean did to fix that:
“Al, cheers from Dean in New Mexico.
First of all, thanks to you, Al, for your great blog and many thanks to the people who watch my stuff. I appreciate their continual support and feedback.
The problem was, using Woodland Scenics inclined track supports with a 4% grade, trains had trouble passing over the transitions at each end as they are too severe.
I needed to smooth out the transitions at top and bottom of the grade.
Here’s a short update series on track repairs which helped to fix the transitions.
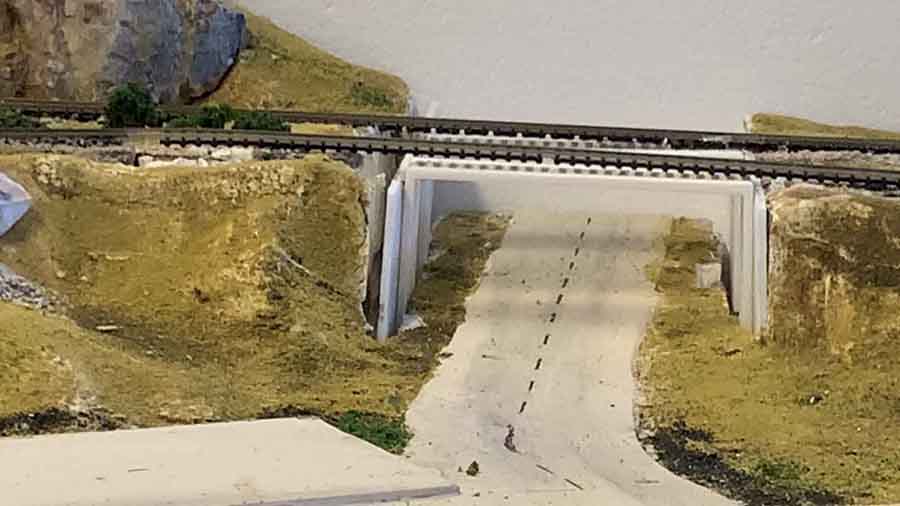
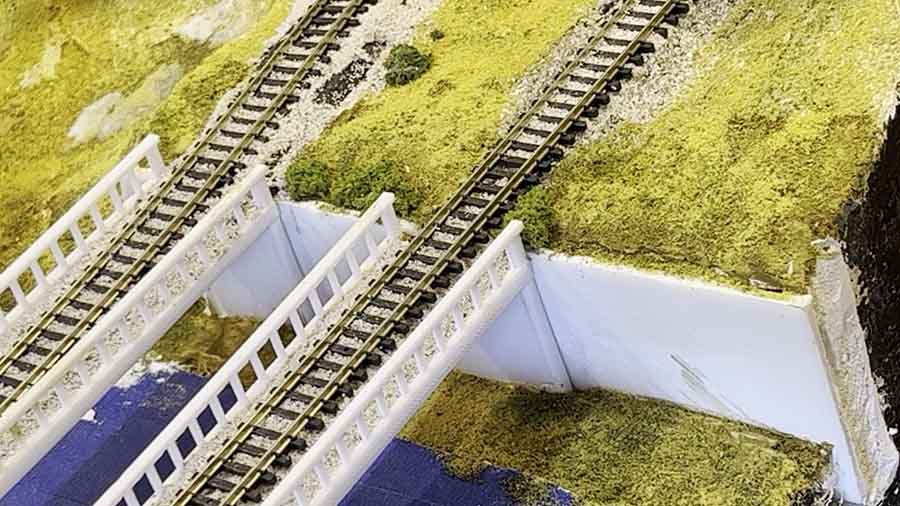
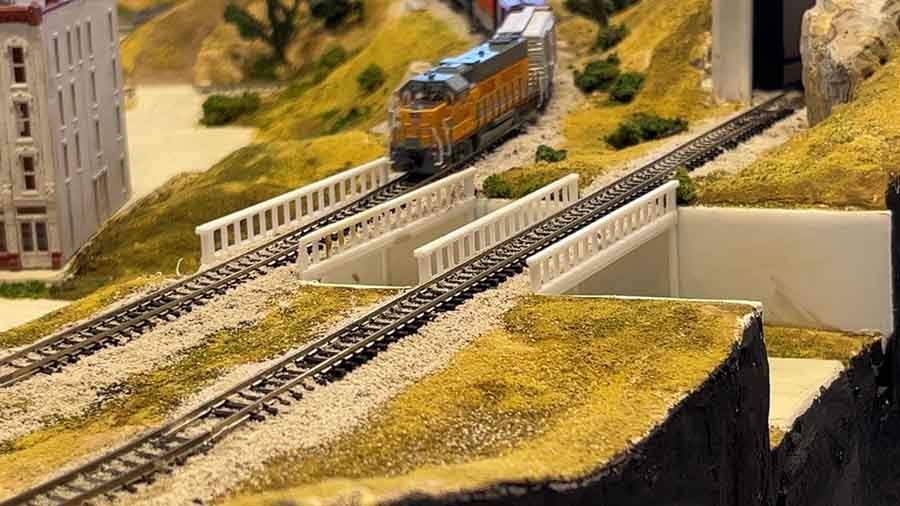
First, the upper bridge and track before their removal and track fixing.
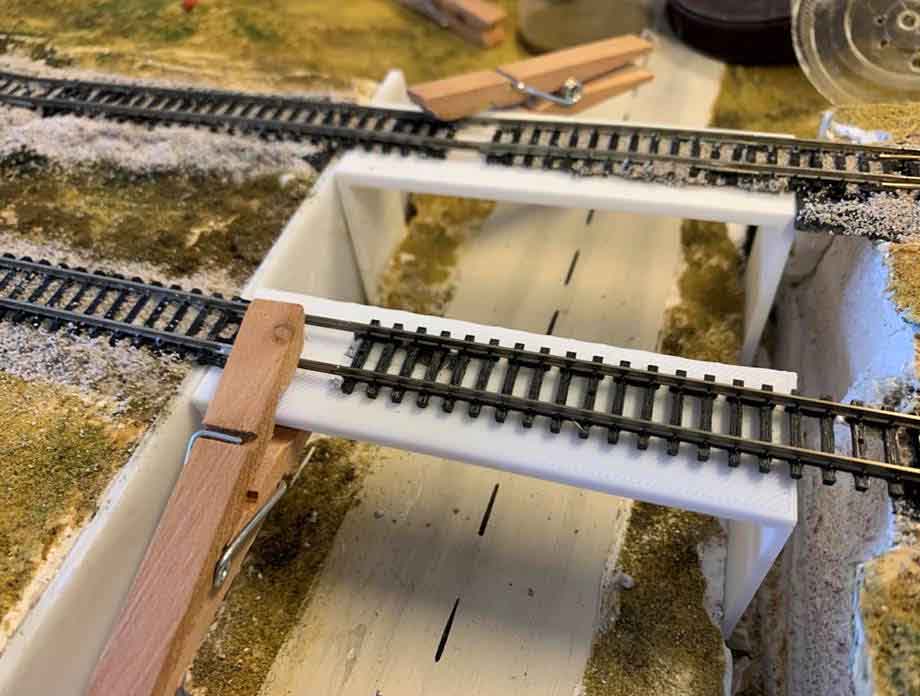
The old abutments and supports were removed, and lengths of flex track were shaped and placed, then supported on foam roadbed before ballasting.
I made sure the grade transition was smooth and even. Next, I needed to install and glue (with white glue) the bridge abutment and supports under the flex track.
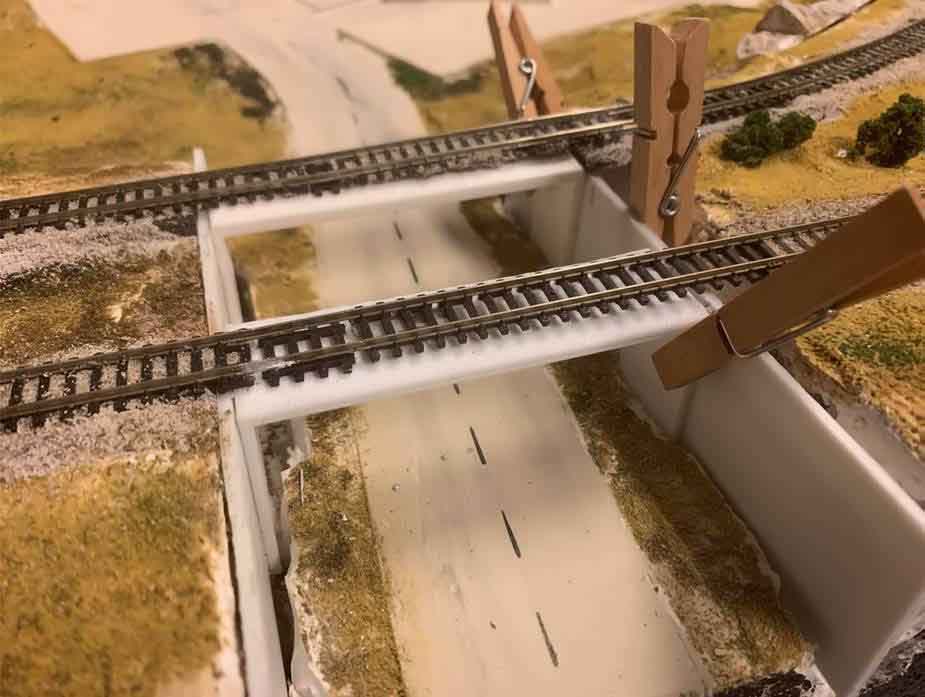
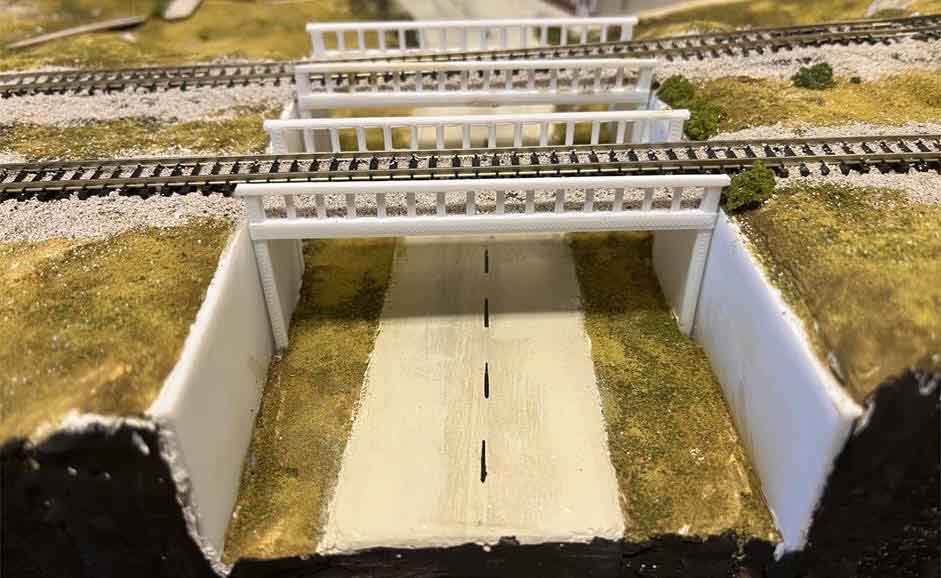
Here, I installed and glued the other abutment.
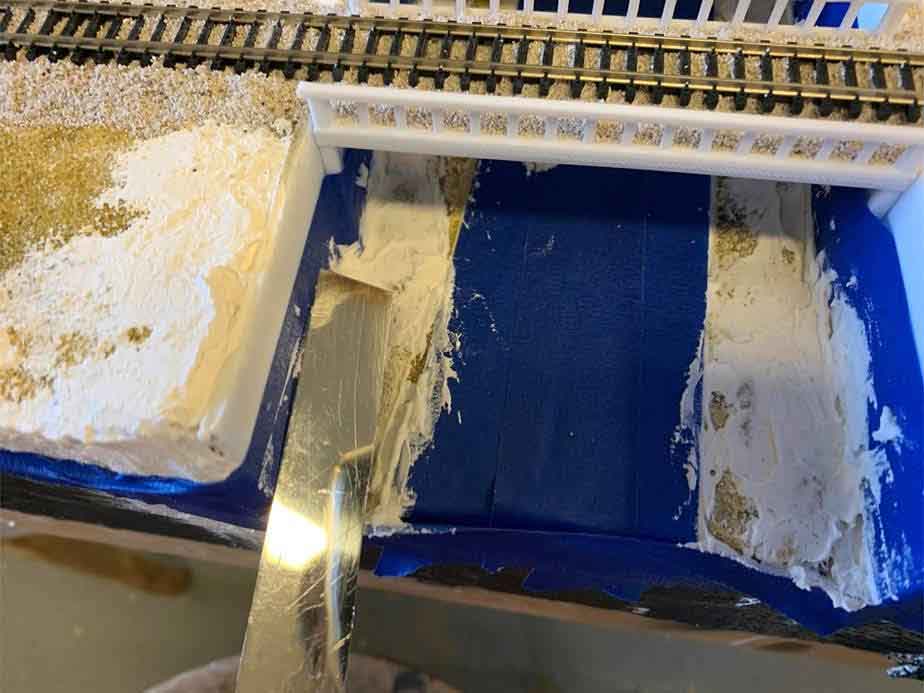
Then, I taped, put down, and shaped plaster (with a flat-end knife).
Put down ground cover over dark brown paint.
A bit more touch-up will be needed, but finally, the job was finished.
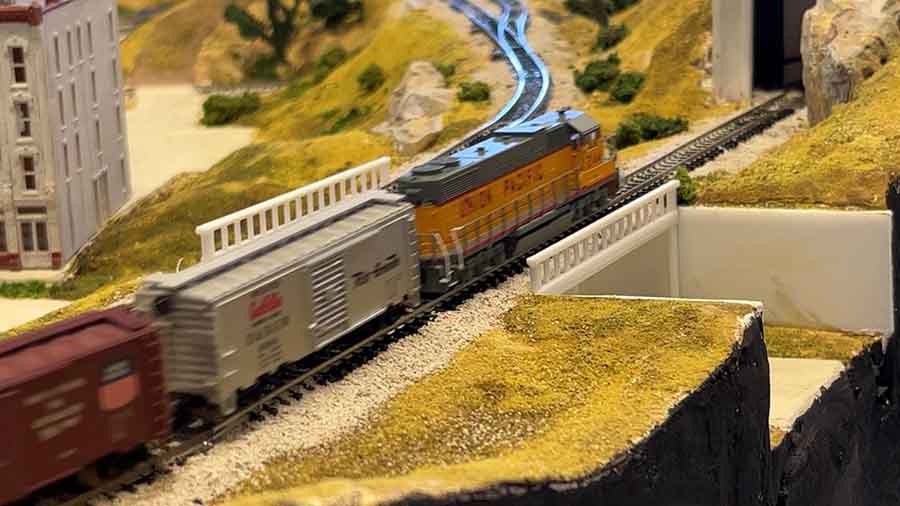
The lower transition from flat to a 4% grade was finished in a similar manner: Tear out old track, replace new track, add supports, and finish scenery. This is a photo after the fix.
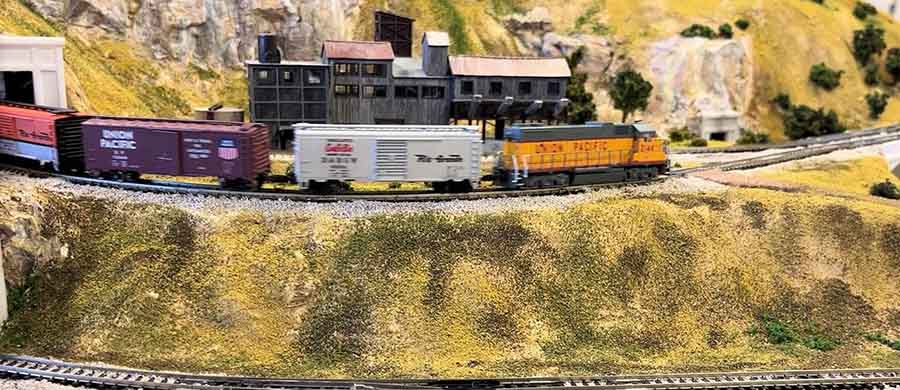
Here are some more photos of the railroad as of now:
A big thanks to Dean for sharing his model train inclines – he has done a fine job of documenting his layout from start to finish.
Here’s a link to a one of his previous posts (which also links to the previous one, and so on…)
Dean also posted this on his 3d printer:
There is also a very good incline post by Chris which will save you hours of toil: How to make inclines.
Now on to Steve, who has sent in a very useful tip, which again, is very useful when it comes to model train inclines:
“Hi Al,
Here is a tip I picked up from another source.
Did you know that you can bend Polystyrene with a soldering iron?
Cut the polystyrene to the required length.
Heat up a soldering iron.
Hold the polystyrene over the iron tip where you want a bend. After a few seconds, it should be possible to gently bend the material.
Remove the material and hold the bend for a short time.
Be careful not to burn the polystyrene in case the fumes are toxic.
I usually do a bend in a number of stages.
I find this trick very useful.
Regards
Steve (Sydney)”
A big thanks to Steve.
If you have a tip you’d like to share, just mail me. I’d love to hear from you.
That’s all for today folks.
Please do keep ’em coming.
And if today is the day you stop dreaming, starr doing and press the fun button, the Beginner’s Guide is here.
Best
Al
PS More HO scale train layouts here if that’s your thing.
Need buildings for your layout? Have a look at the Silly Discount bundle.

Great tips!
Very impressive work Dean , thank you for providing the detail and processes you made . That sort of info is extremely helpful to us all . Getting the track layer properly is key , trains aren’t much fun when they don’t run right .
Great display and model , really enjoy N scale , that’ll be my next attempt .
Good tips and nice work on the inclines
To Dean in New Mexico…it would be very helpful if you shared details on just exactly how you transitioned the track itself. Did you bend the track, or did you have segments starting and ending at graduated incline, like 1%, then 2%, then 3%, to the 4% incline.
On my last HO layout I used a 200 inch vertical radius curve and had issues with switches at the bottom and top of one incline of one incline. The track has since been pulled up and my next layout will use a 500 inch vertical radius at each end. I have a Sante Fe Texas (2-10-4) that I want to run and the 200 inch was set to limit the ability of the engine to jump the track due the drivers not having enough rail to keep them ‘on track’ so to speak. I’ve also had longer cars uncouple at the top of the incline, so my passenger cars and freight cars longer than 60 feet all use lower shelf Kadee #119 couplers. Many of my engines use them as well, limiting the random uncoupling cases. Ray
Gidday Dean,
Your problem was one of the ‘Cardinal sins’, you Never have a ‘track joint’ at the ‘TOP of a Rise’ or at ‘the BOTTOM of a depression’. loosely lay the track over the top to get an idea of the ‘arc’ then go back either side of where the joint will be to get the start points. For a depression use a spirit level for your height and you may find that you might have top go back further than you had planned. Saves airborne wheels , uncoupled close-coupled coaches and derailments
I know there is a prototype for everything, but wouldn’t it be more prototypical for a road bridge to be built over a two-track railway, instead of building two rail bridges over what looks like a minor road?
nicely done
good tips. keep em coming.
Nice work fixing that incline problem Dean. I agree it’s always difficult have track joins at incline changes and even harder working with a 4% grade! I try to keep grades at 2% or a maximum of 3% as locos often struggle up 4%. Well done and great looking layout.
To Tom in Colorado, I thought that too Tom but it’s in the video, at least how he did the lower transition, the rest of the video seems to be about finishing the bridge scenics. Does help with the idea of smoothing out the track transition though. Someone else mentioned about never having a joint on or near the transition which is obvious when someone points it out.
Cheers Mike in Worcestershire, UK
Enjoyed the transition tips. I’m in New Mexico as well, and when I leave town it looks like your landscaping!