Jim’s been in touch. He had a few problems with his HO track so decided to start again:
(If you want to get up to speed, here’s Jim’s first post: Jim’s HO railroad story.)
“Hello Al, again.
Thanks for the daily info and stories from your readers.
I wrote my first story to you about 8 months ago. I had started on a small HO scale layout with an up and over design in December, having just retired from a teaching job and having some space and time to begin this project.
I’m enjoying the work (work?) and consider this both a challenge and a welcome journey.
The inspiration is the real world Pipers Lagoon and Shack Island in Nanaimo, British Columbia, my wife’s home town.
The curves have 18-degree radius and the grades are 3% up and 4% down running counter-clockwise.
The base of this railroad is a 1 meter plus (4 foot square) foam pallet that once held a new dishwasher!
I had gotten this far by October but the track was not reliable. You can see there are no straight sections in this design.
The curvature and grade is always changing. Using Atlas flex track was a challenge because it tends to spring back to straight, not holding the curve as shaped. I had several bad track joins and could see no easy way to smooth them out, so… let’s start over!
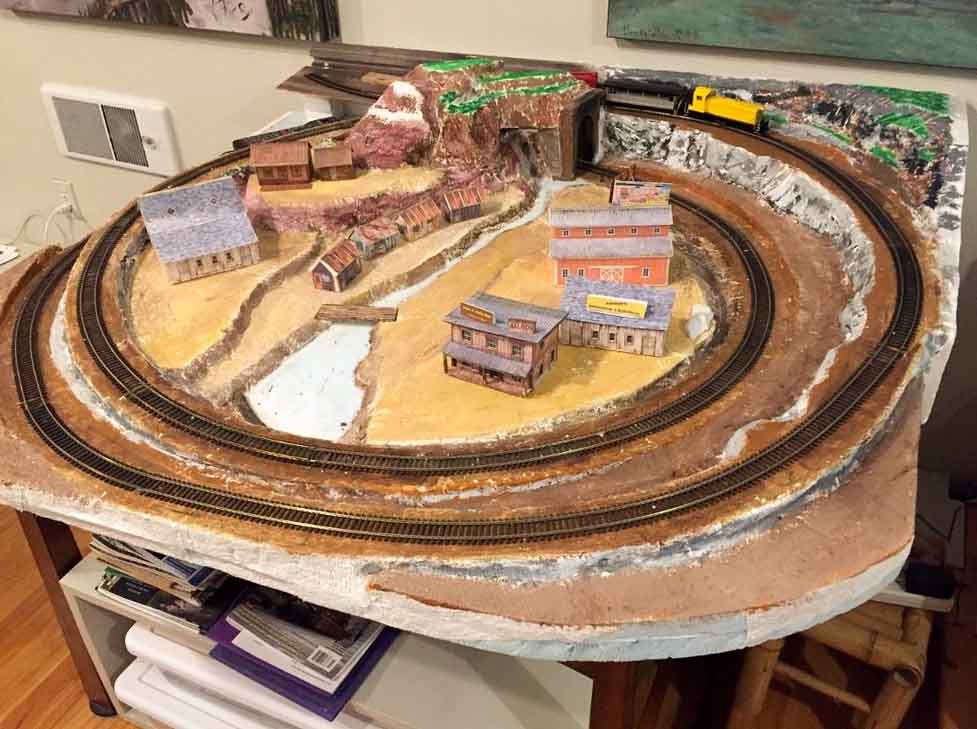
I decided to bite the bullet and redo the track. First step, scrape it clean!
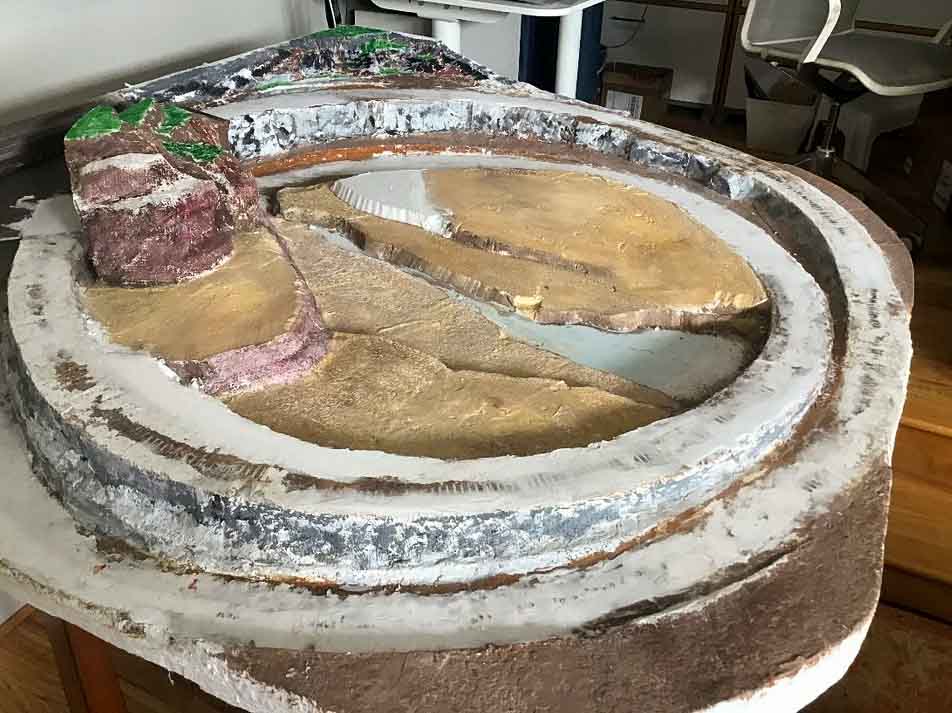
And then clean up the now bumpy roadbed, make it ready for new track.

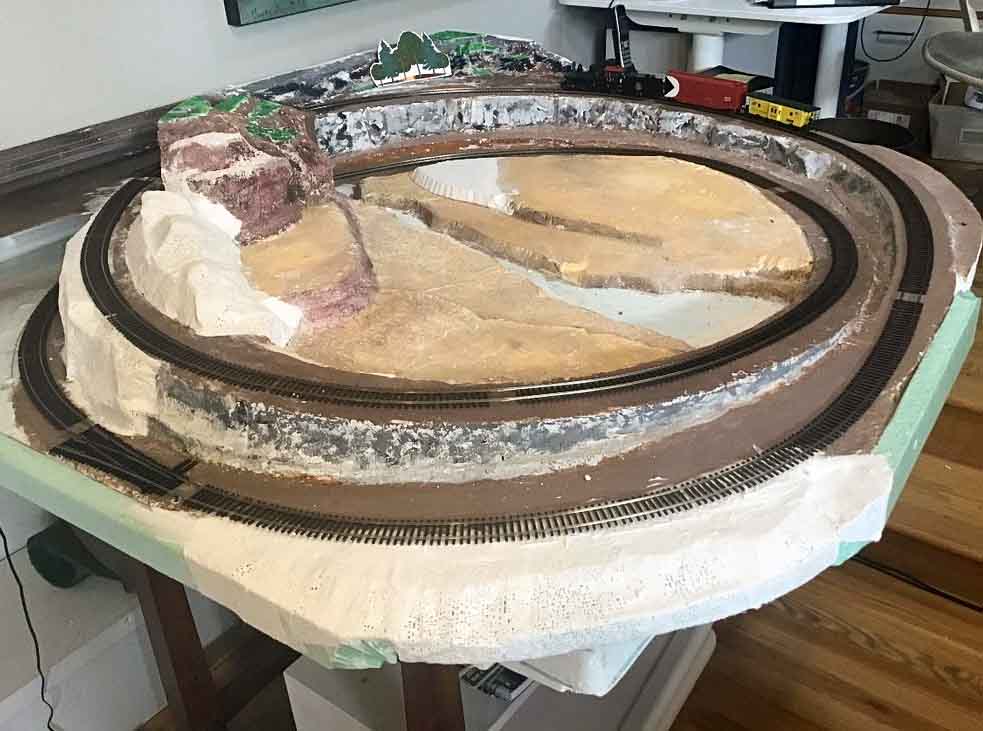
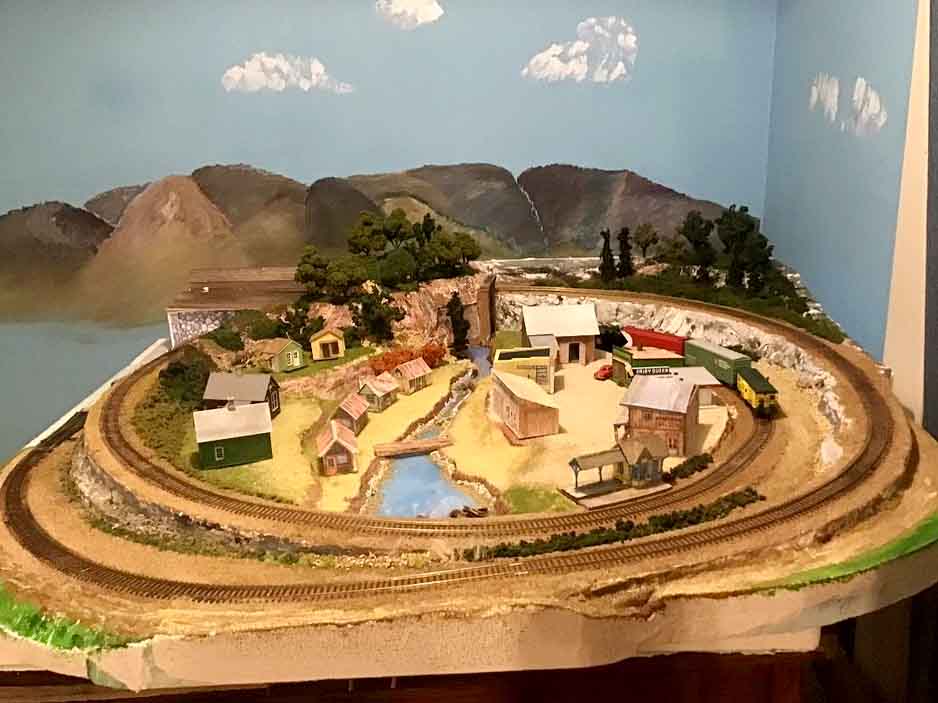
This is with new Micro Engineering track which can be curved to the desired radius and will hold its shape well.
I got started on some buildings and scenery. Then I was able to clear out a 2.5 meter (8 foot) closet for a permanent home for this little scene.
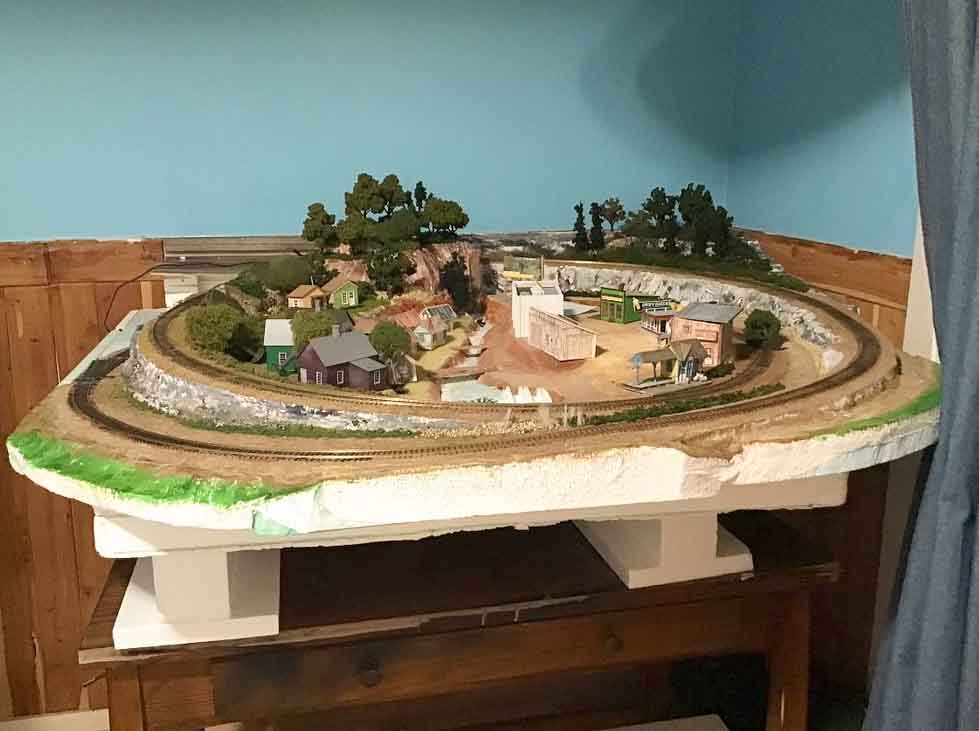
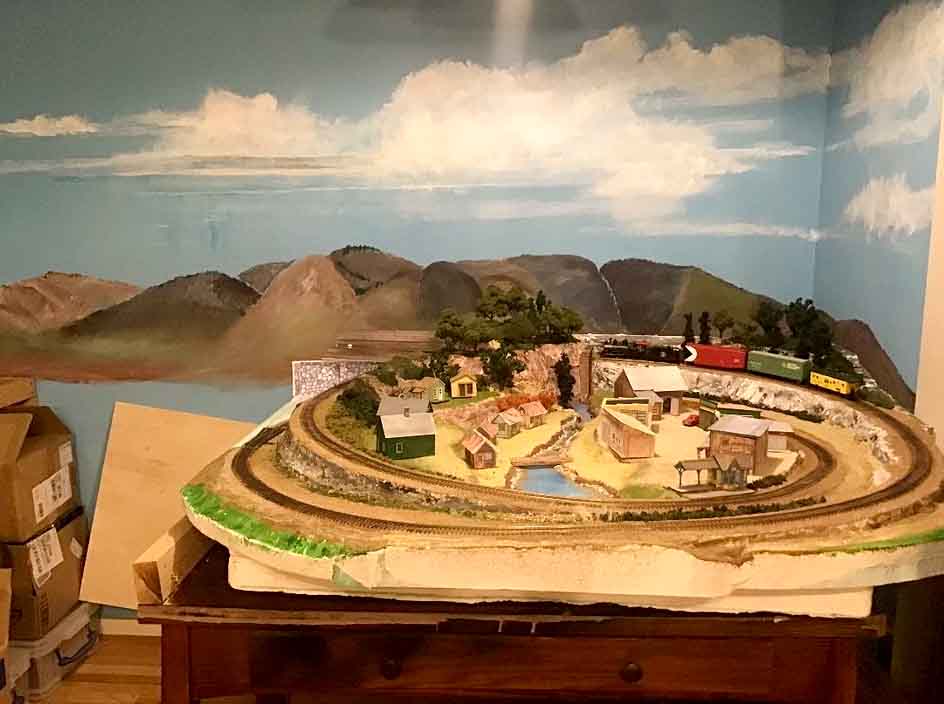
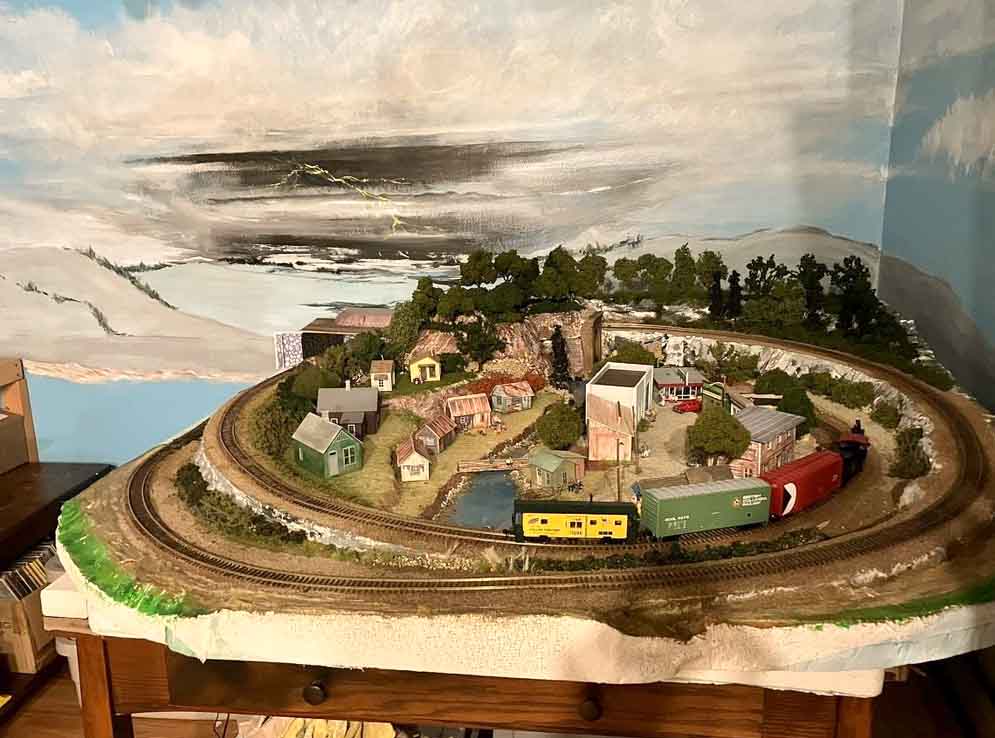
Here is a view of the new location with some mountains and a few “Bob Ross” happy clouds in the backdrop.
You can see “Shack Island” on the left of the lagoon, and the fictional town of Pipers Corner over on the right.
I’ve tried a few HO kits as well as your print out buildings which are perfect for this scene.
Next, some real clouds, thanks to artist and friend Tom Devine who was visiting for a few days.
I was dissatisfied with the mountains beneath the clouds so made some changes to my work, not Tom’s.
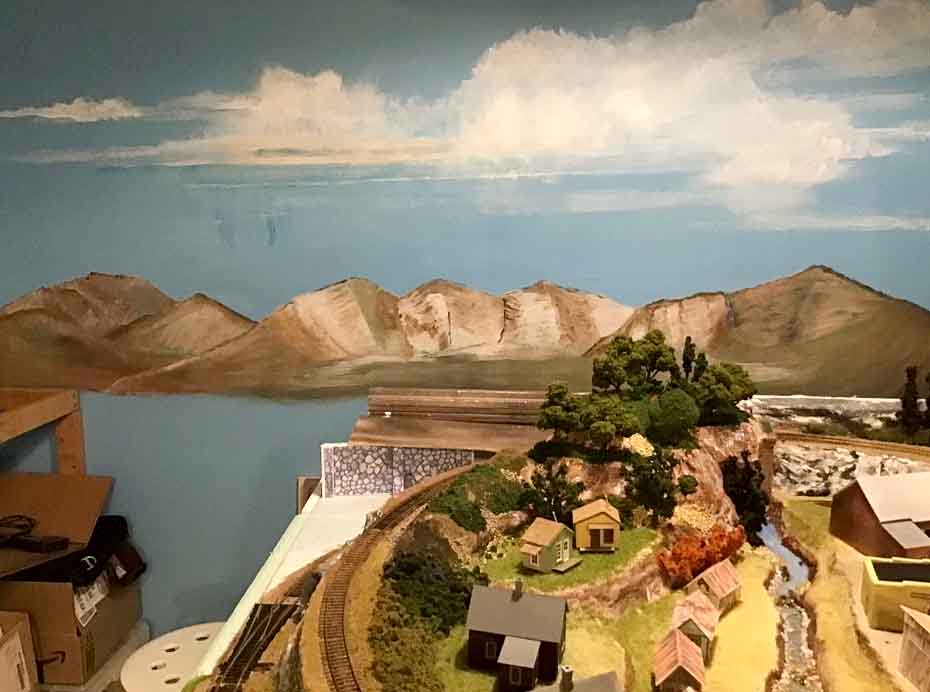
Still not happy, so another try…
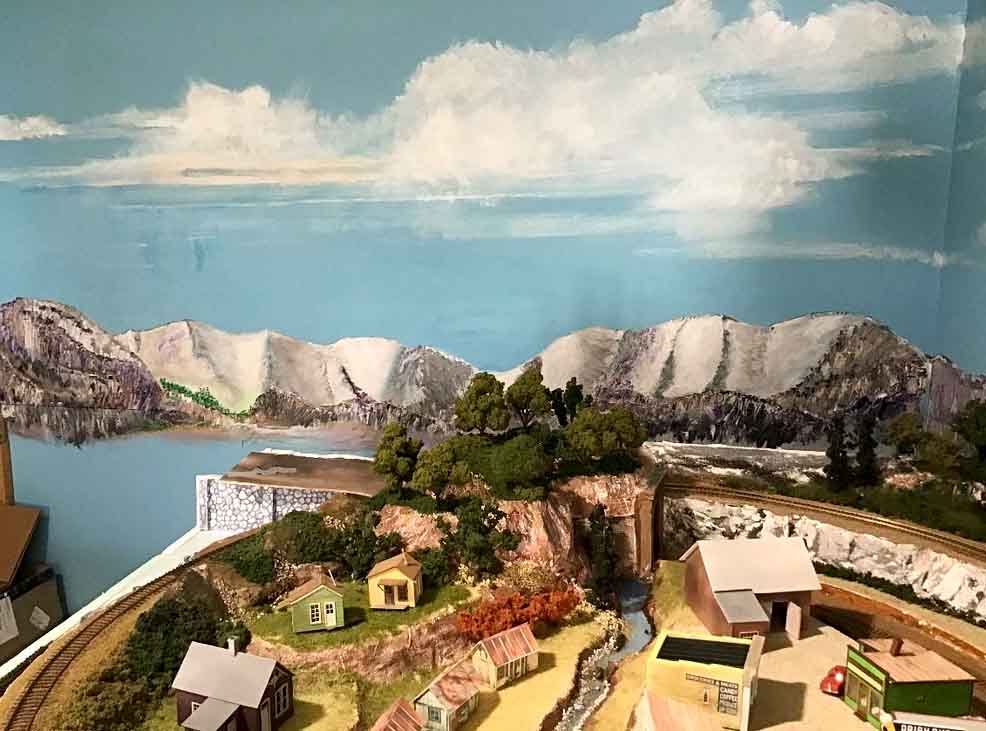
And the current, final version. I modified the mountains a final time but kept the overall outline. Tom returned and “touched up” the clouds using some black and yellow paint to add some “drama” to the scene. He also framed the mountains with some very distant tree lines.
It’s a compelling look and I hope he will come back soon a time or two as there is more black and yellow paint to add to that gathering storm.
Now, I’m about 18 months along and here is my first YouTube video showing the layout in operation.
It is a bit rough and too long so I’ll have to do some edits for next time.
And yes, it just circles at a slow speed but that’s all I was aiming for in this first phase. There is more detail that can be added but I’m ready to start something new.
You will see turnouts pointing off to the left and that’s where expansion will take place. I can move more than a meter (4 feet) to the left and then another meter out into the room.
I’m looking forward to seeing how this will turn out. At my pace of progress, I think it will take 3-4 years if all goes well but I see this more as a marathon than a sprint.
I’ll send updates when there is some progress to report.
With thanks, Al, for all you do to keep this great web site running…
Jim”
A big thanks to Jim for sharing the problems he had with his HO track.
I think we’ve all ‘started over’ at some point – and as Jim says, it’s half the fun.
For me, the key is to start, and then carry on.
That’s all for today folks.
Please do keep ’em coming.
And if today is the day you get started on your layout, just like Jim did, the Beginner’s Guide is here.
Best
Al
PS More HO scale train layouts here if that’s your thing.


I tried to to copy in a photo of my 21 inch radius N scale curves on my wide-open, Kansas Flint Hill layout for contrast, but it won’t let me. Yours looks great with the little engine and short cars chugging up the grade! And is there any chance Tom Devine would like to do a road trip??? What a background! I just spent way too much on a photo backdrop from a company in Colorado. It’s nice but I like your dramatic, painting much better. What he could have done with a Kansas sky 30’ long and 3’ high!
Wonderful layout Jim nice job on a small layout. I can see it growing and growing.
Nice layout. I have had no problems with Atlas flex track. It does tend to straighten out.
There are drill marks every four inches for nails ,screws or T pins.
Use track gauges.
Put the flex to the inside of a curve. This then can be easily cut. Butt the next ridged rail flush. Slide the flex rail flush. cut and continue.
At some point you will have to make an accurate connection, closing a loop or butting a turnout. For all track, cut slghtly over size and use a Dremel to fine tune.
Solder joints as helpful.
What a great layout. All you have to decide is clockwise or counterclockwise.
Those clouds he did for you are wonderful, but I liked the clouds before he added the yellow and black.
Excellent work on the scenery. I can tell that you are a serious modeler, because you operate you train at a believable scale speed!!!
Very nice layout, Like your scenery, Nice
I was very interested in your story about the Atlas flex track and the one comment on it. I think your layout has done a good job of capturing that area of B.C. you used as the basis for the model. I hope in your expansion you utilize some of the area for a small yard and a few industrial spurs. Just watching a train run in circles can get quite boring once the construction is completed. For what it’s worth I like the clouds better (I thought they appeared more realistic) before the black and yellow were added.
I like your layout well done
Regards Gary from NZ
very nice. this is about the size i will have to make when i redo mine. my basement isnt as big as my old one. i like this type of set up.
That is a wonderful layout , size doesn’t matter . Your detail and craftsmanship are amazing . I believe I could sit and admire that all day .
What I like best is he’s got a way to go elsewhere on the layout and in existing space!
Awesome small layout, well done. You made a wonderful looking layout in a very small space, something that you can enjoy by sitting back and watching and plenty of space to add onto. Wonderful job Jim !!!!
Wow……backdrop was amazing. Great detail on the layout.
curves. i hate flex-track.
Guys. I’m asking with no disrespect but after that layout is built, doesn’t it get old soon? I love the entire layout. What a great job you did.
My first N scale layout was done with atlas flex track. I had nothing but trouble with it especially during the summer when it would expand and kink. The second layout was done with Kato Unitrack and no problems. No derailments either. I still have track I bought over 20 years ago and still works like a charm. I had to do a little bit of filing on the switches but they work fine now. I have not bought any rolling stock in a while as I am on a fixed income and trains have become very expensive, especially engines with DCC.
Wow! What a fabulous background painting!