Brian’s been in touch with how he creates his HOn3 log train:
“Hi Alastair,
One person asked on your blog about how and where did I get the logs that are shown on my logging train.
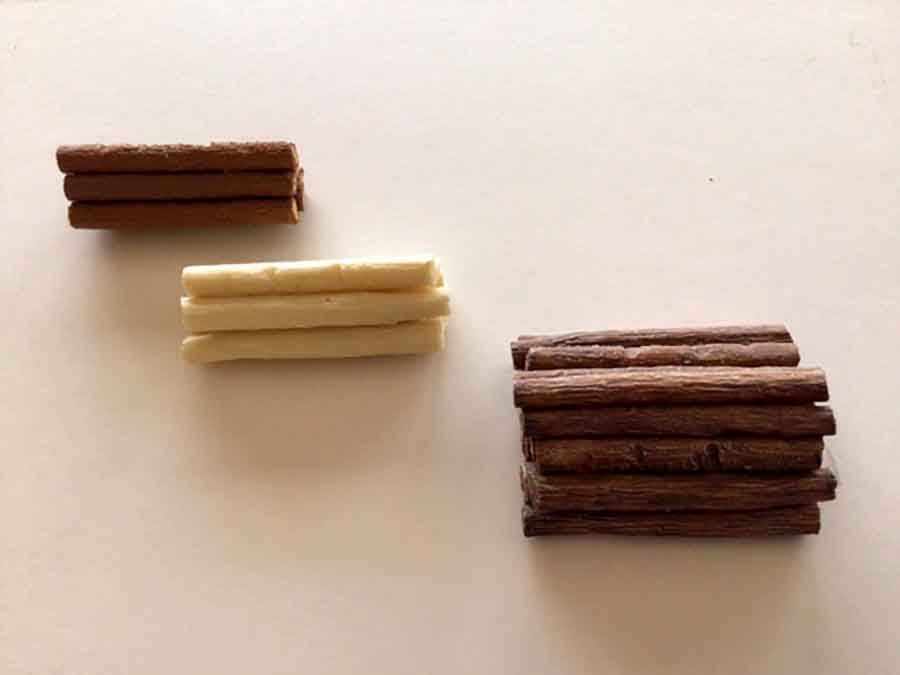
The first two photos below shows the logs purchased from Walthers in the USA that come twice the length shown here. I cut them to be able to fit on my HOn3 log cars. (My layout is all HOn3)
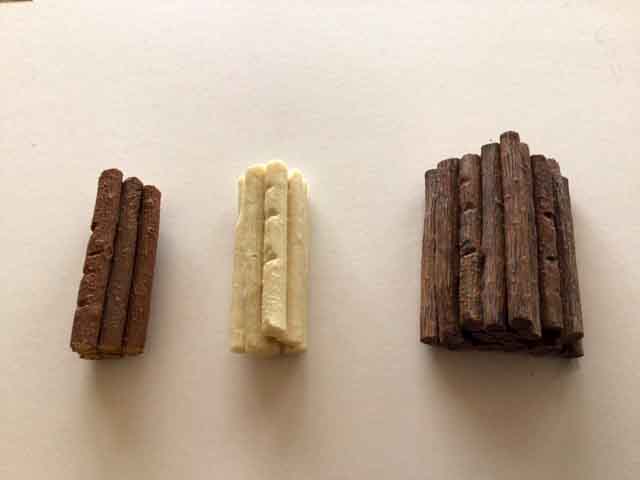
Below, top left is the master, middle is the raw resin casting out of the mould and the third is two and a half castings glued together to form a log pile at my sawmill.
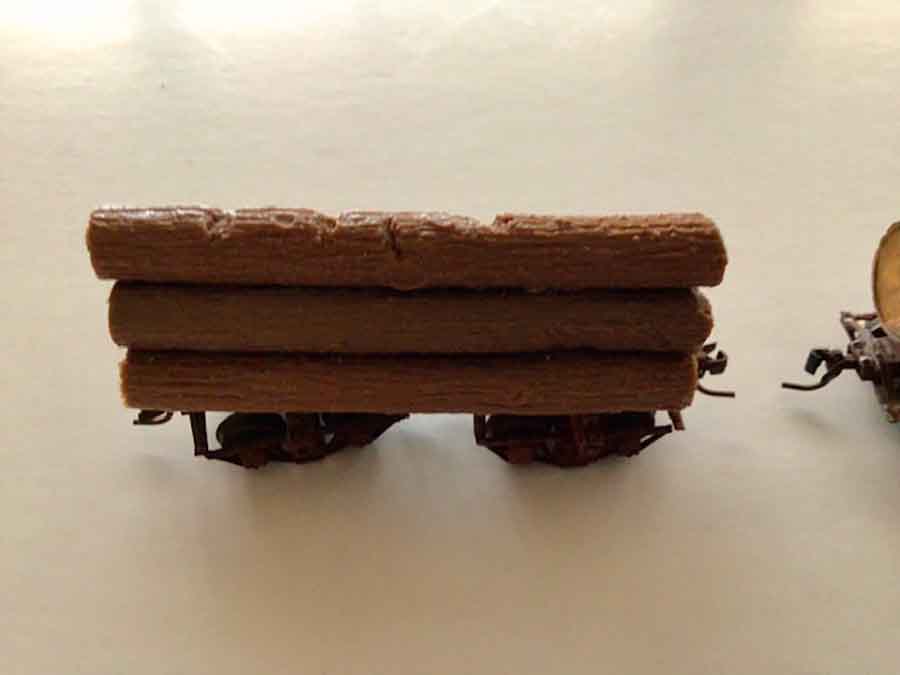
The photo below shows how I mount the log load onto disconnect log trucks.
This is another longer different log that I cast in resin and painted and weathered it. Also mounted on disconnect log trucks. Disconnect log trucks can be adjusted to fit any length of log.

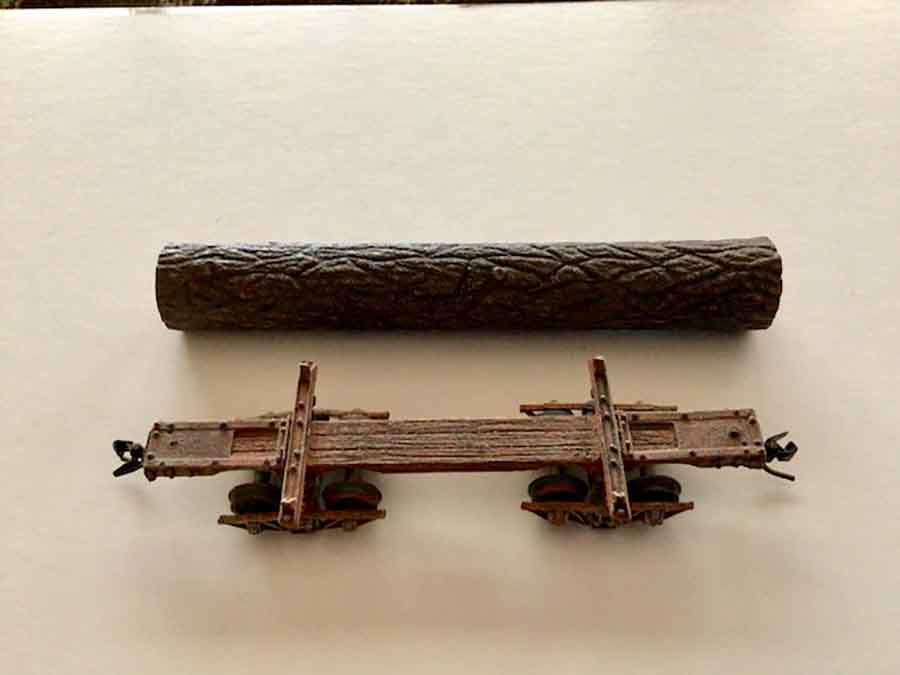
The photo below shows a different log car called a skeleton log car with a cast resin log.
This is the silicone mould that I made to cast the resin logs. To get the height (length) that I needed, I used Lego blocks to make the box needed to pour the silicone into.
I have explained in a previous write up on how to do silicone casting.
I hope this explains how I make my logs for my log train.
Brian – the HOn3 guy in Knysna RSA”
Brian also sent in the below, and I thought I may as well post it as well:
“Hi Alastair.
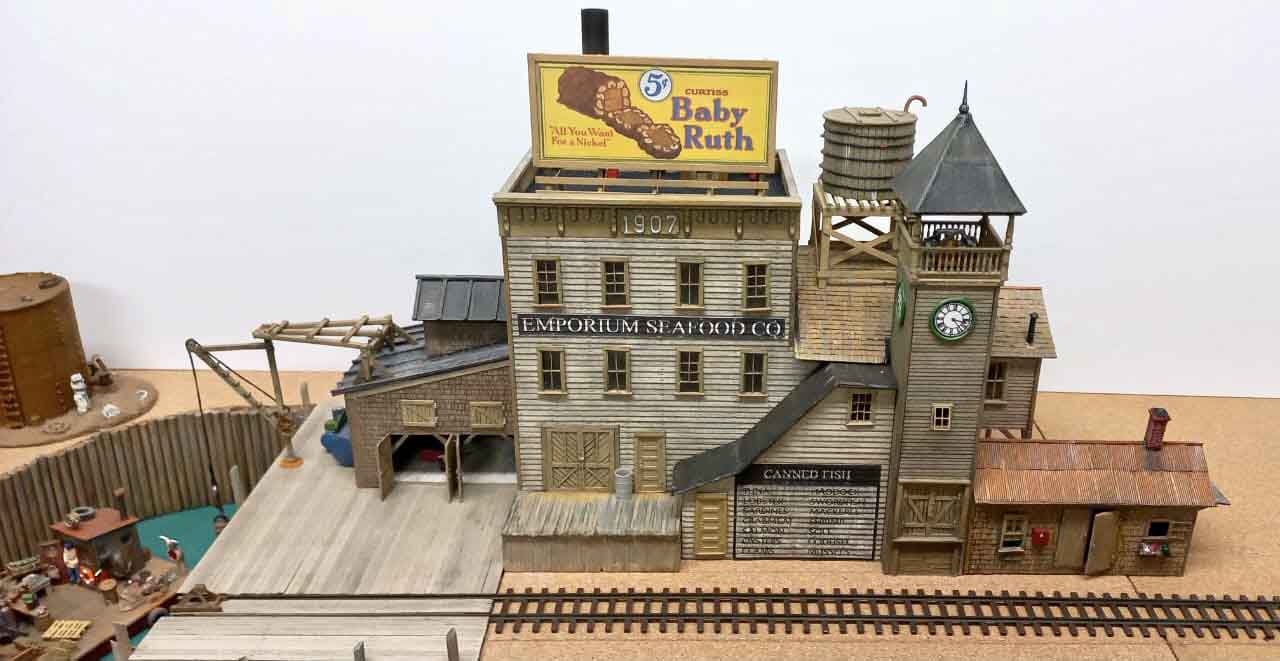
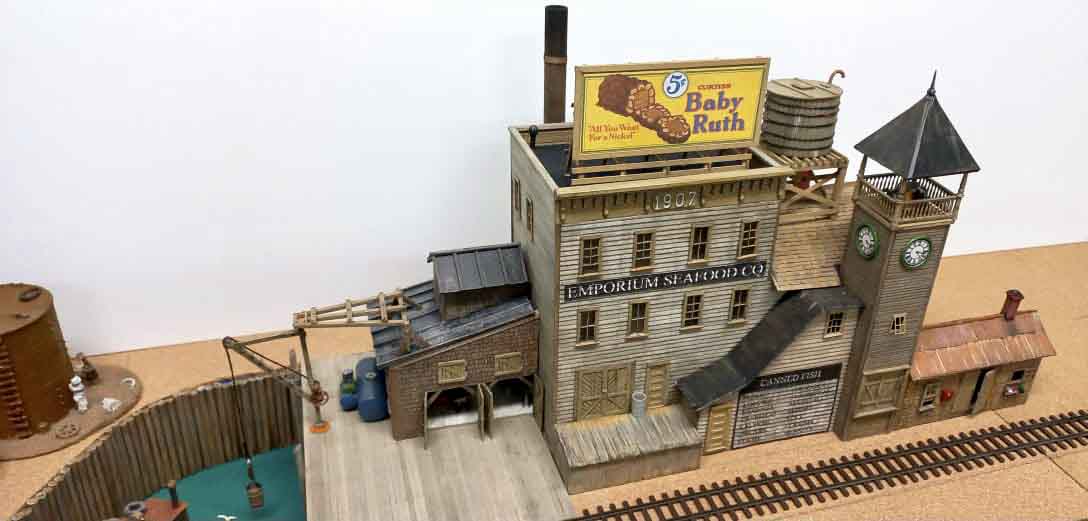
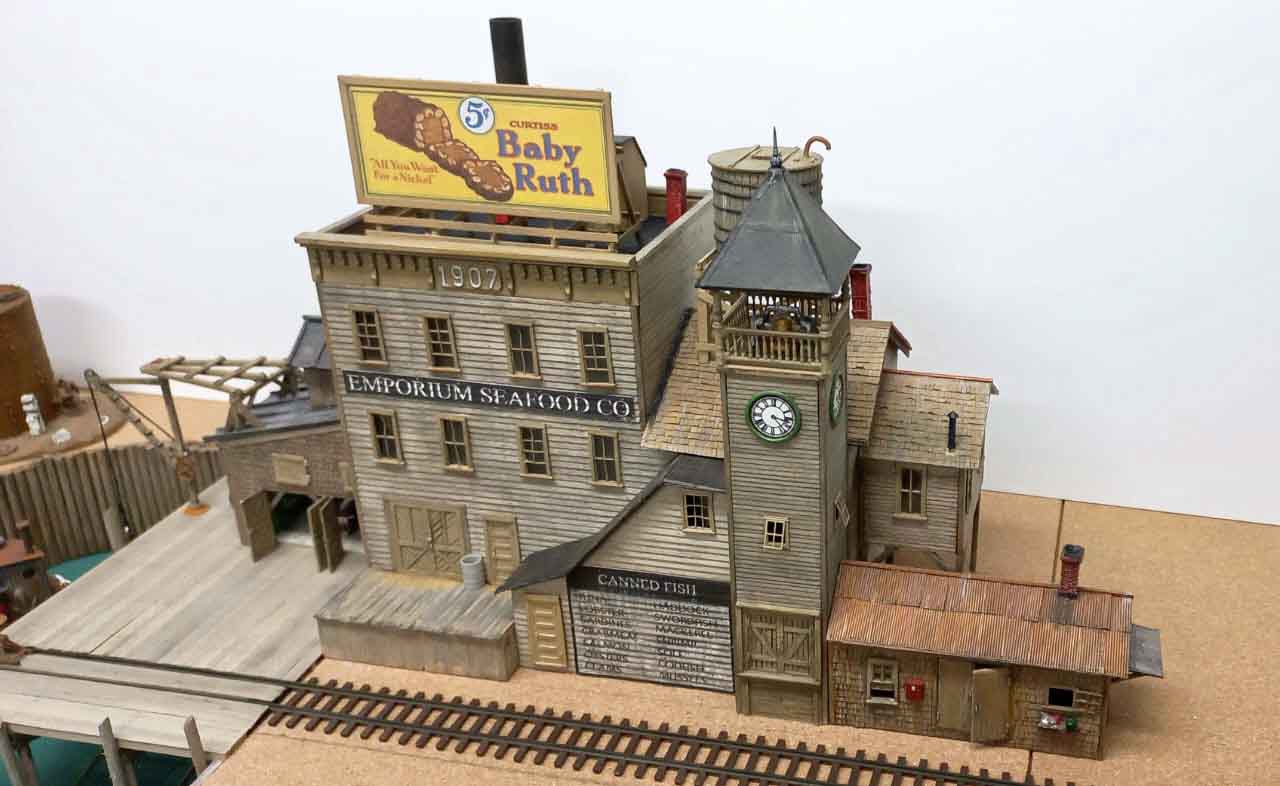
I have almost completed the build of the modified – kit bashed FSM Seafood Emporium kit.
It has taken at least 3 months of work, planning on how it would fit in the specific area on my layout and how to modify it to be plausible.
What takes a lot of time and thoughts is working it as a mirror image as well as reversing it and believe me, I’d did make the odd mistake before assembling it.
I did make some minor changes to the kit to personalise it.
Below are a few photos of it. I am busy sorting through my “bits” box looking for details to add to it.
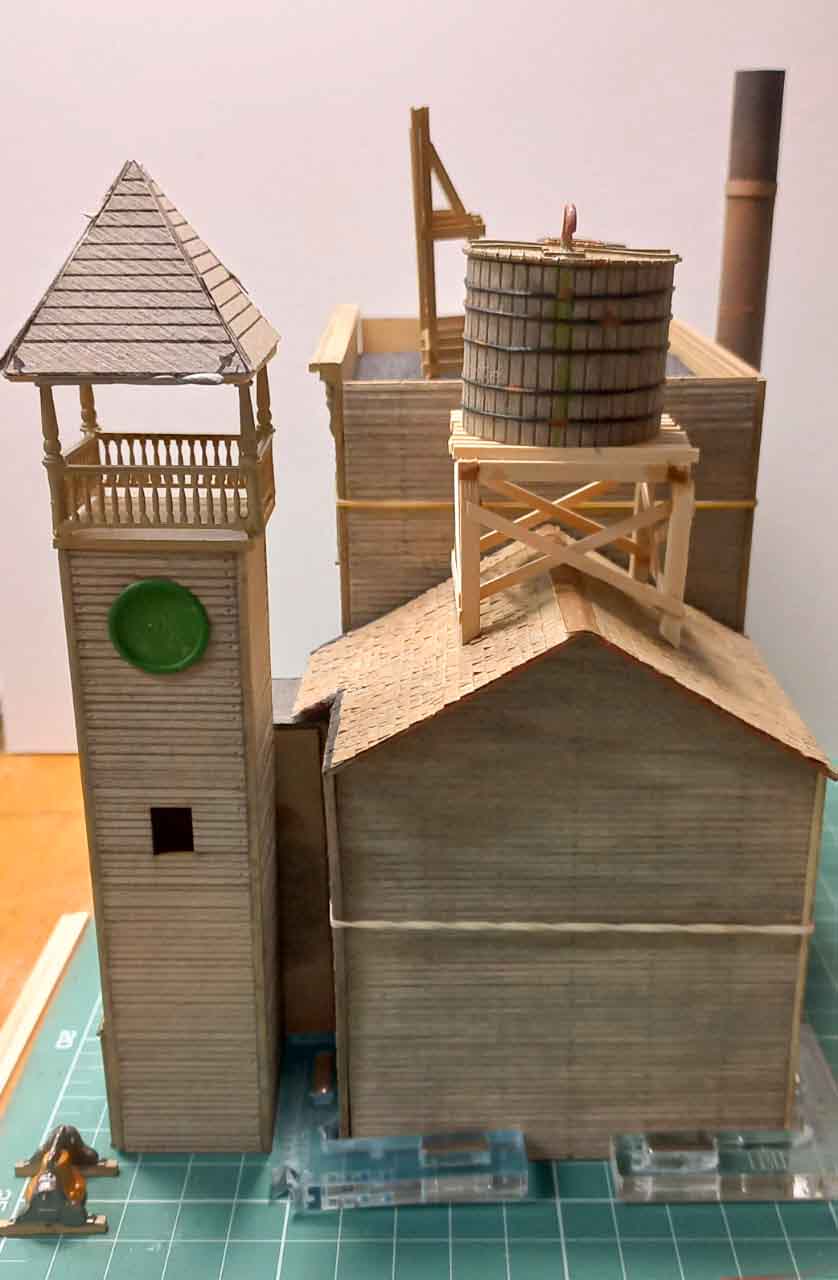
Lights must still be added as well, both in the interior of the workshop and the exterior of the whole building.
The white temporary floor in the workshop has to be removed and all the machines will be mounted on a strengthened wood floor on the wharf.
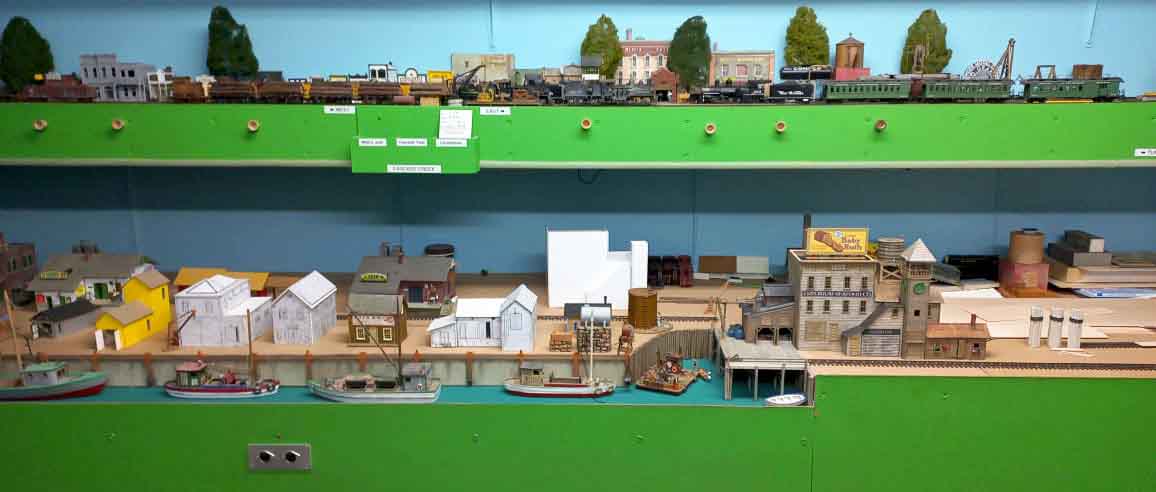
The whole complex (8 separate components) is shown in place on my HO scale layout.
I searched the internet to find a suitable poster for the billboard as the original poster and other components was missing from the kit.
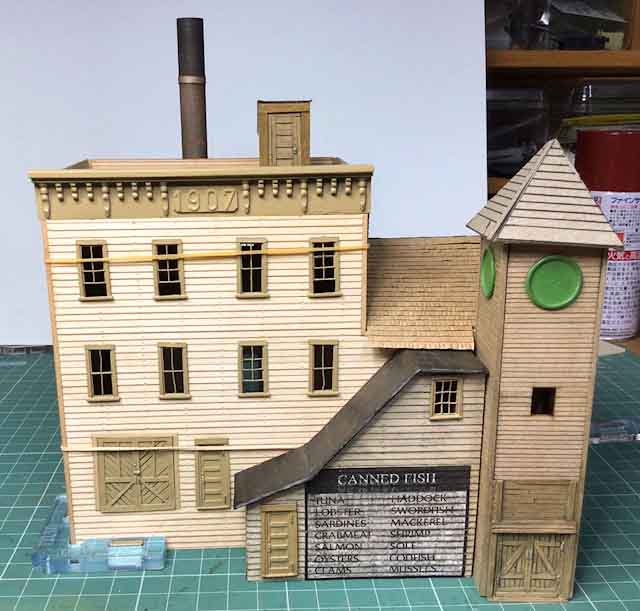
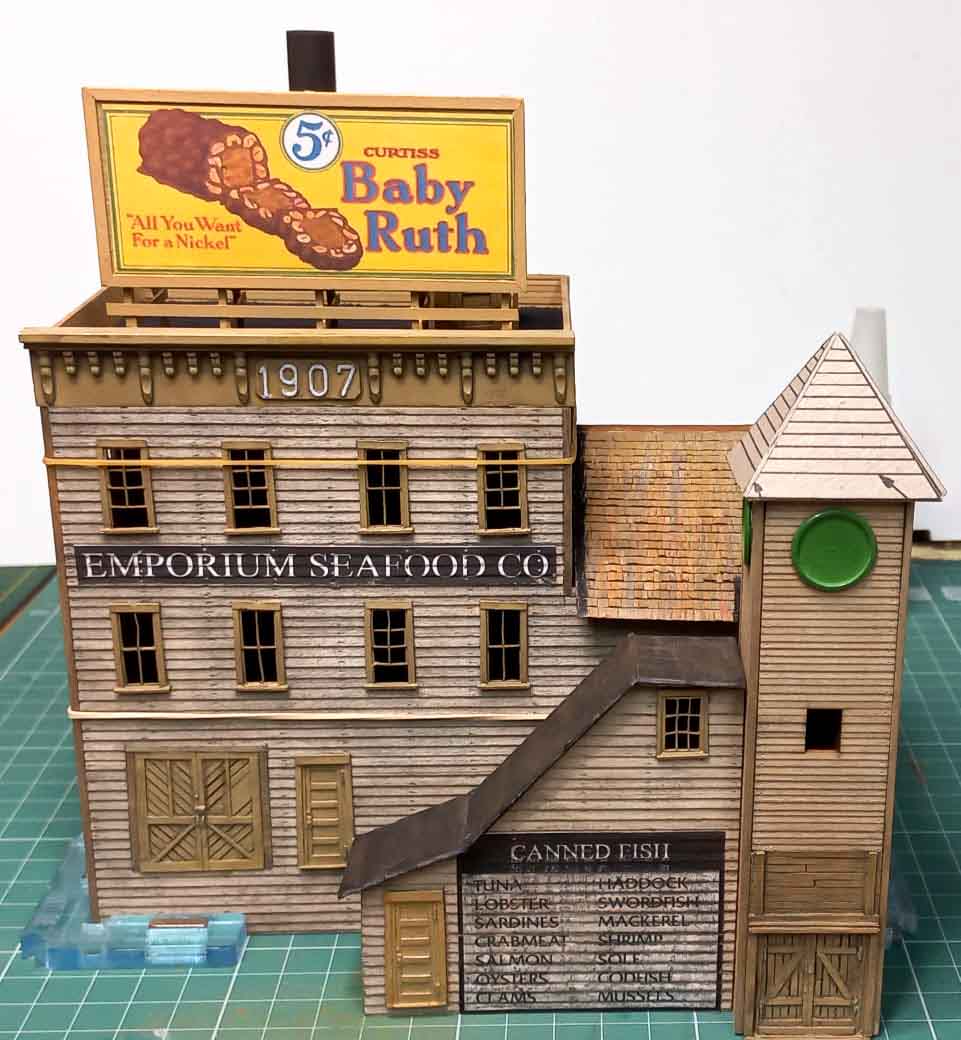
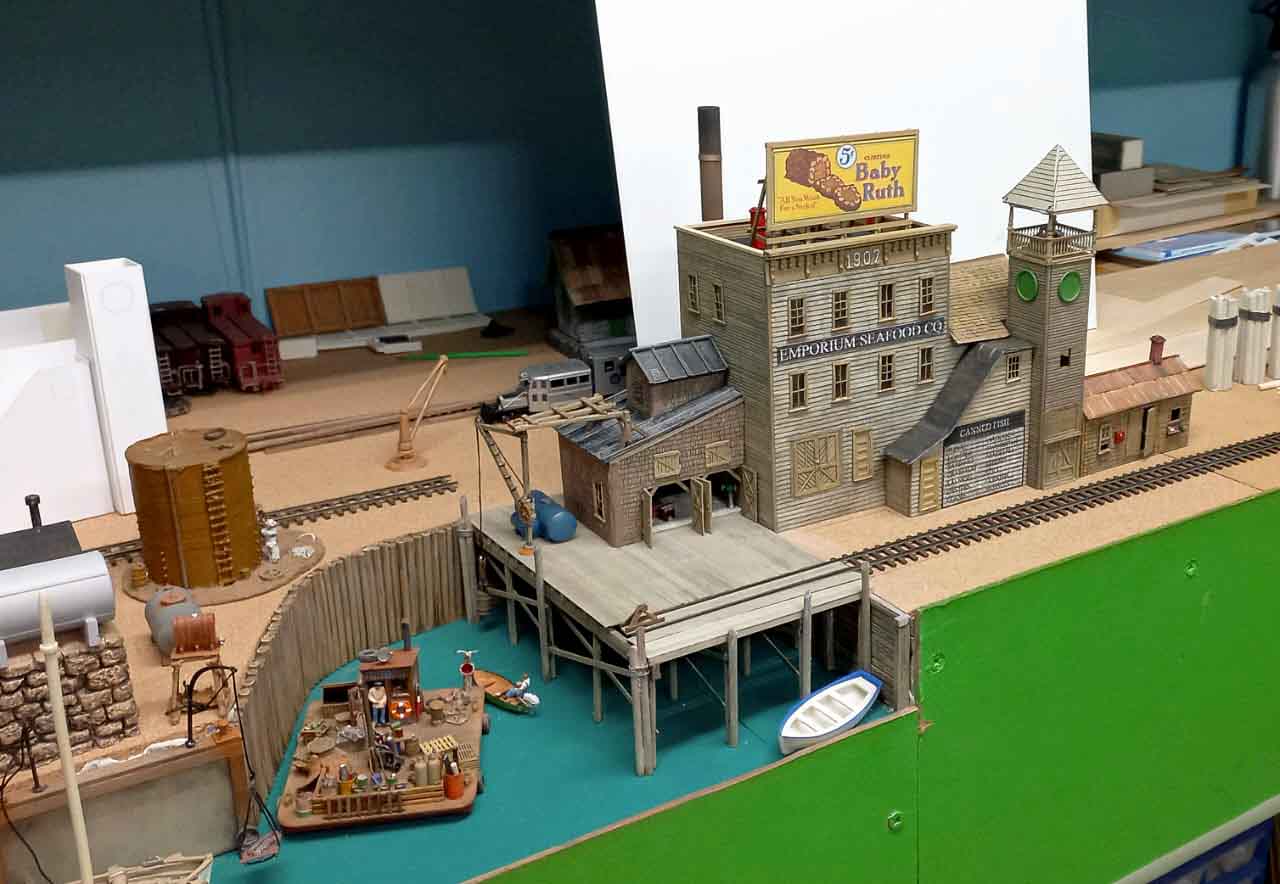
Below is the building situated in the Pelican Bay Area on my layout. (right hand side)
Some questions have been asked, where are the trains.
The answer is waiting for more HOn3 track and points as the manufacturer of Micro Engineering products has ceased operations at the time of writing. I have had to order Peco HOn3 track and points and play the waiting game for them to be delivered to RSA.
Brian – the HOn3 guy in Knysna RSA.”
A huge big thanks to Hall of Famer, Brian, for sharing his HOn3 log train and wharf update.
I know I’ve said it before but I so enjoy seeing a layout evolve.
That’s all for today folks. Please do keep ’em coming.
And if today is the day you stop dreaming and start doing, the Beginner’s Guide is here.
Best
Al
PS Latest ebay cheat sheet is here.

Regarding logs, if you live. In the upper Midwest, look for a weed called “Common Mullen”. When small, they make excellent logs for trains. If you are lucky enough to find a sturdy one about 7’ long, they also make great walking sticks. Just add a rubber foot, stain and a leather strap.
Sending photo with separate email.
Brian you have created beautiful buildings and a wonderful layout. Can’t wait to see video of trains running through your merchant and industrial areas
Brian is one of my favorite modelers on this site and I marvel at his artistic talents and wish I could attain just a little of his capabilities. One thing he has brought to light is a list of kit manufacturers that make awesome kits. My problem is the price tags on some of them. If you add up all the costs of Pelican Bay you are in the thousands and as a retired curmudgeon, in a time of extreme inflation, I just cant do that. It is amazing how little things start to add up pricewise as you forge ahead on your dream layout and you soon have quite an investment. So when I see awesome stuff on this great site I also add up all the costs and add that to the WOW factor.
BTW- those kits cost a fortune to produce so I dont begrudge that and good ones are awesome. I’d also like a Bentley but that aint gonna happen.
The fish cannery is excellent.
Consider this: Would a brick structure be built on a wooden pier? No matter how many pilings the weight would be too great.
JW
Al – thanks for all you do for us. I can count on you to deliver these amazing stories when I come to my inbox. You give me something to look forward to every day.
Wow that great.!!!!!!
I prefer to use actual wood logs on my HO scale logging railroad. After looking around I found that Catnip sticks make great looking logs and can be found on Amazon or at some pet stores. I even split them for my log pond and they look very realistic. I spray them with a coat of clear flat paint to keep the bark from falling off before use.
I just sold all of my 7 1/2 inch train. At 87 and now with a cancer in my lung I am no longer able to work on the rail road. I was able to sell what track and trains I had to a young man with 3 small children it went to a good home and they will get as much enjoyment from it as I did.
George Zaky, George I hear what you say but in my defence on the price of kits, yes they are expensive when you can get them, at today’s prices. I have had most of my kits for more than 40 years and being a former hobby shop owner, (sold and retired 11years ago). I was able to get them at reasonable prices.
I have seen HOn3 brass Shays selling on the internet at +/- $1000.00 each.
I have not “purchased” any new kits for many years now. All those that I am busy assembling/kit bashing are from my collection in cupboards under my layout. The latest one shown above was acquired via a trade by building customer/friends kits for them and in return get the FSM / Builders in Scale kits I would like to have. I still have about 4 or 5 of mine to build.
To JWS, my layout is dated late 1930s and 90% of my buildings are of wood construction. I would never put a brick building on a wood wharf.
Those card stock mock ups seen at Pelican Bay are of Builders in Scale kits. (Also acquired in trade offs).
I also have a few Sierra West models to build for my layout. (A previous post described how I built a Sierra West Scotia supplies kit for a friend as a trade off for the FSM kit described above.
The current exchange rate of ZAR (South African Rand) against the US dollar is at 16 to 1 and almost 20 to 1 GBP. I pity anyone who wishes to get started in this hobby with the current pricing.
As Alastair knows via emails that I have had extensive eye surgery done to both over a 5 year period and last week was given a 100% all clear by an excellent Ophthalmologist locally and only have to follow up every 12 months now instead of every 6 months.
I am 71 years old and now can happily carry on modelling.
My old layout in Cape Town, 22ft X 12ft was broken down and we retired to the small coastal town of Knysna 7 years ago. My current layout of 14ft X 10ft was started 5 years ago.
I will be drawing up a sketch of both levels of my layout soon and will forward to Alastair.
All the best.
Brian – the HOn3 guy in Knysna RSA 🇿🇦
Hy Alastair, This is a general message on scenery. Use printable buildings on cardstock and cut out with a sharp xacto knife. Scenery does not have to be expensive Just add lots of detail. Every corner or edge has a tab which is scored to make a straight edge. use white glue and alligator clips to assy buildings. After assy, install and then dribble grass, gravel etc on white glue to make a lived in look. Cut out all windows and reuse clear plastic from packaging Take a blank cardstock and cut fine wood for corners and framing. Ballast your roofs for a 3 dimensional look. Learn to make trees and grass and scenery that does not have to be expensive to look good. Gray duct tape can be cement and driveways and roads. And you did it for a warm feeling when you look at your layout. good luck to all readers. Bob
Alastair, I am finely returning after a long hiatus (5 or 6 years, I believe) because I lost connect with you and couldn’t recover it.
Anyway, I am glade to be back and look forward to your blog, the comments, the pictures as I put together my new layout starting this summer.
Nice job on the Seafood Emporium kit Brian. I’ll be starting mine next week. It’s a great addition and your layout is coming along beautifully. Thanks for updates and keep up the good work. Great to have a fellow African on the site!
I’m thinking of using sticks of peperoni for logs. And every time the train loops around taking a bite! yummy!!!
i like it, good job.
Love layouts with harbors brings two great things together railroads and ships carrying bulk goods .