Jim has been in touch with his Bachmann EZ track ho scale layout:
“Alastair,
Just wanted to drop a line to say that I finally made a start! It has been a little over two years since I bought the Beginner’s Guide.
My wife says that I pored over it like it was the Dead Sea Scrolls!
I also read the daily posts voraciously and viewed all the videos and photo submissions with great interest.
I purchased your print-out structures (and have already built several of them for my grandsons to use with their wooden train sets and all those “really useful” engines).
I built a 10’ X 16’ shed, initially for my grandsons to leave their train layouts set up in, but with plans to eventually “appropriate” some of the floor space for the 4’ X 8’ benchwork of an HO scale layout.
I scoured ebay and local sources for bargains in rolling stock and locomotives.
I decided to start with Bachmann EZ track ho scale layout because I got a steal on a big lot of new and barely used track at an estate sale.
Last week I finally cleared the decks of other projects and got cracking on the benchwork and layout.
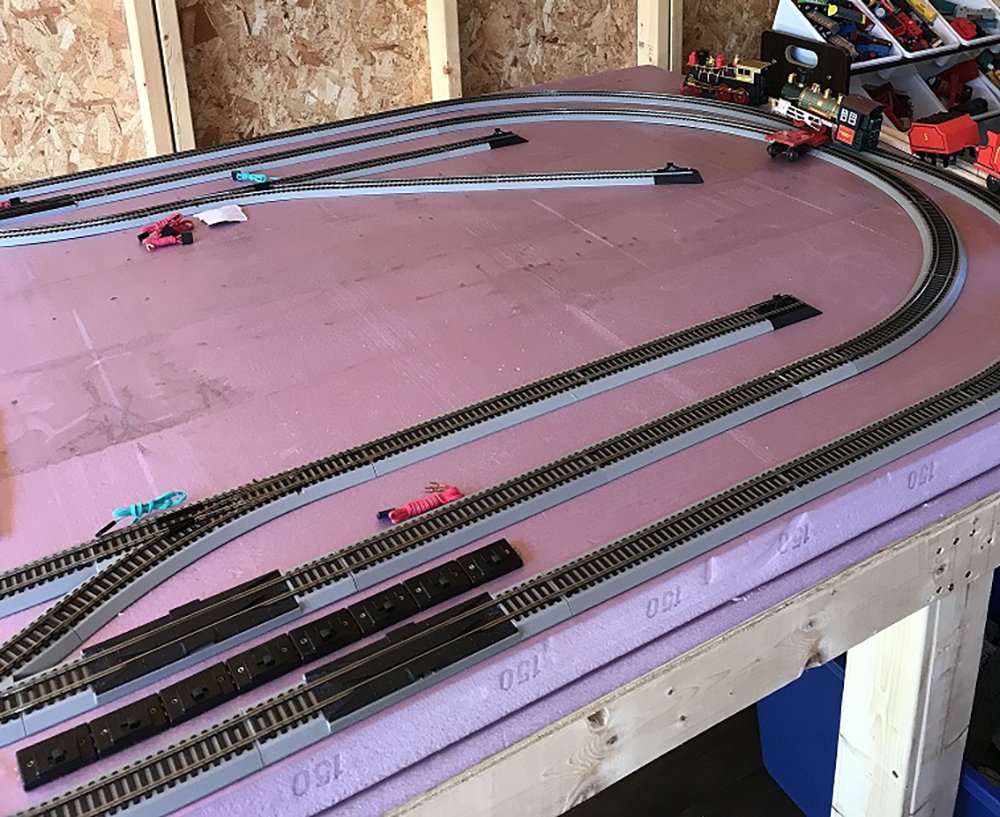
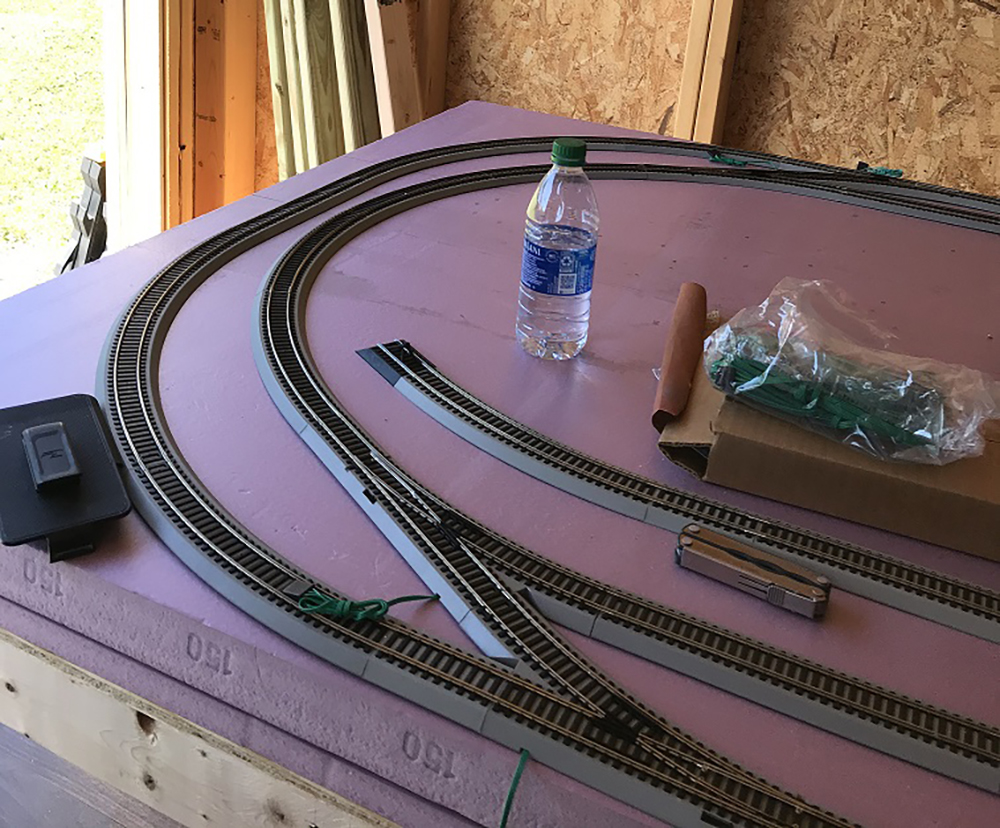
The track that is shown was just put down today.
I will be modeling the late transition era of my childhood in the 1950s and 1960s, for the Southern Railway in the southeast corner of my state, and a non-prototypical branch line called the Runharde and Tyre Short Line.
I am looking forward to getting my track wired in the next week or so and running some locomotives.
My plans include a farming community in the foreground of the first couple of pics, an industrial area in the left midground, and a ridge with train tunnels in the background.
There will be passenger and freight depots and some freight sidings. I will be modeling some actual historic railroad structures from the area. I will take some better pics when there is more detail to show.
Thanks for all you do for our hobby. Thanks as well to all the participants who share freely from their knowledge and experience.
Cheers!
Jim in Tennessee”
Thanks to Jim. And just for balance, here’s an N scale too:
Now on to Bob:
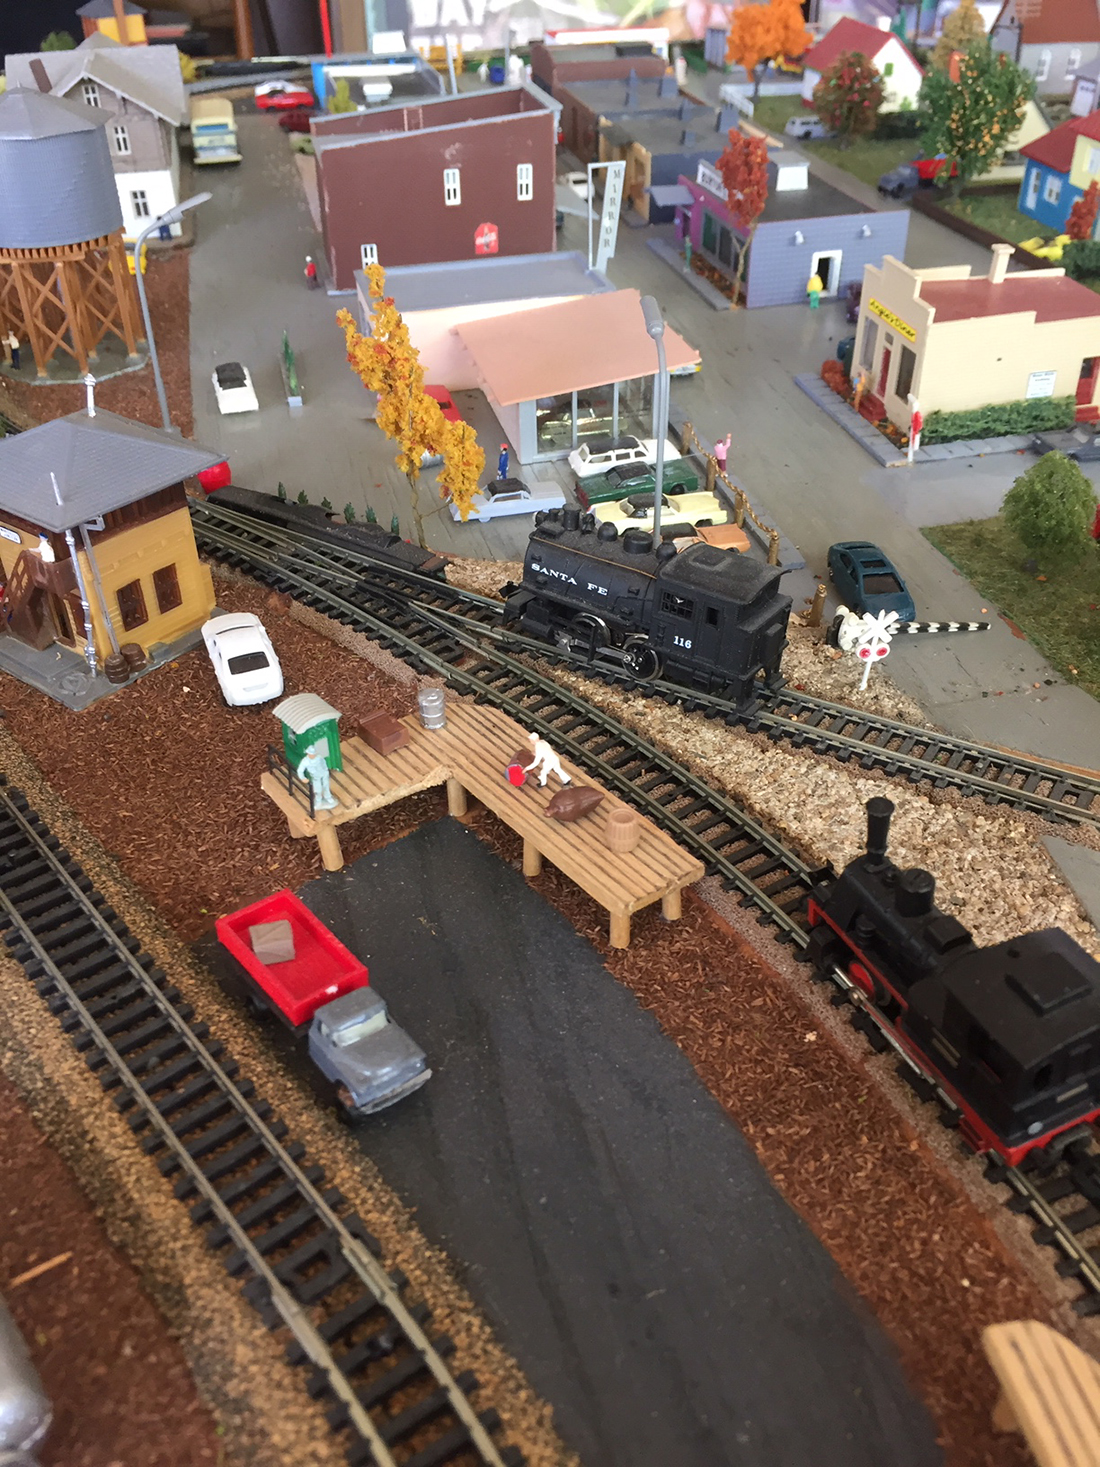
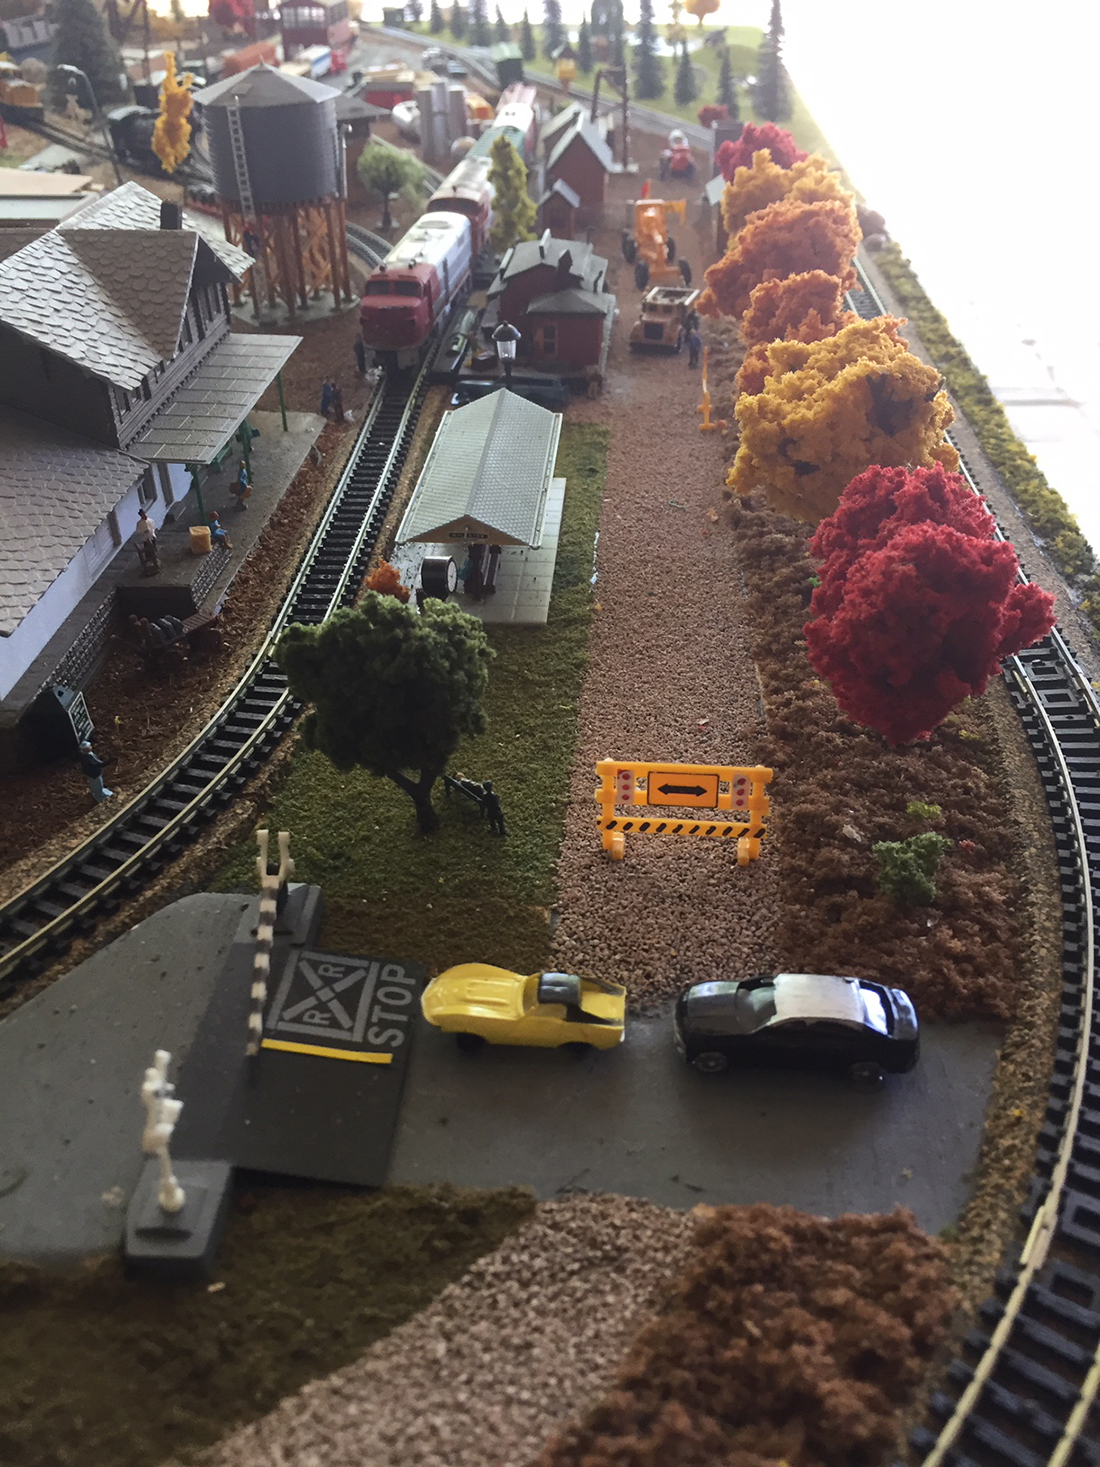
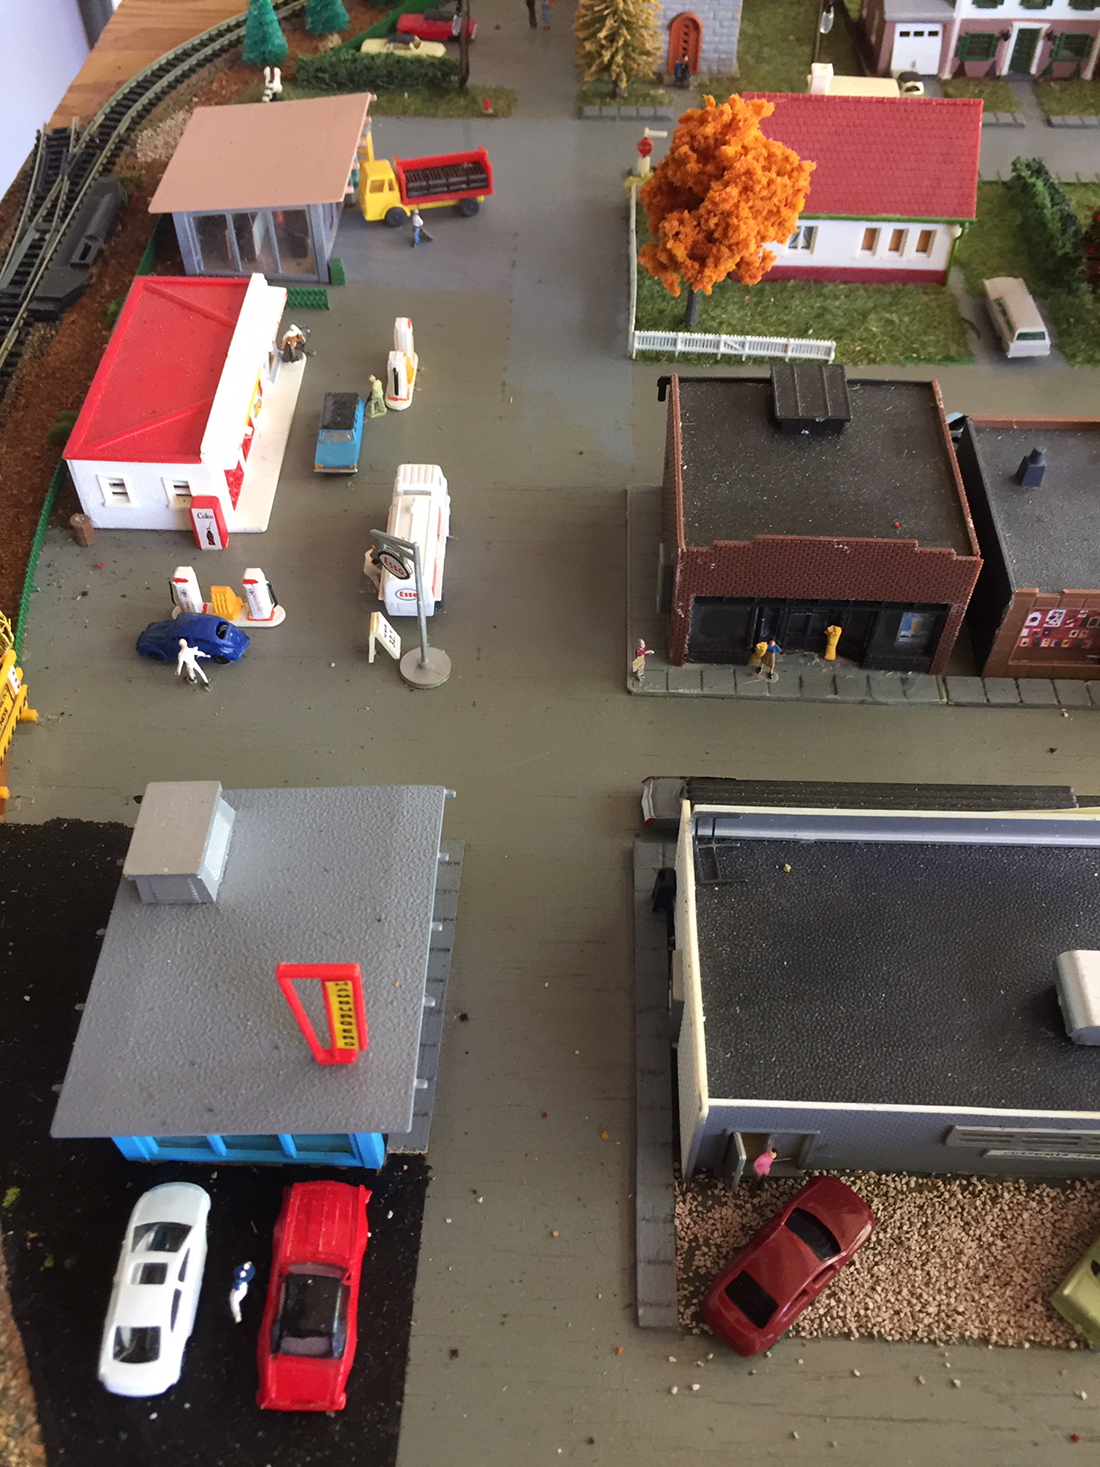
“Here is my first venture in model railroading.
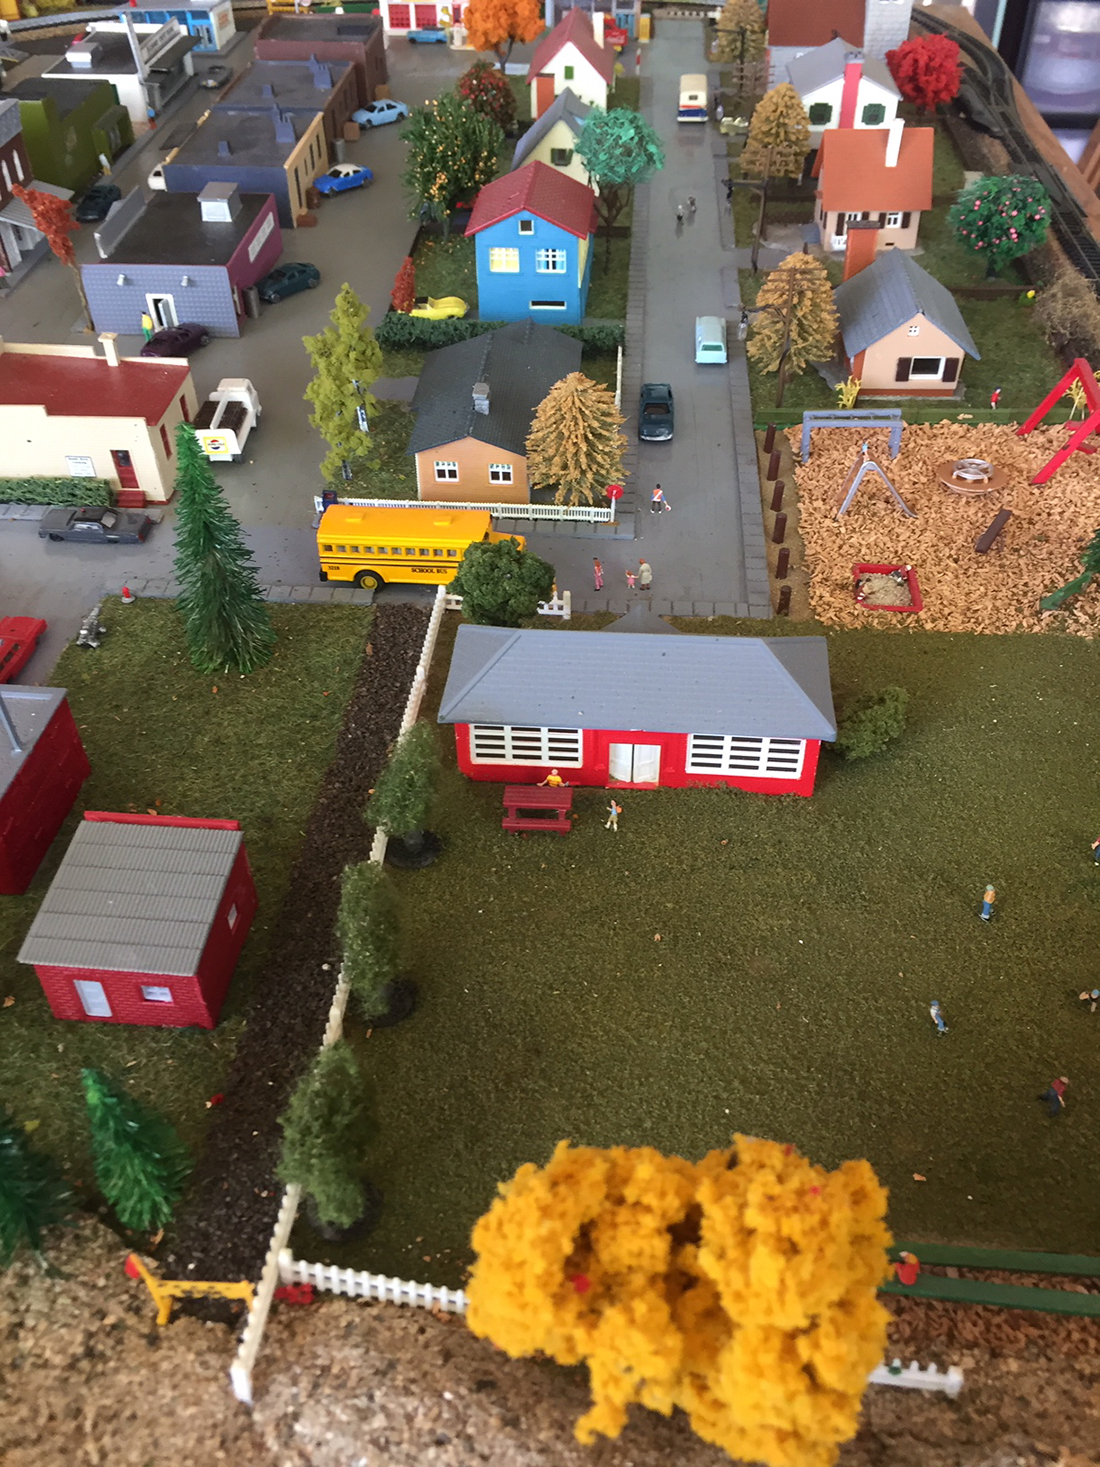
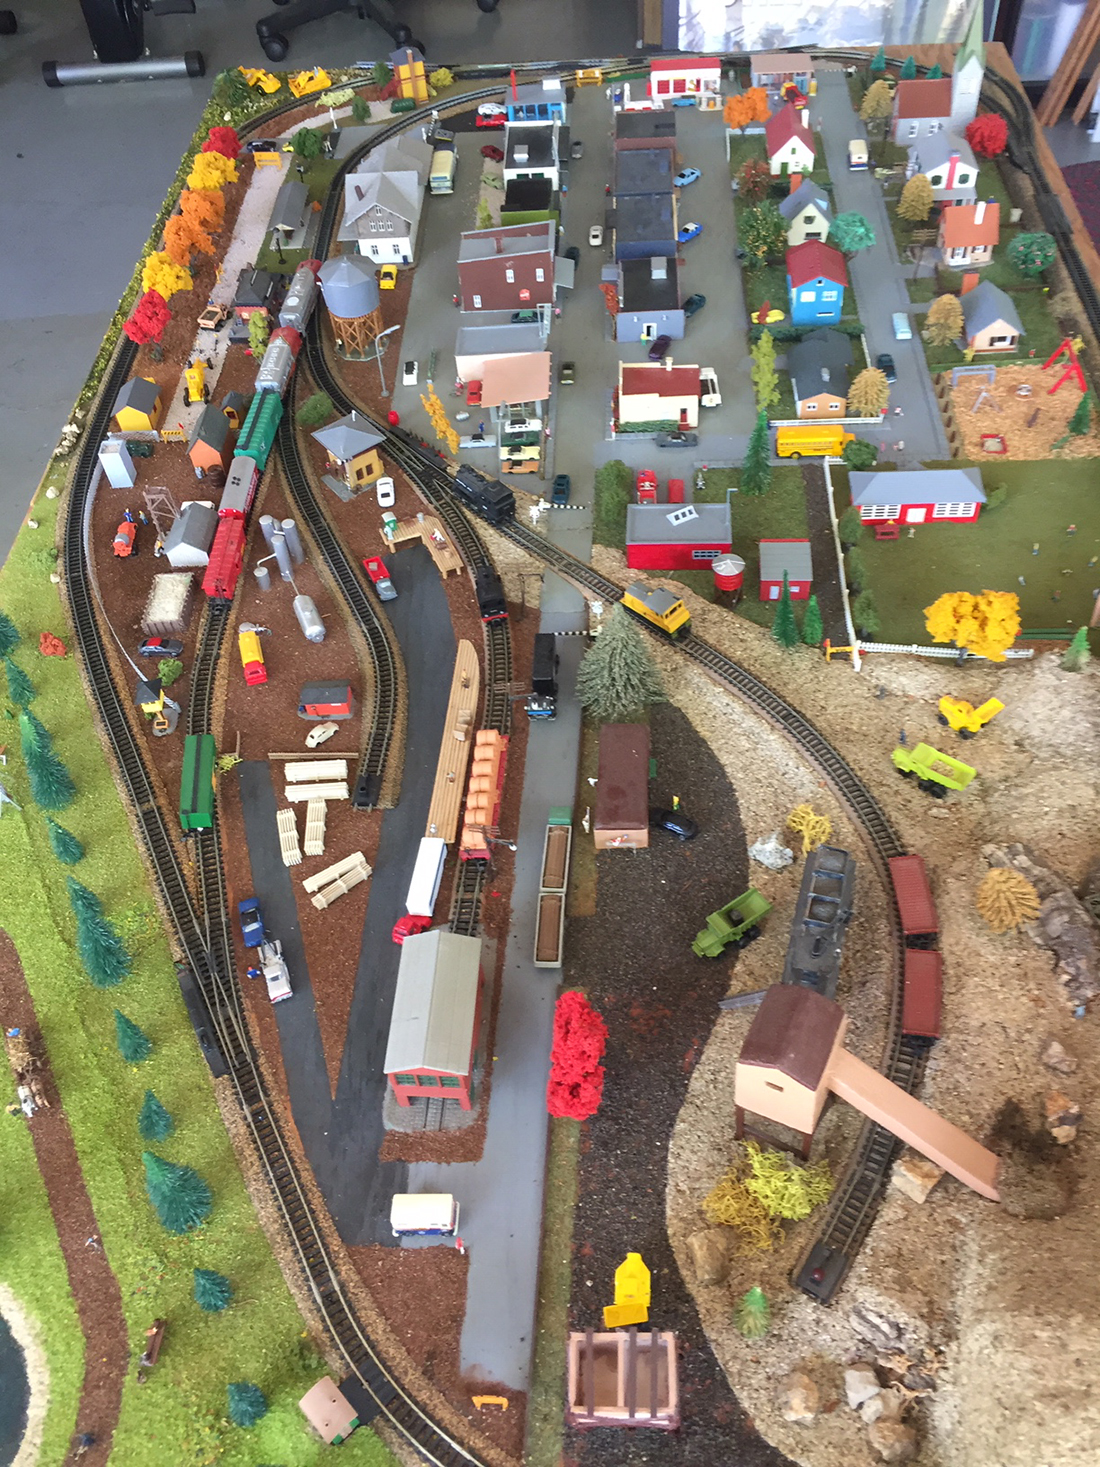
A 3′ x 5′ N Scale layout with town, mine, city park & lake, school & church.
Still working on adding more detail and fine tuning.
Lot of small detail hard to see like boy flying kite & ballon salesman in park, baseball game going on school grounds, boys skateboarding up street, etc.
N-scale needs a lot of patience and steady hands working on such small details. But well worth the effort.
Thanks
Bob Beckstrom
Menlo Park, Ca.”
Now to to another Bob (His last post is here).
“Al,
My new around the wall layout is coming along slow and steady.
When I started laying track and dropping feeders, I realized that my old way of doing it (positive on the outside; common on the inside) could easily get messed up.
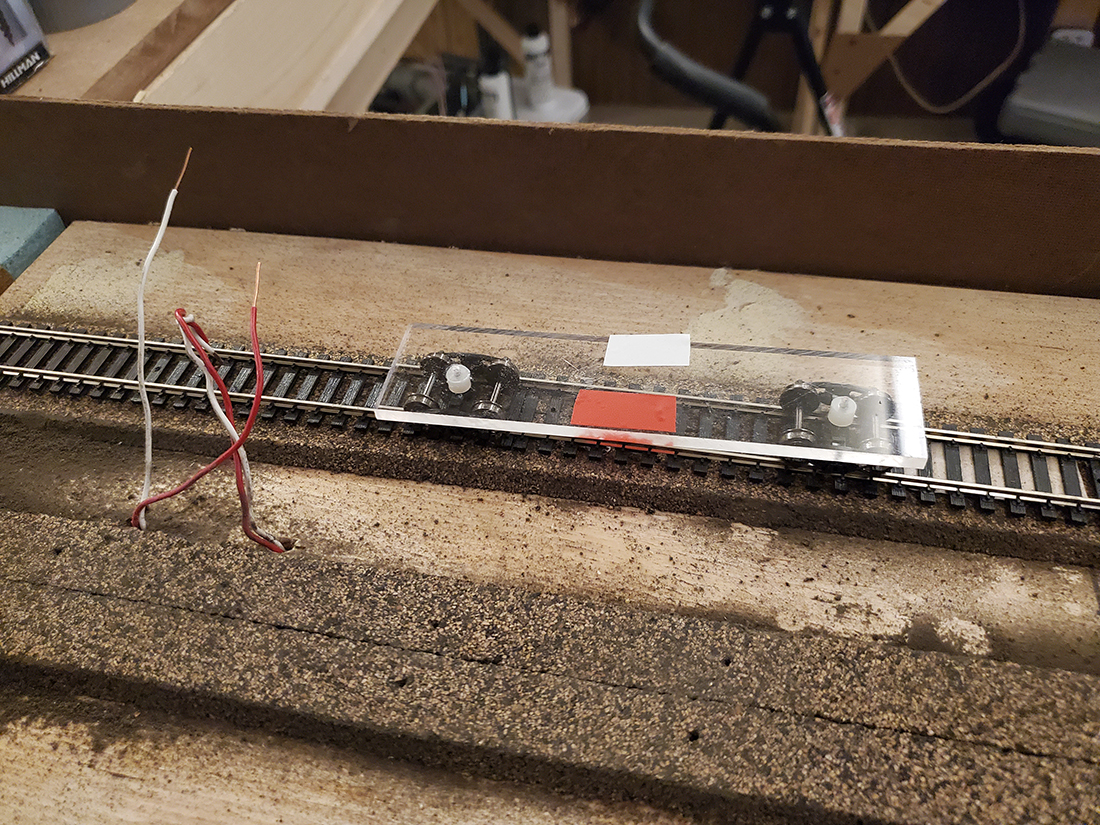
So I took my clear inspection car and put a piece of red tape on one side and a piece of white tape on the other. I roll the car along as I am dropping feeders and I can see which side to put the feeders.
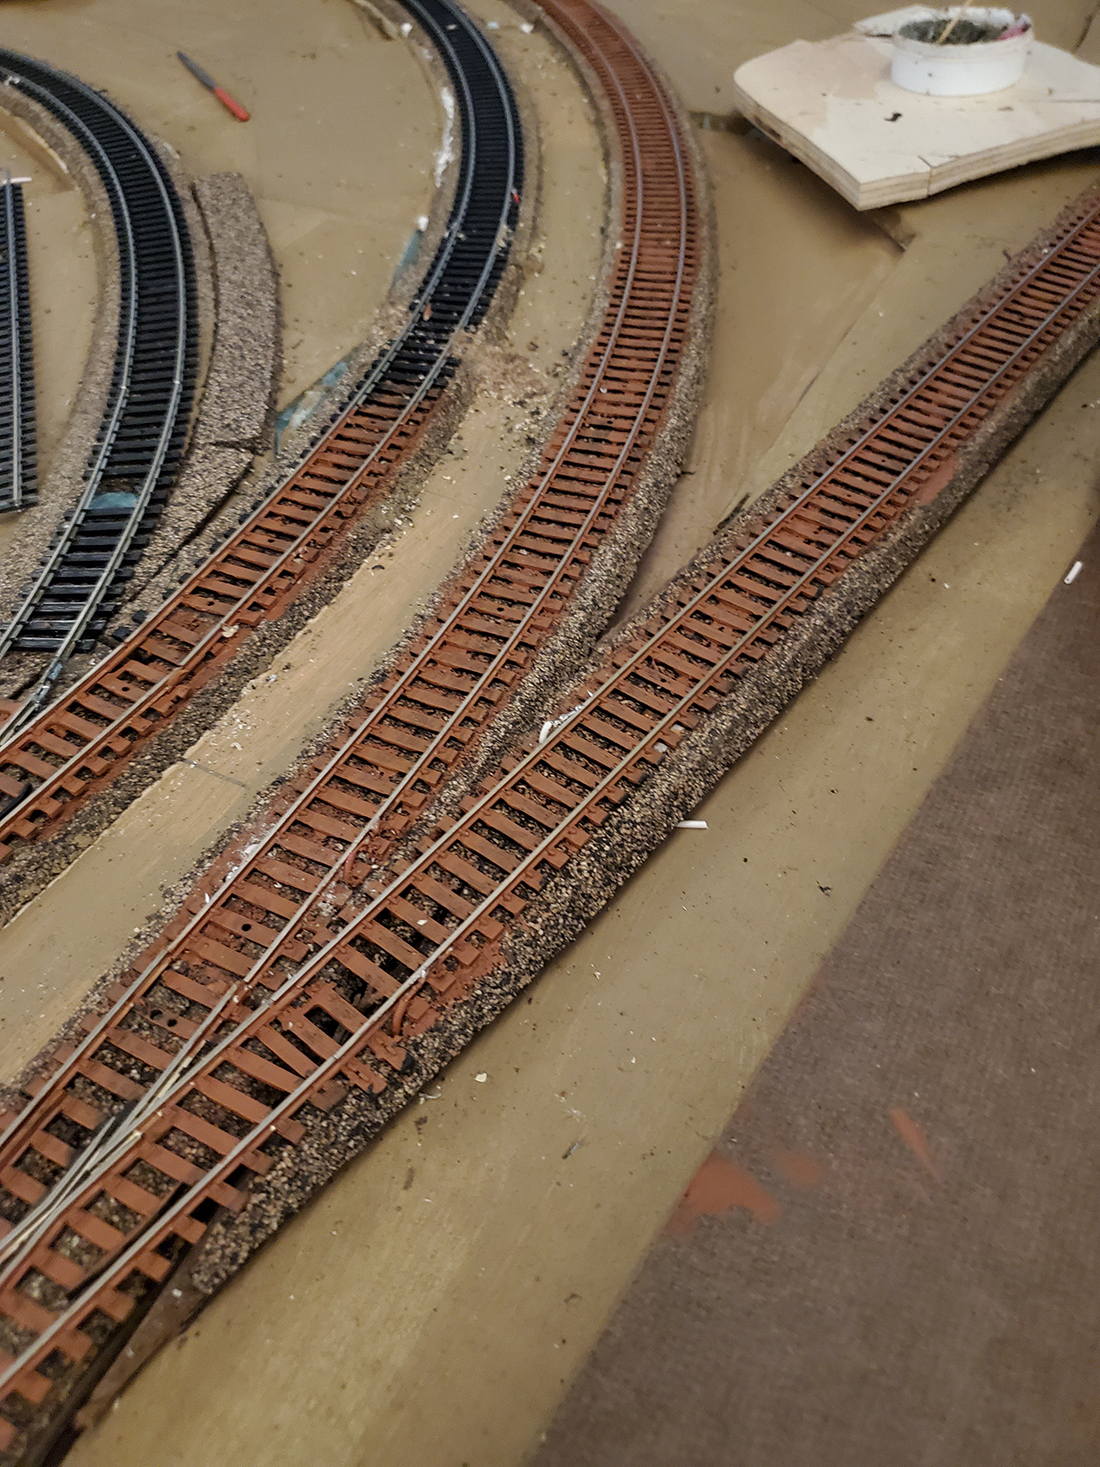
When I first started the remake of my layout I bought five different quarts of flat latex paint: two blues, a green, and a brown.
The brown turned out to be closer to tan so I went back to get another quart of paint. While looking through the brown paint samples, I found one called Rusted Earth. I thought that might do what I was looking for.
When I got it home, I tried it on a scrap of wood. When the paint dried, I thought that would look great on the tracks.
The picture show the first coat on a section of track. To my old eyes it looks like a decent representation of rusty rails.
Bob Filipiak, Virginia”
A big thanks to Bob, the other Bob, and Jim for sharing his Bachmann EZ track ho scale layout.
Jim’s madse a great start, for me, having a theme is the ingredient that transforms a layout.
That’s all for today folks.
Please do keep ’em coming.
And don’t forget the The Beginner’s Guide is here if you want to start having your own fun.
Best
Al
PS More HO scale train layouts here if that’s your thing.
Need buildings for your layout? Have a look at the Silly Discount bundle.



Everyone has a beginning of their layouts and all three in today’s post are making great progress on their own railroads. Each looks great and I’m sure each owner is having a tremendous amount of fun :D. Keep at it gentlemen and share more when you can .
Jim – could I suggest that in the third picture, where you have the two sidings on the left hand side, rather than coming off the main line, curving to the left, then splitting the sidings using a right hand point, if you put a left hand point where the left hand curve is, and split the sidings there, not only would you have less chance of a derailment, but you could also have slightly longer sidings.
To all: Great work! Bob the Rusted Earth on the track looks fantastic! Cheers! NJ Mark
.WHAT no diesels?
The Critic
Nice start Jim: Question, how come you are using double thickness of Pink Insulation Board ? You already have a thickness counter sunk in the layout
wooden frame. Wouldn’t that be enough to work with ? Just wondering.. Thanks. Best of Luck with the rest of the layout. ~ Mike in N.H. USA.
Just starting another layout after forty years and am curious how to lay track. is that corkboard your track is laying on…Do you nail your track down? I know I sound like an amateur, but its been a long time…Bought a lot of HO super seal track and wonder hoe to make my trains run smoothly…Cool Layout. .Do I see a few Plasticville or kits?
Jim in Tennessee…….. Make sure that your track is laid perfectly…….before to start on anything else run your engines and some cars over all the track and test your turnouts. if you have any derailments or problems.….fix them before you go on to your next segment of the project. Two years into my HO layout, which was the first HO layout that I have done, I am still having problems with derailments because I did not test enough and was anxious to move on with my layout.
To Bob Filipiak, Virginia……………..great idea with the inspection car…..wish I would have thought about that although I did not have both wires coming out of the same hole. I drilled holes on each side of the track.
Hello James, my name is Al I’m from Nevada. I have only a small spare bedroom for my 4 x 8 layout and 2 x 6 work bench. I notice in the pics of the bare layout you use the pink foam board like I do AND EZ track like me as well. My question is: how do you hold down the track, i.e. pins, tacks, glue, etc. My track is laid out the way I want but not permanent yet. Thank you from Nv.
Straight track and no derailments, Al
Richard: Excellent idea! Thanks for the input!
Mike: I already had the one inch foam sheet from another project and added the two inch sheet to give some more depth for a planned creek crossing / bridge feature. 3″ = 21.75 scale feet which isn’t a very high bridge around here. Thanks!
Jim,
My only concern? Where’s the inside insulation? It gets cold sometimes in your neck of the woods, and I really want to know you can enjoy your shed and the World’s Greatest Hobby in warmth while it 2 below outside.
Great layout, have fun.
Jim in Tenn. I’m interested in your layout since my Dad worked for The Southern in Richmond, Va.
Jim…
Great Start and an interesting track plan…
I found EZ-Track is the best when young children might be playing with the layout…It is a robust product… It does have some limitations however.
I built a layout with EZ Track on foam about 20 years ago when EZ Track was a relatively new product (and I found my nice Peco switches did not last well under the not so subtle ministrations of my 4 year old son).
To Al Penaluna…
I have used Titebond glue to secure EZ-Track but if I make another layout with the same track I will use any glue like liquid nails that is labeled for FOAM use.
I usually do but this picture is on my swing gate and I put the wires in the center because I didn’t know exactly where the track would be.
Jim, That looks like a great start on your layout. I recently bought a Bachmann train set that had some E-Z-Track and really enjoyed running some trains. If I didn’t already have so much Atlas code 100 track, I would use it on my Christmas layout.
Bob in Menlo Park, That’s a really nice looking N scale layout. I like your town and all the details. I’m glad you can work in N scale. Personally, after getting out and running my limited collection of N scale equipment, I’ve decided it’s just too small for my aging eyes and shakey hands. But more power to all those folks who can work with the tiny little people and other details. It truly amazes me what can be done in N scale these days.
Bob in Virginia, That rust brown paint looks very good on the ties and rails. Also, thanks for the inspection car idea to keep your polarity straight when running feeder wires. I guess the idea would work with any car even if it wasn’t a clear body like your inspection car. I plan to solder my feeders to the rails before I lay the track so I can get the holes in the right place.
Al, Thank you again for all you do maintaining this blog and keeping us all informed of what others are doing in this greatest hobby on earth. Be well!
Eustace; I have insulation on order but it was delayed due to demand caused from some recent tornadoes in the area, so I went ahead with the layout. My stapler anxiously awaits the arrival of the insulation!
Vernon, my grandfather was a section foreman for Southern in the 30s and 40s. As long as he lived he carried his big railroad pocket watch in the bib of his overalls.
John; Liquid nails is definitely my choice for gluing the track to the layout. I have previously used it to glue this type foam insulation board into wall recesses, and it worked beautifully.
Bob – I like your ‘N Scale’ railroad. Nicely detailed.
Bob form Maine.
Hello to all, and thank you Al for all you do on your blog.
Three great looking layouts each a little different and enjoyed. Keep on modeling railroading
Cary B from Maryland
Jim
Your layout looks great.
Bob in Menlo Park – I just had to smile. Is there an N modeler in existence who doesn’t have that very same water tower/switch tower/station set?! And maybe two out of three have that church/3 houses kit! I’ve got ‘em too. In fact, I’ve had them since I was 16 years old, and that was 50 years ago! Talk about enduring the test of time. Like I said, seeing them always makes me smile.
Pretty neat.!!!!! I hope mine turns out that good.
Can someone give me advise on glues to use connecting foam to foam. I I use foam to create hills and mountains on my HO layouts but have had poor results with keeping them attached to one another over time. Many thanks .
Jim, a great start and lots of potential there, so you will have to keep us informed.
Bob1, love to zoom in to see all the activity and detail. Lots to see for sure,
Bob 2, I am to the dropping stage myself, as my two loops are powered by just one connection, and it is time to get more consistent power to the tracks. I like your inspection car,
Enjoy!
MN dan
Jim in VA, Good start but I hope this reaches you before you start gluing the track in place. Unfortunately the Bachmann unitrack turnouts have the worst rating for quality and durability in the industry, so don’t glue down the turnouts because you’ll likely be replacing them regularly. also unfortunately there is no other direct replacement turnouts available other than the Bachmann. I would suggest modifying the tracks connecting to the turnouts to ease removal. Easier to do now than later. Use pliers to remove the rail joiner on the connecting tracks, then use a fine toothed razor saw to cut the ties where they attach to the rail right along the bottom flange of the rail a distance equal to the full length of a connector. This so the connector can be slid back far enough to disengage from the mating track, Do this for all the connections. Now file or sand off the locking tab so it still aligns the track but allows the track to be easily slid apart. When a turnout needs replacing first modify the new one the same way, then slide the joiners back so the turnout is disengaged and remove. Replace the turnout and slide the joiners back in place.
Jim, I did t he sam e t hing.got a crapload of E Ztrack from an estate and got a whole bunch of locos and broken rolling stock from Ebay and kit bashed them tobiuld my fleet. Jackson in Tennessee.
veryv nice. were in va are yoi?i live in rocky mount 540 2382012 please get back.i have a 8×16 ho layout.
Hey Jim. Doug in largo, Florida. Email me some pictures. Like you I am just starting my first build. I am at the same stage except I don’t have your switches and have a couple of questions about them!
Thx
Your layout knocks me off my feet! It’s a fantastic layout that made my eyes open wide. I would love to have a layout similar to the one that you have. I love trains,
and I think that they’re the BOMB!
Hey I love this layout. Really dig the buildings and sense of a town. On the dockside locomotive, one of my favorites. Some operating options and main line running. Yep I like it.
Hy bob, a suggestion for paint, go to a hardware store and look up the sprays available. You will be amazed, for example, a stone spray, earth sprays etc. You can spray the track or put the spray down before track. You should plan to clean the rails after spraying. Another trick is to ballast the track and then spritz with a white glue thin water mix which will secure the ballast. You should have all track operating first. .good luck and keep at it!
You have all been bitten bye the bug. Enjoy!
Jim I wish you luck but those Eztrack switches are famous for derailments. After your first bout you will soon find out that Micro engineering track and switches is the way to go. Flex track allows for less joints and various number switches allow you to ease the engines and cars through turns that are not so abrupt.
Jim
ScenicsRme’s comments are spot on! There will be turnouts that wont work from the start or worse intermittingly so running trains becomes frustrating. Their motors are too small-period! If you take one apart youi’ll see what I mean. There are many solutions to this problem and none of them is simple. Notice all the greats in HO dont have EZ track but flextrack with wide turnouts and motors underneath that are reliable and strong. The EZ straight track and curves are passable and if you test those turnouts and are lucky that they work and you like them then plan on rebuilding them with external motors and rewiring the controls in the future. Those turnouts on the edge will send your newest expensive consist over the edge and I’ll hear the screaming up here in Long Island. Been there and the T shirt is tattered.
Great stuff guys- You N guys are something else.
Big Al- Nice!
really cool
Always great to see progress reports on model railroads. Reminders we have to start somewhere. One step at a time plus patience equals success.
There’s a couple diesels Robert .
All three layouts look like your off to a great start keep up the good work and have fun running your trains. Look forward to seeing more progress
Really nice layout using modest priced scenery items. Enjoyed this presentation Just a thought, I would send these pictures and discussion to MODEL RAILROADER. This month’s MR had a very interesting letter questioning why they do not print articles about nice apartment or small basement sized layouts just like this one
A wonderful article about three enthusiastic model railroaders! Keep up the good work!