John’s been back in touch with his model railway hoist diagram:
“Some time ago my model railway – a railway on a hoist in a garage – Cabin Manor to Gardenton Railway was featured by Al and received many positive comments.
I did have queries about how the hoist mechanism works but for many reasons I never responded.
As I am self-isolating because of a Covid positive test result, I have time to respond and I hope that this brief description, the diagram and pictures will explain it all.
What I have now is the second version of the mechanism as the first didn’t give the stability that I wanted.
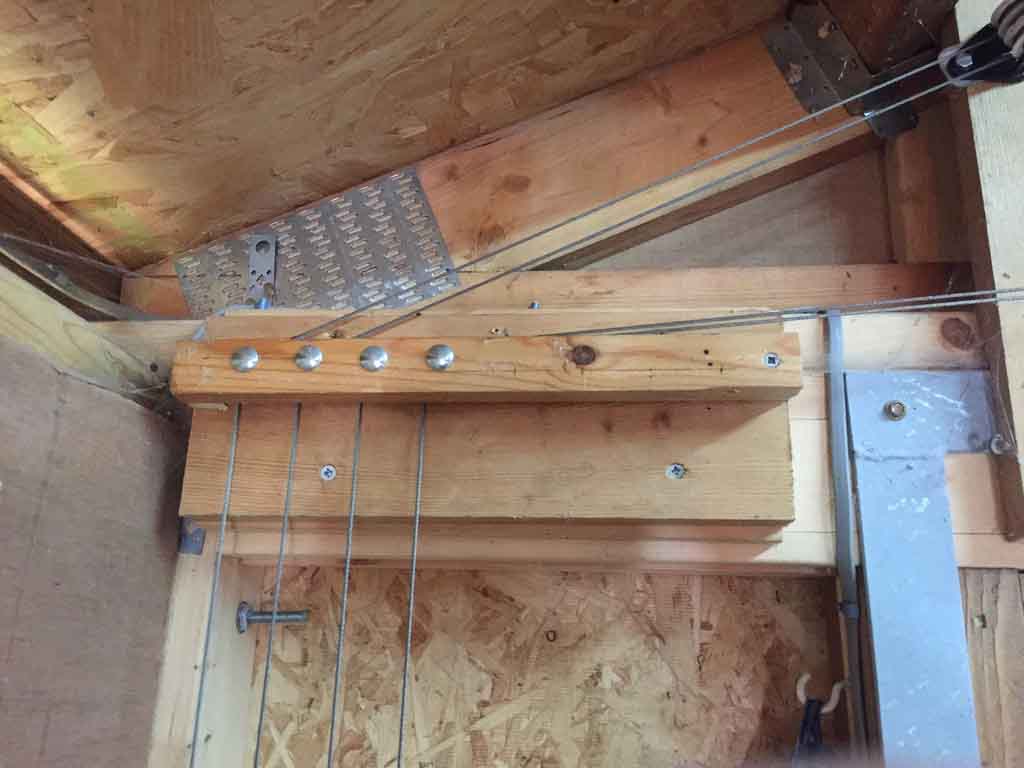
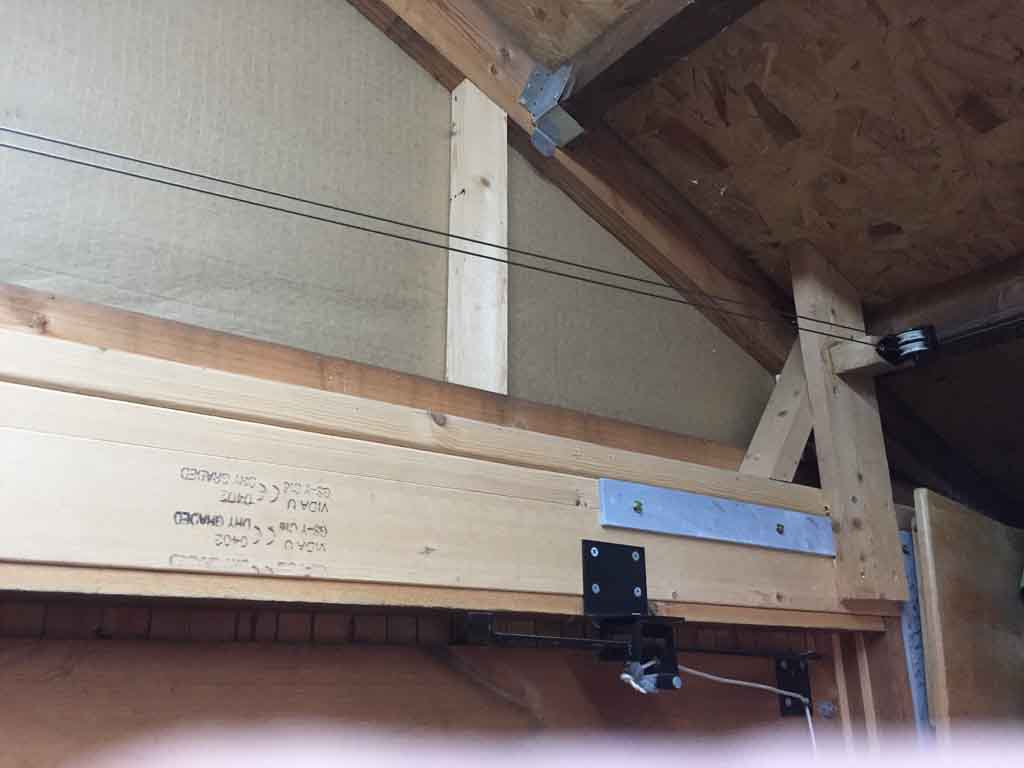
With the uprights from floor to roof, the table is lowered to the supports and is solid and steady and takes the weight off the cables.
When the table is raised, the length of the cables has been adjusted so that it will automatically stop at the required height.
I then move the supports to the upper position and then lower the table slightly on to the supports. It has all worked satisfactorily for about eight years.
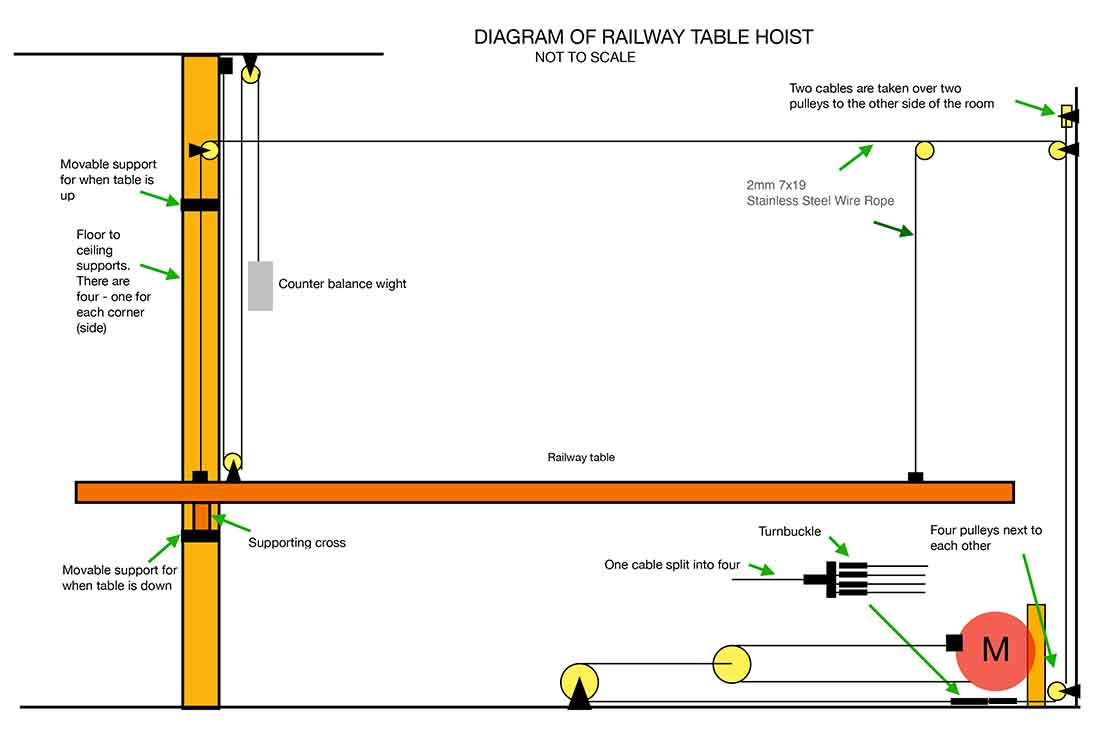
Below is a diagram of the mechanism.
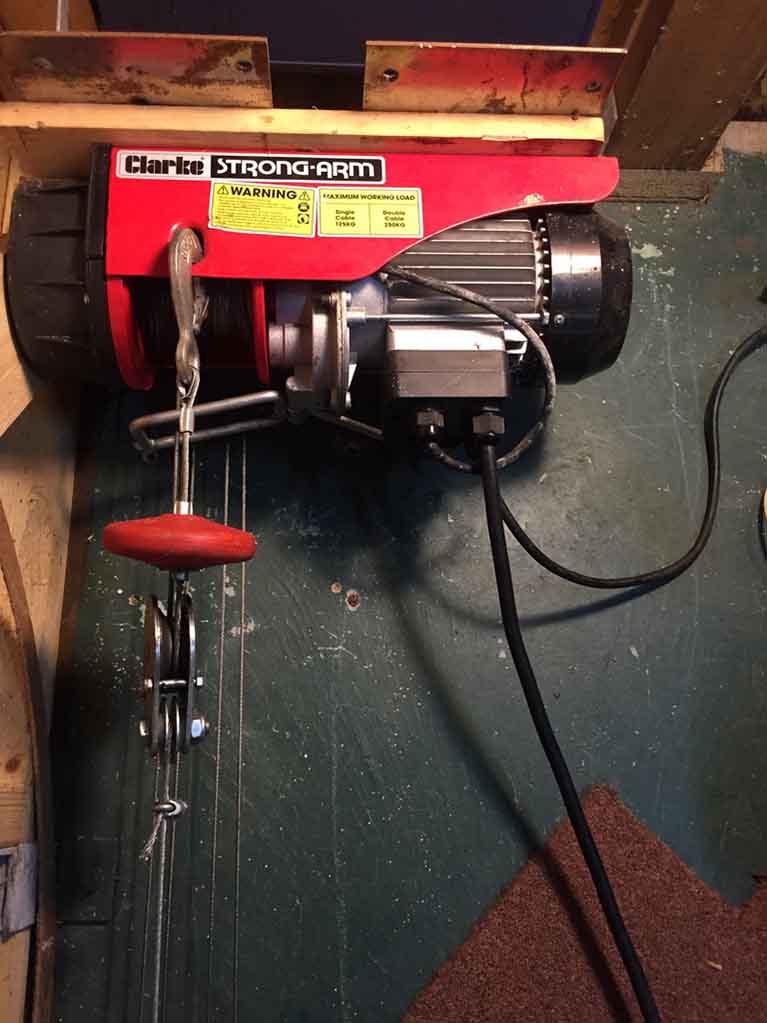
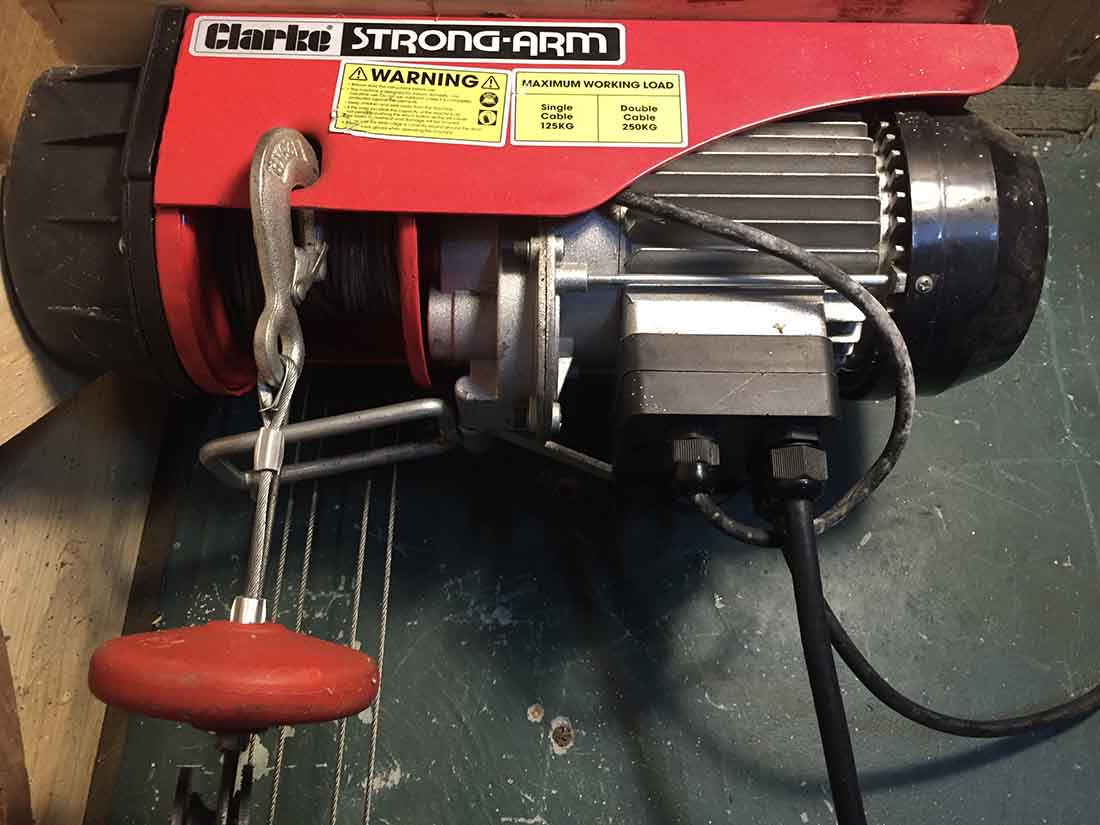
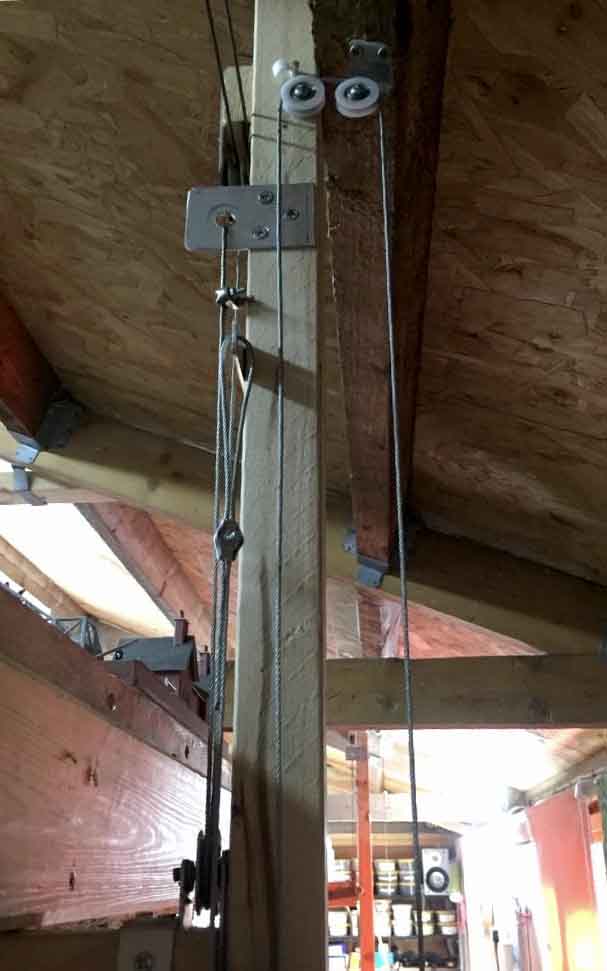
I use a 125/250 kg electric hoist (normally mounted on the ceiling and used to hoist engines out of cars) which is mounted on its side and secured to the concrete floor with stainless steel brackets.
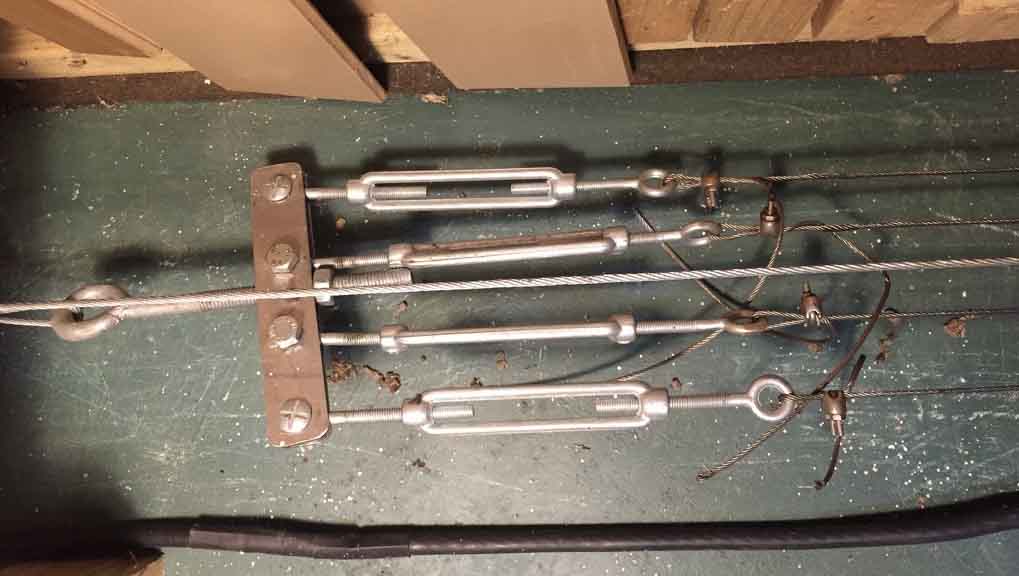
The stainless steel cable attached to the hoist pulley, goes round a pulley secured with sturdy steel brackets, to the concrete floor at a distance from the hoist motor itself.
The cable is attached to a stainless steel cross piece to which is attached a steel eye bolt and four cables each with an adjustable galvanised fence turnbuckle to adjust the length of each cable so that the table is level as it travels up and down.
Because the photos are focused on the mechanism, they suggest that it all looks rather rough and crude but in reality the motor and floor section are all closed from view by a shelf and one doesn’t notice the upright supports or the cables.
Regards,
John”


A big thanks to John, especially for the model railway hoist diagram.
You can see John’s orginal post here.
Now we’re doing a sharp U turn, and revisiting yesterday’s post.
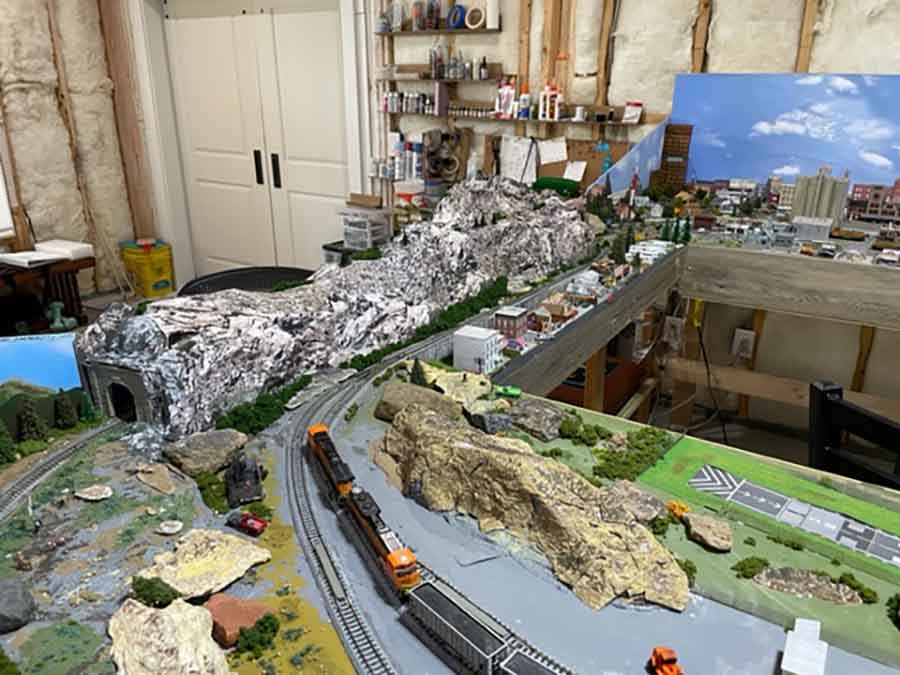
And here’s a pic of his layout to jog your memory:
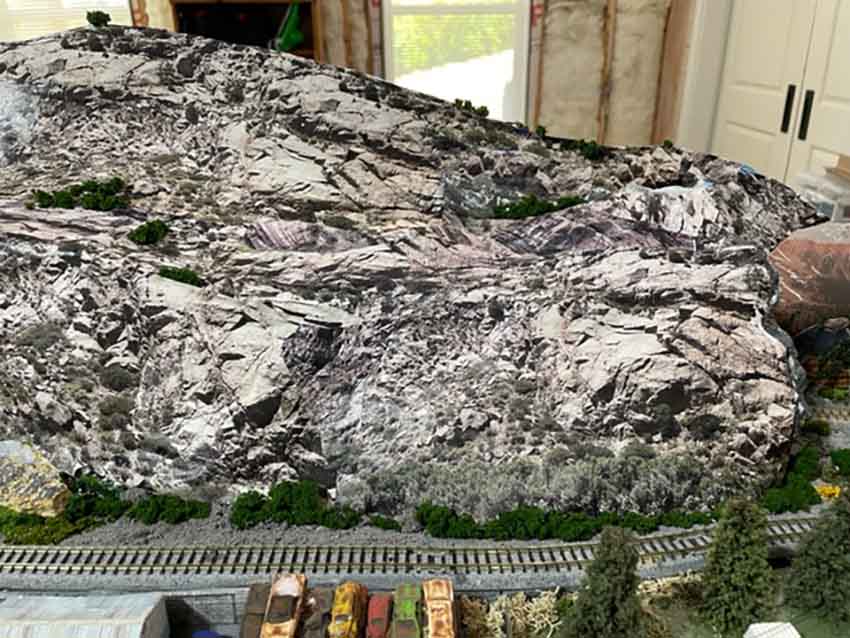
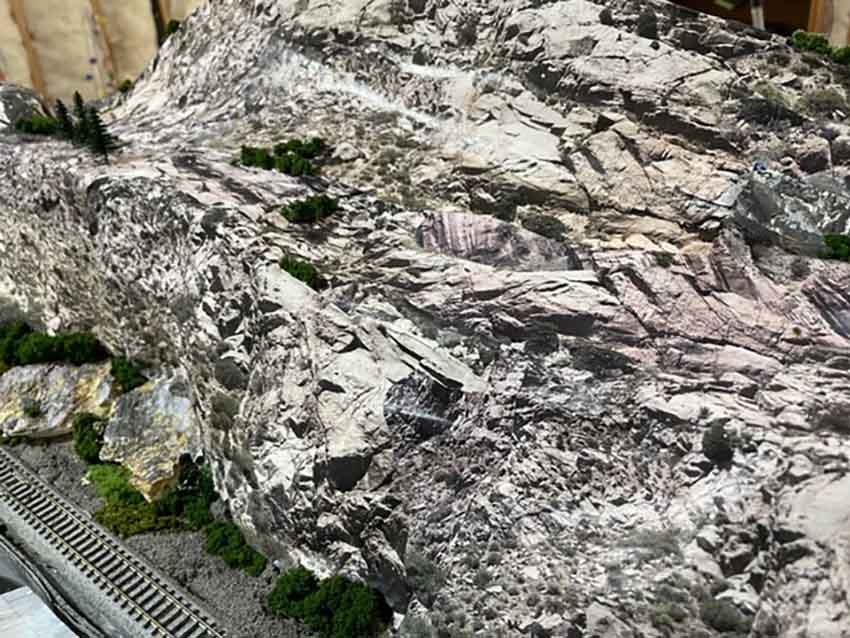
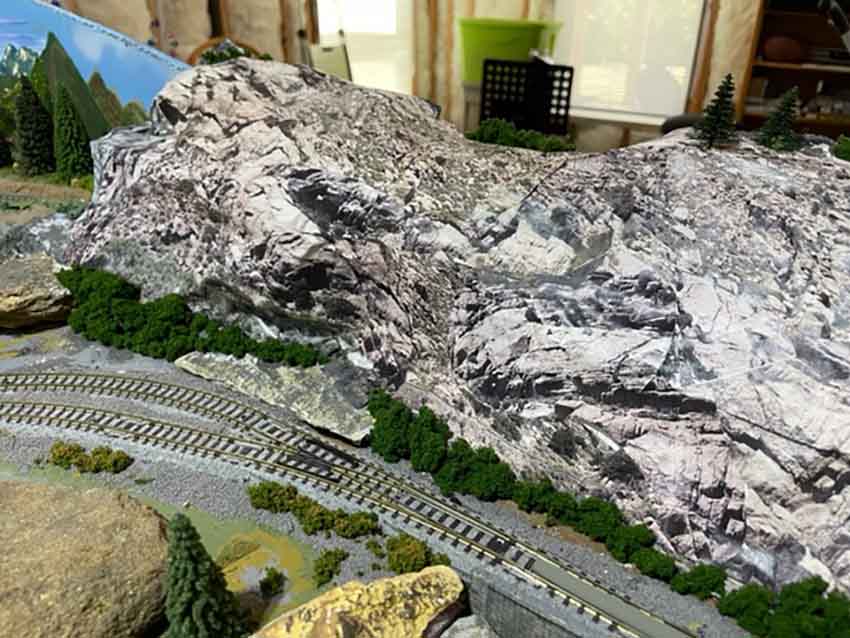
I asked Brian about his mountains because I thought they looked remarkably ‘clear’ – almost photographic, but obviously they weren’t.
Here’s his reply:
“The mountains are a trick I learned with my previous layout.
The base is plaster cloth.
Then I paste actual photo copies of rock faces I’ve taken pictures of, especially along the Arkansas River in Colorado.
Once dry, I brush a mix of white glue and water over them. End result as you can see is very realistic and very affordable to do.
Brian”
It’s another fine example of how the simple ideas often work the best.
Who would have thought it would be as easy as that?
That’s all for today folks.
But please do keep ’em coming – my inbox is looking very sparse indeed at the mo.
And if today is the day you press the fun button and get started, the Beginner’s Guide is here.
Best
Al
That’s all for this time folks.
Please do keep ’em coming.
And if today is the day you get started on your layout, the Beginner’s Guide is here.
Best
Al
PS More HO scale train layouts here if that’s your thing.
Need buildings for your layout? Have a look at the store.
They are great fun to make and great value too.

Brian… what a great idea to paste on rock photocopies. Must try this on my next layout. Thanks.
Most garages have waisted space above the garage door when it is open,
Consider raising the track of the garage door to leave room for your (not Jims) layout underneath the garage door even when the door is open.
What a feat of engineering. When it comes to layouts, where there’s a will there’s a way.
Brian
What a great idea!!! Photos!!!! It really makes a difference when looking at your layout. Neat!
John… I am absolutely gobsmacked!!
Your layout is amazing, the videography is great, the music is perfect. A beautiful layout overall. The design of the lifting system is pure genius. Anchoring the hoist to the floor, the corner support posts and stop blocks all are amazing, it put all of the parts that need mainfenance within easy reach.
I am thinking about moving and believe I could use your ideas not only in a garage, but with a little ingenuity it could be disguised as a light box in a bedroom or even the living room
You have lifted my day, and really got the old idea mill churning. Thank You.
The cables used are very high strength steel. My concern is that the turn buckles and ‘eyes’ are the lowest grade #2 steel. This layout was specially made to be light weight. This was costly construction. Unless there is a room above the garage, the ceiling beams are not structural. It is not advisable to attach the pulleys to the bottom of the beams. This was not of concern with the light weight construction. We have a two car garage with a light weight aluminum door. The ceiling attachments span multiple beams to distribute that small load.
My concern is that someone without proper technical knowledge may decide that they could make a15x20′ mountain layout in their two car garage with a high ceiling using standard construction for cost savings. That said, this is an excellent idea. Get guidance from an architect or structural engineer. Anything can be constructed safely. The Golden Gate Bridge spans hundreds of feet with cables.
Your hoist is awesome and putting the hoist on it’s side is very different!. Don’t know what size layout you have? The hoist diagram is nice but doesn’t have any detailed information. I would like to investigate this further. but without .more info,
it makes the job harder. Keep up the good work
Brian, I am happy for Al to give you my email address if that is in order and we can discuss it and I can give further details.
I suggest using larger diameter pulleys, standard practice is 10x diameter of the cable. Also, do use metal sheeved pulleys.
hey al, the pics of John’s hoist is really cool and fantastic, a lot of workmanship and time has been out into it also I really liked Brian’s mountains they look fantastic wish mine could look that good. also is it possible for you to re post the pics of John’s mountain layout? the reason being, the other day I accidentally deleted those pics, I think they were really superb,and gave me a lot to think about in doing mine that way I’d really like to see them again if possible. thanks for all the great pics and tips…val in U
good idea. if i had a garage i might use it.