Brian’s been pressing on with his HO scale workshop build:
“When I built kits, I always study the instructions and phots to figure out how this kit will fit on my layout.
Usually I do not follow the sequence of the instructions and work from them in a way that I can change or modify it if needed.
In part 1 in the previous blog, I had to flip the wharf horizontally and mirror image it in order for it to fit the location on the layout.
From that I had to construct the workshop flipped horizontally to fit on the wharf as well as up against the main building.
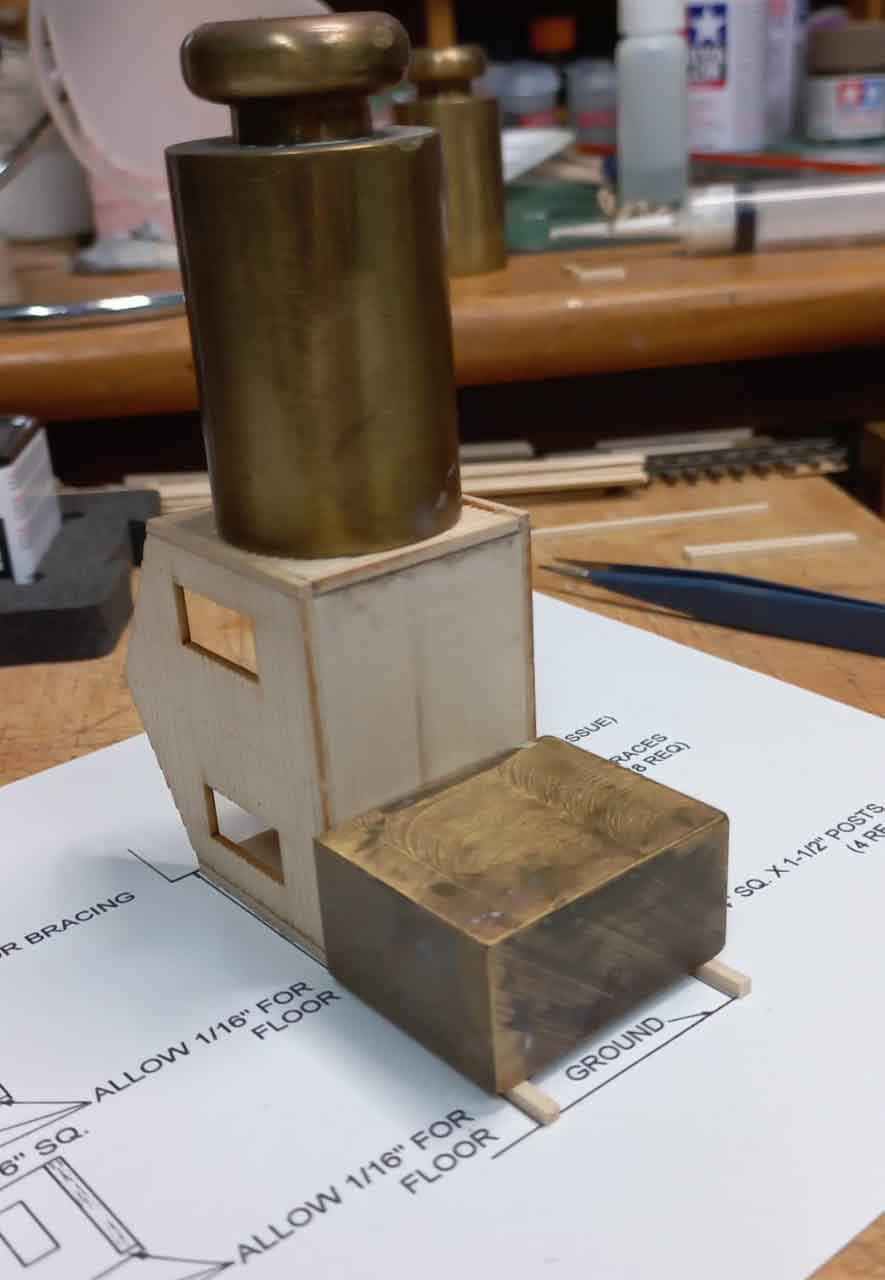
Photo below is the construction of the elevated office on the opposite side of the main building. I have used weights to hold the legs down on the plan template.
Below, the office has been flipped 180 degrees vertically in order to assemble the opposite side.
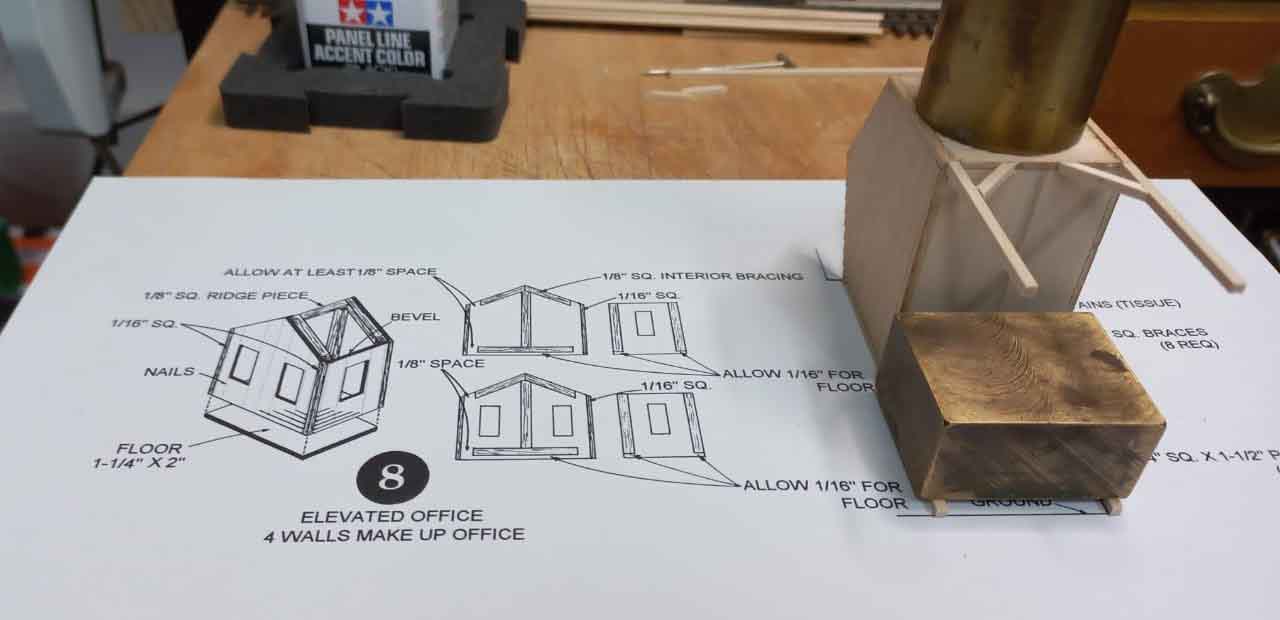
Here it is temporary placed against the main building to ensure correct height and position.
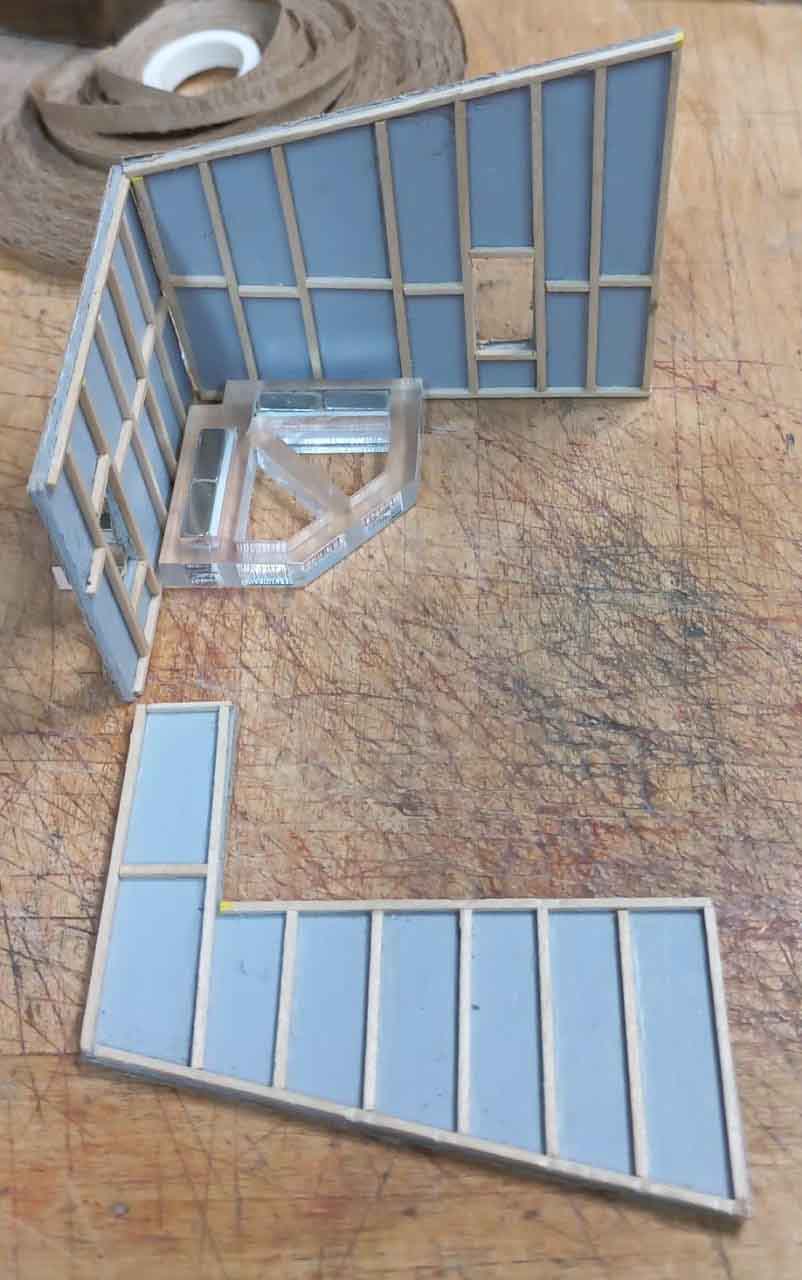
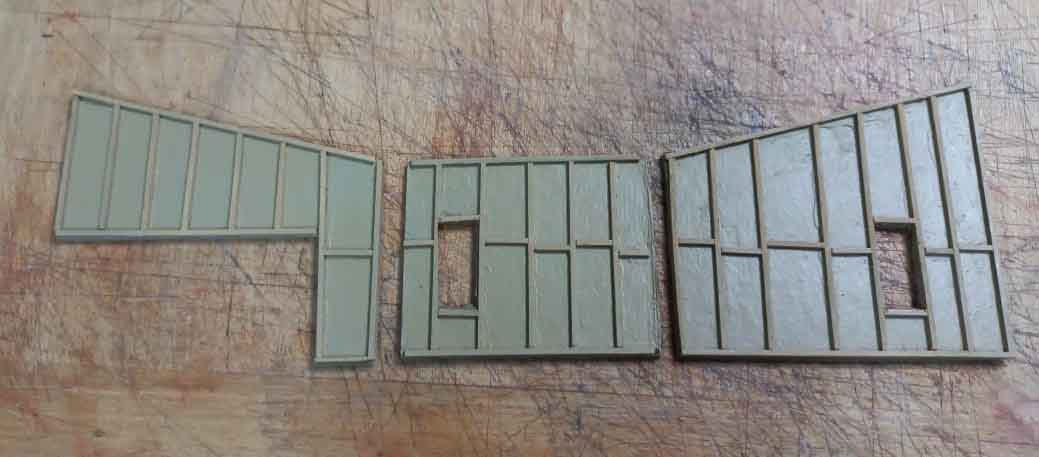
Here, the workshop walls are in the process of being assembled.
After the gray primer was done to smooth out the interior surface, it was sprayed an earth color to represent a wood finish.
The outside of the workshop walls were covered with shingles as can be seen in later photos.
I used a Lego base as a jig to hold the 3 sided building together to make sure that it would assemble correctly on the wharf.
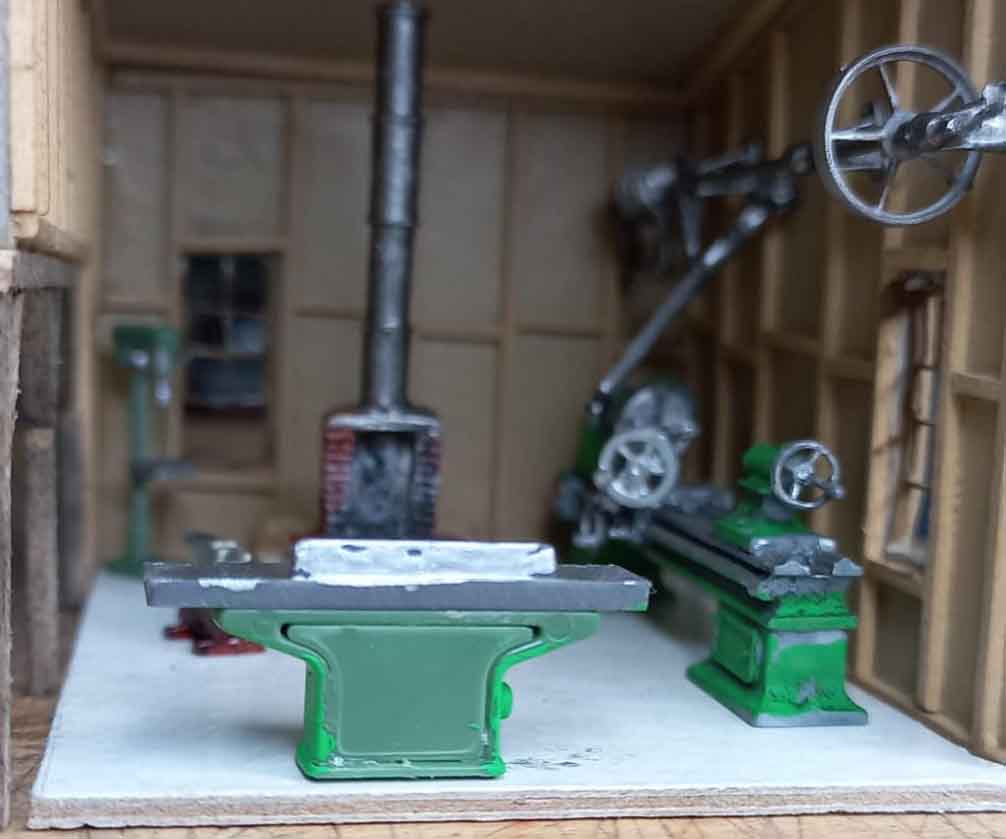
By placing one of my metal lathe kits (a Scale Structure one) here, I was able to judge whether it would fit inside.
Turns out that it was to long and a I found a shorter one which fitted a lot better. The shingles shown here are prior to being weathered.
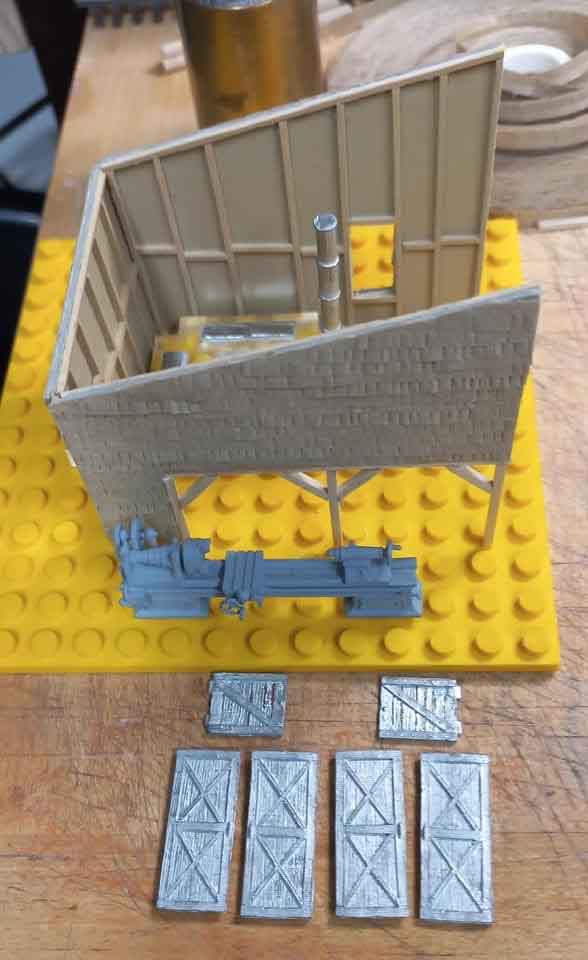
I used my Right Way magnetic corner clamps here to hold the building together while I started with the roof.
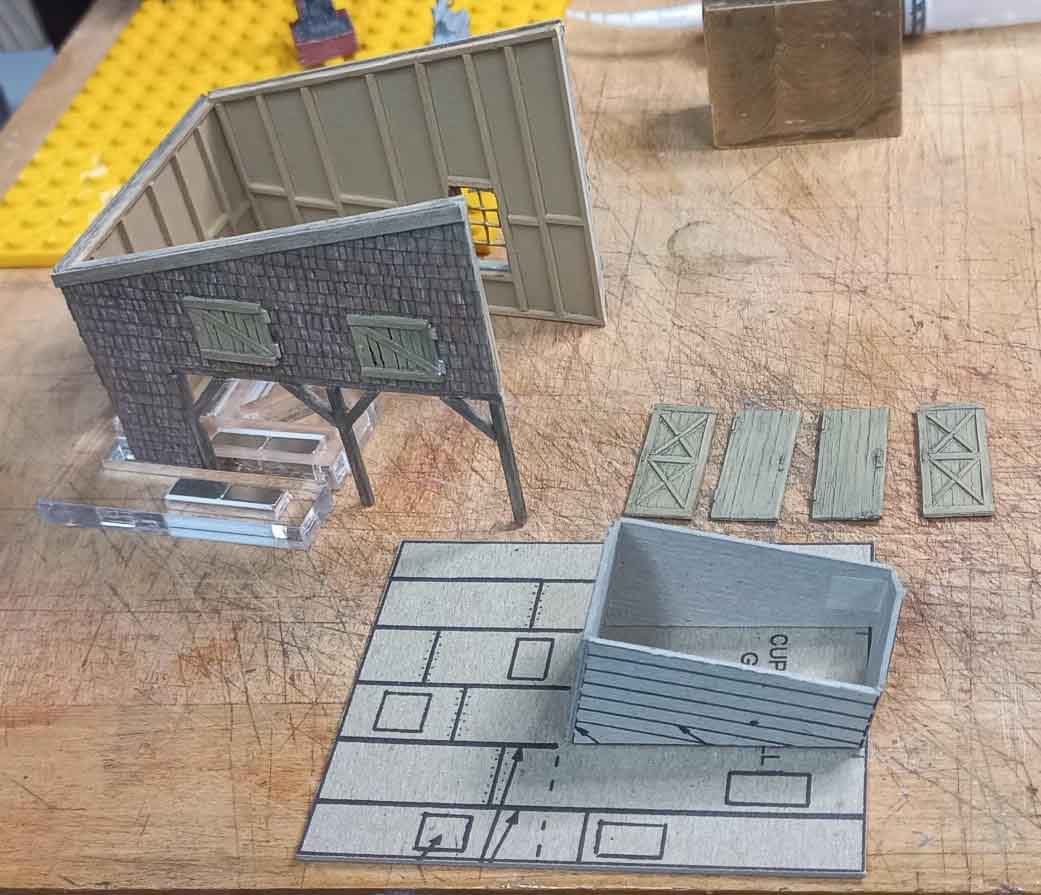
The front doors have been painted and weathered ready for placement once the workshop is in final position on the wharf.
The hatches have been glued onto the front above the door openings.
A test fit of the roof below for the workshop build. The shingles have now been aged and weathered.
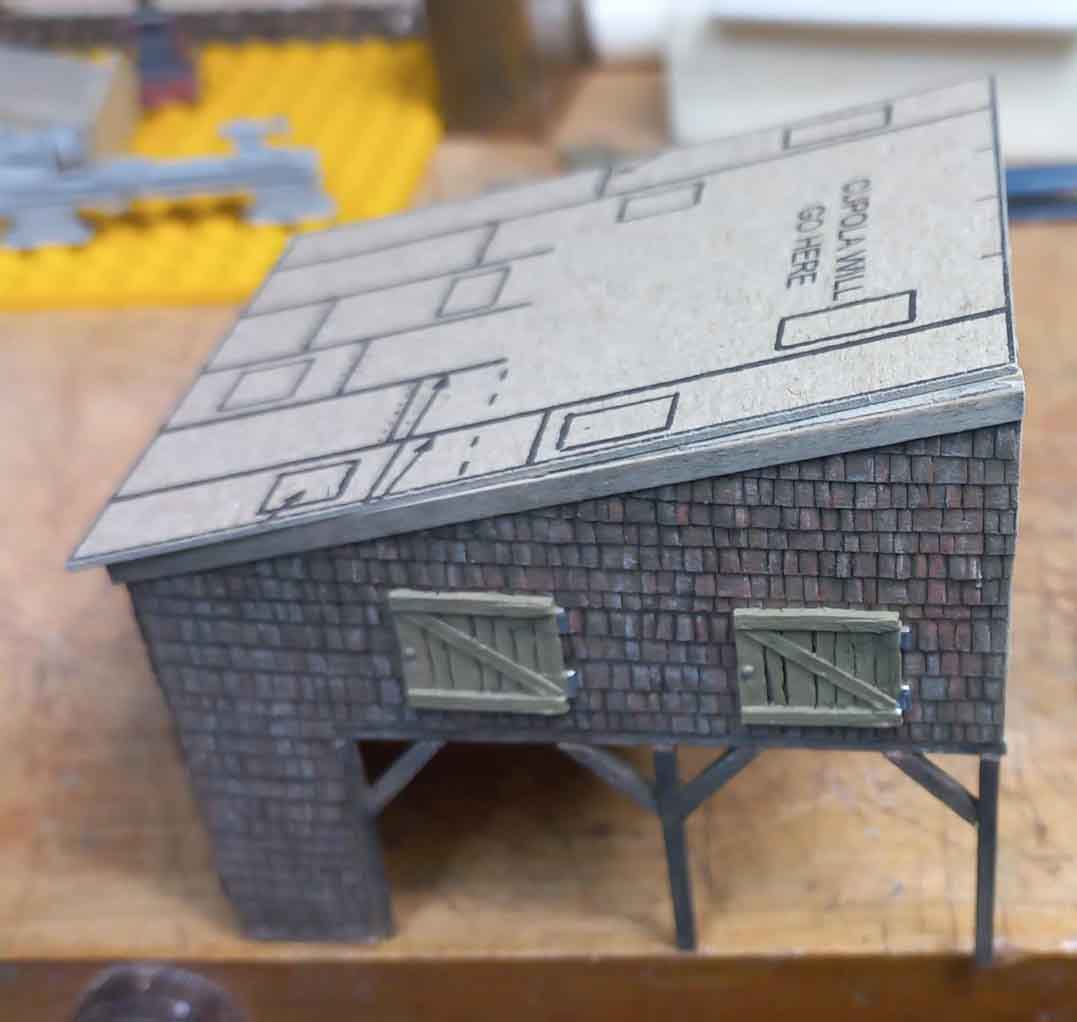
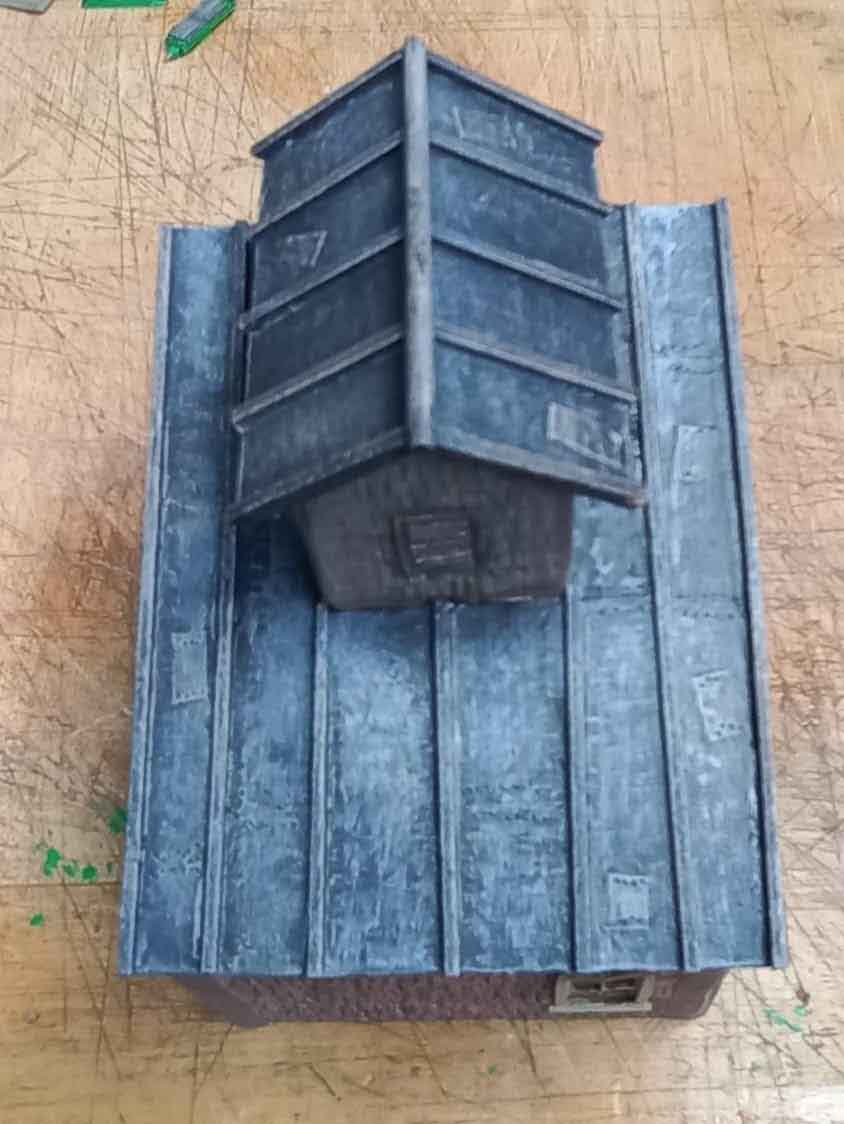
Making sure that the cupola is in the correct position. The corners have to be sorted out with painted and weathered masking tape to hide the gaps as seen in later photos.

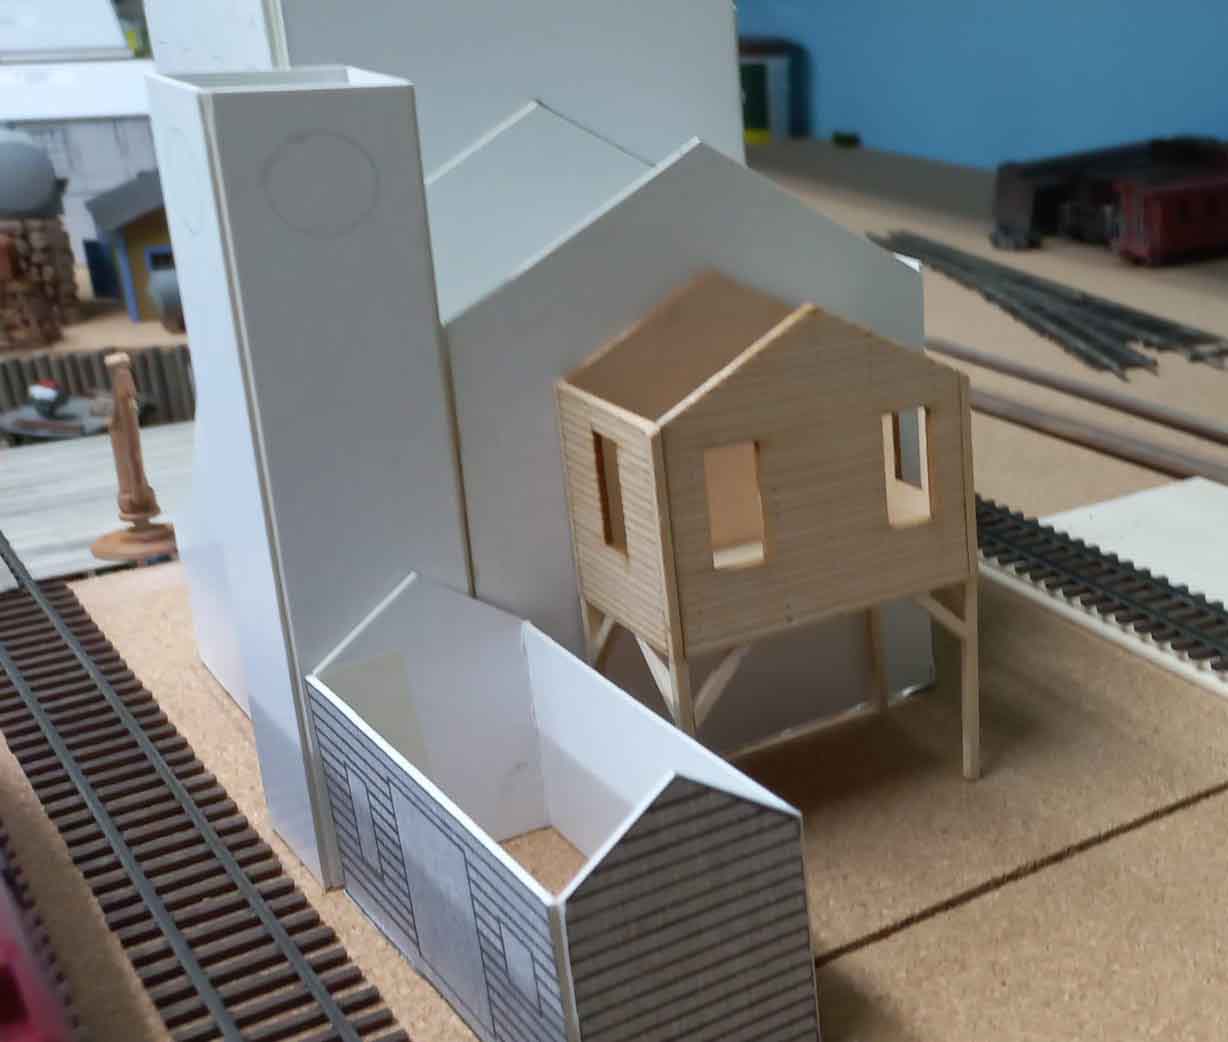
Another test fit against the main building (a card stock mock-up at the moment)
The shorter lathe (SS kit) with a larger 4 jaw chuck on it shown here. It will be painted and weathered later.
Below is where I saw that the longer lathe did not quite fit and it was longer than the one shown above.

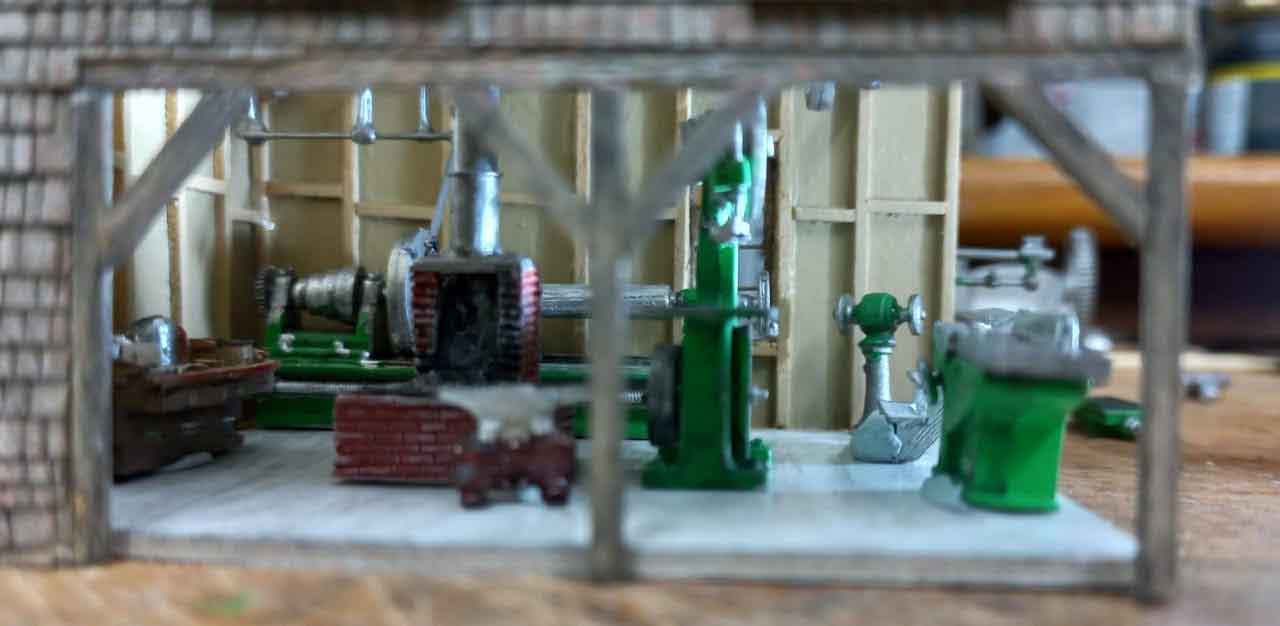
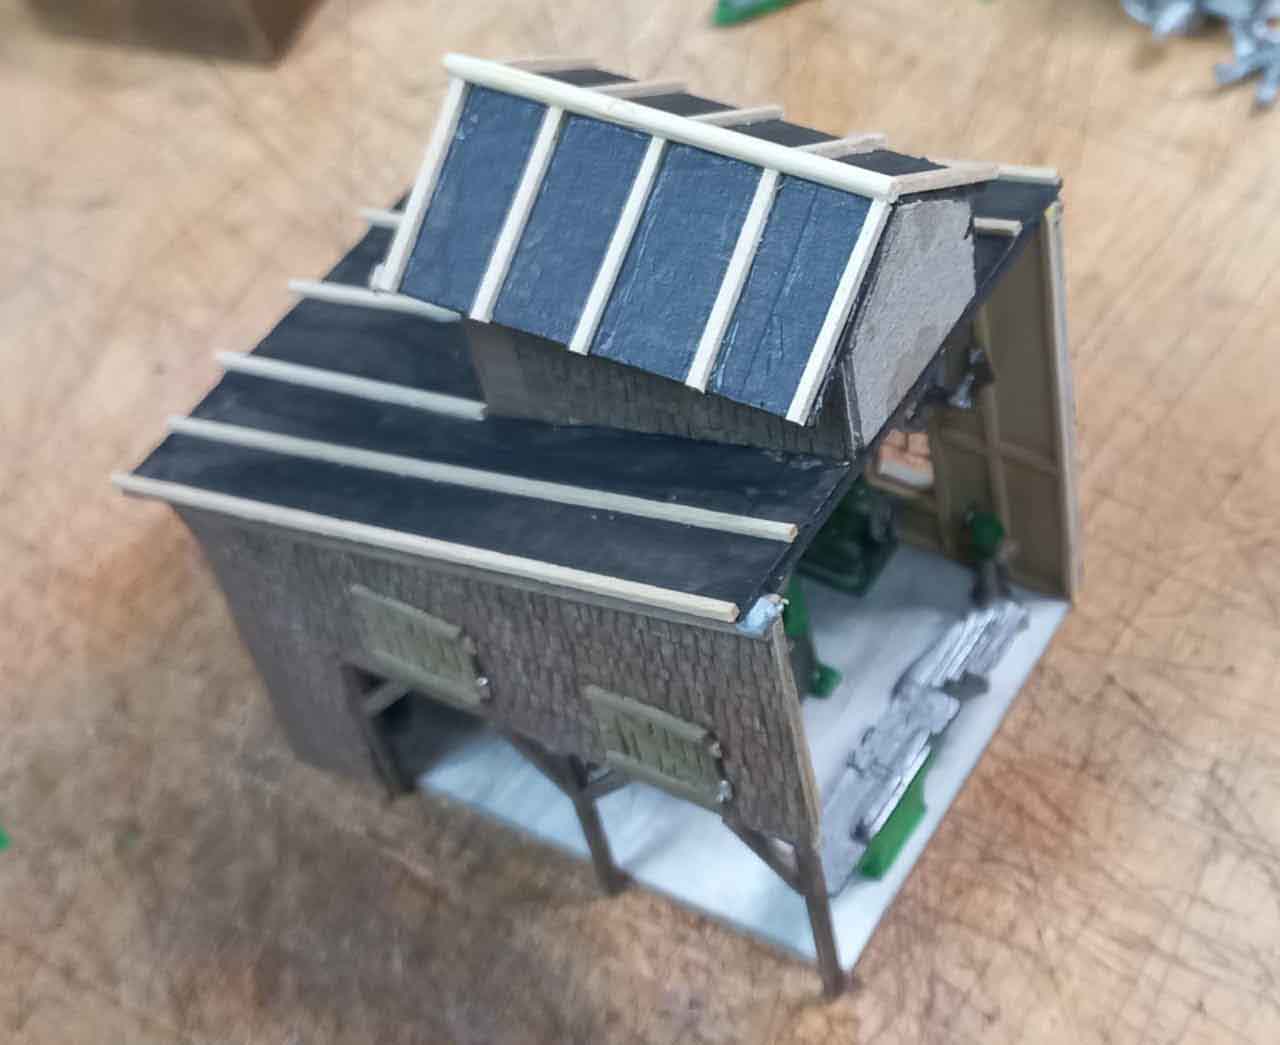
An interior view of the workshop shows temporary possible placement of the machines and the forge.
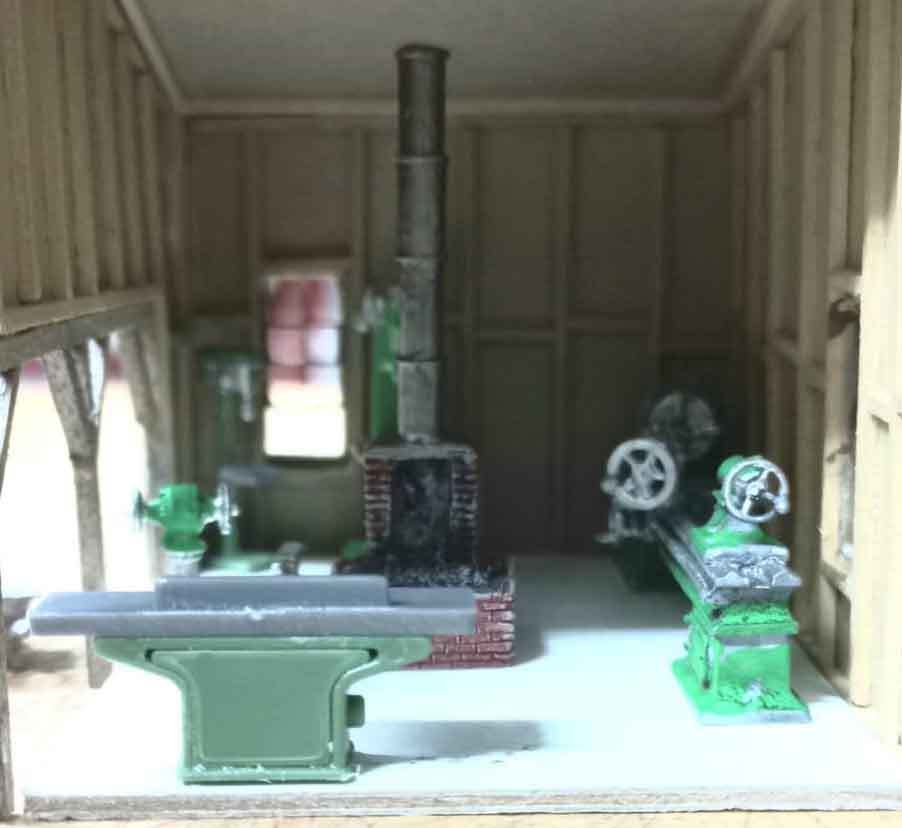
Another interior photo.

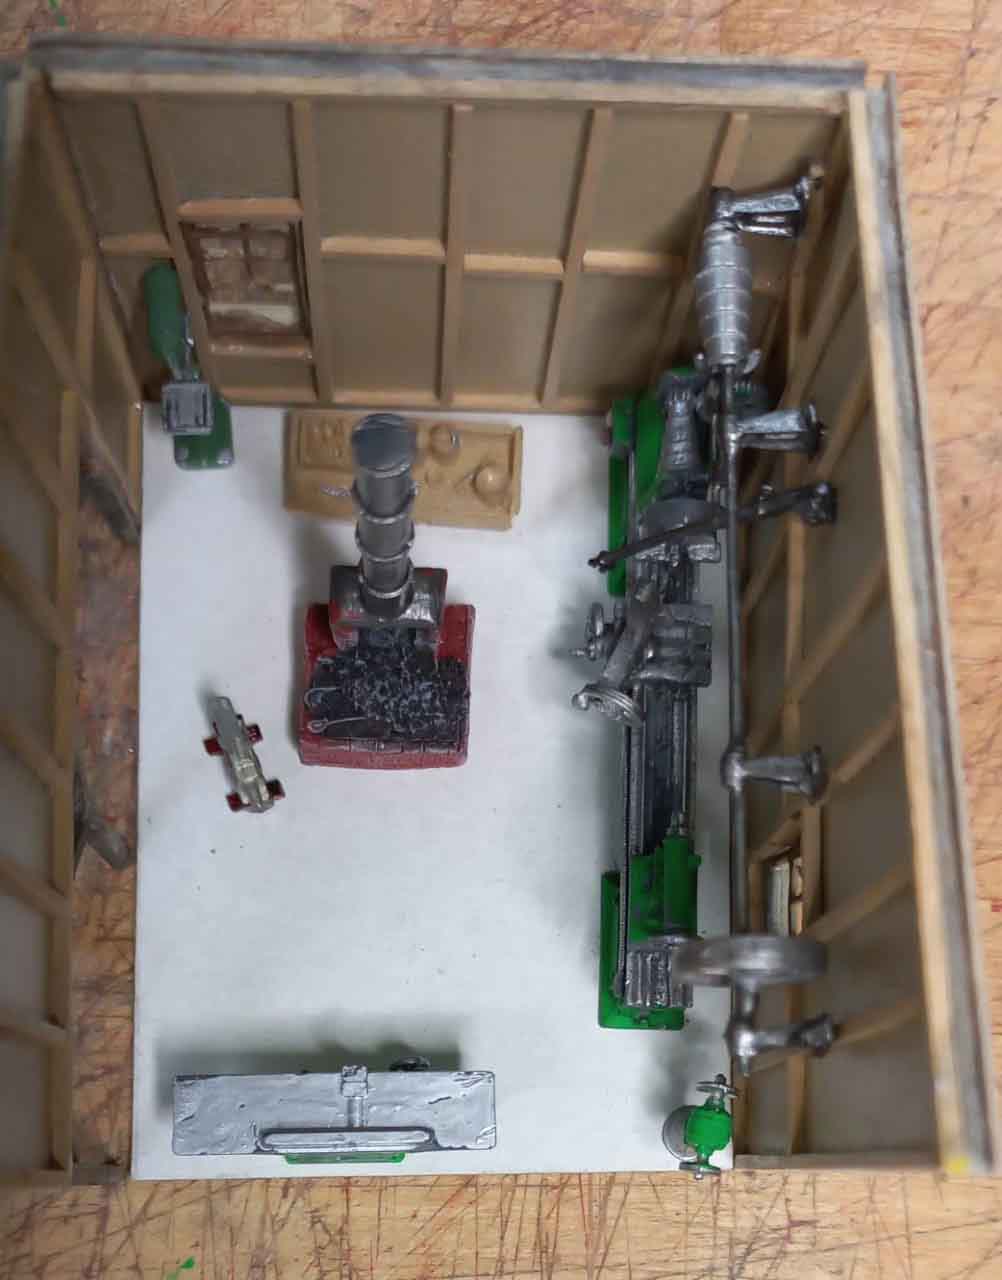
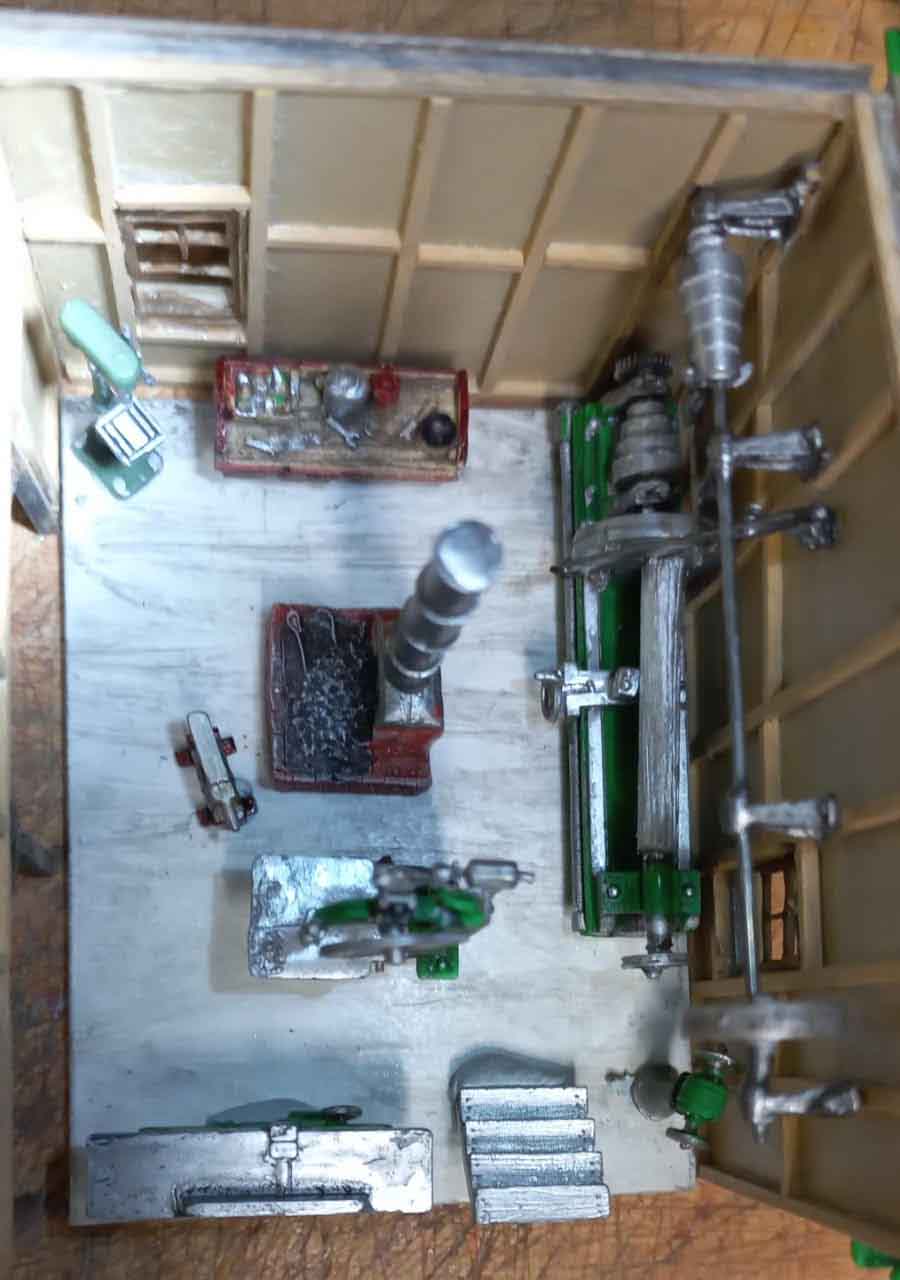
Overhead photo proving that the longer lathe was not the right one for this area.
Here the belt drive system can be seen to power the lathe.
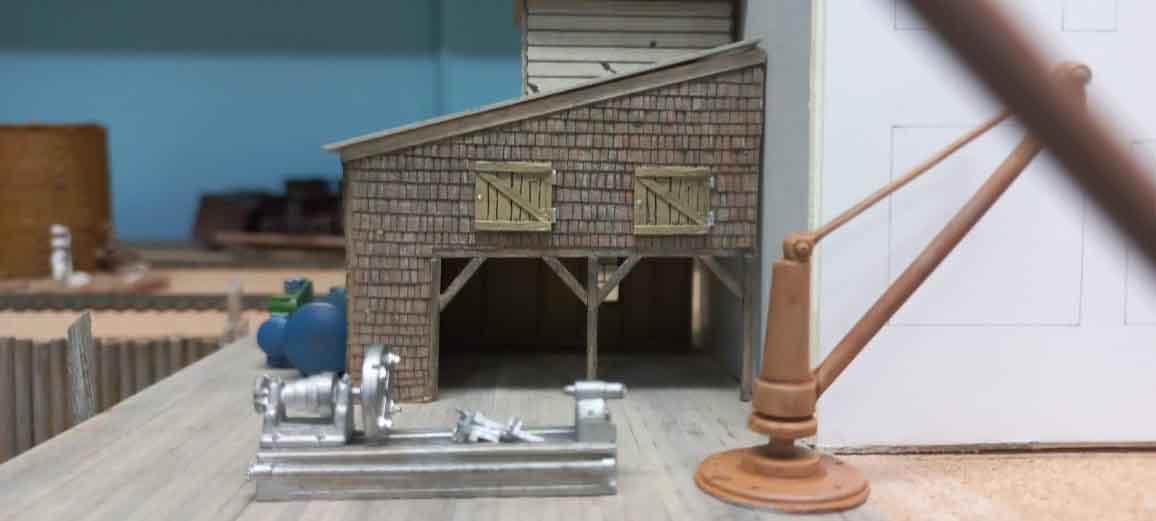
This is the view that shows the detailed interior of the workshop from the front of the layout. The card stock floor I temporarily shown.
Here it can be seen why the shorter lathe fits better allowing for the steps that lead up and into the main building.
Painting the tar paper on the roof. (Masking tape for the correct texture)
The battens in place on the roofs.
Repair patches placed on the tarpaper roof where leaks were detected.
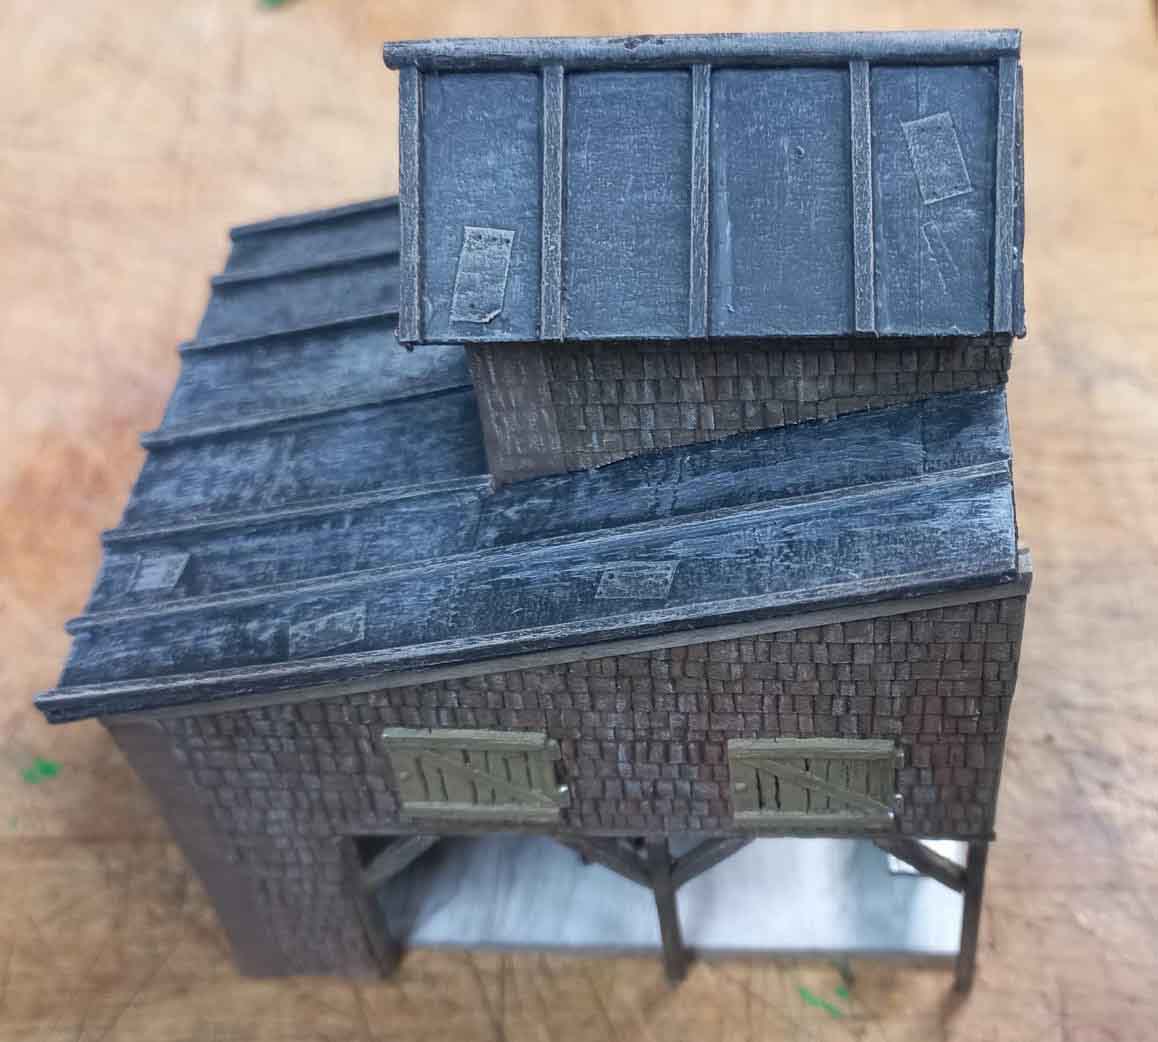
Overhead view of the workshop roof. (Well weathered)
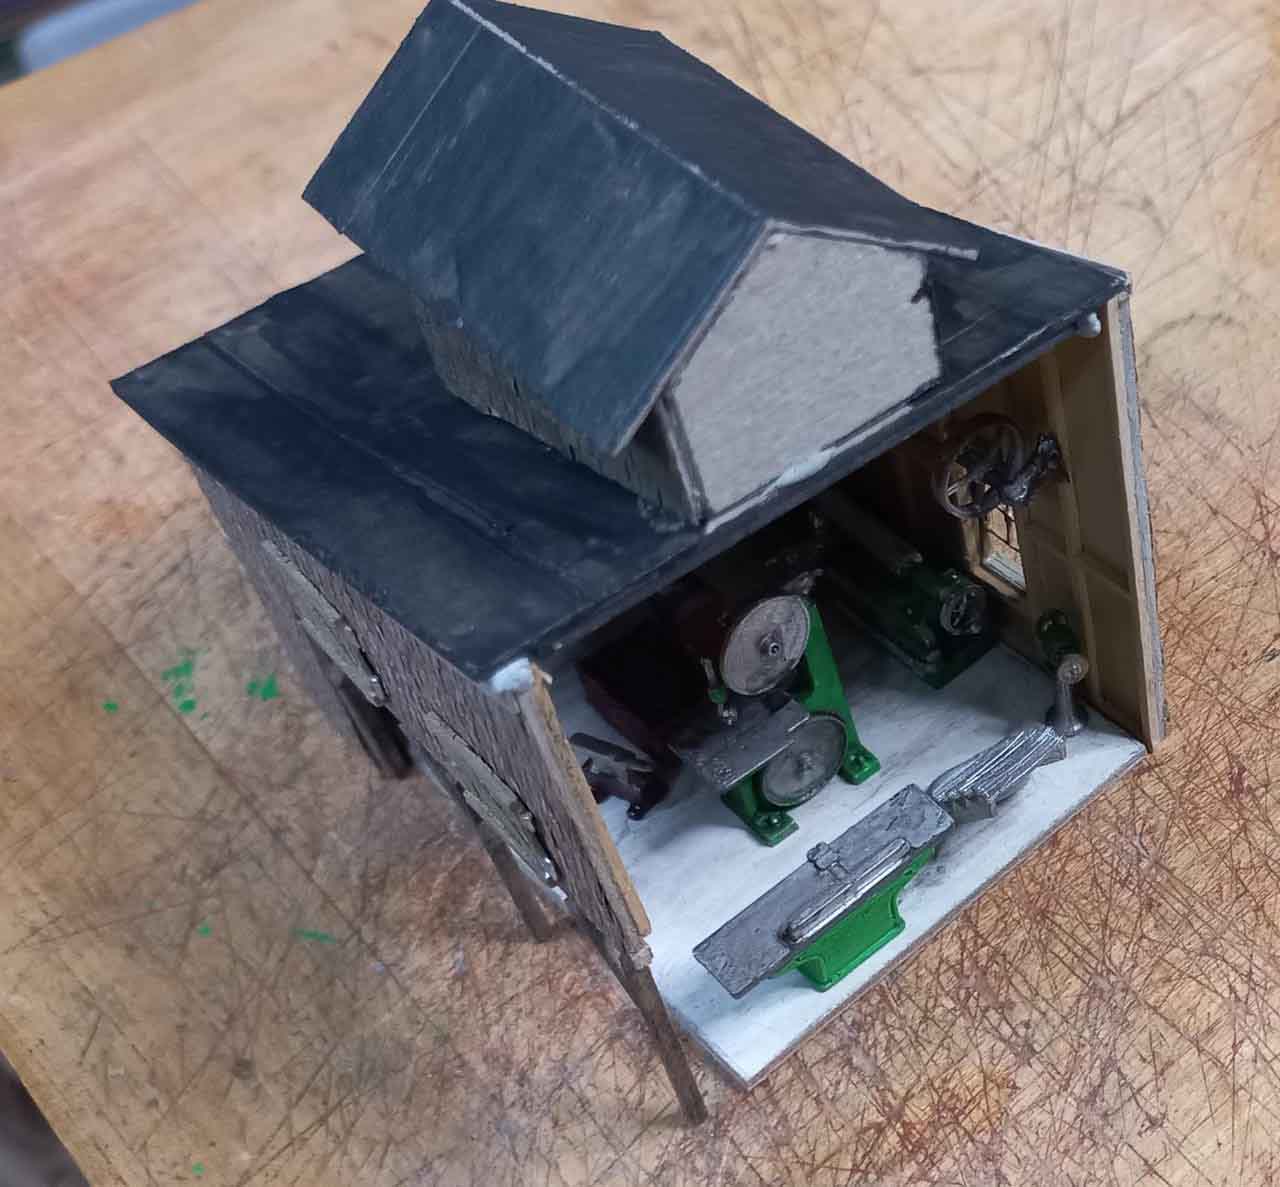
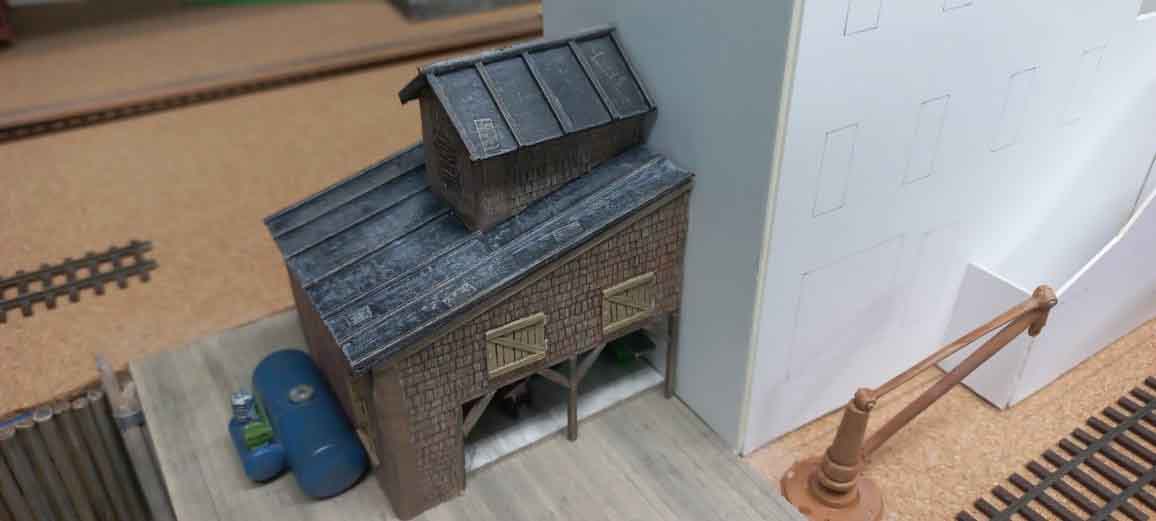
The side/open end view shows the details inside and eventually it will butt up against the main building.

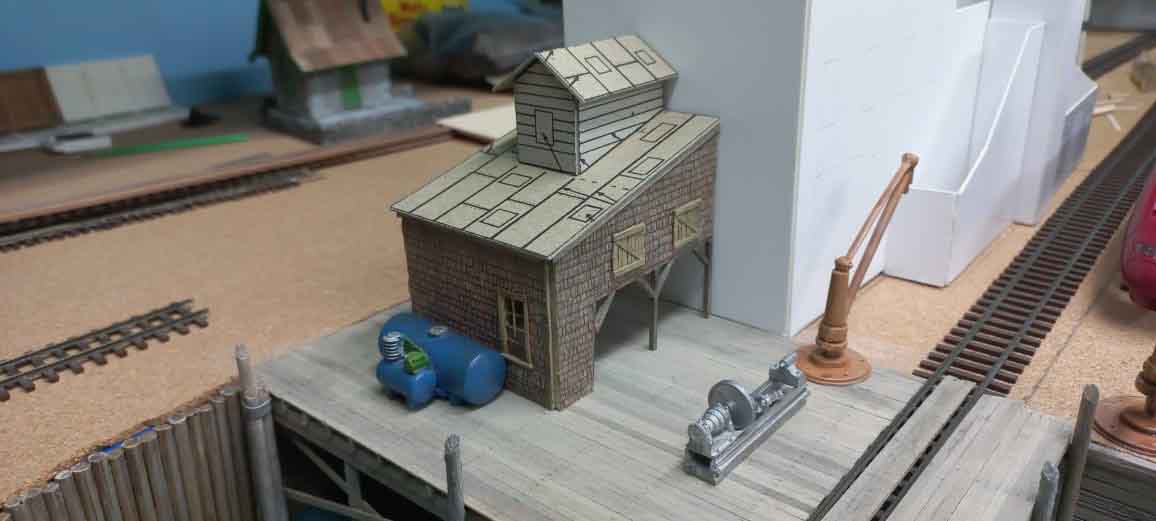
In position on the wharf.
The white card stock floor is only temporary to show the placement of the machines and will be removed in order for them to be placed on the wood deck. There will be lights inside to show the detailed interior.
This is the start of the crane next to the workshop to lift items off boats docked alongside the wharf.
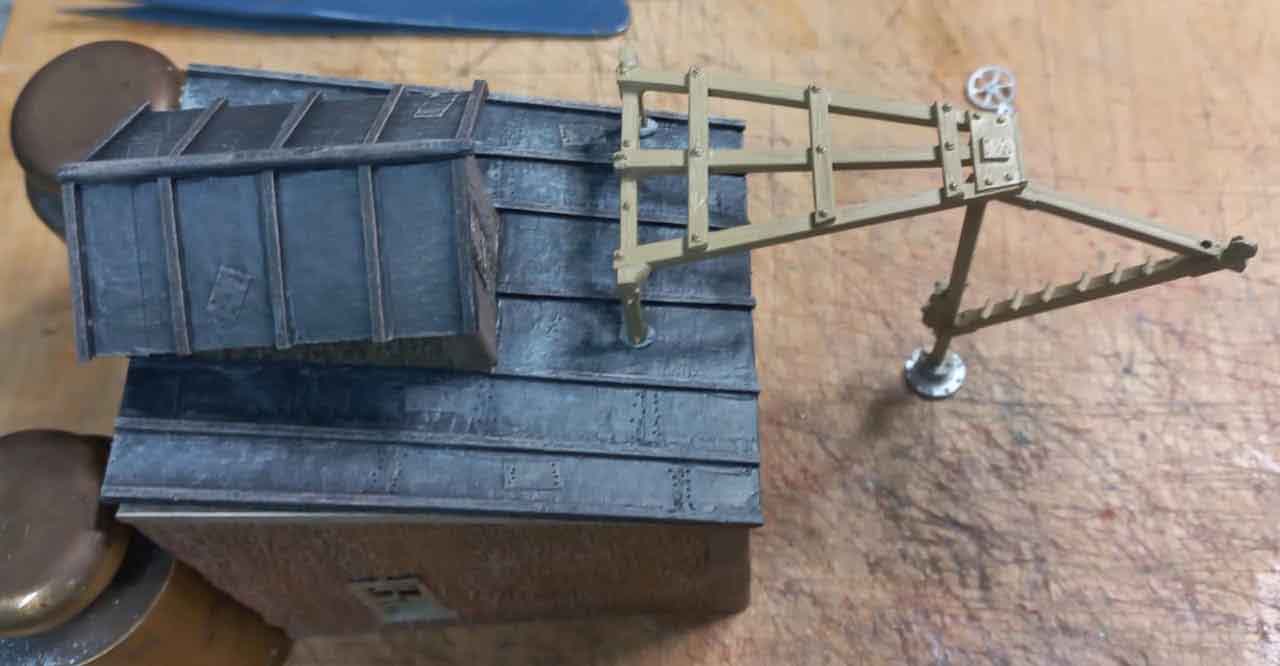
This is as far as I am in the construction of this kit so far.
The continuing construction of this project will hopefully be in the next issue.
As explained previously, this is a long term project and I estimate it to be about 3 months, maybe more and as it is a foreground model, it will need to be extremely detailed.
Until then, keep modelling.
Brian the HOn3 guy in Knysna.”
Wow! A huge big thank you to Brian for his workshop build update.
If you missed the link to his previous post, it’s here.
In fact, if look at Brian’s last few posts, you really get an idea of how he works:
That’s all for today folks.
Please do keep ’em coming.
And if today is the day you get started on your layout, the Beginner’s Guide is here.
Best
Al
PS Latest ebay cheat sheet is here.
PPS More HO scale train layouts here if that’s your thing.

Hi Brian,
The interior detailing is fantastic. Your modeling truly inspires.
Waw !!!
what, No insulation and sheet rock for your walls ? Keep heat in cold out, Lol.
Great job.
The Critic
Fantastic job there Brian!!
Great modeling and craftsmanship Brian. To be admired.
Rob McCrain
Fantastic! Great Job, I like O scale and guys and gals do the same with their building and shops you would think they were real at first glance, Great job Brain!
Brian
This shows why you are the Master Modeler. There are many of us that need to be shown how to “do it” and we appreciate your time and effort to help us mortals.
Many thanks
Be safe
Beautiful detailed craftsman modeling, thank you for sharing. We should all take a lesson.
That’s awesome workmanship. I hope mine comes out that good.
Well that’s a wonderful job. Great model, would like to see more of your layout.THANKS AGAIN.
Wonderful work
Truly enjoyed this post. Great Job! I would like to see how you weathered the building. Where did you get the tools/machines for the building?
Nice work. The Lego base seems to be a good idea to help keeping things square while glue grabs. Think I will try that.
Very nice machine shop !! with the great dock and boat repair facility’s Is this a harbor with a railroad or a railroad with a harbor ? not seen this much detail of a waterfront in a layout again super nice !
Amazing craftsmanship. Oh, to have Brian’s talent!
Wonderfully detailed modelling Brian, master builder indeed.
Brian, Wokingham, UK
Hi Bryan, the machines come from a company called Scale Structures limited, of which I have had quite a few of them for many years. Not sure if they are still available but try Walthers.com in the USA or eBay. They had a wide range of them available at the time.
Brian – the HOn3 guy in Knysna RSA🇿🇦
very nice good work.good info.
Craftsmanship in excelsis! Learning point – Lego as jig – thanks.
Beautifully done.
Truly remarkable, you are a talented modeler . Thank you for exposing your process and sharing your layout . It is inspiring as well as motivating . Great ideas and you’ve proven they work . Thanks , there’s hope for us beginners yet . Enjoy your posts , please keep them coming .