Bill’s been back in touch with a missive on his model train tunnel.
Making the inside look good is just as important as the outside, and Bill shares how he’s done that:
“Hi Al
Hope this finds you well as we move into fall weather.
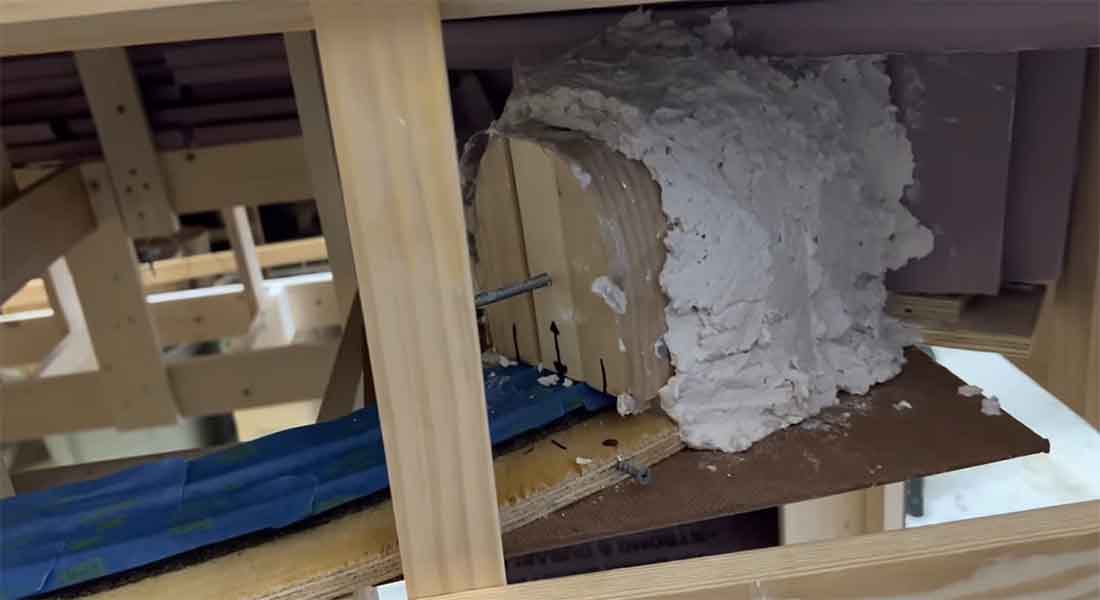
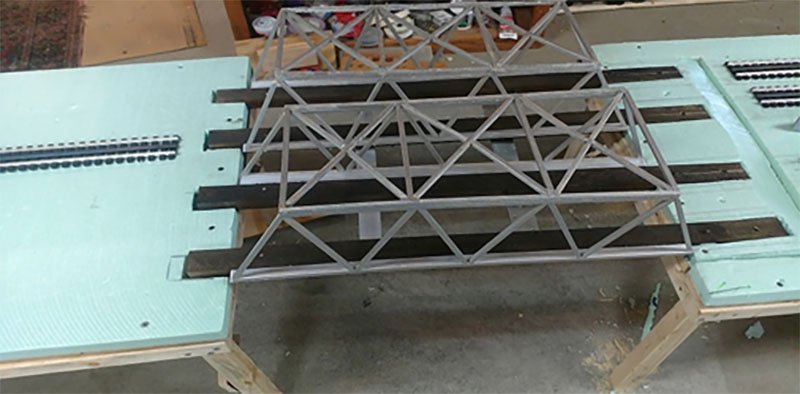
I’ve been having some fun on my O/On30 layout build and recently built a tunnel liner for my O standard gauge track. I looked at different methods then settled on building a liner using sculptamold using a jig to get the shape.
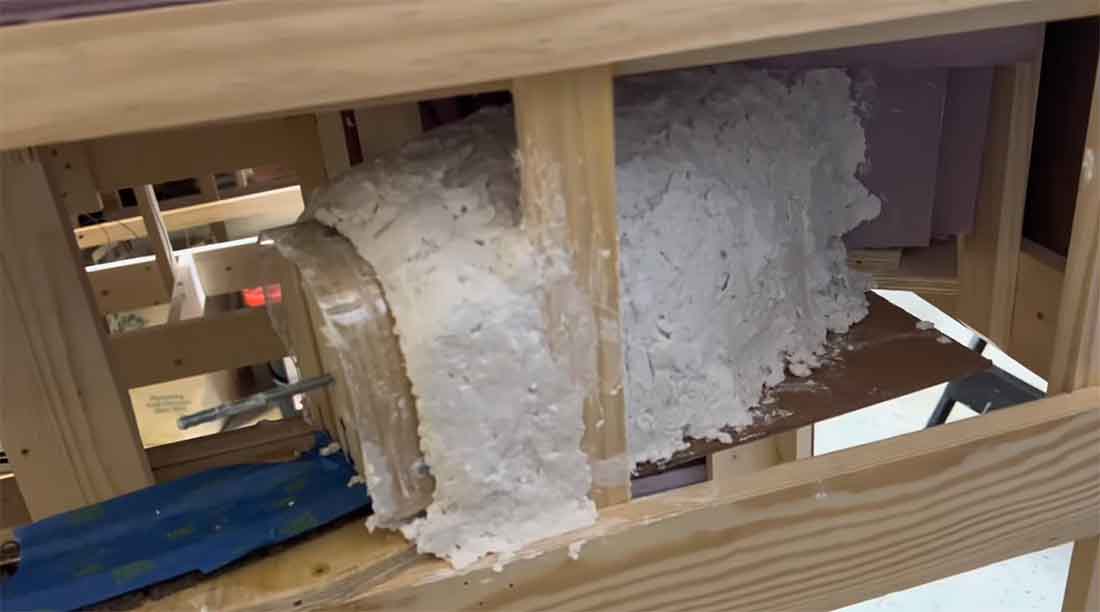
What I started with was cutting 1×2’s that were glued together to the shape of the tunnel portal. On that I nailed a cut plastic soda bottle strip – roughly 2 inch in width. I then cut grooves on the bottom of the jig so it fit on both rails. I then added a long bolt to hold the jig and pull it along as I built up sculptamold around the jig.
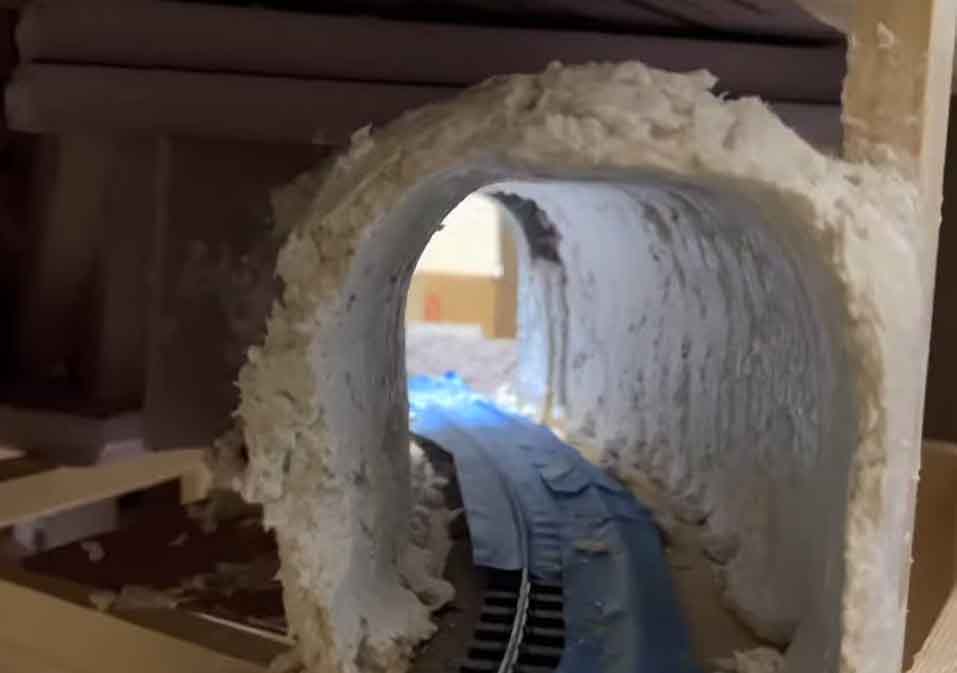
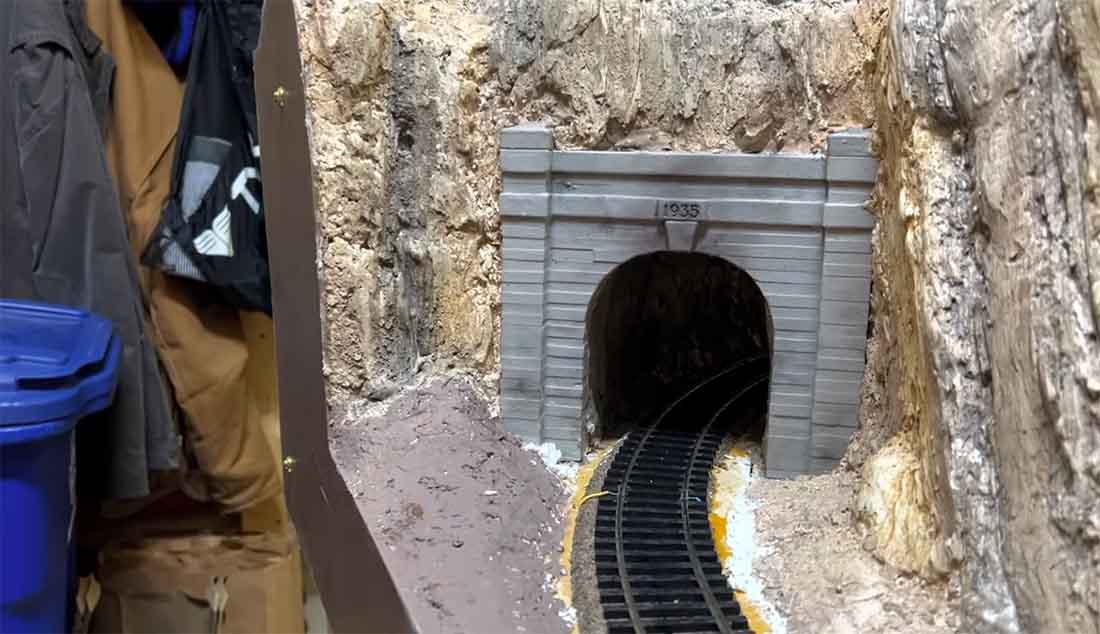
The process actually worked well and did not take much time to do. I was very happy with the results and stained the inside to match the rock colors around it.
I hope others will give this a try if they are able to. The results are worth it.
Best
Bill in Virginia”

A big thanks to Bill for the update – clever stuff with his little wooden jig for the tunnel.
And when it comes to the outside of your train tunnels – don’t forget there are quite a few in the store.
The bridges can also double as tunnels, my fave has to be the wooden tunnel though.
Now on to Heather and Jason, who despite a house move, have cracked on with their layout:
“Hi there Alastair, it’s Heather & Jason here.
I would like to say thank you very much for all you have done for us with this site of yours bringin all these members together in 1 spot.
To able to help others start their layouts is great & we thank you for this as well. It has helped Jason & I a lot with doing our layout.
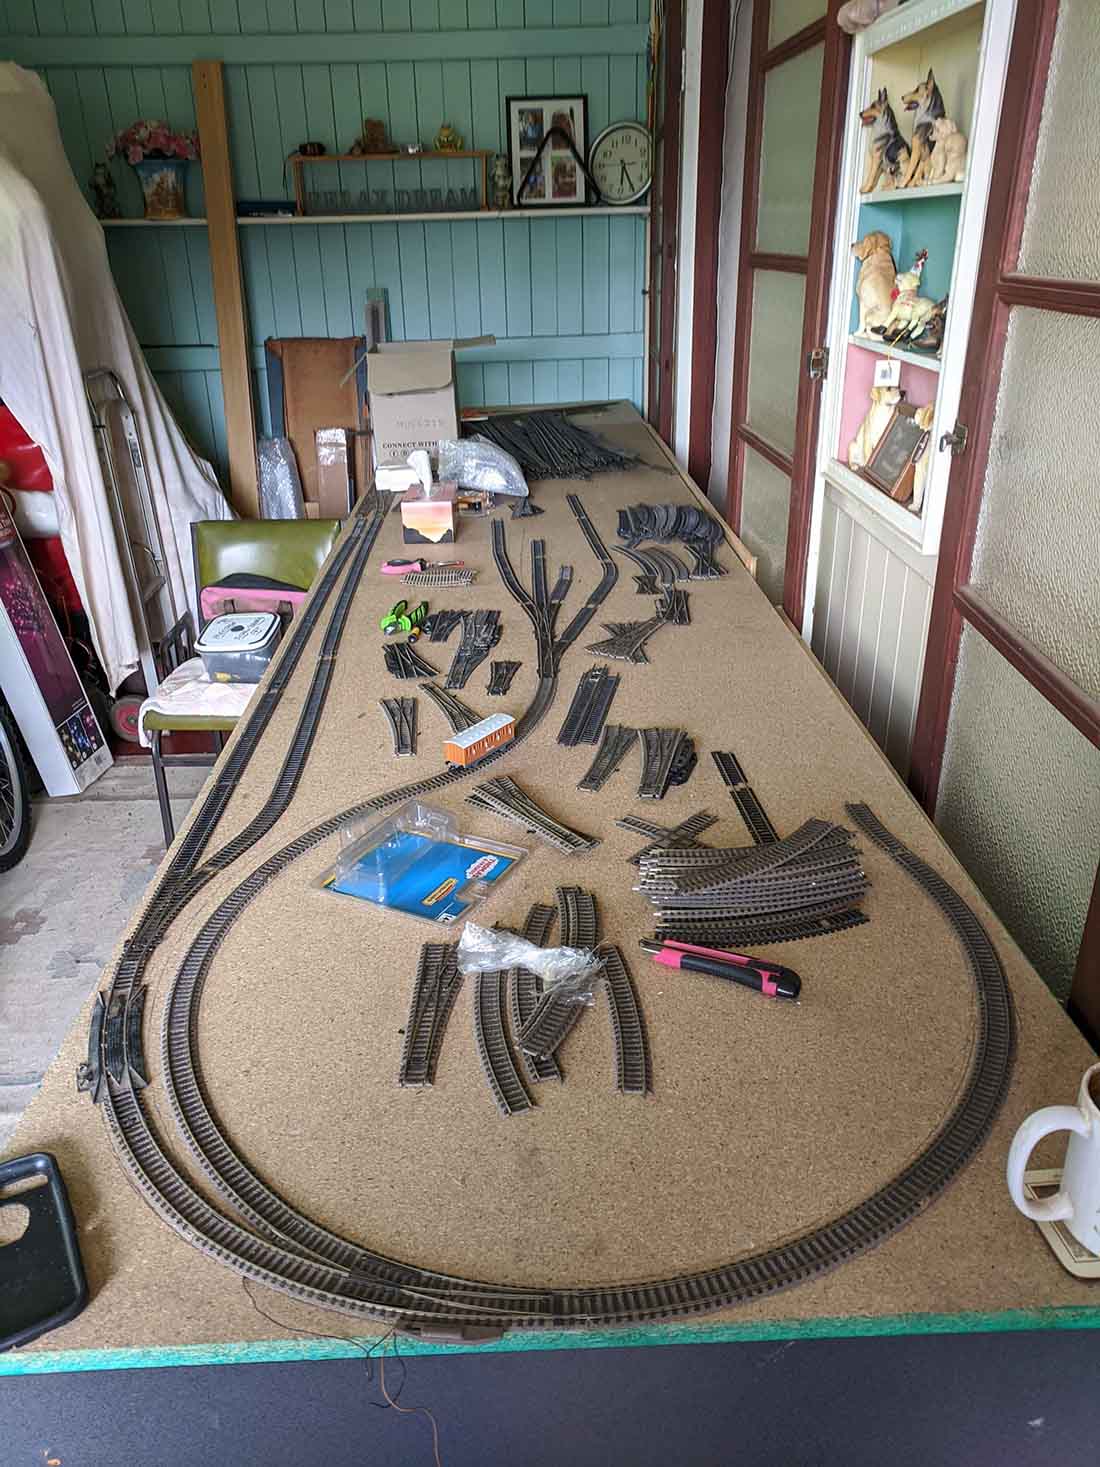
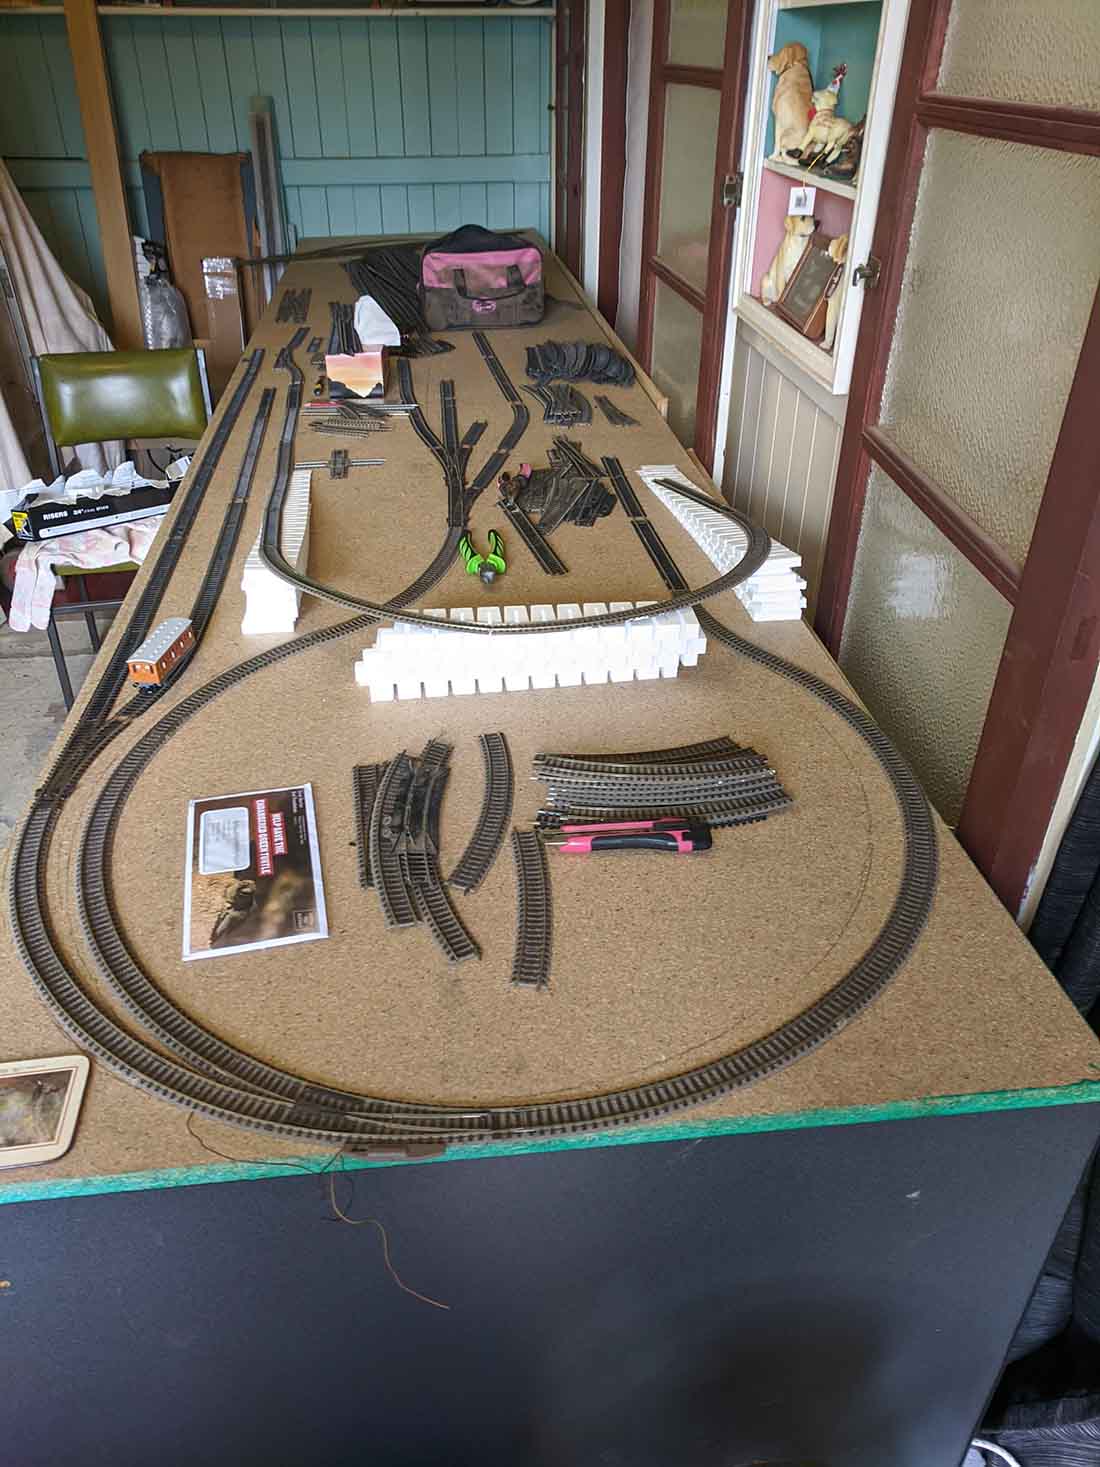
We want to give you & the members a heads up on where we are with the layout & ask if any one can help us with something we know nothing about.
We have seen lift up’s & drop downs, for getting into & out of the control centre, but don’t know how they do it & that’s where we need help. How do we do it?? Sadly we have run out of room but can make it up a bit, by doing a table on wheels in the entryway, so the wheelchair can get through.
Can any one help with how the tracks meet up for trains to run without a problem & what to do about power to that area, thank you ??
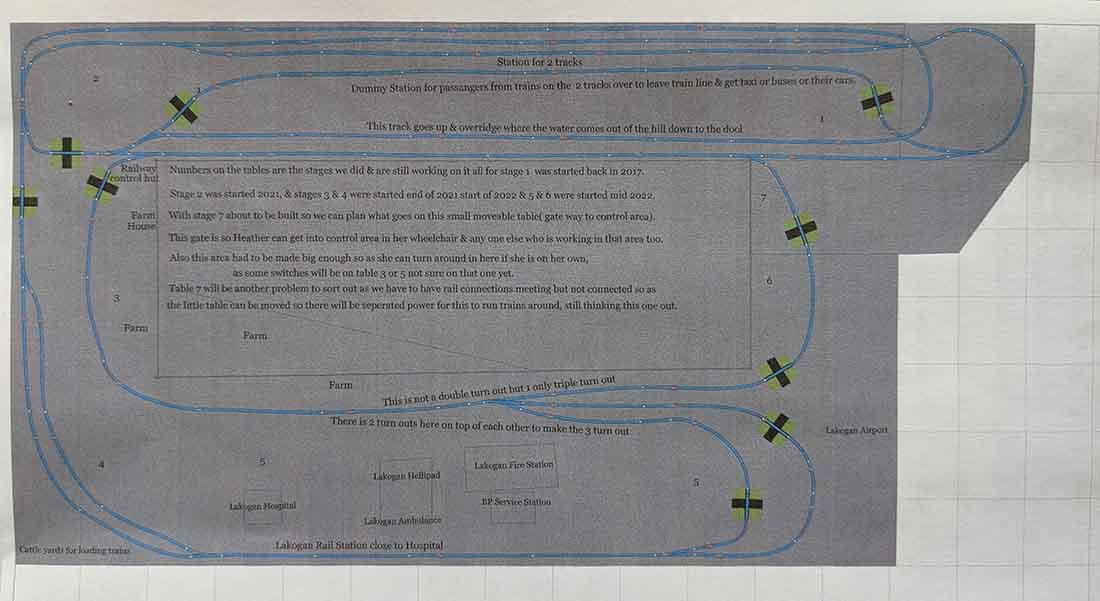
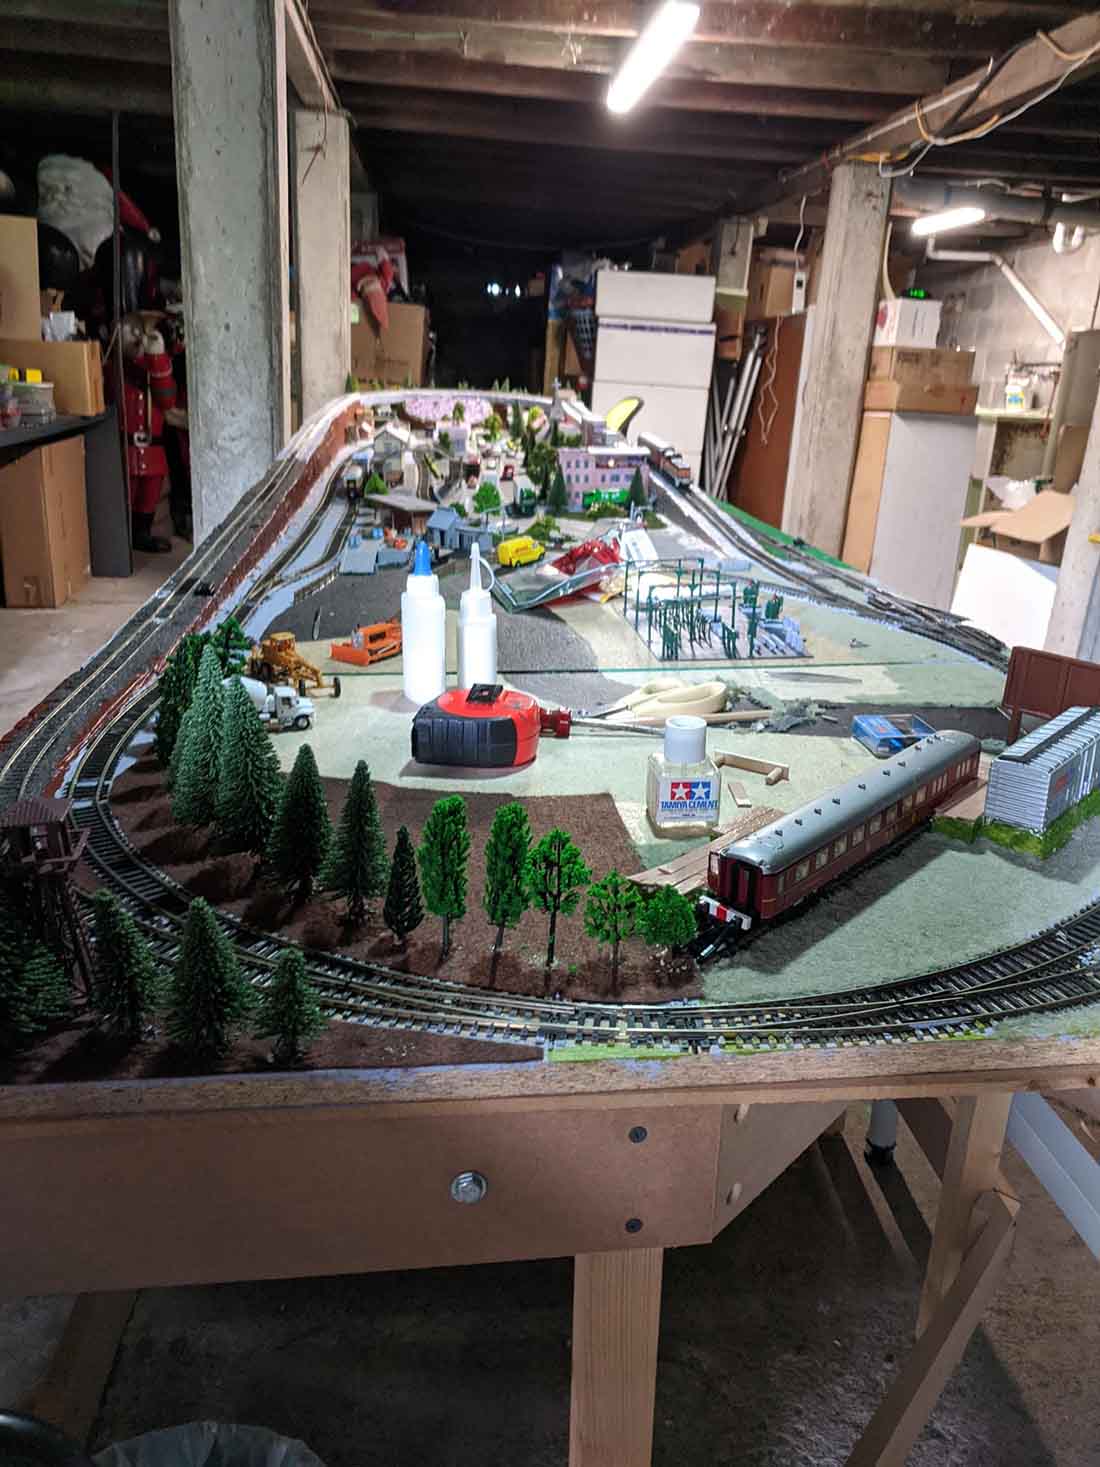
We have 6 stages for our layout & number 7 about to be built. This one is where we need the help as I have planned a return track from the far side, back to the first table rather than go all the way back the long way.
We have sorted out the power problems we had in the first stage & are working on the power stuff in the other sections now.
We are just taking our time doing things but enjoying it all as we go, thanks again mate for all you do.
Heather & Jason.”
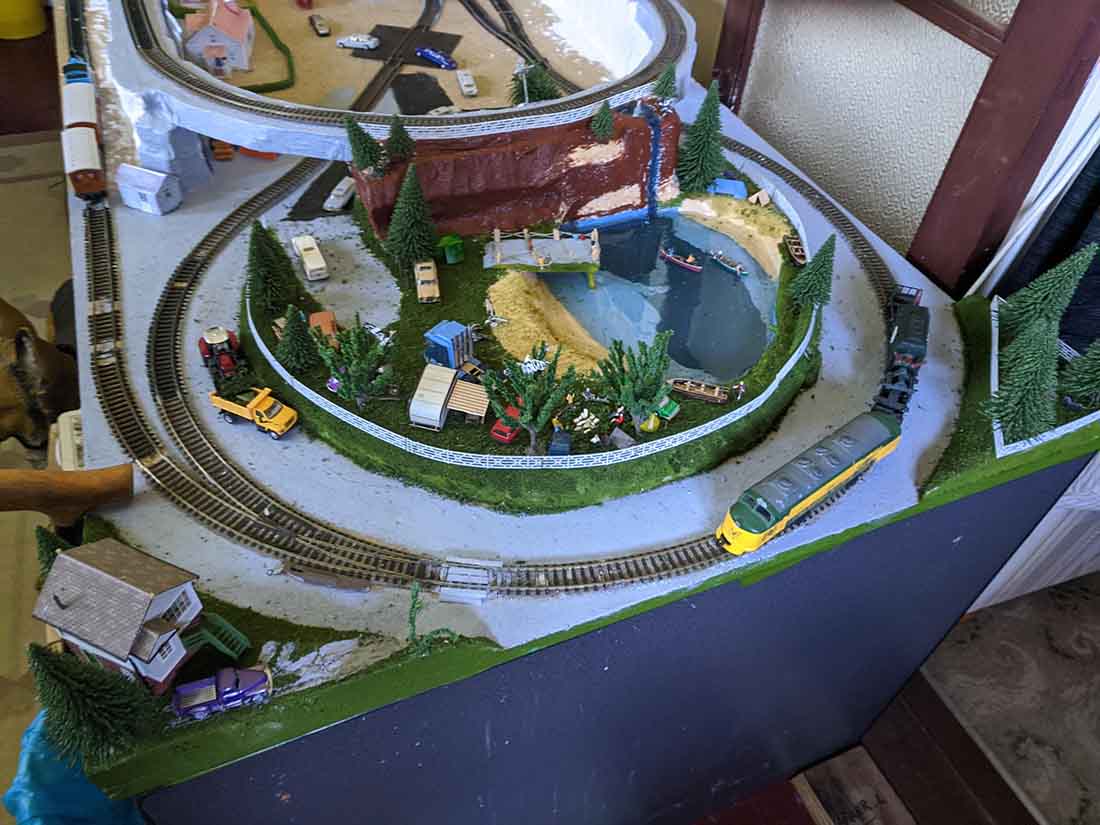

I really admire Heather and Jason’s tenacity – they have been up against it with their layout but they haven’t been discouraged.
As for the ‘up and down lifts’, I thought Lawrence’s lift bridge post may help (pic below also links to it).
That’s all for today folks.
A big thanks to Bill for his model train tunnel tips, and a huge ‘well-done-keep-going’ to Heather and Jason.
That’s all for today folks.
Please do keep ’em coming.
And if today is the day you poke boredom in the eye, the Beginner’s Guide is here.
Best
Al
PS More HO scale train layouts here if that’s your thing.
Need buildings for your layout? Have a look at the Silly Discount bundle.

Bill, Great job with your tunnel liner. I did somewhat the same thing when I built two of the tunnels for Farland. I made these tunnels upside down and created the liner as I built the tunnel. When the inside was complete, I turned it over and blended it into the surrounding landforms, then formed the top of the hill above the tunnel area. That gave me a fully completed interior to my tunnel.
Thanks for the tip,
Rob McCrain – Farland Howe
Bill
Always a hoot when your stuff shows up. That was very clever to use a moving form to make a tunnel. I have looked at your ON30/ O layout a hundred times and marvel at how you planned that. Awesome.
Heather & Jason
I assume yours is an HO layout. Everyone should begin with that!
The key point to a hinged lift out is that the center of the hinge Must be a fraction above -or higher than- Not below -the track or the gap will be too large for the trains to work smoothly. This presents a design problem and there are ways to solve it but the hinge then is visible and must be dealt with. Look at the real ones and all have a huge gear whose center is at the track line.
Thanks bill smart idea and a very good looking tunnel. Great to see the ideas grow into a great layout, thanks Heather & Jason. I have learned so many wonderful tricks and how to do no the great web site.
Bill… what a great idea with your sliding tunnel form. Thanks!
Bill,
Fantastic! I have designed a tilting Train table on Wheels and there is one tunnel on it that I have been trying to figure out how to make exposed Stone in it and it not fall off after I tilt the table. This looks like a perfect answer to my problem.
Now thats what a tunnel looks like. Nice job. Need to go back and finish mine.
It looks finnished when you run a cameea on the track.ive have to long ones for you to work on,when can you start ?
OLDTAZ
I have the same situation with a wheelchair access. On my layout, I have a liftout bridge with length needed for wheelchair access.The bridge rests on supports on the edge of the layout. I epoxyed copper pennies to the support on one side which mate with brass contacts on the bridge. The pennies are wired to the track power. So far, it has worked as trains can pass over the bridge without any electrical problems. Since the track on your layout is on a curve, that presents a contact problem. If the section is a “lift out”, or “roll out” then you can just use a wire plug in between section 7 and either section 1 or section 6. Add positive stops to section 1 and 7 to get section 7 track positively aligned with the track of section iand 6. To get power to be transmitted automatically to section 7 is possible, but would take a design I don’t have at the moment.
Ron thankyou very much that will help a lot now just to get Jason to have some time to start building the table we can work this in to it now thanks for the tip & thankyou all for the help over the years to help us both do this layout & have it up & running plus with a bit of luck Jason has a camera set up to get a video of the track soon, thankyou from both of us, be safe, Heather & Jason.
Bill great looking tunnel, Heather & Jason thats a sharp looking layout well done!!
Bill in Virginia,
Could show you tunnel jig out in the open so we may see its finished construction… Great affect !!
nice ill have to use that idea
I am going to make a removable tunnel tunnle over my nscale layout, so herre I go.
It will be over a cross over.
Bill: I really like the Tunnel Lining Jig (TLJ). I am developing an N-scale layout, so my hand won’t fit the tunnel Lining to paint it. I am wondering why you didn’t add the color to the sculpta mold when you mixed it. I would have thought that would save you the staining step.
Heather&Jason: Great job! That is a layout to be proud of.
tunnels made by men have tool marks on the inside
I’m getting these bombardment of layouts mixed up into just 1 or 2 🤕. Inside tunnel portal is above and beyond. A few of these around, a dissected mountain or mine is also unique. Maybe not quite as actual goes but all these reflect additional modeling skills, innovation and idea.
Regards, Rich
WOW !!!!!! this email is loaded with great goodies !!!!!!!!
Bill, awesome tunnel liner build, I really love how you did that, great job !!!!!
Heather and Jason, what an awesome lay out looking good.
and Lawrence’s lift bridge ” how to ” is awesome.
Alastair, I hope you keep the blogs coming they are so great.
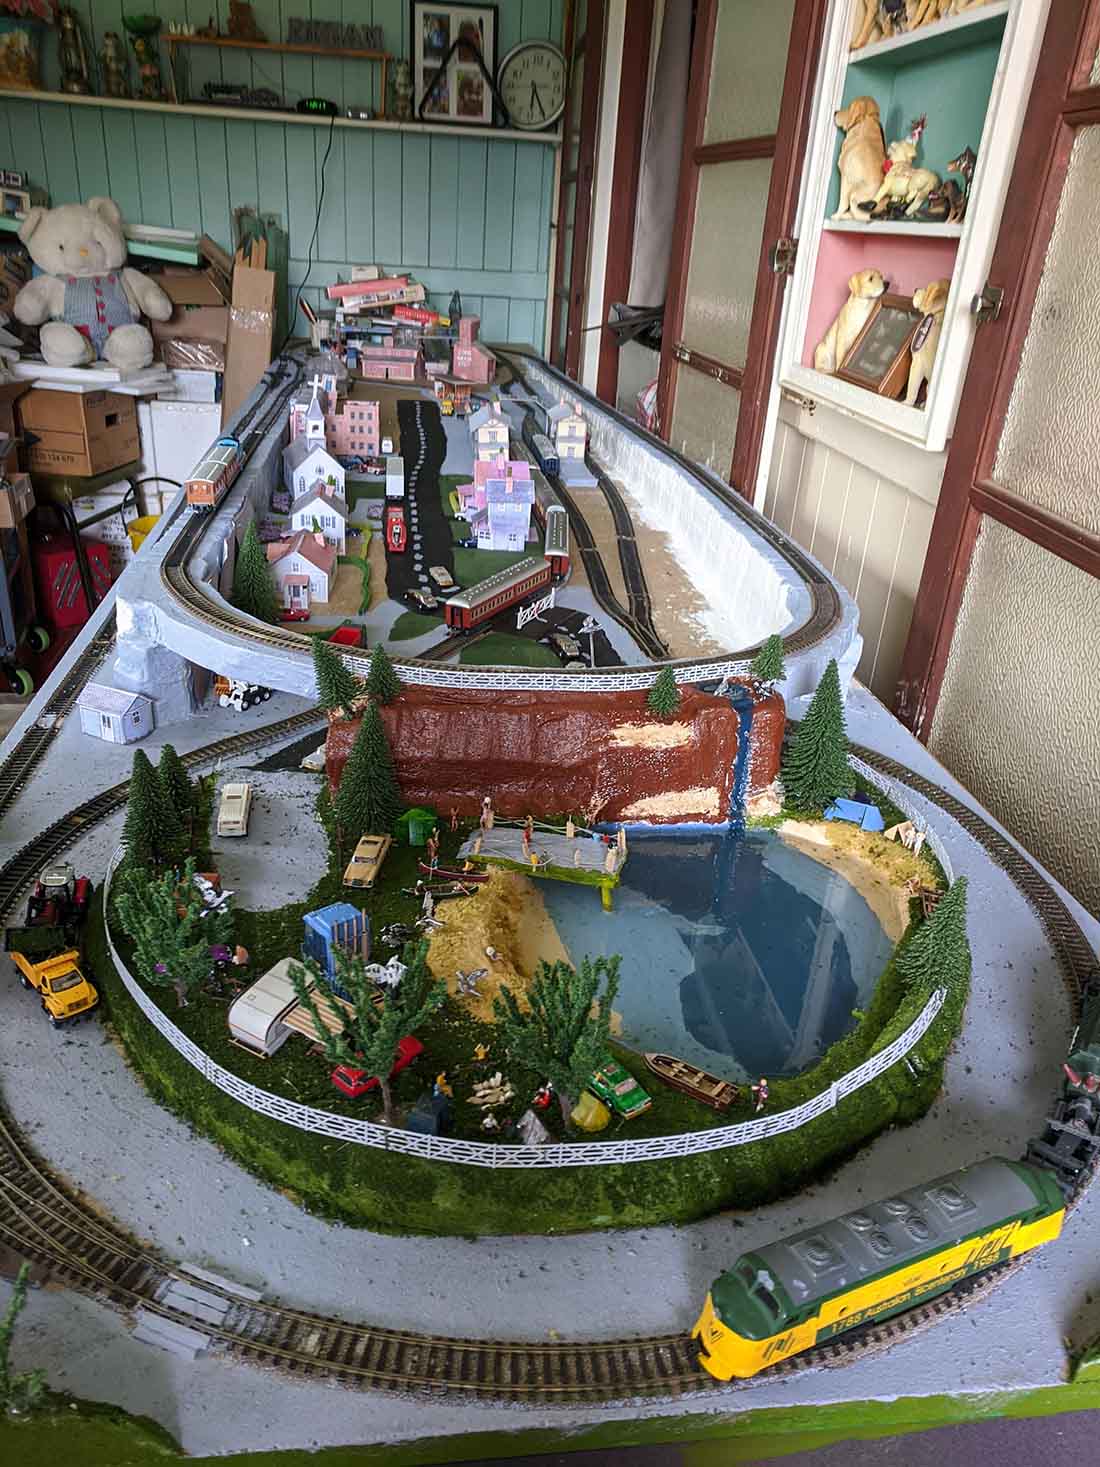
ewally cool. i like the valleys.
Great idea with the tunnel portal … why didn’t I think of that ? Thanks for sharing , seems reasonably straight forward and doable . Will be giving it a go on my current HO layout .
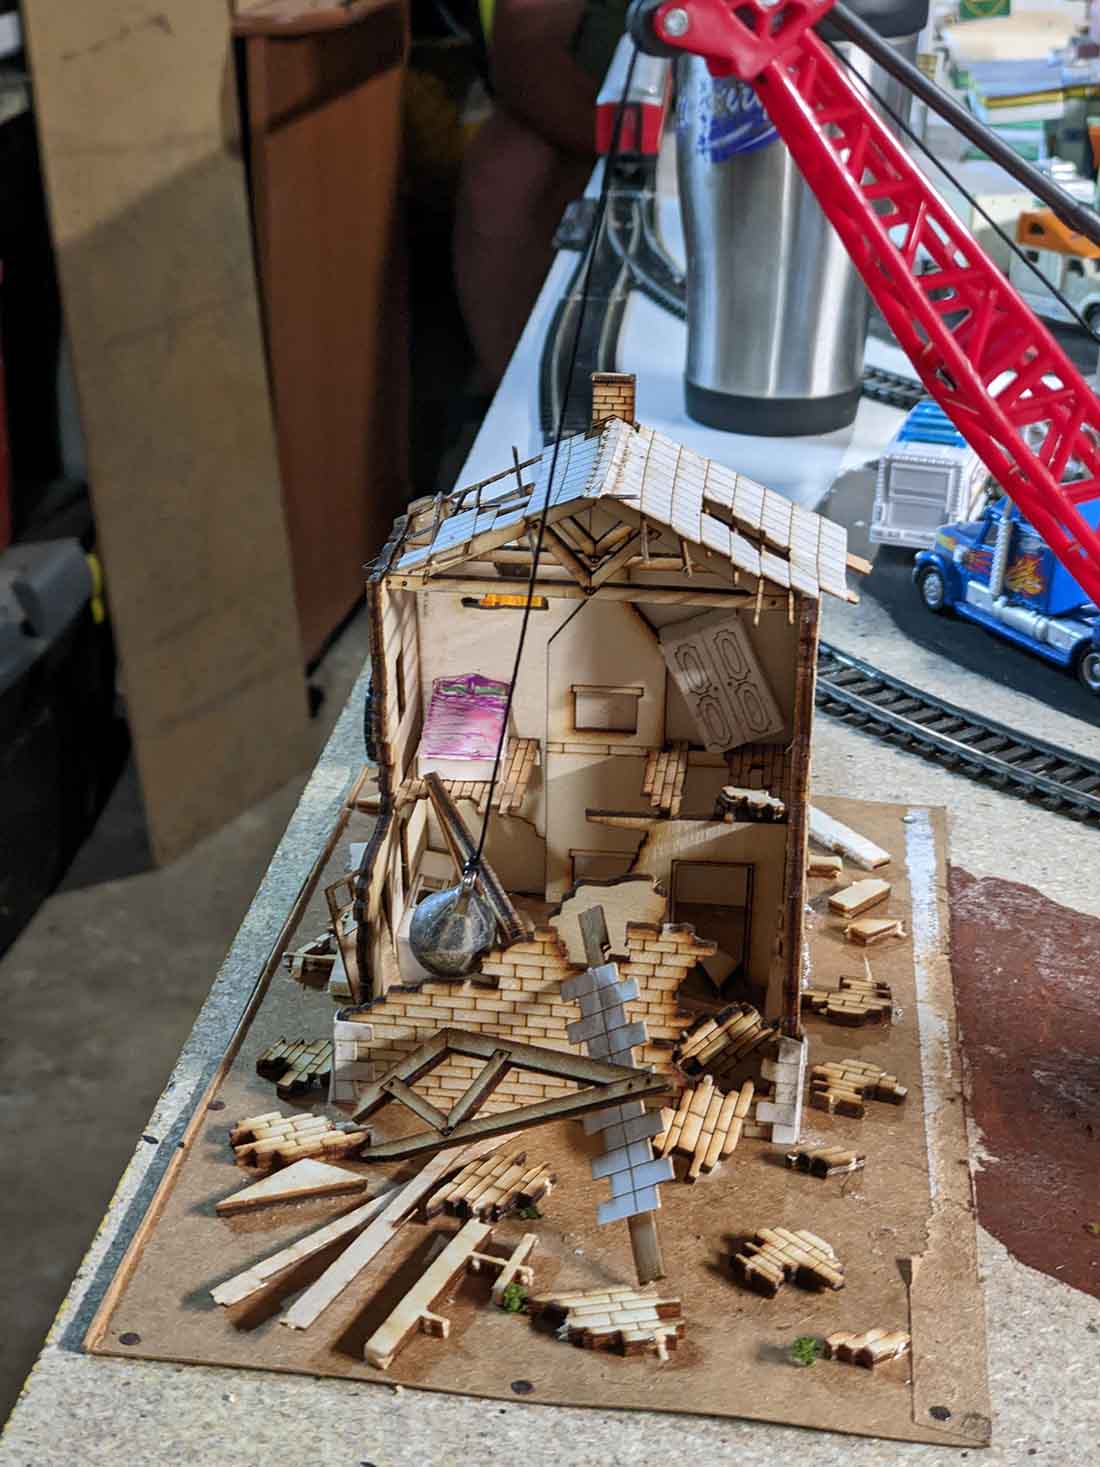
Heather and Jason, well done so far. Some very nice scenes around the layout. Specifically the wrecking ball scene. Keep going with your layout and look forward to seeing more.
Brian – The HOn3 guy in Knysna RSA