“Hi Alastair
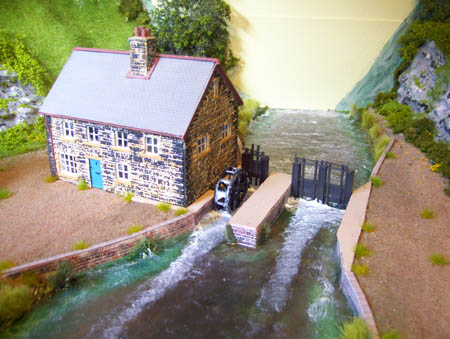
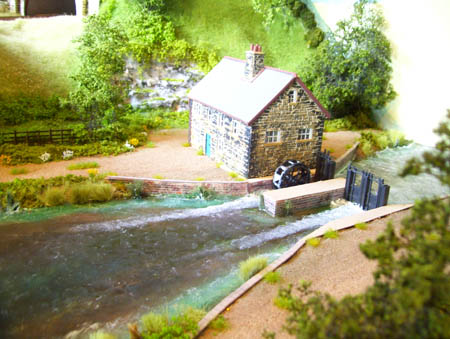
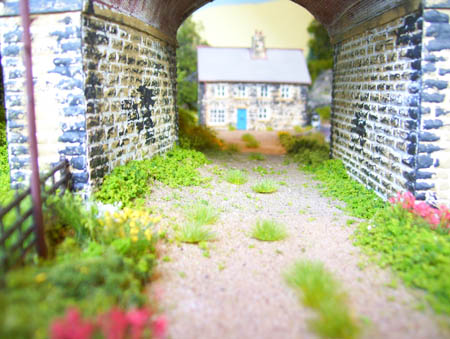
Here is some new pictures of my new viaduct scene.
I’ve used static grass,seafoam trees and Heki flor to recreate flock.The viaduct is scratch built using emboss plastikard and greenscene plastic strips.
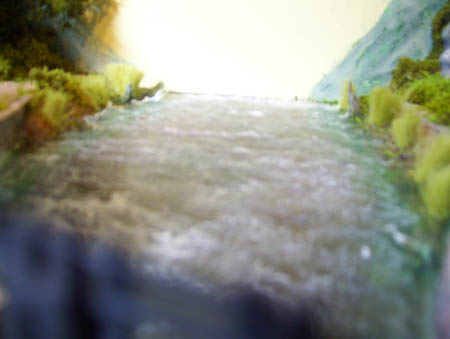
The river is Woodland scenic realistic water and realistic water effects and dry brushed white paint.
Kevin”
“Dear Al
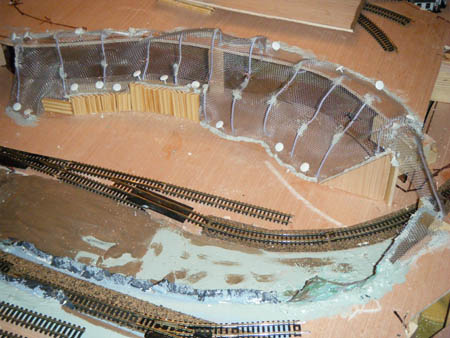
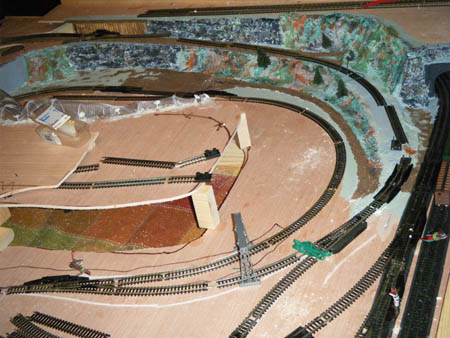
Having been grateful for the help you have given me in layouts and other peoples ideas. I thought I would show my first skeleton picture of my anticipated layout. The trains have passed the layout test so next time I will show you the completed article
Thanks for your assistance
Regards
Michael”
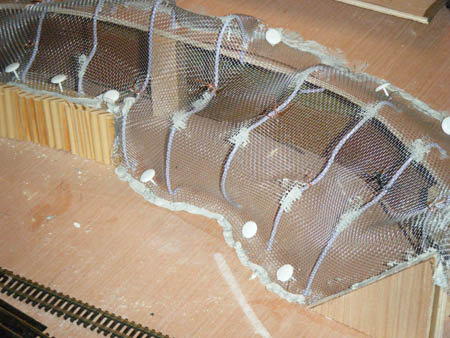
“For more realistic hillsides I use coat hanger wires free formed to stretch your screen wire over. I drilled holes in the table to insert the ends of the hanger wires into then glued them in place. Next I temporarily hold the ends of the screen down with thumb tacks and then liquid nailed all the ends of the screen to the table top. Finally tie small copper wires to help hold the screen to the hanger wires. This allows you to free form hillsides and make shelves to place your landscape trees onto. Lastly I applied drywall compound over the screen and added/embedded crumbles of sheet rock for exposed rock type details.
It is both strong and light weight not to mention cheap.
Ed”
Some wonderful pics! Please do keep ’em coming.
Heading off to ebay? You know the drill. Ebay cheat sheet is here.
best
Al

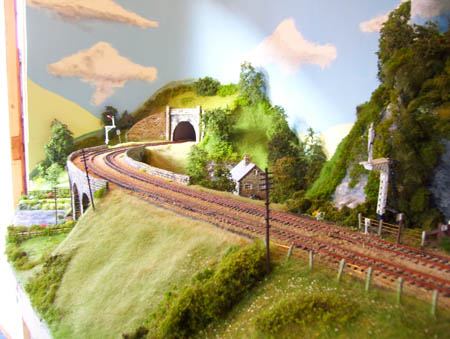



that looks supurb, something to really get your teath into. The viaduct is excellent . Looks so real,. WELL DONE
Kevin – really good modelling!
Michael – I worry about your gradients, 1:40 is plenty with tight curves or you will loose traction.
Ed – That’s a really good idea for hillsides. It also means you can make a structure that lifts off if you have hidden tracks.
Absolutly fantastic, Looks really true to life. Well done
The incline looks steep. How is this built and what
Degree if incline is it?
Maybe check your angle of attack. Degree of incline? 1% 2% and the railroad quits there. It takes 7 feet to go 1 inch into an incline. I am seeing 8% and more on the pictures.
wow i like that a lot
Kev. I’ve got just one word. Outstanding. Very nice landscape work.
looks great,hope the gradients are not to steep.Nice work.
The viaduct is an excellent piece of modelling, can we see more of this layout?
The spirals are very ambitious, so it will be nice if we could follow this one up as it progresses.
Thanks chaps. D/
What are the grades ? Any problems with the climb, up and down with a string of cars?
I love the water scenes & water wheel. That’s got to be a project for me.
Brilliant
Brilliant and
Brilliant
Any chance the three of you could get together?
That would make a mind blowing layout!
very nice. love the idea with the screen and water effects
nice layout
Nice one Kev
Thanks for the show. I got a lot out of the pictures as I am about to start my layout. I like the water running and the locks…..
It looks Fantastic. My some said he has all the sheet rock you need. Thank you for the idea. I can’t wait to see the finish product.
Great job Michael. I would like to know how you get your trains to climb those slopes. I find the slab foam much quicker to achieve hills etc. What room in the house are you useing. My wife would kill me if i attempted to bring mine inside into any room.
Love it, really looks good. Great job, thanks for sharing the pictures and explanation. I would have never thought of using coat hangers. They would be very sturdy no doubt. Thanks again, Austin Wilson.
excellent work
I.TS A LOT OF WORK BUT LOOKS GOOD
Michael, that looks completely mad: I like it a lot! Who’s the guy in the picture on the wall? He doesn’t look completely convinced ………..
Great tips Michael, love the water effects.
thanks
Randolph scott
A great start!
thanks for the good construction tips. I am just beginning the hobby and need all the help i can find.
thanks
Great looking layouts! Thanks for the tip on the screen. My first layout was more like a roller coaster…then the mice ate my scenery! Ah, well, never give up!
The one thing I almost never see are the dimensions of these very large layouts. A 22 inch radius requires 48 inches allowing for the edge. How big is the room?
Be still, my beating heart…
EXELLENT, what is size of layout??
Great water feature. The whitewater is terrific!! Can you give us a “how to?” gotta try this one Loved it. Thanks for sharing your tallent
I so wish that when yo clicked on the pictures that we could see them a lot larger. This was so interesting I want blow up the photos to better see what was done. Great job.
What a superb scenic construction. Just seeing a photograph with no text you woud think it was the real thing. Keep us posted .
Get tips on hillsides.
The photo of the viaduct I first thought it was a photo of a real viaduct. You have done an amazing job. Thank you for sharing it with us.
Sorry but inclines look impossible to negotiate for model workings and would also be not realistic in real life either. Otherwise lots of good space use in my opinion.
Best wishes!
John (Coastway Central)
The water wheel scene and the viaduct were picturesque; very realistic! The other layouts show great promise and creativity!
beautiful work. great tips.
Micheal’s layout looks like a 12′ x 16′ layout judging from the plywood
Not to be picky about slope; Formula says [rise over run equals percent of slope] in whatever dimensions you choose meters/feet/inches. If your engines are hill climbers- immune to curves- pulling more than itself- your pictures [ which are very good] reflect insufficient space @ 1.5-2.0% slope for most common engines. Your work is well thought out by the progress shown. I know you will take this ONLY as understanding facts and not someone being over critical of your fine building skills. Keep up the great “show and tell”. We all need it.
Looking good! One thing mising. You’ve got pics of the bulding, water wheel, water gates. But how about the viaduct (bridge) the rails go are on?
Too fast, I do know how to spell missing!
Great layout
Kevin-only photos of models should be placed on here, not actual places like the river you have claimed is your making.
That’s what I think of that DIORAMA, brilliant, and when you have a spare YEAR can you make a start on mine..
Bob
great photos, i just noticed no matter the stage of a lay out there is always a car or two on it; i do the same, lol
Would love (and even pay) for a copy of the trackplan for that layout!!!!!
Great layout keep up the good work.
This is such a cewl layout. It sure would be nice to see a lot of video of it running.
Kevin….
Best “WATER” I have ever seen…. very very good!
Jim
Alistair, I may finally get you sme pictures of my Z scale layout. Hopefully my daughter is coming down from Erie,Pa. for the Thanksgiving weekend and she said she would try to help me send them to you. I do believe you and the others on this site will be impressed with it, I ain’t braggin’, just speakin’ the truth. The layout was built in July-Oct 2010 that makes it6 years old. It is of “museum quality”. Lee Barry CEO LZPMRR Bristol,Va.
way way cool
Hi there, your water effects look great! I would love to know how & what brand of materials you used. Also wanted to say that is a good idea using close hangers and wire to form your hill sides. Good ideas thanks Keith
Beautiful job I love the hills
I must,agree with other posts regarding inclines. The most important part of a model railroad is operation, and I think the grade of your layout will give you trouble,especially hauling rolling stock. Check online for help, or a book on layout planning. Please note that this is constructive criticism, to save you headaches in the process of building a successful layout. Happy railroading.
I have to say that I really enjoy your post every day it’s the first thing I check when I get to work I have just got into N gage this last year and readlly enjoy your sight. It has showed me a lot, I really enjoy Dave’s videos.
Michael,
Very interesting track plan with any grades. One question, how do you handle run-in? You know the bang bang of couplers as the train goes down grade.
Kevin
Outstanding
Both have done a great job. I really like the tunnel construction. Be careful about gradients though. I learned the hard way on my HO layout, that is a long way from being complete, when my DD40 lost traction on what I thought was a easy grade. It took a while to get that corrected. Keep up the good work.
Great work from both contributors, I really learnt a lot. Thanks! Cheers Rossco, Adelaide SA
Thank you ever so much for posting. The pictures are quite interesting especially the water scenes. please keep posting as you progress.
Gotta love long trestles!!!!!! I’m a fan of the metal ones so……. I’m in awe…….
NICE job getting all the track work, worked to function too!
I am in the process of installing an incline 400 inches long. that means it can only rise to 8 inches for a 2% grade. I built a helix with 22 inch radius rising to 12 inches. the grade was about 3.4%. The engine by itself could not make the climb. ripped it out and went for the incline.
Incline was shot with a laser beam to get it right on.
Beautiful viaduct and water mill scene. I will have to try to incorporate that idea if I can.
Bob – Brecksville, Ohio
I agree that is one of the best water scene’s I’ve seen . You’re going to have a great railroad when you’re done .
Bob
I have a 3.5 inch rise over a 50 inch run and twin diesel with 6 loaded freight cars has little trouble or a single engine steam engine pulling three passenger cars and a caboose handles it with little trouble. Your water scenes are great! Bill
Kevin, really very very nice viaduct scene both landscaping and the water which is very, very impressive. A huge well done!
Hi Al,
Please “badger” Kevin (smile) into providing us the step by step instructions he used to create the best looking running water display I have ever seen!
Fantastic detail. Simply superb. To change the subject — I’m totally confused in blowing up Johns printable buidings to O scale. One post says enlarge by 1:43, another devide 87 by 48 which is 1:81? Help please. Thanks in advance — Jack
The direction of the train I would say that that is a steep down hill, not a climb..
Gentlemen great job good work you both are very
Talented I really enjoyed it
Stay safe
Bob
The white water featured scene really captured reality amazingly well. I have good two part epoxy rivers on my layout but I used white silicon for ripled water and splash at the bottom of a waterfall on mine. Your dry brush technique isnotably great so thanks for sharing & I’ll definitely have to try that on a second layout I’ve been building for the last couple years.
I love the water scenes
Thanks to everyone making their comments. I learned a lot from them. The lay out I am thinking on right now may have an incline, I have not decided as yet .But it looks fantastic . I can’t wait to see it in a more finished setting. Thank you
I love the water effects…seeing those little waves and ripples is really neat. A very eye catching element.
Also I love how you do things cheaply. Too many hobbies have been ruined, in my own personal opinion, by companies that serve large box stores by creating all kinds of neat, specific or even versatile easy to use products, but raising the cost of crafts and hobbies enough to make them less affordable.
Imagination, paint, basic supplies can provide great results. Every time someone proves this, I feel like they’ve open the door for a new person or people on smaller budgets to join this hobby.
Frank in Orlando
Kevin
Great work. I particularly like that tunnel and your stimulated water.
Hope to see the finished product.
Regards Bill
excellent waterfall and water
That is absolutely great the layout looks like the real thing.