Dean’s been back in touch with the progress on his N scale model railroad – all built on an old door:
“Hello Al, from Dean from New Mexico.
In my last two submissions I showed the development of my plans for my next railroad, the 32” x 80” Conejos Valley Railroad, a fictitious railroad in southern Colorado.
The time for planning is over and it’s time to start construction.
This is a two-part submission: in the first, I show how I built the support table and baseboard. In the second I’ll describe the laying of the two outer loops of the layout using Atlas flex track and #6 switches.
After that I can run trains to check things out. I’ve included video that show the construction in more detail.
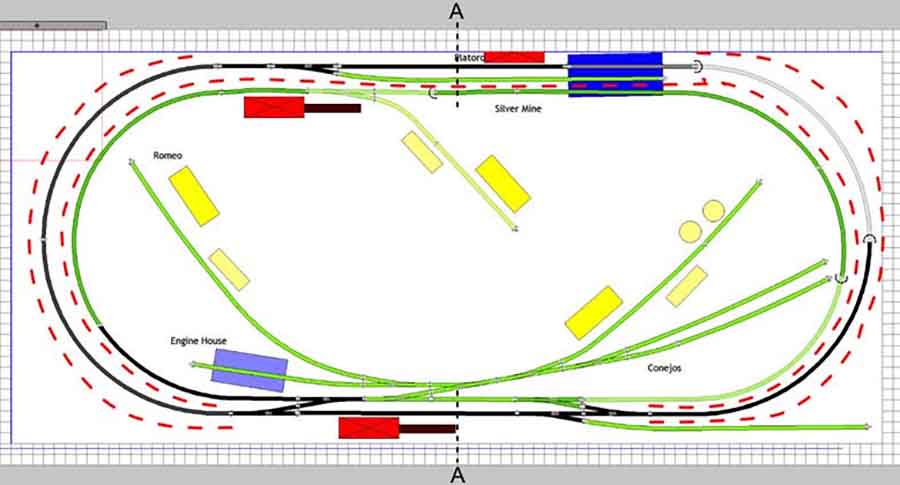
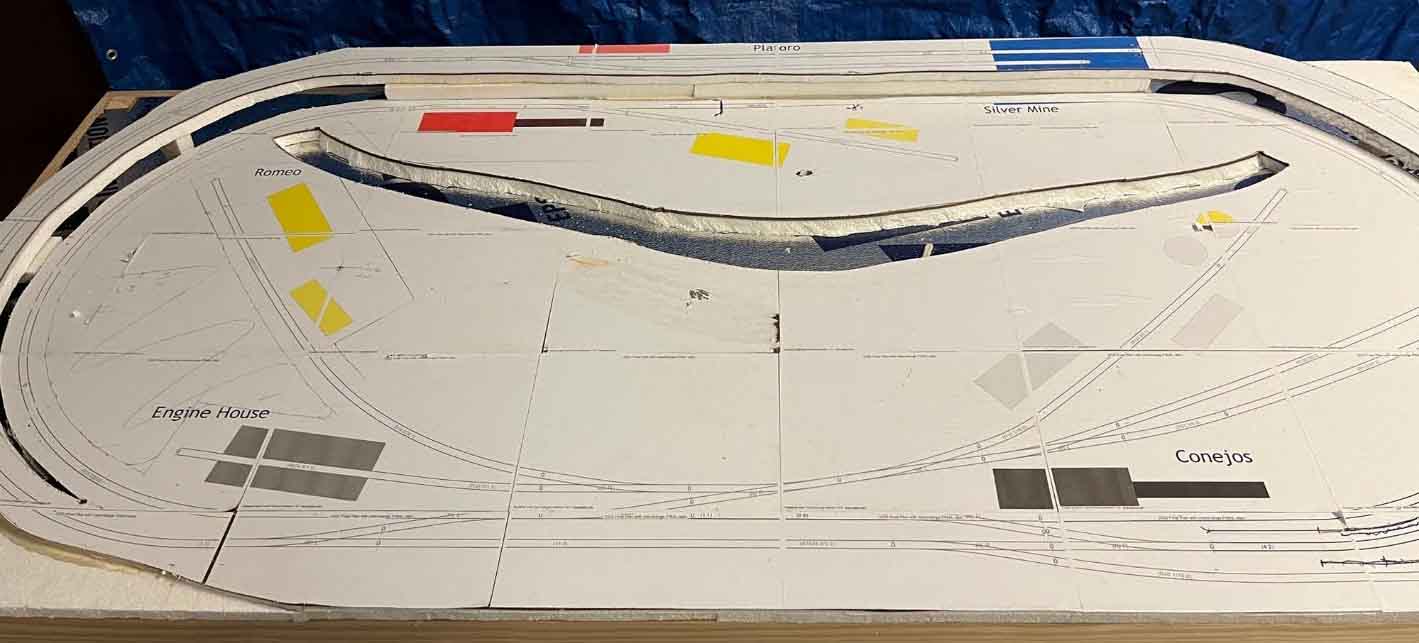
Here’s the plan again for reference. The dashed red lines show where I cut the hardboard and first Styrofoam layer so that I could raise the back part of the outer loop.
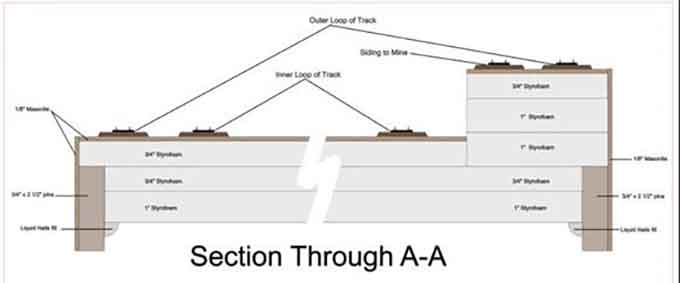
The baseboard, shown in the section diagram through A-A, was a sandwich of 1/8” Masonite hardboard over three layers of white Styrofoam.
The thicknesses of the foam layers are not too critical, but at least two layers are best.
The baseboard was contained in a wood box constructed from ¾” x 2 ½” clear pine.
The layers were glued together with Liquid Nails construction adhesive and a bead of the same held the bottom layer into the wooden box.
The diagram shows how the rear part of the upper layer is supported with two more layers of 1” foam.
Full size copies of the layout were printed using the Atlas Track Planning Software that I used for the layout design.
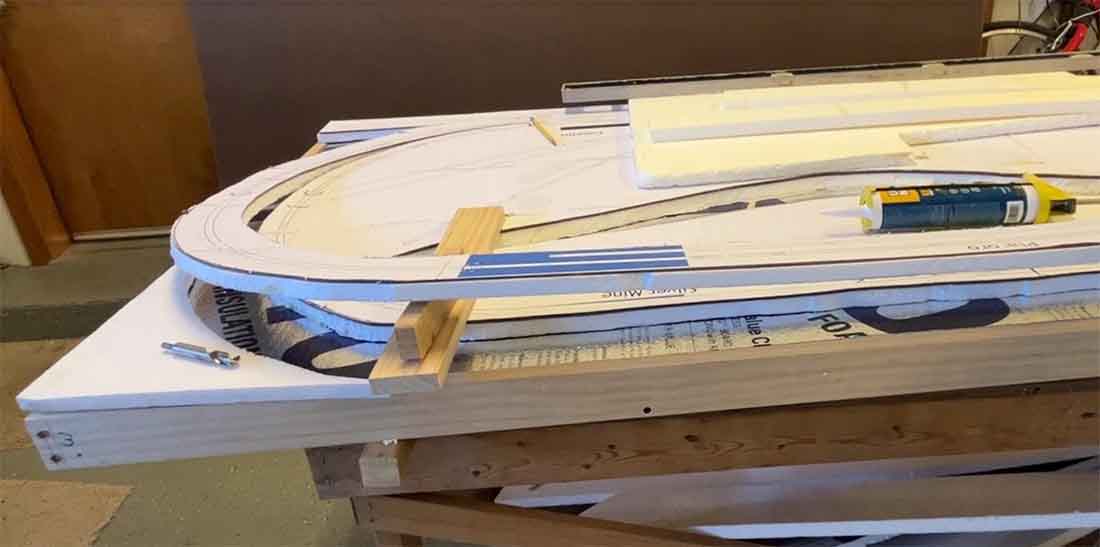
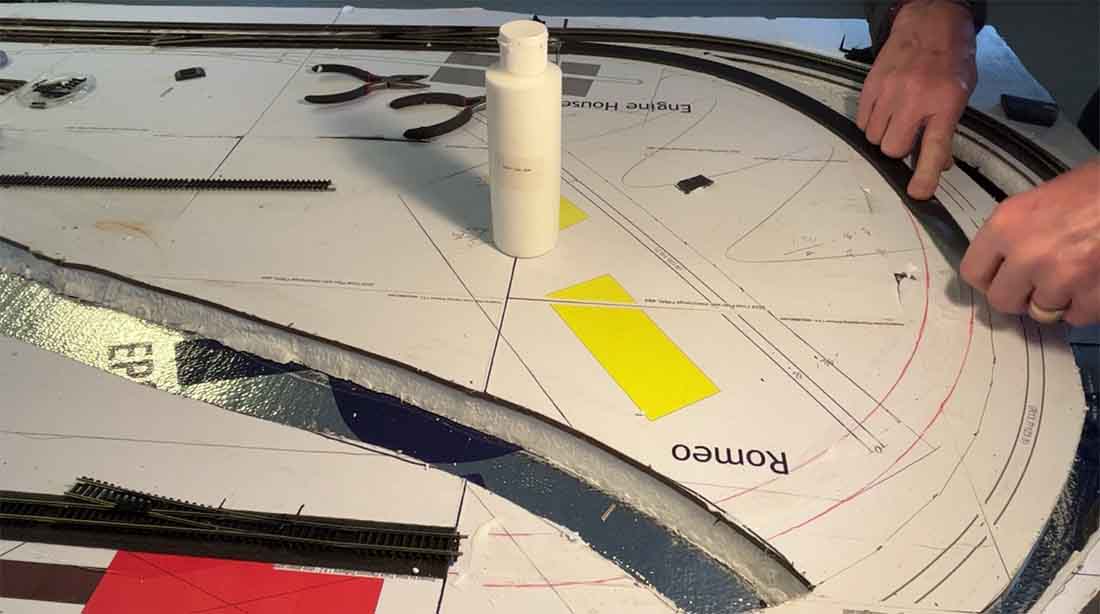
These pages were glued to the hardboard with a thin layer of white glue. The photo below shows how the rear part of the upper layer was raised after cuts were made.
Below is a photo of the supporting table. Diagonal braces and a front cross piece were added after this photo was taken.
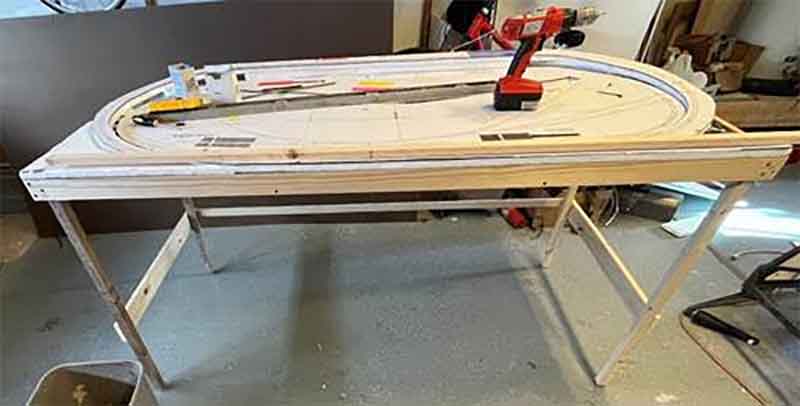
Another view of the tabletop:
Now on to the first trackwork. I used Atlas code 80 N-Scale flex track and Atlas #6 Custom Line switches fastened to Woodland Scenic rubber roadbed.
The roadbed was first glued to the baseboard, then the track glued to the roadbed, in both cases using Woodland Scenic Foam Glue.
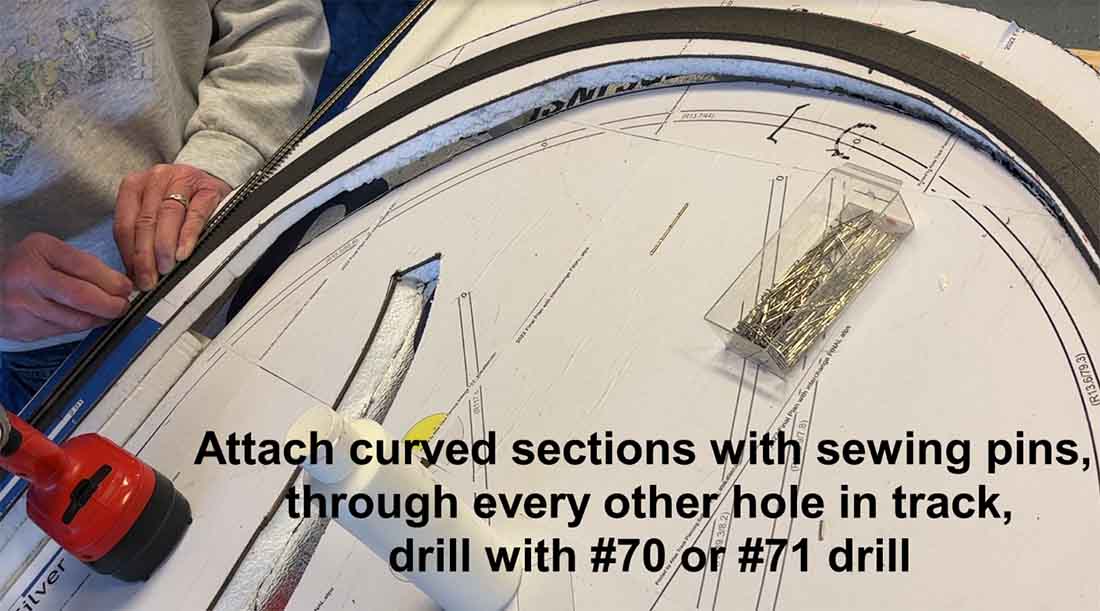
On the curves I pinned the track to the baseboard with straight pins.
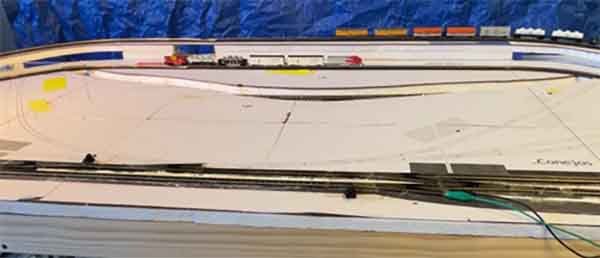
You can see two trains running below.
That’s all for now. In the next two future episodes I will:
Add the remaining track and switch machines (ground throws and remote), wiring (DCC) then ballast.
Build up hills and mountains and cover all scenic areas with plaster cloth.
Thanks to all my watchers and subscribers for your continued support.
Dean from New Mexico”
(Here’s Dean’s last post, where he talks through his Atlas track plan.)
I always think of Michael’s layout when an N scale on a door pops up.
Now on to Ian :
“Hi Alistair,
My interest in trains started at the age of 6 yrs.
When I lived in Great Torrington, my father use to take me down to the station where I spent most of my time taking train numbers ( don’t ask me why).
During that time I got to speak to many engine drivers as well as the fireman. It was because of this that I was offered a trip on the footplate on the Petrockstow line.
Could you imagine that happening now especially with the so called Health and Safety rules.
I was hooked. It was then a built my first Tri-ang analogue layout.
After years of moving around Devon, Dorset and Norfolk I married a Weymouth girl whose father happened to be the Weymouth Station master and the second layout was built. This time it was digital, a train layout in a shed approx. 18@x15’ and was a very complicated layout.
About 3 years ago we moved house which had a long but narrow garden, once the house was in some sort of order a shed measuring 14’x10’ arrived on Nov 2020 somewhat smaller than I wanted.
Rob our electrician was summoned to wire up the shed on one condition that a cup of tea and a visit to the model railway construction was in order should any work be undertaken in the house.
I had an idea as to how the layout should look so first the baseboard was constructed using 3/8” ply and 3”x2” legs which would support my weight, the base width itself was anything between 24” to 36” which gave me plenty of room for the marshalling yard etc.
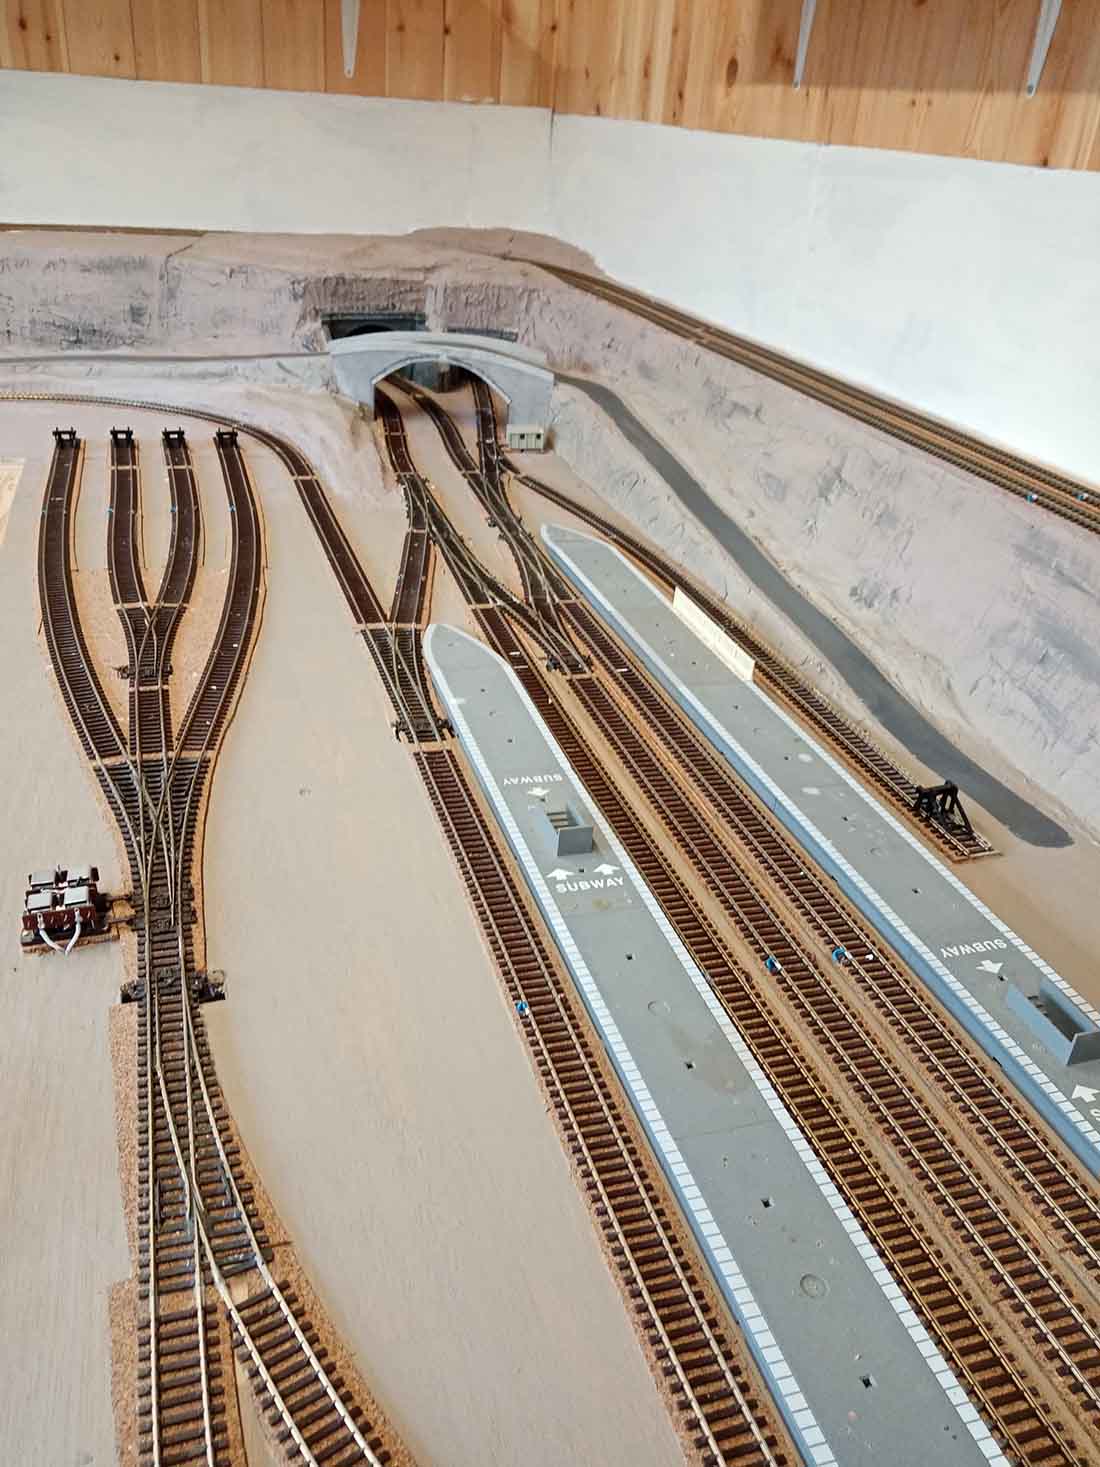
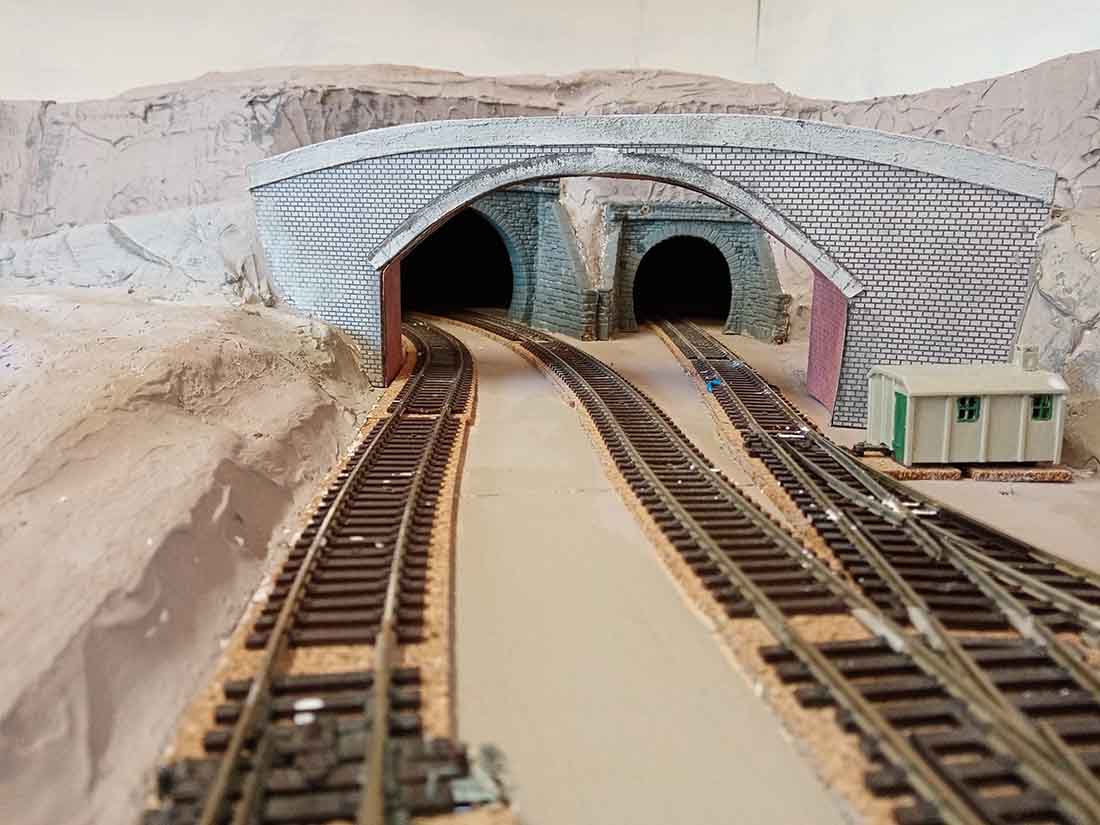
At this point a second base board was added underneath this ran the full width and length of the shed to incorporate a single track eventually ending up under the control board with four siding fiddle yards, entrance to the fiddle yard is via the tunnel nearest the wall.
Inclines of 1” every 24” were made of ply/hardboard and covered in cardboard, mod rock and a thin layer of Polyfilla to give the rock effect.
Once the inclines, tunnels and bridges were in place and the whole thing wired up to the control board I ran several trains with various rolling stock to make sure of any mishaps.
Next was the Faller car system which I had from my previous layout, as you can see from the video the little VW Camper van run really well sadly only enough room for a single track.
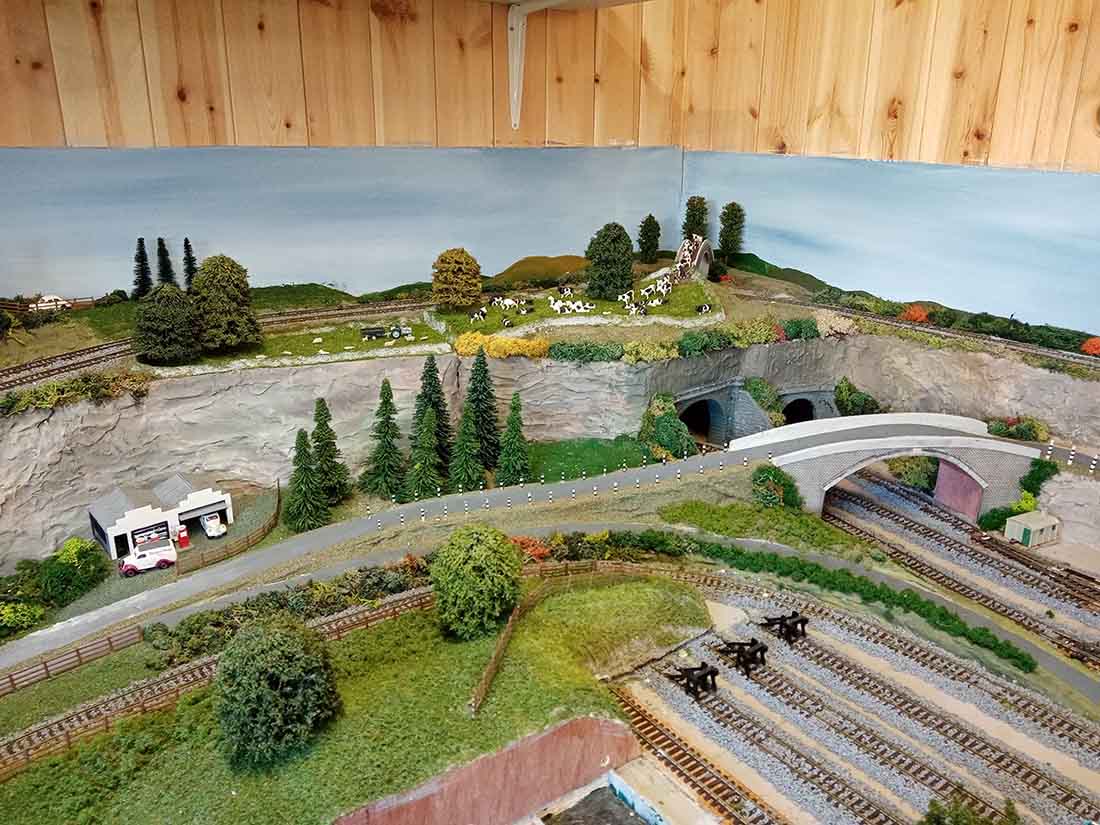
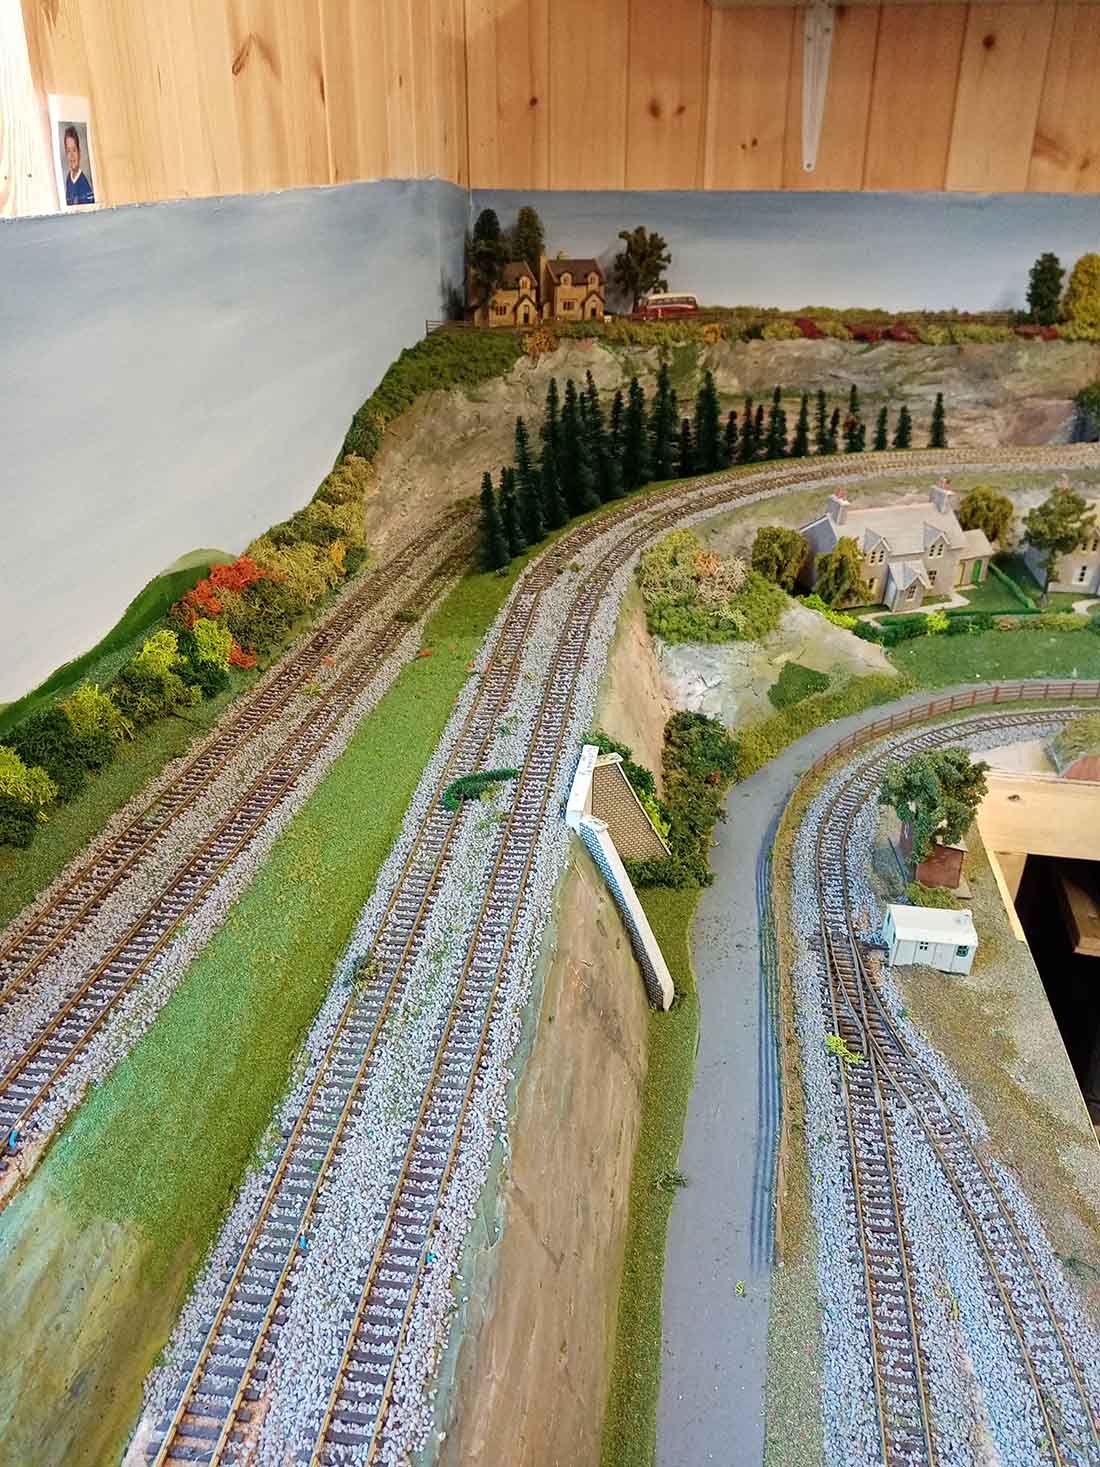
Access to the shed was made from a sliding section 18”x24” (I hope I don’t put on any weight) which can be removed and stored when required, ballast and scenery were next on the agenda, buildings placed in various positions to give me some idea of how the scenery was to be created.
Two sections of the hills can be removed for easy access should a train become derailed, the first is behind the garage the second is in front which allows me to clamber up onto the base board to get to the far corners if required.
Only a 3rd of the scenery is partly finish if ever it is, I don’t want to shut myself in the shed for the rest of my retirement, so I joined a model flying club something I’ve always been interested in.
So dry weekends are spent flying, wet weekends are spent either in the shed or repairing the WOT trainer, for some reason the cornfield in the surrounding landing patch seems to jump up at the plane when landing.
I’m not a model train buff and I’m sure some of you will look at the layout with disapproval especially the way the building etc are placed but to me it’s the way I see it even if some of the engines are pulling the wrong rolling stock, it’s all in the satisfaction of scratch building and running the trains achieving something on your own.
Ian”
A big thanks to Dean and Ian.
That’s all for today folks.
Please do keep ’em coming.
And if today is the day you decide you’re missing out on all the fun, the Beginner’s Guide is here.
Best
Al
PS Latest ebay cheat sheet is here.


I am not seeing a door in any of the photos or in the section. Is it that well hidden?
I thought the same… no door. Am I missing something?
Paul thinks,
The size of the layout is 32″x80″ which is the size of a standard door slab, probably why the door reference. Whats really important is the screw size, right? or did he use 6 penny nails- – – details details- –
I’ve used doors myself – now detail observation the southern rly (uk) concrete huts for plate layers -or linesman use were craned off a low wagon. They were the shape they are to fit in loading gauge so they were set long way to track not at 90 degrees I know they fit point motors better tis way but…
Ian,
Don’t think for a minute that anyone reading this blog will “some of you will look at the layout with disapproval especially the way the building etc.” Anyone with that attitude has completely missed the Model Railroad point. Each of us has a part of the hobby that we are most interested in, mine is model building. Others have interests that actually change as they grow in the hobby. The point is that each model railroader works to make their layout work best for them. Can each of us do better? Sure. But that’s the pleasure of this hobby. Our miniature worlds are never done, and our efforts are never wasted.
I love your layout.
John from Baltimore
excellent
Dean,
Good documentation of your methods. Helping beginners get going on their first layout is a worthy effort. Ian, you certainly have a good eye for a workable track plan and I like your scenery too.
Rob McCrain
JOHN FRYE response exactly what I would have written. My enjoyment has come from the way I build the layouts, The Hobby for me is in the doing. Ians layout is great. I bet he likes it , and its construction , better than all of us.
Too many critics. I agree with Ian. Your layout your way. If you can do better, send in your pictures for others to look at and critique. I think Dean and Ian did great work!!
Dan in Virginia
Ditto even , it’s your layout, your imagination and vision . It matters not what others critique of your work . We all learn from our mistakes and from others . I think you’ve got a great layout and start . It’s yours dude , do it how you like . Enjoying it it where it’s at , not competing or regretting .
Run those trains brother .
Dean, I love watching your videos and seeing your posts. You are an excellent presenter, should have been a teacher!
My question is simple but not obvious to me. I’ve read several posts saying the your base support.l to a layout is most important. Recently, I read a discussion in the comments of another post about 3/4” versus 1/4” and 1/2” plywood and how one warps and such. Why did you select several layers of foam boards to be a substructure under the hard Masonite layer? It obviously is not for supporting great weight? I see that the top layer of foam allowed you to dig out the river and to use foam to elevate the grade but what did the other two layers add?