Clark’s been having some problems with his N scale track and sent this in.
“Hey Alastair,
Clark here again.
I am still at it, and quite frankly still hopelessly addicted to this hobby.
But I recently reached one of those moments that I suppose all modelers have at one point or another.
It’s a worrisome, sleep depriving, I “can’t believe I even have to face it” moments, when I realized I would have to replace a section of installed, and already ballasted and running track!
The blood in my veins ran cold as ice, as I knew I would have to face this.
I was replacing a badly kinked section from my original design that I think in my heart, I knew from the beginning would be a problem.
I just didn’t want to face up to it. I had underestimated the curve after a cross over – well, you’ll see from the pictures.
But I’m here to tell all the others who will face this, just be patient, breathe, and have confidence in your skills, and you’ll get through it.
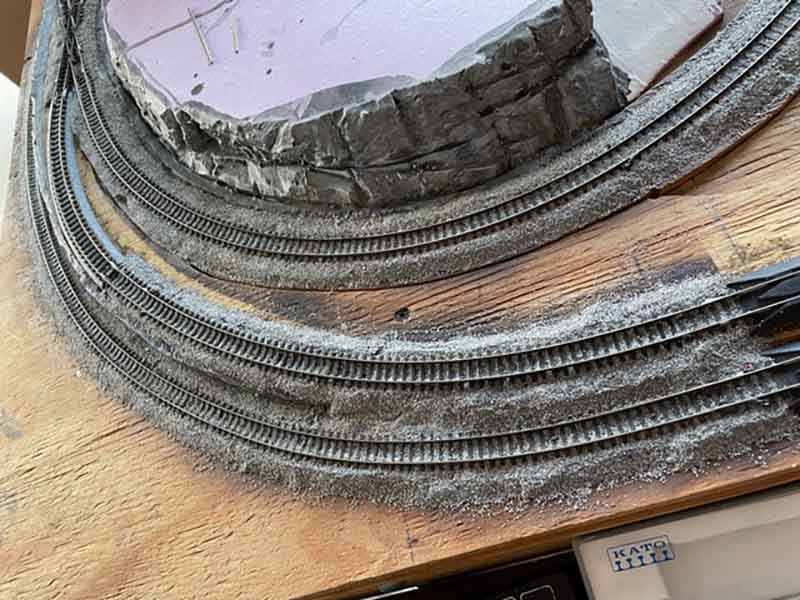
The ballasted section had to go.
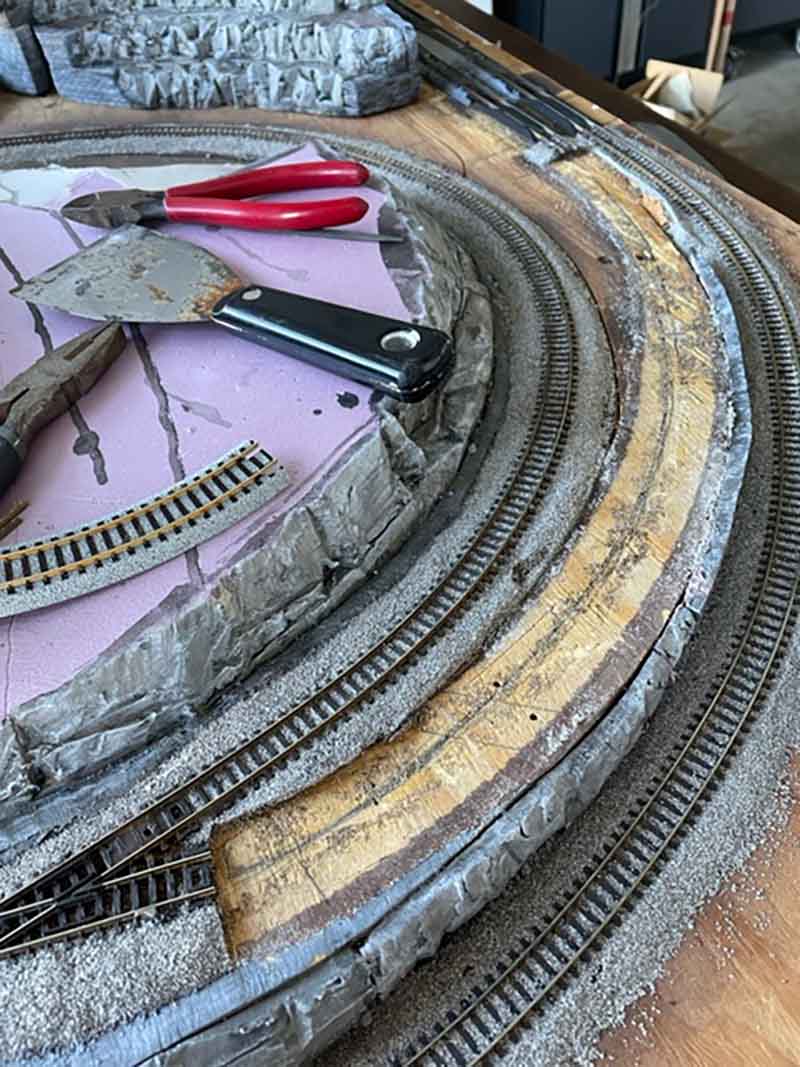
Removing the bad section.
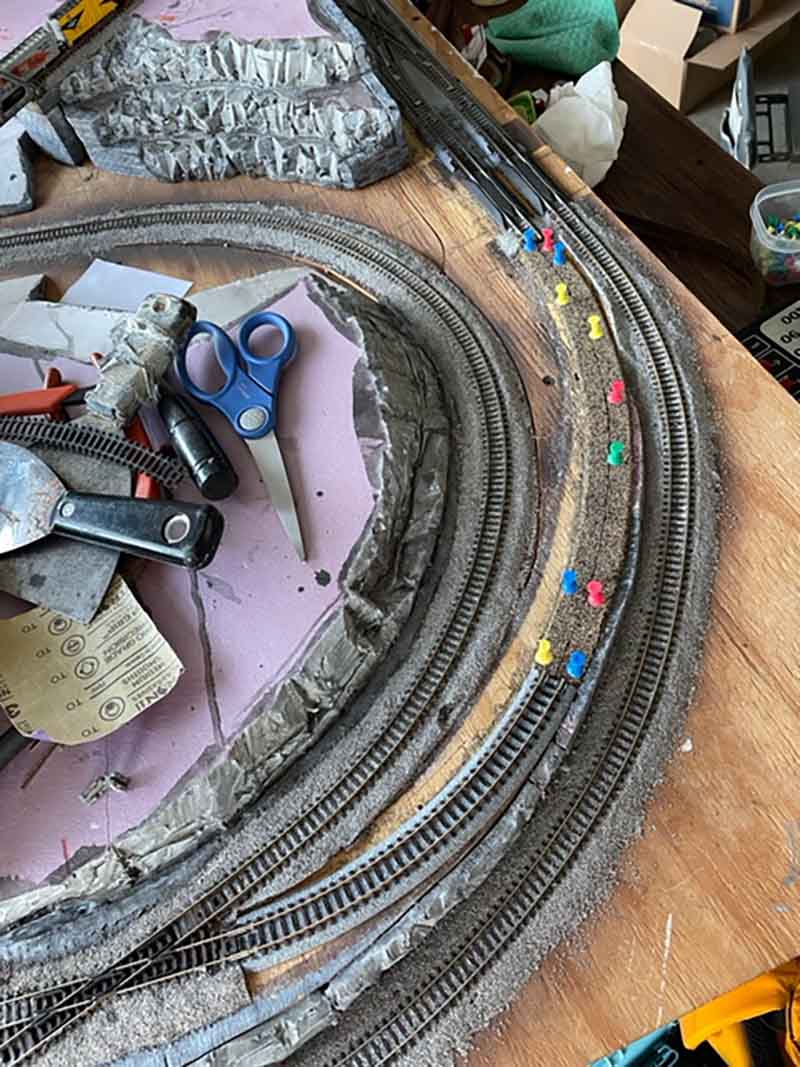
Laying the cork.
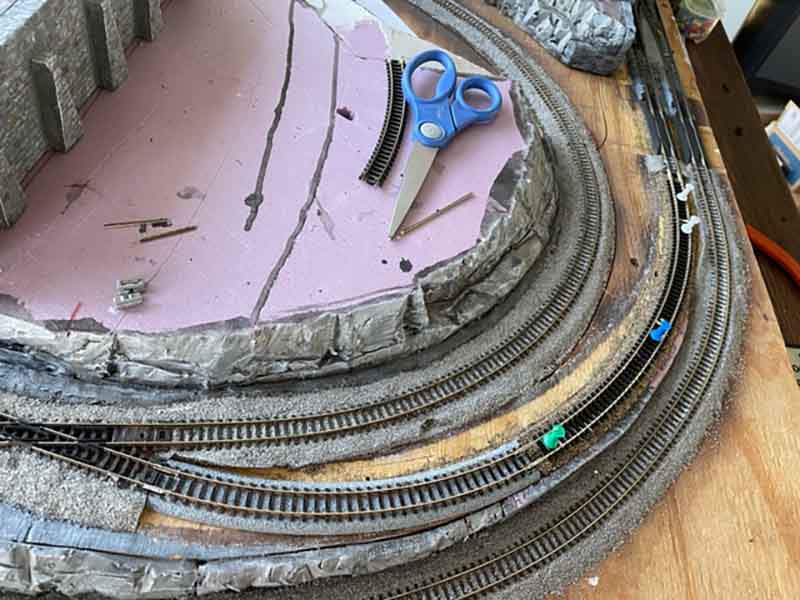
Added Flex track.
I’ve attached a series of pics documenting this change & result, and here is a video link for the latest.
I’ve added a trolley car, on a reversing switch, that can be timed, so it goes back n’ forth & I love it!!
Clark”
Clark’s N scale track problem is a common one. Yet the solution is simple enough – don’t even think about scenery until your track is running perfectly.
The track can’t run just okay, but absolutely perfect.
It really is worth the time and effort – and there are hundreds of posts on the blog to prove it too…
In fact, I’d really like to hear your opinions on it, please do leave a comment below.
It reminds me of one of Bob’s posts.
His layout is properly stunning, but he was kind enough to put together a post of the thinking and planning behind it.
You can see Bob’s N scale post here.
We all learn the hard way, except for those that take the plunge with the Beginner’s Guide.
That’s all for today folks.
Please do keep ’em coming.
A big thanks to Clark.
Best
Al
PS More HO scale train layouts here if that’s your thing.
Need buildings for your layout? Have a look at the Silly Discount bundle.

Yep – add scenery last when it is running perfectly – another mistake is not setting up points motors and signals as you go. Difficult to go back for them too
We’ve mostly done the same or similar!
Sympathies but sometimes that’s how we learn. After 4 years I still have a section of track not ballasted. I just know I shall have to get in there and do the job properly .
its something we al do , I have made a lot of mistakes over the years ,but then we learn from these , as for ripping up and relaying track , think I must be the record holder …..Dangerous Dave
I am in to N Scale and would really like to know what the actual problem was with Clark’s track section. Was it electrical, was it the way the track was laid, etc?
Thanks Clark! I have been avoiding a similar problem for awhile now and your message has motivated me to dive into the project !
Looks like you are back in action. 👍🏻
Looks great.!!!!!! Would like to see more.
Another thing to consider is if you want to put up overhead wiring for electric trains. I deliberately left this til last on my layout so as not to have to try to work over and round it, but the planning is very important, I found I needed to put masts up in awkward places such the middle of a wall or in a street, I should have done the detailed planning as soon as the track was laid and running.
Hope you never had two trains trying to pass at the same time….clearance looks pretty close at one point.
Terry, Idaho USA
Since you asked for input:
a. I always use straight pins to tac the track and ballast down at first and then run the trains.
b. When satisfied I install switches, detectors, etc., but still no ballast, and operated the layout some more.
c. Everything is correct and operating efficiently. I lay ballast on the spurs first, then the mains, then complex tracks i.e. crossovers and switches.
d. I always use what I call the “shoo fly” ballast fixative to finally glue the track in place.
I use alcohol mixed with clear wood glue (about 70-30 mix), prep the ballast by using an atomizer to spray on alcohol, then dribble the mix of wood glue and alcohol onto the ballast.
Later, if track has to be pulled up or moved, I simply dribble alcohol over the area to be changed, let it soak for a minute or so and it will come up.
WARNING! ALLOW PLENTY OF VENTILATION WHEN USING ALCOHOL)
That’s now looking good Clarke. Look forward to the scenery coming together. I really like the speed that you’re running the trains at – much more realistic than too fast. Also like the timed trolley car on the top track. Would like to see how this is set-up on the electrics.
Brian, Wokingham, UK
Been there done that! It’s part of my learning process. While pulling up track and scraping off ballast isn’t fun, when I’ve fixed the problem there’s a higher level of satisfaction.
We’ve all done it at sometime but … once cleared and reset three is a glow to see ‘perfect’ working.
Thank you all for your comments. They are very helpful.
I feel your pain. As a result of putting down a new floor, I had to rip up my old layout. I was able to use three of the sections in my new plan. Because of old problems I ripped up most of the old track and roadbed. The old layout was very hilly. it had Woodland Scenic risers. I removed everything down to the risers and some risers. Putting plaster cloth, glued roadbed and then glued track over the risers was a mistake. All track was destroyed trying to reuse it. I lost over 100 feet of track and a dozen switches. I have now used 5mm plywood glued to the risers and then glued roadbed. I nailed track and white glued the ballast. If it ever needs to be removed a water solution will loosen it safely.
Another thing to remember when hooking flex together on curves stagger the joints so they don’t kink
Clarke, as Donald says, we feel your pain!! I find several cups of tea help too.
Lots of thoughts coming your way on here, but another possible option is using ‘longer’ or extended length crossovers. This gives you a more acute exit angle and may help with the subsequent curve out in limited space? Not too clear about the track being used if one is produced in that make, but Just a thought?
Alan – Sandhurst, UK
very nice. true satements. there are a lot of pitfalls you have to catch or they are trouble later.
Clark,
I appreciate your predicament. I just changed out all of my Menards tinplate track because I couldn’t find large enough switches (O72 or larger). My larger MTH locos just didn’t like that track. I tried Ross switches with the tinplate track and the geometry was wrong…didn’t work with the adspter pins. Finally switched to Gargraves flex and straight track with the Ross switches…and it’s much better. Even still my one long steam engine does not like O72 switches. So I’m not done yet.
Just keep at it and test run as much as you can.
Bill
Technical issues aside , I’m very impressed with your brick walls and tunnel portals , flagstone looks great . Very nice layout , keep posting your progress .. Thankyou
Clark, we all have those situations that arise. It is always best when building new track to run it extensively for an extended period before any scenic work is begun. That includes ballast. The track is a model, too. Once you are sure everything is as perfect as it can be made, commence with the scenic work. I have been in your shoes multiple times, I have learned from my mistakes nad have moved on. Best of luck. Rob
Al,
I had the same issue when in “N” scale. 4 axle engines no issues, 6 axle a lot of issues, my curves were too tight. Finally figured it out, Changed the curves, no issues. Now, having said that I am into HO scale, easier on my old eyes. No issues from what I learned in N Scale.
Dave S
Hey Clark, we’ve all had the misfortune of finding out a particular part of our layout doesn’t work the way it did when we laid it. There are so many things that can cause a once perfect layout to be a source of sleepless nights. It can be weather, it can be humidity, or it can even be the weight we add to a layout after it’s built. Heck, I built a 10-1/2’ x 5-1/2’ layout on casters so when it was finished I could roll it into its final position. Little did I realize that the concrete ledge that my layout would sit on in the adjacent wall was not the exact height of my floor! You talk about sleepless nights… I couldn’t even reach huge sections of track that needed to be repaired. Had I not spent thousands of dollars to get this built, I might’ve given up. And yes, even the massive sections that I couldn’t reach were ballasted to perfection LOL!!! But we find a way to get to the point that we had originally hoped for. It’s not about winning, it’s about running the race! Your layout looks great. But that lonely commuter up on top needs some friends!