Lawrence has been back in touch – he’s “finished” his O scale track layout.
He’s also answered a few questions.
If you want to get up to speed, his last post is here.
But if you want a bird’s eye view, his track plan pics are here.
“Al
I am answering a couple of questions asked from one of my previous up loads to you. This is in reference to my lift up bridge.
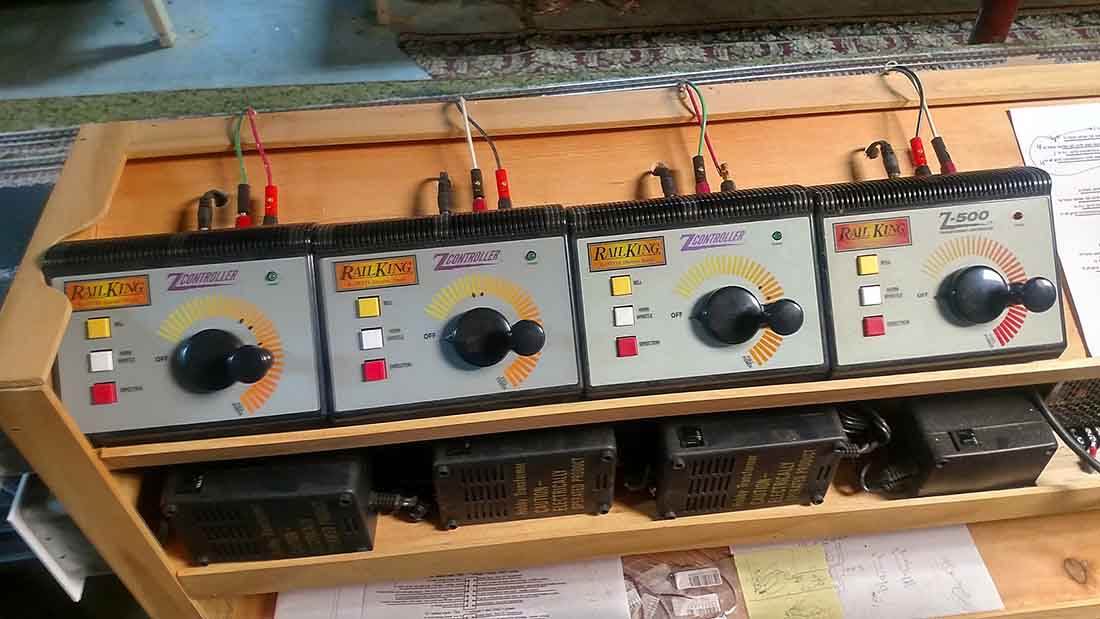
I am running four train lines for O scale DC (not DCS). I am using four separate transformers for this, one for each track.
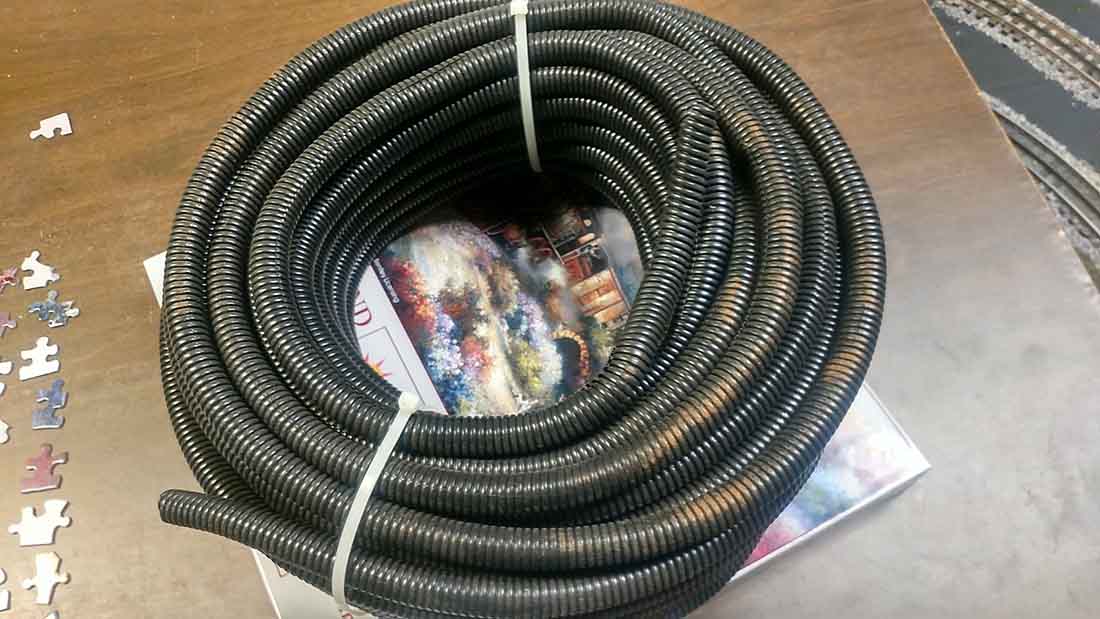
(BTW – I refuse to work on a layout wider than three feet and to work the wiring from under the layout.)
The cable housing, I am using for the power distribution is the same stuff I used when building electronic cabinets for major companies before I retired. It is a flexible split one half inch housing used for cable lines.
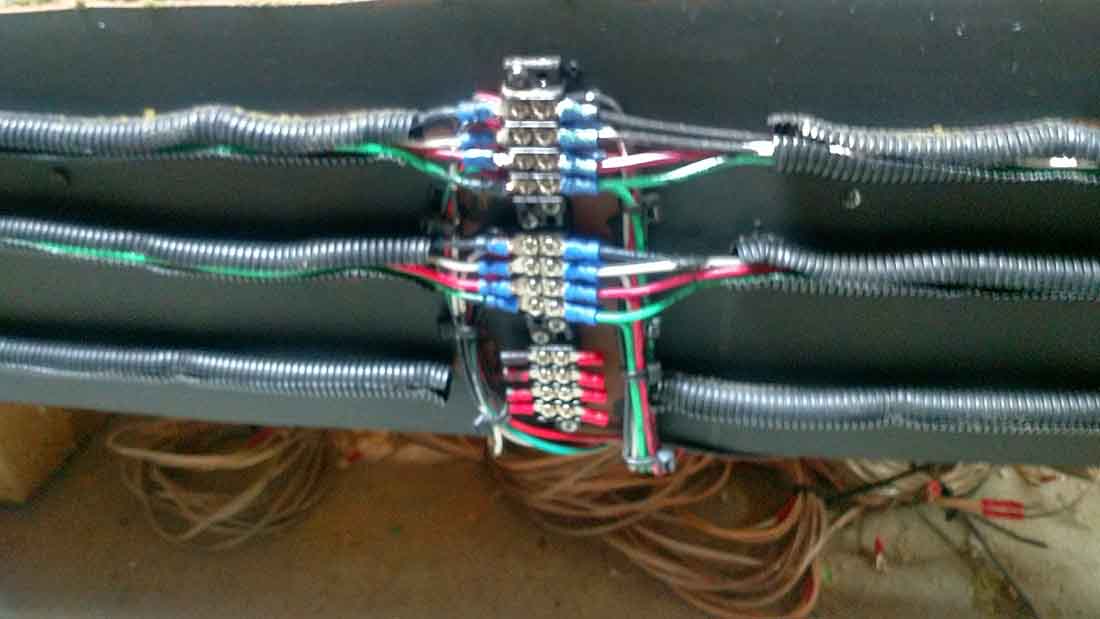
The wires for the distribution are all 12 gauge four colors. As you an see from the outputs of the transformers (picture 1) and at the cable distribution connections (picture 3) the red and green (tracks 1 & 3) and the black and white (tracks 2 &4) are for each track. One red/green and one black/white pair runs in each cable housing.
All the cable runs are on the facing on the side of the track. All the drop wires are pulled forward from under the track and are connected to the power distribution on the facing connections.

Picture 5 displays the power connections from the transformers to one side of the track and to the lift bridge itself.
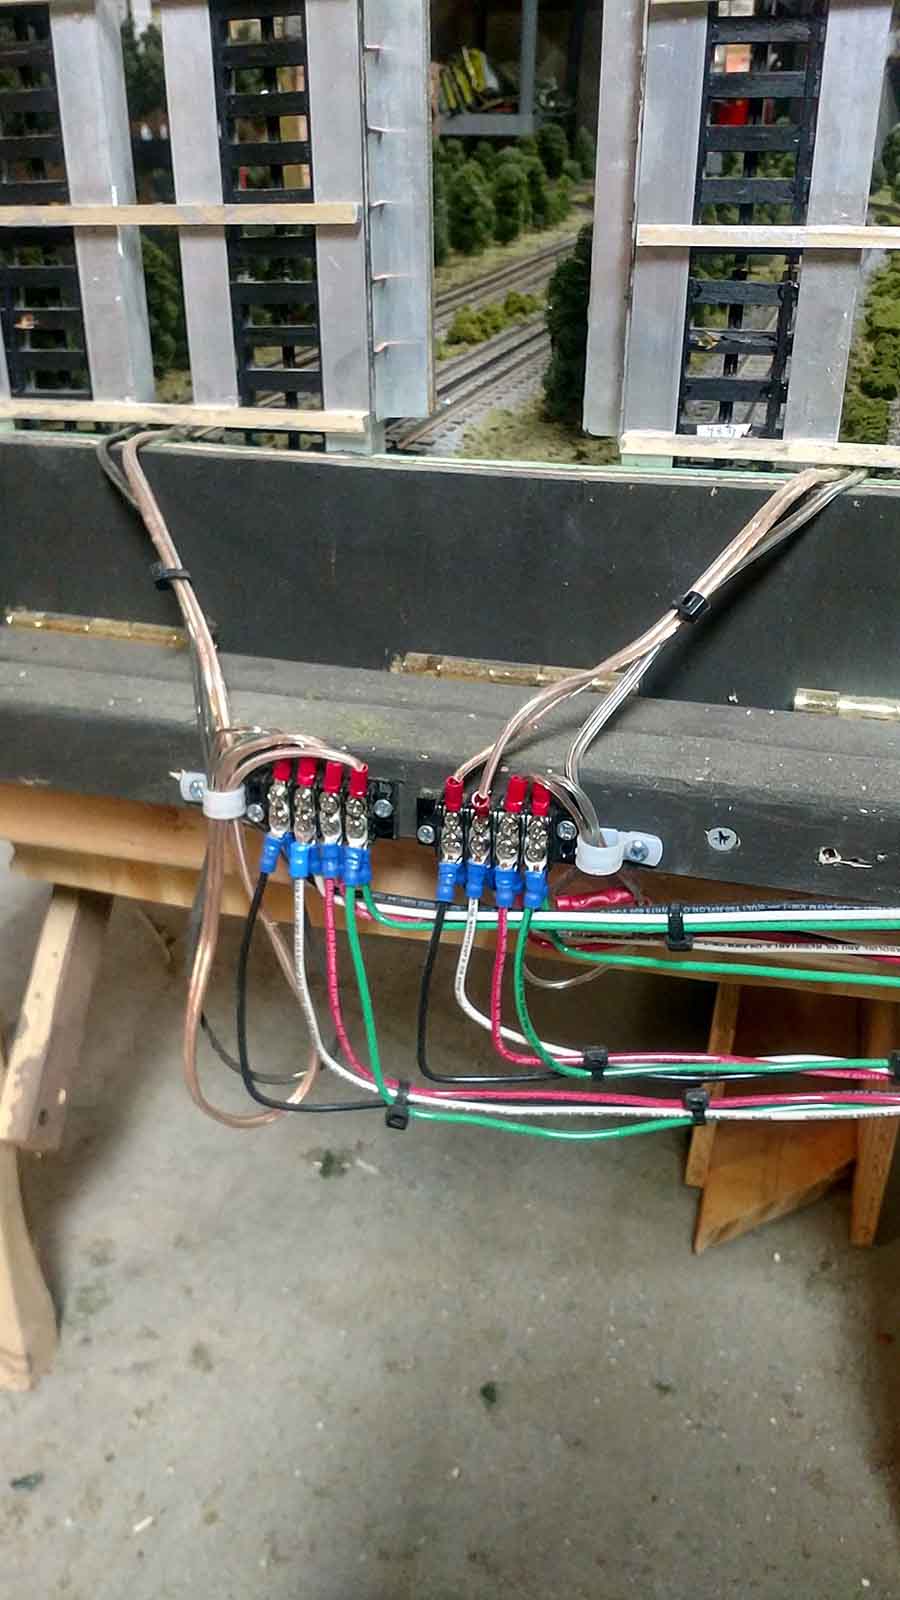
The four tracks on the side away from the lift bridge are all isolated for the three feet from the bridge connection when the bridge is lowered. The last picture displays the micro switches that are engaged when the bridge track is lowered.
The power enters the micro switch on the normally open connection. The isolated track is connected to the common on the switch. When the bridge is lifted there is no power on the three feet of track to the open end of the bridge. When the bridge is lowered the micro switch is now in the normal closed condition and the power is applied.

NOTE: when testing this method – run the engine (only) slowly toward the open bridge and stand next to the engine to ensure the train stops before getting to the end of the track. Then rerun the engine with the bridge down and the engine should run across the bridge normally.
Lawrence”
Is a layout ever finished? And even if it is, you can always start another one, which is exactly what Lawrence has done.
He’s decared his O scale track layout finished. I know this because shortly after the above, this landed in my inbox:
“Al
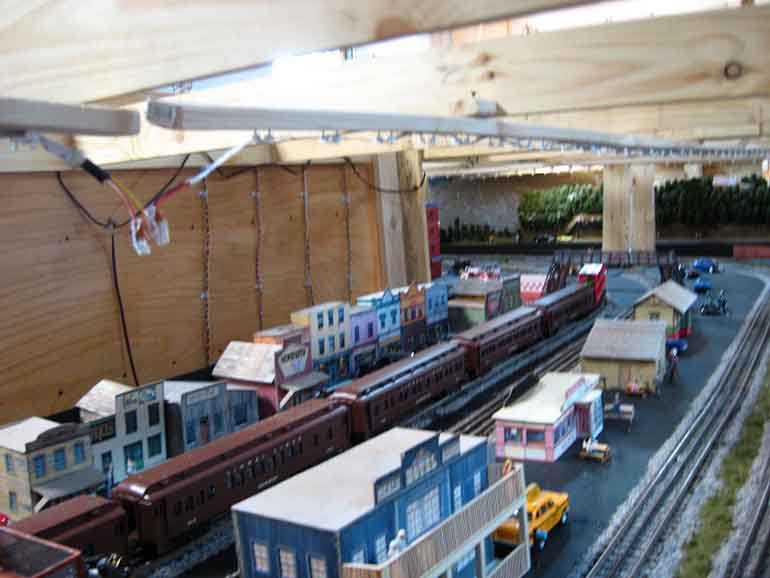
My O scale track (at a level of 18” of the floor) has been DECLARED finished. I know you can always add more stuff to a layout. But as they say “enough is enough”.
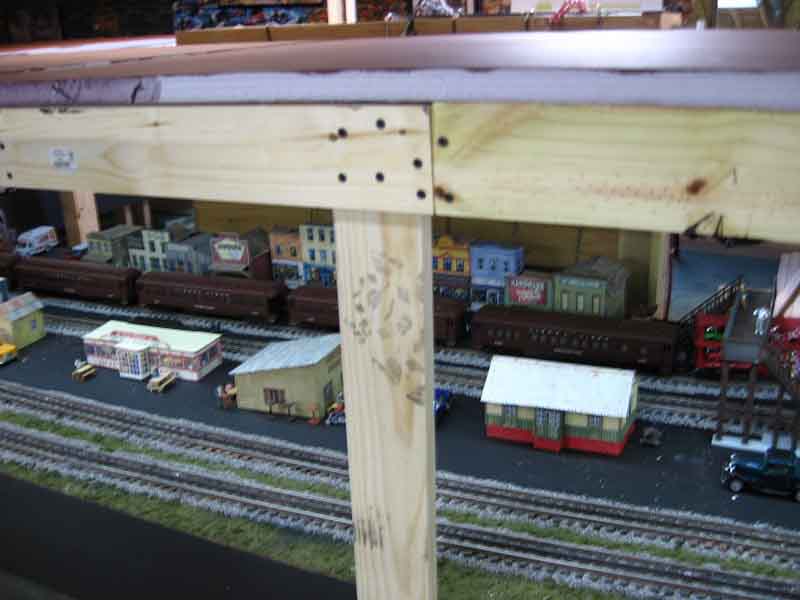
I am starting my HO scale layout at 40” from the floor, above the O scale layout. Attached is a picture of part of the framework for the HO. Notice the 1X2s across and under the framework in the front of the picture.
The problem of seeing the O scale layout with the HO above it is solved by the addition of LED string lights attached to 1X2s under the HO framework.
The second two pictures display the 1X2s with the string lights attached. Not too worried about the wiring here as this is the only wiring that will be located under the framework.
Lever-nuts was used to connect all the wiring, VERY EASY to use and rewire as needed. LED lights do not light if wired backwards. Lift up the levers, switch the plus and minus between the two lever-nuts and close the levers. Lights now working.
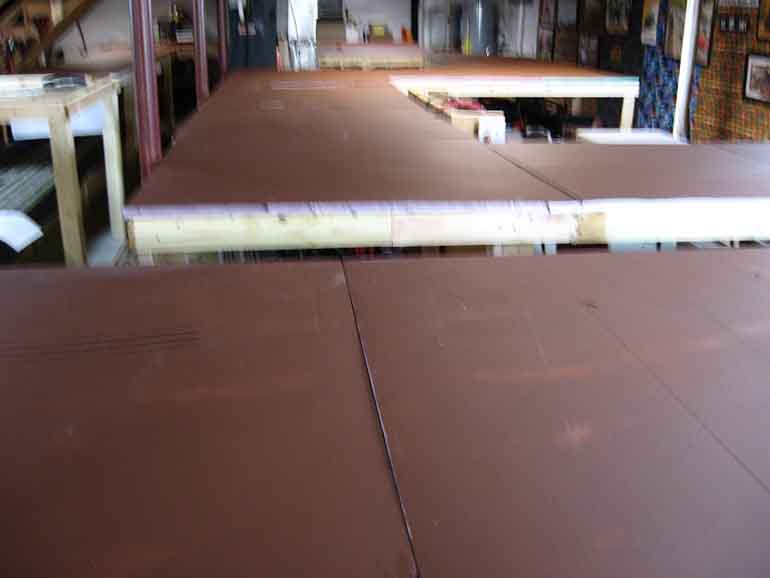
Have not put the purchased the plywood yet but got the foam sheeting. Cut and molded the sheeting to the framework size. The foam is a lot lighter and easier to size. The sheeting will be used to trace the size on to the plywood for exact fitting. Painted the sheeting to get rid of the green color.
With the sheeting on the framework the O scale is very dark and hard to see. But I am using a computer power supply for my DC accessories. Turning on the lighting for the 12VDC LED strips shows up the O scale layout nicely as shown in the last picture.
Further updates (track layout) in upcoming emails.
Lawrence”


A big thanks to Lawrence for his O scale track layout. I do enjoy seeing a layout from start to finish, so I’m really looking forward to his new layout updates.
Talking of O scales, I’m always reminded of Martin’s O scale.
That’s all for today folks.
Please do keep ’em coming.
And don’t forget the Beginner’s Guide is here if you’re tired of sitting on the side lines.
Best
Al
PS Latest ebay cheat sheet is here.


Pretty Kool!!!!
Very well done Lawrence. Great Idea with the wiring. Love it. Thank you.
Outstanding!! Join OGR Forum for O scale, Have a Great Christmas all!
This is a very cool layout