Peter has been in touch with a great step by step on model railroad scenery design:
“Hi Al, ok my friend, here we go picture by picture.
I’ll keep each one fairly brief, buy hopefully understandable.
For module building it’s scene oriented, so that’s first, a basic idea of what I want to depict.
Start with the frame or ‘bench work. ‘ I use 2×2’s for the legs and 1×3 for the framing for the top and around towards the bottom.
I stay with 1×3 for the risers for the eventual track bed as well.
Once I’ve figured out what the center piece is going to be i.e. bridge, buildings, yards, etc. I screw in the risers where the track will run through.
I then figure out the scenery plan and frame that out, thus the thin card board stripping can be stapled in place to prepare for plaster cloth to cover those areas and tie in with the road bed.
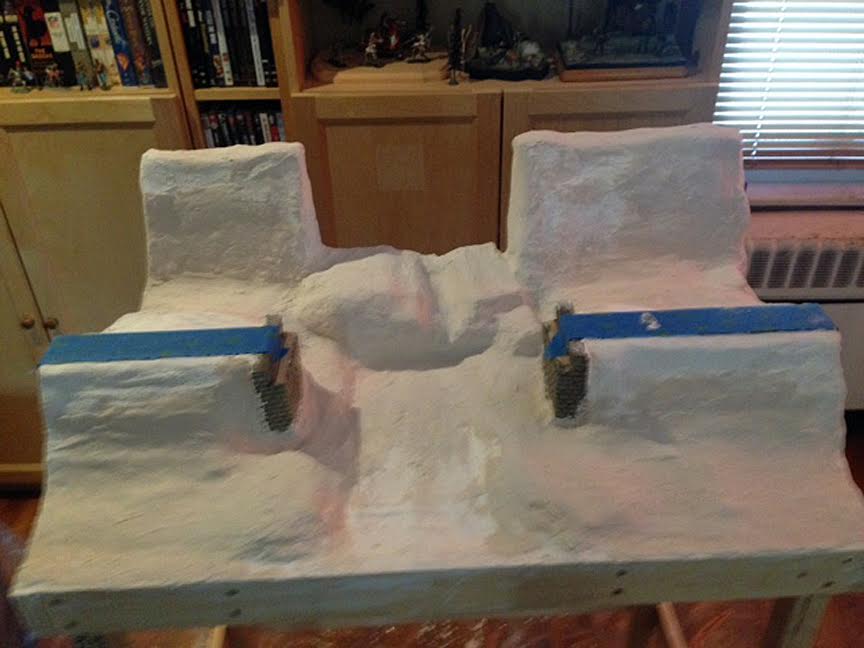
Next step is to add plaster to solidify all areas and start to build a solid scenery base, so I get a sense where rock molds will go.
If I add to my thoughts as I go along I’ll use moist newspaper to build up a mountain or hill and plaster that. Also the track bed is in place and covered so the hand laid ties don’t get messy.
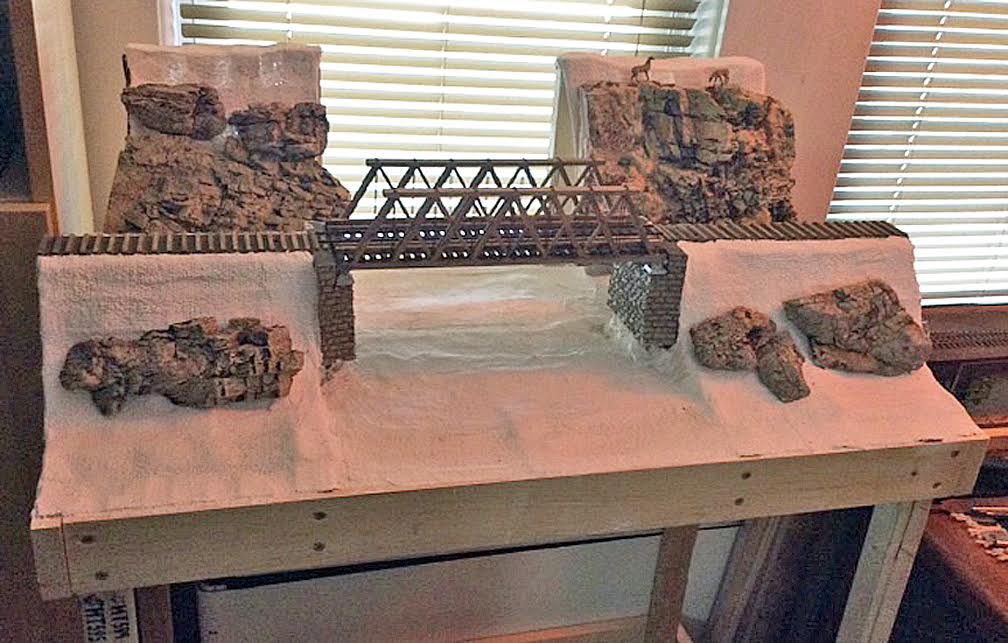
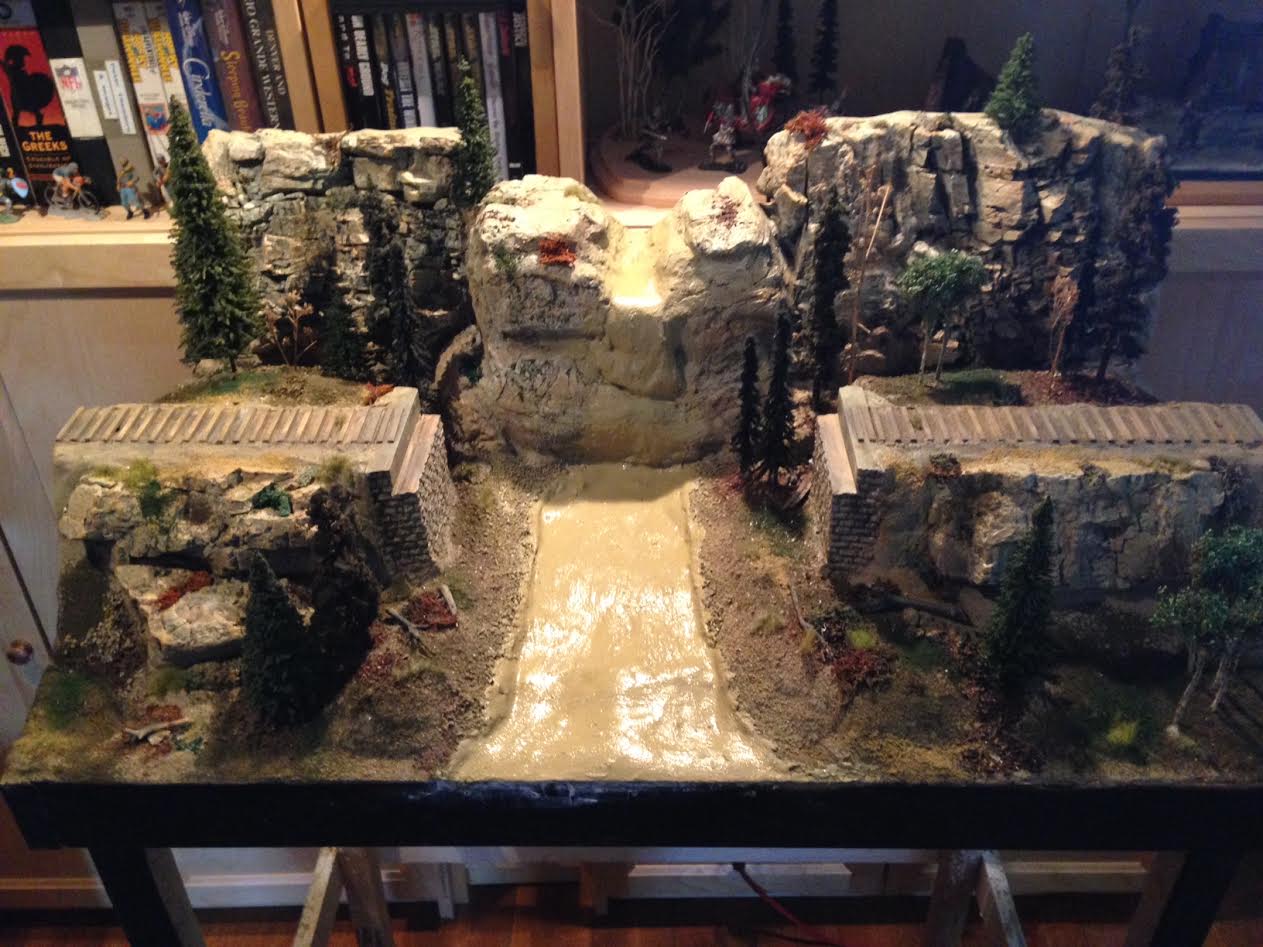
Once I’ve settled on a scene, I place the rocks where I’d like them to be and place the subject in as to get a picture of how it’s going to look.
I paint an earth color in depending on the geographical location, in this case a Colorado narrow gauge area.
Of course many colors are added later, but this is a base.
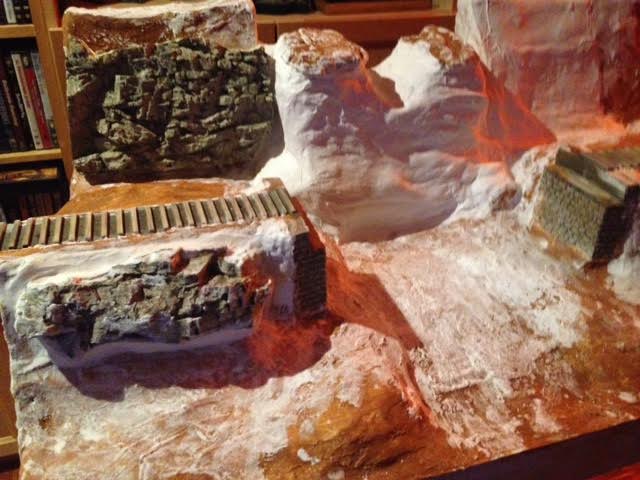
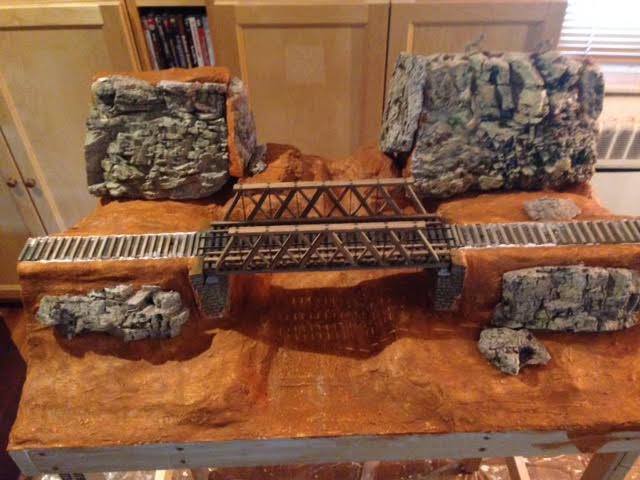
Rocks and bridge abutments are now being plastered in place and rock build ups I’d like to add, I wanted a water fall so I had to build up the center for height.
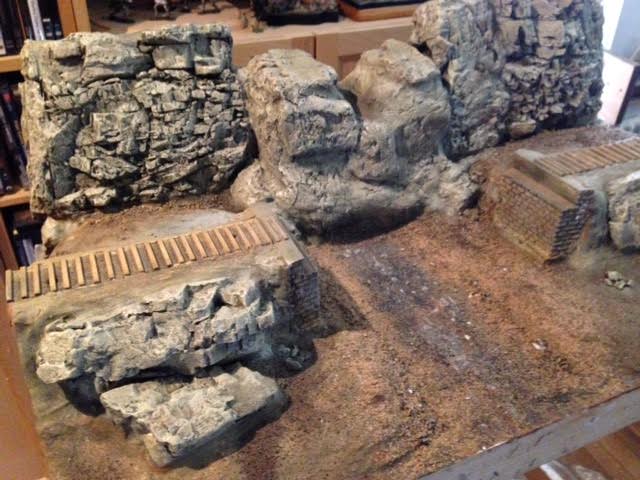
Rocks are now plastered in and I’m fairly happy with placement, this took some thought of course and didn’t happen over night. In this scene you’ll see I’ve added more dirt color, sifted sand and starting to add small rocks in different areas. The water bed is taking same as well.
Model railroad scenery design:
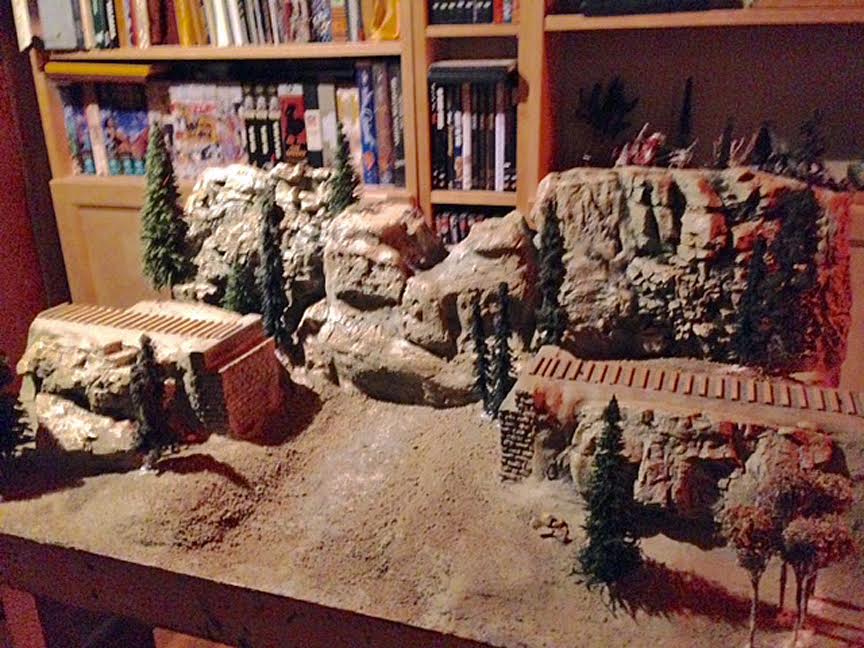
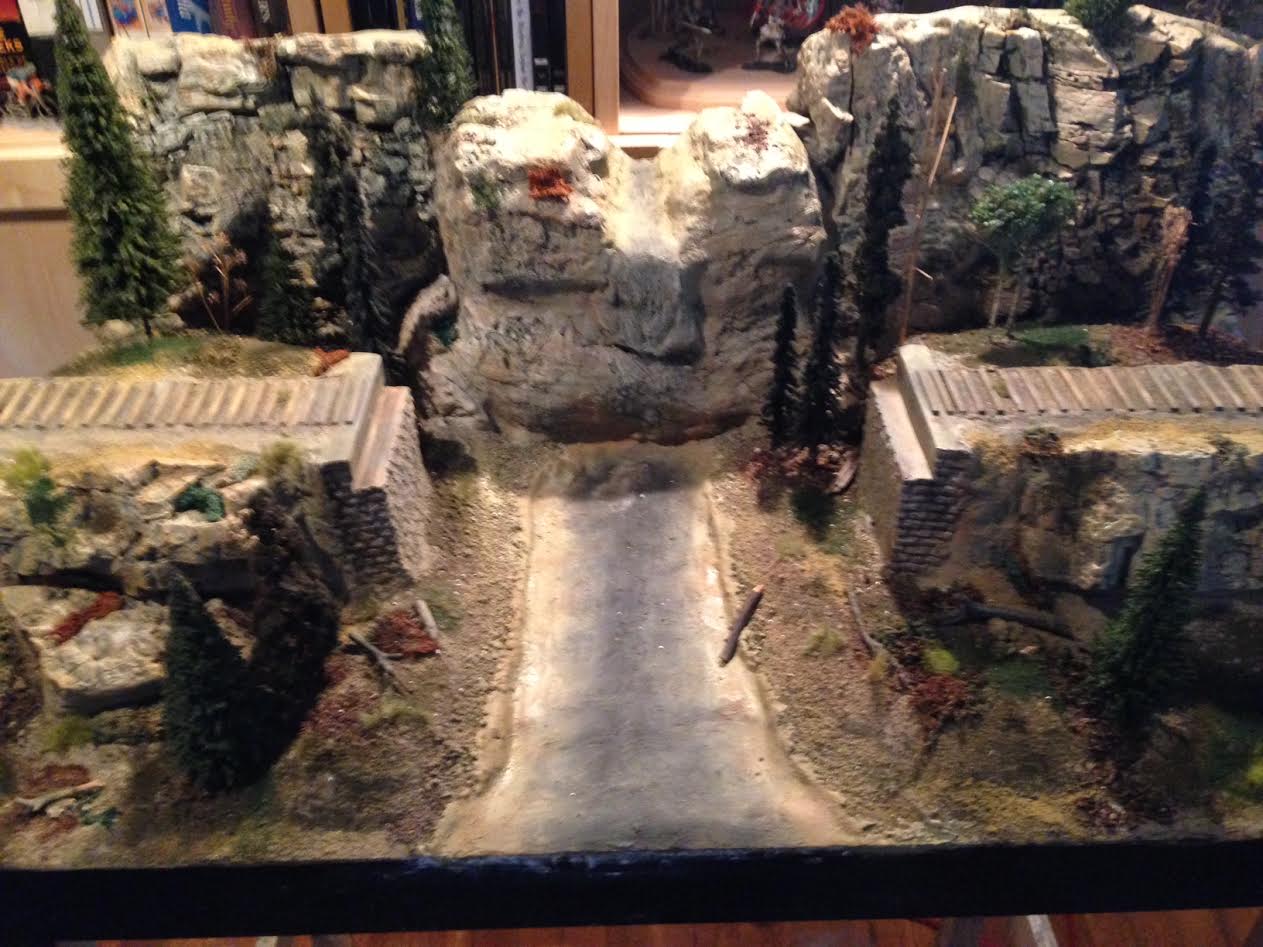
Once the rock, earth, water bed and general scene has been blended together I add my trees and rearrange them a few times for, a hopefully aesthetic taste with different kinds of trees and shrubs eventually. Now it’s really taking shape and I can almost smell the outcome.
I’ve now added ground foam and various ground textures of many colors, green, yellow, brown (all kinds available) including pieces of fallen tree limbs, driftwood etc.
The water fall and river bed are now coated with a thin veneer of plaster.
Once dry I give it a muddy base color, then paint the center of the river bed a dark color for depth. Rocks and driftwood are added to the river bed.
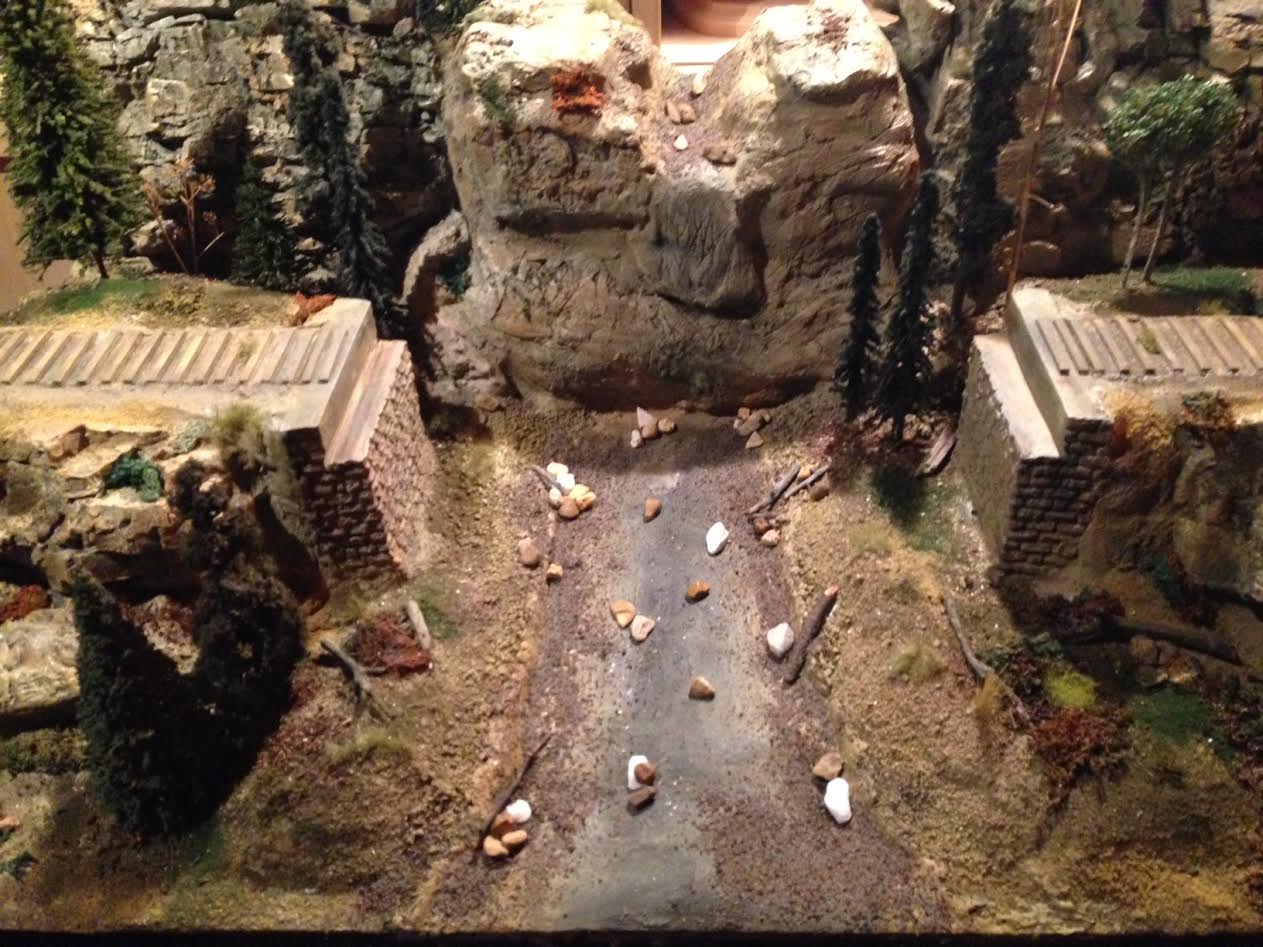
Once everything is dry river bed wise, it’s time to pour in the 15 minute two part epoxy with a tiny and I mean tiny bit of blue/green tint added.
If too much is added it takes away the clear water look and realism. Don’t forget to dam the front of any scene so the epoxy won’t run onto the floor..lol
The reason I use epoxy for years is that it dries completely flat which is good. because once dry I start adding ‘Liquitex’ gloss medium & varnish with a brush starting from the back to the front.
Many layers are added so the it creates movement to the water. Make sure each thin layer dries before adding a new one.
You can add a tiny tiny bit of blue tint to the first couple of layers (acrylic works best) . It dries clear so the effect is what I want & hopefully looks real.
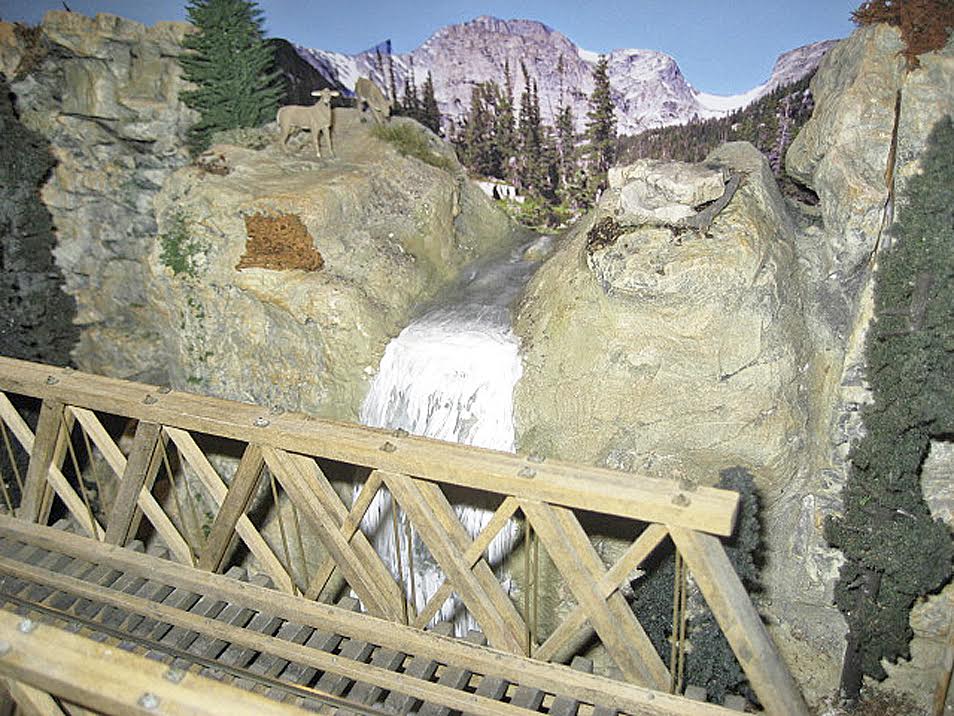
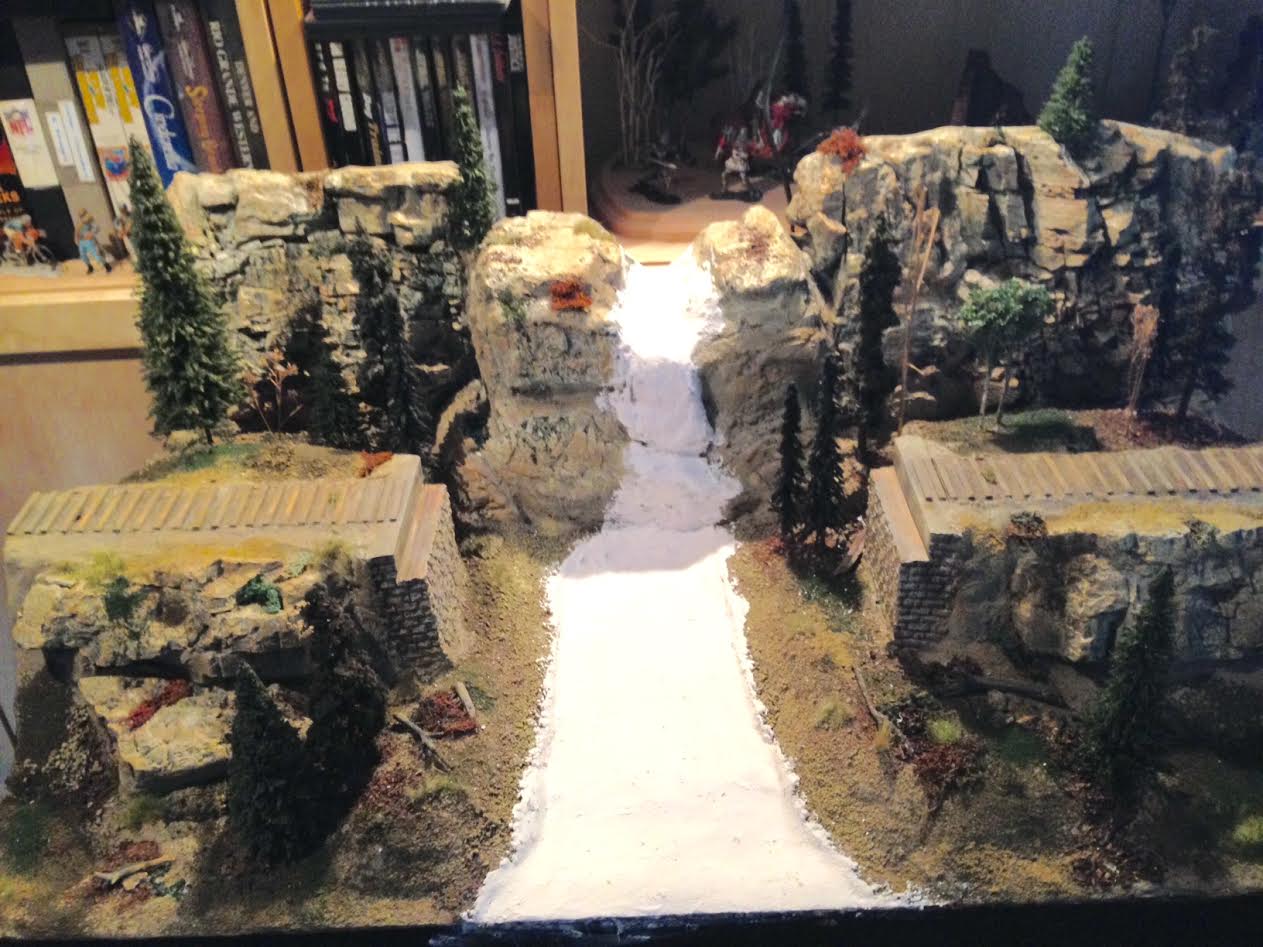
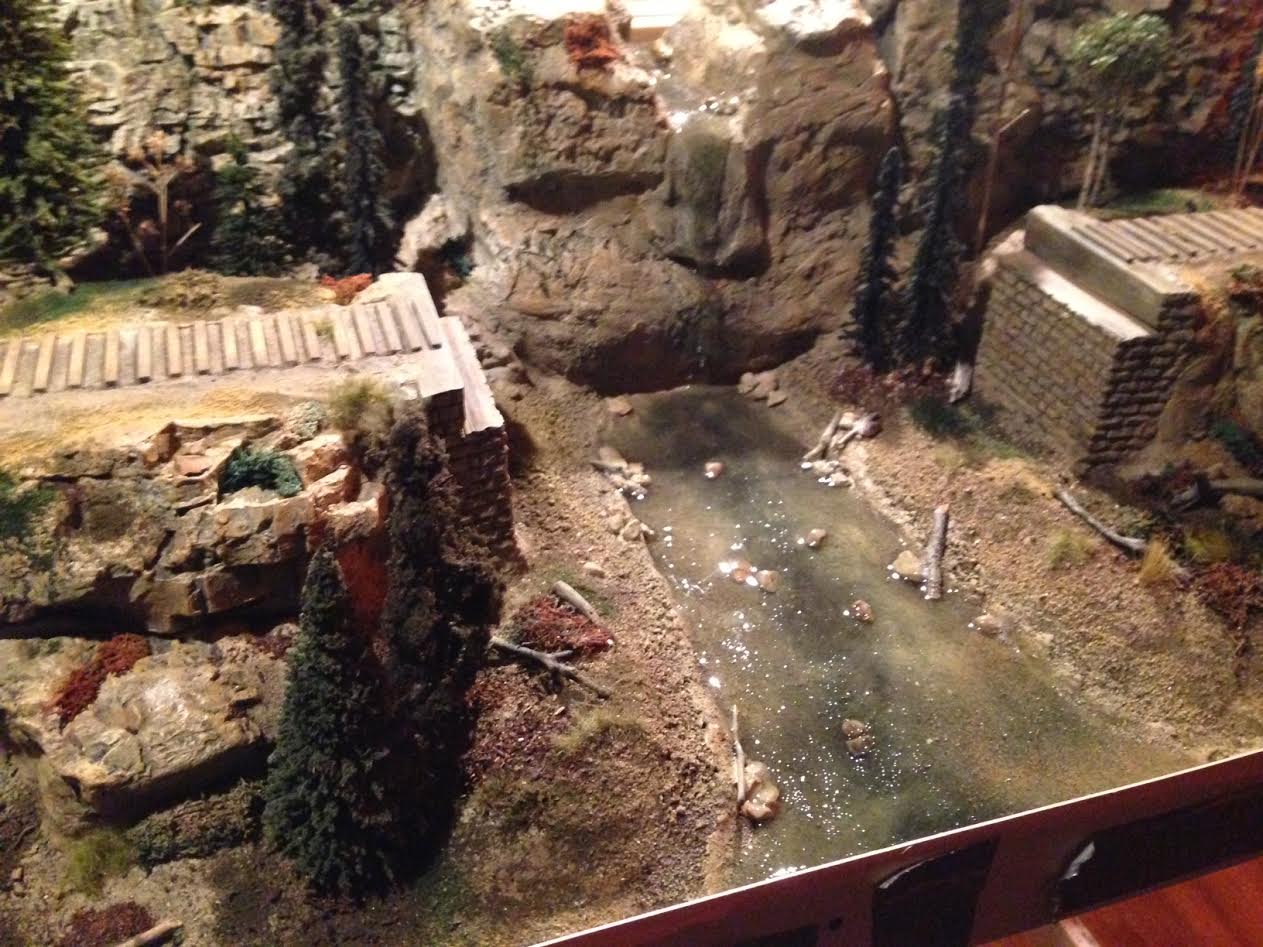
For the water fall, I used woodland scenic water effects (expensive stuff!) I measure the length & width of the fall. I use a Pyrex glass long baking dish to brush on the water strips, I say strips because it may take a few before your satisfied with the amount of white acrylic you’ve added so it looks fairly real.
Once you’re satisfied, you can use the water effect stuff to glue it in place and even use it to attach it to the bottom of where it’s landing.
Once dry and in place, it’s time to add more gloss medium to blend it in. I added more white acrylic to the gloss medium where the fall hits the river bed, around rocks and whatever else would cause water to ripple and have foam.
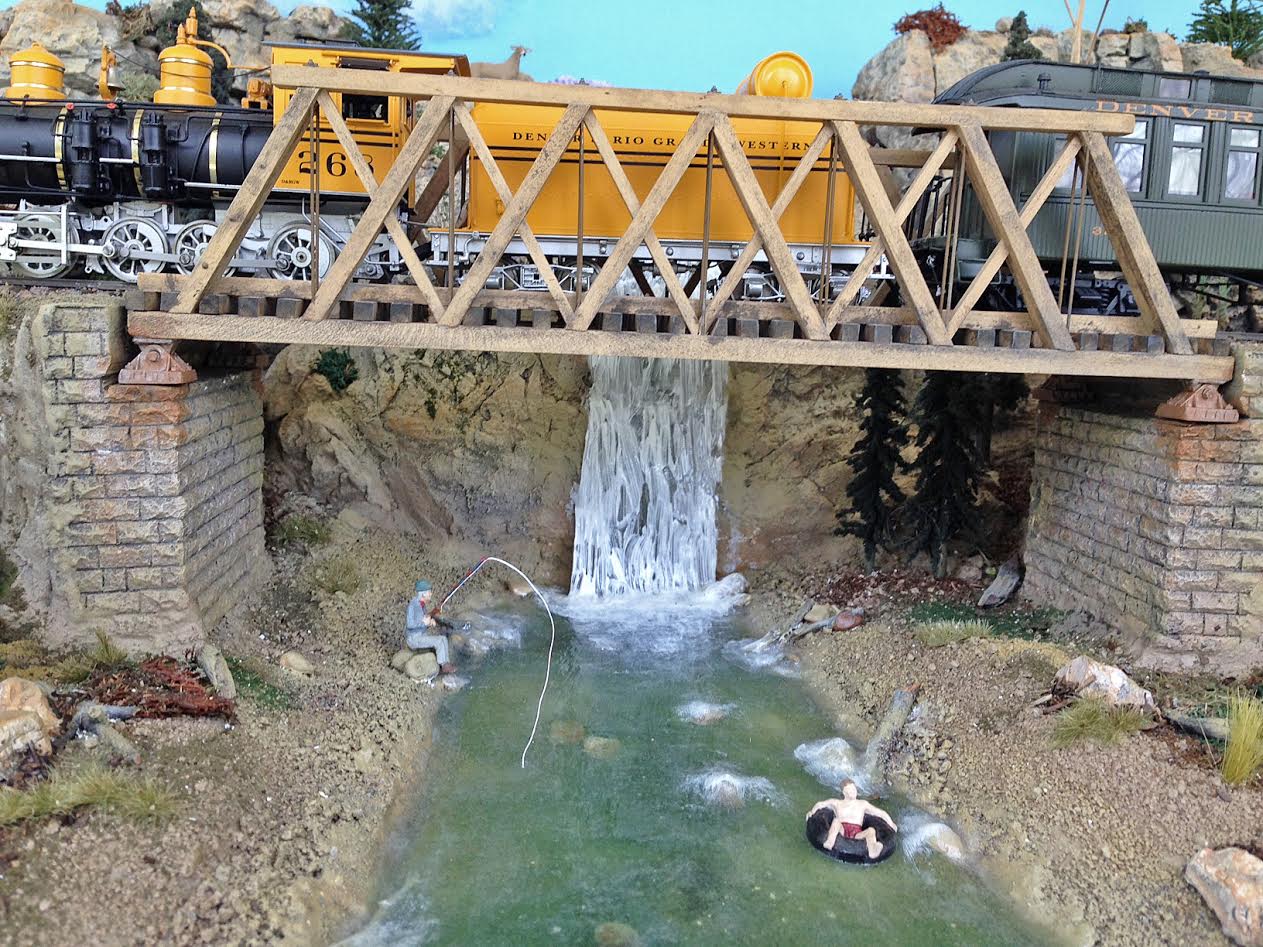
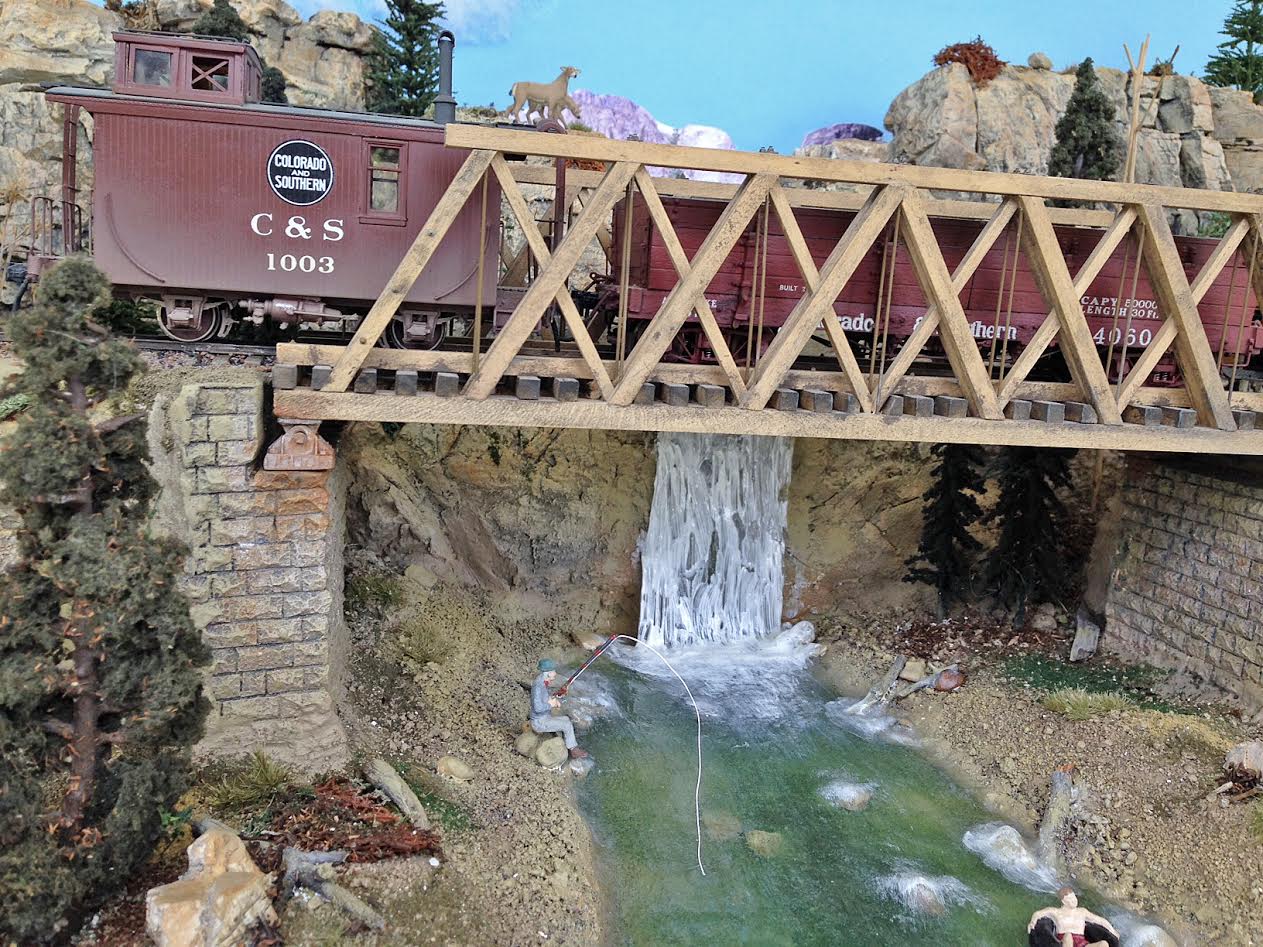
I lay the track rails once scenery is done and spike them in, Bridge can now be added and adjusted with shoes given a rusty color and any details around the scene I care to add just from observing nature. There’s more than one color to rocks by the way, there’s many bottles of paint lying around when I attack something like this.
Well, I hope folks can pick up a few things from all of this, I sure did from my many years in the hobby obtaining tips and technics from fantastic modelers.
Thank you, & best to you and all,
Peter”
A huge thanks to Peter for taking the time to put this model railroad scenery design post together. Hope enjoyed it as much as I did.
That’s all for today folks.
Please do keep ’em coming.
And if today is the day you decide to stop watching and start doing, the Beginner’s Guide is here.
Best
Al
PS More HO scale train layouts here if that’s your thing.
Need buildings for your layout? Have a look at the Silly Discount bundle.

Wow, what a wonderful diorama.
Such patience, to pull together the scene with so many layers!
The fisherman has patience, too, with that kid scaring away the fish! Lol!
The detail on the bridge, including the rust of the support pads, and the run-off of the rust, is great. Interesting use of tie bars in a wooden bridge; is it prototypical?
Will you combine this into a layout? How many such detailed scenes would you use?
Great how to. Thanks for sharing.
Cheers
Cameron
Beautiful work and great commentary. Thanks for the inspiration! Cheers! NJ Mark
Thanks for sharing. Very informative, easy to comprehend and great results.
Very nice work Peter and it shows a railroad is only as good as the scenery, a lot forget that fact and work hard building their track work but then let it down with the scenery that is put on as an after thought not planned from the start like you have clearly done. Well done.
Eric (Leeds) UK
No kidding Peter; your “step by step” procedure is awesome! Thank you ever-so-much for sharing your techniques with us.
Regards, Tom (USA).
One of the best how-to’s I have seen.
Well done…. looks very nice ! 👍
Nice tutorial. Yes the Woodland Scenics stuff is as we say in the south “they sure are proud of it”. So a much cheaper alternative is using Liqui Tex. Plenty of videos on youtube showing it is use so check and see if this is something you could substitute. I am planing a 35th scale large D Day dio in the future. it might have cost me close to $200 to use the Woodland Scenics stuff…less than 20 using a thing of Liquitex
Superb work, Peter. I am amazed at what you have accomplished. Please send more of your layout how-tos!
That was great Peter! Thank you so much for sharing!!
Patti in Curdsville, Virginia
Stunning finish and great tutorial, definitely helped a whole lot in understanding all the processes to follow. A big thanks for taking the time to share this wonderful part of your layout build with everyone.
wow, very nice….. looking good
Awsome
This “Step by Step” scenery clinic is fantastic!
Would love to see more like this…
I may be a “veteran” in the hobby (having built layouts for nearly 50 years now) but I can still learn from new ideas…
This is some of the most realistic “water” modeling I have seen…
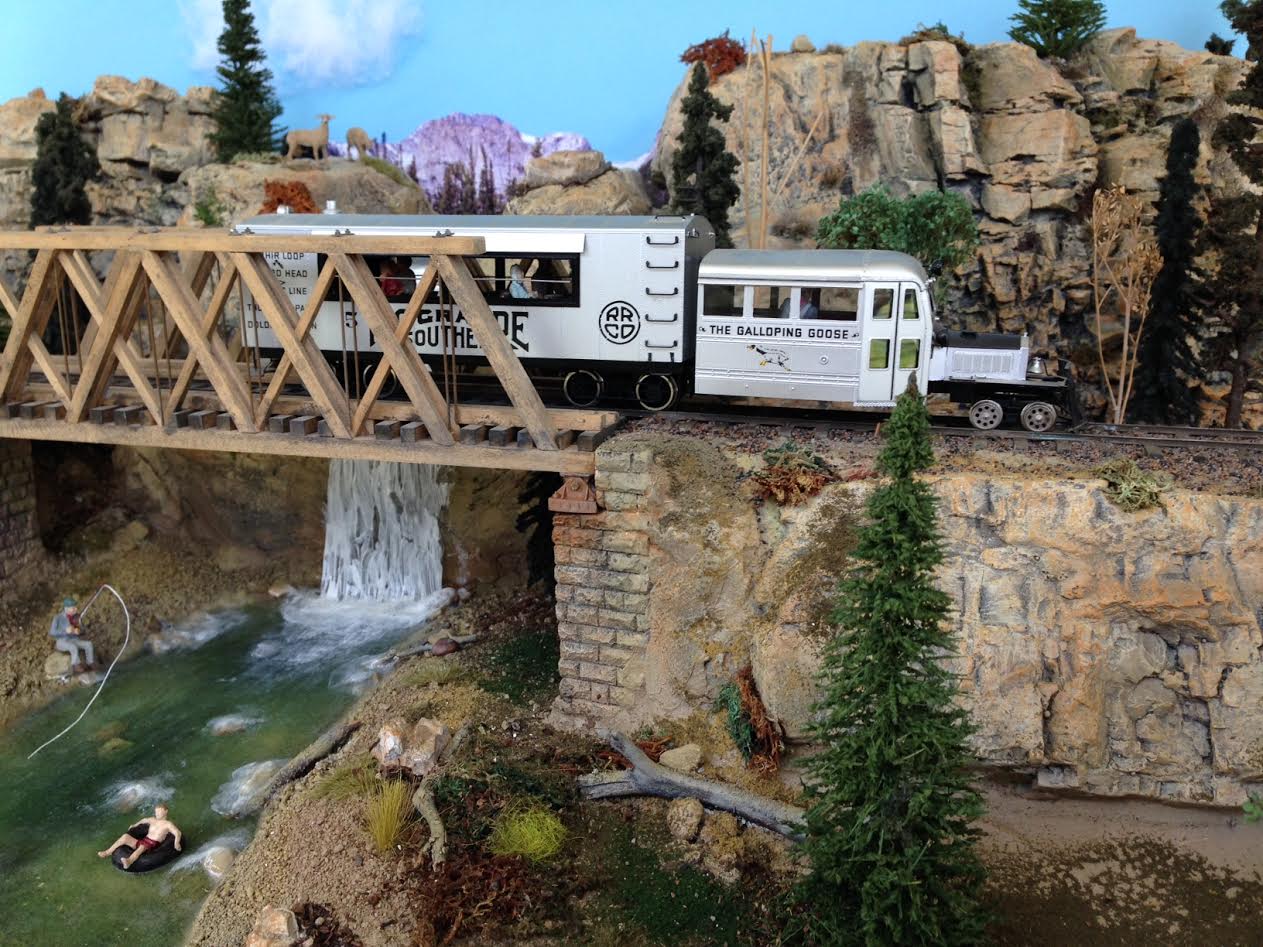
Thank you all for your wonderful complements, and much thanks to Al for putting it together. To the gentleman with the 1st reply. Yes, that is a prototypical Hermosa or Howe truss bridge , you can google for pictures of them. This will be part of a larger layout eventually. I like doing module scenes because for one, they’re easier to move and all can be electrically tied together. I’m going to combine standard O gauge with Rio Grande Southern On3 narrow gauge. Not going to use dual gauge track but they will be intertwined with standard O being more of an industrial look and the narrow gauge mostly mountainess with plenty of trestles and tunnels. For example; the standard gauge yard will be a module in itself. Thank you for the ‘Liquitex tip, I will certainly give it a try. I agree Eric, scenery makes it for me as well, George Sellios is a great example of that. I for got to mention how important backdrops are. Other than using the wall and painting in whatever, I found with modules a light sky blue foam board works for me too, I experimented with clouds and came up with an idea to use white fiber stuffing, it can be pulled out in various thickness that you desire and applied with Elmer’s clear spray glue. Then stick your tuft of cloud on for a 3D effect. The glue also crates a slight shadow behind the cloud. Thanks again all and we’ll keep doing our things Be well , Peter
I’m impressed with your comments and pictures of this beautiful project. Kudos
and plaudits to you for the time and efforts you put in. Great work!
Wonderful job. Peter. I was with you until you talked about the glass Pyrex dish, then , well not sure. The effect is wonderfully done.
Mn Dan
Very realistic!
That’s a great job!! Well done!! wish you were my neighbor . HAGD
Great tutorial Peter! I especially like the fact that you build the scenery before laying the track. That’s the way prototype railroads have to build their track. The addition of the mountain photo backdrop really completes the illusion that we’re looking into a real waterfall and bridge scene. Thank you for sharing your methods with us. There’s always something new to learn in this hobby.
Pretty kool.!!!!!!
.All great scenes begin with a first step. And patience. Thankfully the patience part is free!
Fantastic outcome from your wonderful narrative! I, for one, would love to see more of your ideas and work Peter. Thank you for sharing this outstanding presentation and tips!
Roger in Clarion Iowa
A project any of us can do!
Peter
Thanks for that thoughtful treatise. Shows that it takes a lot of work to put the artwork together. Love to see more.
Simple yet beautiful! Very detailed landscape and diorama. Love that detail!
always loved the bridgework. very nice work.
Excellent step by step how to , great job looks awesome.
I’m applauding your tutorial, and Peter your landscape is absolutely as good as one can be. Water colors are tough, but you managed yours so well. I have something in mind like yours, and you have given me the right set of tools to work with. Congratulations sir!!!