There are quite a few train diorama ideas on the blog now, here’s Peter’s.
“greetings from central florida here are some pics of a 2×2 foot train diorama i finished a while back .sorry for the first few blurry pics hope you enjoy
PEACE PETE”
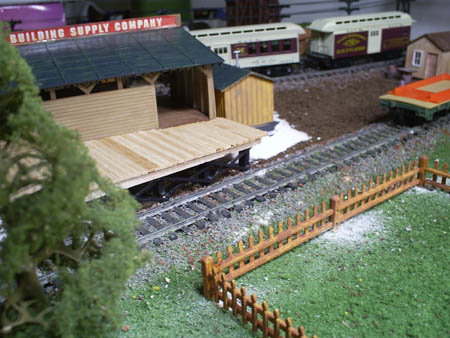


It’s amazing how much Pete has packed in to his 2×2 train diorama. Just goes to show lack of space shouldn’t stop you having a layout.
Please feel free to add ot the train diorama ideas – I love seeing them.
Now on to Steve:
“Some tips I have come up with:
1. for station strip lighting (or any cheap LED lighting) try using the 5m reels of smd leds (about £7 on ebay in 2 013).
The reals can be cut every 3 led’s (5cm)and are 12v ready – though i opperate them at 9 v as i find them too bright at 12v.
They are also self adhesive and can be painted with humbrol enamel paints if needed.
My12 platform cathedral roof station would have cost £150 to light with brand lights instead it cost about £5 (I still had 1/3 of a reel left for houses/shops). you alsohave the option of two colours: cool white for fluorescent lighting and warm white for incandescent
2. Want a panal of turnout indicator lights on your DCC layout without the expence and hassle of micro switches? (this method even shows that the frog has connected rather than just showing that the motor has thrown).
Simply add insulating plates to the “V” and solder a separate wire up from under the base board to each arm of the V. run the wires back to the control panel and add a LED and 1k resistor.
All the leds (of the same polarity) then just need 1 common return to the respective output from the control unit or bus. NB not worried about wether the frog has completely thrown – simply wire or solder the anode of one led to the cathode of another (you can even use just one resistor).
In this way you only need to run a single wire from one arm of the V with 2 much shorter common return wires to the respective polarities of the controller or bus. 1 wire being attached to all the led anodes and the other to all the free cathodes
Steve”
“Hello Al,
just thought I’d pass on a scenery tip that our club had used successfully a number of years ago and I’m sure it’ll still look fine today.
We took the flowering buds from a grove of wild sumac trees and let them dry for a week or so. You can get these in random sizes and they’ll make fine fir trees.
We used an out door oil base stain tinted green for the foliage and clipped the stem level and inserted a 2 – 3 inch long brass thin rod for mounting. Individually placed or clustered on a hillside makes a fine scenery point of interest.
thanks for your tips,
Jim”
Now on to Paul:
“Hi again Al,
Here are some more photos for you.1st is a photo of a GWR 56xx Class 0-6-2 tank loco, which I weathered the same as the Jubilee.
The other photos are of the Jubilee with a load of crushed coal in the tender.
Plus other photos of Bachmann and Hornby wagons with coal loads.
Paul”


That’s all for today folks.
And if you want to make that start – your layout won’t build itself – the Beginner’s Guide is here.
Best
Al
PS Latest ebay cheat sheet is here.


Hi. Could Pete send in a diagram of the way he wires up the leds and the resistors with regards to the frogs. Regards Keith
Pete I would love to see the wiring diagram of your turnouts with the led lights. Thanks in advance for your reply.
Nice layout. I hope mine turns out that way.
Great layout!
Would also like a wiring diagram.
ok lost here, it is 2×2 is ir part of a larger plug and play or is it a 2×2 layout? LMK
I echo Keith’s request for a wiring diagram…and although this is an old post, hope AL forwards the comment and re-features the topic with the diagram