Dean’s been back in touch with his latest missive – plaster cloth mountains – and they look great:
“Al, from Dean from New Mexico.
Here is the next installment on my Conejos Valley Railroad layout construction in which I continue the scenery and build a mountain. I’m using a slightly different construction technique compared to how I built the hill in the last installment.
But first, some history if you don’t mind. When the Spanish moved into the new world, they quickly populated Mexico, then moved north to as far as central Colorado (as evidenced by place names such as Alamosa, Salida, Buena Vista, and Pueblo). Towns such as Durango, Antonito, and Chama were named by the Denver and Rio Grand Railroad when they came through and set up the towns as railroad towns.
I picked the name, Conejos Valley Railroad, as it is a real river valley in southern Colorado and is a conceivable place for a real railroad.
What’s in a word! Conejos, means rabbits, and people like me pronounce it conehos, although the Spanish j is more uvular. In an earlier blog, someone (with tongue in cheek) noted a similarity between conejos and cohones. Spanish is all about vowels and here are some examples:
Conejos — rabbits
Cahones — drawers (in cabinets not pants)
Cohines – cushions
Cohones – look it up!
On to important things.
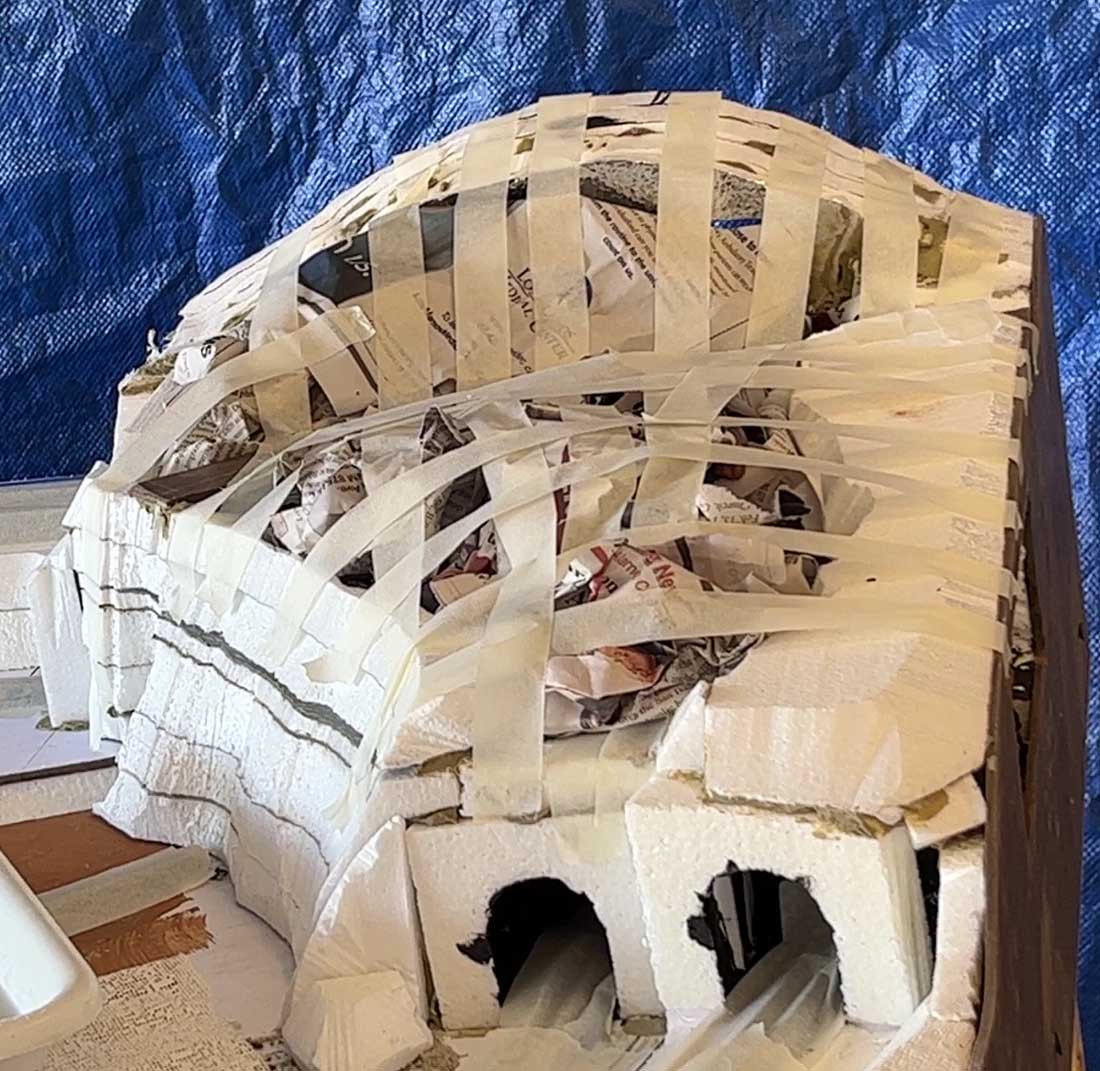
I started building the mountain using layers of cut and glued Styrofoam. But as it got higher, I wanted more internal space, so I switched to an alternate method using plaster cloth over tape and wadded newspapers.
In retrospect, I should have used more strips of tape as the resulting hill was too bumpy. Tunnel entrances were cut from the Styrofoam.
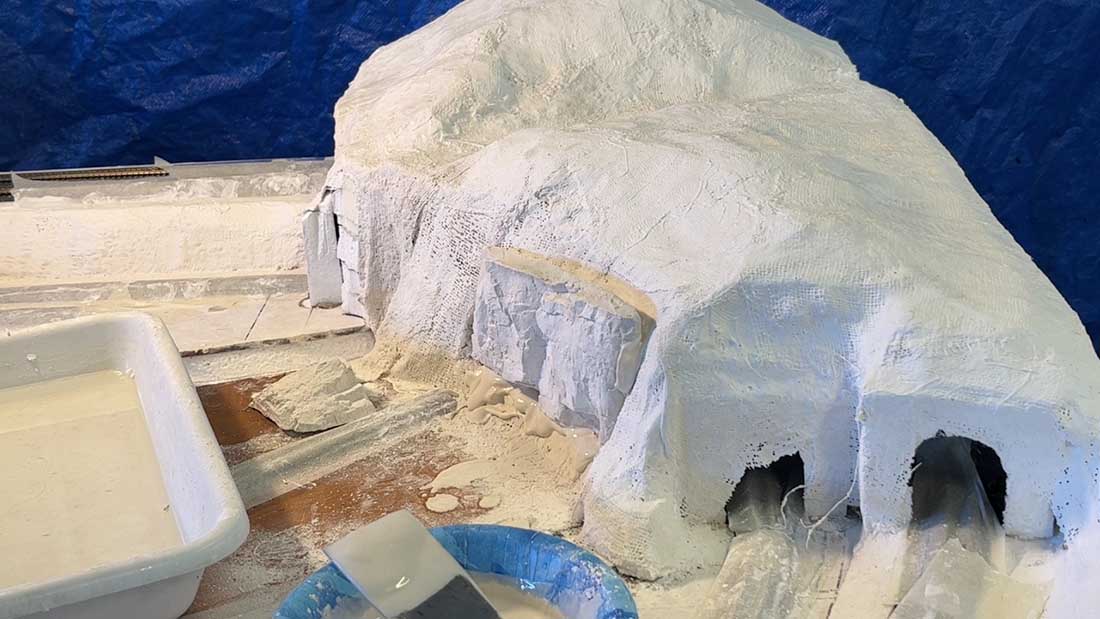
The formed mountain was covered with two layers of plaster cloth soaked in water.
Rock castings (using Hydrocal) were placed into the mountain and plaster mixture was placed between them and carved to form more rock formations.
Incidentally, I waited too long, and the set plaster was very difficult to carve.
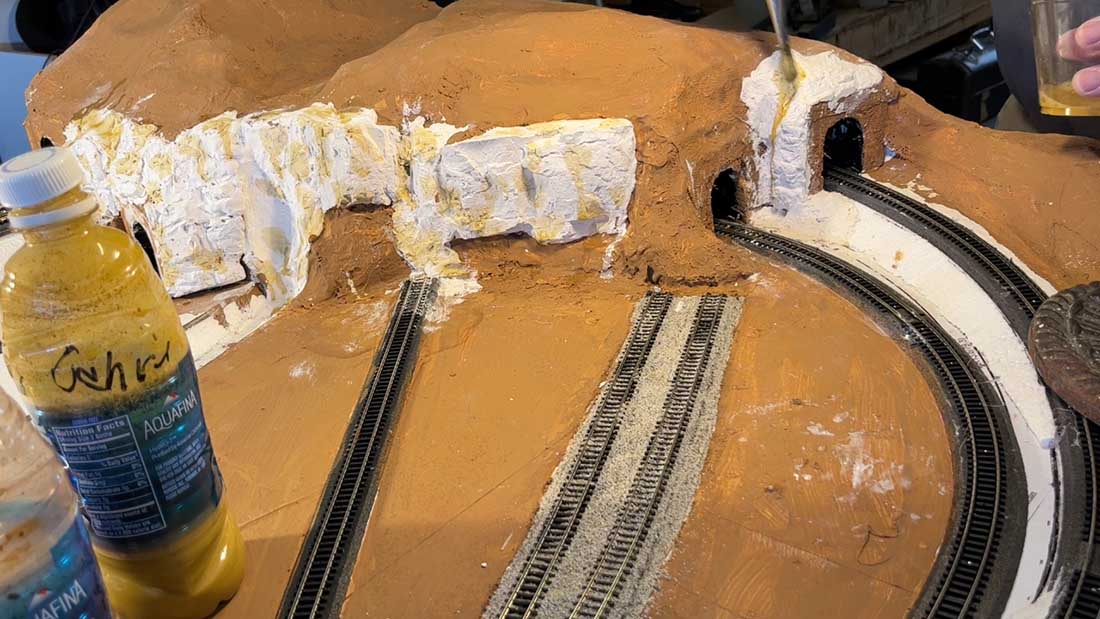
I painted the areas representing dirt with my usual paint mix, and then spotted the rocks (with Yellow Ochre and Burnt Umber) and colored all the rest of the rocks with Black.
All stains were acrylic artist’s paints highly diluted in water.
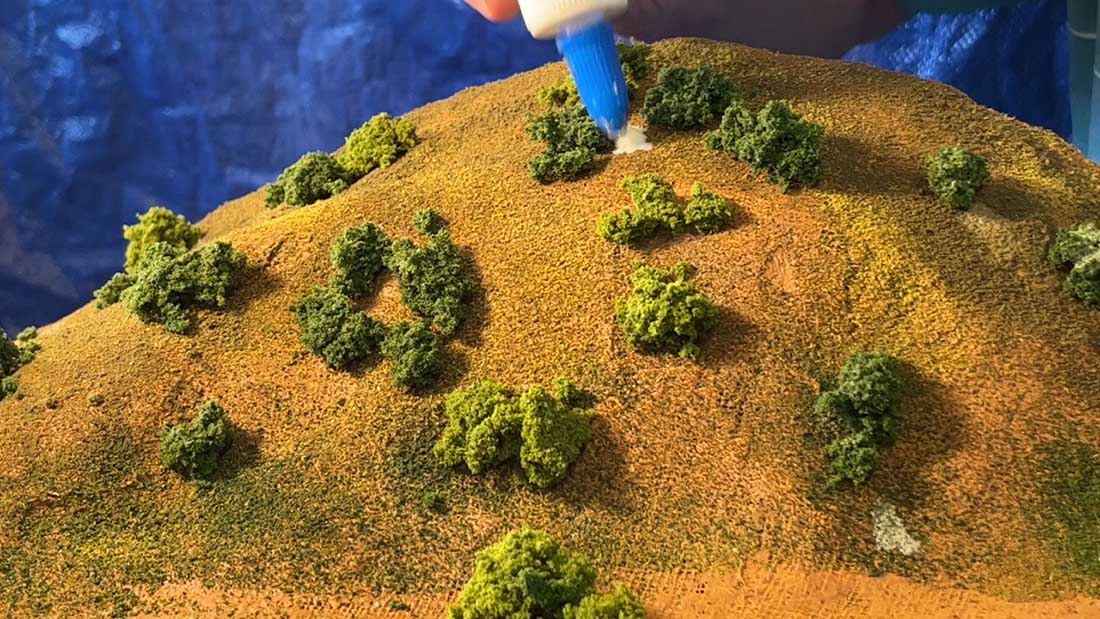
I then coated the surfaces with dilute White Glue (1 part plus 1-2 parts water) and spread ground cover somewhat randomly over the wet glue.
I used my usual Earth, Yellow Grass and Green Grass Fine Turfs (all from Woodland Scenics). I used minimal Green mostly along the river bed.

Finally, I glued (with White Glue) Light Green, Medium Green, and Dark Green clump foliage (Woodland Scenics) to represent trees and bushes.
I’ll add deciduous trees along the river when I form it and the waterfall through the valley.
The stained tunnel portals were fastened in place with Joint Compound. And here is the final result. After cleaning the tracks, I ran some trains which you can see below.
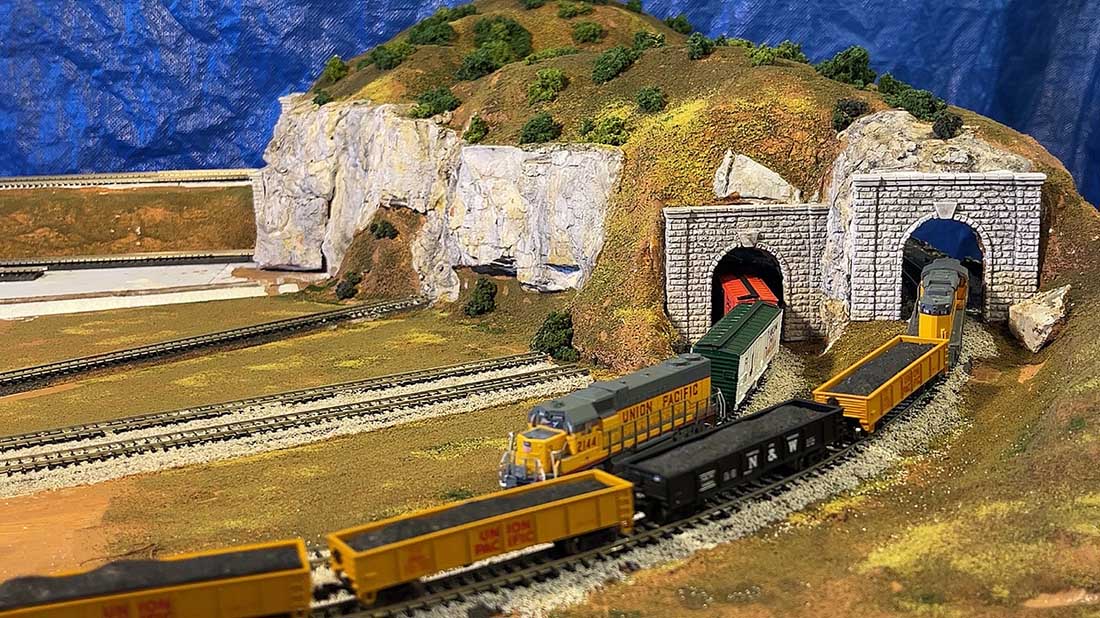
Next, I’ll add a small central hill, streets and roads for the towns and industries, and finish the river and waterfall.
Thanks, Al, for all your support.
A big thanks to Dean for sharing his plaster cloth mountains step-by-step.
That’s all for today folks.
Please do keep ’em coming I’m nearly out of stuff to post…
And if today is the day you get going on your layout, just like Dean, the Beginner’s Guide is here.
Best
Al
PS Latest ebay cheat sheet is here.


Hi Dean, the construction of your plaster cloth mountain has been very well explained using that method. I have used the same method using both plaster cloth and styrofoam on my layout. Very easy to use if you are prepared for the mess although it is a clean mess and cleans very easily and quickly. Well done.
Brian – the HOn3 guy from Knysna RSA 🇿🇦
Dean, Nice going on the terrain building. You are certainly doing it the best way. Masking tape is a modeler’s best friend. It has so many different uses, it is truly a perfect tool. Good post, Rob McCrain
Dean
I am using strips of cardboard stapled together in a somewhat tight mesh which will be my bi level train tunnel/ mountains. That precludes use of rolled newspaper. That mesh has some form and strength for the plaster cloth to go on and then it hardens nicely.
I’m looking for the rough, steep, rocky look so I force it that way. Then it’s follow your instructions for the finish.
Much thanks for the narrative and nicely done scenery.
Big Al- ” A fine mess you’ve gotten us into.”- LOL
i like the terrain, very nice, and light weight.good idea.
Al: Thanks for the informative tutorial, nice job! I also use plaster cloth to make hillsides and find that crumpled newspaper or brown wrapping paper work well too. Color is dependent on what scene one desires , I like the diluted acrylic paint approach to creating the rock look desired. I find portals can be tricky, especially a double portal since various cars have different “swing” during turns, I have had to sand down the portals on the sides to allow for the ” swing”. Your layout look greta!
John H. for LI, NY