Brian’s been back in touch with a cautionary tale on track curve radius:
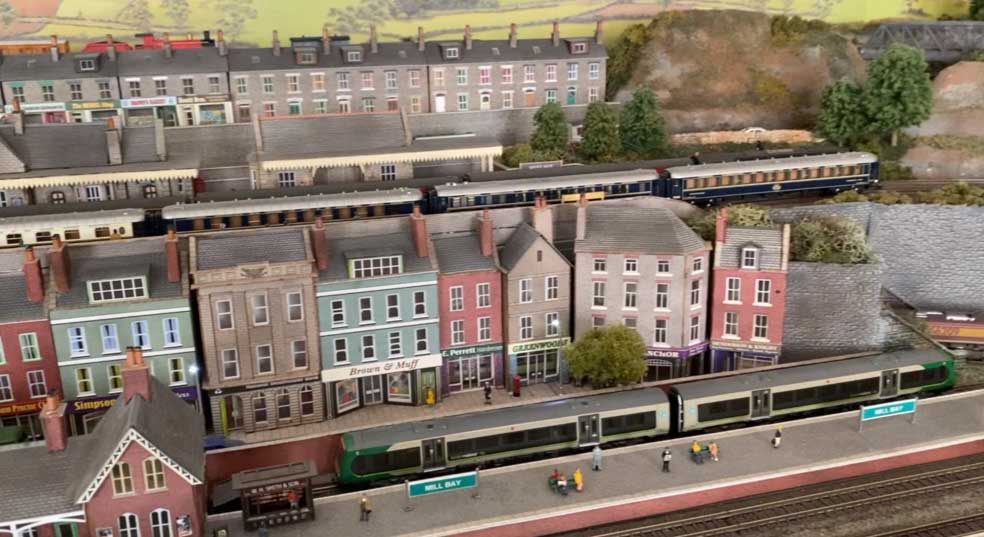
“This saga started nearly ten years ago when I retired and decided, with the financial manager’s consent, to build a new ‘engine’ shed in the garden to house an N gauge railway,
which you will have seen in previous videos, and shown again a few days ago on Al’s daily ‘blog’.
It was all planned back then on paper incorporating mostly Peco set-track curves giving the maximum curve radii in the available width of the layout – Peco curves No.1 ST12
and No.2 ST15.
As the layout was planned on three separate levels, I did use some flexible track to make the curves on the lower level to reduce joints (and possible long term
problems).
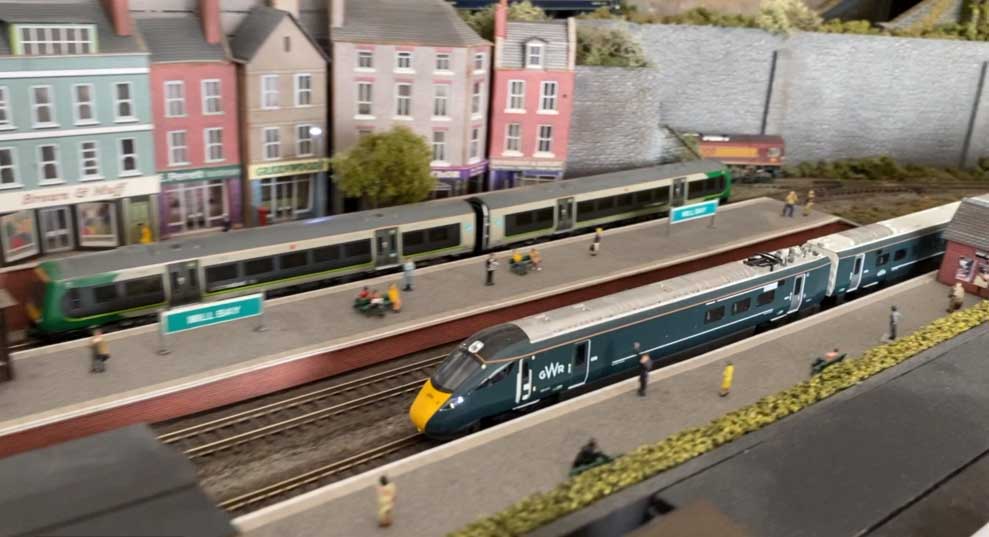
Now despite what everyone says about layouts never being finished, within 18 months Grandpa’s Wonderful Railway (GWR) was complete with scenery and running smoothly to the Grandchildren’s delight and that’s been the case for several years since.
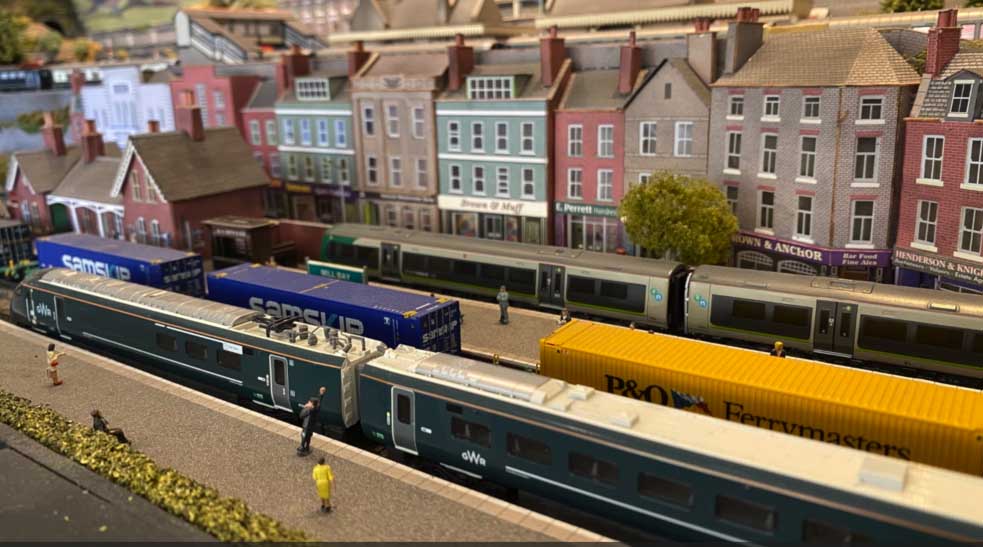
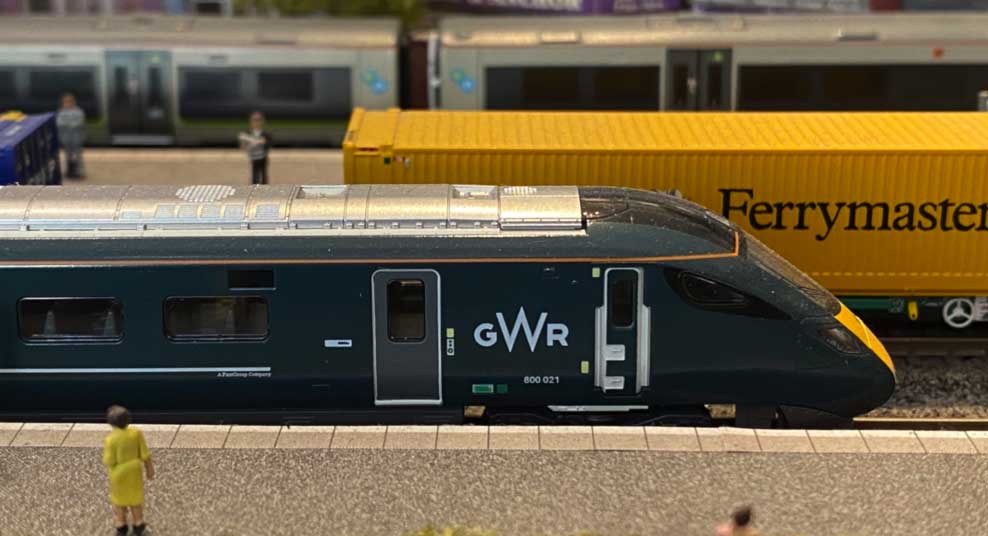
However, things started to go awry back in 2021. That year, Kato released their Hitachi Class 800 five-car model in N gauge, in both UK operator liveries, GWR (Great Western Railway – Intercity Express Train) and LNER (London North Eastern Railway – Azuma).
The Class 800 (Electric/Diesel) trains came into service in the UK in 2017 for GWR and 2019 for LNER. I had to have one on Grandpa’s Wonderful Railway!!!!!
Mine arrived, and as expected with Kato (you may remember my Kato Orient Express post/video on Al’s blog) the engineering and detail were exquisite. Out of its presentation case, and on one of the bottom level tracks, it looked great.
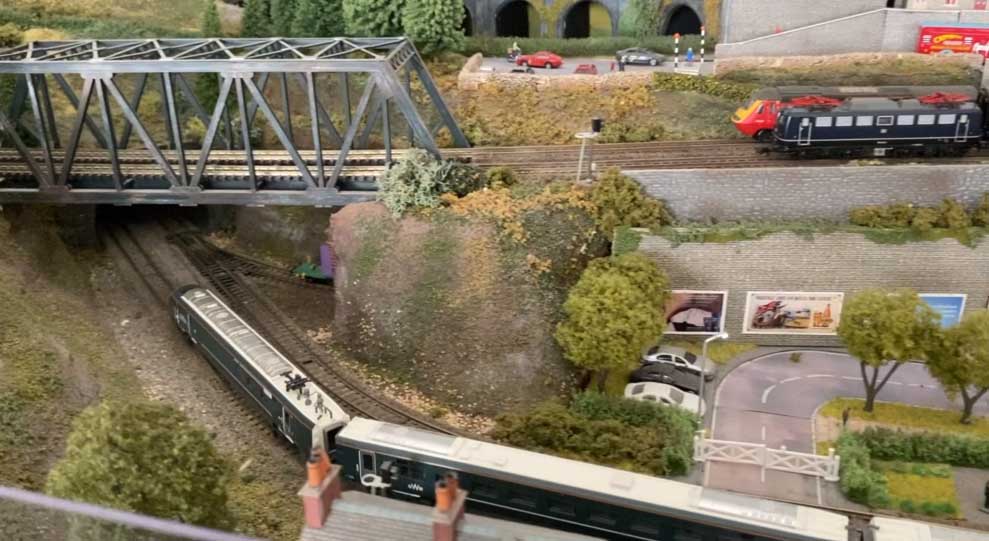
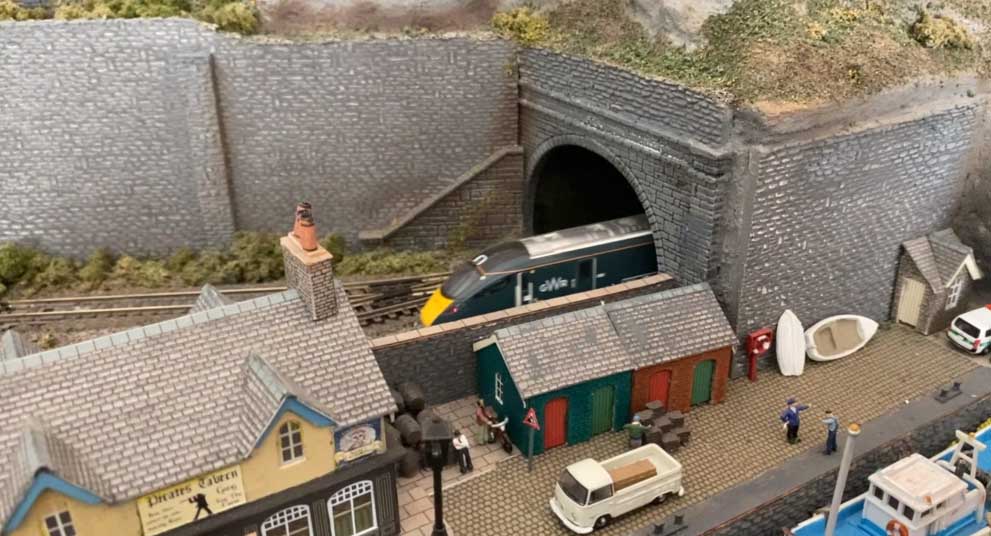
On the parallel track in the other direction was a Virgin HST (Class 43). They both disappeared into the tunnel but didn’t come out! Investigating, the two trains had made contact on the curves at one end of the circuit and derailed.
I had reduced the radius on one of tracks in order to form a reasonable size inspection ‘hole’ in the baseboard for me (or one of the Grandchildren) to clean the track from underneath.
I hadn’t had problems before on these curves with other trains, so it was obviously down to the Class 800 longer units. The only solution was to run each train on that level separately, one in the station and the other operating – not a major problem.
When Al put up one of my previous posts recently, I thought it would be a good idea to put together a video of my Class 800 running and give a cautionary word on ensuring curve radii are maintained on parallel tracks.
So, in an effort to identify exactly what I’d done and give accurate information, I went out to the layout this morning to do that.
Unfortunately, in eradicating spiders’ webs from the offending corner the hand held vacuum cleaner nozzle clipped the track and dislodged the flexible track joints which formed the curve! The track separated, sprung out of the sleepers and is now ruined!!
On a readily accessible part of the layout, a repair would be reasonably straightforward, but the damage is to the lower level circuit, and very difficult to work on. I’ll now have to think of a way of repairing the damage without removing the baseboard, track and scenery above it.
Morals of the story –
1. Make sure that you maintain recommended spacing between parallel curves for various trains. Ideally, try and include the maximum radius possible.
2. Make sure that you have access to any hidden track for clearing derailments and cleaning track.
I hope you enjoy the Kato Class 800 video I’ve included.
Best to all.
Brian, Wokingham, UK”
A big thanks to Brian for sharing his track curve radius advice – parallel curves feature quite often on the blog, clearly the are particularly troublesome.
Please do leave a comment below if you have any advice to share.
That’s all for today folks.
Please do keep ’em coming – it’s still looking like I might be putting my feet up in a day or so.
And if today is the day you get going on your layout, just like Brian, the Beginner’s Guide is here.
Best
Al
PS More HO scale train layouts here if that’s your thing.
Need buildings for your layout? Have a look at the Silly Discount bundle.

I’ve heard we’re never more than 6 feet from a spider. Sorry to hear one did so much damage. Love the setup though. I guess the spider did, too.
Reread Brian’s comments – change my response to include multiple spiders. 😀
good job. i like it.
Brian
Awesome layout.
You identified a problem and the solution to it also which when in the planning stage is not so readily a concern nor obvious. That’s what engineering is all about.
So what’s the answer- maybe the 8th layout try will get it right?
I suspect you’ll get a lot of would-ofs should-ofs but you created a masterpiece, told us about some pit falls and that makes you- Da Man! Much thanks for that.
Brian , great job , your display is very clean , except the spider, really a nice layout , great detail and scenery . Grandkids will be on you to make another .
I have two elevated tracks that run parallel throughout , there are many curves to contend with . Takes a lot of trial and error and patience, but it’s worth it when it works .
Love the monogrammed engine, GWR. Nicely done.
Great video of your excellent railroad. Nice detail. Your words of advice are well taken. My layout is in three car garage the also is my man cave. I constantly have issues with spiders and palmetto bugs, aka cockroaches. They us love to eat plaster. So I have our bug man take care of them each month.
Congratulations Grandpa on a nice looking layout. The new 800 looks great too and would be a super addition to any railroad. I’ve seen the picture at the end in a video on Youtube with huge waves smashing against that wall and hitting the buildings beyond. A fantastic sight. Have many years of great fun with your railroad.
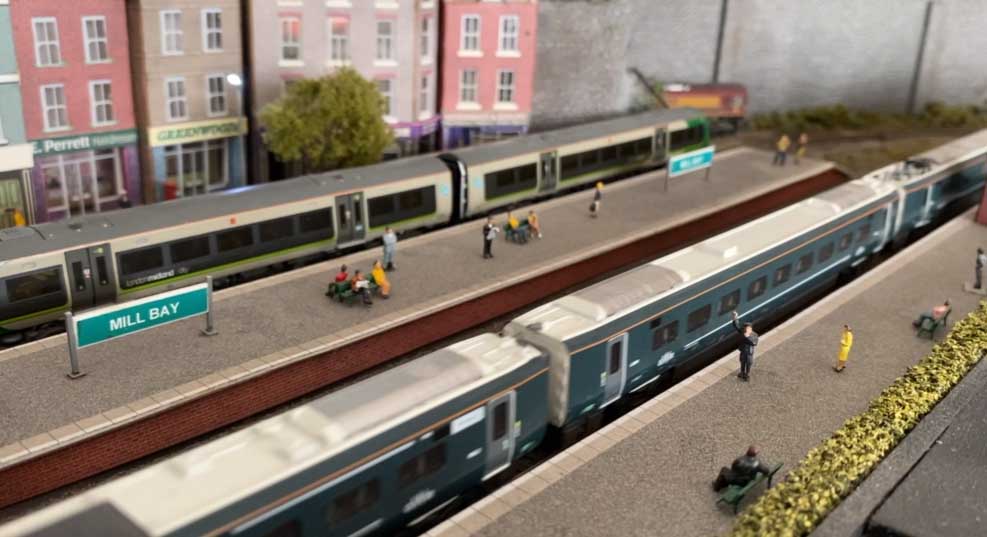
Watching the train leave the station and take the curve at 20 Secs the coaches look significantly longer that the standard length coach we have used for many years on our model railways.
I recall when the Eurostar trains were first planned for London/Paris/Brussels there was much engineering work on the bridges through Kent to prepare for their introduction and the route taken had to avoid tunnels. I do not know if there were also modifications to any of the track alignments
Lovely layout Brian, I had a similar problem eith my HST and some
American Diesels. The ‘Nose has gone PAST the TRANSFER POINT’
known as ‘Advance and Transfer’ in nautical (and Aero) terms where the
mass has to slow down to be able to take turn ‘Transfer’, being a passenger
in your ‘ own car’ is a goog example, you want to keep going but the car says
‘No’, we’re going this way, the ‘Transfer’, and around you go. anyway, back
to the problem, collecting anything coming the other way. I solved the problem by laying ‘EASEMENTS ‘ on the ends of straights to bring them ‘into and ‘out ‘of the corners . Looks neat too when you see the LOCO ‘elegantly swing into
the corner’ instead of the driver’s ‘G-FORCE’s Experience hanging on to the brake pedestal with both hands!.
I’m not clear on what was dislodged, the track joints (ie where one length of flexible track joins the next with fishplates holding the rail ends together) or, one of the individual rails has been pushed out of the chairs (clips) on the sleepers (crossties). If it’s the latter, that length of flex track has definitely had it, I don’t know of any way to restore that, except possibly pulling the rail out to an undamaged section and feeding it back into the clips one by one, which would probably mean lifting the track completely first anyway, you certainly couldn’t do that still in the tunnel. If it’s just the joints have come apart, and you have a hand hole below the scenery, could you locate the break and push a marker up through the scenery above the fault (eg a bradawl) you might find you could cut a small, more easily repairable hand hole to rejoin the track below? Of course you could do what the real thing has done on occasion, which is install sets of points outside each end of the tunnel where you can reach them, and run single line through it!
really nice.
Loading gauge is always something to pay attention to. Full sized railways must account for it too. What a lovely railway though. Your 800 seems to run very smoothly. When designing curve radius/spacing I always design for the worst case and then add a comfortable extra margin to account for the unknown future.
Rob
Great job with the scenery and detail Brian. Love that GWR and as Rob says it runs really well. Very nice railroad- thanks for sharing.
Wonderful railway
I probably dont have a firm understanding of the problem, but perhaps you could cut the track outside each end of the tunnel in an accessible area, and remove the track. Then mount a new section of track on a piece of plywood whose thickness is equal to the remaining rail bed. Prewire the section.Slide the track/ plywood unit into the tunnel. Connect the track and scenic the ends
You could try removing both sets of track from the tunnel, then take some suitable plywood, shape it to fit the tunnel floor, set new flexitrack on it, test it for clearance between trains, then insert it from one end of the tunnel to the other. It will, I guess, be curved and if you cut it right , it should slip into the tunnel easily without too much surgery to the scenery.
I also try to avoid rail joints in tunnels, hence the use of flexitrack, which gives longer runs between joints, and allows you to form the easements (gentle lead-ins) that Wayne mentioned. If joints are unavoidable, make sure that the joints are smooth, and well restrained so they can’t come apart or distort.
Awesome set up. back in the early 70’s I had a N scale set u in my bedroom till my nephew one day whale I was at work he destroyed my set up. I wish I had a camera back then. I had a wooden trestle going up in to a mountain. I had some buildings on it and adding every so often. I even had six engines. When my brother and I move back home to help mom My total set was stolen. I was planning to put up a big table
I even bought a new steam engine to put on it.