Glyn has been in touch with his take on scenic backdrops for model trains:
“Hi Al,
Thanks again for all you do for us through your blog.
Recently you have had a few posts about scenic backdrops and blending them into the foreground. It thought I’d add a few images which might be helpful.
Having made plenty of mistakes in the past, this time round I made sure I constructed my backdrop first and then painted it to match what I proposed to create in the foreground.
This obviously requires having a definitive track plan in place with some idea as to what scenic vignettes you want to model in the foreground. With that in place I started building my scenic elements from front to back using a combination of Construction foam, Woodland scenics shaper sheet (a little goes a long way), plaster and paper towels followed by application of rock molds using re-usable molds from a variety of manufacturers.
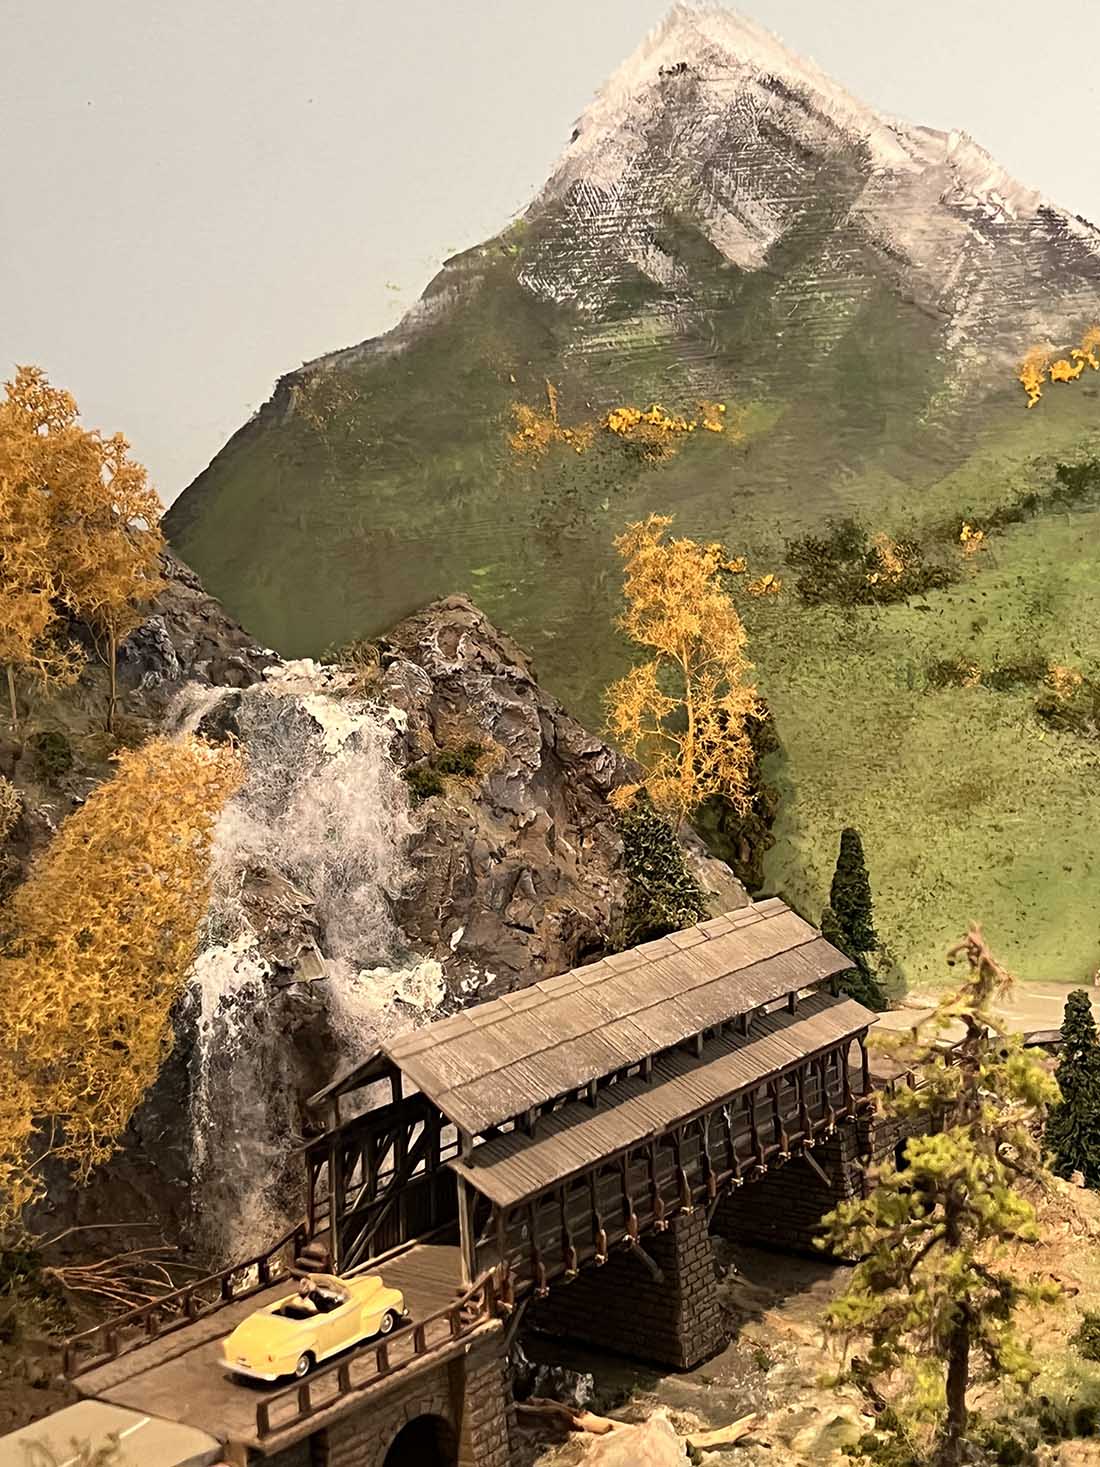
I create the foreground scenery (mountains, valleys and pastures) to go all the way to the back of the layout so that it almost abutts the backdrop. It’s important not to leave large gaps although smaller gaps can be plugged with vegetation.
Once the plaster is dry, I paint it using simple off-the-shelf artists acrylic paints available at hobby stores, using Woodland Scenics “leopard spotting” technique with burnt umber, black and yellow ochre.
The colors you use may vary depending on the final color combination you want for your rocks.
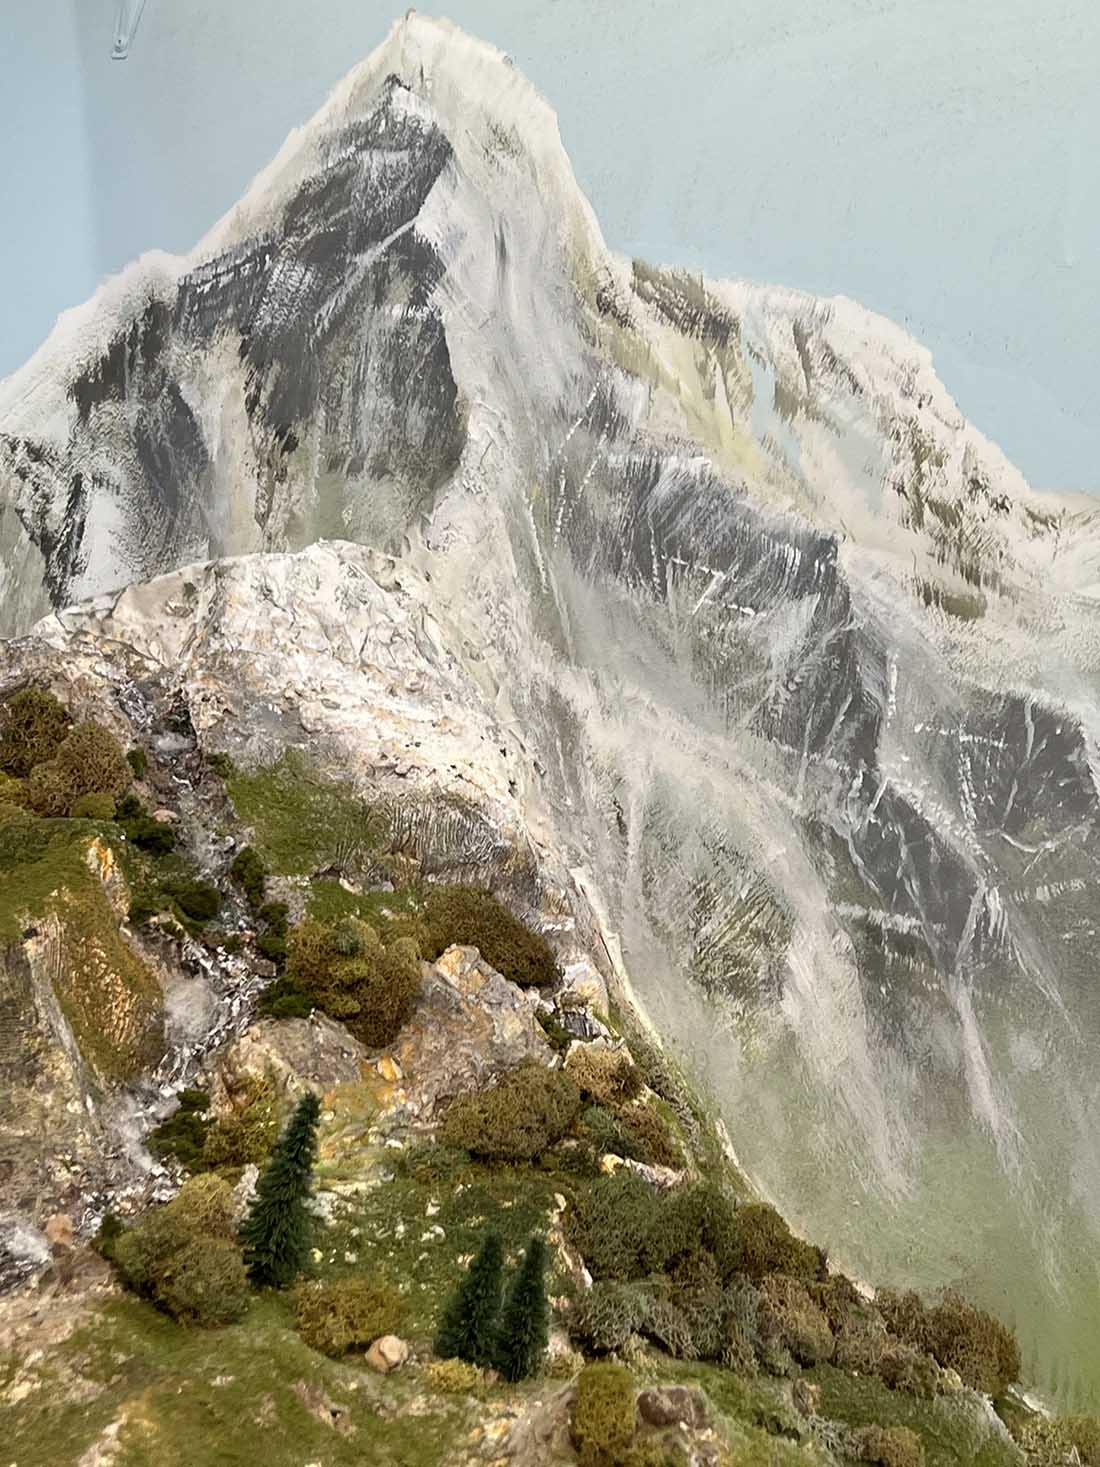
Once dry, I dry brush rocks with white to create and enhance highlights as well as giving depth to the rocks. This is a really important step as it gives tremendous 3-dimensional detail to the final outcome.
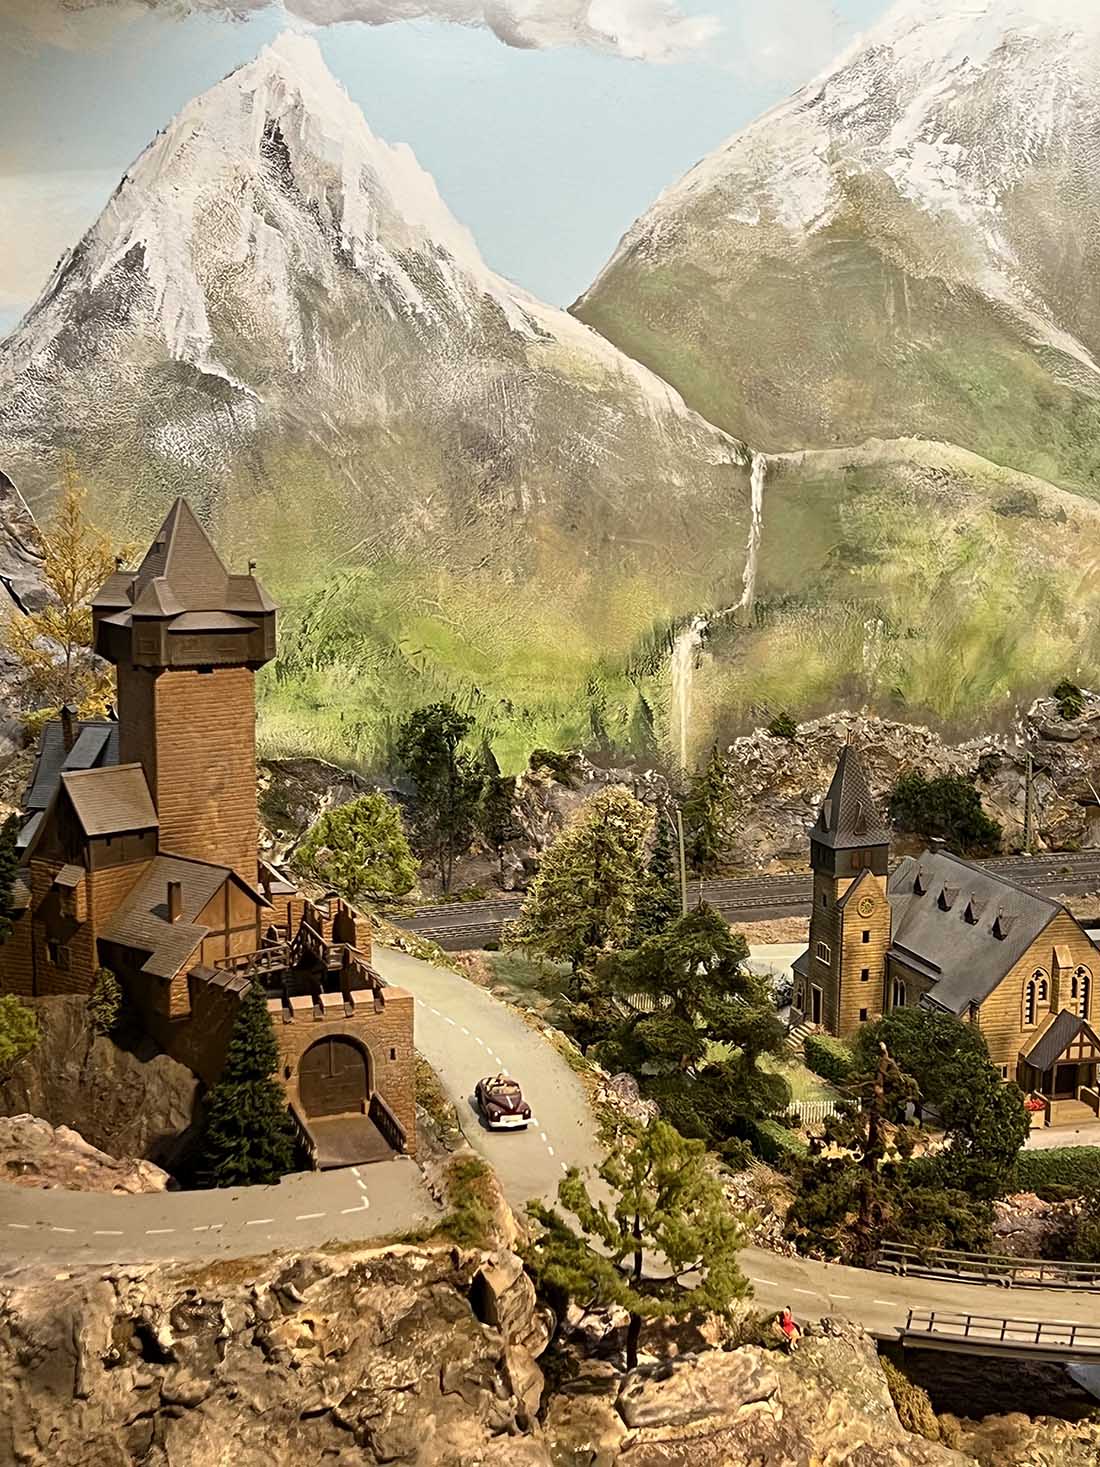
I try to match mountain peaks or rock features to the backdrop so that I can blend the transition with paint to make it appear as seamless as possible. Occasionally, as with the tallest mountain in this series, I will even pack a little plaster into the junction with the backdrop to make it appear completely contiguous.
Once this is done I step back and add paint or vegetation in the form of Woodland scenics clump foliage or small rocks as needed. The results can be quite realistic with a little time and patience.
You don’t have to be an artists to achieve this – just some imagination and studying real scenery.
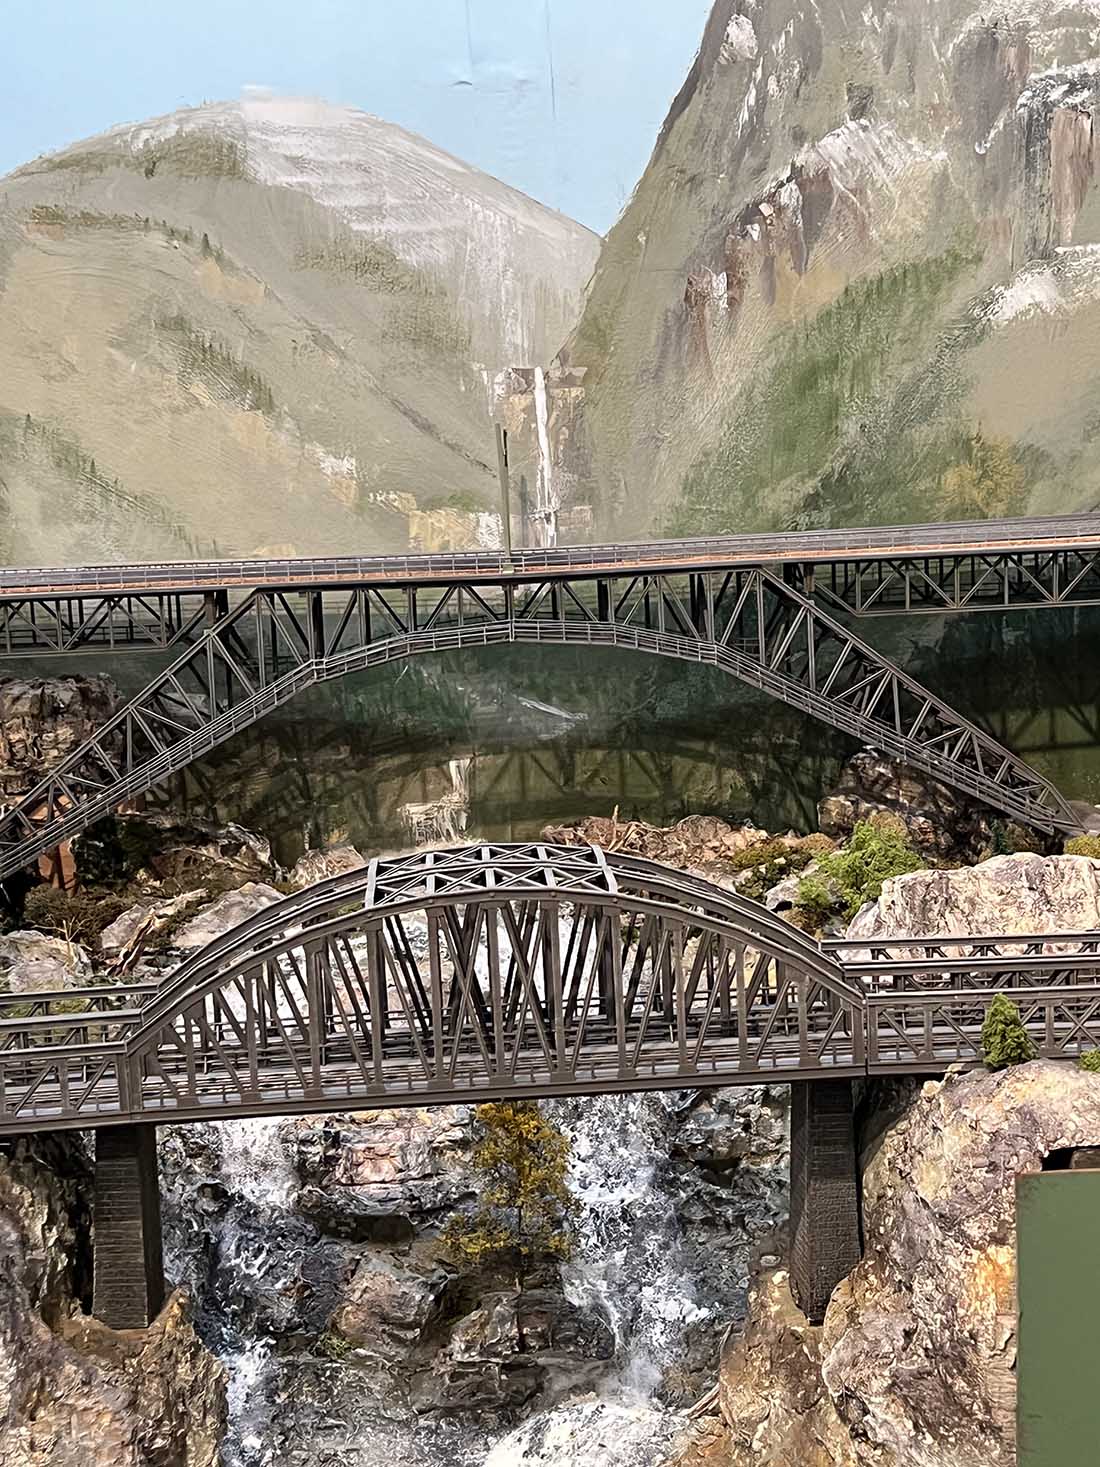
The large bridge scene I created required convincing distance for the mountains, river and waterfalls. I used some photographs I’d taken to paint the backdrop and added a distant waterfall as a source for the river that would terminate in the waterfalls beneath my bridge construct.
Start by painting the distant mountains light progressing to darker with more detail as you approach the foreground. Using rock molds beneath the higher bridges created more 3-dimensionality and the depth I needed to create the dramatic waterfall cascading beneath the lower bridge span.
Using these simple principles you can achieve convincing realism at little expense without resorting to buying expensive scenic elements. Re-usable rock molds are invaluable and making your own trees using the many techniques described so well in Al’s blog can save hundreds of dollars.
In the end it’s all about having fun and being creative!
Glyn in Santa Fe”
A huge big thanks to Glyn and his tips on making scenic backdrops for model trains.
I have to say, I absolutely love Glyn’s stuff. It’s easy to see why when you look at his previous posts:
There’s also quite a lot of useful posts on backdrops now – here’s a few of them:
Painting model railroad back drops.
Model railroad photography backdrops.
Now on to Brian.
“Hi Alastair, attached is a video tour of my layout taken a couple of months ago.
I have done a lot on it as you would have seen from photos that I have sent in before.
I was unable to get it from my cellphones video camera up until now.
It is a 360 view of my train room.
I Hope that you can use it.
Brian”
I liked Brian’s video purely because like most people I’m a little nosey.
I like seeing the rooms people work in and how their set up is – I think that’s why all the best posts, as well having good close up pics of the layouts, have a pic or two of the layout in situ too.
That’s all for this time folks.
Thanks to Glyn for his scenic backdrops for model trains, and to Brian for sharing his layout room.
Please do keep ’em coming because it’s still really quiet this end.
And if creating your own model railroad is an itch you just have to scratch, the the Beginner’s Guide is here.
Best
Al
PS Latest ebay cheat sheet is here.
PPS More HO scale train layouts here if that’s your thing.

And there’s the Silly Discount bundle too.

Master Builder Brian. Harbour scenes are stunning – well done!
Best to all.
Brian, Wokingham, England.
Glyn, Lovely work. The mountains, the waterfalls, the valleys, the settlements, all very interesting. Your layout is very artistic.
Brian, What a well-done layout. It is very orderly. Your panning video is perfect for us to get the big picture on your train room. Thanks for that.
Rob
Glyn love you Marklin layout, being a Marklin man myself, I’m a total Bavarian Marklin collector. Have you heard of ETE GROUP? European Train Enthusiasts they are all about European Trains. Just An FYI
THANKS AL FOR YOU GREAT WORK
love the scenery, also the bridges, great.
Glyn, your waterfall effects are very convincing! It’s very difficult to achieve a realistic look, and only a few pull it off as well as you have done. Kudos!
BEAUTIFUL, very nicely done.
Eric Retired Firefighter St. Louis Missouri area.
I think that’s the best backdrop I’ve ever seen
Glyn, great suggestions on creating and blending backdrops with foreground scenery. You are a master at capturing the look of snow-capped mountains. I’d still like to know how you got real running water on the waterfall under your bridges in your earlier video. All in all, very impressive work. Good luck with all those FSM kits and please send more photos / video when you get to work on the American end of your layout.
Brian, your HOn3 work is always an inspiration, and your video of the whole train room gives us a better sense of how you’ve managed to get so much fine modeling into a fairly small space. I have lots of HOn3 engines and cars but never seem to be able to translate that into a layout I want to build. I guess some of us are collectors and some are builders. You’re obviously a great layout builder. I applaud your design of basically two layouts in the same space without feeling the need to connect the upper and lower layouts with a helix.
One of the best scenery’s I’ve seen posted. Great job.