AL:
I have learned so much from your readers and thought I would send you one of my pet projects. My layout is still far from being complete. Much detail to do.
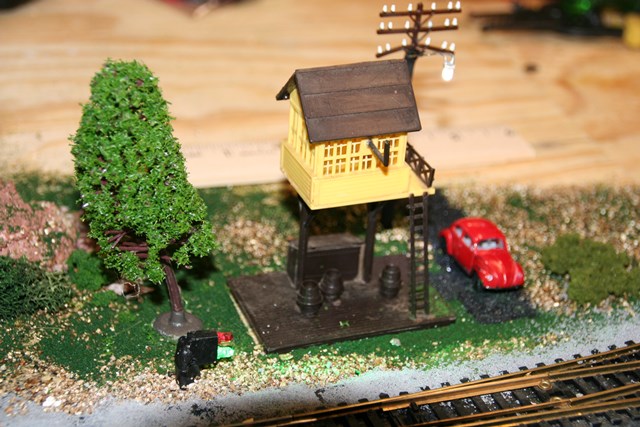
But I always see layouts with street lights, but haven’t seen any with street lights on the telephone poles as in my home town.
This project is so simple and easy it is insane !!!! And you can make these up in less than 10 minutes each, once you do the first one.
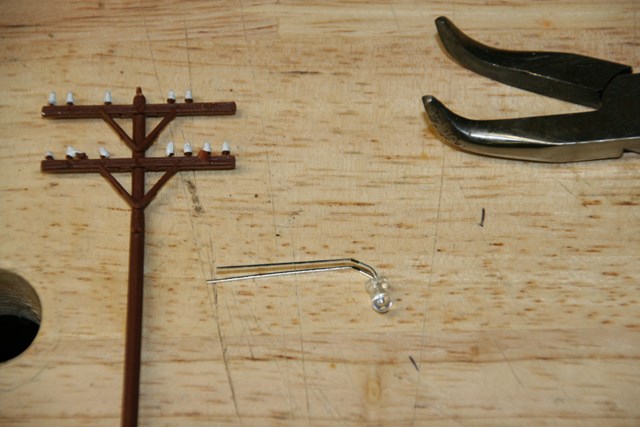
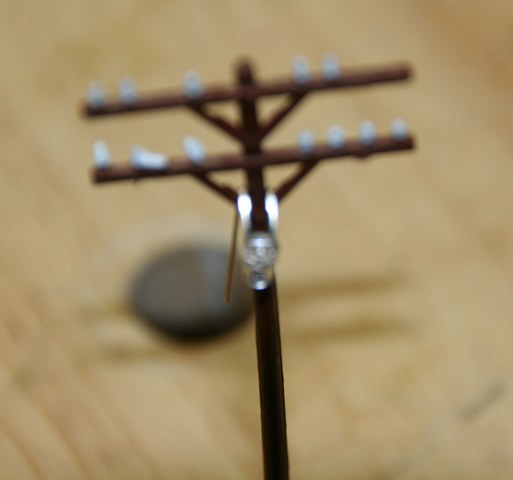
1. Slide LED legs through the side braces on standard telephone poles.
2. Bend the LED slightly so you have a downward angle.
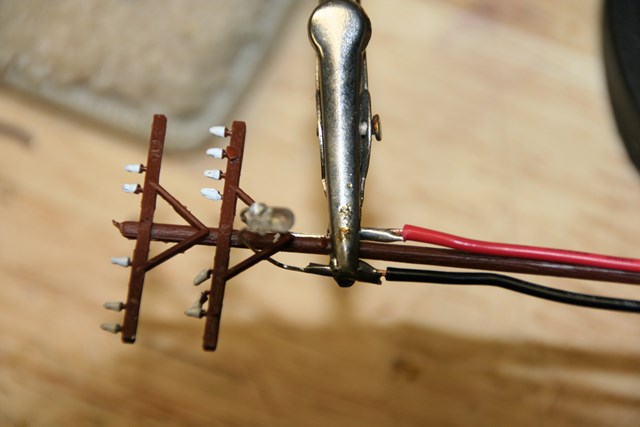
3. Solder the lead wires to the legs of the LED and bend the legs down alongside the telephone pole.
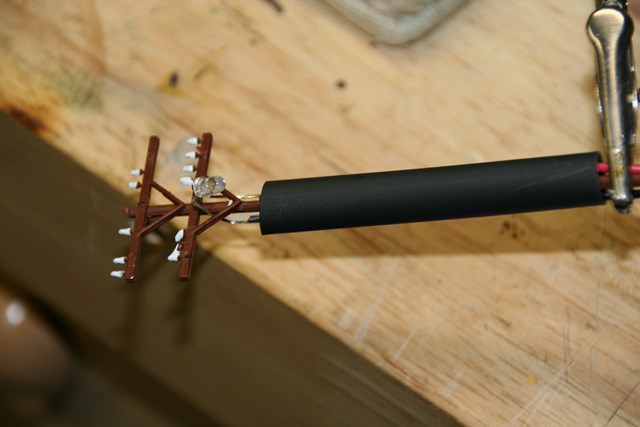
4. Cut the square base off the pole and slide a section of heat shrink tubing over the pole and wires.
5. Shrink the tubing with a hair dryer and paint the pole and tubing brown.
6. Dab a spot of silver paint to the very top of the LED, to simulate the metal dome.
You can adjust the length you want the LED to protrude from the Pole, and experiment with shrink tubing to get the proper size. Don’t worry about the solder joints touching, as the heat shrink and side arms on the pole will keep the legs of the LED just far enough apart to prevent shorting.
Hope you enjoy the photos. Looks great in rural areas too.
Keep those hints and tips coming in !!!
Darrell”
Now Schiffy has been in touch with some old pics:
“Hi:
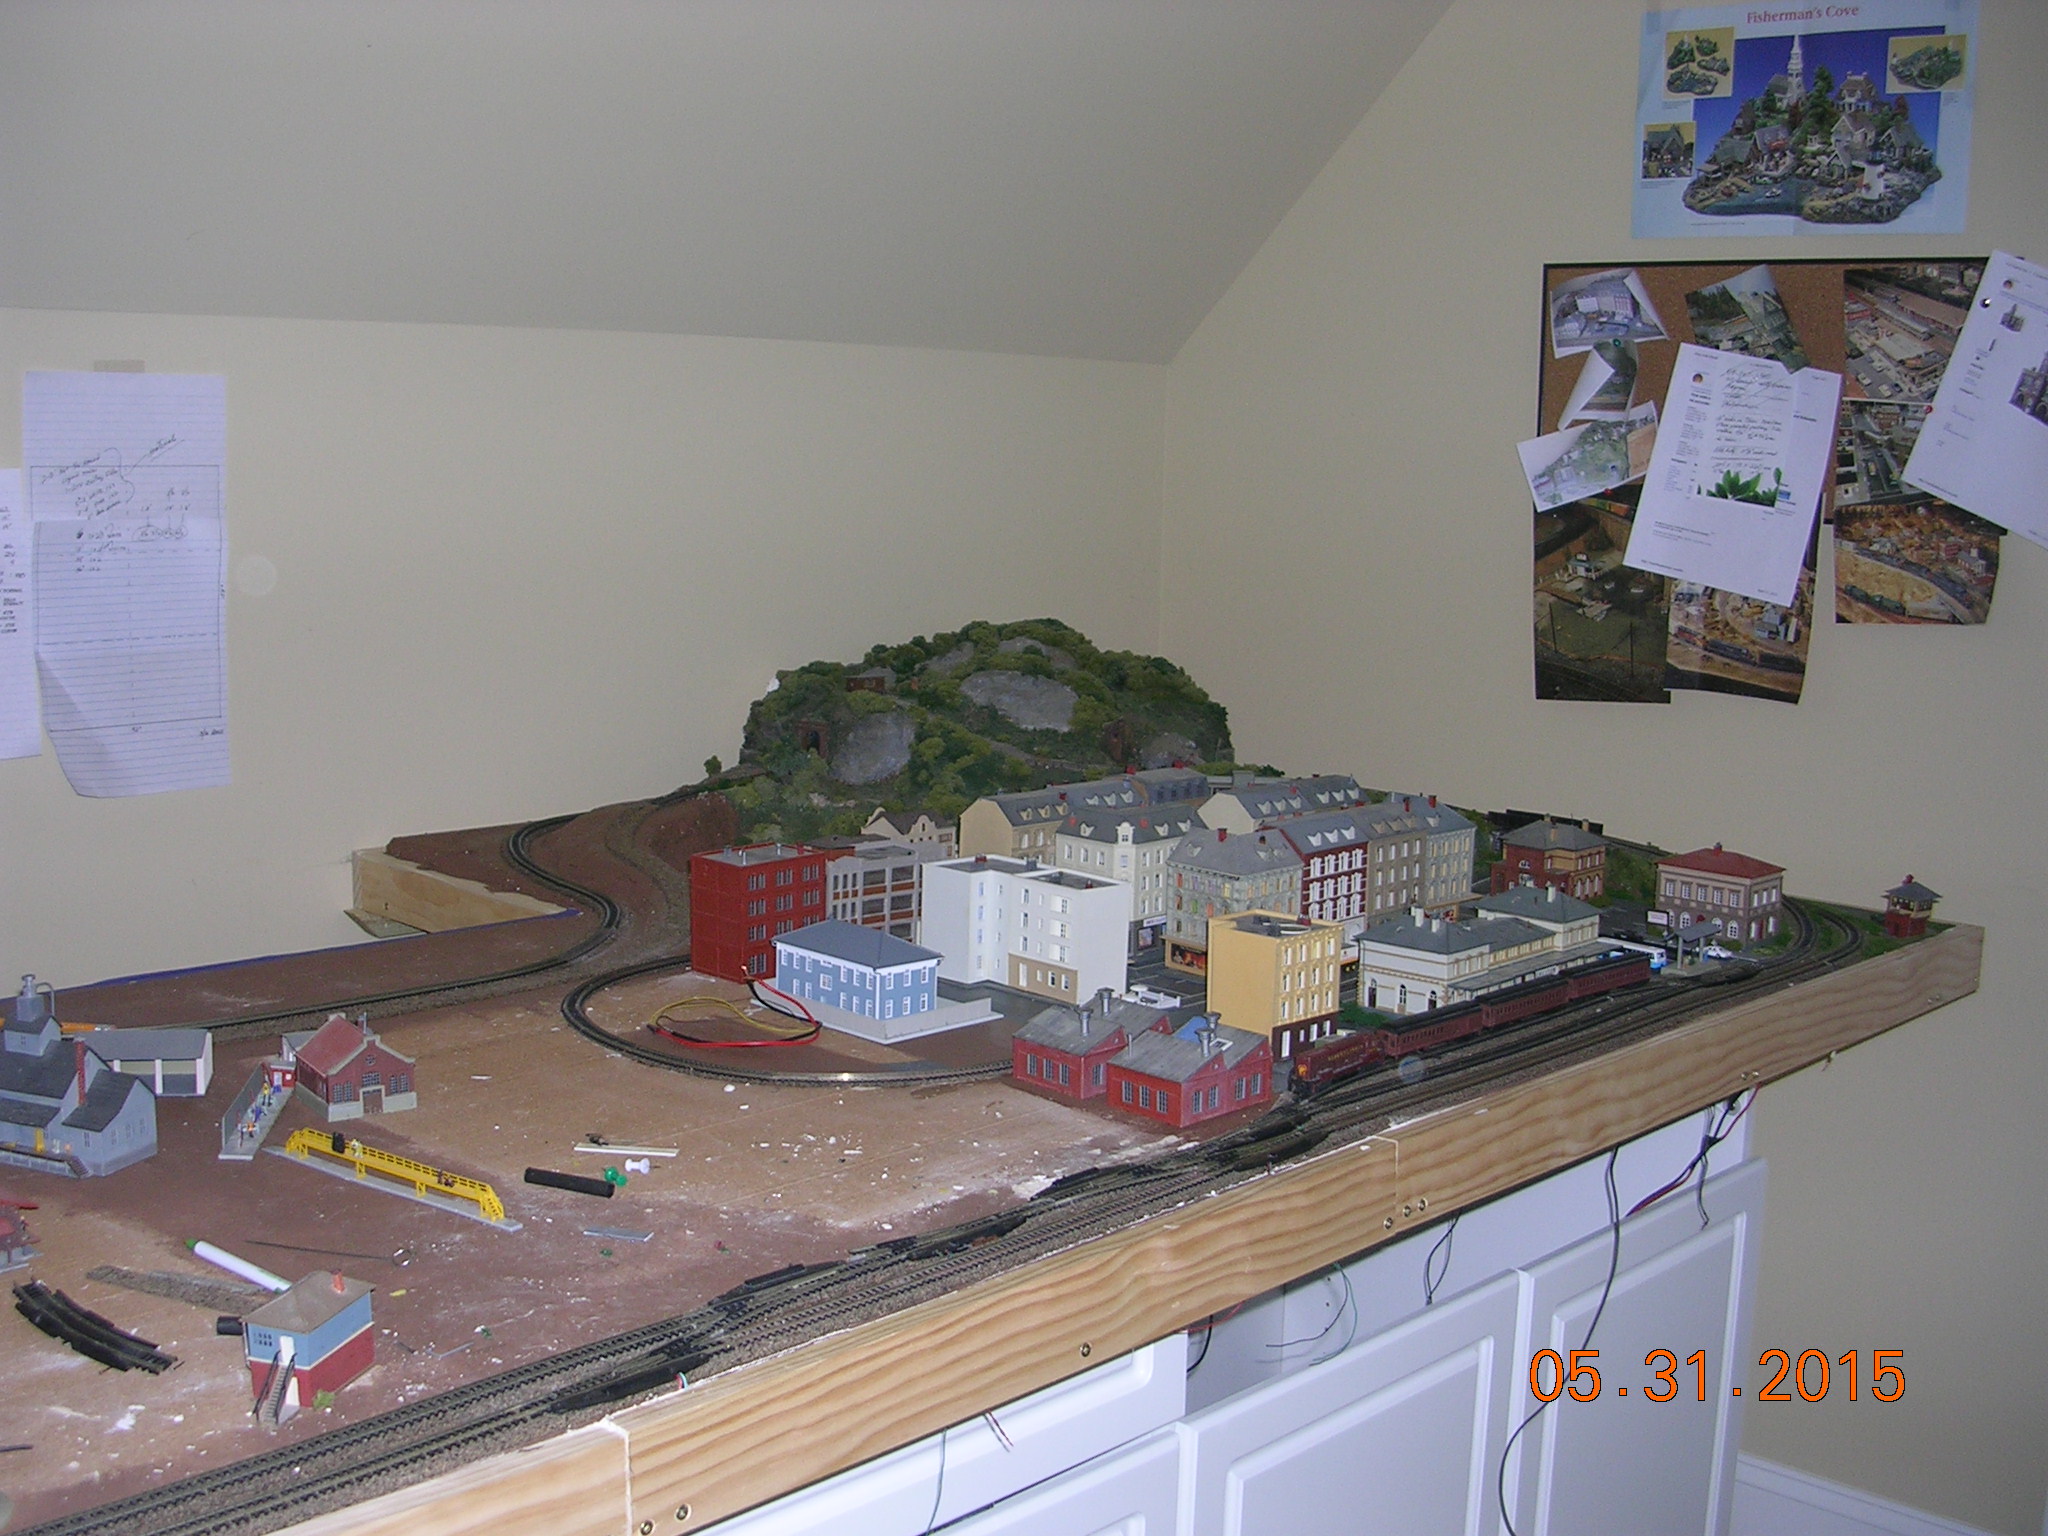
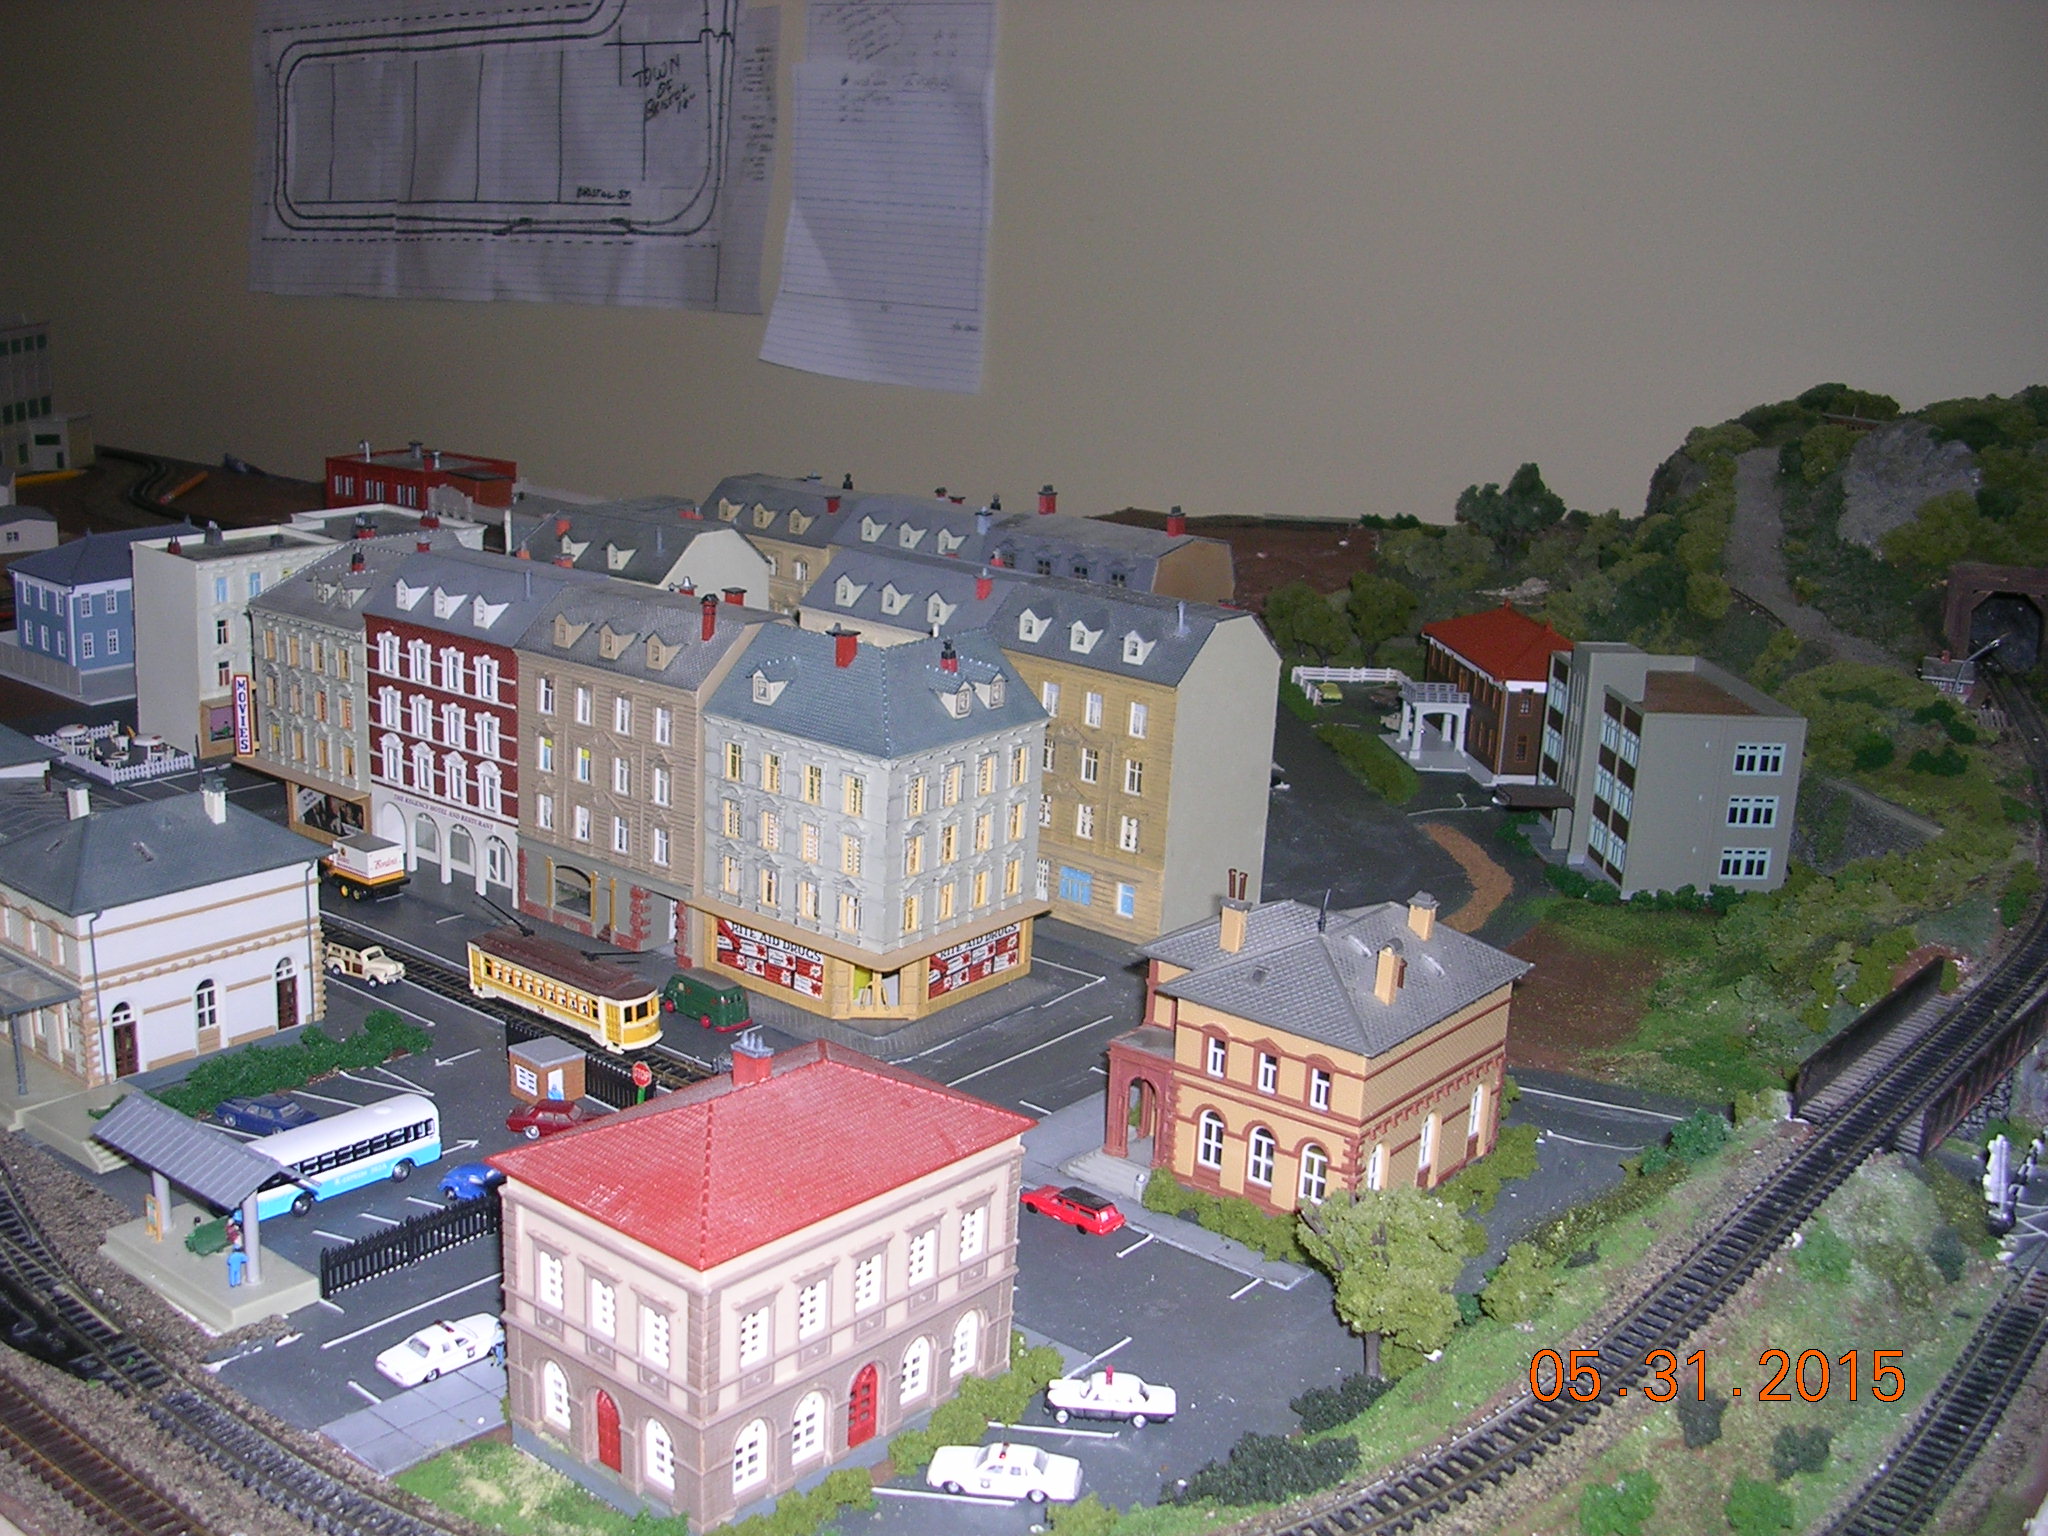
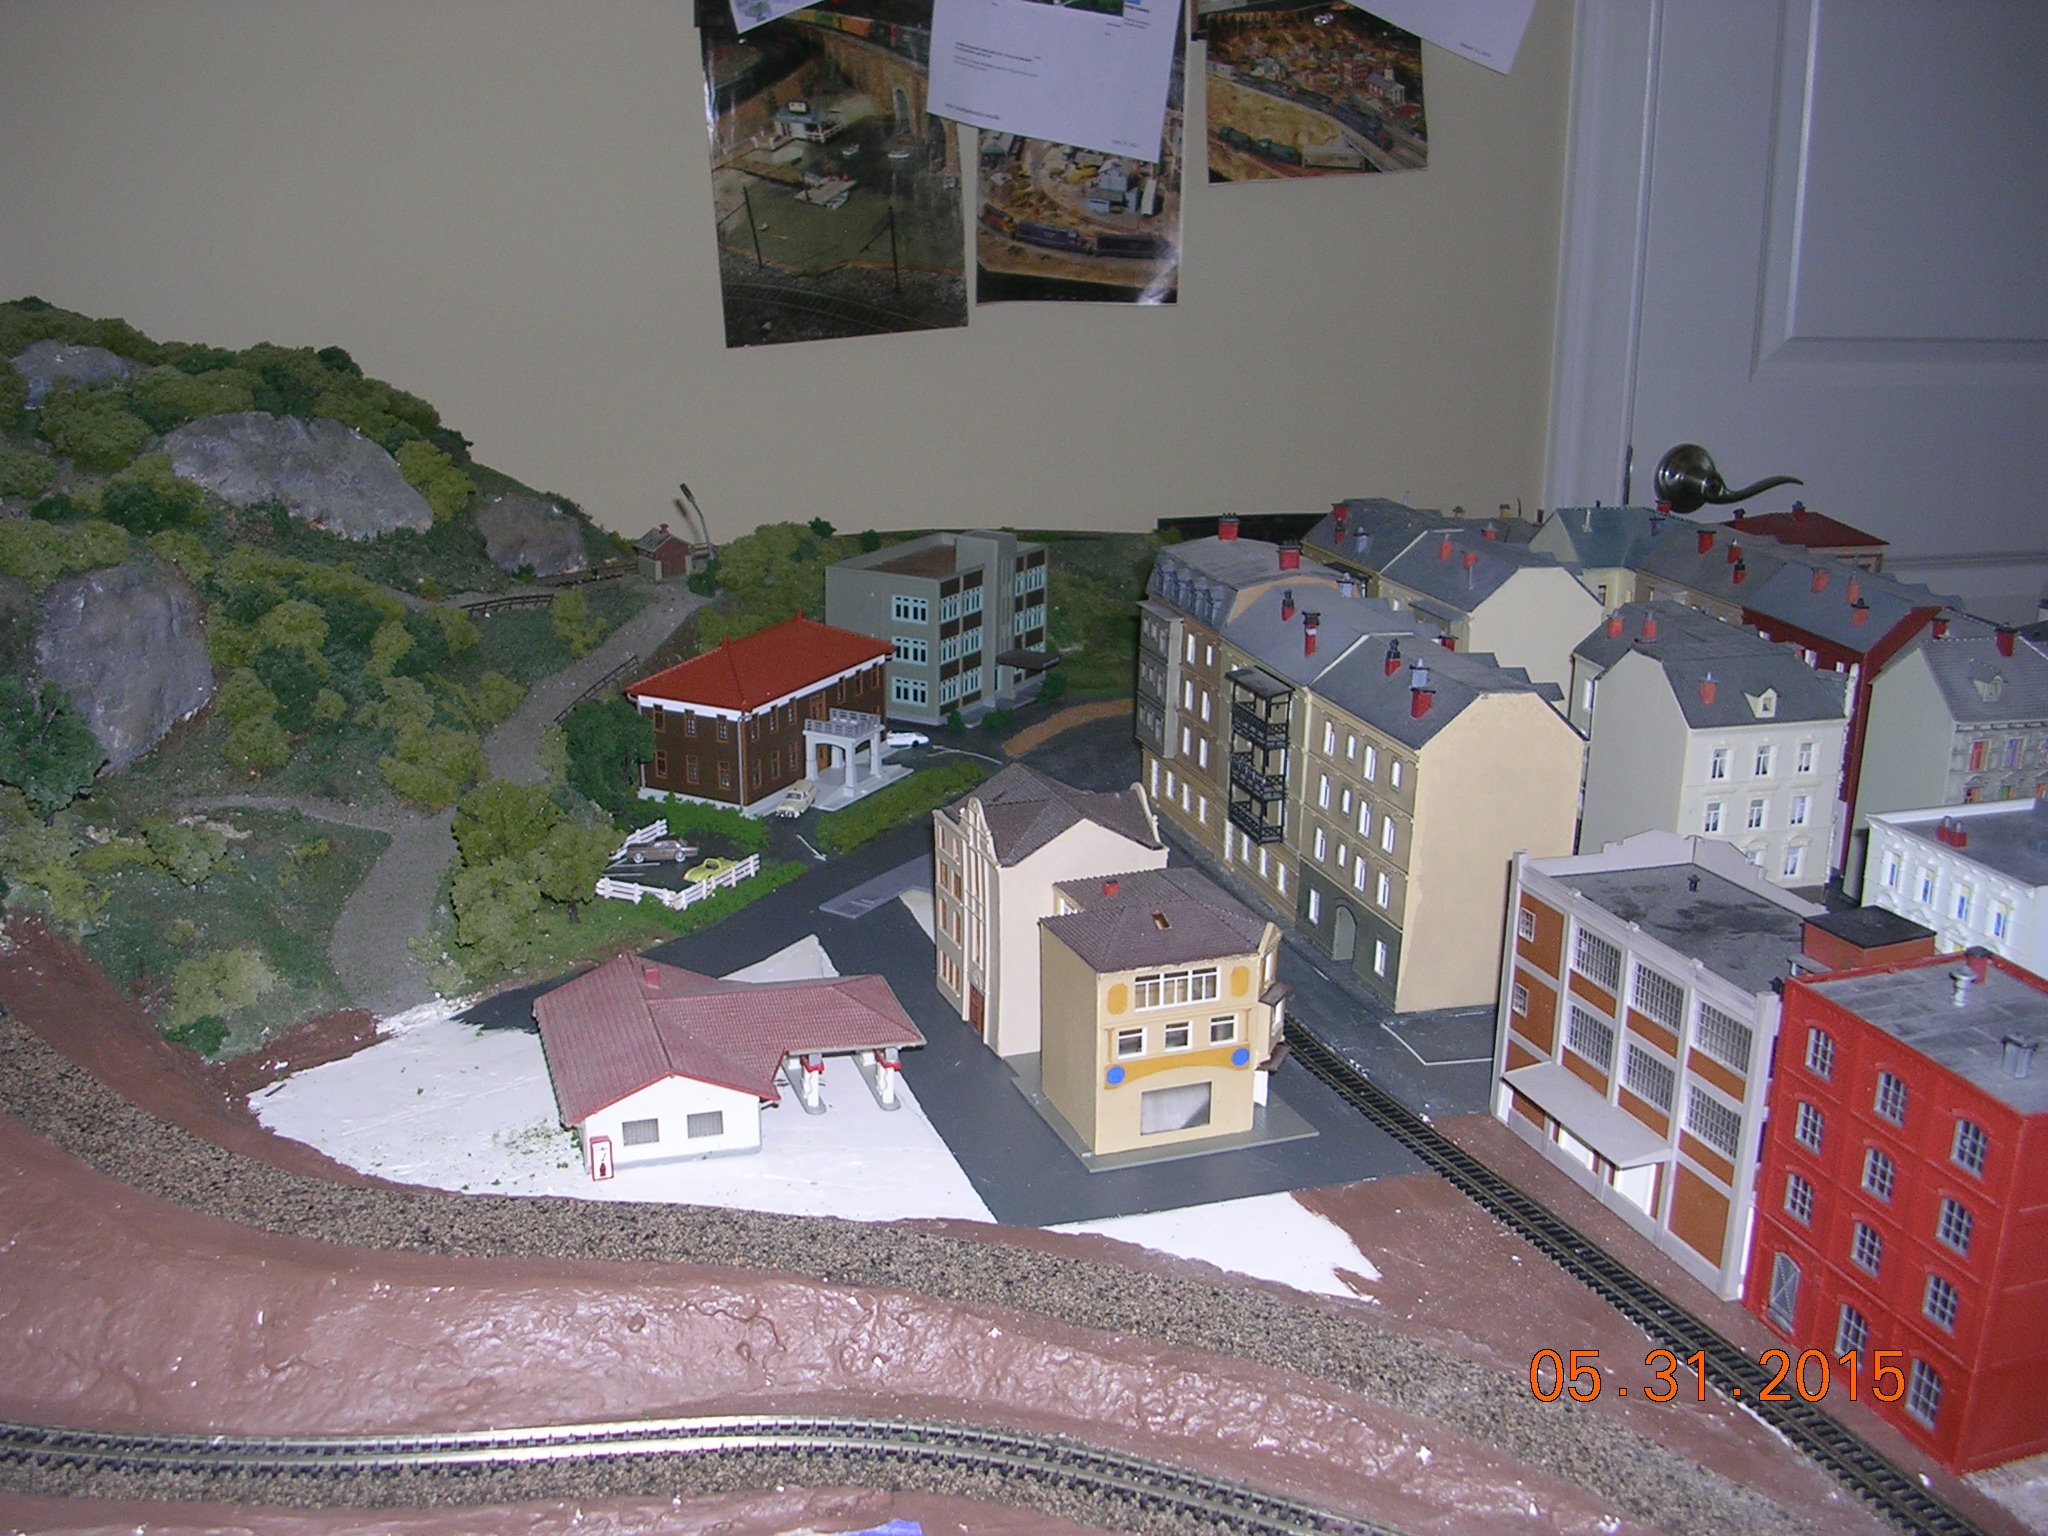
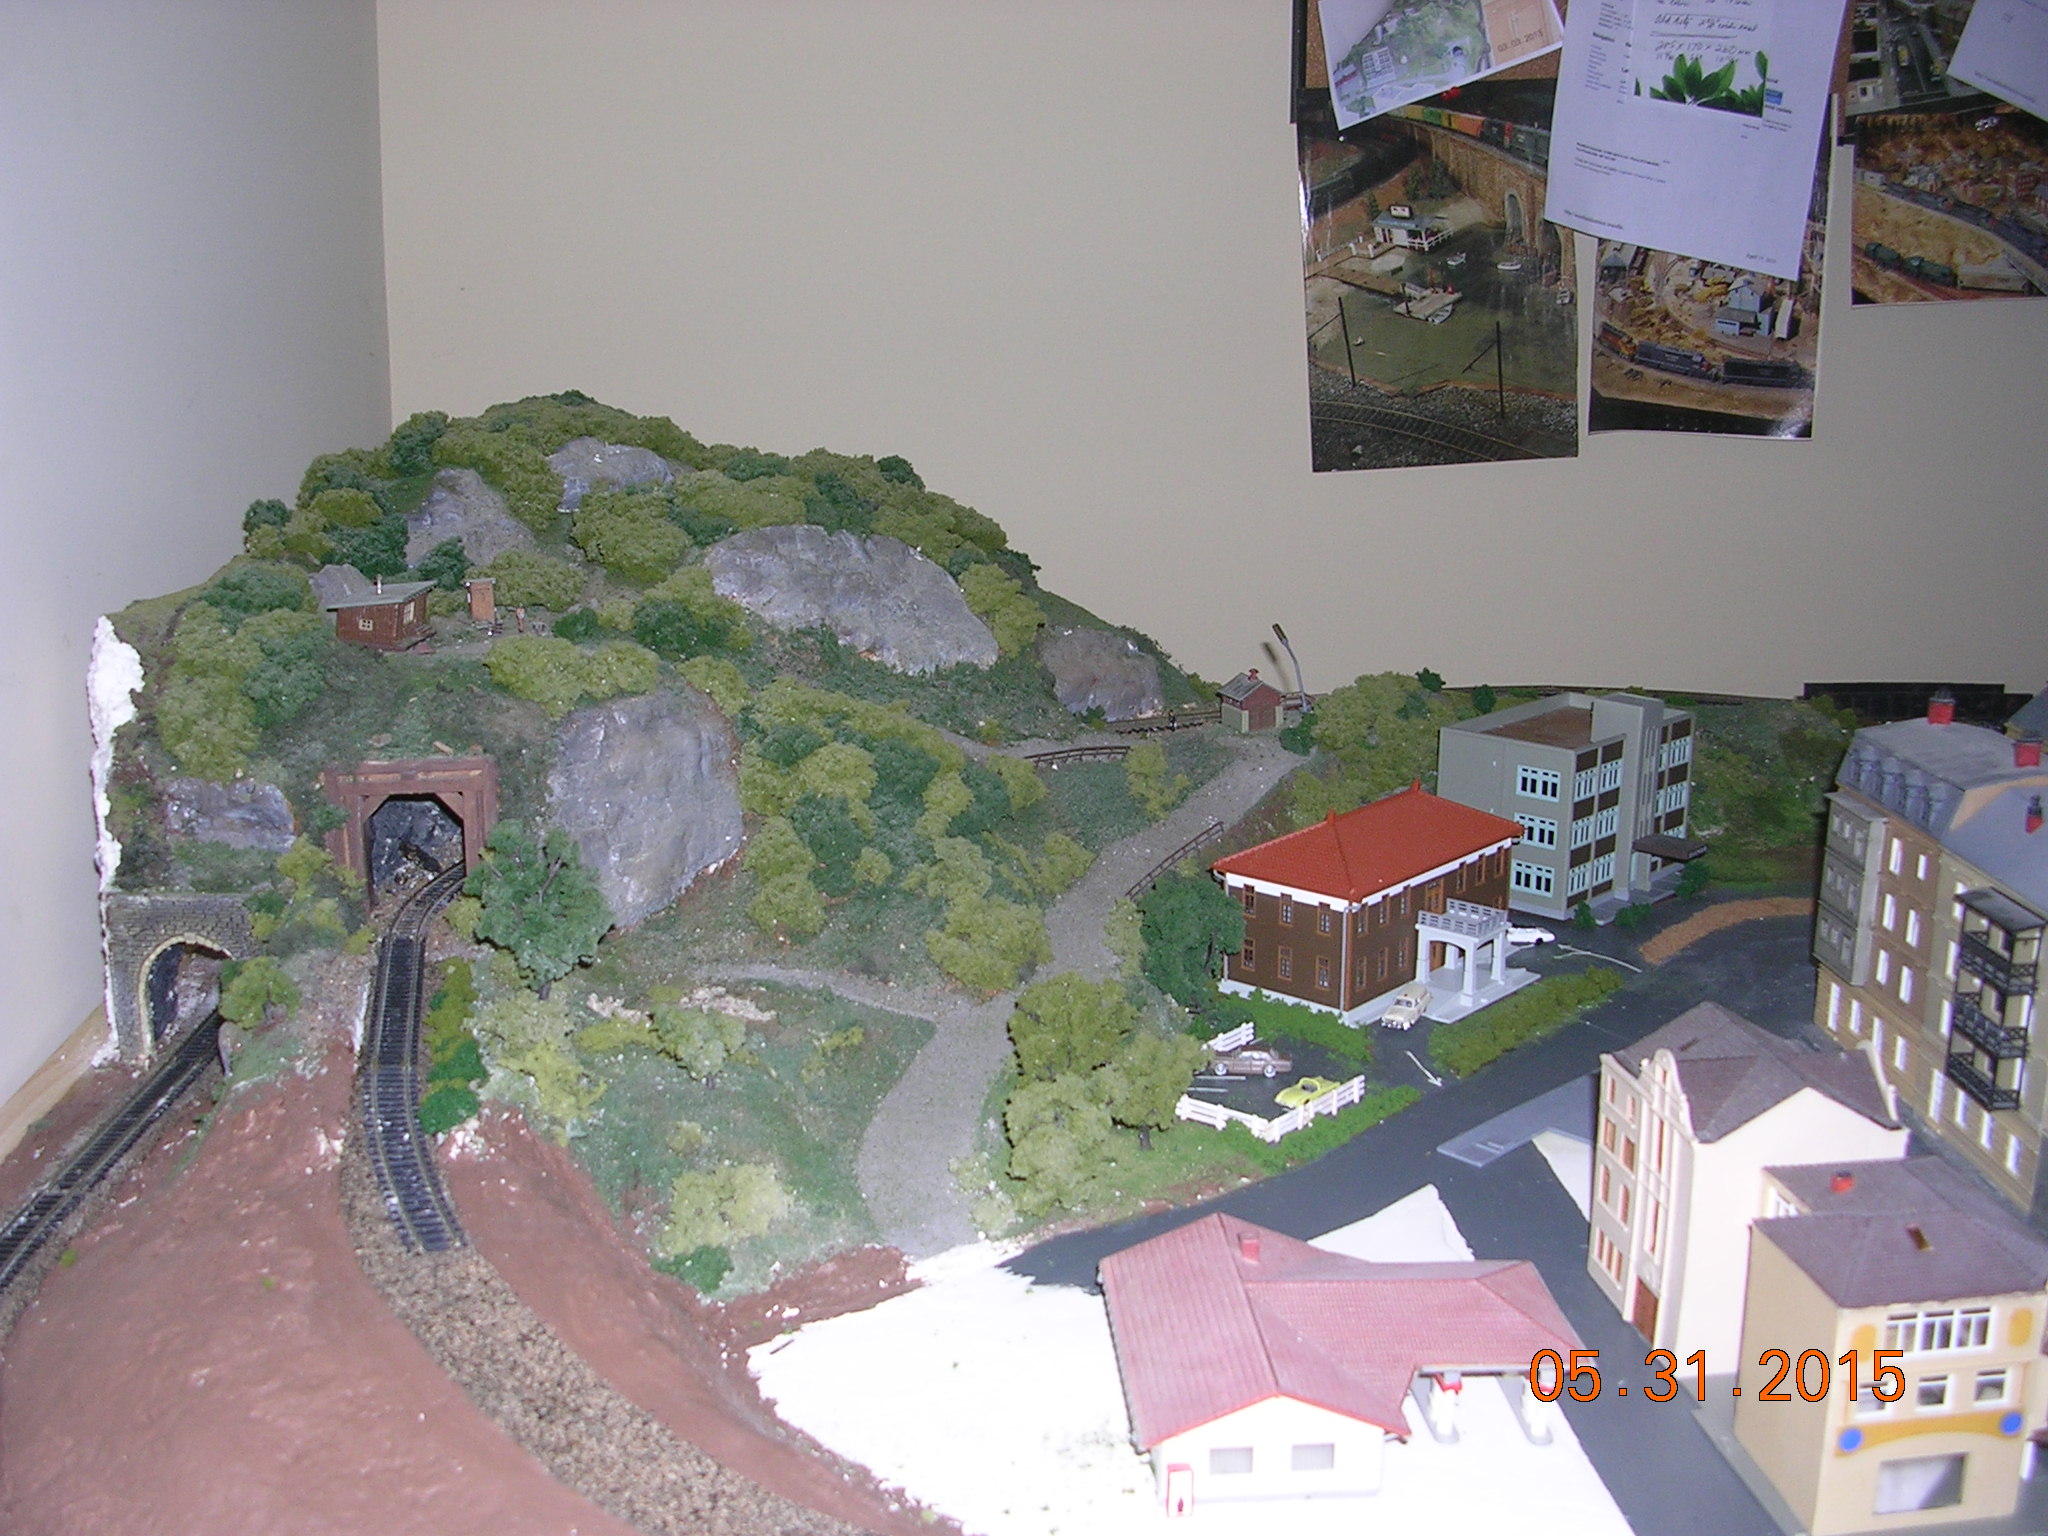
I’ve enjoyed all the tips and especially Dave’s videos. I recently moved to Wilmington, NC from Virginia. I had to tear down my layout (Bristol & Cheston). I made the decision tear it down completely and rebuild. I did save some landscaping that my wife made. I’ve gotten a lot of great ideas from the folks responding to your e-mails. I also gave a lot of thought to the economic activity to help determine the layout design. Moving goods and services between the two towns is important.
This is an attic layout that when finished will be 4 feet by 15 feet in scale. The base is made of ready to assembly cabinets. I had a need for storage of buildings, supplies, etc. The grid work is made up of 1 x 3 pine attached to the cabinet tops. I cantilevered the top over the base cabinets to get the 4 feet of width. Cabinets are only 2 feet deep. I used recycled 2 x 4 drop ceiling tiles on which to lay track and build up terrain. It is easy to handle and can be carved.
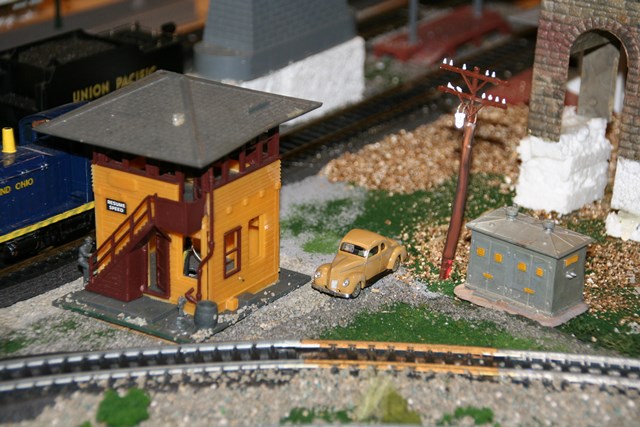
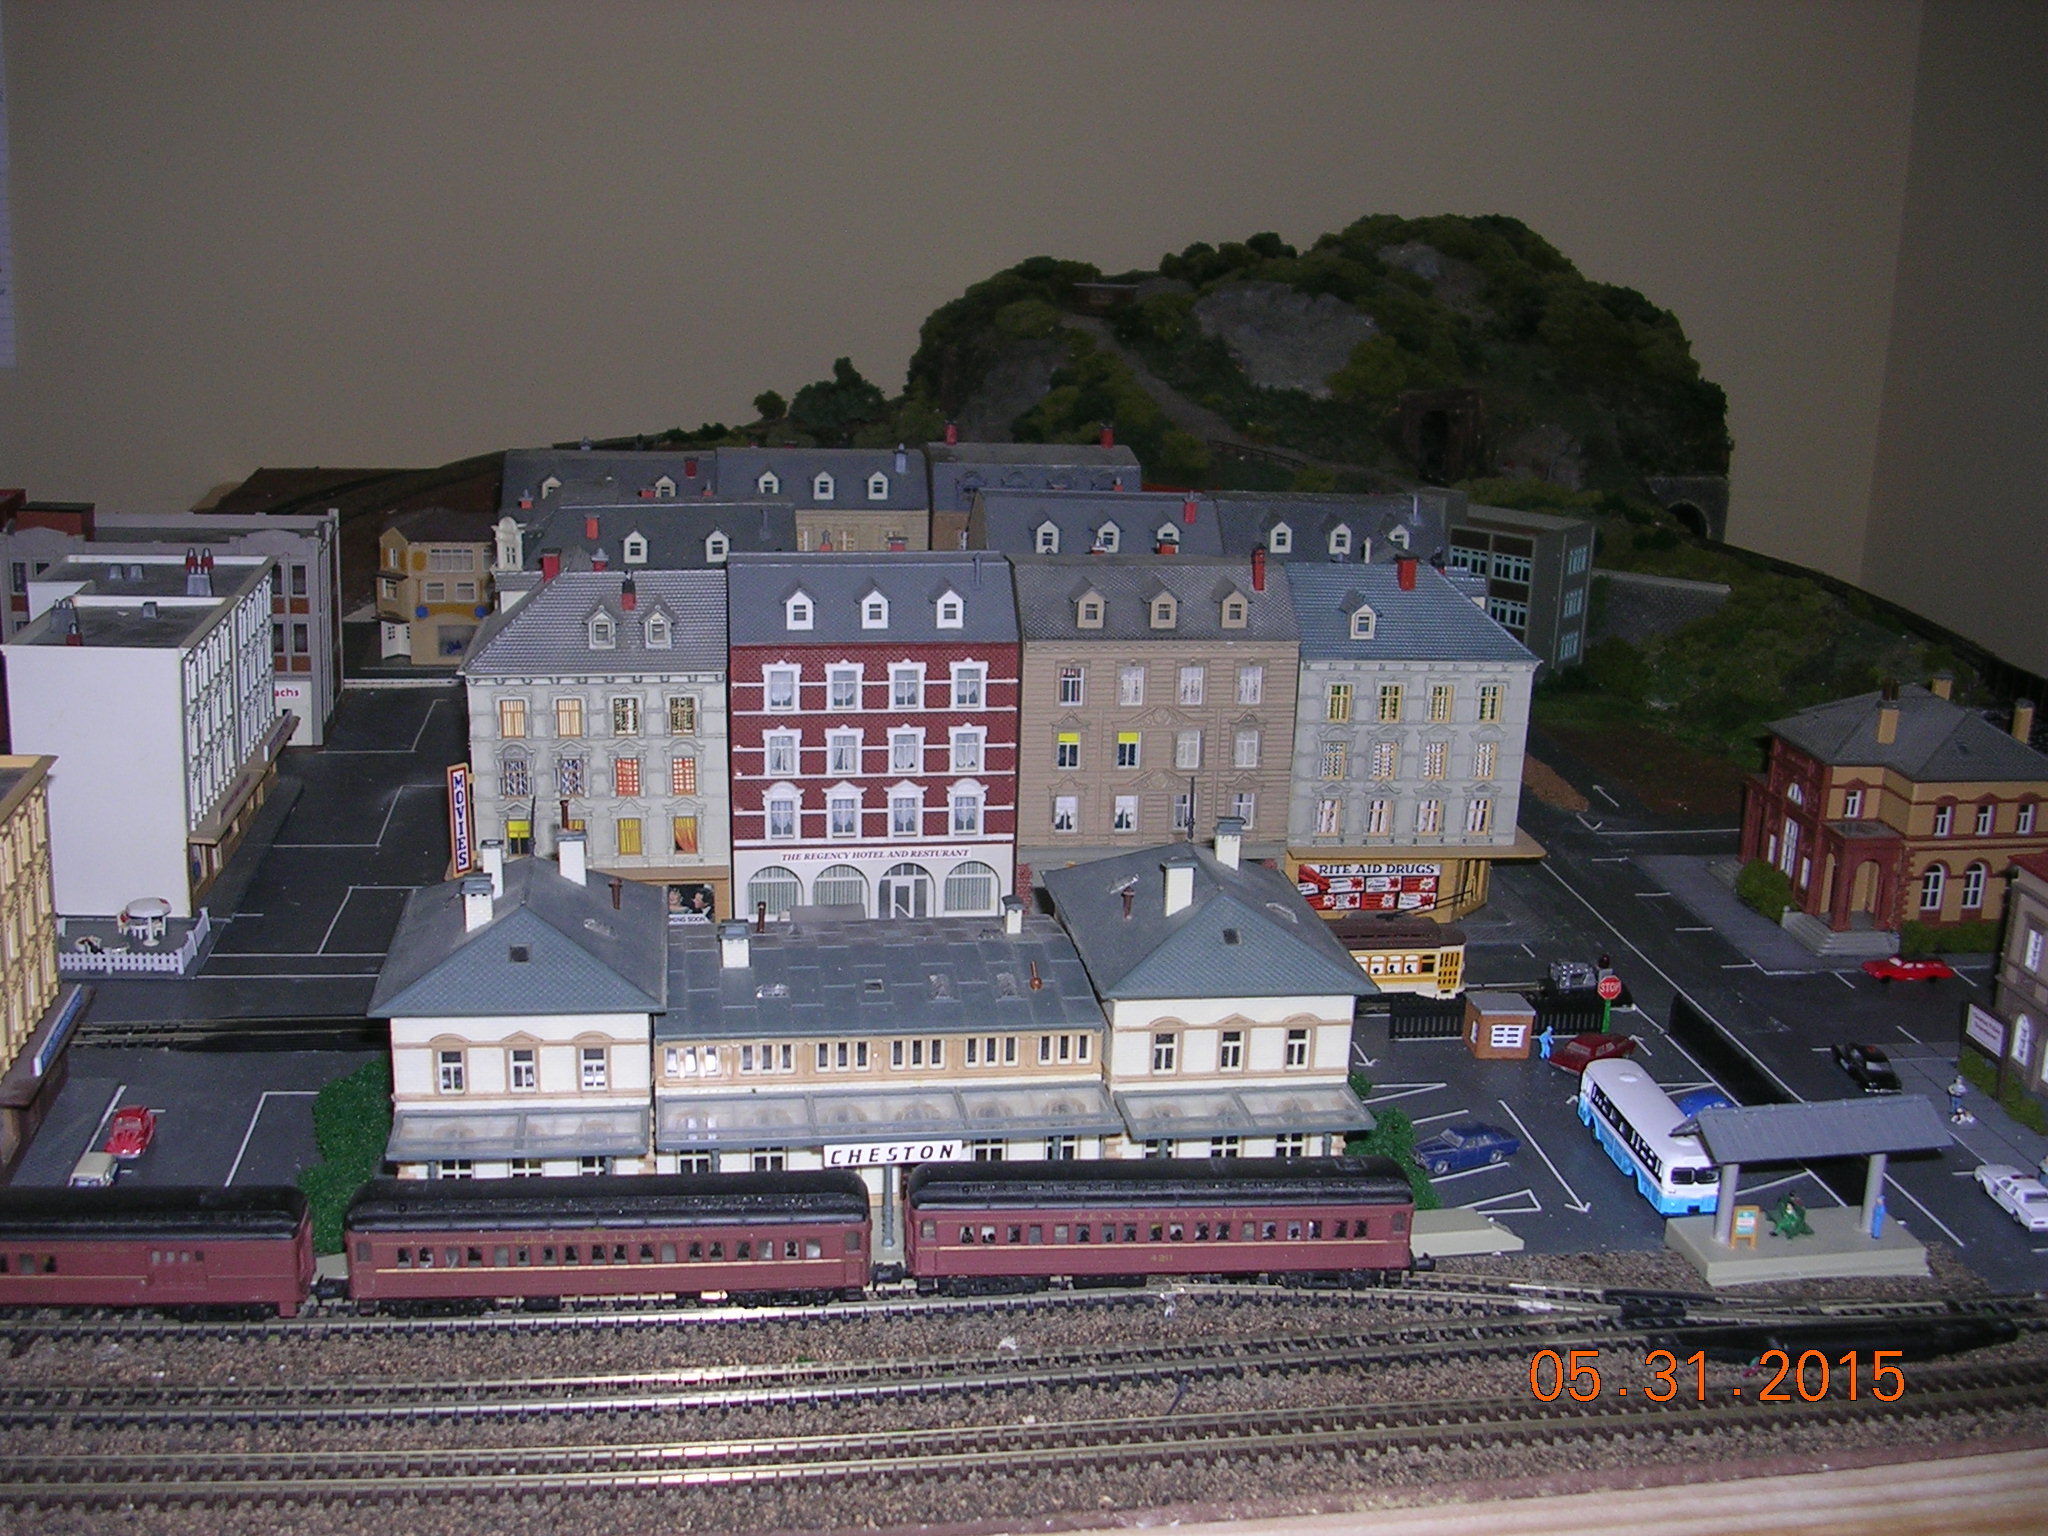
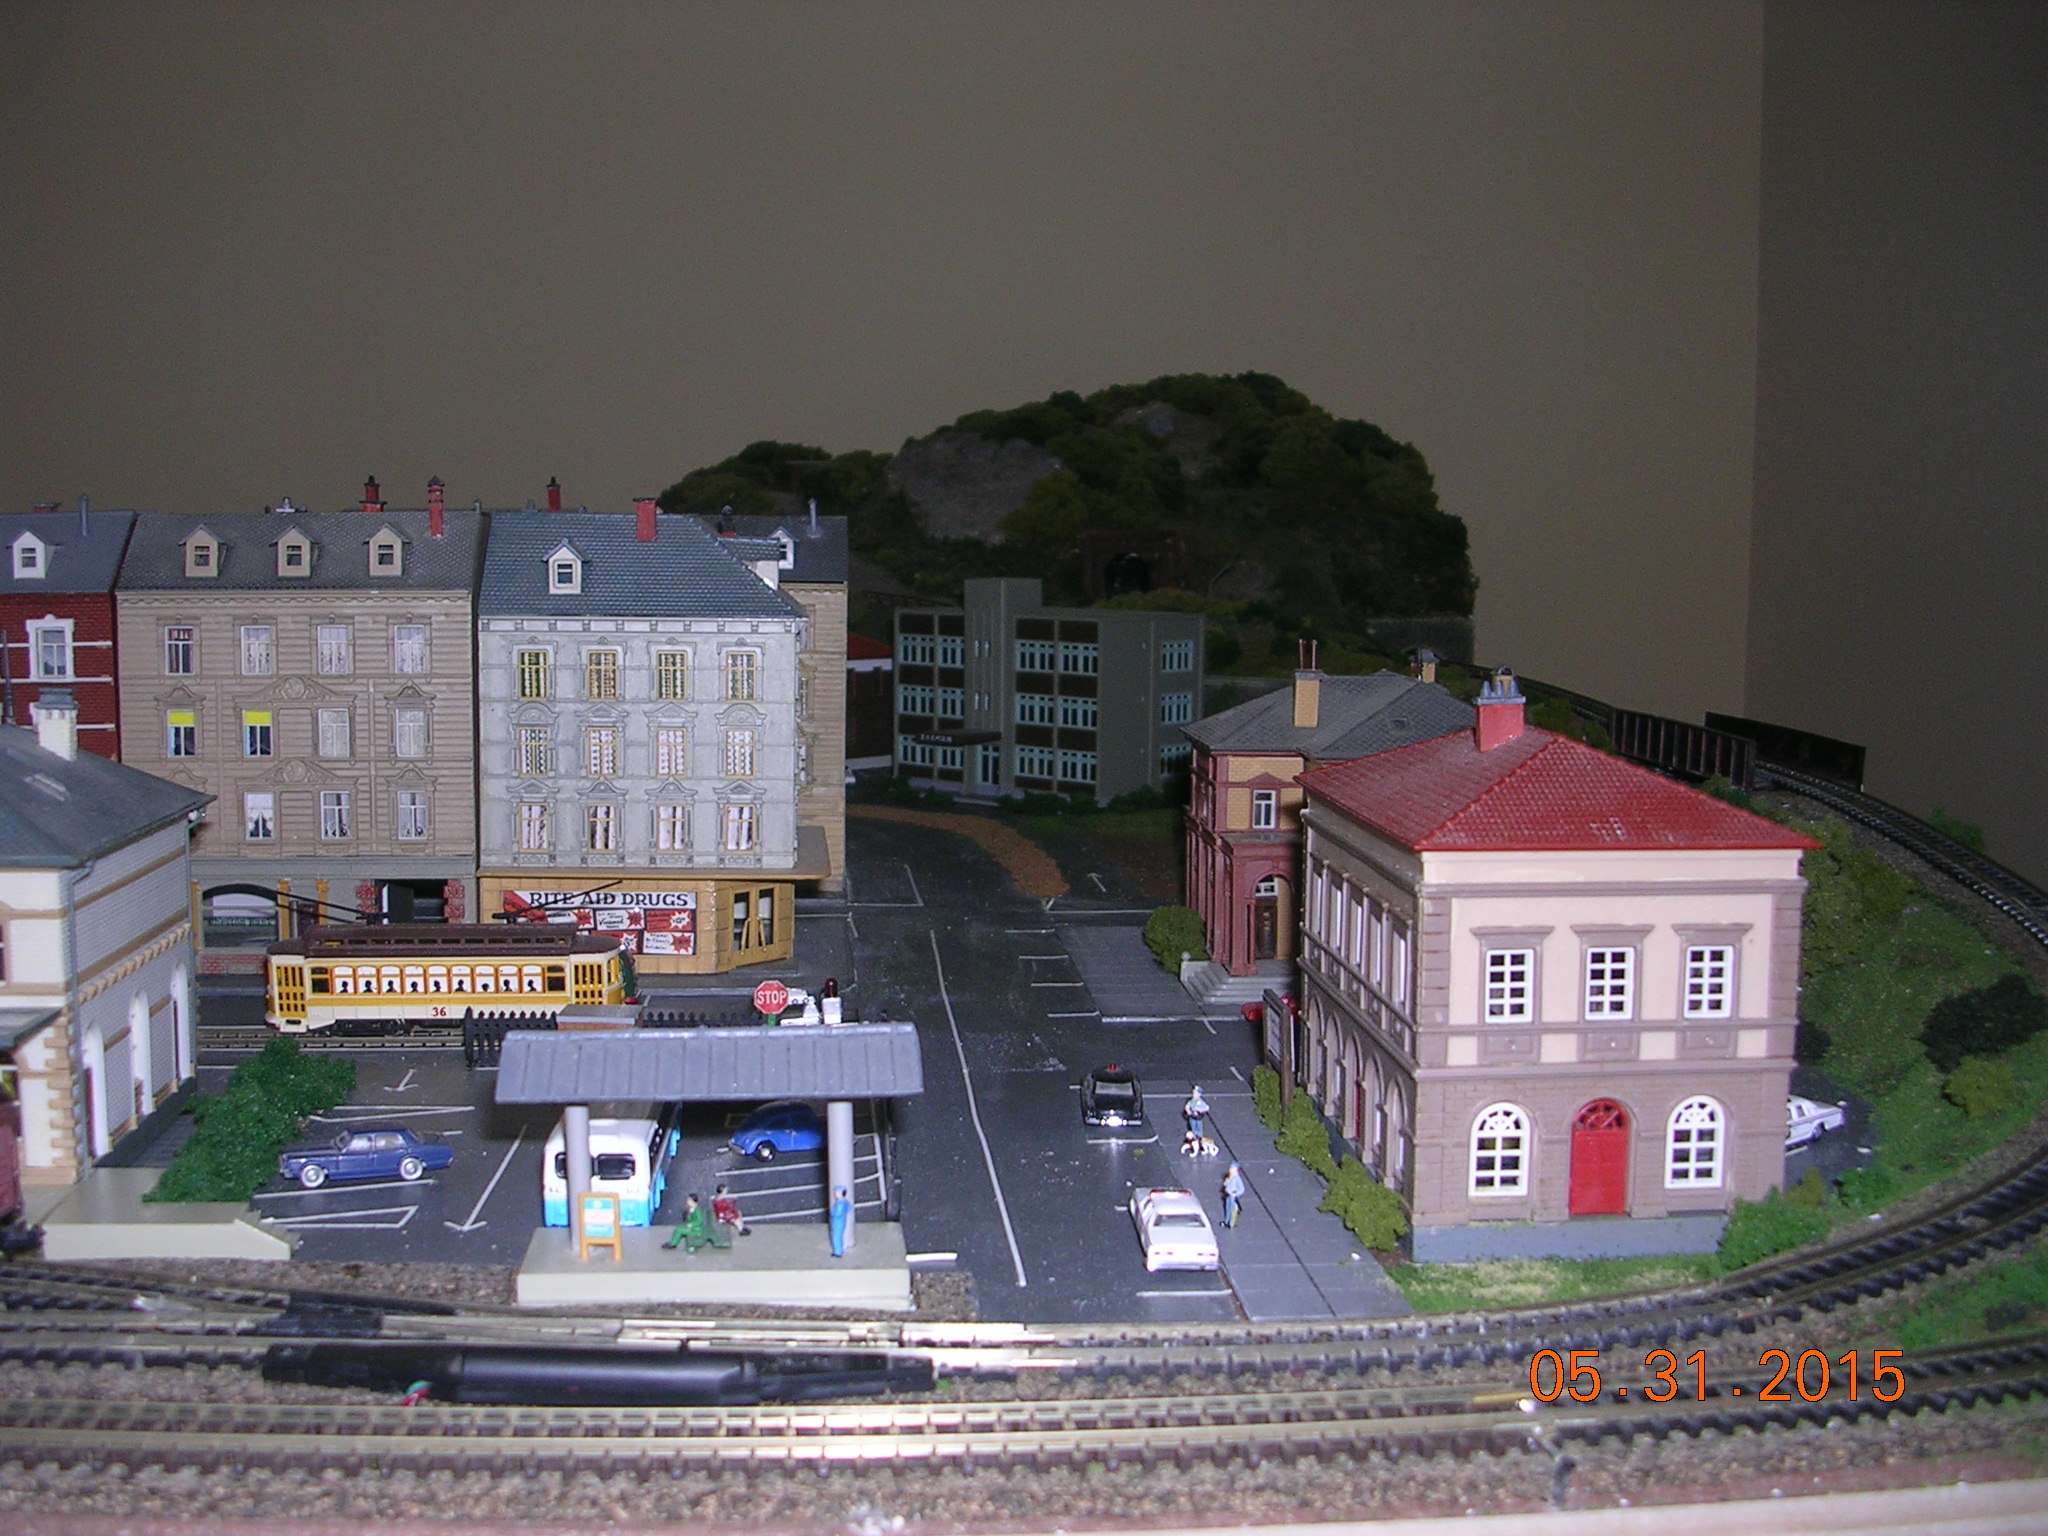
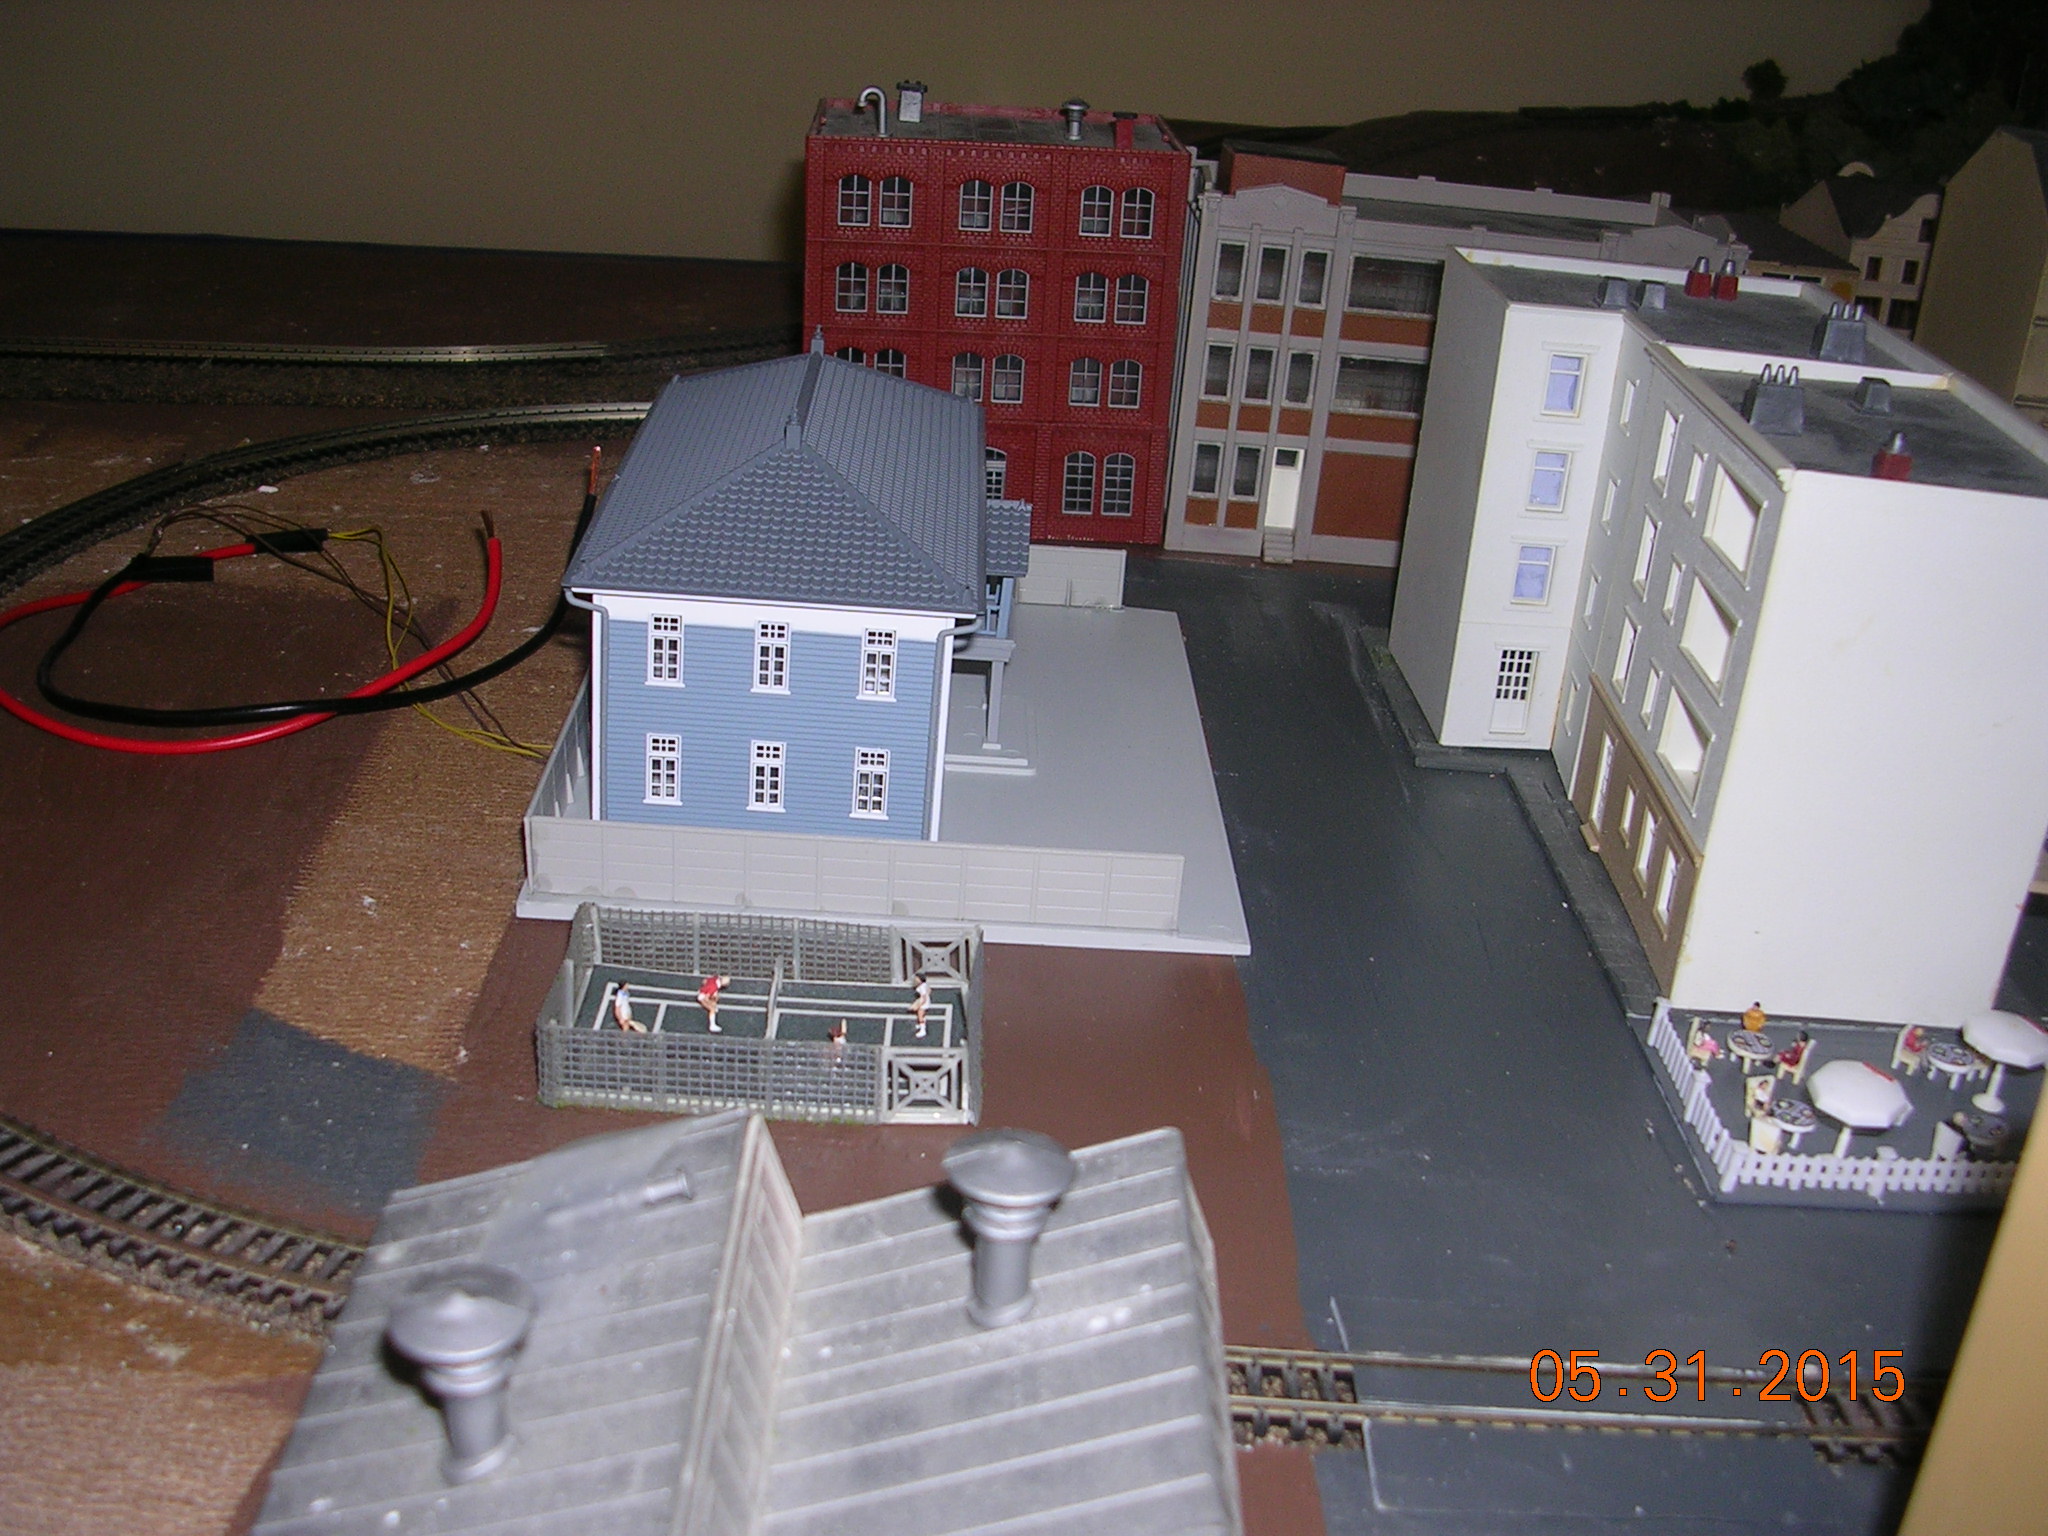
There are two towns. Cheston, the city you see the photos is partially complete. Cheston has a trolley system. There will be an industrial/commercial area to economically support the city. Future plans also call for a small resort town, Bristol, with a waterfront economic activity on the river and some local farming that will supply Cheston and Bristol with fresh veggies and meat products.
If what I am doing is of interest I will be happy to supply details of construction methods and wiring for this DC system. I thought a lot about DCC and haven’t ruled it out. A lot of my locos are not ready for conversion and it would be bloody expensive to buy all new stuff.
Schiffy”
A big thanks to Darrell and ‘Schiffy’. I do love seeing your creations and solutions, even if they are a few years old.
That’s all for today folks.
Please do keep ’em coming.
And if today is the day you get started on your layout, the Beginner’s Guide is here.
Best
Al
PS Latest ebay cheat sheet is here.


“Schiffy” has the “eye;” I love his streets and his impeccable sense of city clutter…and I guess just about every other aspect of his modeling. If I lived in NC, I’d be camping at his door looking for a mentor. And his wife helps! Heaven!
M
Shiffy great job! Would love to have the details of your wiring, as I’m starting my first build in many years, and I can see things have changed a great deal since way back when! Thanks Much & Keep up the Good Work
Darrell, nice tip for the lights, ready-mades can be quite pricey. Making your own is so much more satisfying as well.
Schify, if you do the rest of your layout the same way you’ve started it’s going to be awesome. You can already see the thought that’s gone into the planning.
Al, you can breathe out now. After your last mail I got a horrible feeling you were thinking of stopping. Don’t worry about the new look – it’s great. Keep it up guys 🙂
That is awesome!!!!!!!! If ur running code 80 peco or atlas….I have alot of switches and track that is brand new never had a train on it at all!!!! Plus I started buying corkbed have a little over 2 boxes of that too. Let me know if anybody is interested. Can’t build my dream layout so I’m selling off what I bought and it’s all brand new.
re: step 5
They actually make brown shrink tubing. That could save a little time with no painting. You can find it on ebay. Personally I would use Panduit. I have delt with them on a business level and they always treated me right. They even have assortment packs with every color in the rainbow in .25in x 6in. An old matchbook cover can be used as a heat diverter to protect the plastic near the end of the tube runs. Excellent how-to for the beginners and old heads alike (as always).
Happy Modeling
Dan Brown
Great idea for making lighted poles. As with any idea there is more than one way to skin the cat. For LEDs, a good cheap source is LED lamp strings at craft stores; after the holiday season they go on sale. As for wire use telephone cable wire or communication wire, it is a smaller gauge of wire so it is easier to hide. You can cover the solder connection and prevent shorting (insulate) the connection by covering the joint with fingernail polish, use a color to reflect the lamp support. (Also, if you stagger your connection you can prevent shorting the leads.) Remember, unless you purchase 12V rated LEDs, you will need a resistor limiter or operate the LED’s from a low voltage power supply. (the hobby lamp strings would need a series resistor, depending on the supply voltage.)
I think this is a great idea….
Darrell to add another detail to the lighting poles put one power wire inside the shrink tubing and keep the other outside it that way you will have a scale power supply running up the pole and secure insulation.
Nice looking urban scene, but I’m a bit confused. For the longest time I was under the impression that submissions to Al were current projects being worked on by readers. But this is the second time this week that photos have date stamps from six or more years ago. Is it just the photos that are “old”, or are the postings recycled from years ago? The content is still interesting, of course, but I’m just curious.
Dwight, hello.
Not everybody has been viewing this site that long or has seen all of the wonderfull ideas posted over the years, and sometimes an idea does not seem relevant at the moment…so, the occasional ‘rerun’ of a post can be very valuable to the group. Now that I am working on landscaping,( finally), This is just what I can use! Plus, Al might be running a bit light on submissions,
Either way,thank You, Al for your efforts, and to the rest of you for you ideas.
Andy in Yakima,WA USA
I tried Schiffy’s method of setting my 4 x 8 foot practice layout directly on a set of bookcases with the thought that the bookcases would give me a place to store a lot of model railroad supplies and they’d be a good support for the 1 x 4 framed piece of 2 inch thick foam board I was using as the base of the layout. The problem was that setting the layout directly on the bookcases made it hard to get underneath for wiring, so I added a set of 2×2 legs with casters on the bottom which raised the layout high enough above the bookcases that I could reach underneath to run the track and turnout wiring. Even this proved a little awkward since at 73 years old I was having trouble getting under the raised layout too.
My final solution was to attach the layout to the wall with 4-inch door hinges that allow the layout to be tilted up, giving me easy access to the bottom for running the wiring. Attaching the layout to the wall with hinges also allowed me to add a 2 x 5 foot extension in a similar fashion with a fiddle yard at an ell to the main layout.
Darrel, Thanks for the tutorial on adding LED lights to telephone / power poles. I wonder if fiber optic wire like the Dwarvin system would be easier to conceal since you’d only have one tiny wire running up the side of the pole? Of course, with that, you have to add something at the end of the wire to simulate the light bulb. Perhaps a clear drop of glue would do the trick?
To Tad Heath
I would be interested in the cork roadbed if it’s HO
Dave W (Pittsfield, MA)
Pretty kool idea i am going to have to try that..
This is Schiffy. Thanks for posting. A lot has changed in my layout since I wrote this post. I will provide an update with photos. Thanks to everyone for those comments and thoughts.
Darrell, I did the same thing with grain of wheat bulbs on my N scale layout back in the 60s. Haven’t installed power poles on my current layout yet but will do something similar with LEDs.
excellent points altogether, you just gained a new reader. What may you suggest in regards to your submit that you simply made some days in the past? Any positive?