Charles has been in touch with his railroad build.
Was it an April fool? Or was it proof that your model railroad can be anything you want it to be.
And I really mean that, as you’ll see:
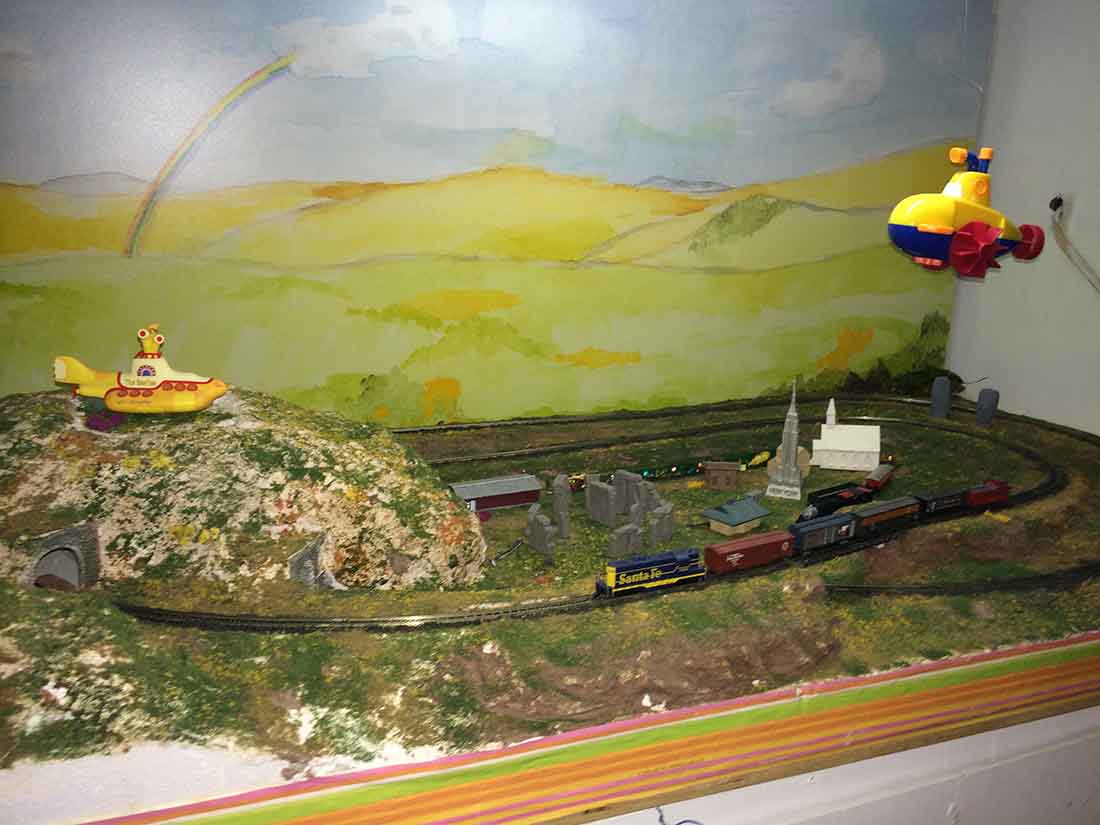
“In the early 1900s, short-line railroads proliferated in Oregon.
In the agricultural and timber area of Linn County, about 70 miles south of Portland, along the Willamette River, the locals built a house called the Linn County Poorfarm.
Today, it remains as a farmhouse, but old-timers remember it as a place where the indigent and those with mental illnesses lived; those who were able worked the farm, with food supplemented by the charity of others.
In 1976, my wife, our infant daughter and I moved to Linn County, not too far from an old community called Oakville, not far from Oregon Electric RR tracks.
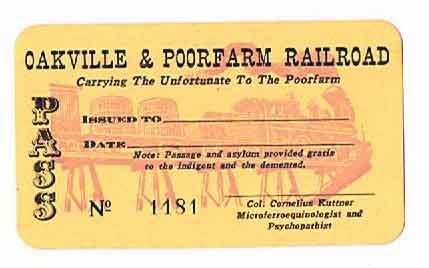
Our house had a workshop, and this soon became home to a 4×6 foot board with an HO railroad, aptly named The Oakville & Poorfarm Railroad.
I drove past the Poorfarm daily on the way to my psychiatric practice.
It was logical to imagine that a short line could have built between Oakville and the Poorfarm, and with something a bit more than logic, that it would have been built by a fictitious ancestor of mine, Col. Cornelius Kuttner, who just happened to be the superintendent of the Poorfarm, collecting government subsidies to house the patients while putting them to work as laborers laying the track.
We moved to Portland 25 years later, in a house much too compact to set up the HO railroad.
Using a space I found in the basement (a past homeowner had used this as a place to have his own railroad on a board that was hinged and would block the hallway), I realized I had to find some way to fit a railroad onto a shelf 2 feet (0.6 m) deep.
A trip to a local model railroad show had me asking questions of those running Z and N scale trains. Finally, with the excellent advice I got from the members of Cascade Z Modelers, I made the plunge to Z.
I did it all wrong.
Before, I had fastened my rail to cork on a flat plywood sheet, just not having the confidence that I could actually make good scenery. I got a 2×4 foot sheet of white foam, double-stick roadbed, and flextrack, and went to work.
I learned how to make a mountain out of instant papier-mache, use Woodland Scenics risers, ballast and put on greenery, and it actually looked good.
Oh, the disasters!
My trackwork was not great, the rail joints not the best, and I had to re-do them. Then came one really cold winter week, when it got so cold in the basement that the foam curved up off the plywood base, taking the track with it.
I asked around on the forums, and learned that the white foam I used was just a bunch of little foam pills that were stuck together, whereas pink foam is actually molded as one piece. OK, I’ll just rebuild it all from scratch.
But first–hmm, let’s try just gluing down the white foam to the plywood base with Gorilla Glue. Amazingly, it worked, and the layout has stayed intact since.
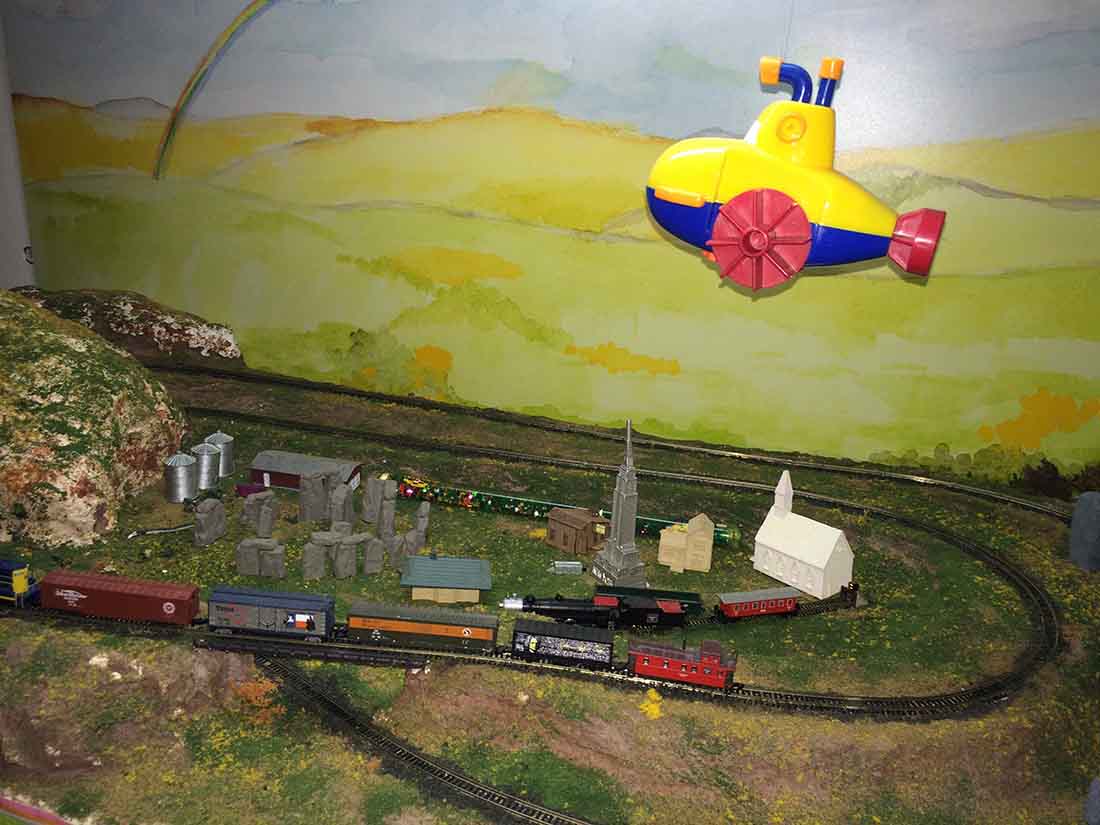
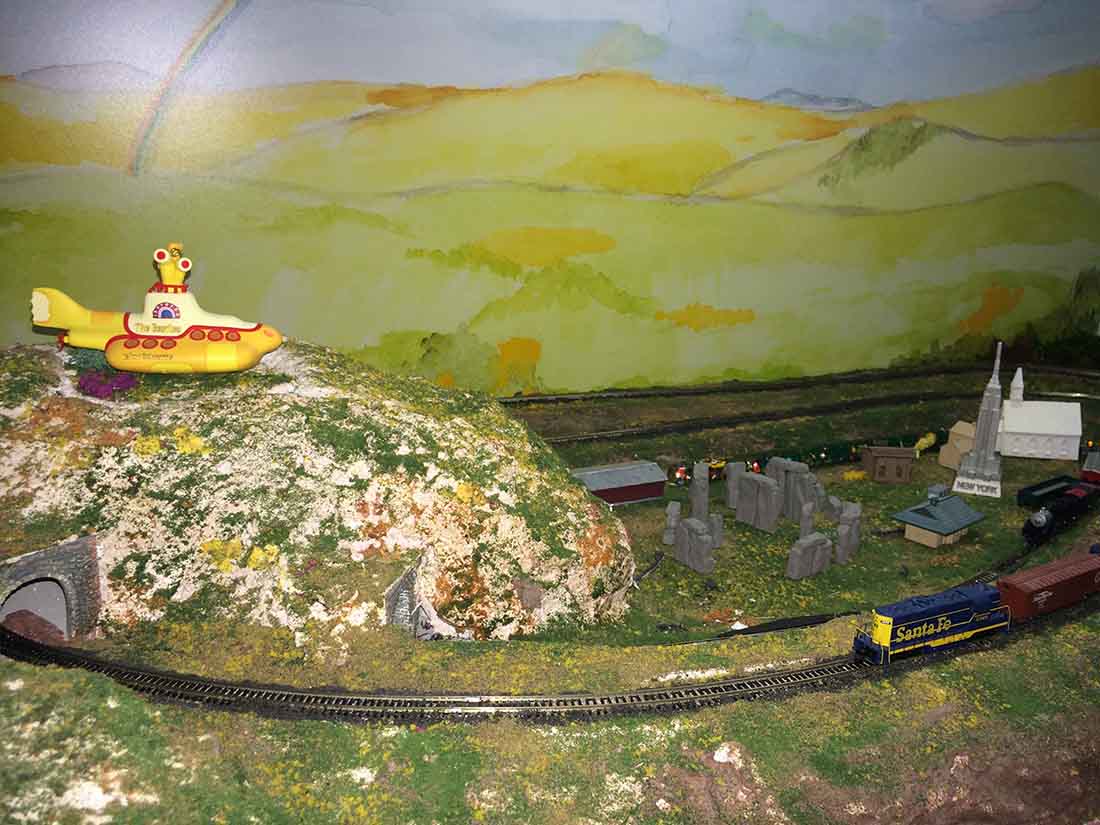
The layout is set in a time & space continuum that resulted from the arrival of the Yellow Submarine, which is simultaneously resting on the mountain and flying through the air. As a result, the combined tavern-workshop has the signs “Rotgut and Smoothies” and “Velocipedes and Jet-Packs Fixed Here.” S
tonehenge is here, as are the Easter Island heads, not to mention the Empire State Building.
One of my favorite discoveries has been No-Ox-Id, which has kept my diesel engine running reliably, although my trackwork just isn’t smooth enough for my steam locomotive.
Charles”


Hope that made you smile and scratch your head as much as me.
Now on to Brian:
“Hi Alastair,
I have made a start on my next long term project (may be a 3 month long one).
It is a very detailed building and will end up being a super detailed one as it is right on the front edge of my layout.
This is the kit that I obtained through a swap (built a kit for a friend in return for this kit) I think that I got the better side of the deal. (See my previous post of the kit that I built for the swap.)
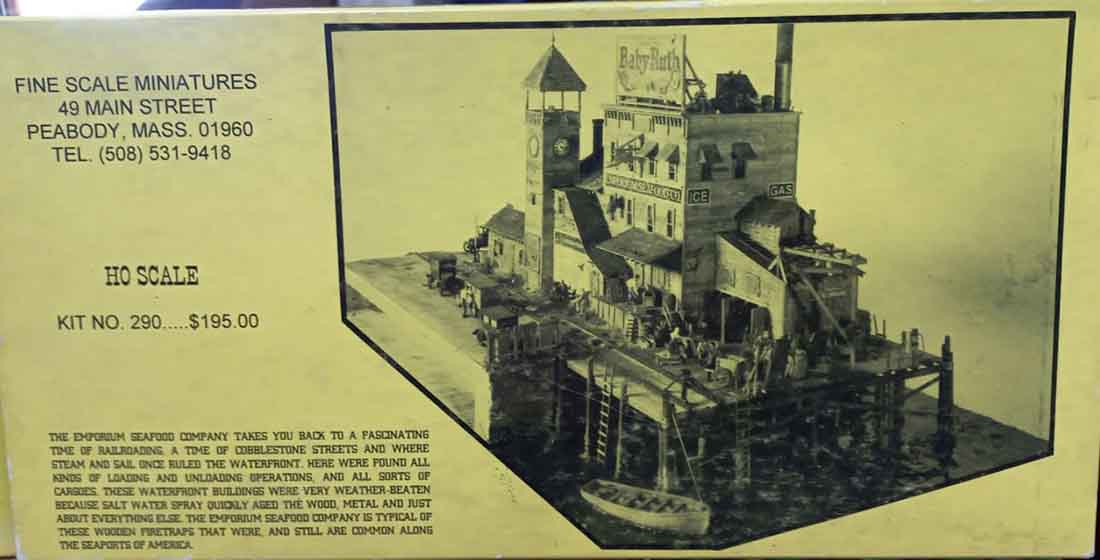
The FSM Seafood Emporium kit is a kit that I wanted for many years and I now have it to build on my HO Scale narrow gauge layout.
I have to modify (kit-bash) it to fit the area at Pelican Bay.
It will have to be flipped horizontally as well as a mirror image of it to be able to install it the way I want it to be.
The track comes onto the wharf from the opposite side in the kit. From left to right but I have to have it from right to left.
As with all my buildings, I make a cardboard mock up of the kit to be able to visualise how it should look (being a foreground model) it had to be right.
From this I was able to cut the layout baseboard to suit the wharf.
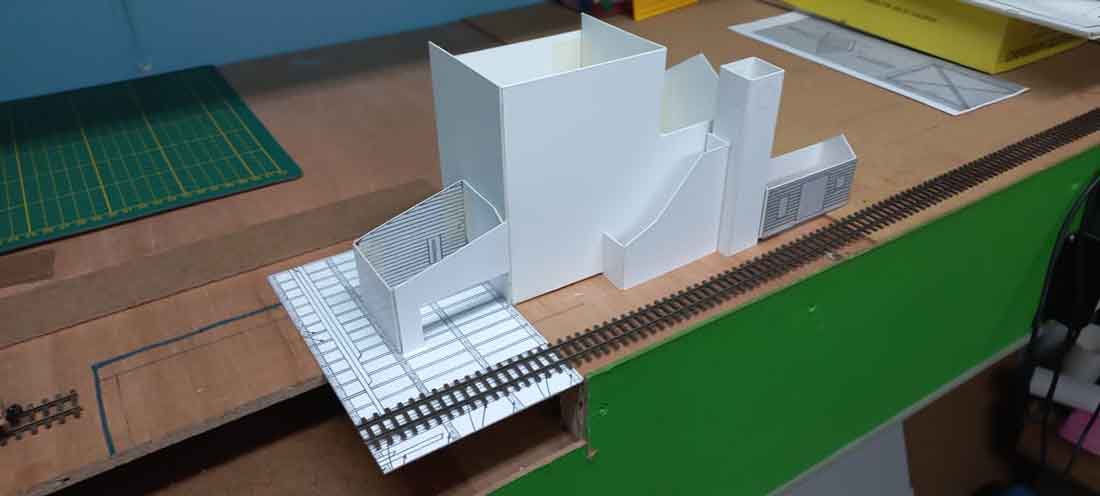
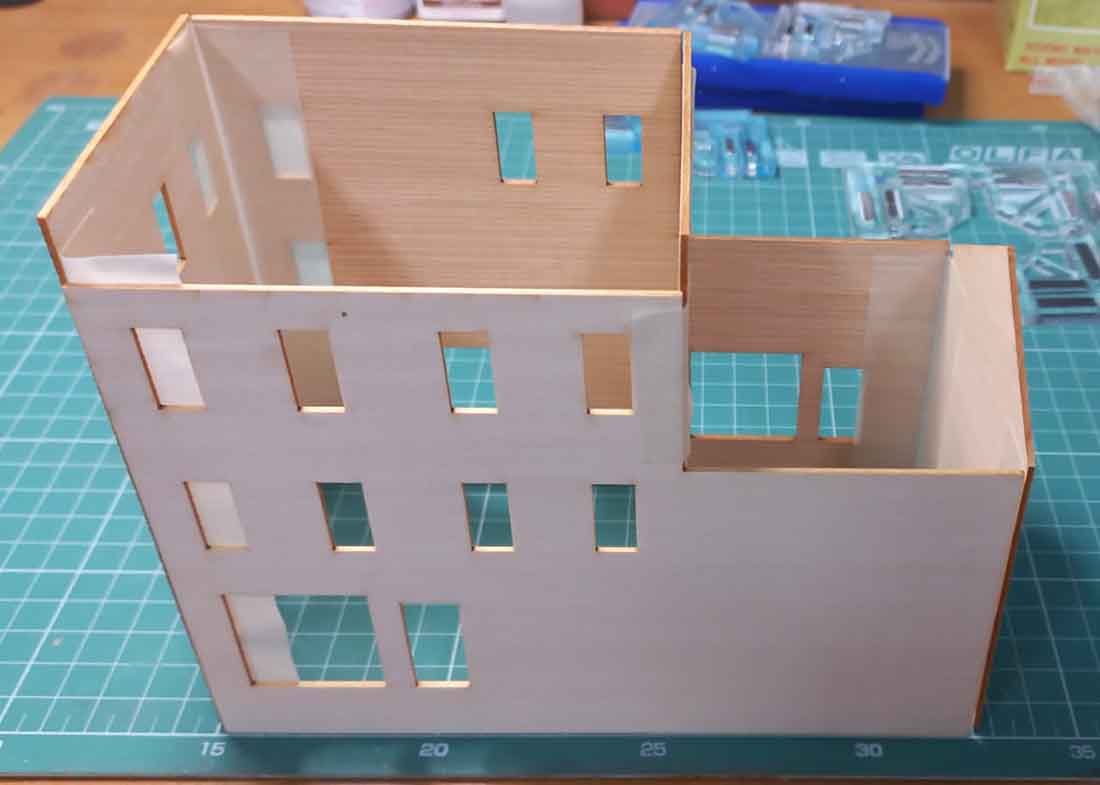
Here I have temporarily assembled the original parts to visualise the building.
Unfortunately was not able to use the front and back pieces as the scribed siding would be on the inside, therefore will have to cut new pieces from my wood stock in order for them to be correct.
I used the original pieces to mark out the sides on the card stock.
The area for the wharf has now been cut out and the cardboard wharf is test fitted in the correct position.
Now to build the wharf.
The template is used to lay out the main beams under the deck.
Here are a couple of photographs showing the construction of the board by board construction of the deck. Above shows the single strips of the boards being placed on the template.

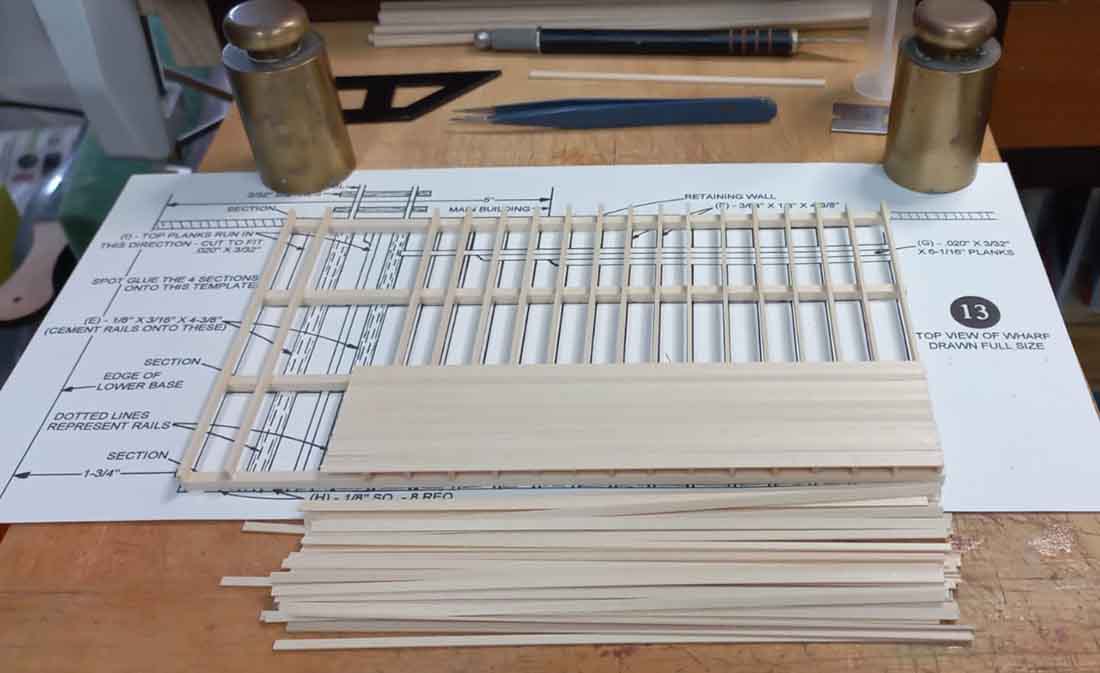
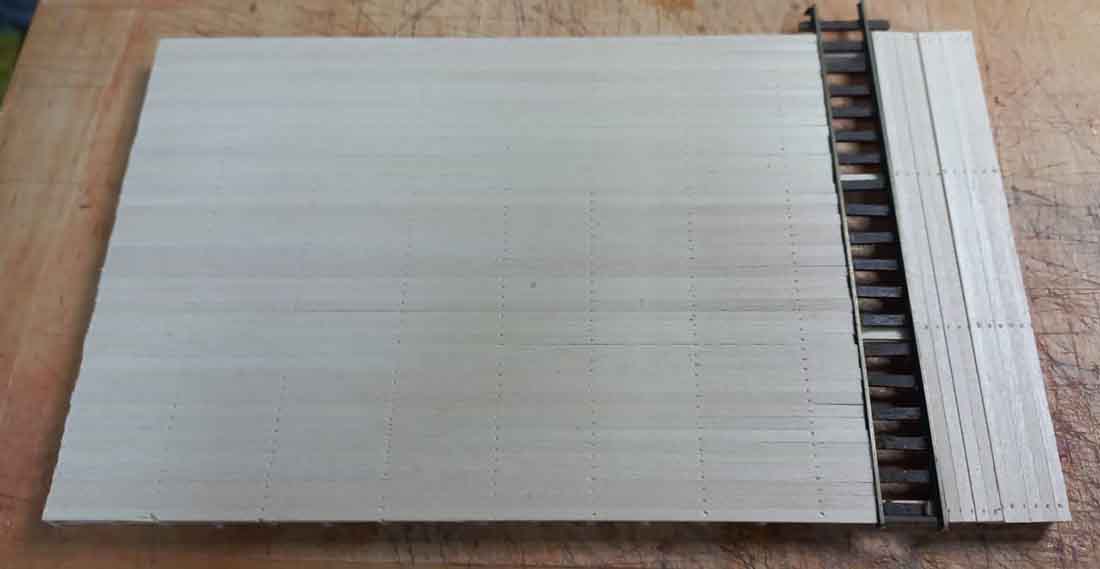
The nail holes were added using a ‘ponce wheel’ against a metal ruler. I obtained the ‘ponce wheel’ from a dress makers shop (It is used by dress makers to mark out dress patterns) You do get different size wheels with different amounts of teeth per inch.
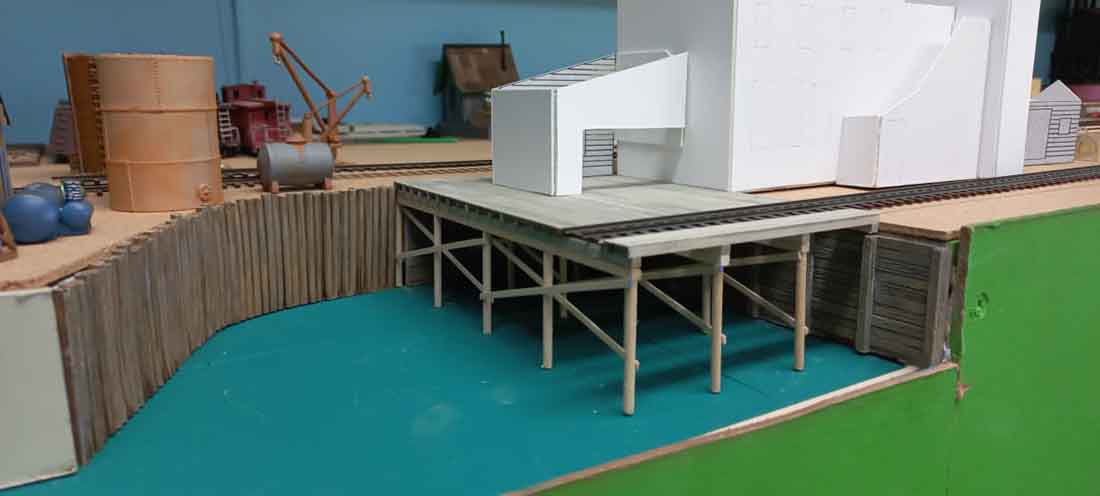
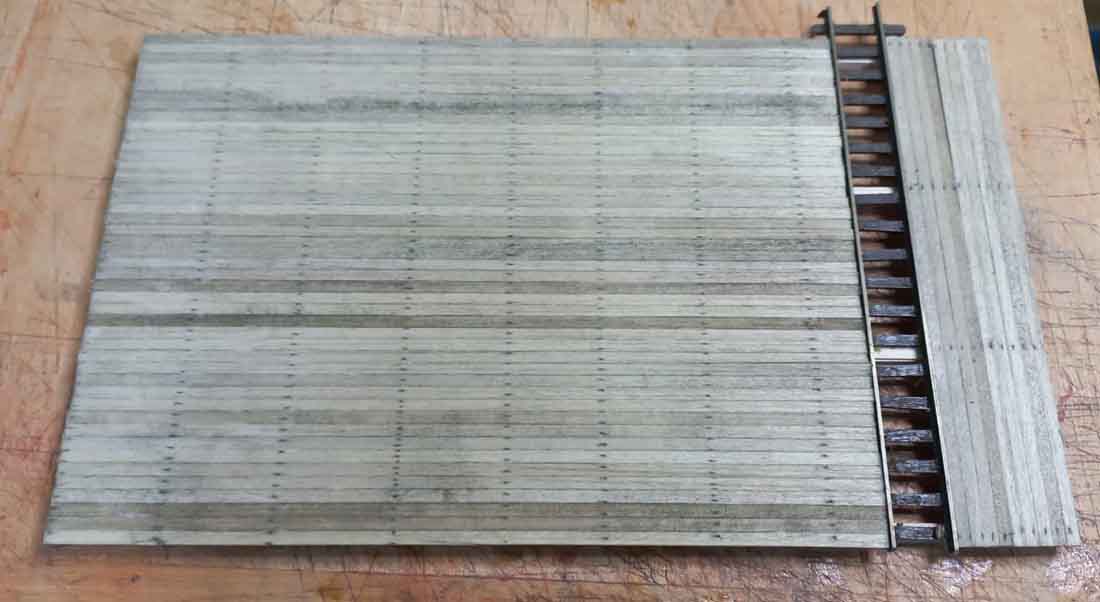
The above shows the test fit of the pilings to ensure the correct height.
The side pilling wall was made using skewer sticks, cut, stained, weathered and glued to fit the cutout area.
The ‘wood wall’ behind the wharf was from a wood wall casting that I made using casting resin and painted accordingly.
Another view taken of the wharf. The wall on the left is a long piece of Masonite painted with Woodland Scenics concrete colour and has the wood support posts added. Still needs to be weathered once fixed in place.
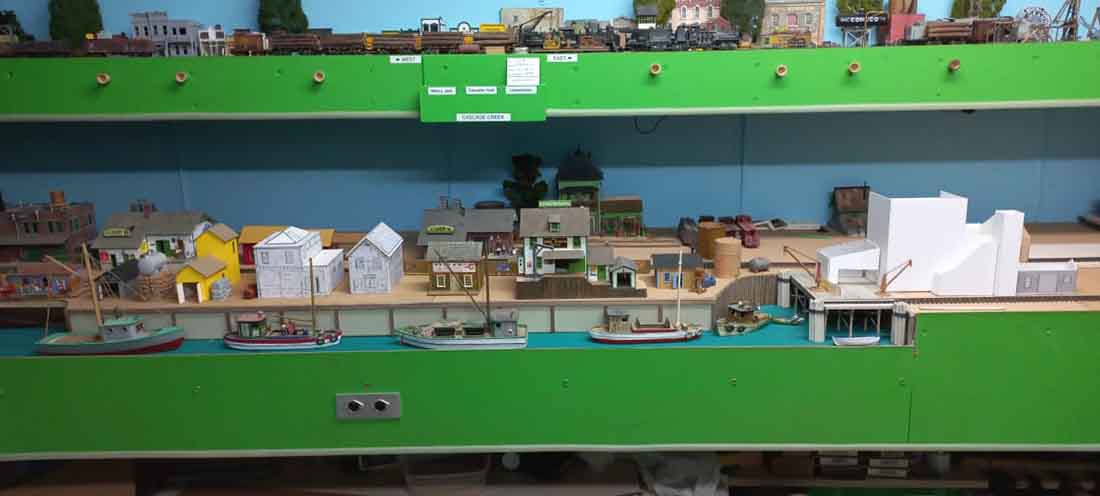
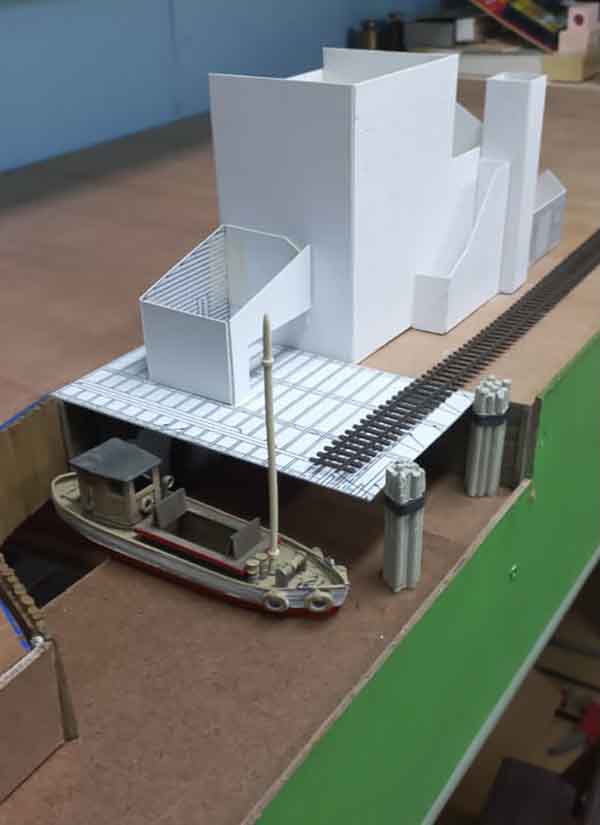
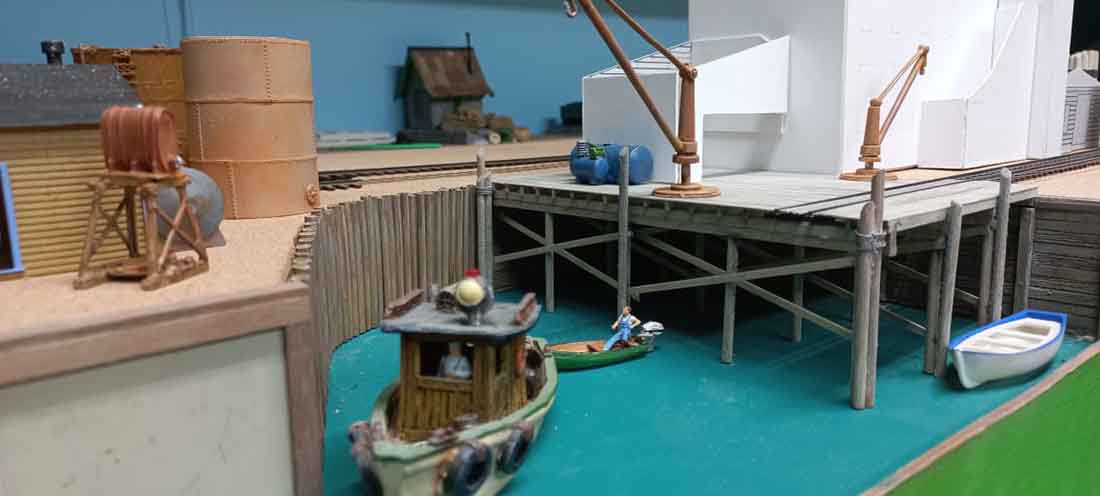
The photo below shows where it fits in on my layout (Pelican Bay).
Unfortunately this is as far as I have progressed on this build. Now to start on the main and side buildings.
Will keep you all posted in future articles on the build.Have fun and keep modelling.
Brian – the HOn3 guy in Knysna.”
A big thanks to Brian.
Whenever I see his name in my inbox I’m always reminded of his HO scale dock.
That’s all for today folks – please do keep ’em coming.
Hope today’s post made you smile.
And if today is the day you build your own space-time continium layout, the Beginner’s Guide is here.
Best
Al
PS Latest ebay cheat sheet is here.


uuuuummmm…. april the 1st?
Ridiculous!
what is growing on that farm lol
Very detailed wharf you have there. Very nice work.
Where are the running trains ?
Charles
I cant imagine Z scale. Loved your narrative and your whimsical theme for your layout. It seems to me many just want to see a photographic, perfect, replica of something real so they dont have to open that box in the brain which may have some demons emerge and God forbid have imagination. Space constraints are a big problem for some but there should be NO constraints on fun and imagination. The poorfarm is a heavy concept and I appreciate learning about it. So many things out of scale but I love it.
Brian
Where Charles above is the Picasso you are the DaVinci. For some reason, and I am not cheap, I cannot fathom spending $195 for a kit as great as it is. It is this fault of mine that says I can do it cheaper and then it turns out like crap. In my old age I have to learn to be more precise and give in to the pros so watching you is a big learning process.
All be safe
Hi Brian, I’m always impressed with your layout projects and the buildings you create are so realistic. Where do you get your wood products from ?
Chuck
This is a general comment. Why is it that most perimeter fascia is not painted to blend in with the scenery on the layouts? I look at the wharf scene and the blue water contrasted by the green fascia and I think wouldn’t that look cool if the color carried down the fascia? Other RR’s could use camo or blended colors to carry the scene instead of the stark contrast of the fascia board. Just wondering. I love looking at all the craftsmanship on this page and marvel at the skills of the craftsmen displaying their roads. Just Sayin’
Looks Kool. I like the yellow submarine.
Nice jobs guys. Have fun!
Thank you for publishing the O&P RR, Alastair, and thank you for the kind comments, folks. Even criticism is OK with me, this layout is just for fun. Reality is highly overrated.
I should add: that wonderful background was painted by my wife, a lady of many talents and best of all, tolerance for my hobbies.
Brian, Nice trade on the kit since it is worth almost $400 now!
one of the wonderful things about our “hobby” is that it is so many things to so many different people. and above all else
you control and create whatever it is that makes you happy!
To Chuck Holsclaw, I get all my wood products for my modelling from Walthers in Milwaukee – USA under the brand name of Northeastern Scale Wood. (Both sheets and strip wood.
To all the others who commented on my article – thanks, for both the positive and negative comments.
I strive to do the best that I am able to do as well as satisfying myself and keep my standards to the best of my ability.
After all, it is my layout and I am the boss 🤠😜
Brian – the HOn3 guy in Knysna RSA
Brian Messenger and Chuck Holsclaw
Another source of wood products can be found at
Balsa Wood Products, Inc
They have balsa wood, birch wood, and basswood for modelers
Hope that helps.
I love the name of the layout, I see you have passes; Would you like to exchange for one of mine