Ian’s been in touch – he’s shared his train layout in a shed:
“Hi Alistair,
My interest in trains started at the age of 6 yrs.
When I lived in Great Torrington, my father use to take me down to the station where I spent most of my time taking train numbers ( don’t ask me why).
During that time I got to speak to many engine drivers as well as the fireman. It was because of this that I was offered a trip on the footplate on the Petrockstow line.
Could you imagine that happening now especially with the so called Health and Safety rules.
I was hooked. It was then a built my first Tri-ang analogue layout.
After years of moving around Devon, Dorset and Norfolk I married a Weymouth girl whose father happened to be the Weymouth Station master and the second layout was built. This time it was digital, a train layout in a shed approx. 18@x15’ and was a very complicated layout.
About 3 years ago we moved house which had a long but narrow garden, once the house was in some sort of order a shed measuring 14’x10’ arrived on Nov 2020 somewhat smaller than I wanted.
Rob our electrician was summoned to wire up the shed on one condition that a cup of tea and a visit to the model railway construction was in order should any work be undertaken in the house.
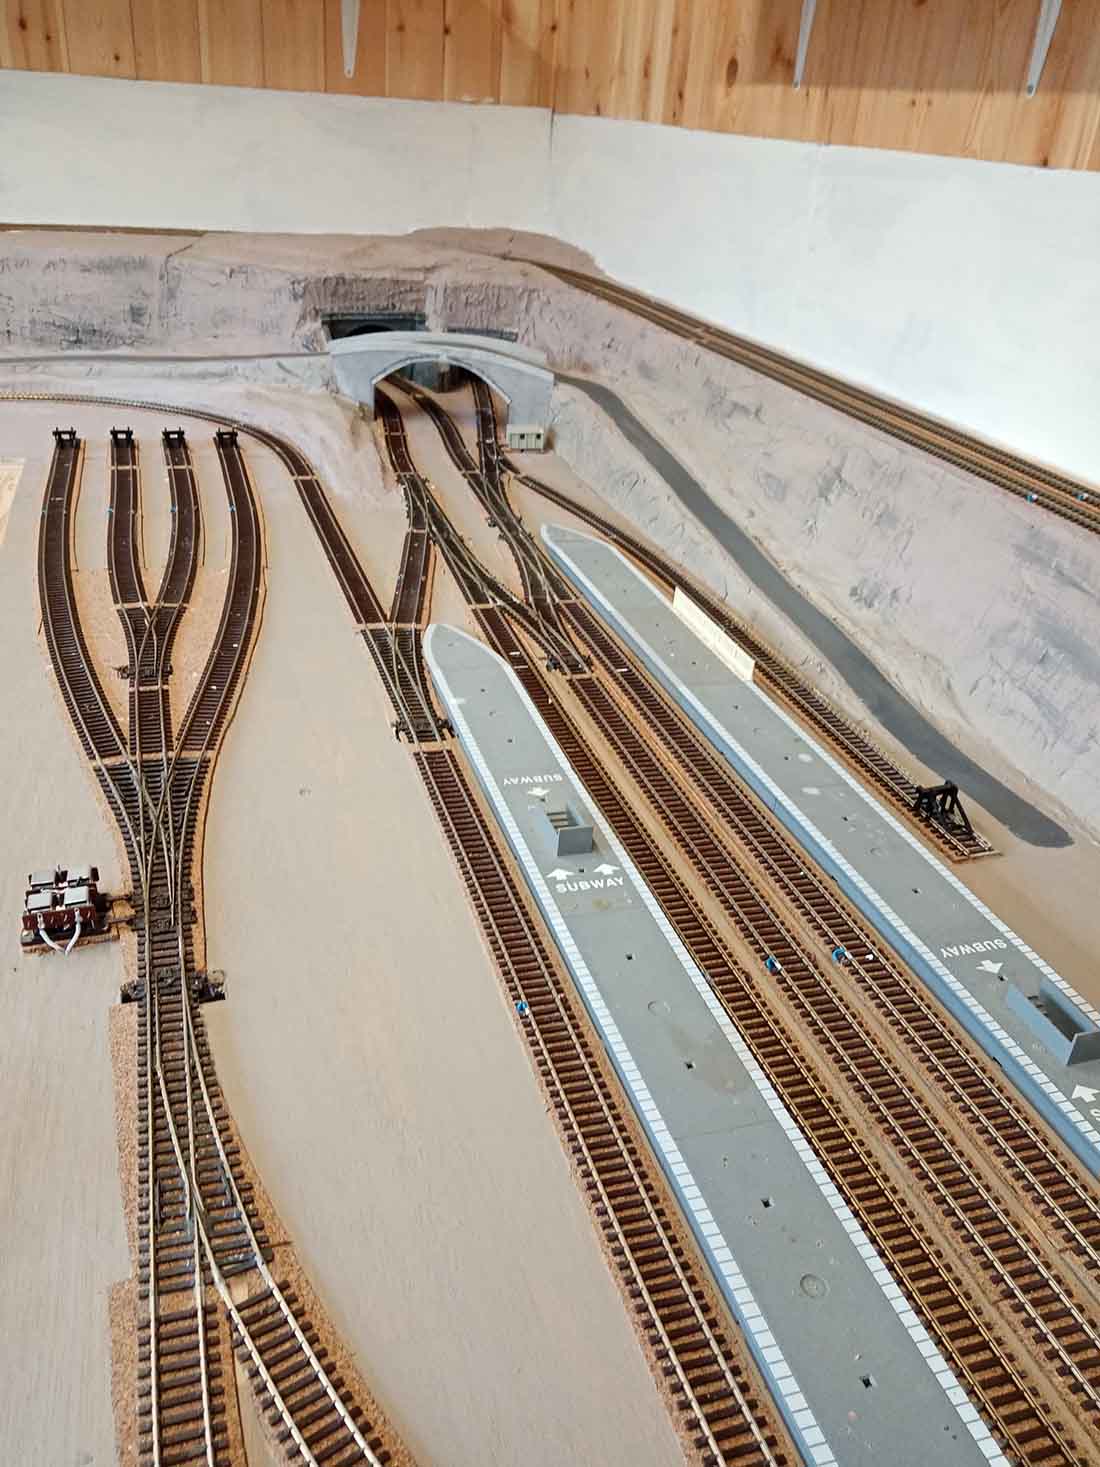
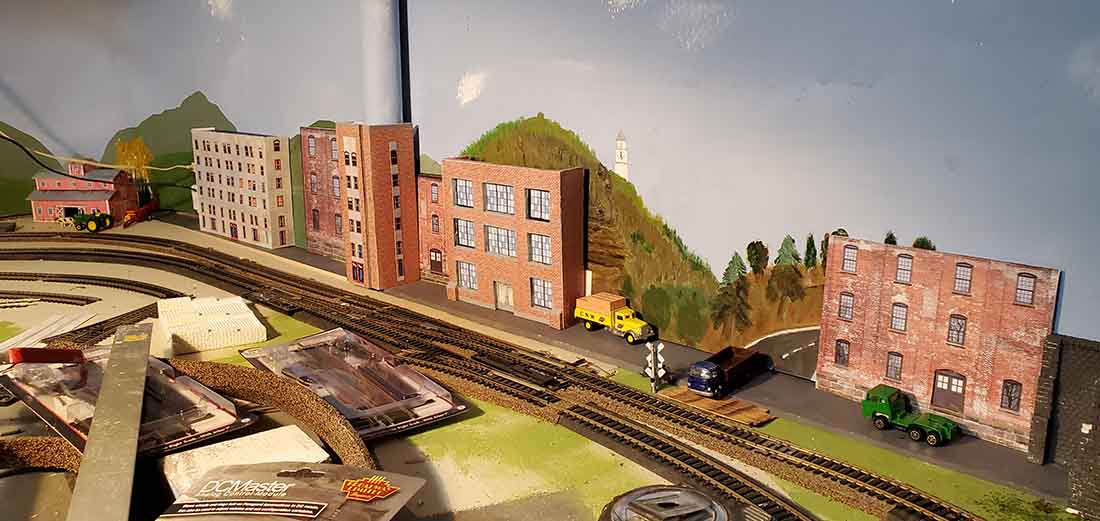
I had an idea as to how the layout should look so first the baseboard was constructed using 3/8” ply and 3”x2” legs which would support my weight, the base width itself was anything between 24” to 36” which gave me plenty of room for the marshalling yard etc.
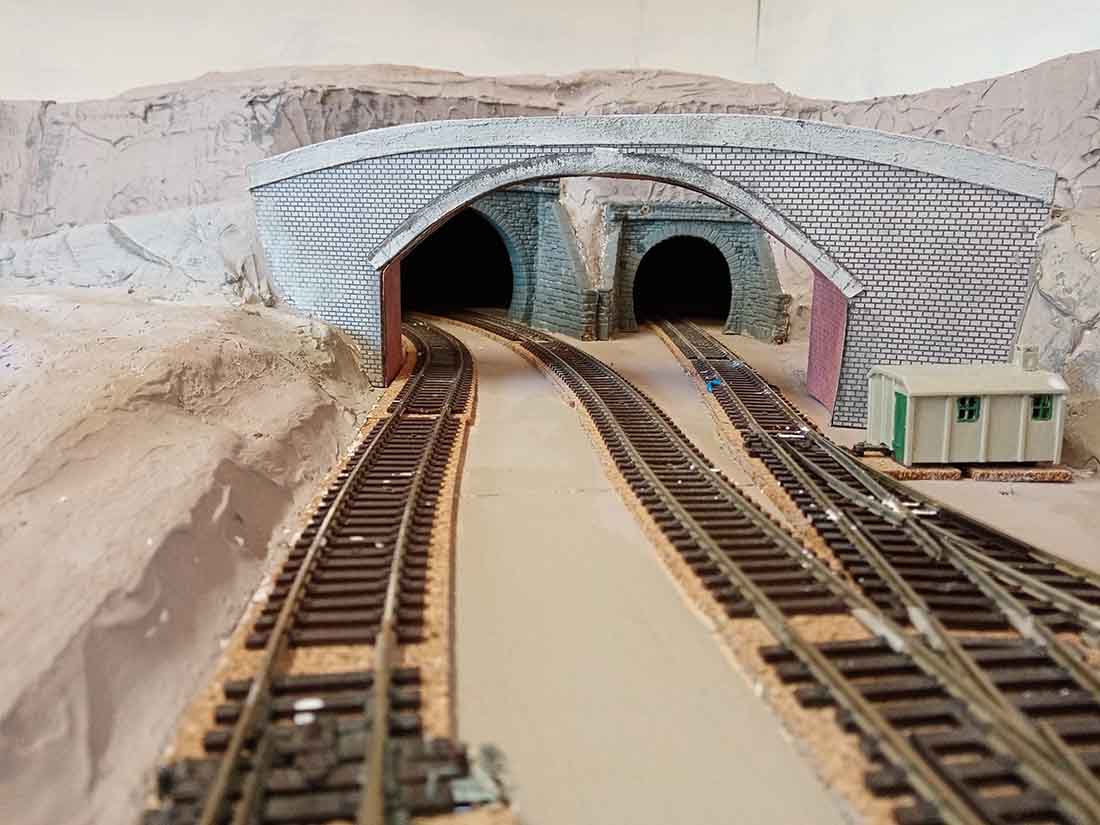
At this point a second base board was added underneath this ran the full width and length of the shed to incorporate a single track eventually ending up under the control board with four siding fiddle yards, entrance to the fiddle yard is via the tunnel nearest the wall.
Inclines of 1” every 24” were made of ply/hardboard and covered in cardboard, mod rock and a thin layer of Polyfilla to give the rock effect.
Once the inclines, tunnels and bridges were in place and the whole thing wired up to the control board I ran several trains with various rolling stock to make sure of any mishaps.
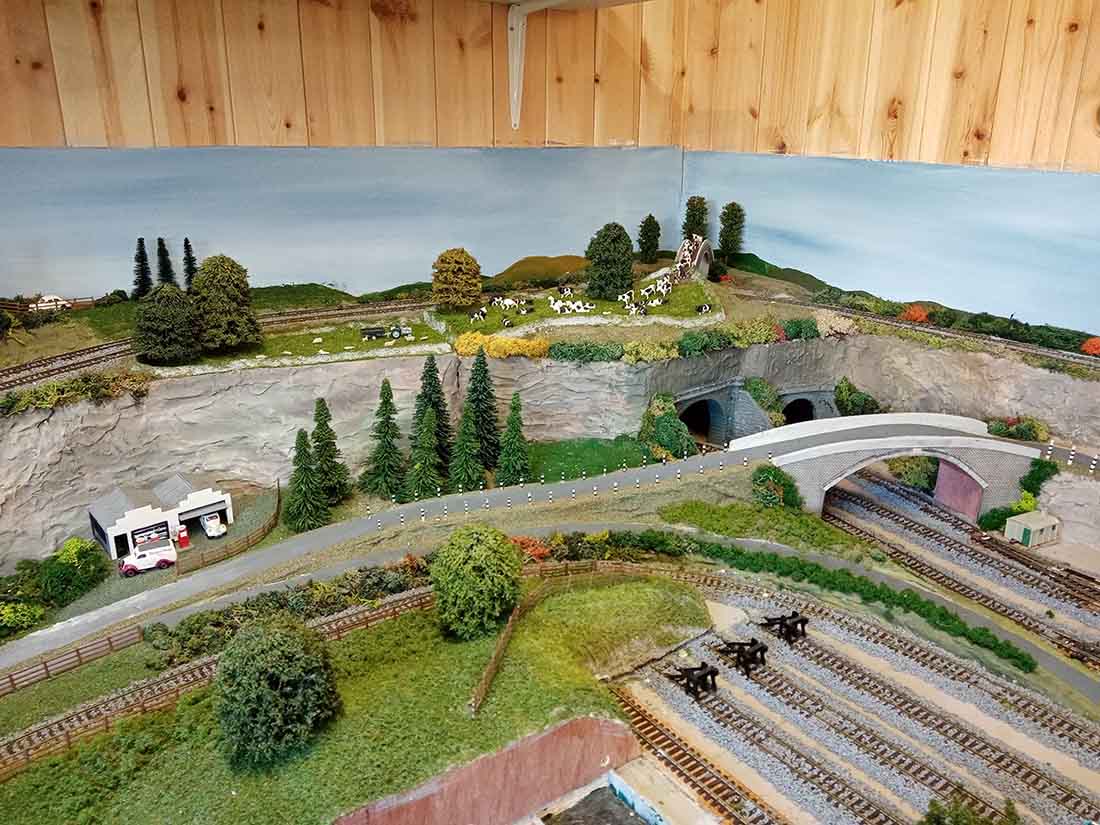
Next was the Faller car system which I had from my previous layout, as you can see from the video the little VW Camper van run really well sadly only enough room for a single track.
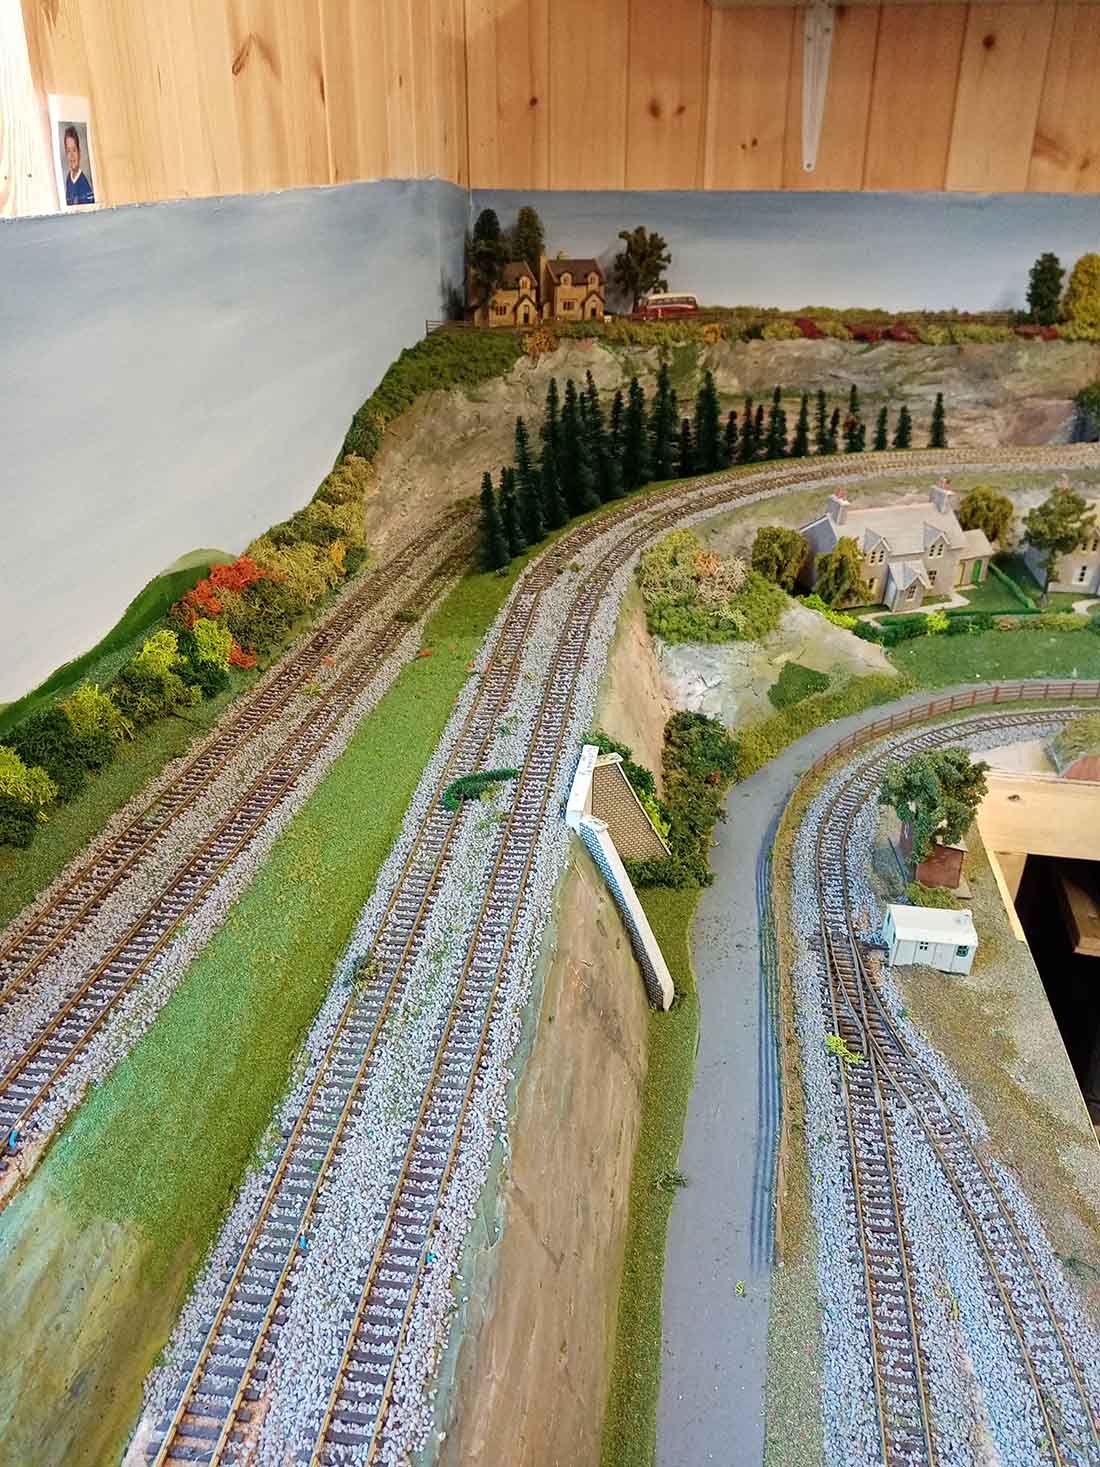
Access to the shed was made from a sliding section 18”x24” (I hope I don’t put on any weight) which can be removed and stored when required, ballast and scenery were next on the agenda, buildings placed in various positions to give me some idea of how the scenery was to be created.
Two sections of the hills can be removed for easy access should a train become derailed, the first is behind the garage the second is in front which allows me to clamber up onto the base board to get to the far corners if required.
Only a 3rd of the scenery is partly finish if ever it is, I don’t want to shut myself in the shed for the rest of my retirement, so I joined a model flying club something I’ve always been interested in.
So dry weekends are spent flying, wet weekends are spent either in the shed or repairing the WOT trainer, for some reason the cornfield in the surrounding landing patch seems to jump up at the plane when landing.
I’m not a model train buff and I’m sure some of you will look at the layout with disapproval especially the way the building etc are placed but to me it’s the way I see it even if some of the engines are pulling the wrong rolling stock, it’s all in the satisfaction of scratch building and running the trains achieving something on your own.
Ian”
There’s been quite a few train layouts in sheds recently – a simple way to get your own space. And think of the peace and quiet…
Here’s Ron’s: Garden shed model railway layout.
Next on to Dan, who has been busy with some of the printable buildings:
“You will recognize most of this stuff as much of it is yours.
The 3 sided tower covers the drain from the kitchen and has windows from the building next to it.
As this is somewhat distant I did not do the relief that John recommends. Great to do while watching football (not soccer) playoffs.
Greenery and other landscape treatments will finish it off. But first I have track work to do.
Have a great balance of the day.
Dan, aka MN Dan.”
Now on to Bill who has a question:
“Hi Al,
Thank you for all the posts! I read them every day and save most of them for future.
I have finally started! As a kid, I set up my Lionel around the Christmas tree and ran it until tinsel fell on the tracks popping the circuit breaker. It has been seventy years since those days and I have finally started my layout.
I decided my first effort would be a conservative 4 x 8 early twentieth century California Sierra Mountains logging operation with two connected tracks in HO scale; an upper/inner logging track bringing rough cut logs down to the mill and village where they would be cut and loaded onto flat cars for transport to “market” on a larger mainline.
I have completed the bench work and laid out both lines, but now I am losing some confidence. My lower mainline should be fine with 18” radius and 2% incline/decline, but I’m more concerned about the upper layout. I have designed the track on a 12” radius with 3% to 4% incline/decline hills. My intention is use a small loco, x 6 x, or Shay at slow speeds pulling three or four logging cars. Am I destined for continuous frustration with derailments using this tight of turns?
Thanks in advance for your input.
Bill
California, USA”
Please leave a comment below if you can help Bill.
That’s all for today folks.
Please do keep ’em coming.
And if today is the day you get busy on your very own layout, the Beginner’s Guide is here.
Best
Al
PS More HO scale train layouts here if that’s your thing.
Need buildings for your layout? Have a look at the Silly Discount bundle.

Ian , your layout is looking great now , and Dan you are starting to see the results , small can be beautiful….
Ian-
Very nice layout, thanks for sharing! I’m sure everyone would like more photos and more details. I assume it is 00? Can you share a track plan as well as some rolling stock photos? If you do a video- include the WOT trainer!
Nice looking HO layout, way to go.
Beautiful layout, and great job. Enjoy your railroad and thanks for sharing.
where did you get that 3 way wye switch , I need one in code 83 for my layout and can only find code 100
Pretty Neat.!!!!!
very nice. makes want to change from my basement to my 10 x 12 shed, maybe.but still very nice.
Bill,
First check the manufacturer’s documentation about how small a radius the loco will negotiate.
second, a quick search say you might be able to use a shay on 12″ radius, since often a loco can go around a smaller radius than the manufacturer says, so it would bear testing. See if you can find someone who has the loco in question and see if you can set up a test curve to try it on.
Bill
Attach a straight piece of flex track temporarily to a board and keep raising the incline until your engine and your expected consist of freight cars yells “enough.” Then lower the board a bit at a time until your height and car load runs smoothly.
Do the same thing with a piece of horizontal flex track and reduce your radius until the engine starts balking or jumping. Then INCREASE you radius to the space you have to ensure everything stays on the tracks.
Have fun!
Great info for someone that is just starting out laying track. Thanks. Kevin
Bill, You are doing just the right thing, test, test, test. Test your radius and your inclines with the equipment you plan to use. I am starting a layout in a small room, (7.5′ x 9.5′). I put together some track on a board starting with 12″ radius and working down to 9″. Easements are in order and easy to do and all equipment looks good and tracks well. I use the method John Armstrong describes in his book Track Planning for Realistic Operation. As his lowest numbers are for an 18″ radius, I just use the same figures for all curves, 12″ down to 9″. It takes very little space, only 3/4″ for a 180-degree curve. Try it, you’ll like it.
Bill,
In my experience I wouldn’t worry too much about the incline being as much as 4%. That’s what “helper” locomotives are used for to this day in the Rocky Mountains.
Ian amazing layout! Build it so it pleases you!!!
Daniel
well done, love the tunnels
Serious undertakings and comments today. The RR is beyond reproach and using printable sheets for backdrops is endless possibilities and savings. Especially with scales and sizing at fingertips for distance illusion.
Rich
Bill,
I have done tight curves and up to 4% grade. Your loco needs to be as heavy as possible for traction, be able to negotiate the curves (try an 0-4-0 or 0-6-0 or an articulated Shay style). Choose it carefully, as some modern locos tend to be lighter, and less capable under load on grades. Conversely, I have an old Arnold 0-6-0 whch would probably haul a 6-car train up a 6% grade without wheel slip or other problems.
Make sure you tailor your wagons, so that they are as light as possible (including the load) to reduce the required pulling power of the loco. If possible, go for shorter wheelbase wagons which will negotiate tight curves better, or wagons with articulated bogies. You will soon learn by testing how many wagons can be pulled – you may even get down to 3 or 2 for smooth running.
One last thing – check that the couplings are moving freely on the curves. If they are binding or running out of travel, they can cause derailments and other troubles
Very nicely done , very subtle but great detail . Cant imagine having an entire shed to house my display , I’m envious at that .
Bill, other comments about testing are right on. As a last resort, after track is laid and you still have derailments at specific locations, I have used superelevation as a means of keeping wheels on rails. This involves using thin wedges under the track bed to raise the rail on one side so that all the driving wheels remain in contact with the rails as much as possible. Note that this becomes very specific to a small number of locomotives of similar configuration, and to very specific locations, often entering or leaving switches and curves. Very fiddly work, but it can make the difference between keeping the current configuration and relaying lots of track.
Nice layout Ian, looks good and Dan, the background buildings look great.
Looks great !!! Both of them !!
Ronnie Temple: Roco has a 3-way switch in Code 83, catalog # 42454
Nice work! I always shudder when I see tracks that run behind/beneath scenery and hope you have access to the trackage incase of derailment or, God forbid, you need to repair some trackage. (Ask me how I know).
I’ve seen this many times. Why do some of these layouts missing ties between connections?
nice track work.
Ian’s back story brought back fond memories. My father was the station master at Hatherleigh and had responsibilities for Meeth and Petrockstow. I enjoyed many a footplate ride to Halwill Junction on the Great Torrington to Halwill Junction line. Great layout. and having a dedicated shed for a layout makes me so envious.
Great looking layout
What’s with the gaps between track connections?
Bill, my layout is in the same size room as yours and you can add a nice layout in that area. My layout has two levels, on the top shelf 12 inches wide and bottom shelf is 24 inches wide around the room. A great amount of detail can be added in small spaces.
The other two layouts are very well done and the comments made about testing testing and more testing are real.
Well done to all.
Brian – the HOn3 guy in Knysna RSA
Ian, you are wrong! There is no such thing as “the wrong rolling stock”. Your layout, YOUR rules. The most important thing is, and always will be, HAVE FUN AND ENJOY!!!!!
By the way, nice layout. Beautiful scenery and the vertical curved bridge is sooooo English.
Thank you for sharing you work with us.
Respectfully,
Frank Fleury
Surrey, BC, Canada (the former colony)
The missing ties are where the modeler had to remove the ties to install rail joiners between two pieces of track. The ties can later be replaced under the bare rails to hide the gaps. Dan just hasn’t gotten around to replacing them yet.
Bill, the great John Allen’s famous Gorre & Daphetid model railroad had 3-4 percent grades and 12-to-14-inch minimum radii and worked just fine with small locos and short cars. The testing recommendations are right on.