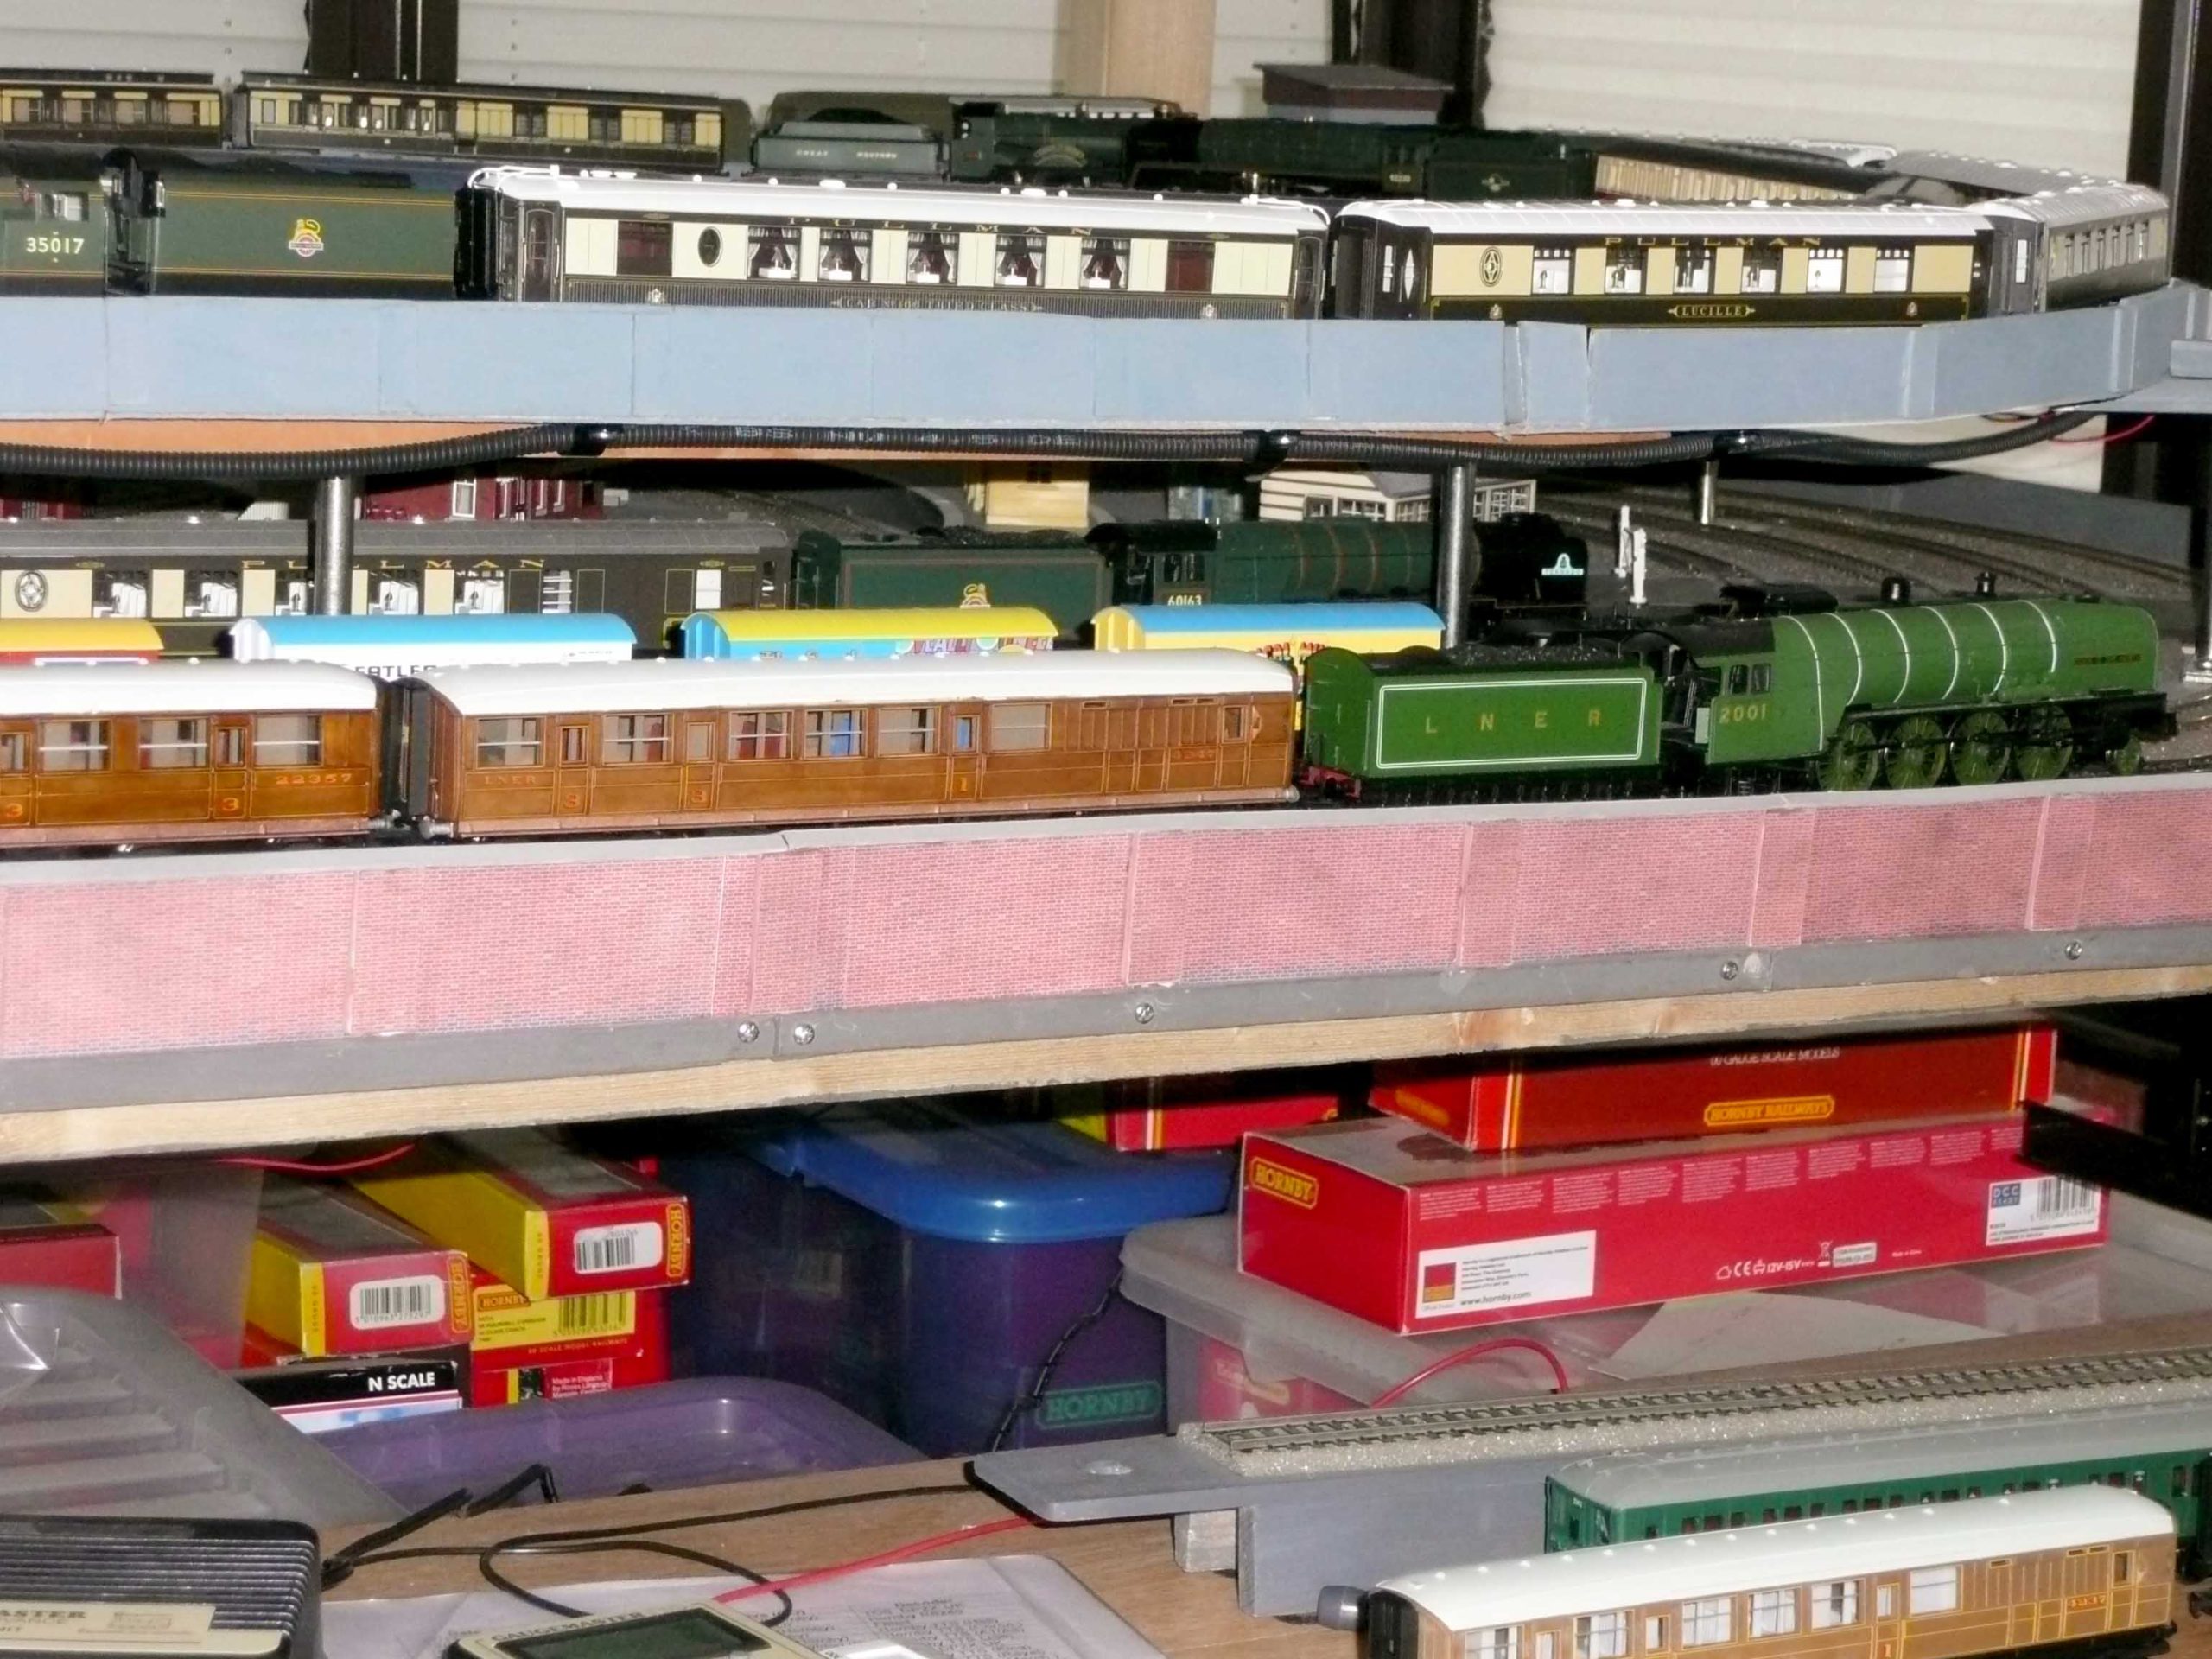
Steve’s been in touch. With the help of youtube he’s been busy weathering model train cars.
“Hi Alastair,
There are a number of YouTube vidoes that show a simple method for improving the look of Hornby ‘Railroad’ LNER Teak Coaches.
I was impressed by what I saw and decided to give it a try.
The steps that you need to follow are relatively simple:
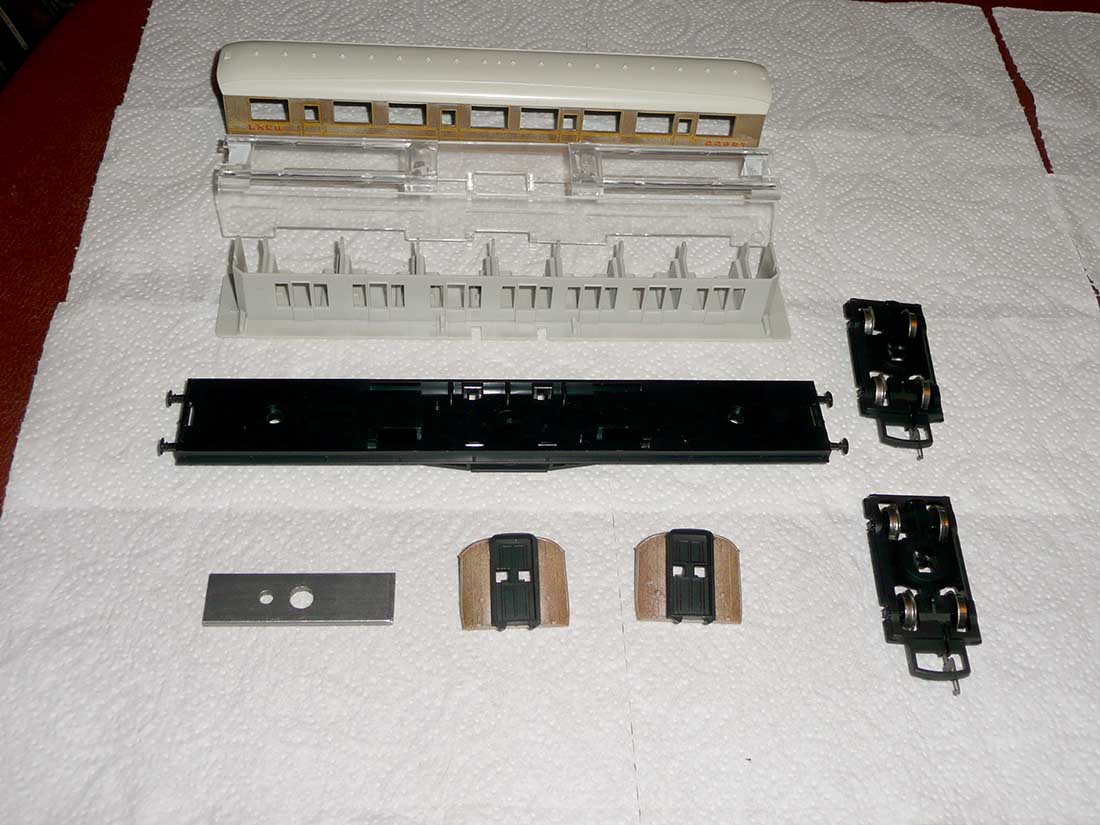
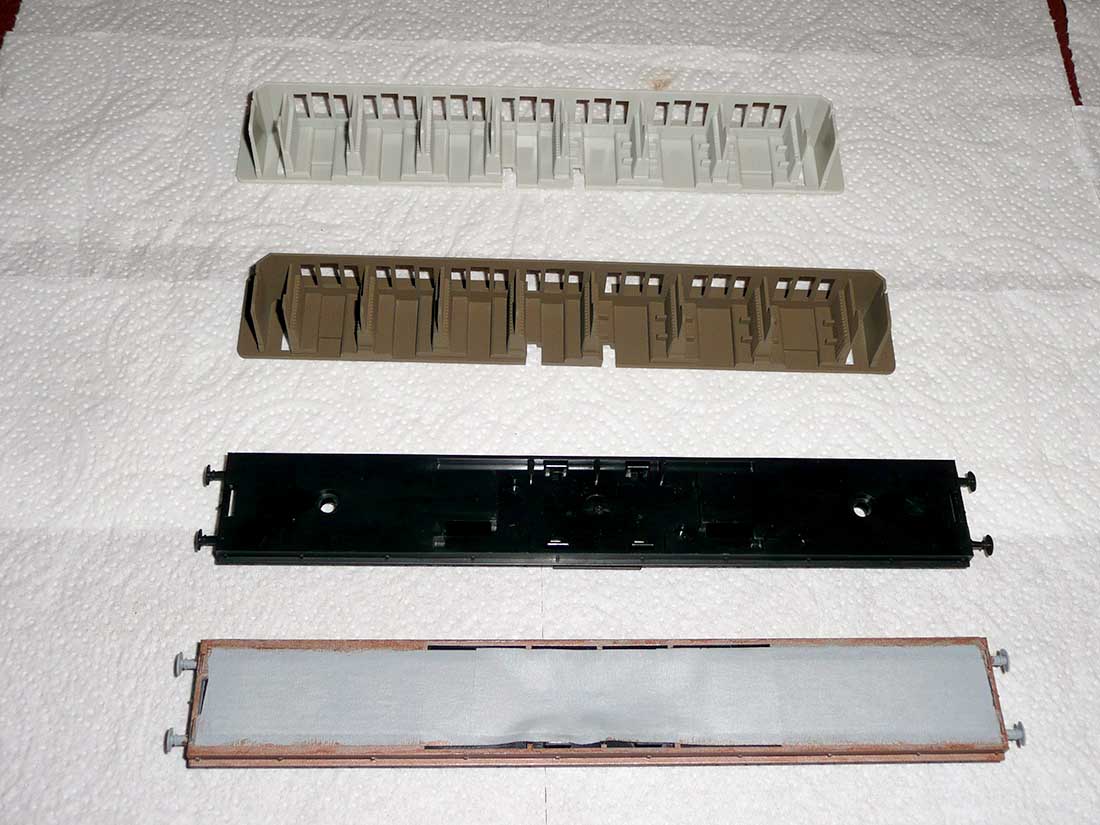
1. Dismantle the coach by first removing the bogies. Unclip the body shell by sqeezing the clip at each end. The body shell should now lift away.
If you encounter any resistence first check that the glazing unit is not glued to the inside of the body shell. If there is no glue it should be possible to remove the body shell with a small amount of force.
Now unclip the glazing unit from the base of the coach. You may now lift the glazing unit and the coach interior piece away from the
base. The ends of coach shell are separate pieces and can be pulled downwards and away from the main unit. There are YouTube videos that will explain the whole process.
If the glazing unit is glued to the inside of the body shell then unclip the glazing unit from the base and while keeping the body shell clips open remove the base of the coach. You should be able to see the areas of glue and these may be stripped away by inserting a craft knife between the two surfaces. All remaining components may now be separated as before.
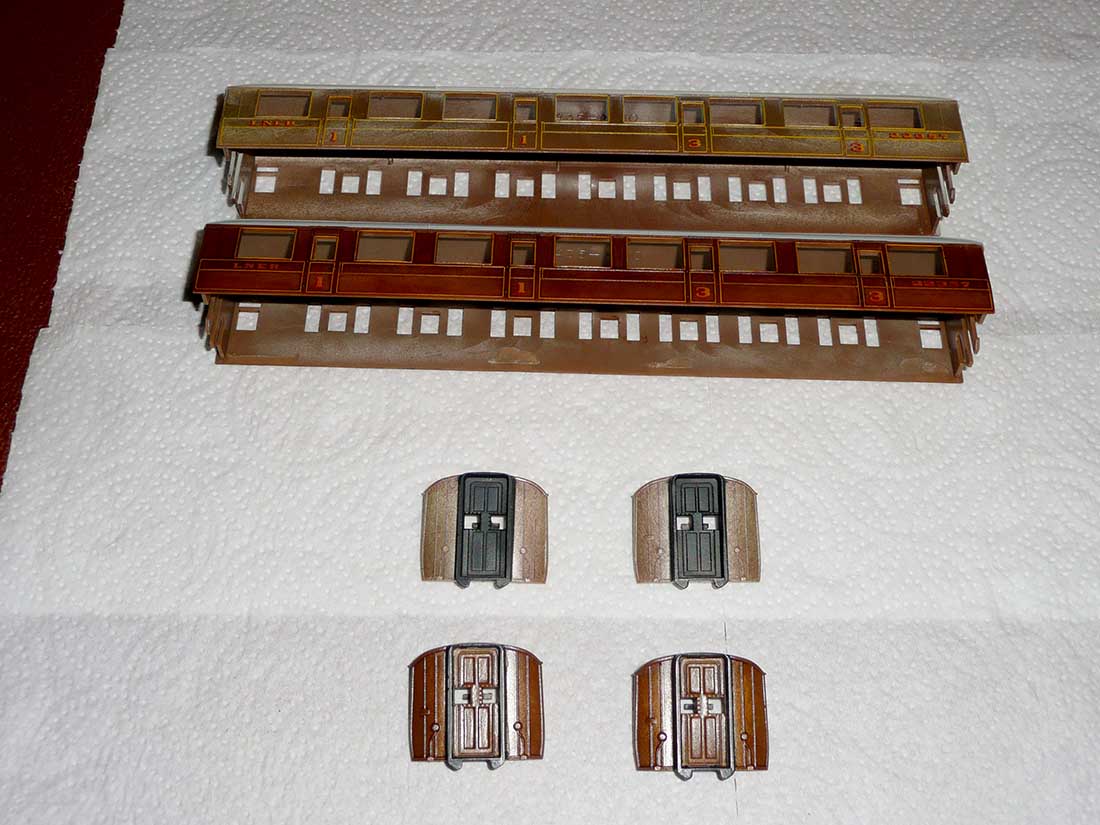
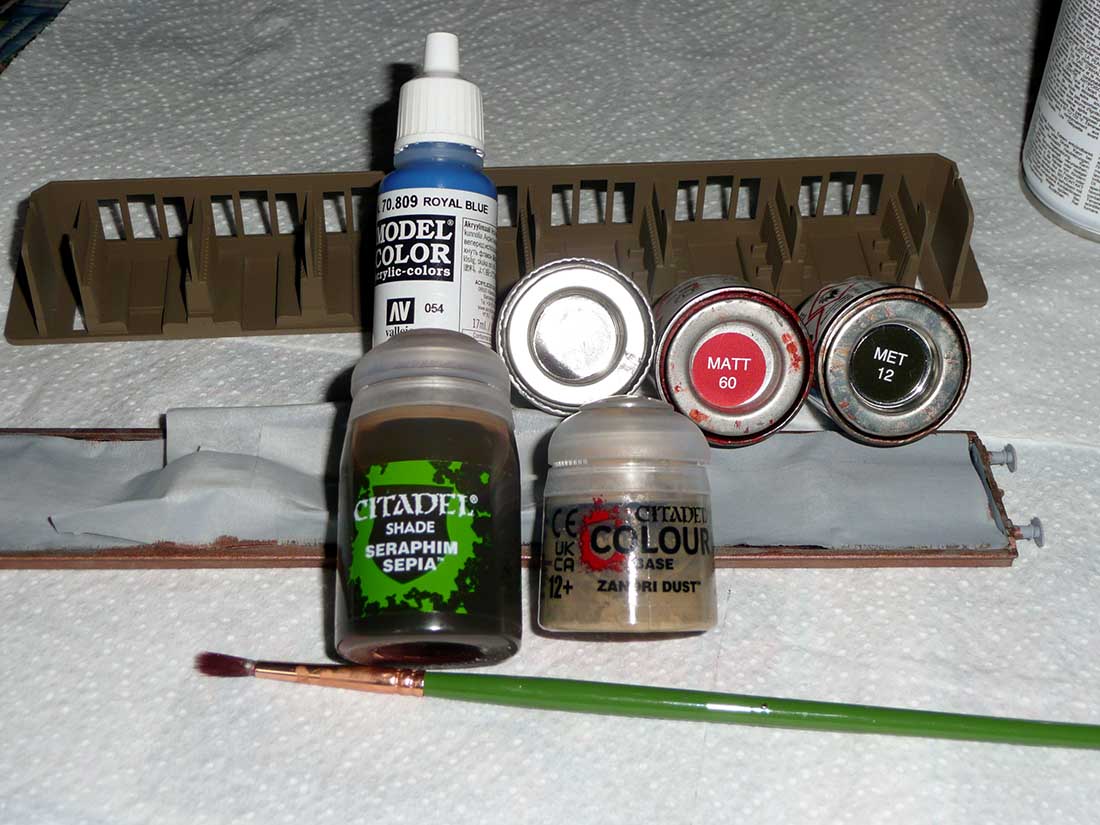
Carefully wash and rinse all the component of the coach in order to remove any dirt or grease.
Mask off the roof section and apply several coats of Citadel (Shade) ‘Seraphim Sepia’ to the teak surfaces. This may be applied using a soft paint brush.
I see no advantage in using an airbrush, although one may be used if you wish. The ‘Seraphim Sepia’ is a wash and will dry very quickly.
Take care not to apply too much at once and brush out any excessive build up in creases and corners. The colour will darken as you apply a further coat.
I applied five coats to my coaches.
This process will not damage any of the original lettering on the coach.
The doors at the ends of the coach are usually black in the Railroad models. If you wish to give them a teak finish than apply a coat of Citadel Base Colour ‘Zandri Dust’ before the coats of ‘Seraphim Sepia’.
Apply a coat of varnish. Initially I used Humbrol Clear applied with a paint brush. Now I prefer to use a Humbrol Satin Varnish Spray as it gives a more uniform finish.
If the roof surfce is damaged in any way and you wish to respray it then mask off the body sides and apply the colour of you choice.
(Precision Masking Tape should not damage any of your previous work.)
Apply any paint of your choice to the coach interior. E.g. Framework – Humbrol ‘Dark Earth’ (29) ; 1st class seating – Blue; 3rd class seating – Red.
Paint sections of the underframe as you desire.
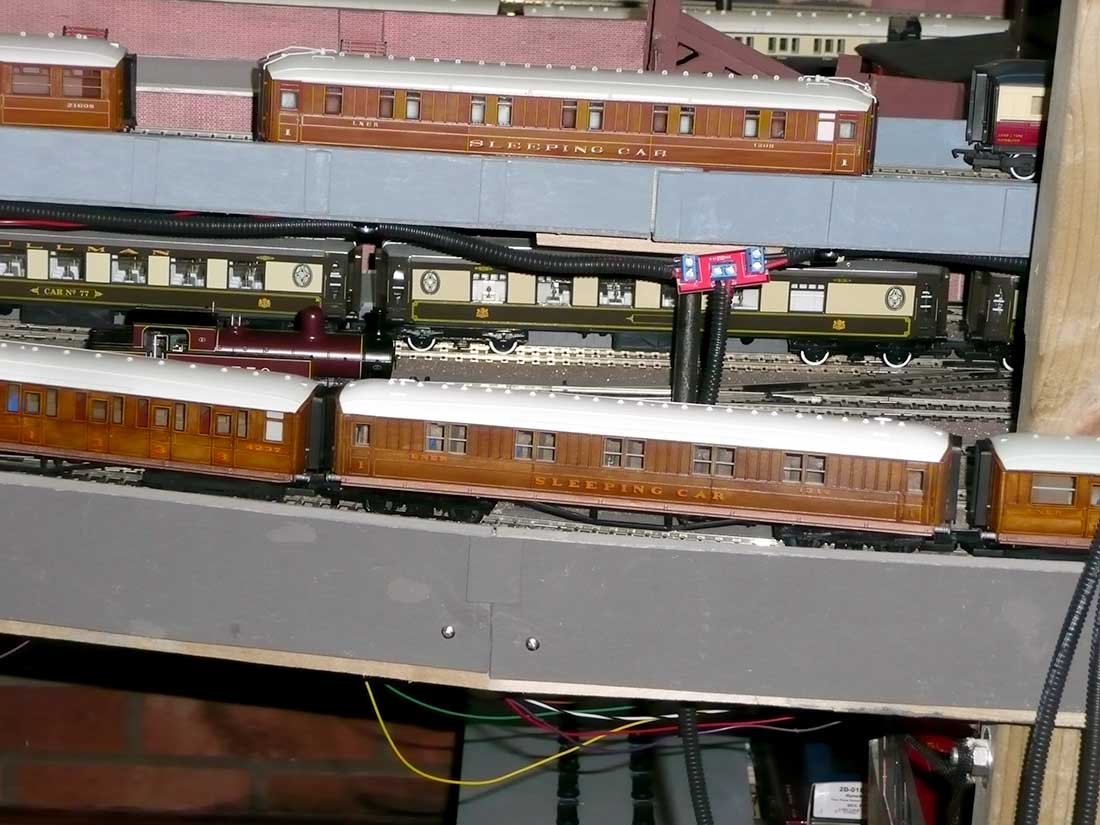
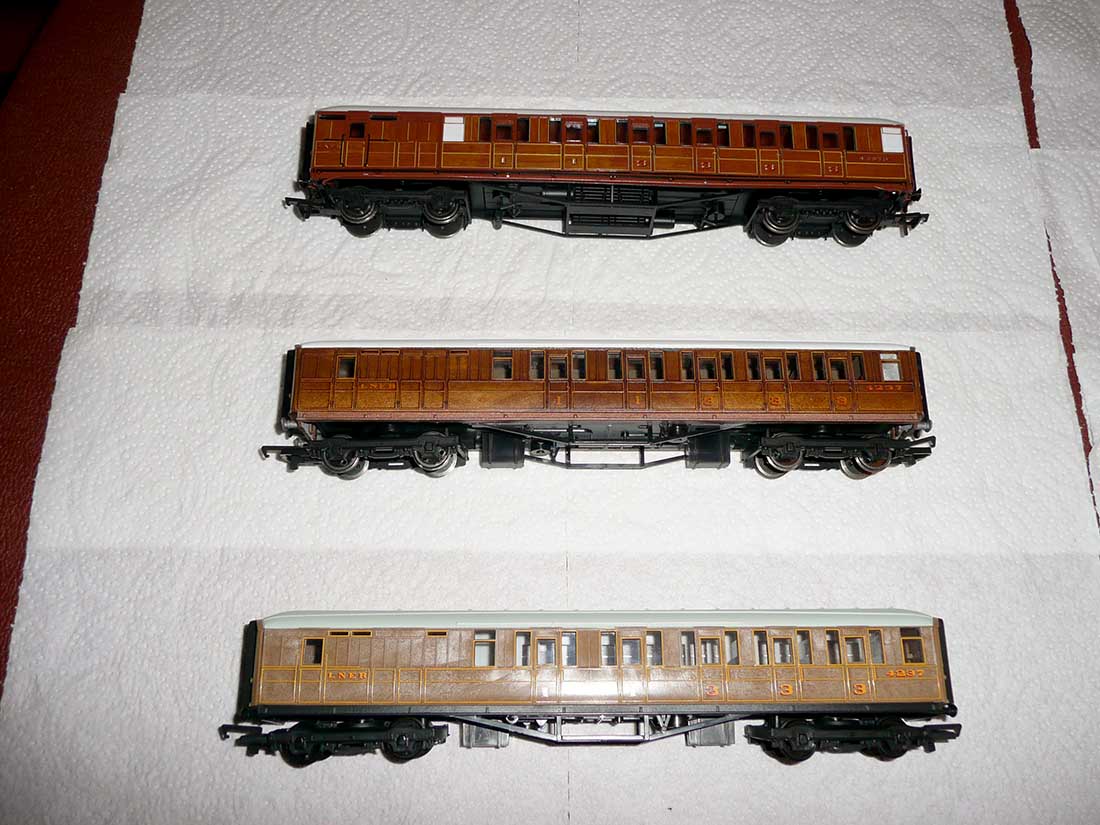
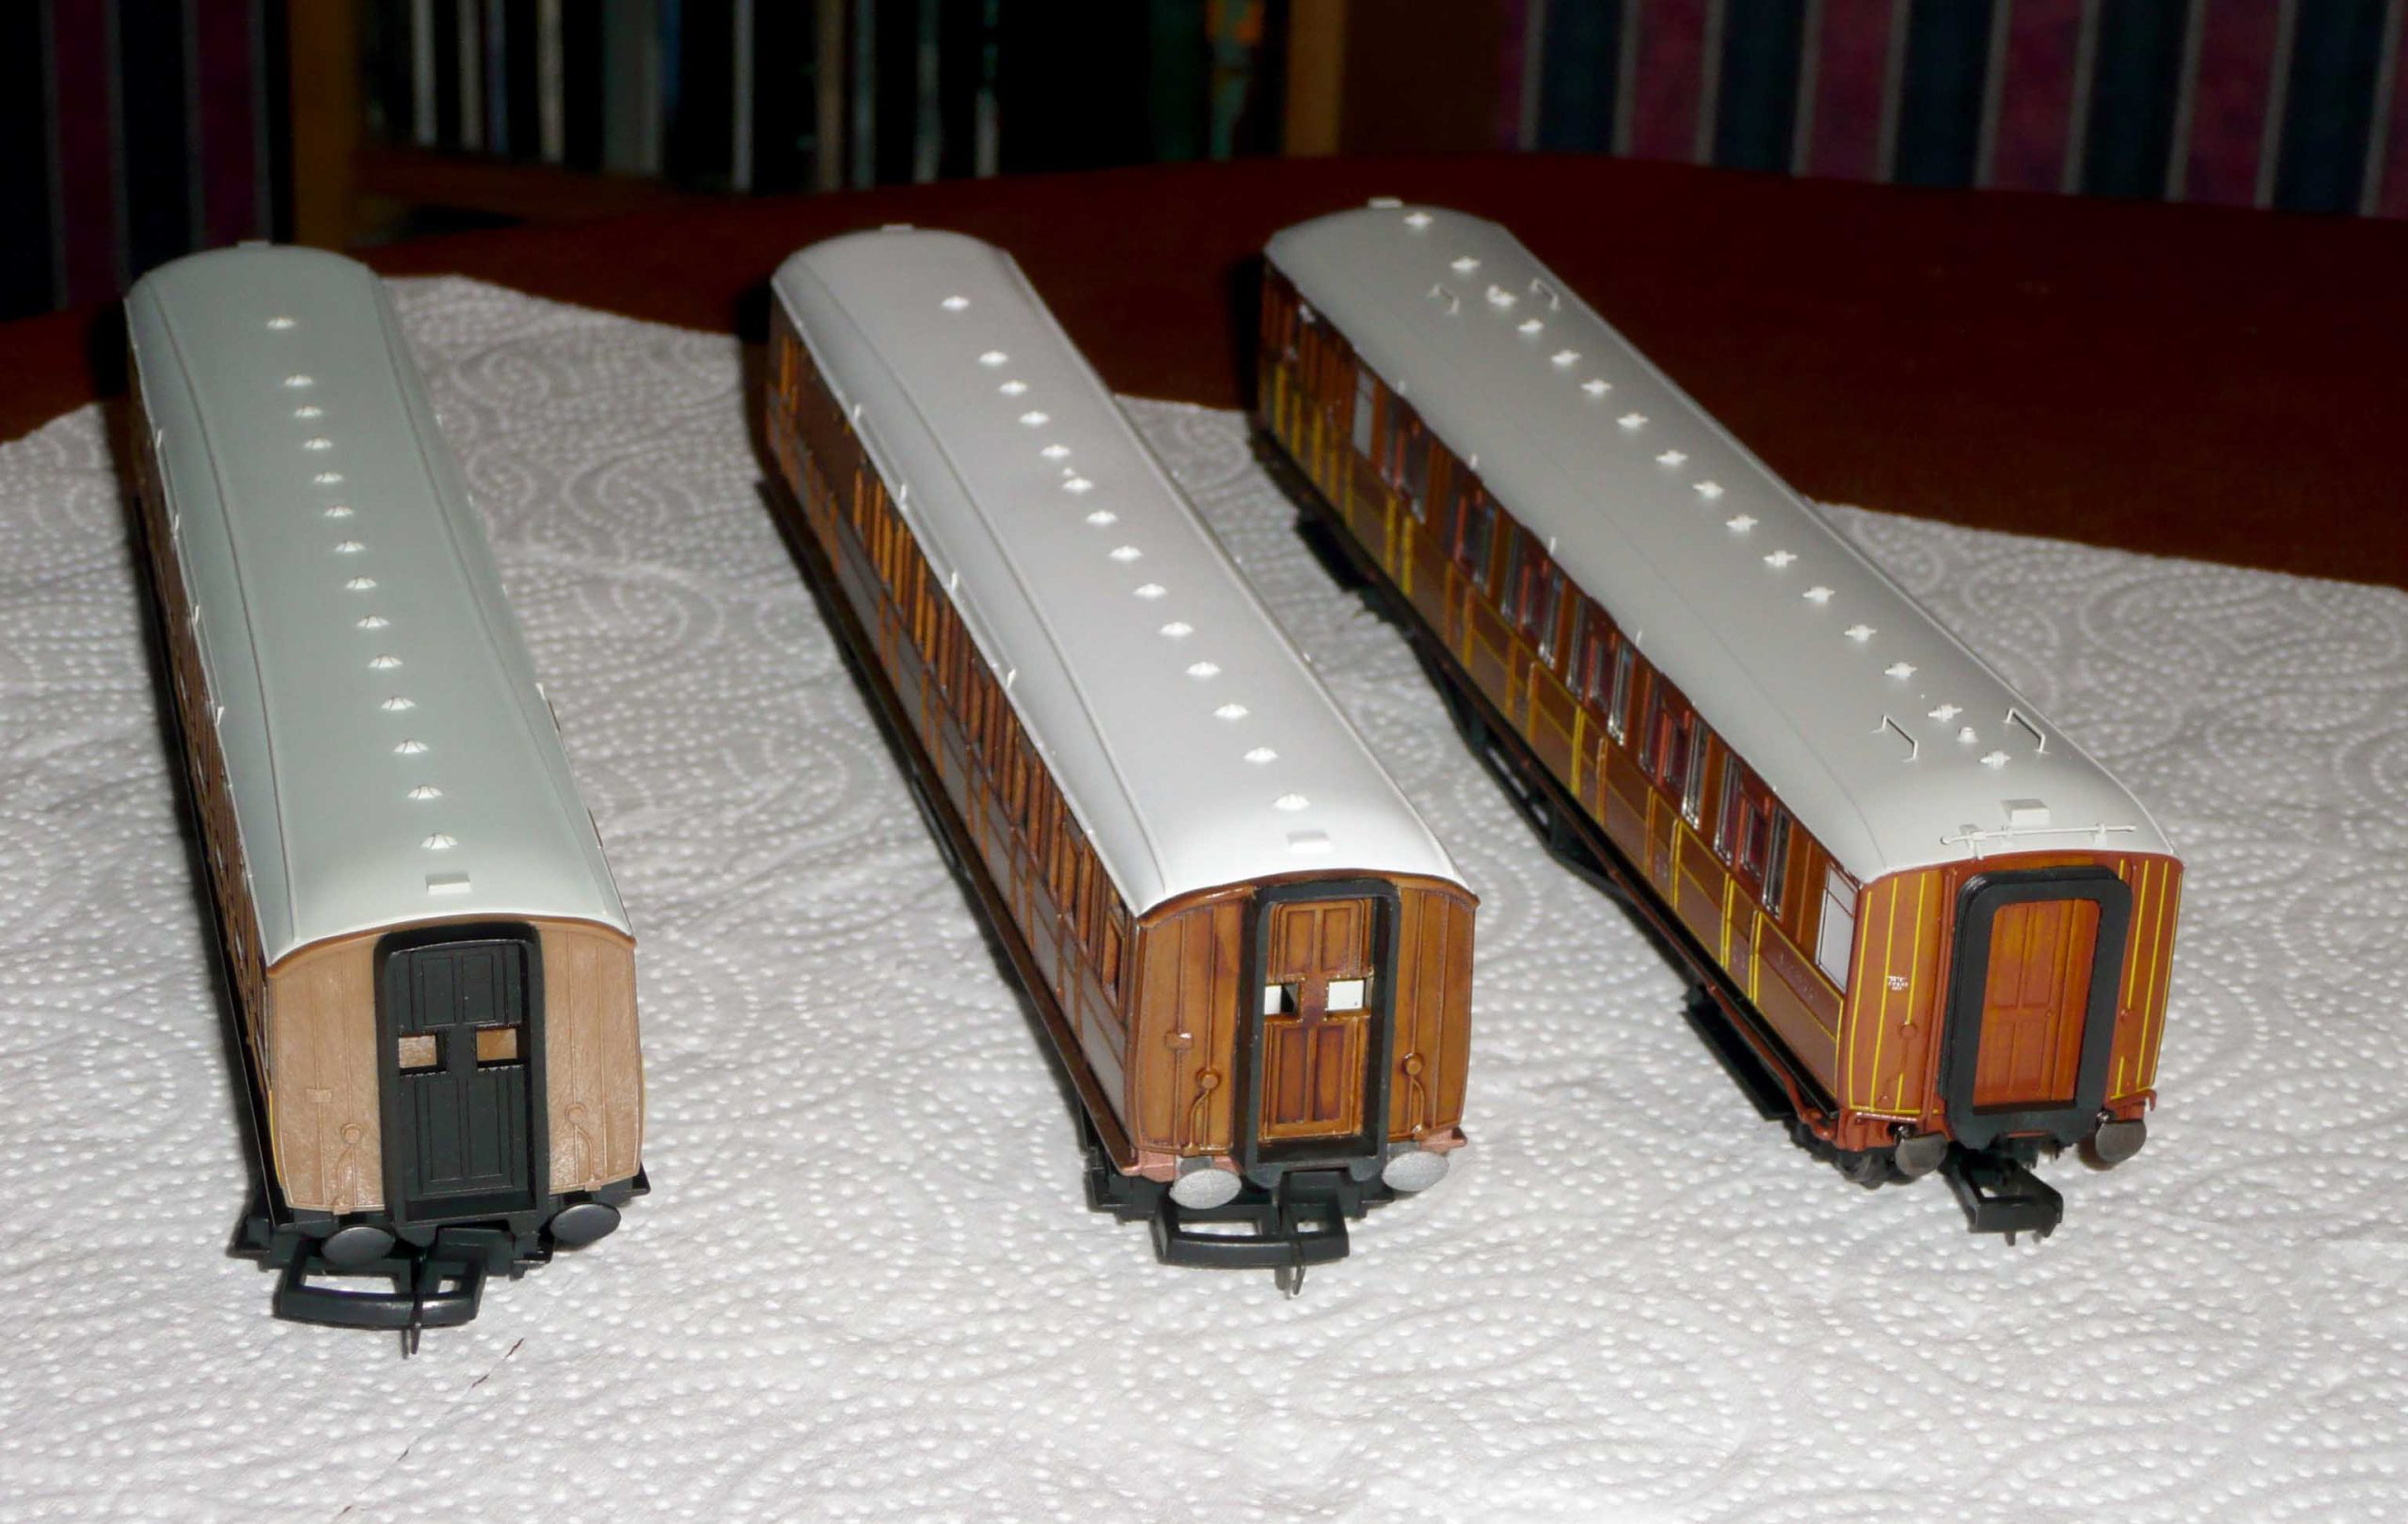
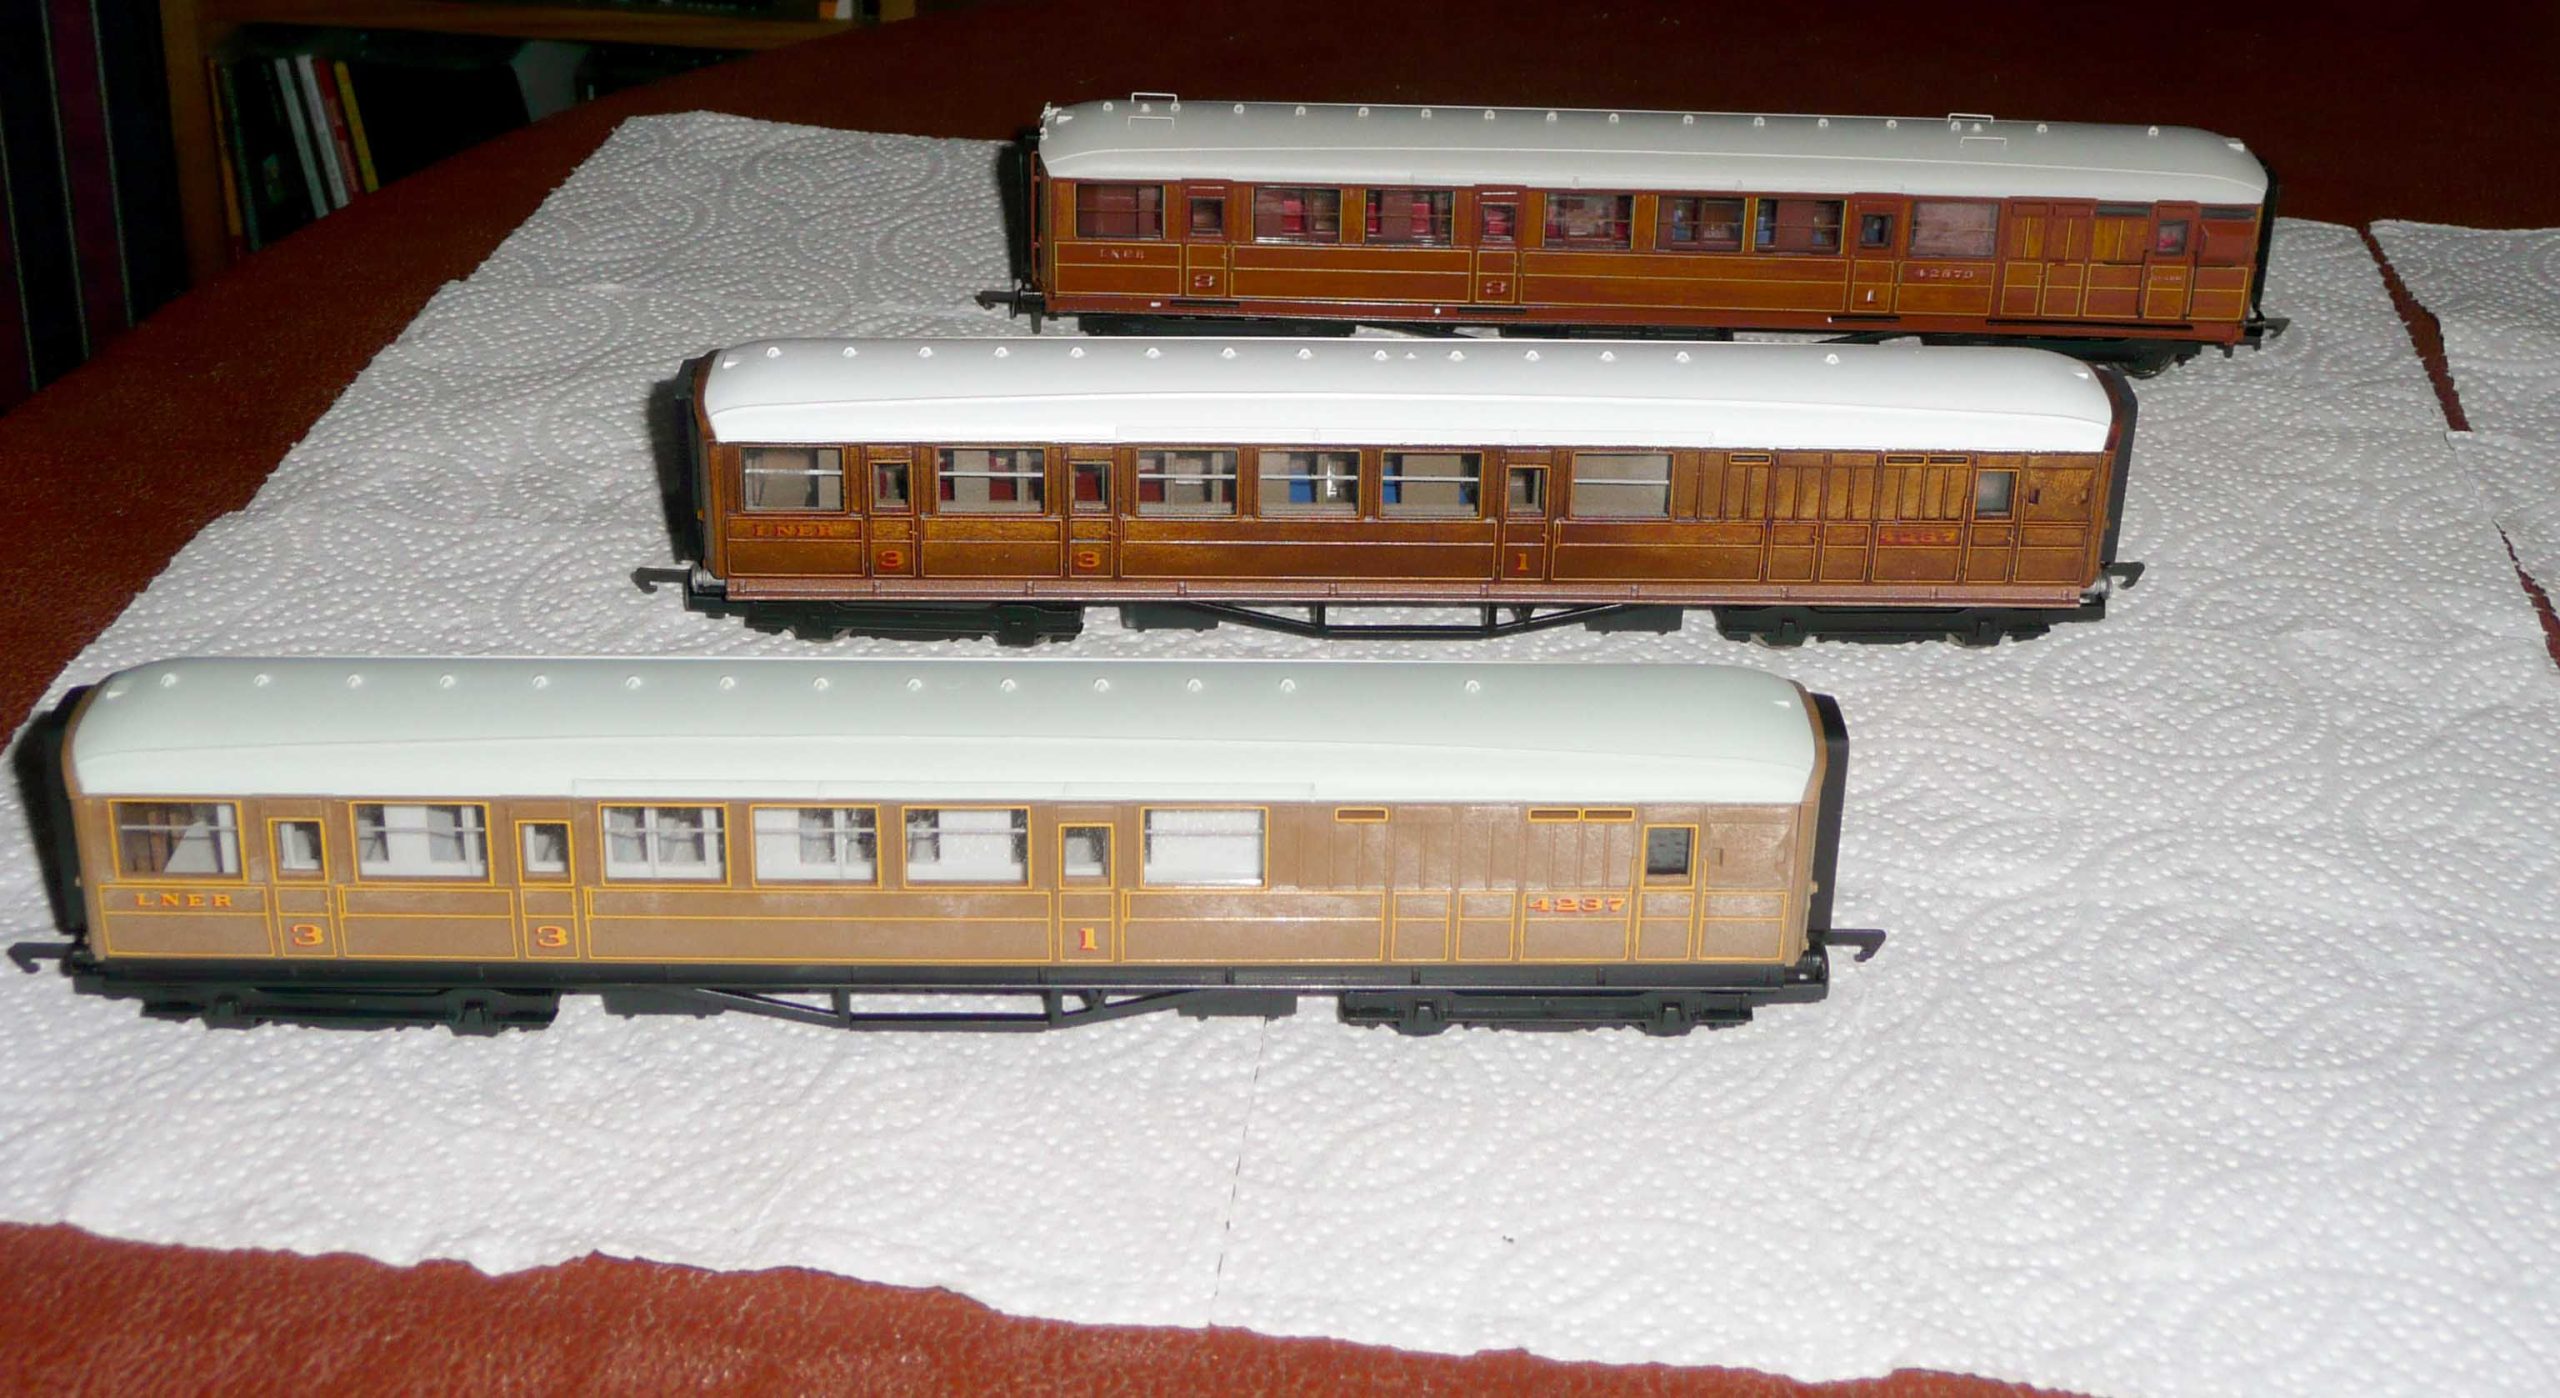
The photograph shows some of my efforts so far. The coach on the elevated section of track (top) is from the latest Hornby ‘superior’ range for comparison.
Kind regards
Steve”
A Hornby LNER Teak Coach disassembled
Parts before and after treatment.
Finished coaches behind a P2 ‘Cock O’ The North’.
Three coaches for comparison: Untreated ‘Railroad’ model, Treated ‘Railroad’ model, Hornby ‘Deluxe’ model.
Underframe & interior piece partially painted + paints used (most of).
The featured ‘Brake Composite’ coach needed a roof respray. I used ‘White satin’, which is not to everyone’s taste. I have just
received a can of WRX ‘Grey White’ for the next coach that needs a roof respray.
A big thanks to Steve – it reminds me of the weathering locomotives post from a while back.
It also reminded me of Dan’s old Santa Fe passenger car too.
Now on to Michael.
His last post was called ‘Two years of trail and error’, is here.
It’s worth revisiting it to get a feel of what Michael is doing.
He really is chopping out the bits that he didn’t like – common railroad mistakes we all make:
“Alastair –
I thought I would share a major course correction I am working for my railroad. I played with that configuration for quite a while. I learned a lot, including what I did not like.
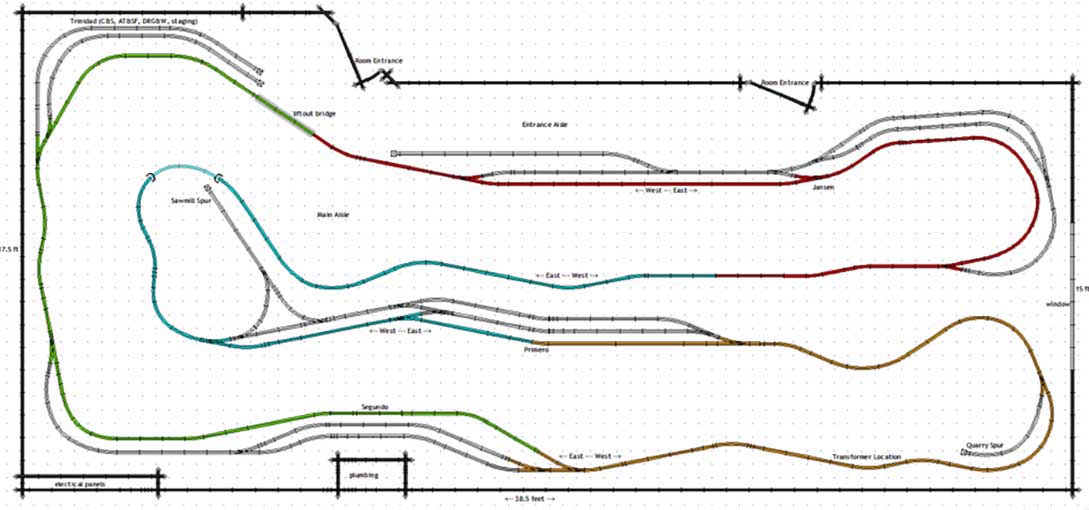
I decided there were some significant weaknesses with the old design. That design was basically two large irregular ovals one above the other connected by an incline. The design lacked a coherent “operational story”, in other words, the railroad did not have a clearly defined job to perform.
Also the design was an island design in the middle of a large room otherwise used for storage. I decided the room itself was poorly utilized and there would be no way for me to achieve the “Wow! factor” I was really looking for.
So this past summer I tore it all down; removed all the ugly and junky storage; I had the walls and floors finished and greatly improved the lighting.
While the room was being reworked I designed a brand new around the walls and peninsula design for the railroad.
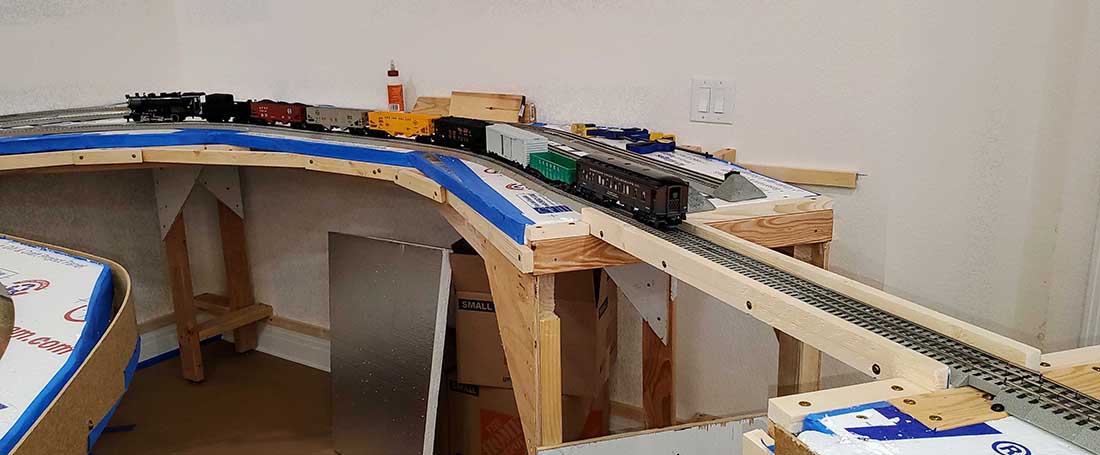
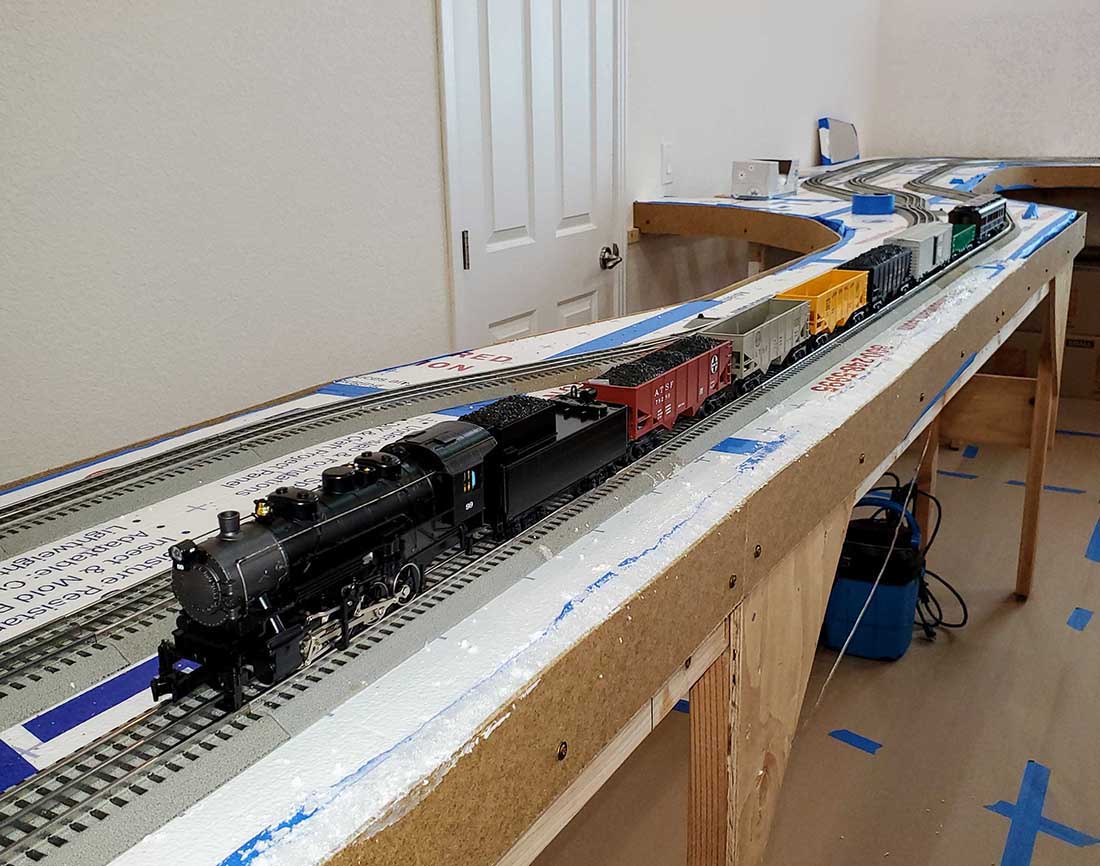
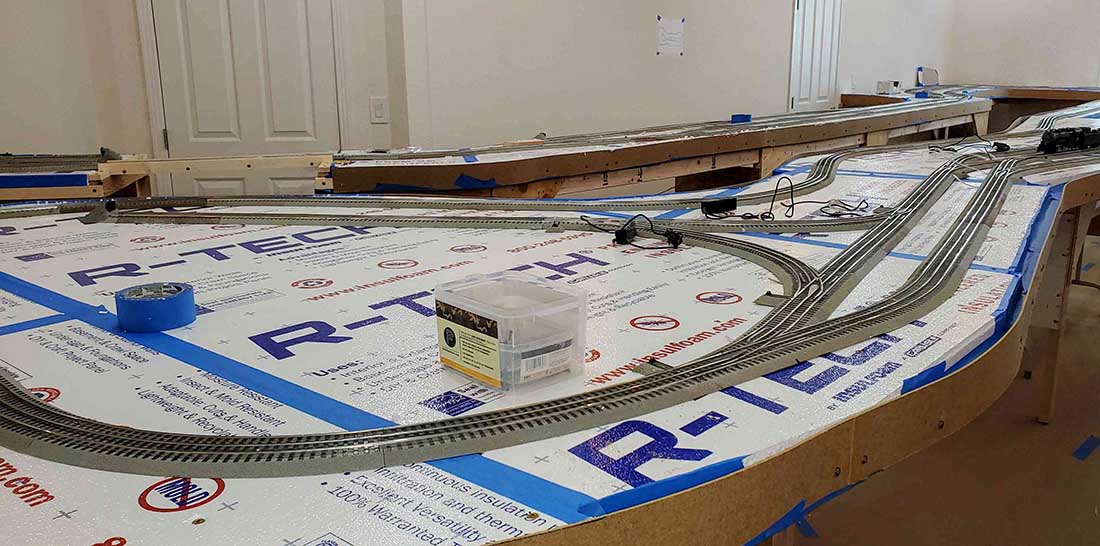
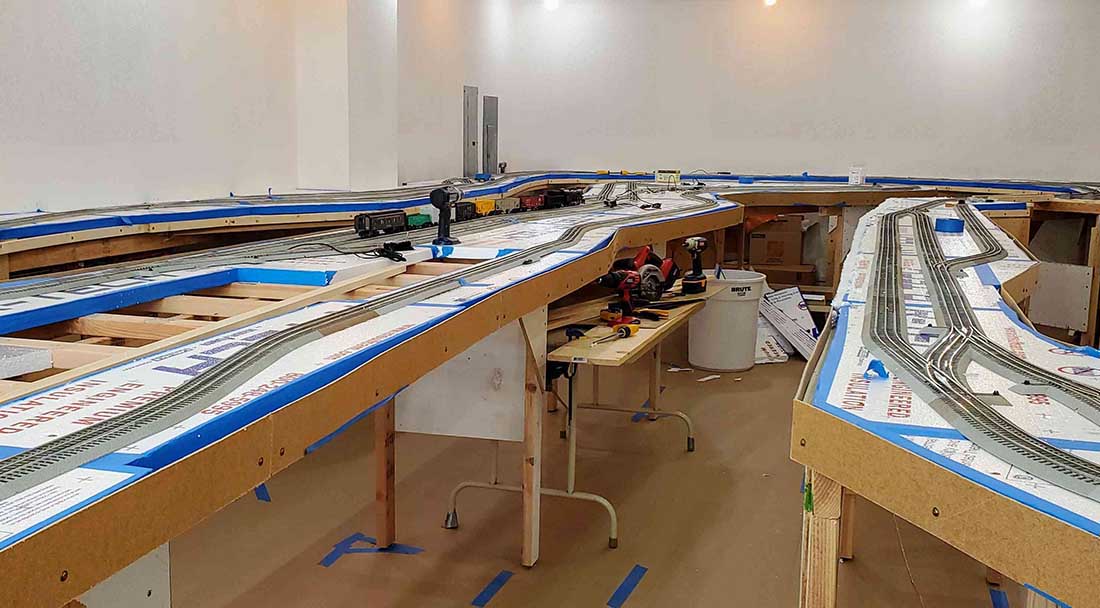
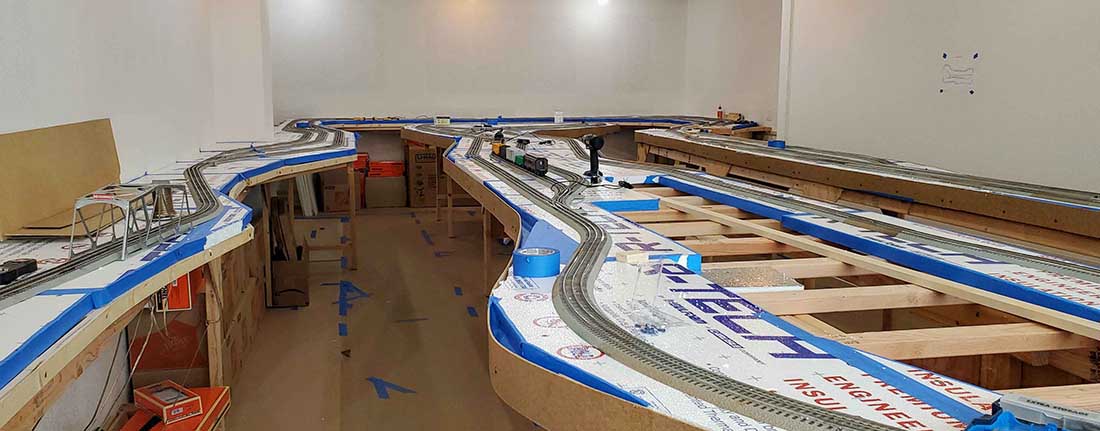
The pictures I am sharing today are of the as-built design on new benchwork before any paint, scenery or structures goes on the layout.
As a reminder, the sole purpose of this railroad is to run my fifty to sixty year old vintage Lionel O-gauge equipment. (HO is not an option!)
The new design preserves all of my original layout goals, but without the common model railroad mistakes.
There are several improvements with this layout:
Much larger footprint;
* old design was 11 x 27 feet, ~300 sq. ft.
* new design is 17.5 x 38.5 feet, ~670 sq. ft.
* Interestingly, the total amount of track is almost the same: just over three scale miles.
The uninterrupted main line is more than a half scale mile longer.
All reverse loops are removed; reverse loops on 3-rail O-gauge aren’t an electrical problem but they do take up a lot of space and can be hard to reach in some areas; they are not particularly prototypical.
Turning trains is accomplished by using a wye.
The incline is removed. This track didn’t get used much and became a source of irritation. The new design is flat all around. I will obtain the appearance of grades using scenery and forced perspective. Additionally, having a grade is not operationally important in this case.
Simplified wiring.
Larger more sweeping curves; longer straight sections.
Can reach all track easily.
Better designed aisles; The narrowest pinch point is 21 inches wide, and there are many areas where the aisle width is greater than 36 inches. So there is plenty of room to walk around. The interior main aisle is accessed using a very simple lift-out bridge.
Benchwork is about 7” higher than before.
The biggest improvement is in the operational story.
This railroad is very loosely based on the Colorado and Wyoming Southern Division.
The Southern Division carried coal from the mine at Primero, to the coke ovens at Segundo, and then onward to the Colorado Fuel and Iron steel mill at Trinidad. There were interchanges at Jansen and Trinidad with the Colorado & Southern, AT&SF, and Rio Grande railroads.
The new design includes areas on the track for Primero, Segundo, and Jansen and provides for interchange traffic using the two staging tracks labeled Trinidad. With this design the railroad has a clearly defined job moving coal, coke, steel and other products between the different locations.
I’ve worked out a good deal of operational detail (at least on paper).
The overall plan and room outline drawn in SCARM
View of Trinidad and lift-out bridge
View of Jansen
View of wye at Primero
View of train room from Janson
View of train room from Quarry spur
Enjoy!
Mike”
A big thanks to Mike for sharing some common slip ups, and to Steve for showin us hoe he weathered his model train cars.
That’s all for today folks.
Please do keep ’em coming.
And if today is the day you get going on your layout, the Beginner’s Guide is here.
Best
Al
PS Latest ebay cheat sheet is here.


very nice set up.
Steve……. nice work on the weathering…..get tips.
Michael……..wow…….some train room…….jealous of your benchwork.
Nice work