Ken’s been in touch with some good advice on model train derailment:
“Al,
Thanks for sharing your followers’ updates so we all can benefit and gain inspiration.
In that vein, here is a video I put together about a problem with derailments that expands on one of your previous posts from Mal from North Wales.
How to stop your trains derailing
How to stop derailments part 2
He gave a very thorough treatise on derailments.
I wanted to provide some insight from this side of the pond with video footage to illustrate.
I had a specific problem with derailments, mostly at one spot on the layout, but found out it was repeated many times due to poor turnout construction.
I have been using Atlas N Scale #6 Custom Line turnouts for over 20 years and never had a problem until I started buying more in the last 10 years or so. (The newest I purchased very recently seem to be much better)
You will see in the video how I figured out the source of the problem and how I went about fixing it. Along with some description of the issues causing this to happen.
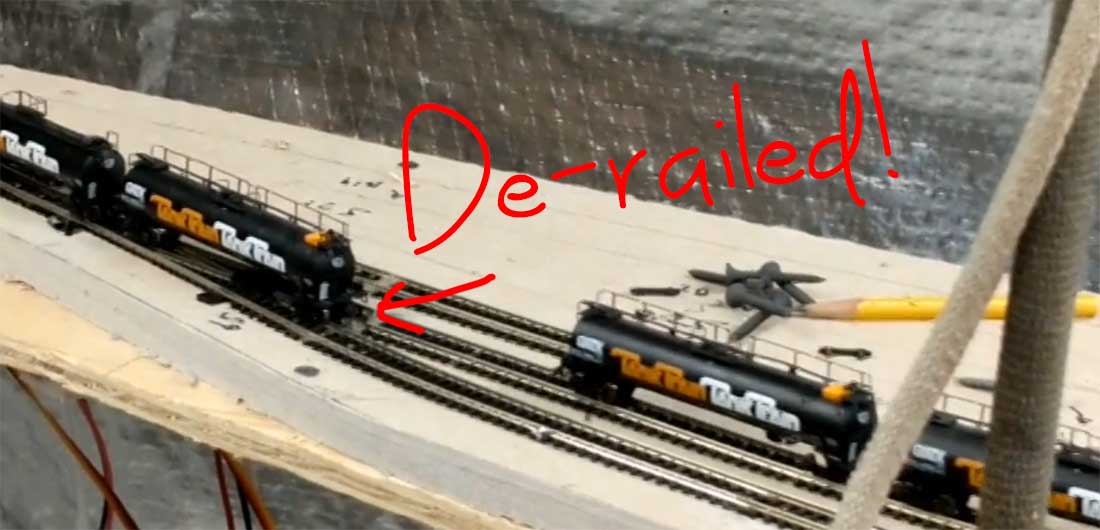
Trains derailed…

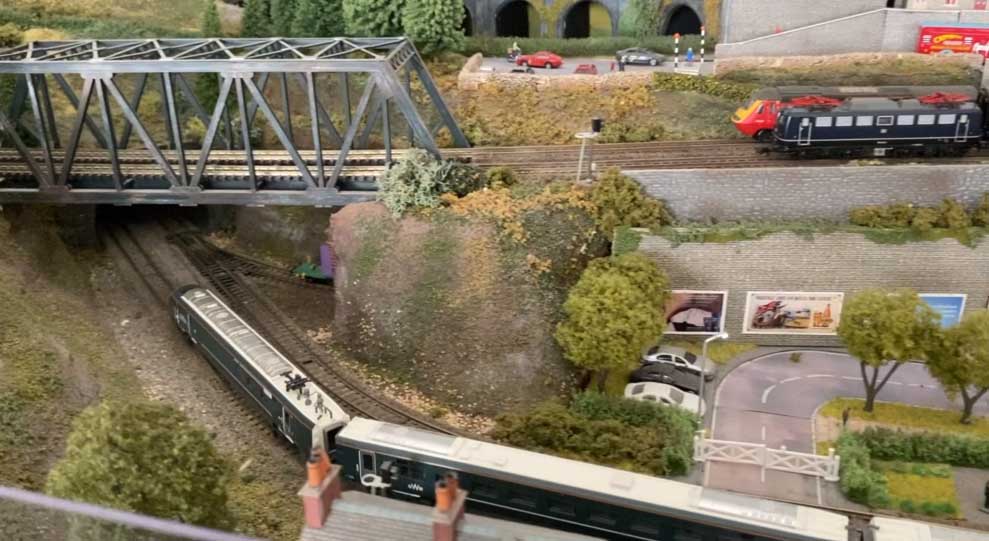
Troublesome spot…

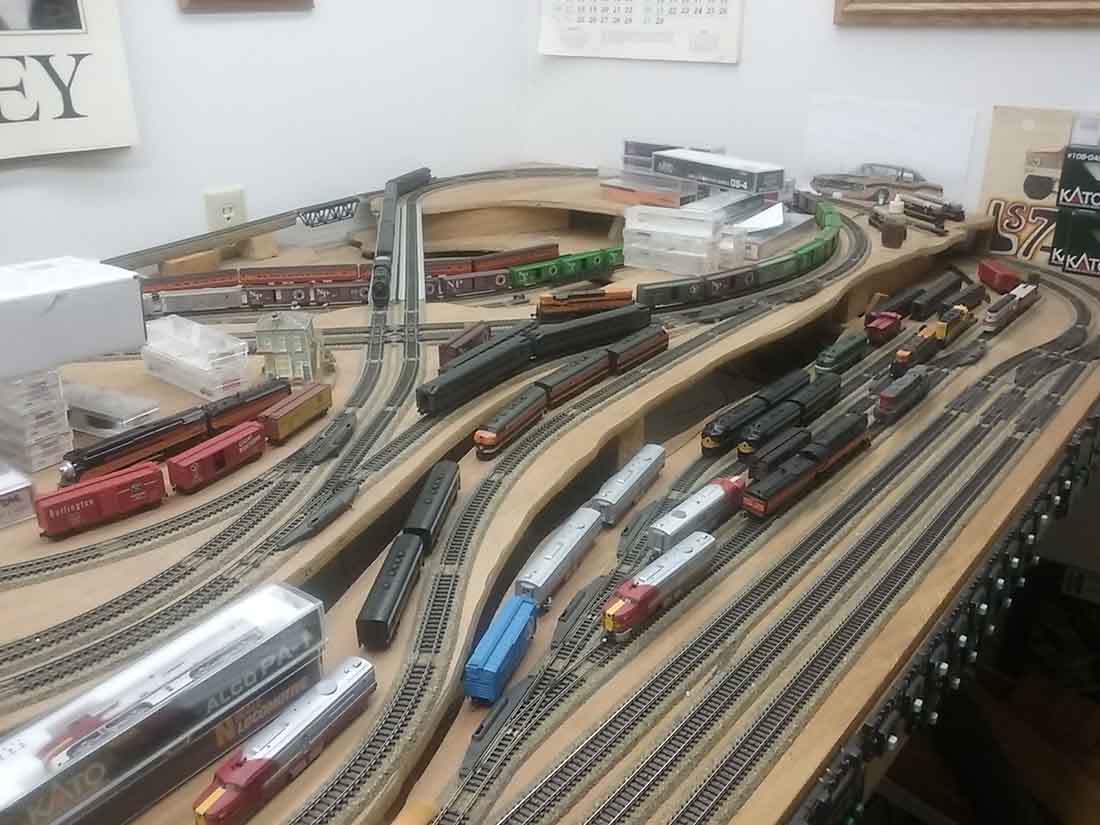
Trains running…
Thanks and keep sharing the inspiration!
Ken from Halfmoon, NY”
A big thanks to Ken for sharing his model train derailment vid and pics.
I know it’s something that blights us all at some point – patience and persistence is the key.
(In fact, thinking about it, this whole hobby is patience and persistence.)
Ken’s post reminded me of Brian’s, which also concentrates on derailments:
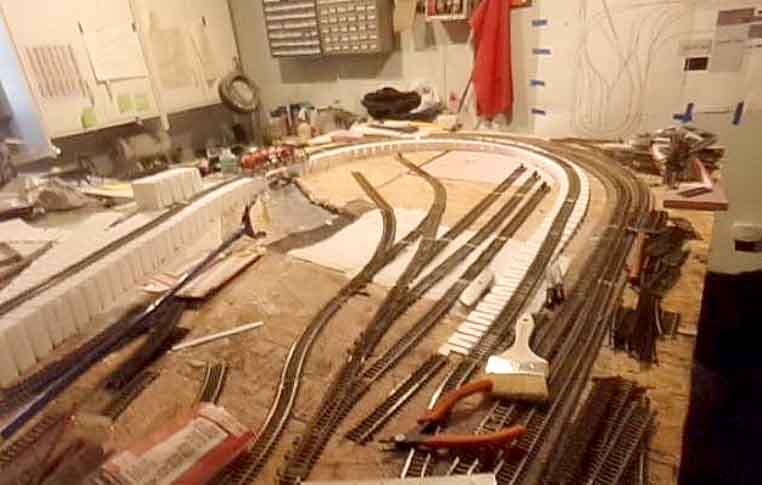
Then there is Jim. He was blighted by derailments, so decided to rebuild the entire track layout. It’s a story we can all learn from:
Track layout rebuild.
And then on the other side of the coin, have a look at Ernie’s layout.
He forgot he left his Atlas N scale layout running and went away for 3 days.
When he got back, it was still running, no derailments!
Dean’s recent post come to mind too – because the weight of the cars can also be an issue:
As anyone who follows the progress on my layouts may have guessed, I tend to be cheap, buying low priced cars, then fixing them up.
All my freight cars were bought in two parts: a Bachmann train set (the Bachmann “Golden Spike” set with two engines, four cars, track and a DCC controller—no longer available) and two sets of multiple freight cars from overstocked dealers.
I’m not a prototypical modeler and the only visitors to my trains are grandchildren who don’t care how they look, just how fast they run.
But with the low-priced freight cars, I’ve had lots of trouble keeping the rolling stock on the tracks. It was more a question of seeing which set of cars could make up a train that could make it around the layout without derailing.
I decided to do something about it and to tune up my freight cars.
The first thing was to use a consistent set of couples and wheel sets.
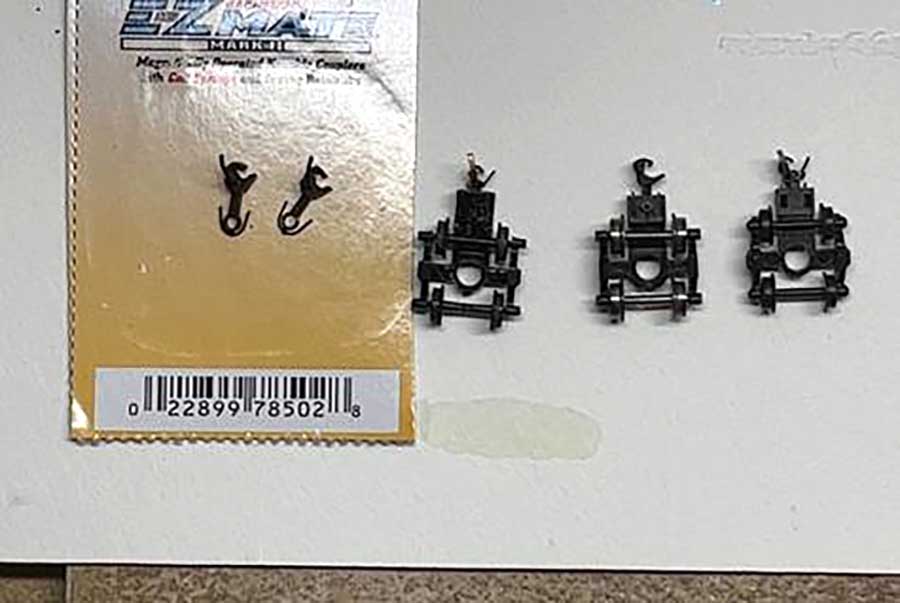
Here is a photo of some of the couplers and wheelsets that were on the cars. As you can see, they are all different and some don’t even couple consistently.
Although I prefer metal wheels, they tend to bump over turnouts, so I’ll stick to plastic wheels for now.
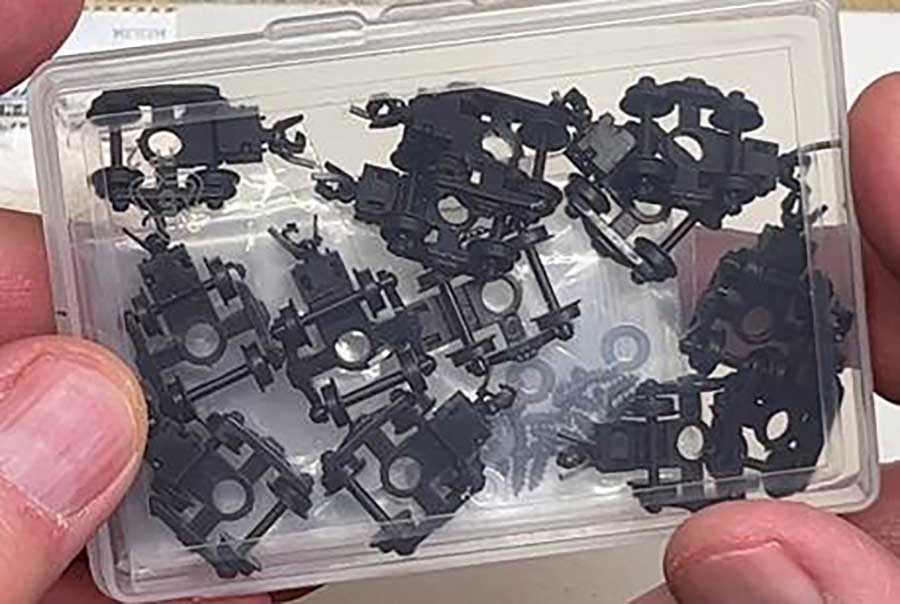
Here are the couplers and wheel sets, bought from China, that I’m standardizing on. They come in a box of a dozen sets which for around $15 can be purchased on eBay (search for “N Scale 1:160 Roller bearing Truck Coupler 33″ Plastic Wheels”). I’m with time converting all my stock to this wheel set.
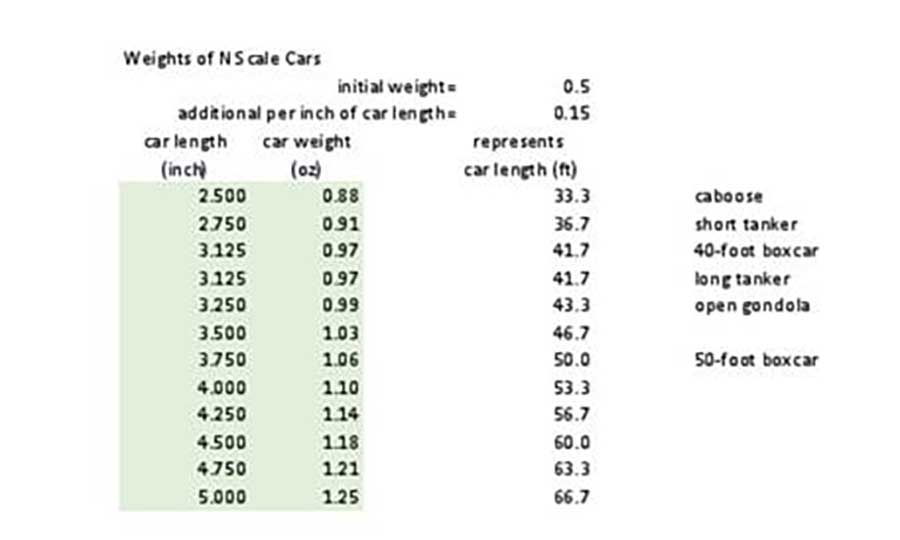
Next, I correctly added weights to my cars. The NMRA (National Model Railroad Association) sets the standard weight of an N-scale car at 0.5 oz plus 0.15 oz for each inch of car length. Here is a table with the results for various car lengths from 2.5” to 5”
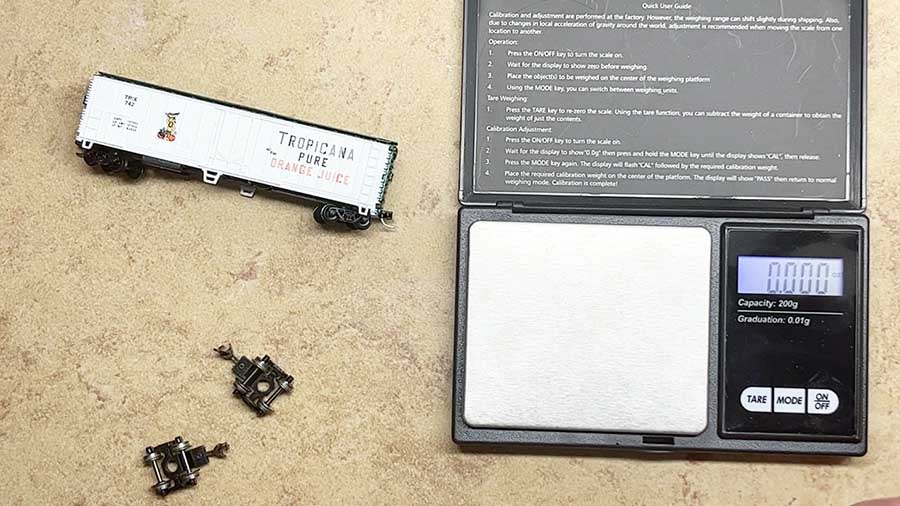
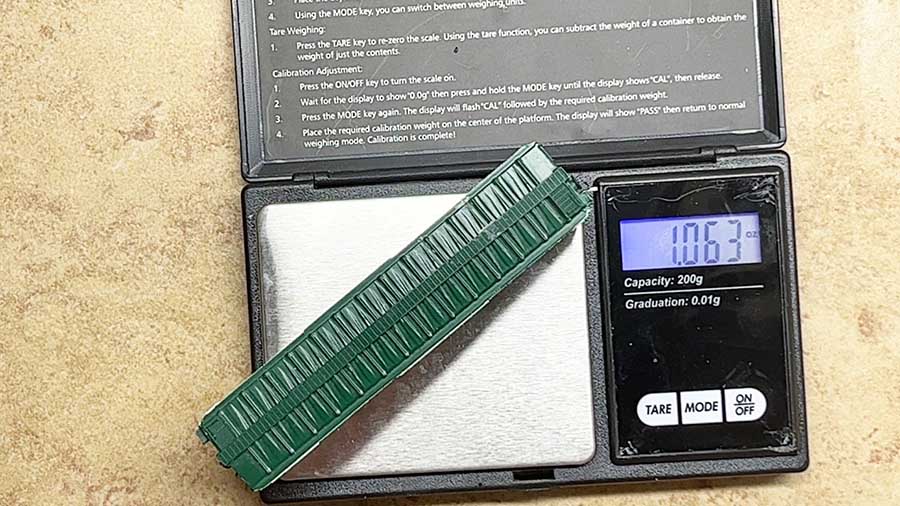
I bought a small digital scale (from Amazon) and started to weigh my cars.
A 50-ft boxcar weighed 0.56 oz; it should have been 1.06 oz. This is typical of all my cars, way underweight. I’m mostly using ¼-20 nuts as weights. This car took five nuts to increase its weight to the correct value. The nuts are attached with a few drops of super glue.
When done, the car was actually right on.
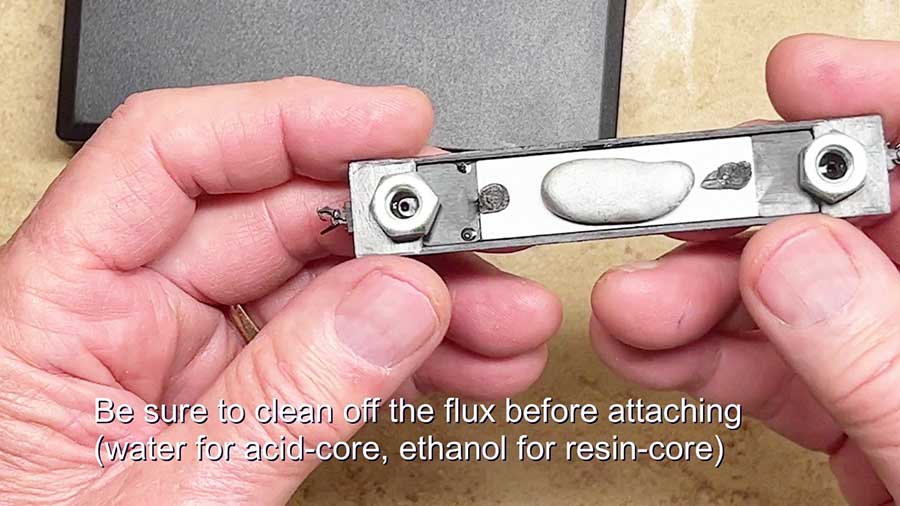
I don’t recommend buying tin-lead solder now, as it’s much more expensive than in the older days, but, if you have a roll of solder in your toolbox, you can melt a blob of it until you get the correct weight.
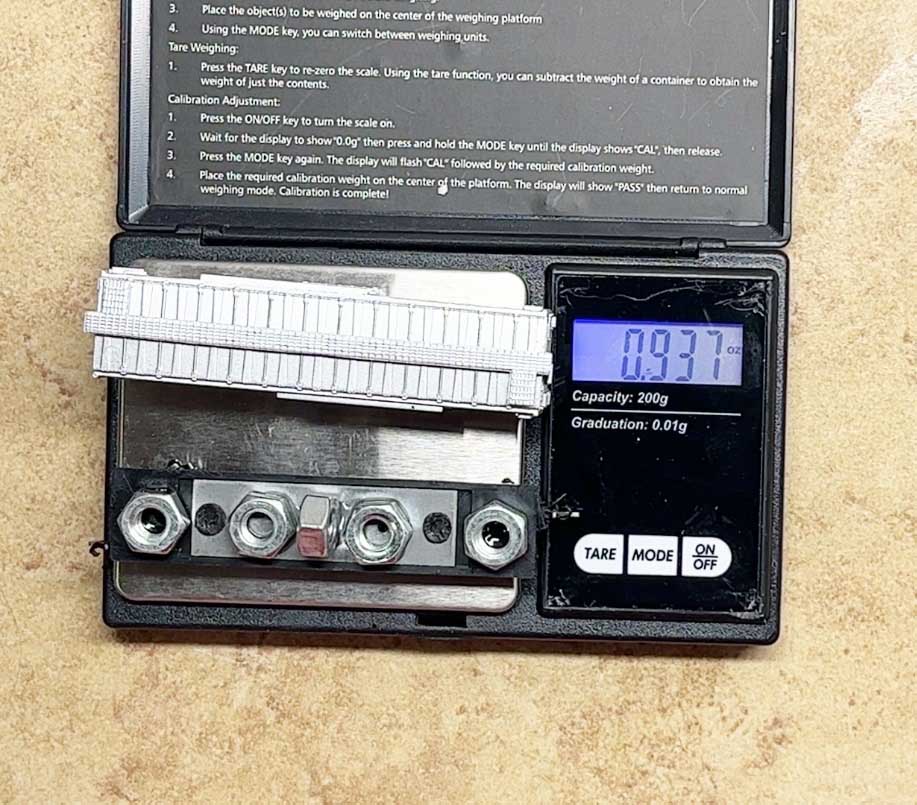
The same number of ¼-20 nuts was needed for a 40-ft boxcar, coming in close to the recommended value.
My set of open gondolas each took four ¼-20 nuts. I attached them with super glue to pieces of cardstock so that I could remove them if needed.
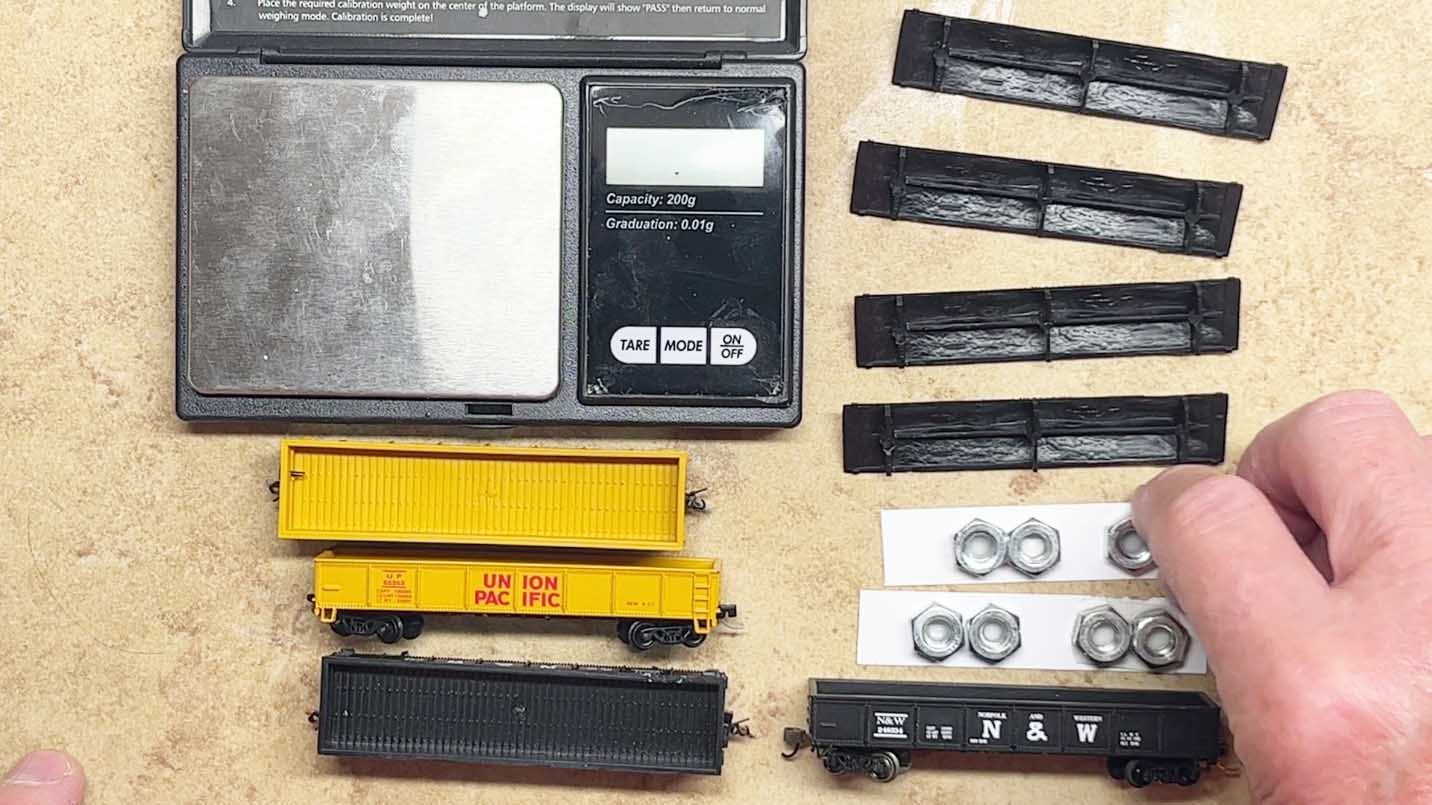
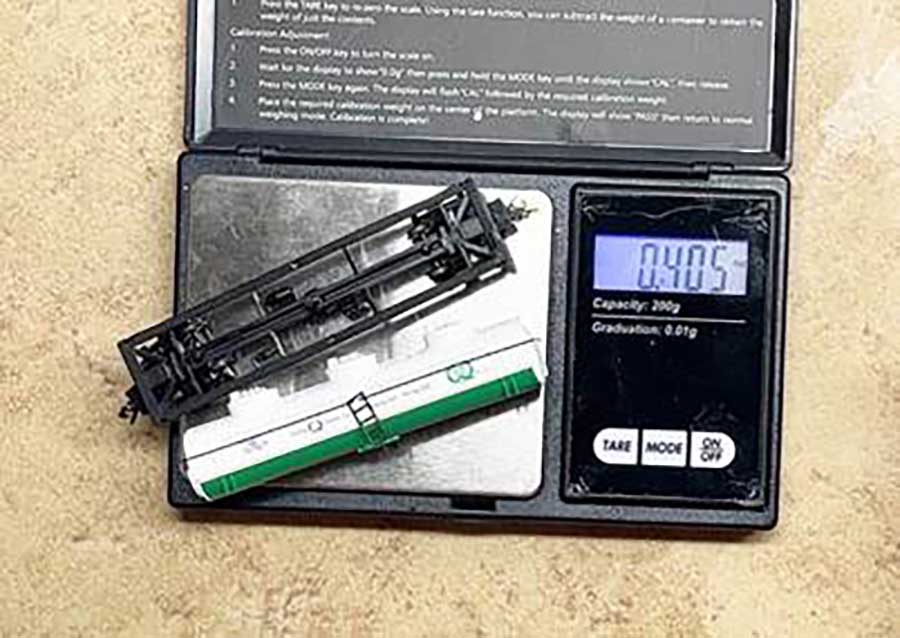
The long tanker is a problem. It’s grossly under weight (0.4 oz rather than 0.99 oz). Any place I put it on a train other than the rear car would lead to derailment.
Other modelers have suggested that you can snap the bottom of the tank apart from the top to add weight, but I haven’t been able to do that.
I’m trying to come up with some kind of liquid that I could squirt into the car then allow it to set up—maybe liquid epoxy. Any ideas from readers would be appreciated.
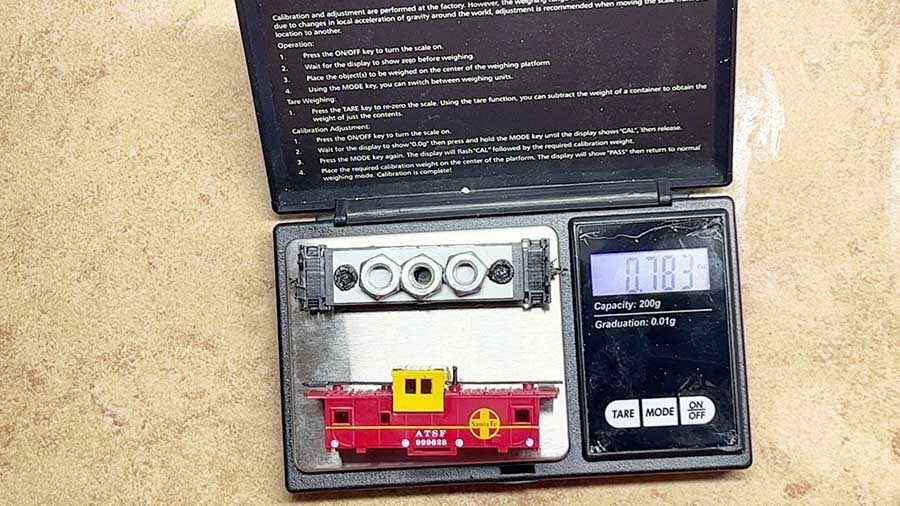
The caboose needs one more nut to make the correct weight.
Thanks, Al, for all you do and thanks to my viewers! I appreciate all the support.
Dean”
That’s all for today folks.
Please do keep ’em coming.
And if today is the day you get started on your layout, the Beginner’s Guide is here.
Best
Al
PS More HO scale train layouts here if that’s your thing.
Need buildings for your layout? Have a look at the Silly Discount bundle.

interesting to learn about thankyou for sharing. love the tanker train too.
One thing I might add to the derailing conversation is always to check and ensure your turnouts/switches are level. If they are not, a flange can climb the rail and cause problems. Proper weighting of your cars and wagons is always important. You might assume this was done at the factory, but it seldom is.
Rob McCrain
Mastering the model railroad ,thanks for the tips .
Ken and Dean, thanks for sharing these tips.
Ken
Excellent video. IMHO the smaller the gauge the more one must follow your instruction set and fine tune the points. Of course other rules apply such as coupling function as you astutely alluded, abrupt grade change, and harsh turn design.
Loved watching your long consists roaring smoothly around the track.
Dean
A lot to consider about your article. When you said the metal wheels bump on the turnouts the problem is with the turnouts- see Ken’s missive. I really cant agree with the chinese wheel sets, though I totally agree about consistency, and would recommend Kadee for all couplings & gear.
Underweight tanker cars are a problem in all scales and one should more weight even if doesnt make the NMRA #.
Please keep updating and send videos of the Cahones Line.
Big Al
Thanks for all you do. It makes my morning coffee taste so much more delightful.
Rather than nuts, I use 1/4 and 1/2 ounce auto weights from Harbor Freight
Speaking of Atlas switches, About two years ago I started my N gauge empire and ordered around 20 Atlas switches. I think I returned about one/third. In one pack I opened, one of the rails fell onto the floor. One was wired backward (red was open, green was closed) and several others simply didn’t switch. Those that I installed were a major source of derailment as the points didn’t operate properly. I did inherit some Atlas switches from the 1970’s; all of these work perfectly.
In any event, I have now changed to Peco and they all work perfectly.
Excellent tips! Properly weighting my cars is on the To Do List and is long overdue
Dean,
Try using pieces of copper wire or solder pushed through a hole in the end cap or bottom of the tank. Then squirt epoxy in to keep the wires from rattling around. Putty the hole, touch up paint then weather the car to hide it. A slightly bigger hole in the bottom and pour in sand is another possibility.
Dean,
One more idea. If you are willing to drill a 4.5mm (0.177 inch) hole, air rifle pellets are either tin or lead, approximately 8-11 grains each. 15.4 grains = 1 gram. 28 grams = 1 ounce. A 250 count tin would be enough for several cars.
I had all of Ken’s trouble with Atlas turnouts and I also experienced Normans point rail falling out of the new package… and like him, I converted to Peco and couldn’t be happier.
nice tanker train. thanks for the info.
One product that I found really good for hoppers and tank cars, was steel shot from a shot blasting company.
Pour into the bottom and cover with PVA (white builders glue) – it creates a rusty looking bottom of the hopper cars – and is easy to pour into tank cars
like the info.thanks.
Thanks Ken for the help. Hello to you from Cairo New York
Special thanks to Ken and Dean.
When I rebuilt my layout [change of location] I bought new pointwork for most of the layout as advice had been that [even when track had been pinned only] I could expect damage no matter how careful I was when taking it up. Even with recommended new Peco points I still experience derailment black spots – most of which I suspected were either old [clunky] wheels or underweight rolling stock. Back-to-back diagnostic axle tests with a decent caliper showed a clean bill of health. Faulty blades – I ignored this where new points had been used: the more fool me! So thankyou, Ken, for a clear guide showing how to diagnose and “fettle”.
Thanks to Dean, too. I am doing extensive refurbishment of a set of 3 Triang coaches [1950s?] which I bought for next to nothing. Many faults, but one was the usual fitted weights had not been included in the sale. Yesterday, I was looking up advice on what weight to add, and almost tossing a coin over whether to use the NMRA formula or go lighter to enable longer rakes and less wear on locos. The best advice was to use trial and error with adding small copper coins – and finding the minimum needed. Sticking such weight over the axles seemed sense, but Dean’s simple idea of gluing onto a piece of card appeals. With interior details of seats awaiting my scratchbuilding attention fitting such over coins on a card a plan is formed.
Not least, thanks to Al – you not only come up with great issues, but how often are they very timely.
Brilliant work on the turnout mods. Would have never thought of it.
I find a better choice is to buy auto wheel weights from Harbor Freight. They come in1/2 and 1/4 ounce stick un packages of 48. They are much denser than steel nuts. They are flat rectangles. In addition to any closed car they can be painted, black in my case, and stuck inside my open hoppers.
Great advice and ideas from all the submitters. I’ve used Woodland Scenics Pinecar weights which come in various shapes and sizes and have adhesive backing to bring my underweight cars up to NMRA recommended weights. However, the Pinecar weights cost around $5 for a 2-ounce pack, while the Harbor Freight auto wheel weights are similar and around $10 for a 12-to-24-ounce package. So, I’ll be shopping at Harbor Freight tomorrow.
One thing not mentioned in the above discussions on derailments is to check your wheel sets and track for proper gauge with an NMRA gauge. Improper magnetic coupler height can also contribute to derailments, so that can also be checked with a Kadee coupler height gauge for your particular scale.
Atlas flex track is good but their turnouts are not. The hugh layout for N scale at the White Pines Model Railroad club had a 2 level 500 foot mainline plus a mountain branch line that limited its turnouts to PECO and rarely had a derailment whether the trains of one of a 100 N scale members and a 35 year every Monday night three hour Prototypical operations sessions. The layout was originally in another location and moved to White Pines. The layout and its PECO switches remained reliable until the club lost its space and the layout went into a dumpster’ The Oak Park Railroad Club ended its problems with derailments by pulling all of its Atlas and Shinohara switches and replacing every single one with Peco turnouts
PECO switches are a better choice both in HO and N
I get my stuff (OO/HO) from auctions so they can be any age/make/condition.
What I’ve set up is a board with a section of track to include a siding then run the wagons over by a finger. You can feel if there will be problems
Nickels work well as weights for me (20 for $1) and are easy to glue down. I’ve replaced all Atlas points with Peco and switched from hook couplers to magnetic knuckle couplers. Derailments are now very rare.