There are quite a few portable model train tables on the blog.
But none are as inventive as Ewart’s.
“Evening, Al
I have been receiving your posts for the past 18 months or so, while I have been pondering how to give my grandson a model railway that can be stored in a small space, but expanded to a full 8x4ft layout.
I have been collecting some locos for him, and so far about 20 wagons of Hornby OO. He is nine years old and the equipment is new, but only DC.
I have purchased a full set of the track pieces, and the railway works ok on the floor, but it’s a bit of a nuisance for his parents having it there.
So, what to do? I researched portable model train tables and decided to build a railway that could be folded into its own layout requiring less than 10min to uncrate, and less than 5min to re-crate.
I purchased an 8x4ft sheet of 17mm structural ply and cut it in half to make two 4x4ft sheets. I turned the good side up for the lower sheet, and turned it facing down for the top sheet.
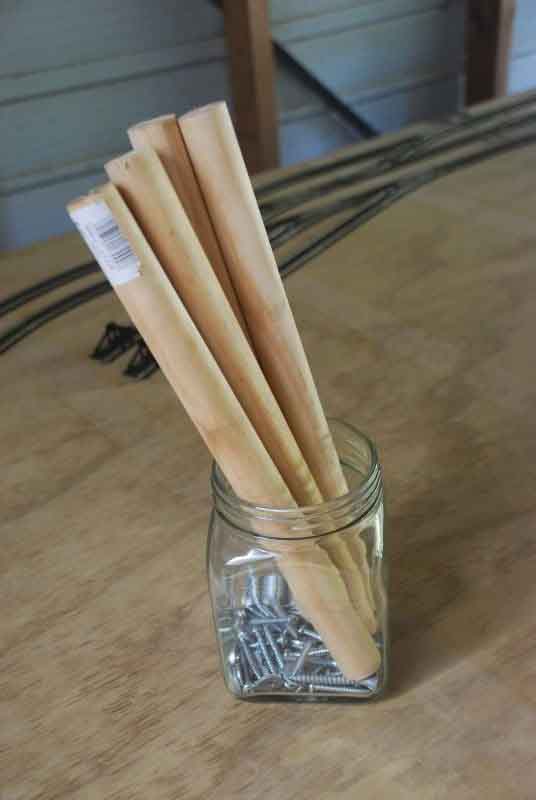
In each corner of the bottom sheet, I drilled a shallow depression to take a 25mm 1ft long dowel and secured all four of them with very solid 32mm x 6mm screws.
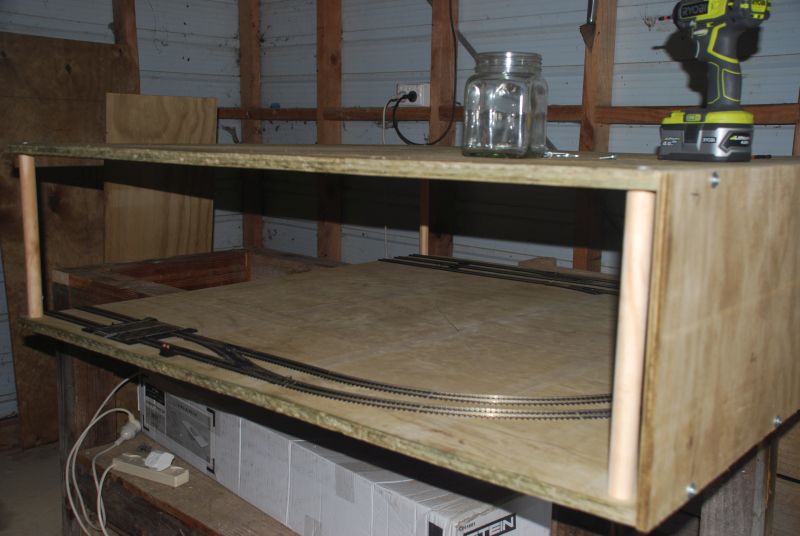
The second sheet I drilled the shallow depressions again, and lowered the sheet onto those I had just secured, and again tightened very securely with 32mm x6mm screws. The result is a firm open box of two 4x4ft 17mm sheets held together with 25mm dowels in the corners.
I next purchased an 8x4ft 12mm non-structural ply sheet and cut four planks that would fully enclose the box, and screwed each of them into place with eight 32mm screws and washers, four screws for top each side, and four along the bottom.
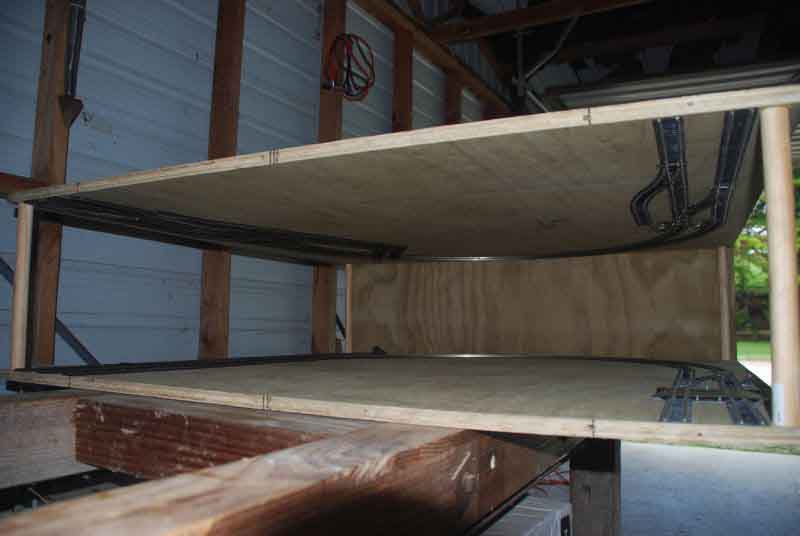
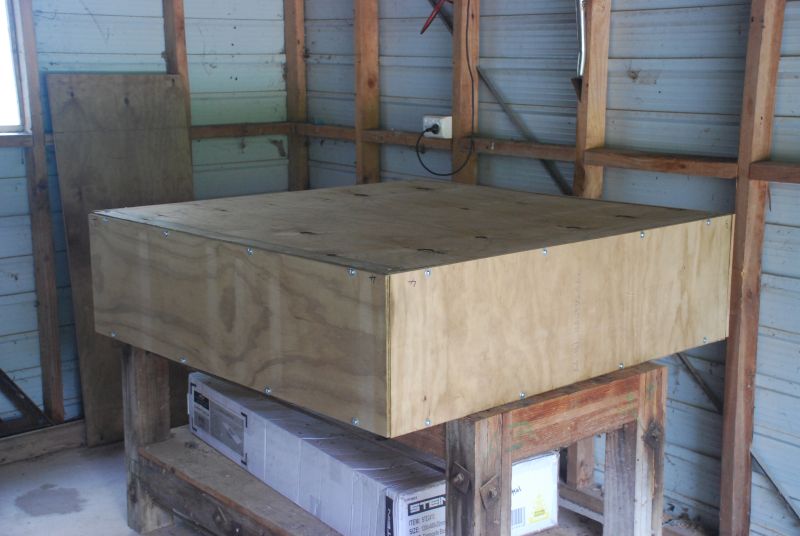
The result was a 4x4ft fully-enclosed crate, one foot deep. A little heavy, but solid, and deep enough so that if my grandson gets really absorbed and builds some mountains, the depth of the crate will allow the mountains to be a permanent fixture inside the crate.
So far so good.
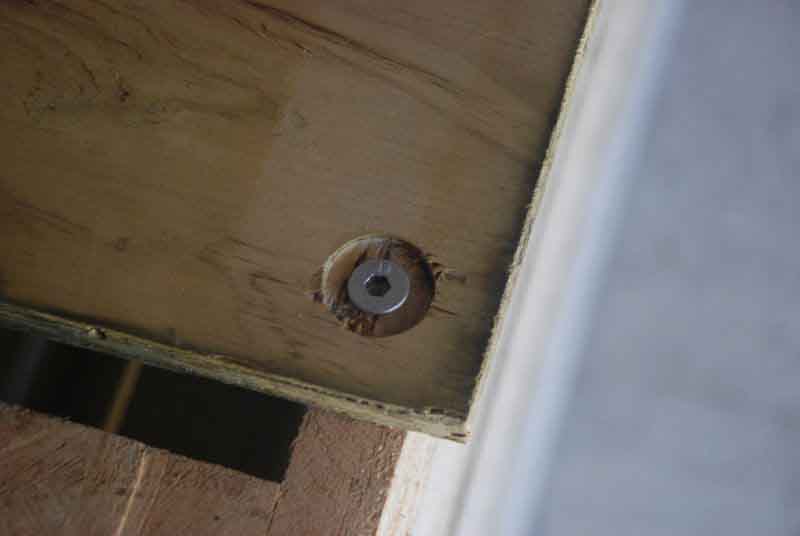
I unscrewed everything and put the two 17mm plates back exactly as they were when new. I purchased three 6mm bolts and cut off the thread and the nut from each, and cleaned them up on the bench grinder, to make three 60mm long steel dowels.
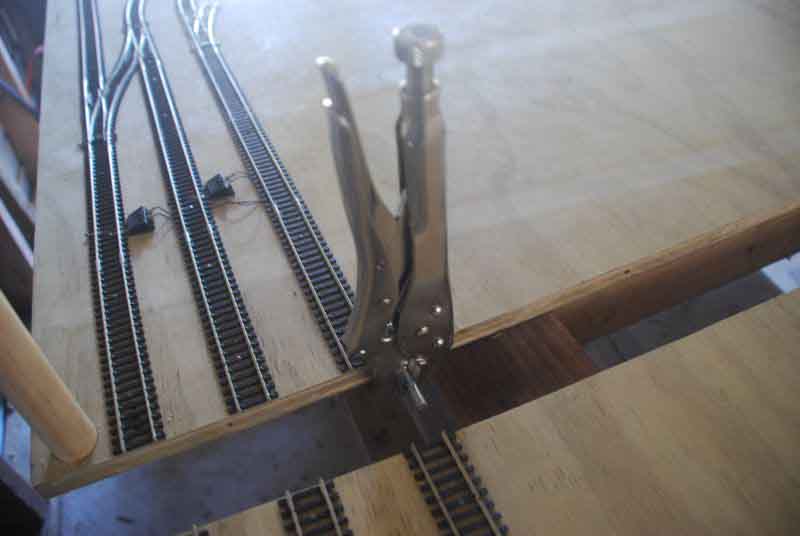
I also purchased a 6mm dowel drill-bit and made three holes each in the facing end-grain of both 4x4ft plates, just deep enough to take the steel dowels. I inserted the dowels and banged the two sheets together with a rubber mallet, using a piece of waste timber to ensure the plates were not damaged.
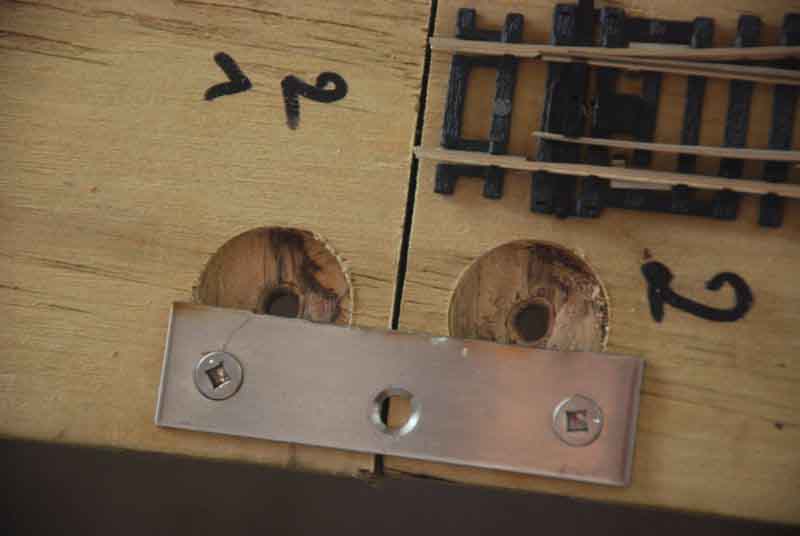
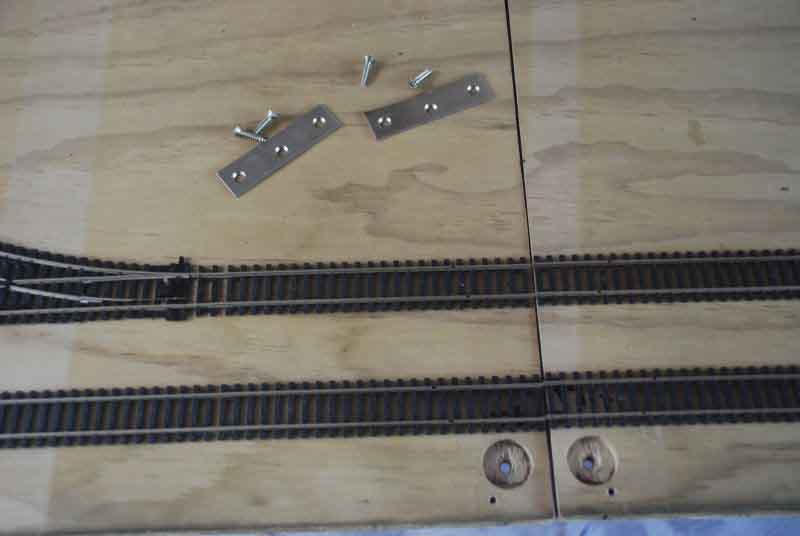
The ends had come together really well, but I needed to ensure that the plates would not move under use, so I hack-sawed the screw-plates from both sides of a very solid cupboard hinge, and screwed each of them across the join, one on my side, and one on the other side. The rejoined plate was now as tight as a drum.
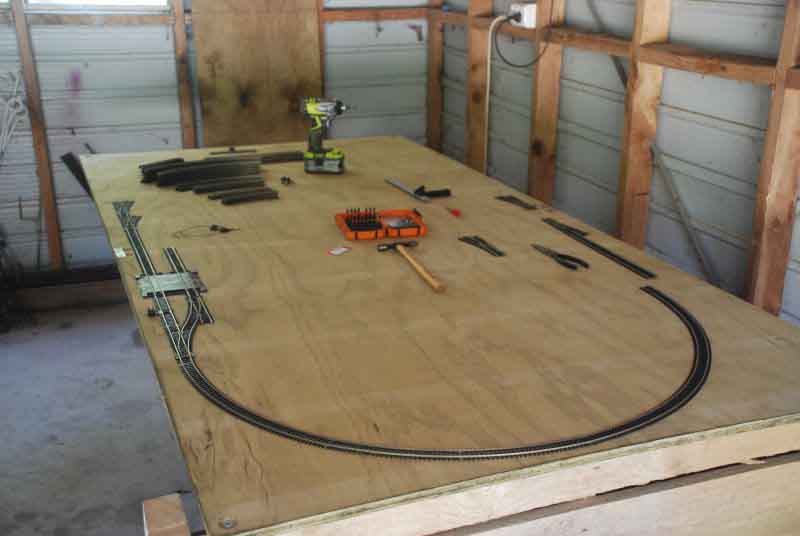
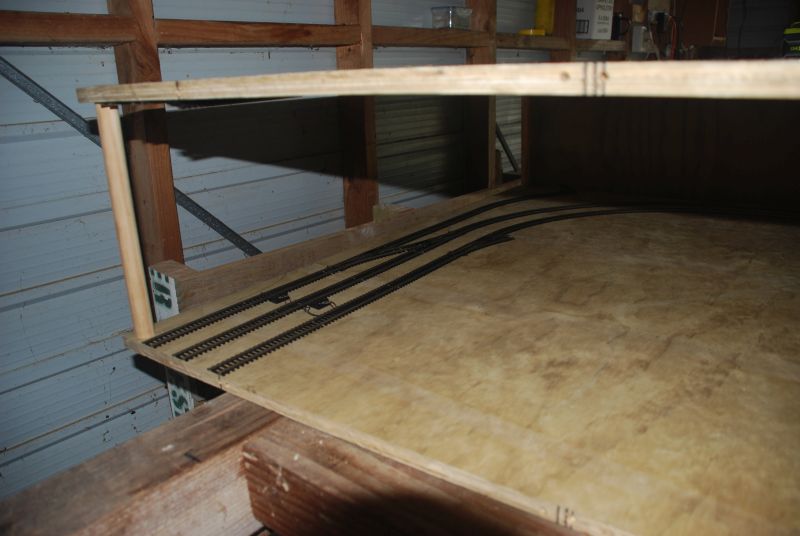
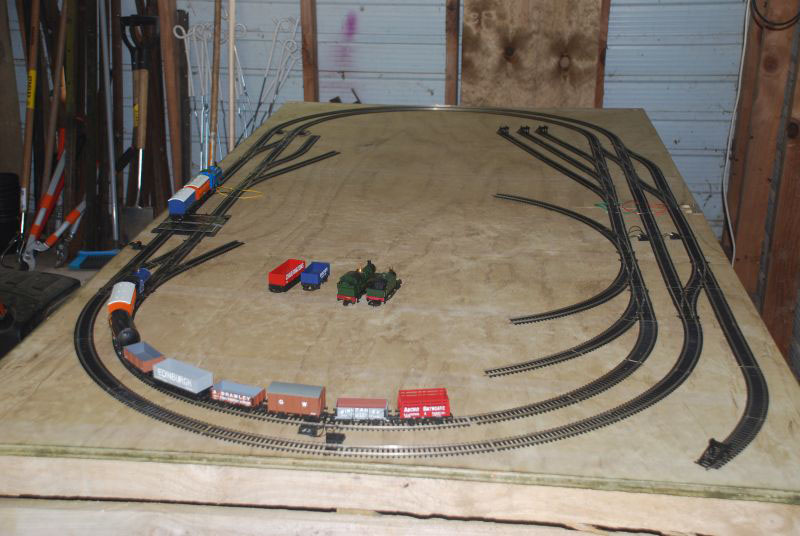
I intended to make a starter layout on the two pieces, to give plenty of places for my grandson to add track in different ways each time he has to restart his layout. You can see from the attached pictures that the layout is long, and has two tracks for a fiddle yard. I wanted three, but I couldn’t make it work.
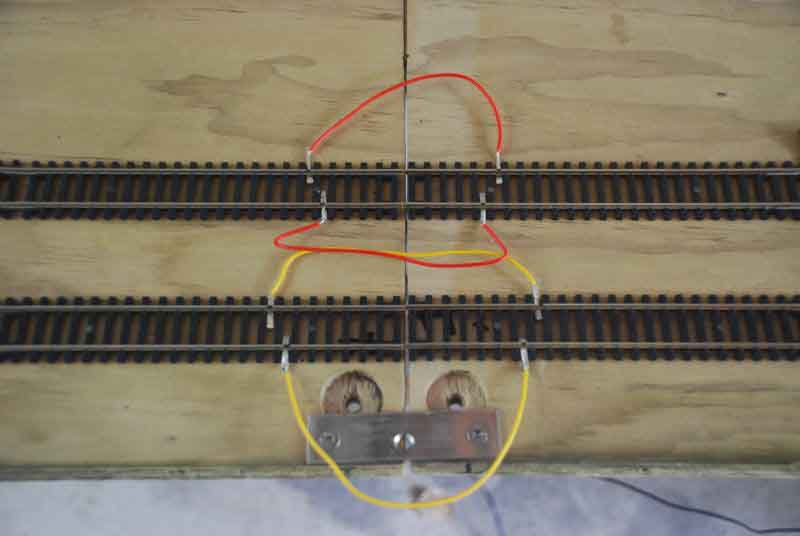
I also had to remove the fishplates from all track that stopped at the centre joint and I coddled up some wire joiners to secure the power supply to all rails. After quite a bit of testing I decided the railway was ready for tacking, and I finished that this afternoon.
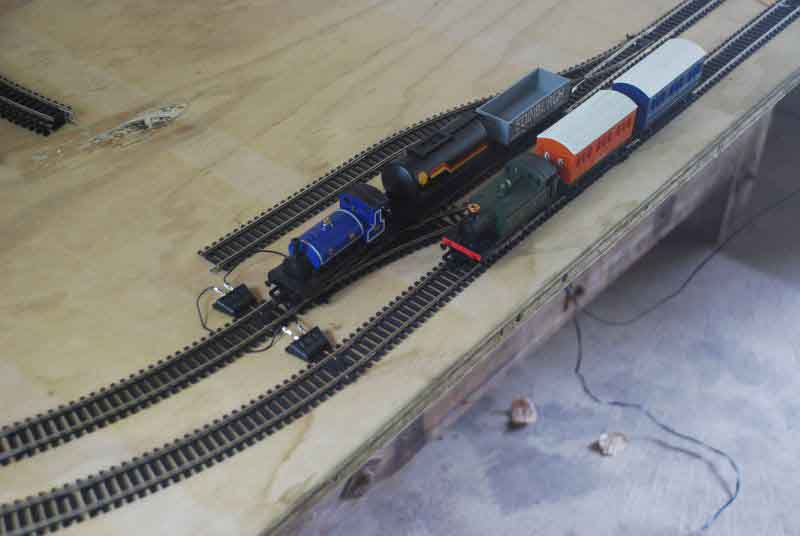
The railway works well, with trains being able to run round the outside track, and move into the inside track and back.
Once my grandson left for home I rebuilt the crate, ready for his return.
It takes less than three minutes to unscrew the crate, and about ten minutes to take all the non-fixed track off the board, and to re-build the crate.
Ewart”

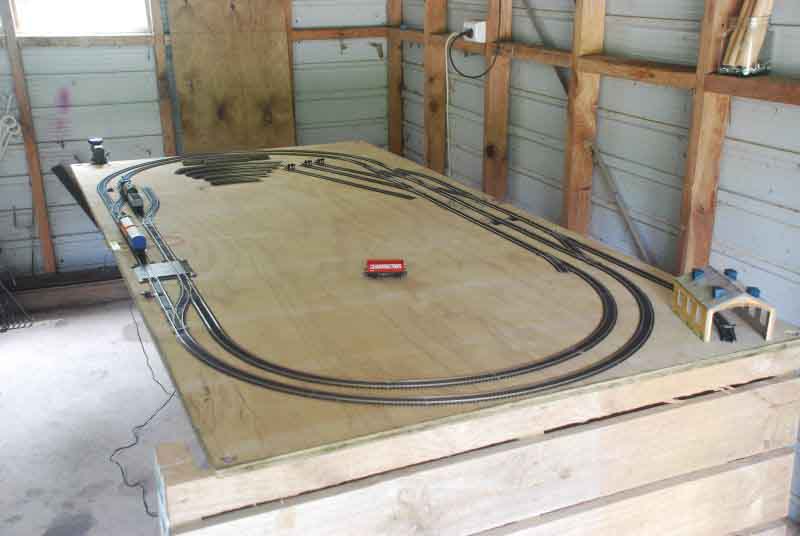
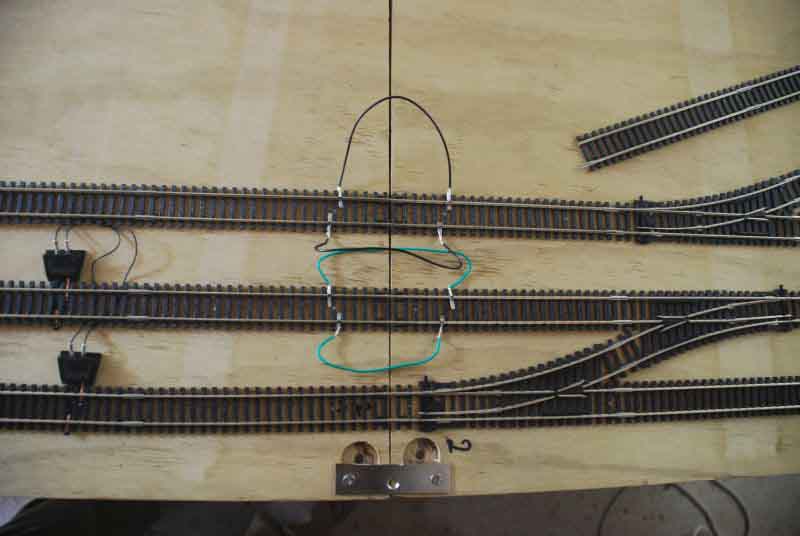
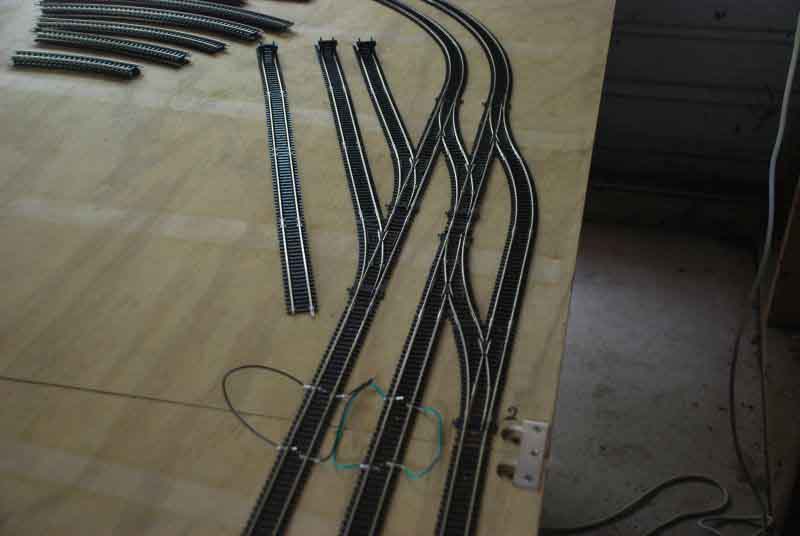

I have added quite a few new starter tracks. By that I mean lots more turnouts so that my grandson can add track to go through a town, or an industrial area.
I did solve the problem where I wanted three tracks for the fiddleyard. I have been testing the layout all afternoon and it looks pretty good.
Regards
Ewart”
A big thanks to Ewart for sharing his portable model train table.
And now Bill’s been back in touch – his last post is here.
There’s this one two: HO scale modular layout plans.
“Hello Al,
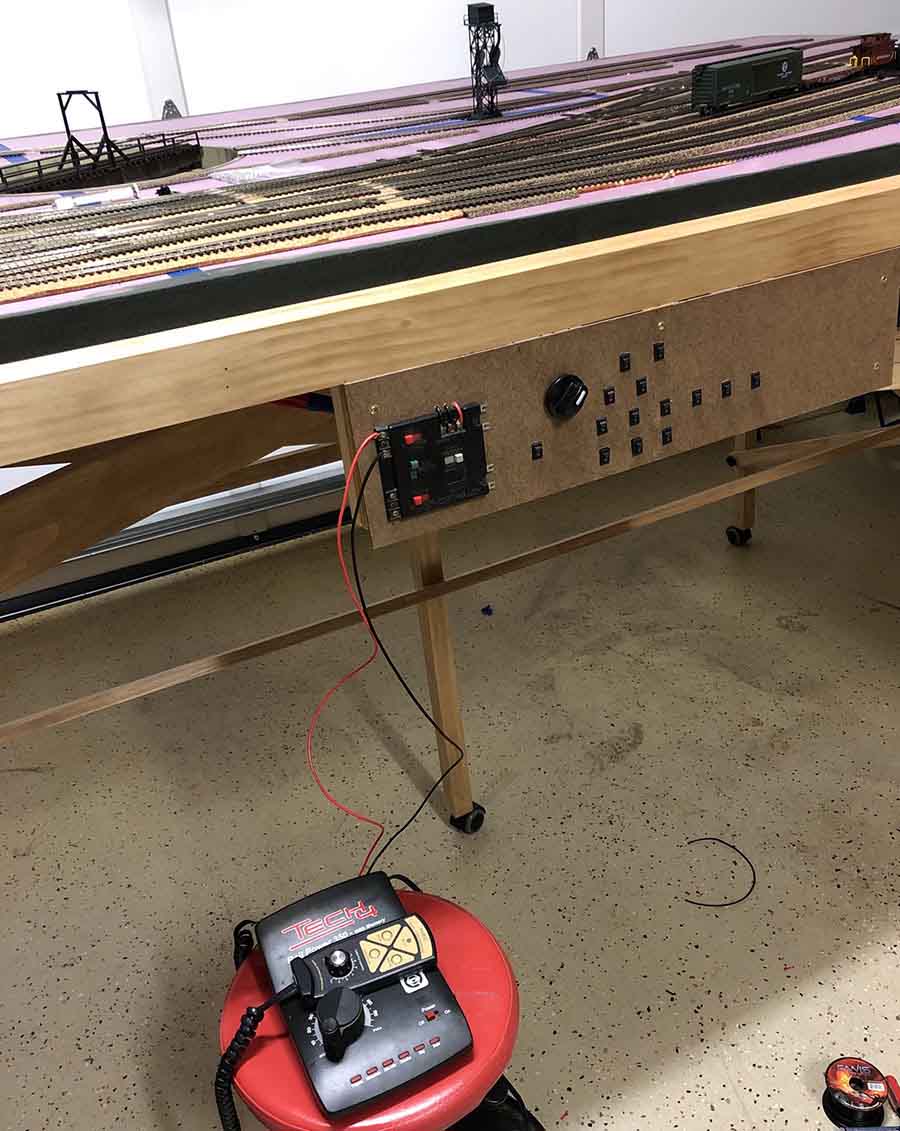
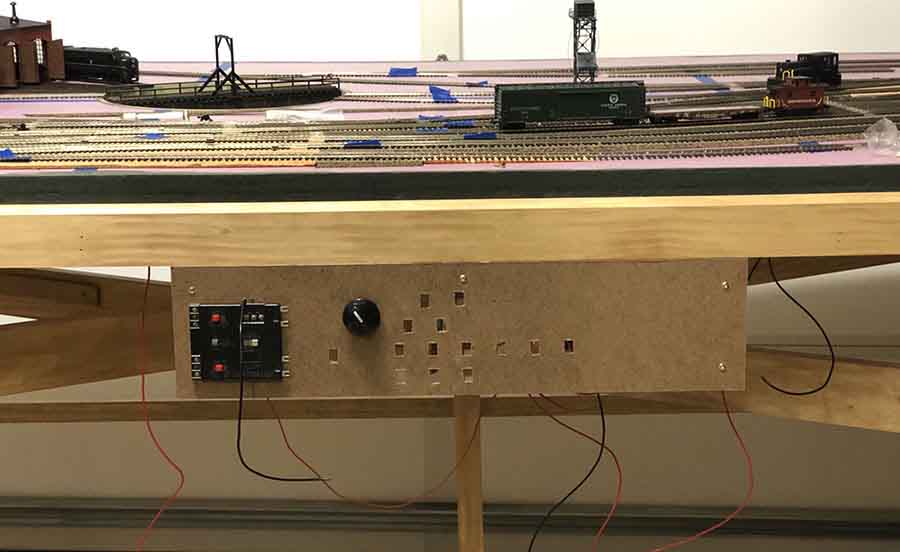
I’ve had more time to work on my switching layout than I thought I would and things are coming together. The past few weekends I’ve focused on wiring the layout. I have it set to run on DC. All feeders are in place and I used 22 gauge wire for those and 18 gauge wire for the runs to the panel.
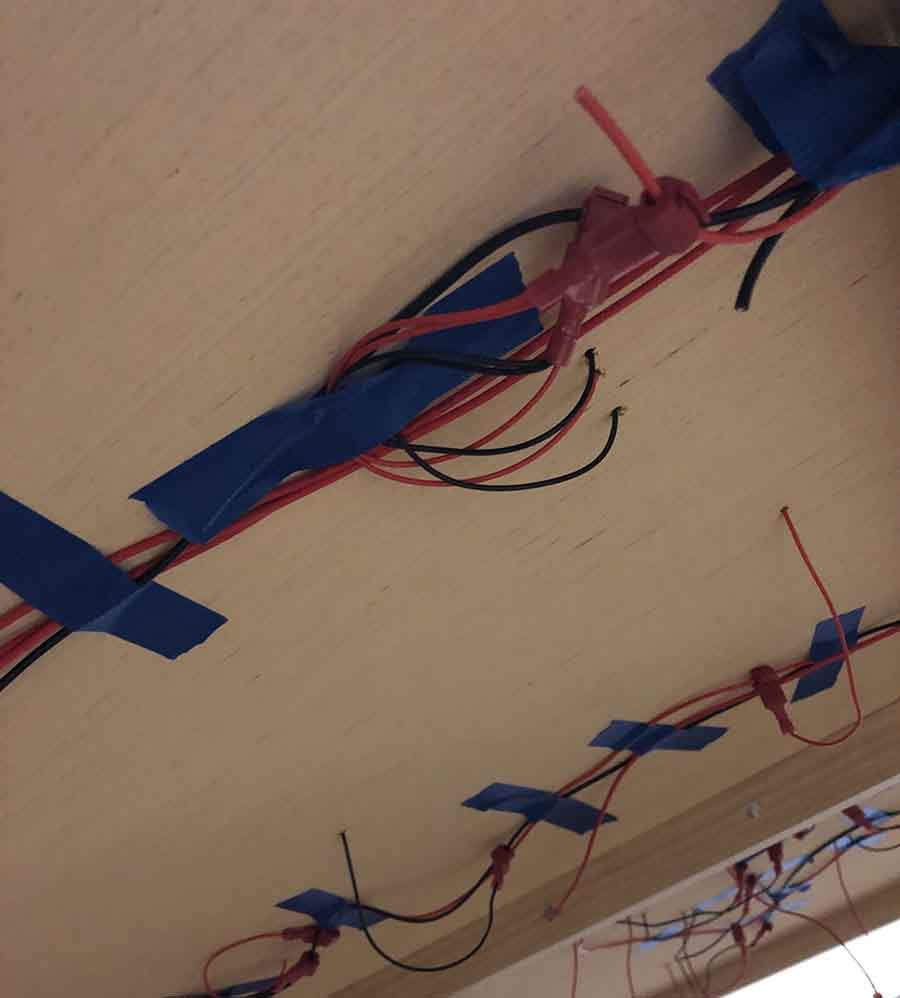
I’m using suitcase connectors for the first time and really like how simple those are. I’ve had almost no problems with them – I found one bad connection today as I was test running all the track after I finished the basic control panel install. I’m using micro switches for the blocks and a rotary switch for the engine yard and parts of the repair shop area.
In my work wiring I did come across a great use for painters tape. I used some to temporarily hold wires in place under the layout. The tape works so well I am going to forgo putting in hooks to contain my wiring. The tape holds great but is easy to remove if I need to do something different.
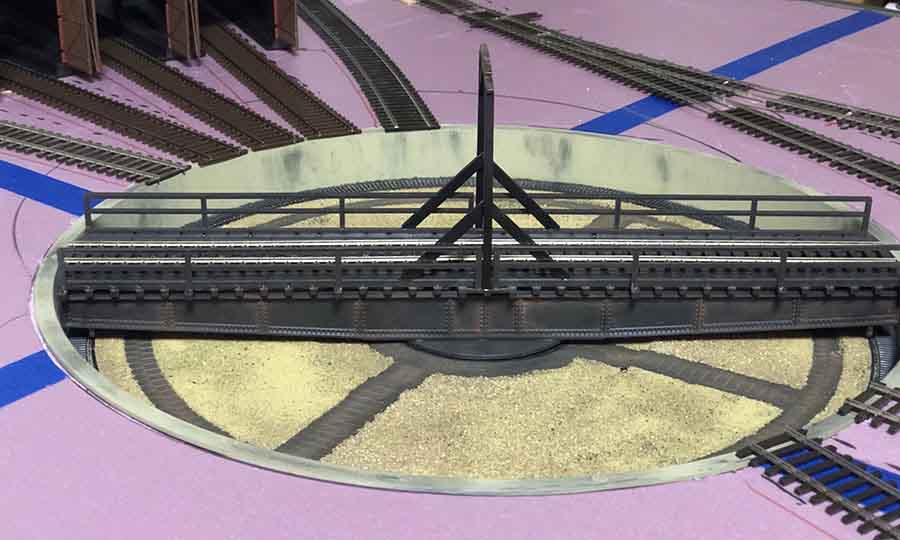
I also had the opportunity to weather my turntable before I put it into place on the table. For those that remember my very first post showing me in about 1974 I used a Heljan turntable on my layout. While the one I’m using is much much newer it’s the same type of turntable from Heljan.
Won’t be long before I start to get ballast in place. As always I’m still having fun!
Best
Bill in Virginia”
Dave’s right have a look at the Latest ebay cheat sheet here. Still updated every day.
That’s it for today. Really enjoying all the updates at the moment – I hope you are too.
Please do keep ’em coming.
And don’t forget the Beginner’s Guide is here if you want to do more than just daydream about your layout. Why not make a start?
Best
Al


What might be an easier way to build a folding layout is to fix a solid block about two to four inches tall, either side of the join, on each board, with a hinge linking each pair. This allows the rail ends to separate without crushing each other and gives the clearance between the folded boards for modest structures (if the clearance between the folded boards is limited, you can design the layout so that taller items like buildings are sited to miss each other) and it means you don’t have the effort or risk of trying to lift the loose board into position over the other, just fold it over. The props to hold the boards apart at the non-hinge end can be permanent fixtures. This is not my idea, I should say – it goes back at least as far as the late great Peter Denny.
As Usual, Dave has done a great job on his “over-haul” of his previous great layout. Would suggest some fencing so that the cows and horse don’t run onto the
the track! The background pix look great. Gives real depth to the entire layout.
Kathe, in Florida
Excellent work Dave as always. Love the duck pond.
So if you have almost finished, are you thinking up your next layout? 🙂
Eric (Leeds) UK
Dave….
Looking good so far. I want to ask. I really like your backgrounds on the wall. Where did you get those. They look so good and you have seemed to do a good job utilizing them in the proper places. They look good. The open expanse of fields that you can see and then where you just used the roofs of buildings because it is next to raised track. Clever. Thanks and keep showing us.
Jim
Really like the concept of a train in a case. The height of the case gives room for scenery and buildings.
As always Dave’s layout videos give a smile. Great scenery and trains!
Bill in Virginia
A lot of inspirational ideas this time.
The “crate” layout is quite the concept. Not sure if that is Peco Setrack or Hornby but I really like the very short radius points and wish that they were available here in the states.
Bill’s layout is coming along nicely.
Dave’s video is another “tour de force” performance. I really like this new arrangement — A better track to scenery ratio in my opinion.
John from California
Very ingenious, Ewart. Shows how grandfathers can do so much for their g-kids. Very clever.
Looking good layout, Bill.
Disappointed in Dave’s post. He gives us a closeup of the engineer in the cab and the guy doesn’t even wave…………
Thanks all and Al.’
MN Dan
Nice work!! thanks for sharing!!
I really enjoy all your posts. I do have a question. I have “small” collection of American 1940 and 1950 locomotives and rolling stock that I have not got the room to set up “two bedroom over crowded apartment. Is there any one interested.
Word of caution for Bill using painter’s tape. Do not know how adhesive of blue type reacts over time. Since it is also designed for temporary; I do know from experience; regular masking tape’s adhesive will be absorbed into raw wood and dry to a powder, then fall off. On a sealed surface, it first get gooey, then dry to a powder and tape will fall off.
Would also like to give a “shout out” to both Alastaor for his site and Dave for his ideas and videos.
First off, Ewart, very nice layout for your grandson.You have your track set up and now time for land scap, streets, people. Nice job.
Bill and Vergina, it wont be long before you two start landscaping your layout. The turntable is looking good, and a great idea on the wiretapping, everyone has there way of doing things. I prefer tiewrapes loosely but screwed down. Good job though.
Dave, nice job on the way you have your red and green track light. I looked up the net worth price difference on the lights you paid for, $200 of your money is
$260.00 ! Wow I know prices of hobby’s is going through the roof, unbelievable. I am on a fixed budget and I look at different ways, that is just who i am, with that said, any ideas on right of way, green & red lights ?
SDG St.Petersburg Fl
SDG you misheard me the light were £8 about !0 us dollars …..what i said was locomotives are very expensive these days with new ones moderate size being in the region of £200 ……The backscenes are from Gaugemasters …about £8 for 3 ..Dangerous dave
does anyone work with “O” gauge Lionel
I have my original Lionel Lackawanna circa 1957 and have never really built a layout to showcase, this one of a kind and beautiful diesel engine etc
any suggestions?
I agree with Rod Mackay, using blocks as separaters and hinges on one end is a much simpler system, no unscrewing and reassembling needed. Just fold it up when not in use. I made a layout for my son using this idea. One end of a half was attached to a wall permanently with legs to support the free end and legs also on the folding end which ended up close to the wall when folded. Plenty of room for buildings etc when folded with a decent gap. When folded that piece had a solid base covering the wiring etc, which was used as a table for other activities in his bedroom . Mike S