“Hi Al.
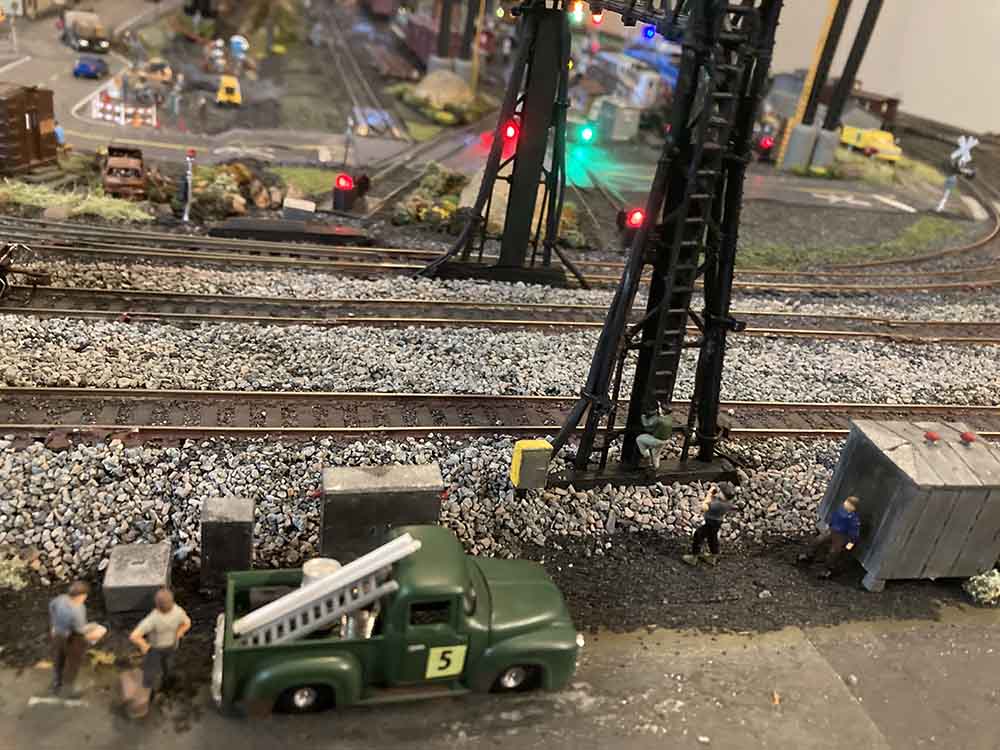
I finally completed and installed the PRR Main Line Signal bridge that I have been working on for a while and also installed Crossbucks and a Pole Light in the parking lot of the south Yard Master Tower of my layout.
Before I get into the particulars, for those of you who saw my blog to Al about adding PRR signals, I had a major concern about the number of wires that would be running down the bridge. It was solved with the help of fellow modelers.
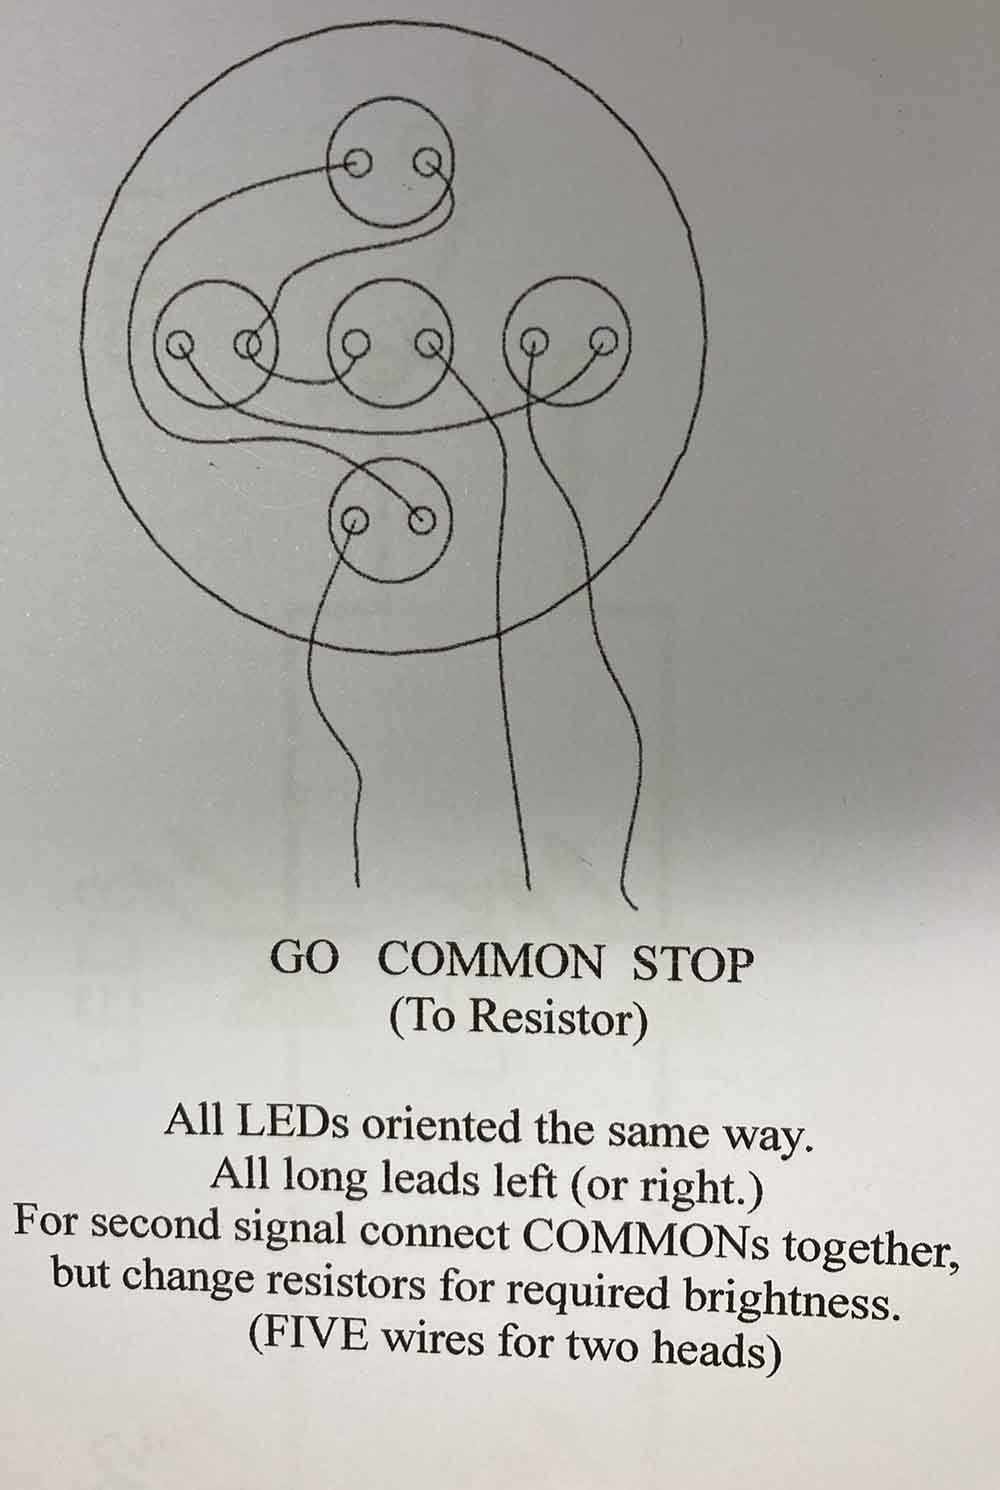
I want to thank Earl, Les, George and Kelvin for their suggestions and info on the wiring of the signals. BUT I have to give Charlie S. a very special thank you on solving my wiring concern. Charlie provided me with a schematic of the wiring of the signal (see PIC 1).
This basically wired the LEDs in a series configuration which reduced the ten wires down to three.
This made the installation of the signals onto the bridge very easy. Charlie…again…. Thank you.
This was not easy for me as the wires were very thin and the LEDs and connections were very small. I had to be very careful not to have the wires touch each other. The following pictures show the making of the signal.
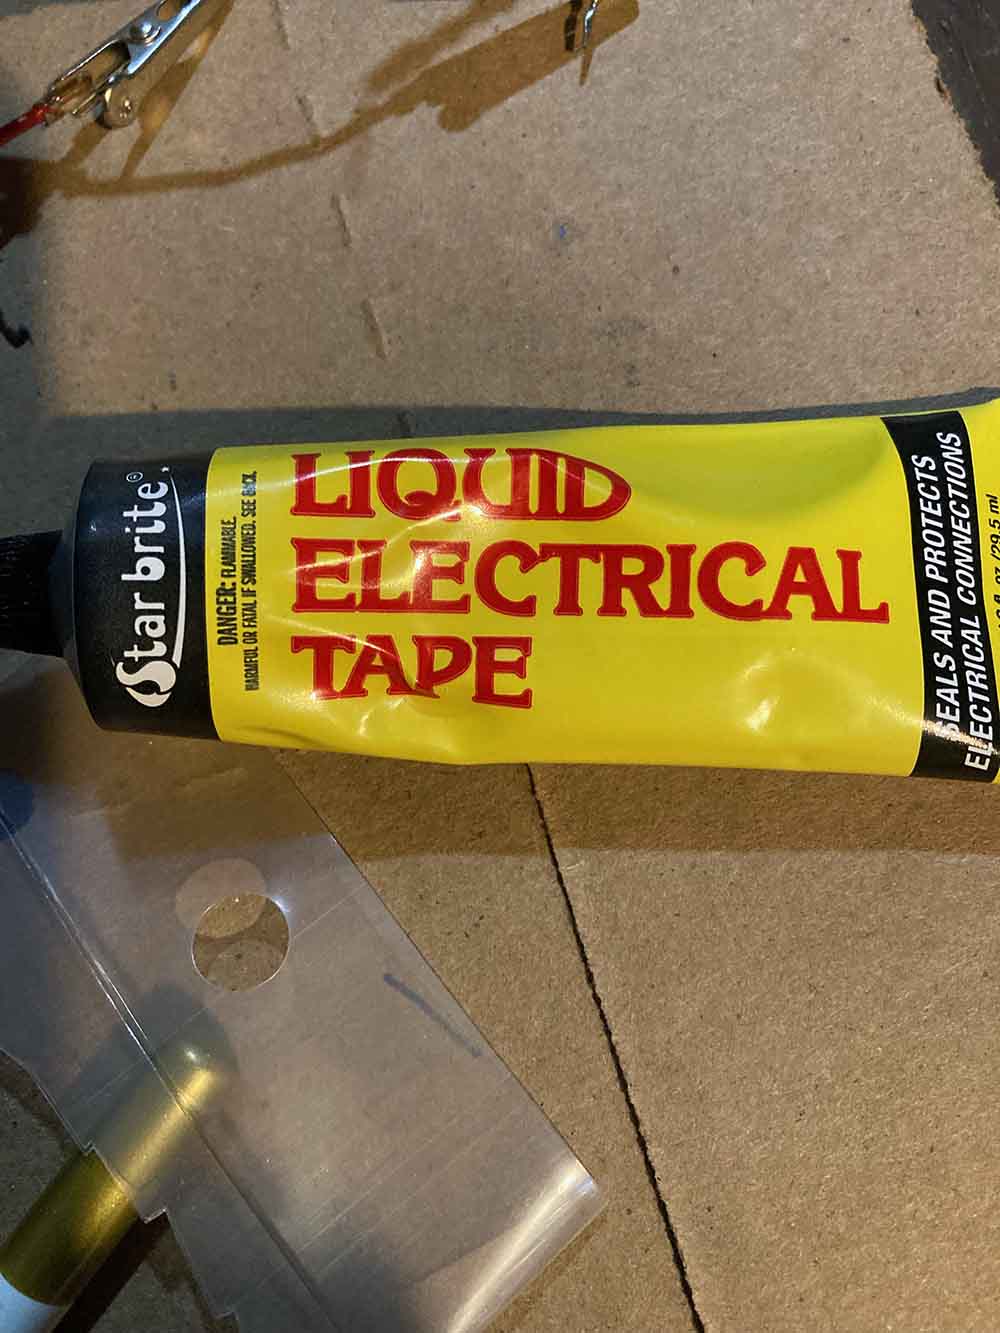
Pic 2 is the back of the signal with the wiring completed and I used Liquid Electrical Tape (Pic 3) to protect the signals from shorting out.

Pic 3 – The Liquid Electrical Tape I used.
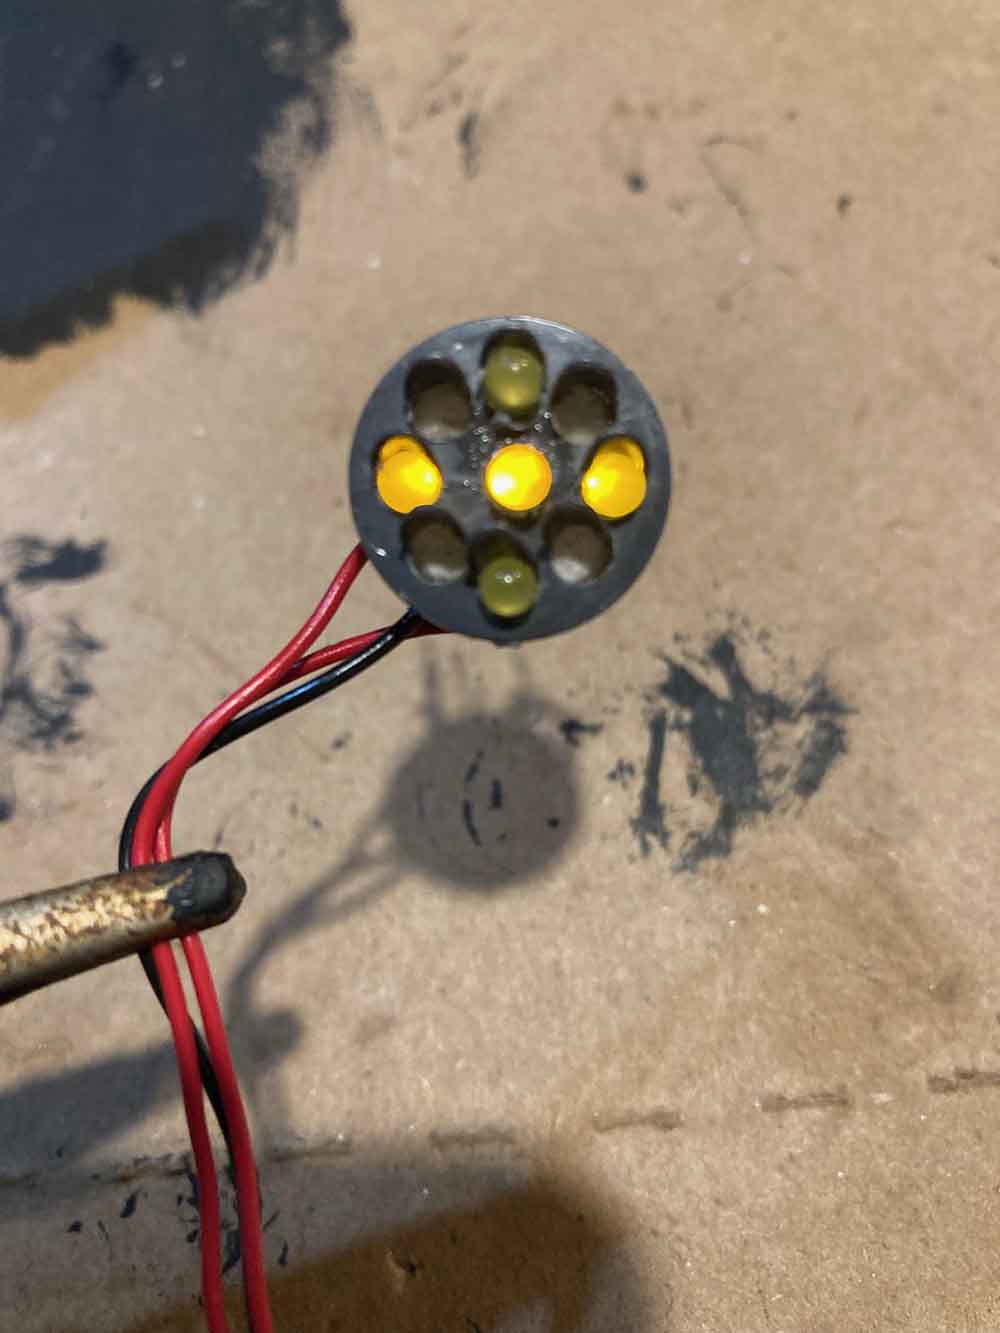
Pic 4 – Horizontal signal (STOP)
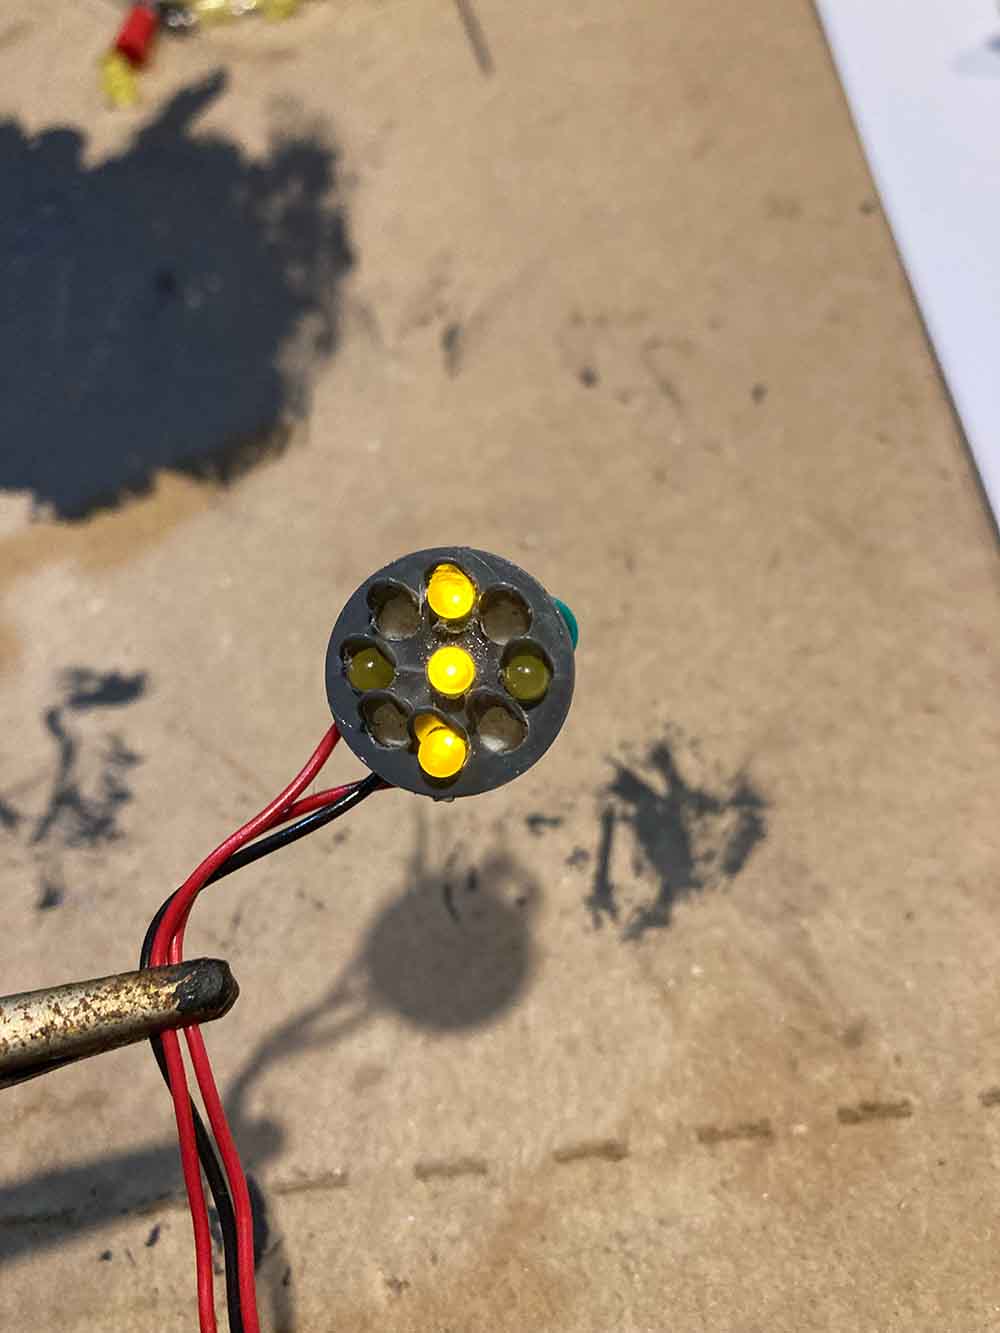
Pic 5 – Vertical signal (PROCEED)
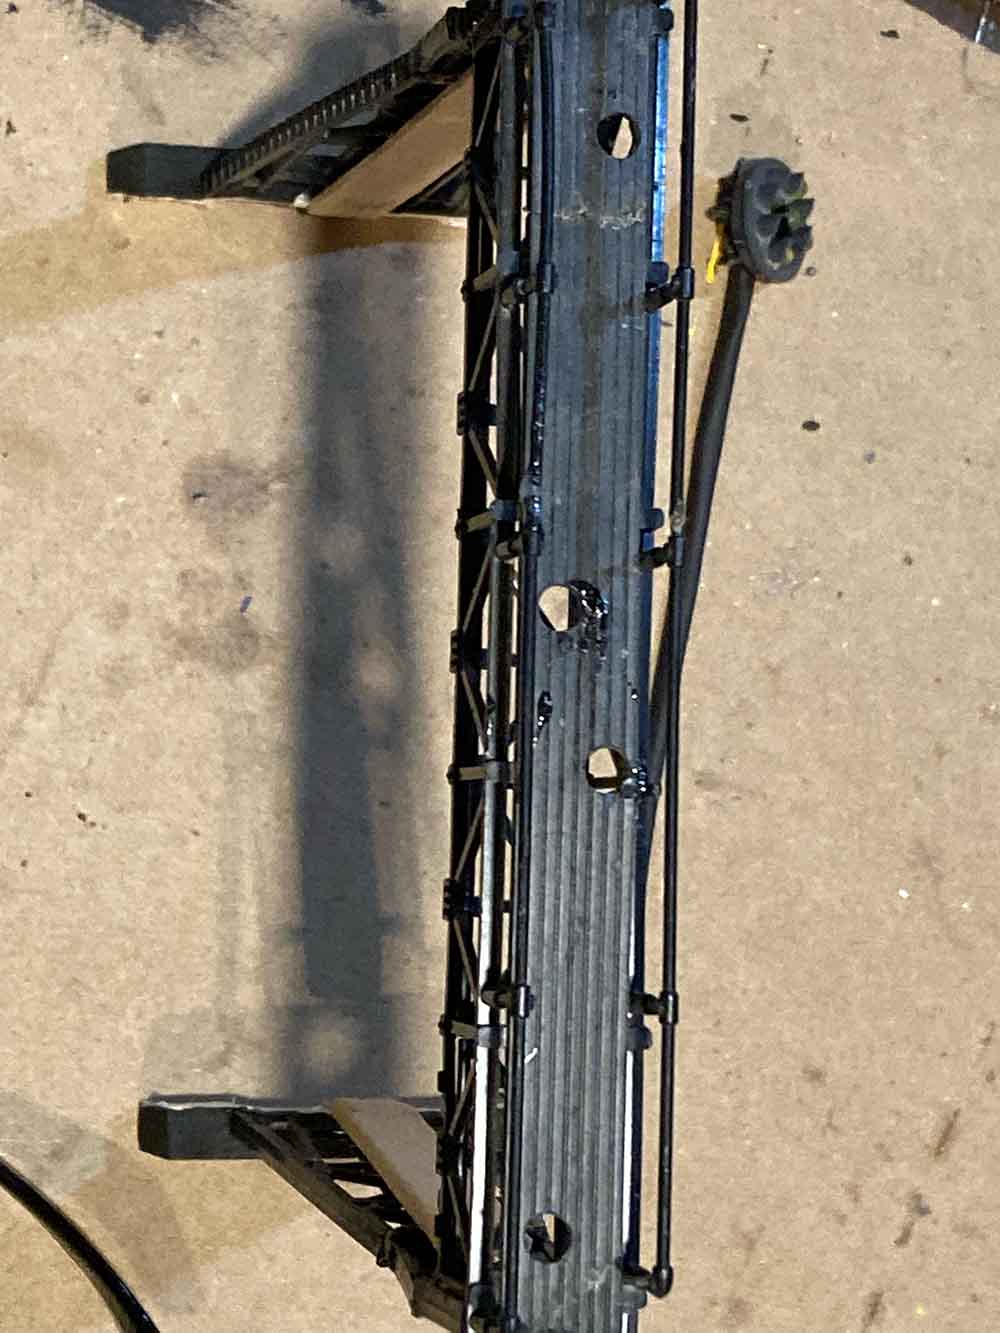
Pic 6 – The signal bridge with the holes drilled through to accommodate the wiring running down the bridge to under the layout for connection and power from a toggle switch.
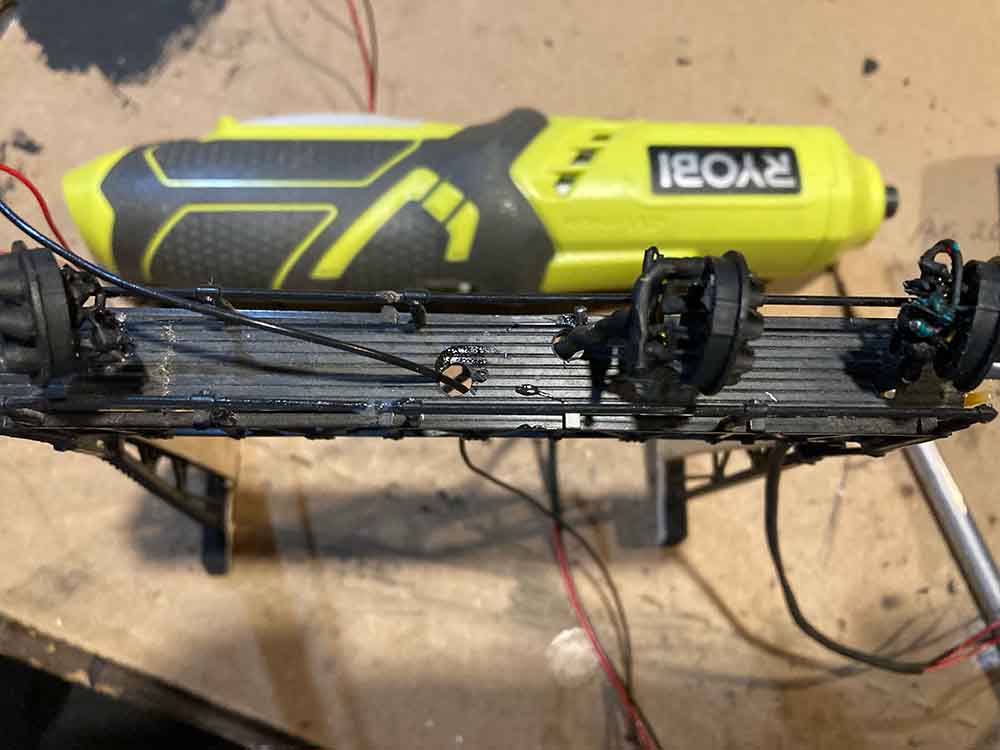
Pic 7 – The mounting of the signals onto the signal bridge
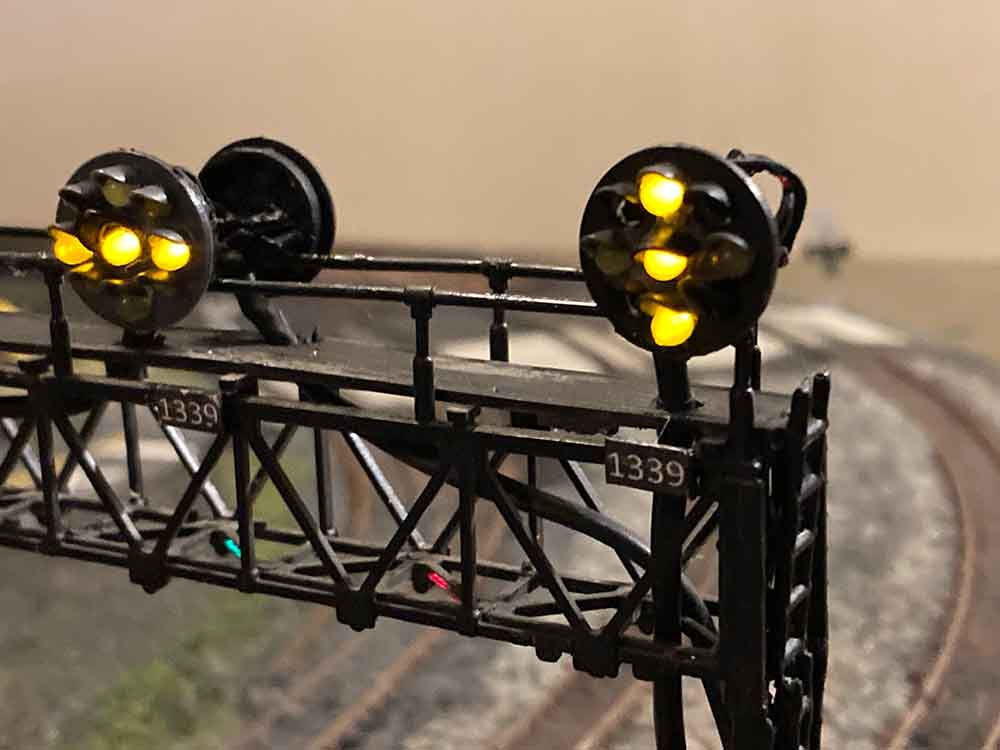
Pic 8 – The signals installed and working.
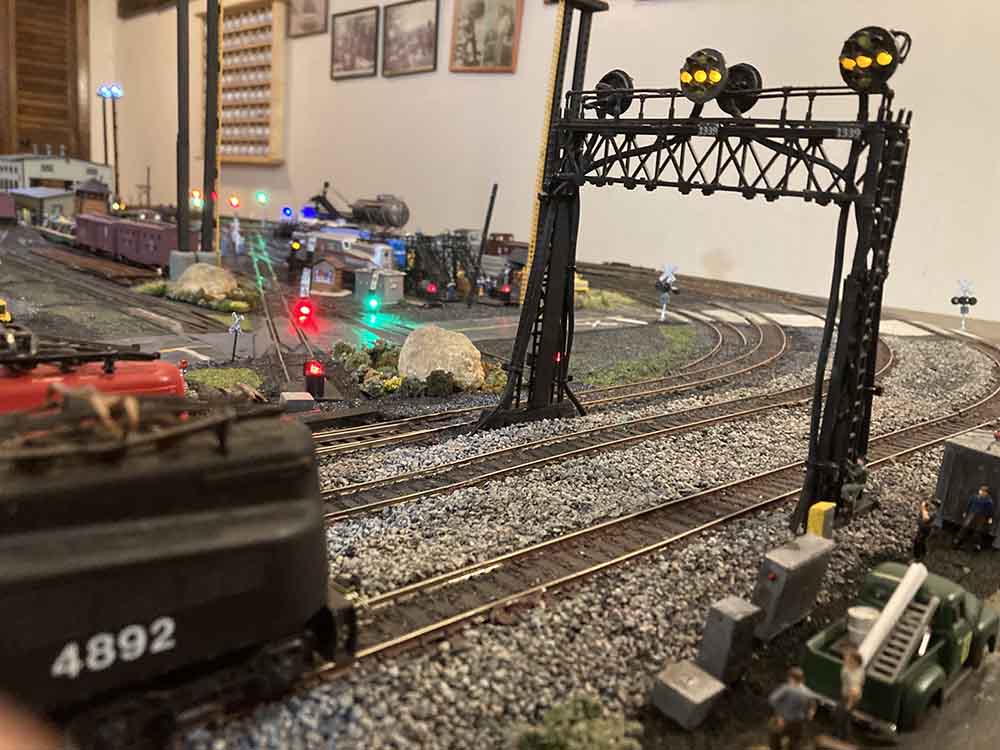
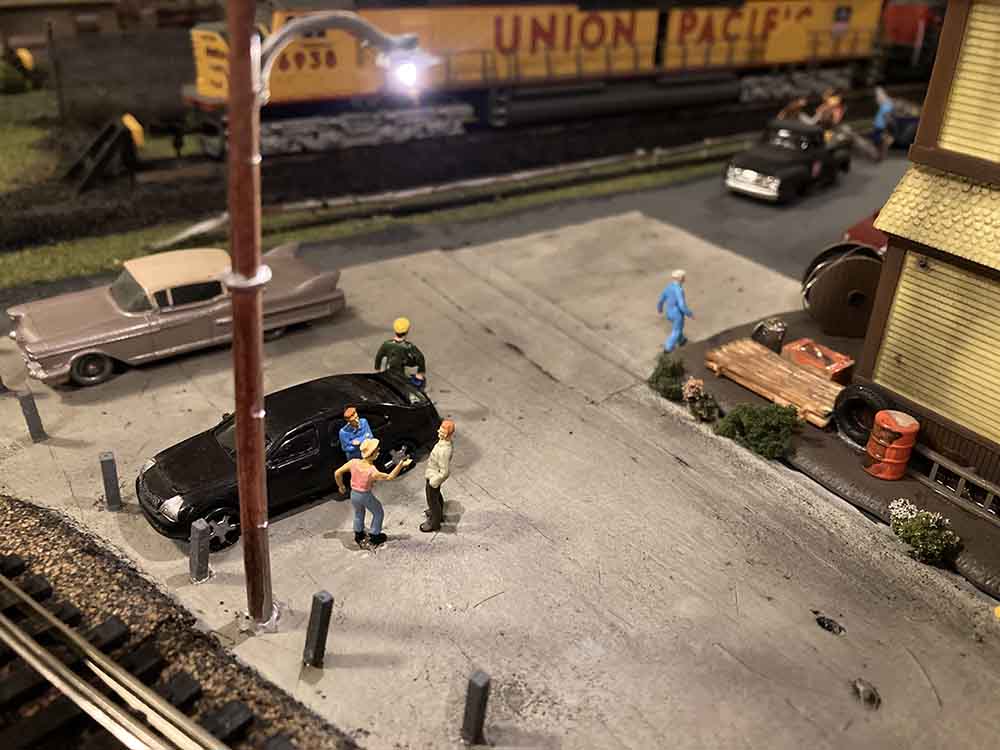
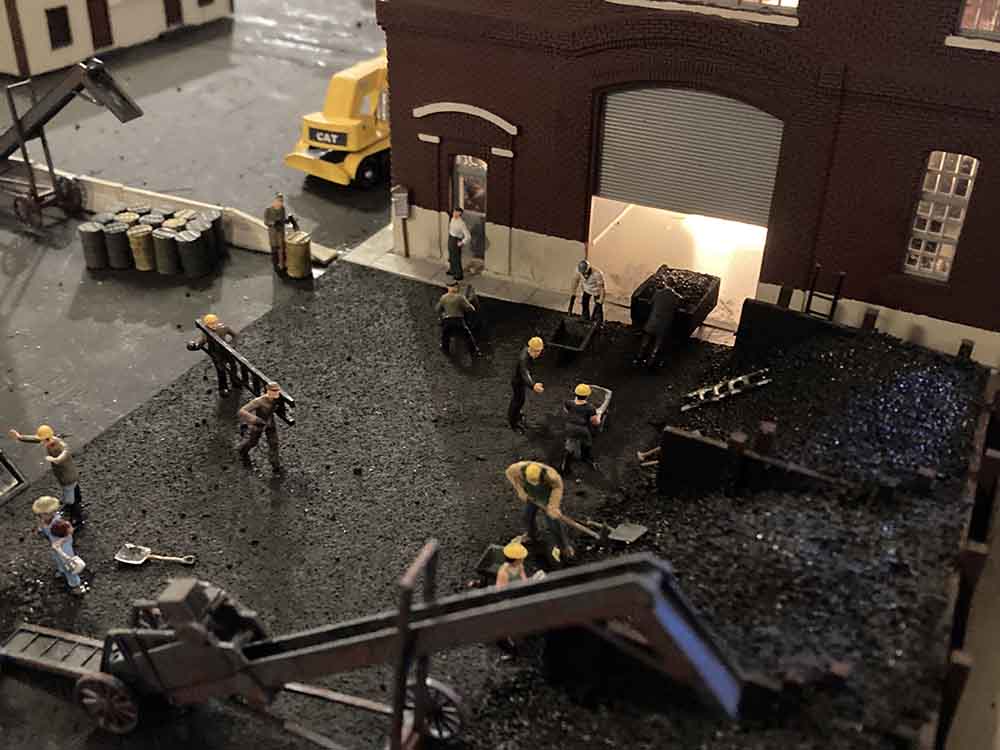
Pic 9 – Installed on the layout with a work crew.
This is the first PRR Signal Bridge that is completed. I have two more to build and install on the layout.
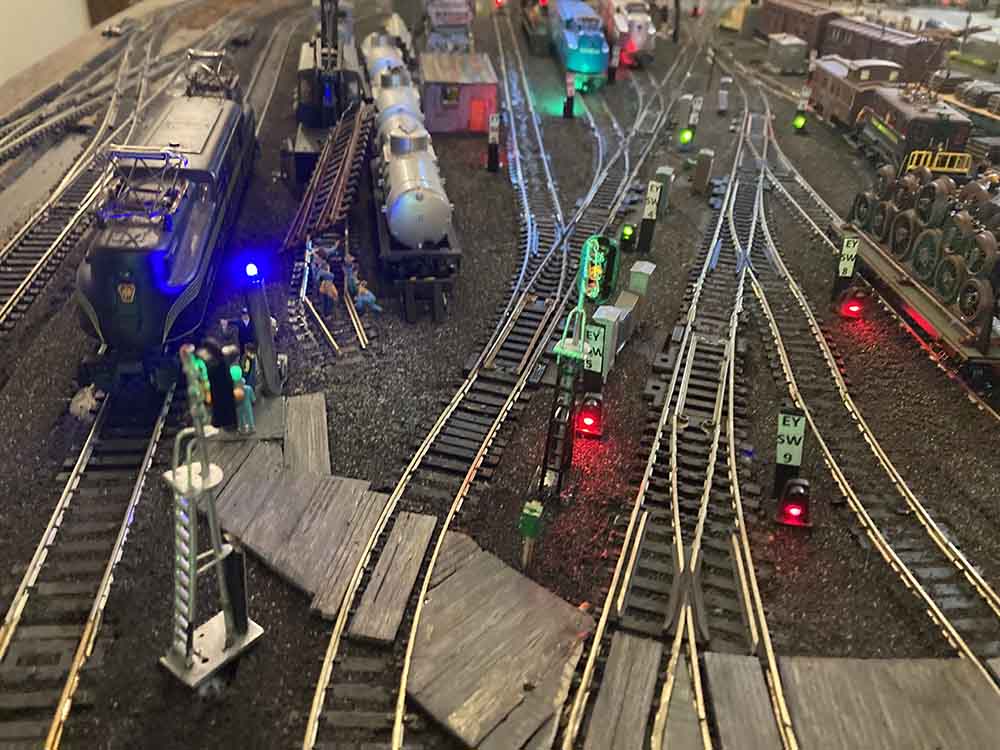
What follows now is some pictures of the layout I hope you like. I also installed Crossbucks to the layout as you will see in the video and I have a picture of one of the many Pole Lights I will be installing throughout the layout.


Here is the video on YouTube:
As you can see from the video, I still have a lot of work to do on my layout; ballast of all the rails, ground cover, complete the passenger yard with trains and I have to replace some turnouts with underground switch machines.
I want to take this opportunity to thank Al for creating and hosting and maintaining this site for us. And I want to thank all of the modelers who send tips and pictures and blogs about model railroading. I have learned a lot from all of you.
Happy modeling. I will keep you posted on my progress.
Regards,
Gary M from Long Island”
A huge big thank you to Gary for sharing hsi model train signal lights.
His previous post, which he mentions above, is here: HO scale signals.
You can also see everyone of Gary’s posts in the link above too. It’s wonderful to see a layout take shape from day 1.
And thank you to everyone who has helped, emailed or commented on a post to help someone out. Without you lot, there wouldn’t be a blog at all.
Gary’s post also reminded me of these:
Signal lights for model train switch.
How to make signals for your layout.
Simple model train signal circuit.
That’s all for today folks.
Please do keep ’em coming.
And if today is the day you join in on the fun and start your layout, the Beginner’s Guide is here.
Best
Al
PS Latest ebay cheat sheet is here.

And there’s the Silly Discount bundle too.

Hi Gary, great job on the signals and bridge, one tip though the wires you are using are much too thick, they don’t need to be. LEDs only use very small amounts of power. The thing that put me onto this was I bought some LEDs from China that came with wires attached that you could barely see, just thin strand of copper wire covered with a clear insulating layer. These are on my layout in various places and have been working fine for ages with no problems with these wires. Much easier to hide wires if they are very fine.
Cheers Mike S
Nice work with the signals …well done
I have also been working on some lights, street, signal bridges, pole, etc…
What I have found is this. I took some small speakers apart and the winding wire is insulated but also really tiny. So far these have been a big help in hiding wires in tight places compared to what I used to use. I color the ends that go under my layout with paint pens so I can tell the pos from the neg. Excellent for LED’s.
As Mike Street said above, the use of conventional LED’s for railroad modeling is being replaced by much smaller SMD (surface mount device) LED’s.
These are so tiny that the smallest ones are barely even visible without a magnifier, yet they are still plenty bright. As such, it is best to order them pre-wired, in which case they come with extremely fine-gauge “magnet wire” as the +ve and -ve power leads.
I have been installing these in N scale locomotives as headlights, marker lights, alternate flashing ditch lights, reverse lamps etc. Gary’s overhead signals could easily accomodate red, green and/or yellow LED’s, in any combination desired, with the use of smd LED’s.
For those who might be interested, just Google “smd led” to learn more.
Great work on your Pennsy signal Bridge and signals. It looks good. Signals add so much to a model railroad and I applaud you for building your own. Nice going, Rob McCrain – Farland Howe
Very nice. I’m just getting started.
Gary
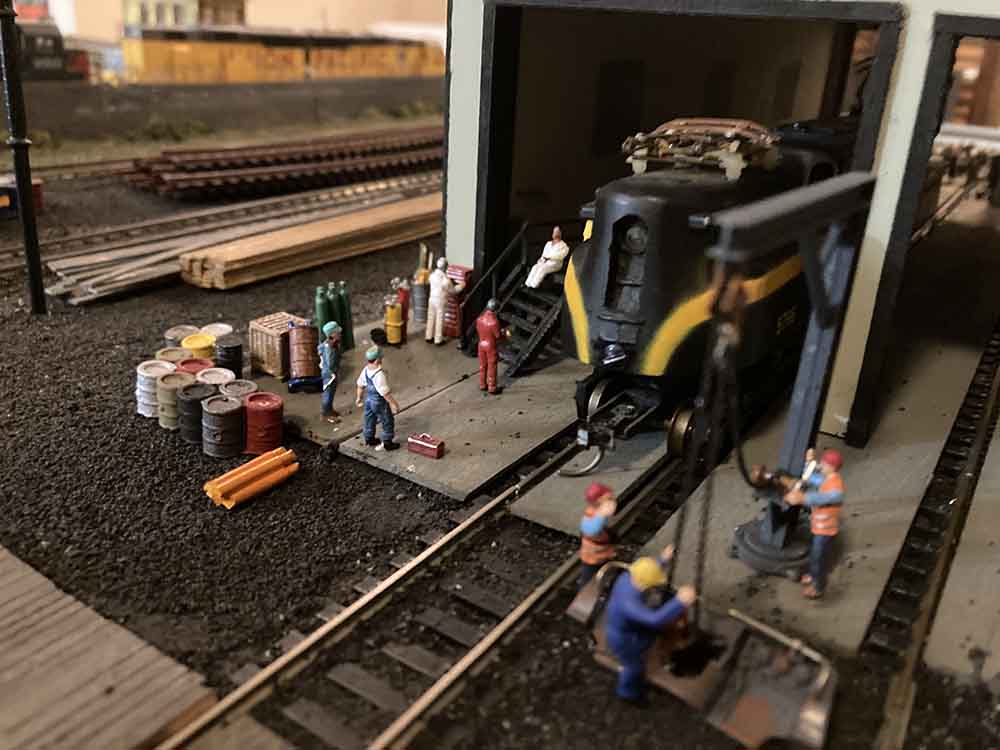
Awesome job. Fabulous layout, theme, & craftsmanship. The lighting and signals make it so alive. Sunnyside yards! with the ubiquitous coffee truck- fabulous!
Keep us posted please.
Thanks Big Al!!
George from LI also
The layout is nice as is the signal work. After having a layout that works on DCC it is strange that it is so quite on a DC layout and the fact that the trains stop and start instantly. The momentum that is possible with DCC adds so much realism as does the sound effects.
Pretty Kool? I hope mine comes out that good.
Mike & Pete & Dwight…….Charlie S., who gave the schematic for the wiring, told me about Ribbon wire which is very thin. I am pretty sure it is 28 gauge, but because the signal were small and very close together, I coated them with the Liquid Electrical Tape. I found it very hard to work with and solder wires so thin. I don’t think I could go with anything much thinner than 28 gauge.
Also, the color of the signals on the actual PRR main line from New York to Washington, DC, we’re not colored. They are a dim faint yellowish color. Many other railroad signals use red, yellow and green but not these.
Thanks for your comments.
Much evidence of hard work and careful planning. High speed through yard seems improbable tho. Can locos really stop on a dime like that? Liked seeing how many people were included on lay-out which made for more realism as they were primarily “working stiffs”! Signal wiring is so far beyond my capabilities that I’m left in utter awe! Lastly, the treatment of concrete surfaces is superb.
Gary I really like the life you’ve added to your layout, each scene is alive with people that all seem to be dressed for their occasion and positioned so well. I too like your concrete work. Lighting and signalling add so much to the realism as well. You have invested a lot of good effort and time into your creation and it shows. Remember how the first video games with low resolution looked? Figures etc formed with large square blocks, then over time resolution increased to add much more realism as time went on. I see our model railroad creations this way. During the process, just like the evolution of video gaming, the game is working, sometimes good, sometimes not so good. But our imagination fills in so we see our creations in their future with much improvement, refinements, etc. I know that my layout for example has tons of room for improvement as others will be quick to point out in a positive way, meanwhile my layout is running and working and I visualize its future with constant improvements to anything that may catch my eyes at any given moment. Good work Gary, looking forward to what you do next.
I can’t even imagine the attention to detail required for these signal lights. My hat is off to all of you!
there is always something worthwhile in all articles! thank you!
I don’t recall seeing GG1’s in the Sunnyside yards; only DD1’s and FM diesels. I lived on Long Island around the late 40’s early 50’s until I started working and moved to new England. DD1 passenger runs ran past my house in Jamaica on their way to Jamaica station. I missed the Pennsy and LIRR, but still had the NYNH&H. The B&M passed through my back yard in Boston. Your Sunnyside layout is full of detail, more than I have seen on any other layout.
Proper PRR, Conrail, and Amtrak terminology is stop signal. Also approach indication is lights at 45 degrees diagonal from upper right to lower left. Your signals have number plates. This changes sop indication to stop and proceed.Clear and proceed are self explanatory. Approach is proceed, not exceeding 30 MPH. Stop and proceed is stop, then proceed, not exceeding 15 MPH, looking for switch not properly lined, or looking for broken rail .
Dave Karper…..you must have worked on the railroad from the way you described the use of the signals. I did not install the diagonal position because of the number of wires I was dealing with and because I do not know the electronics to have the signals go from proceed to caution to stop. I am controlling the signals through toggle switches.
Mr. Ron from So Mississippi…..the DD1 were very old locomotives before the GG1. The first GG1 was built in 1934 by General Electric and two other companies. 139 were built and were in service for almost 50 years used by the PRR and then the PENN-CENTRAL and then broken up to CONRAIL for freight and AMTRAK for passenger service. I do not know if they ever ran up to Boston. Main routes were New York to Baltimore and Washington and west to Chicago.
Thank you both for your comments.
Are you going to add the catenary for your GG1’s to feed from? Lots of work, but would be really cool.
So COOL, thanks for the share. That will be fun to build.
Gary M. Yes, I worked for Conrail and Amtrak. My Amtrak time was on the Northeast Corridor, so I was into Sunnyside quite a few times. No motors ran to Chicago, as electrification ended at Harrisburg, where power was changed to HEP equipped diesels.
GG1’s did not run to Boston because of a frequency change at Gate.
Bob Towers & Jeff Gates…..I have thought about adding catenary to the layout but that is on the bottom of my to-do list and also that would be a major project especially for the interior of my layout. I would not try to electrify the engines from the catenary. That is way beyond my skill level. But thanks for your comments.
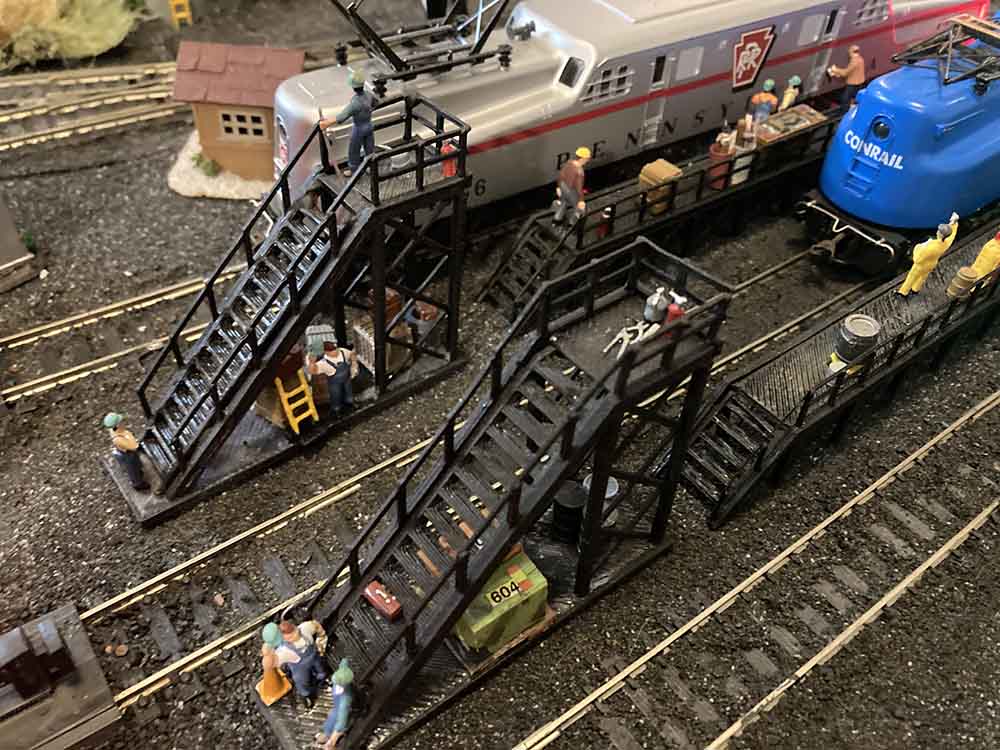
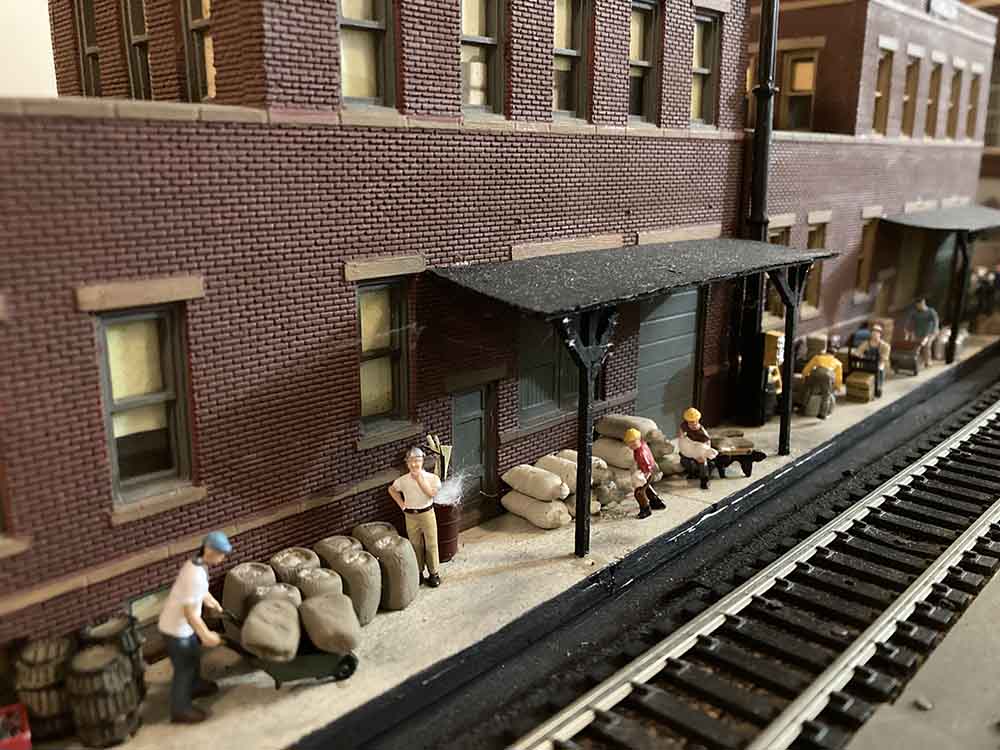
Impressed by the signals but even more by the ‘activity’ – by this I mean the cameos – people and sacks give the platforms life and the lorries at the depot all make it a very vibrant layout.
ALASTAIRE…..PLEASE -PLEASE-PLEASE….FORWARD ALL OF MY INFORMATION TO GARY M….I would like to speak to him and or meet up with him…. Thank you
Good morning Gary M. (HI NEIGHBOR)
This is Frank Serio, from Bethpage, LI, NY. I lived directly across from the train entrance area to the SUNNYSIDE TRAIN DEPOT. We lived between 43 street and 44 th street and the cross streets of Skillman Avenue and Borden Avenue. We used to sneak past the R.R. iron security fence which was to the right of the “Skillman Avenue Park” handball courts. As small children we would sit on top of the dirt hills and watch the trains as they passed by and headed to the depot yard. Age 76 here, and retired, I would like to see what I missed on train board layouts, over the years gone by. Just so happens that I will be traveling today on Sunrise Highway, past “TRAINLAND in LYNBROOK”
really nice work. good job.
Most impressive , way out of my wheel house indeed . My sausage fingers and arthritic hands won’t permit me such delicate craftsmanship. Great detail . I’m curious however , and please no offense intended , it appears in so many posts that a fair amount of trains are just short . I grew up in Pittsburgh PA , the trains would go on for hours it seemed … dozens and dozens of rolling stock . Why is it that we see so many short trains . I’ve six separate lines on my layout each has 25-30 rolling stock . The locos pull nicely and without fail . Just asking ??
Regardless , Gary, that is one keen layout and I tip my hat to your ingenuity. Nice job.
Awesome pictures and video of layout Gary, well done !!!!
Great layout. May I ask which LEDs you are using? Thanks.
Awesome job Gary, for 30 years I walked across the Sunnyside yard overpass on Queens Blvd and always enjoyed looking down at the yard. You did a great job at duplicating the look but it’s sad that as time went on the yard became less active but you captured the glory years of Sunnyside.