5 trains running on one piece of plywood, and Dennis is a happy man.
Best of all it doesn’t look crowded:
“Started this with one idea in mind – mining and lumber mill – then added a reverse track for a little pusher car to go in and out of the mine, then added the first raised track, then the second, then another reverse track going from the mine drop-off to the processing shed, and on and on. 5 trains running on one piece of plywood!
Dennis”
And Ben has also got started on his layout and has his trains running.
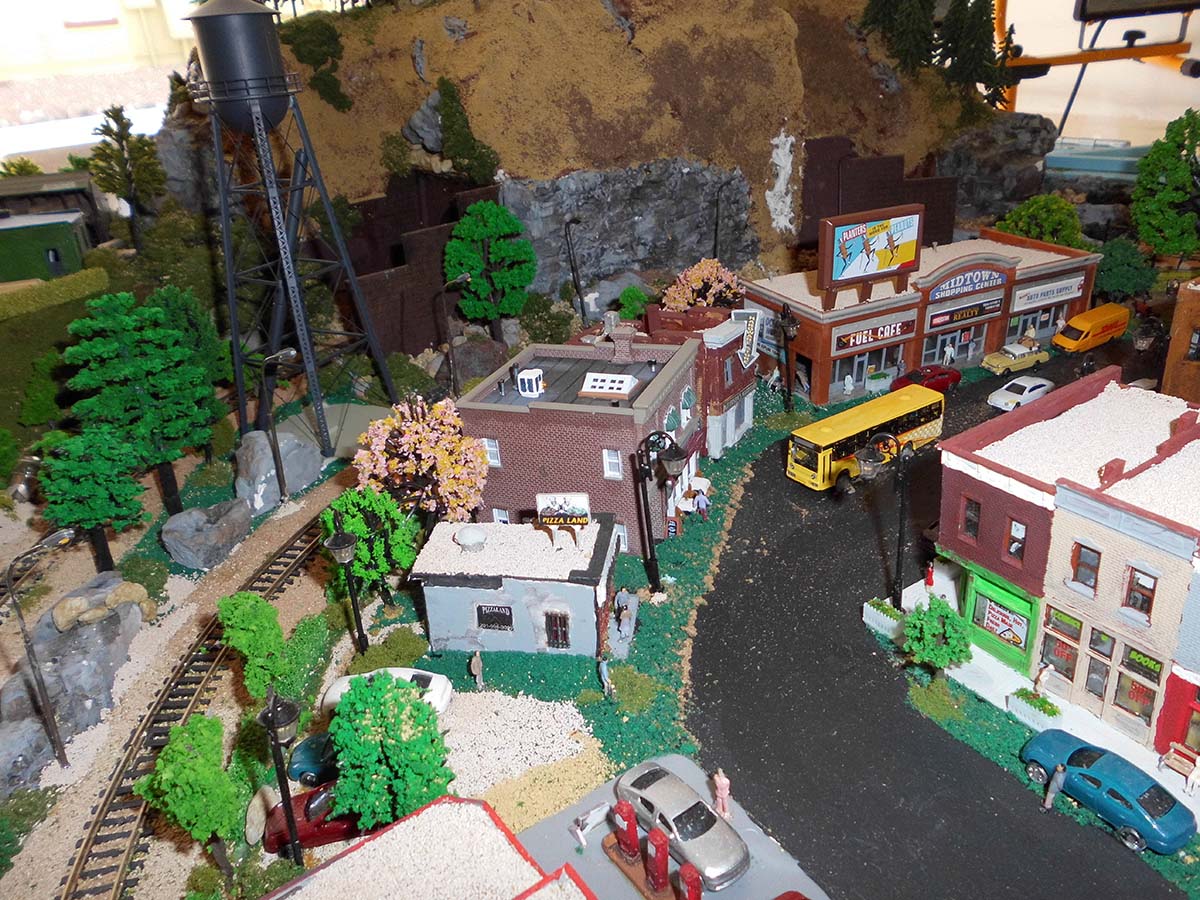
“This is my work in progress it has no rhyme or reason it all come from my mind as i go it could be anywhere USA.
Also just a little of my stien & coffee cup col.
My train room is 12.5ft. x10.5 ft.
Ben”
Now on to Vince:
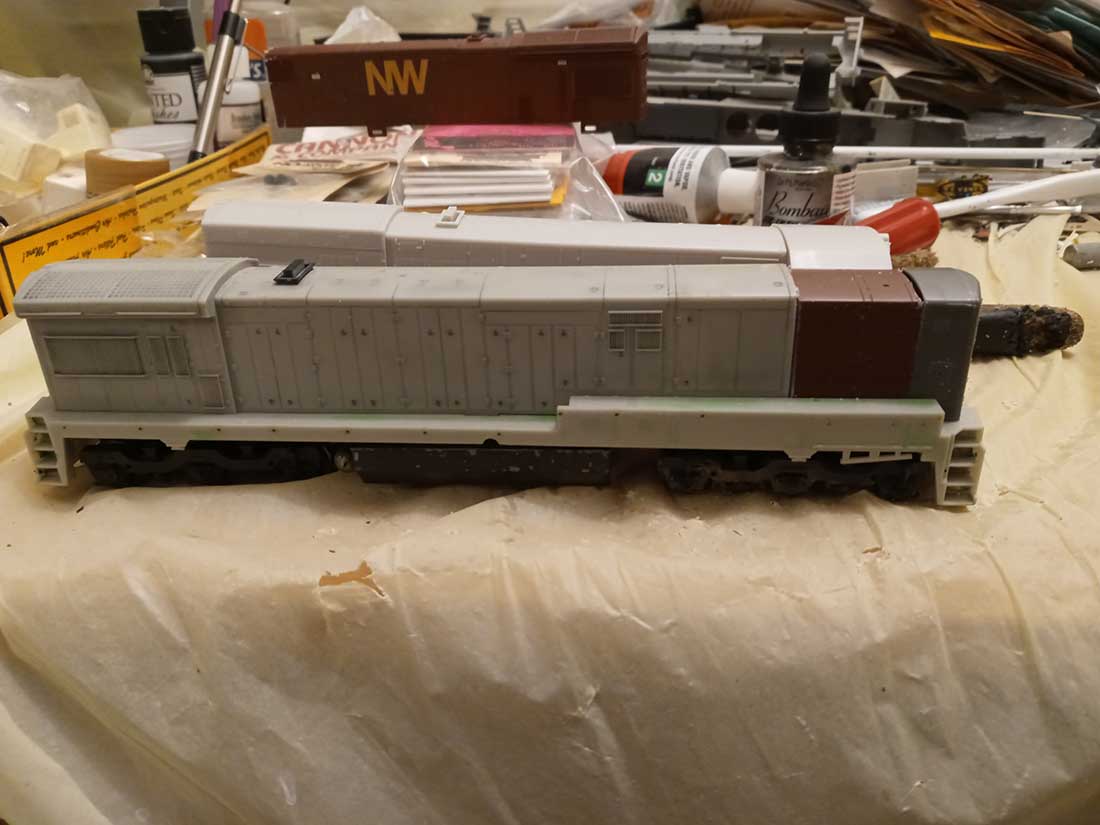
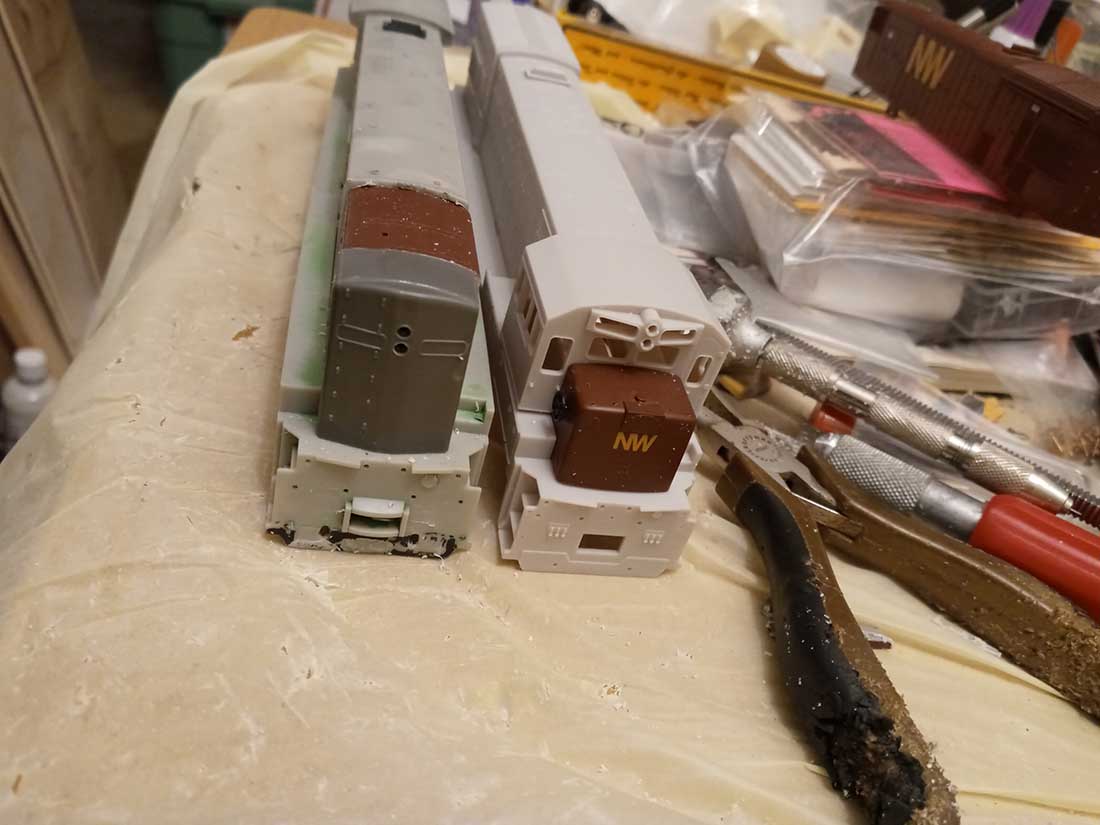
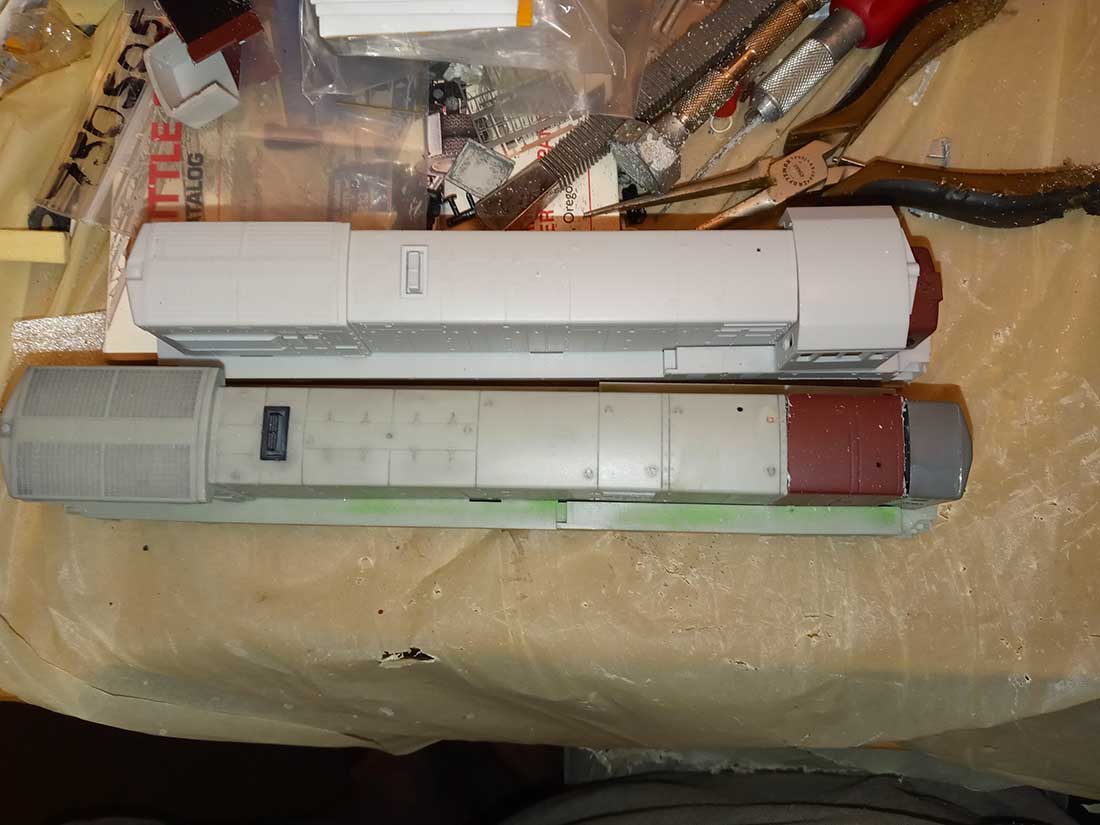
“Just thought you might like to see my latest freelanced railroads most current build
Athearn U-C chassis with an atlas U30/36C shell that I’m building into a Cabless Unit still a ways to go but it’s a start
Vince”
A big thanks to Vince, Ben and Dennis.
I know I say it often, but even after all these years it’s still wonderful to see what you’re all up to.
Dean’s been busy on his Model railroad table – have a look at what he’s done:
“Hi Al, greetings from Dean in New Mexico.
Here’s my latest set of photos and a video on my construction of the Scenic Ridge Railroad.
A recent shoulder replacement has slowed me down a bit, but fortunately I had a number of photos and videos saved up for my series.
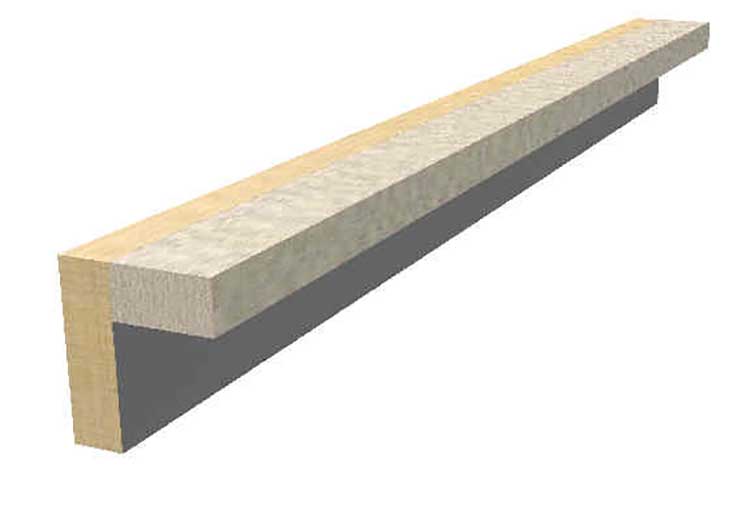
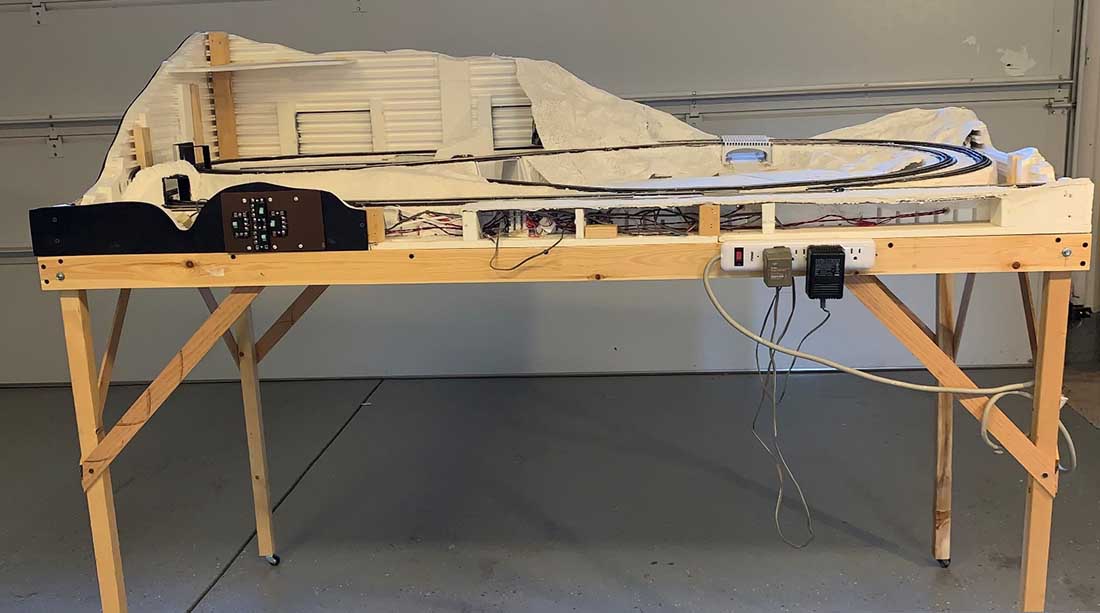
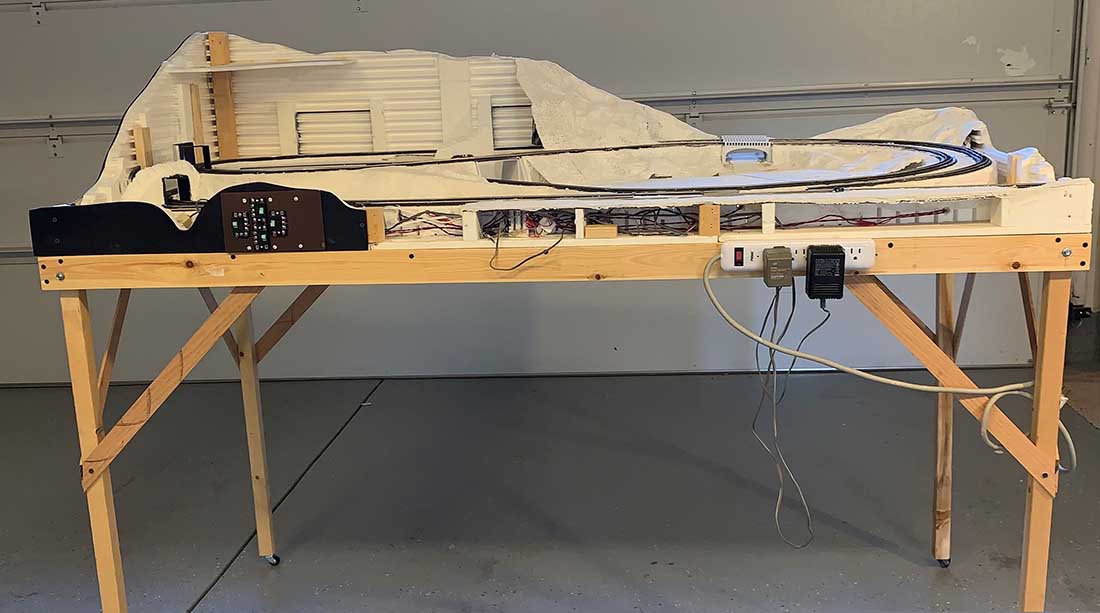
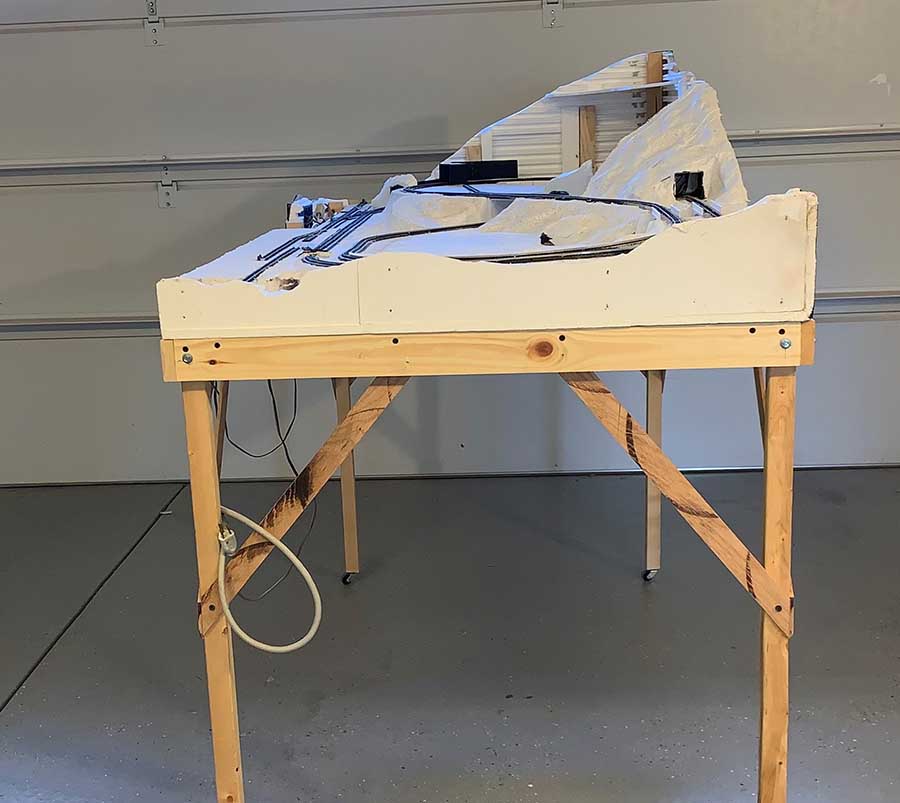
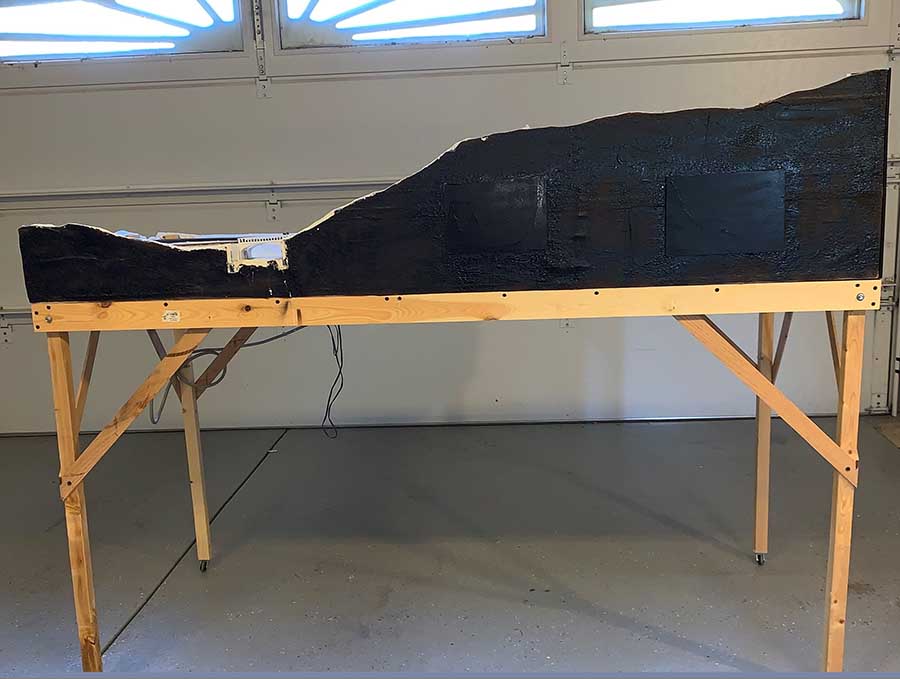
So, I’ve been catching up on the smaller videos. This one covers the construction of a lightweight but strong support model railroad table that I built to hold the railroad layout.
It’s on small casters so I can easily move it around to work on, or to photograph, the layout.
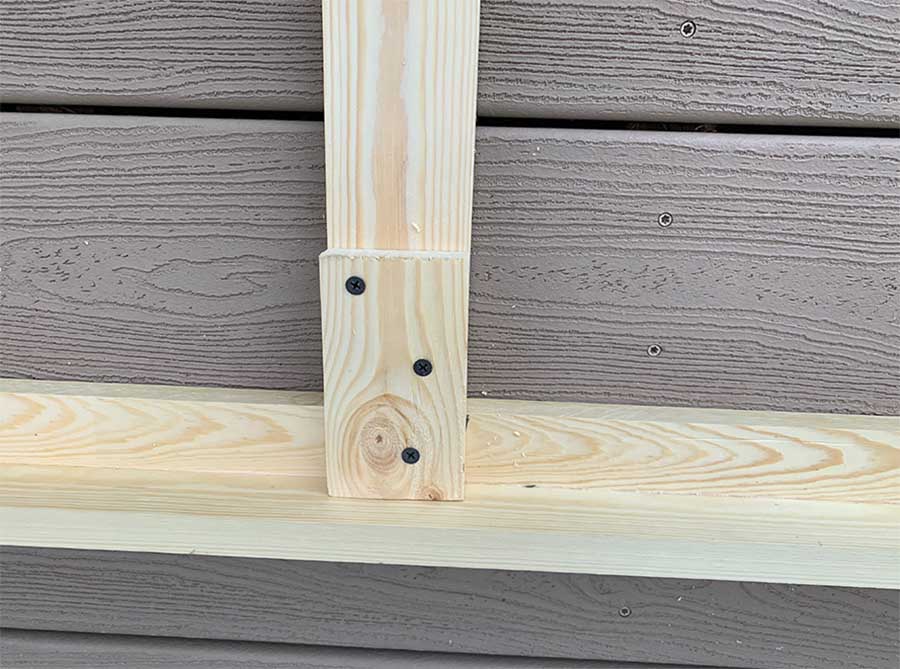
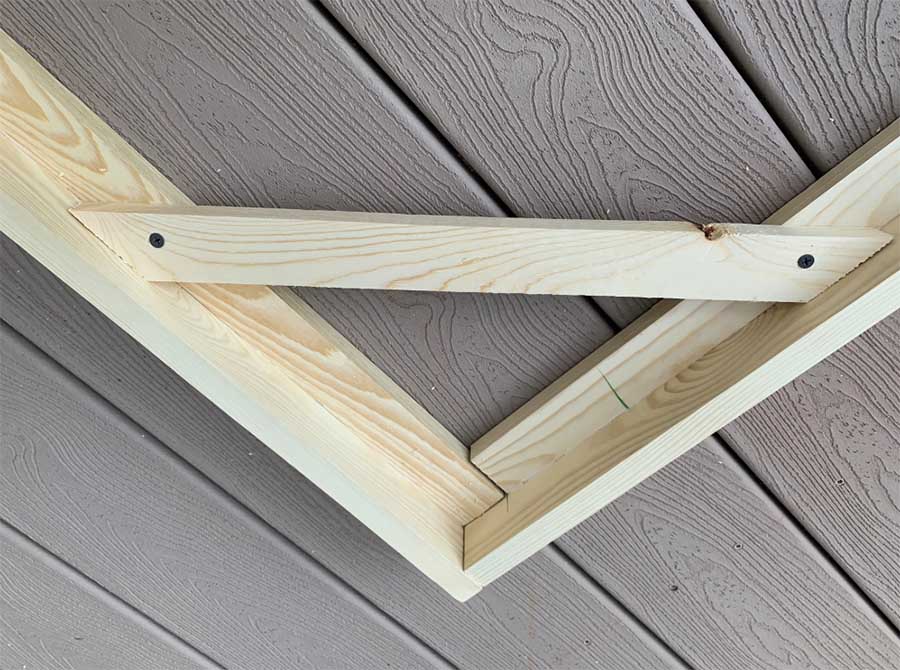
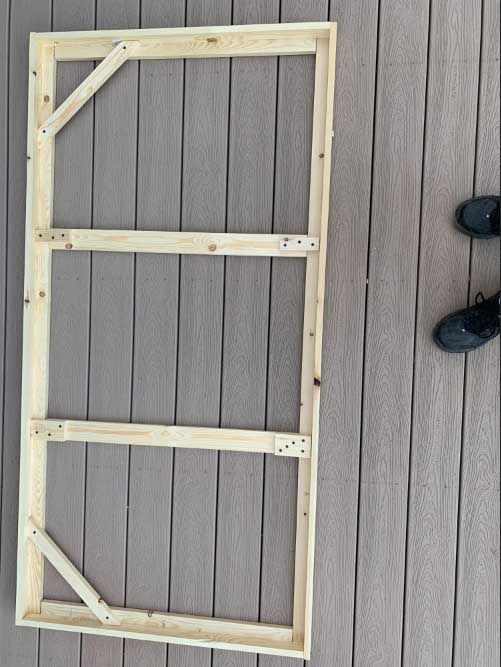
The table is built with four L-girders, which has been around for many years. I first saw it in Lynn Wescott’s classic book, “HO Railroad that Grows” that I found in 1960. I spent many hours poring over this book, and it taught me a lot about what I know about model railroad construction. Used copies of the book can still be found on Amazon.
I don’t know who first used the L-girder, but many model railroads have been built with it.
The L-girder consists of two narrow pieces of lumber, glued and screwed together. It makes a very straight, rigid, but lightweight structure.
The design of this table is very versatile, and a similar table could be constructed for sizes up to about four feet by 8 feet.
It’s cheaper than using things like hollow-core doors. Here are some photos showing the construction of the table.
I made a video that talks about the construction in much more detail:
My next construction video, which I hope to get out in about a week, will cover Outer Supports and Fascia Boards, Bridges, and Tunnel Portals. Stay tuned.
Dean”
A big thanks to Dean. Looking forward to his next installment – it’s really taking shape.
I know a few of you are having problems with the mails at the mo, so if you’ve missed any during the week here are some of them:
“I started a while ago, having retired from a teaching job and wanting to try my hand at inside trains.
I’ve had G scale trains running outside in Southern California since the mid-80s, but that’s a story for another time.
My goal was to learn how to create something in HO scale and see if any skills are transferable from outside to in, and perhaps back again.
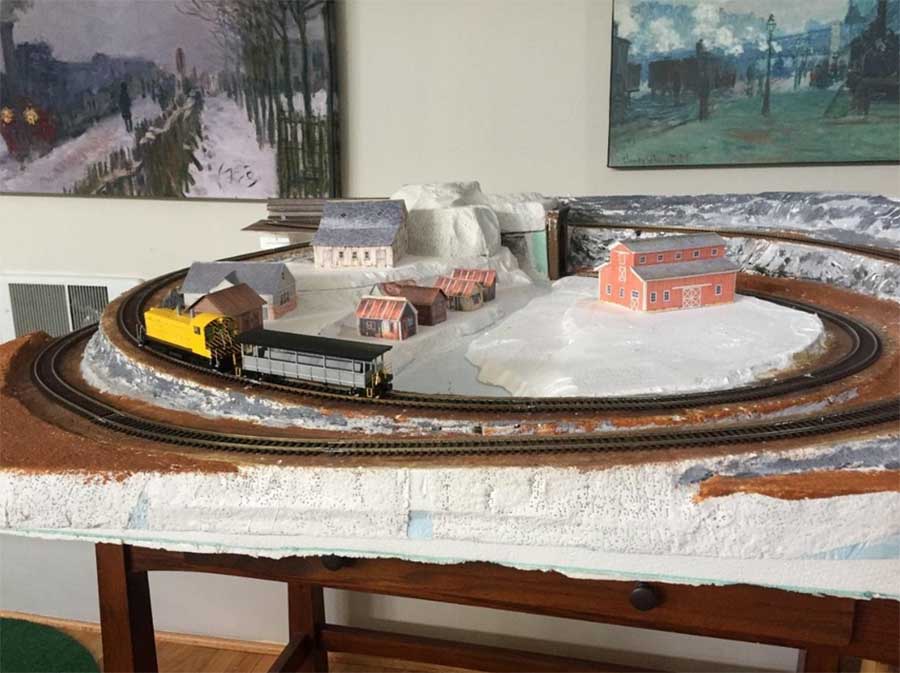
What I’ve learned so far is that HO track work can be very unforgiving. Rail joints must be nearly perfect. Even small gaps can cause running problems. It’s faster and cheaper to do it right the first time. I didn’t give enough weight to all of that when I began this project and I expect many may wonder “why not, isn’t it obvious?”
Concept:
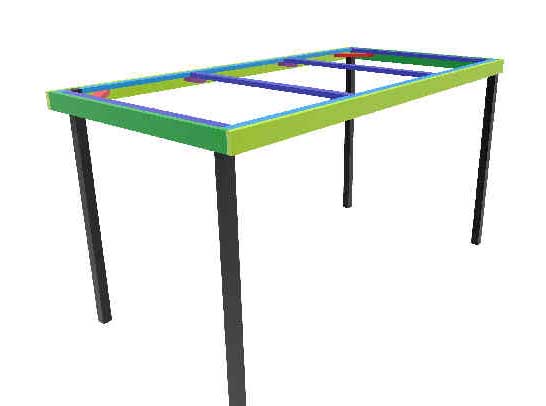
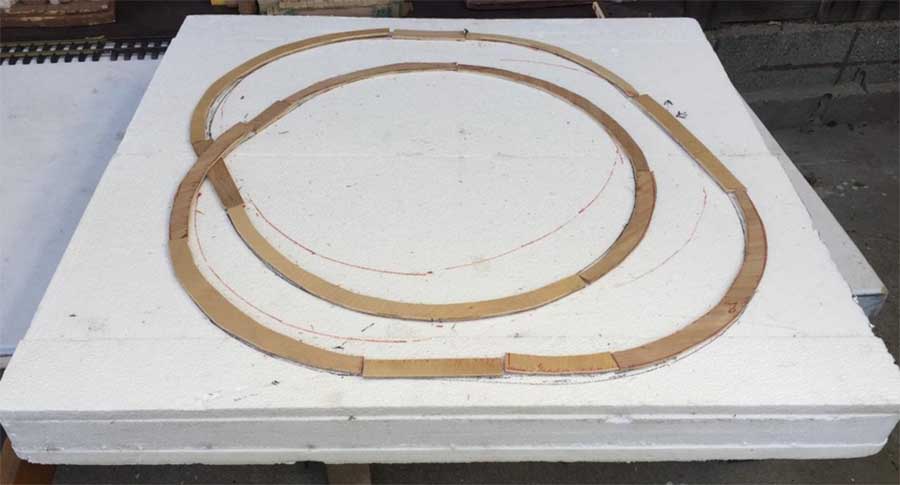
I had about a 4 ft. square space and a large piece of foam that had come with a new dishwasher that could be used as a base. I wanted to include two levels in an up and over design. So here was the initial design:
It’s a tight fit and at the time I didn’t appreciate the difficulty I might have matching up the rails on hills and curves.
I had a supply of packing foam that I used to build up some hills and used commercially available foam risers to support the roadbed.
After a lot of trial and error and refitting, this was the starting point for track and scenery. The grades running clockwise are 4% up and 3% down. The radius is about 18 inches.
Then the theme for this little railroad came into shape.
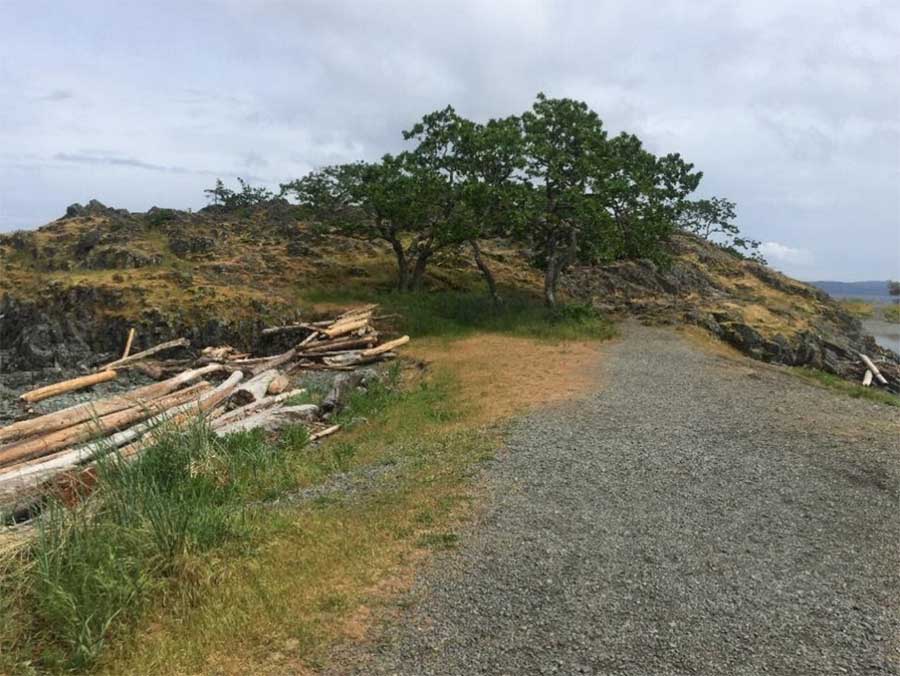
The second photo shows an entrance to Piper’s Lagoon in Nanaimo, British Columbia. That’s my wife Sue’s home town where we’ve spent many happy summer days. This became the “inspiration” for this inside railway project.
To be sure, trains did not run near Pipers but they will in the model. All of the elements here are to be modeled: a rocky hillside, trees, stray logs and water. The Strait of Georgia is in the background to the right and the actual lagoon is off to the left just out of the picture.
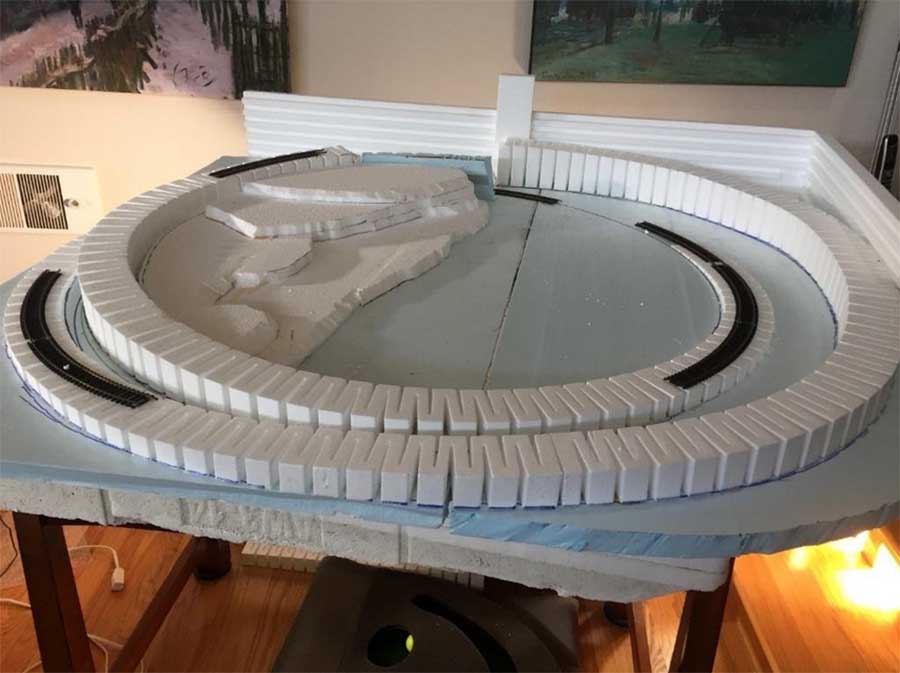
This hillside will be modeled in the top left corner of the layout. I’ve added more foam to create a fictional town for Pipers.
The lagoon has been shrunk down to just a small tributary, a compromise because of limited space. The small shack gives a sense of scale with more to come.
A unique feature of Piper’s Lagoon is Shack Island, a small land mass out in the lagoon. You can hike to it at low tide but it is surrounded by water when the tide is in. For over 100 years, Nanaimo families have maintained and enjoyed camping on Shack Island in old wooden shacks without power or running water.
While working on the foam setup, I also completed several of your print-out shacks and other structures.
After installing the track, I acquired a “tourist train” to serve visitors to the lagoon. The track is a mix of HO flex and Atlas 18 degree-snap track.
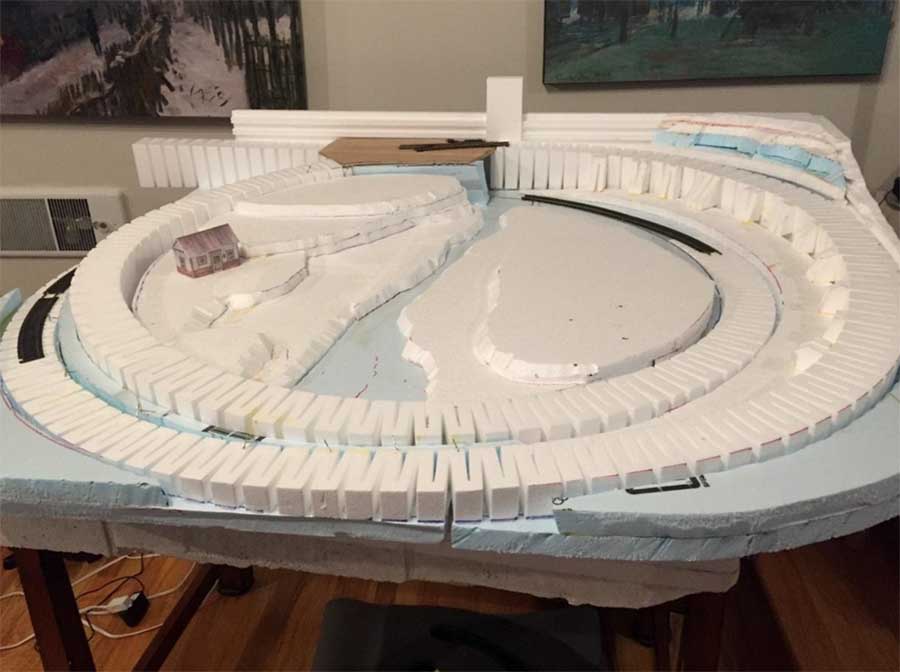
The plaster cloth has been covered with some acrylic paint to give a sense of what this might become. I learned a lot about installing HO flex track on sharp curves and grades. That’s something that probably should be avoided when possible.
So here’s where things stand today. It’s a barren landscape but in a few months (I hope) we will have trees, bushes and grasses of all kinds.
The track will have ballast and the small lagoon will be filled with water. The colors here are just the foundation as I try to bring Piper’s “alive” with the top left hillside, shacks running along the lagoon and the town of Pipers with a station, hotel, saloon and a few other buildings.
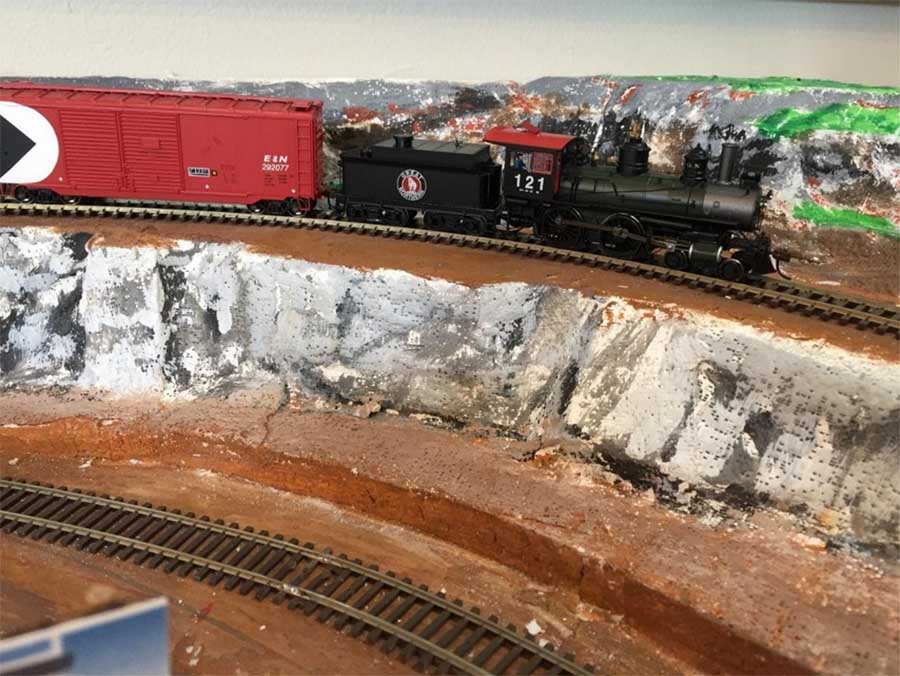
But first, the track needs a do-over. Some rail joiner connections aren’t quite up to standard and there is a kink and camber problem just behind the red barn in the preceding photo.
The yellow diesel was quite happy with the track and its imperfections but I had to stop and reconsider after the purchase of a small steam engine exposed these faults.
It would get around the tracks by lurching a bit at the various spots. One of these faults can be seen on the lower track just below the Baldwin 4-4-0 and a second is just a few more inches to the right where this train is heading. Another can be seen in the front track in the prior photo; for some reason, this soldered rail connection is uneven but the Baldwin had no trouble here.
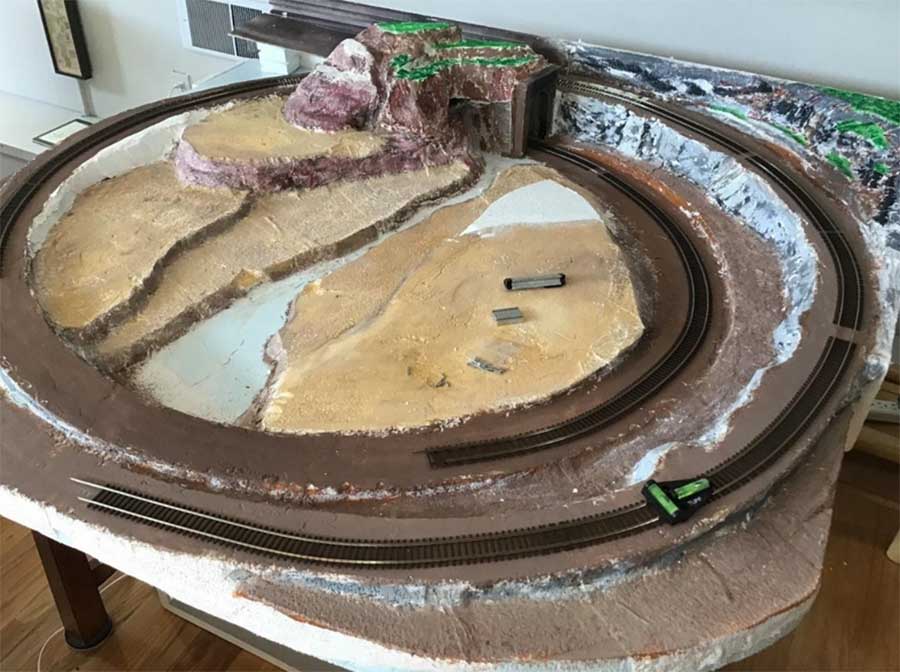
I thought about cutting and adjusting or simply taking up the Atlas 83-pound track and starting over. And that’s what I’ve done.
This time I’m using Micro Engineering flex track that requires some effort to curve to shape but stays in place.
Here’s the first picture of the re-do with some of the rail in place. I can say that this track so far is now level and the rail connections are smooth, as they should be.
I’m going to leave it here for now. I’ll get the rest of the track in place and test it all before starting on scenic details.
I’m glad I stopped and re-trenched because I know I’ll be better served in the long run.
I could have avoided this do-over by doing some research at the beginning and I’m thankful for the YouTube videos that show a better way to do this.
That’s all for now but I’ll send an update when this is running and there is some scenic detail to share.
Thanks for the opportunity to share this little story, Al. Keep up the good work for all your readers.
Jim”
A big thanks to Jim.
Now on to Steve:
“Hello Al.
I have built and sold many HO layouts over the years.
However, this time I am building an N Scale layout for my grandboys.
I wanted to make the train layout very simple for them to operate with 6 switch tracks for a good variance of operation.
Everything on this layout lights up – all buildings, cars, streetlights, railroad lights, tunnel lights and spotlights.
Again, the operation is simple but the city and decor is extensive.
Thank you for letting me share this tilt table layout.