Today Peter shares his tip on his Kadee couplers:
“Hi Al,
For some time I have been toying with switching couplings on my rolling stock.
I have an 6 x 11 layout in my shed, set roughly in the early 1960’s. Most of my stock is rather old, acquired 2nd hand and has mixed couplings from different times.
Whilst the couplings worked satisfactorily I find it frustrating when trying to uncouple stock plus the fact I wanted to do shunting on my layout.
I watched with interest Dangerous Dave’s video on magnetic couplings, but they wouldn’t meet my shunting needs. So I have embarked on a mini project to change my couplings over to Kadee couplers, (other similar makes of coupling are available) as all I have seen and read about these seem to meet all my requirements plus they look really neat compared to other couplings.
I have to honest and upfront here, these couplings are not a cheap option, but still works out cheaper than replacing my existing rolling stock, and I would still have to purchase Kadee couplers made for NEM sockets, so that wouldn’t save much!
Whilst 5 out of my 6 locos have NEM sockets most of my rolling socket does not, so first off I had to find out what type and size couplers I needed, to this end I purchased a starter kit which has a wide variety of Kadee couplers, plus a gauge for setting the coupler and pin heights.
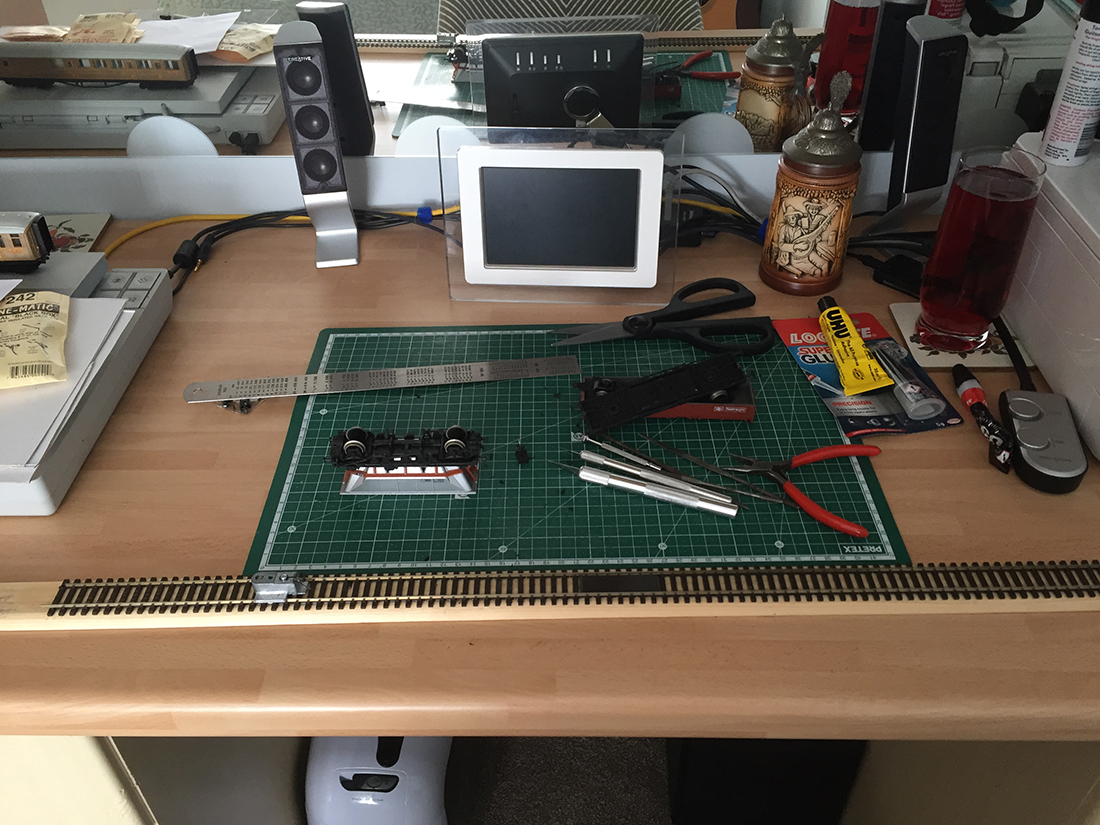
I set up a work area indoors (closer to the coffee machine😂) and worked through all my rolling stock to find out which couplers would best fit each wagon or coach, having done this I then compiled an order for the various bits required.
The kit also contained uncoupling magnets for both code 100 and code 83 (USA rail) but none for code 70 which is the standard I am using.
However it gives me a chance to try them out. On my layout I plan to use thin (2 to 3 mm) very strong magnets, available on eBay to place under the track at appropriate uncoupling positions.
You can see the uncoupling magnet and gauge in the photos below.
I decided not to fit NEM sockets onto this stock as I wasn’t going to change them again (famous last words!); I fitted the standard Kadee “gearbox” that took the whisker coupling, this seemed to offer the most compact option.
Depending on the original coupling, I removed it by removing a screw into the bogie or chassis, drilled out a rivet or cut the plastic coupler off.
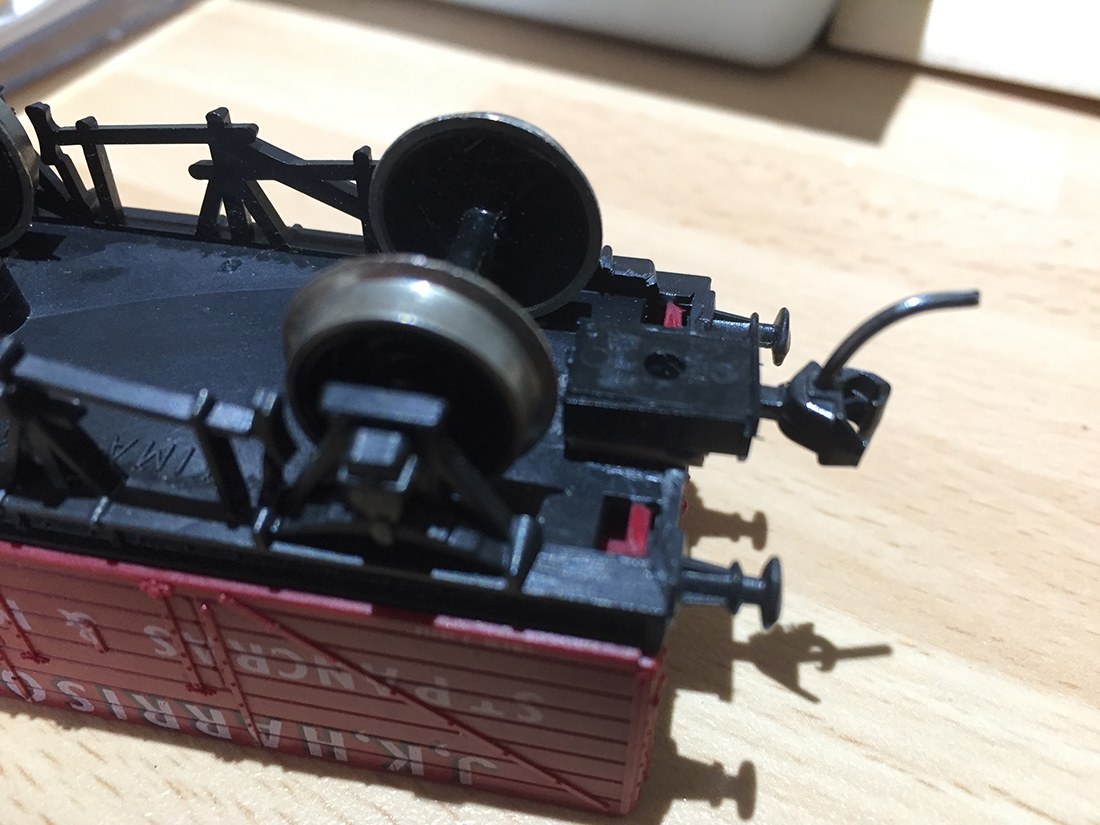
Fitting the Kadee gearbox to the chassis of a goods wagon was relatively straight forward.
Most of the time the gearbox would sit on the wagon chassis directly, sometimes I would have to cut a notch for the gearbox to sit into, or I would have to pack the underside of the chassis to get the gearbox to the correct height.
I fastened the outlet and gearbox on using blue tack whilst I did a final fitting with the gauge, when all was satisfactory I then glued the gearbox in place. In the photo below I had to pack this wagon gearbox to the correct height.
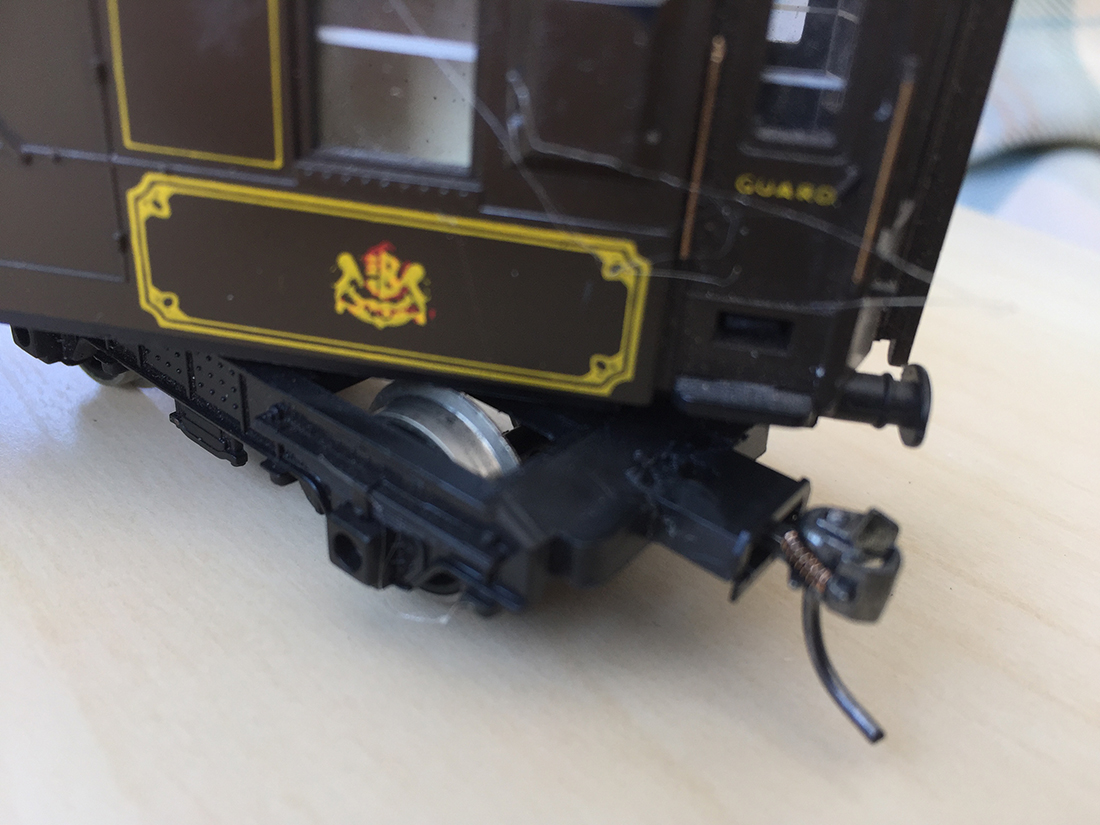
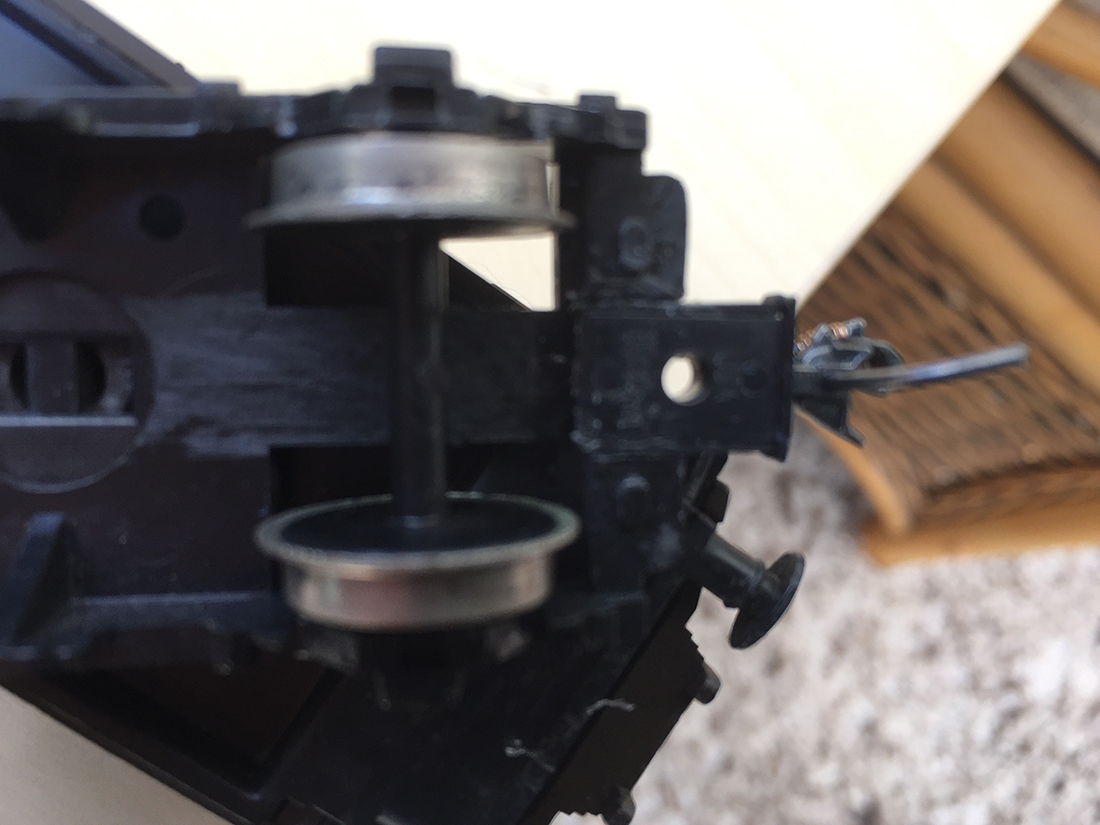
The coaches were somewhat trickier and I found easier to disassemble the coach and work on the chassis alone.
The same principle applied here as with the wagons, but found that the bogie chassis were lower than that of the wagons and some drastic surgery was required on some coach bogies.
I cut slots out of the bogie frame so that the gearbox sat in the frame, but not always level. I used short overset shank couplers on all coaches, cutting the notch to suit each type of coach, most were fairly straight forward once I knew what I wanted to do.
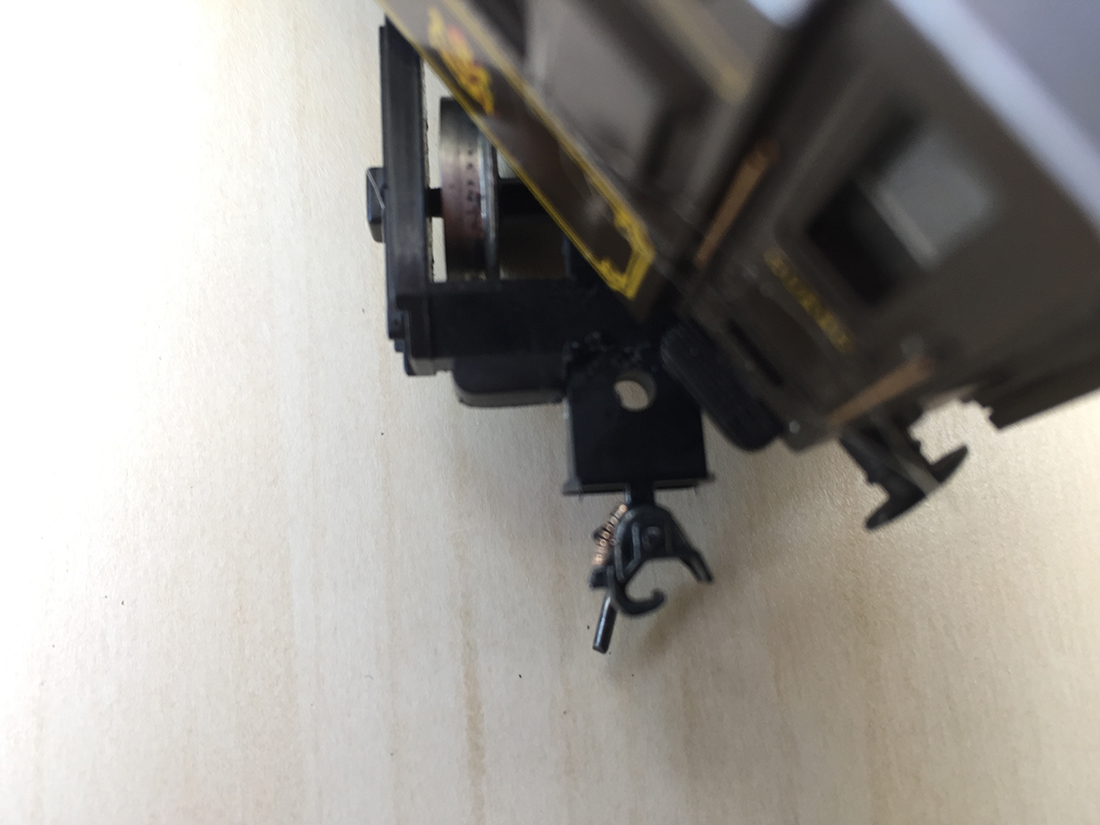
As you can see in the photos the gearboxes sit proud of the chassis frame, but are not really noticeable once coupled and sitting on the track.
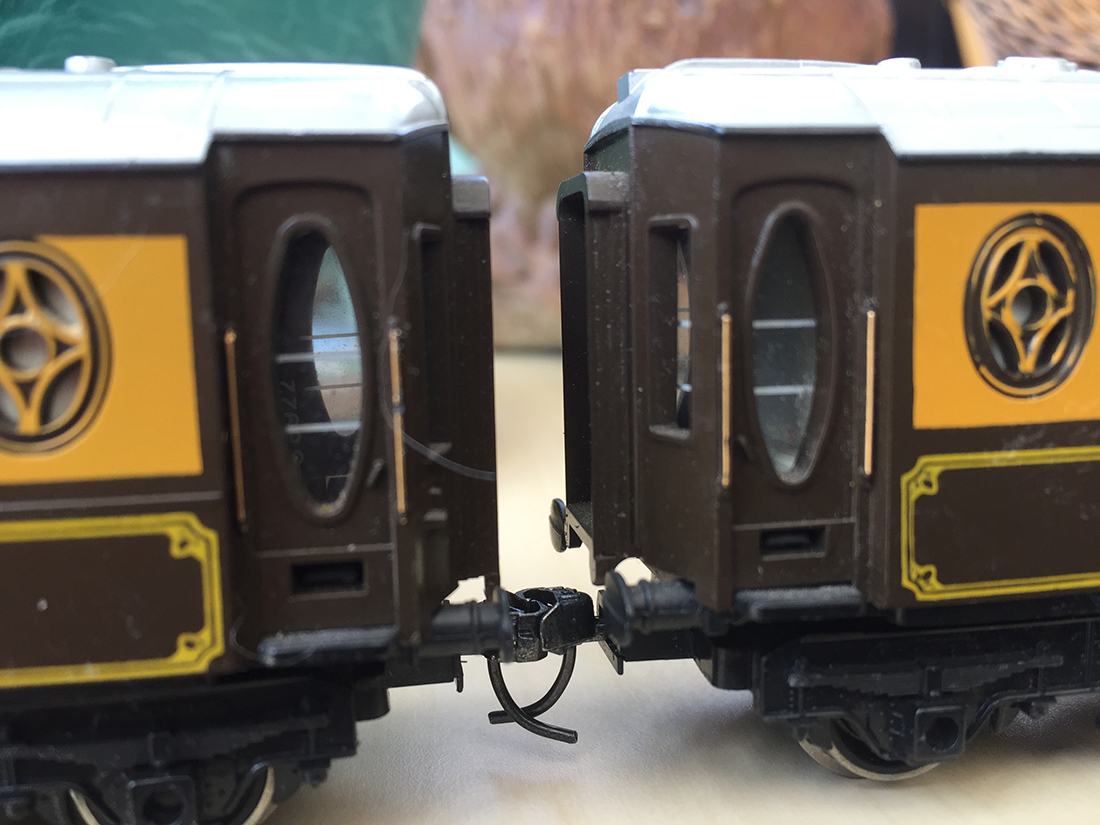
As with the wagons I checked the coupler setting with the height gauge, but also did 2 coach ends first so that I could also run them round on my layout and check for correct spacing and ensuring that there was no buffer lock, I then glued the gearboxes in place and did other coaches of the same type.
I have also converted my type 37 Deltic that had fixed couplers, this process was similar to that of the coaches, but I used more care and attention to avoid cockups! I have now my remaining stock of wagons with NEM sockets fitted to change over to Kaydee couplers and 5 locos to do.
Again the couplers for these come in 3 lengths with standard, overset and underset variants for each length of coupler.
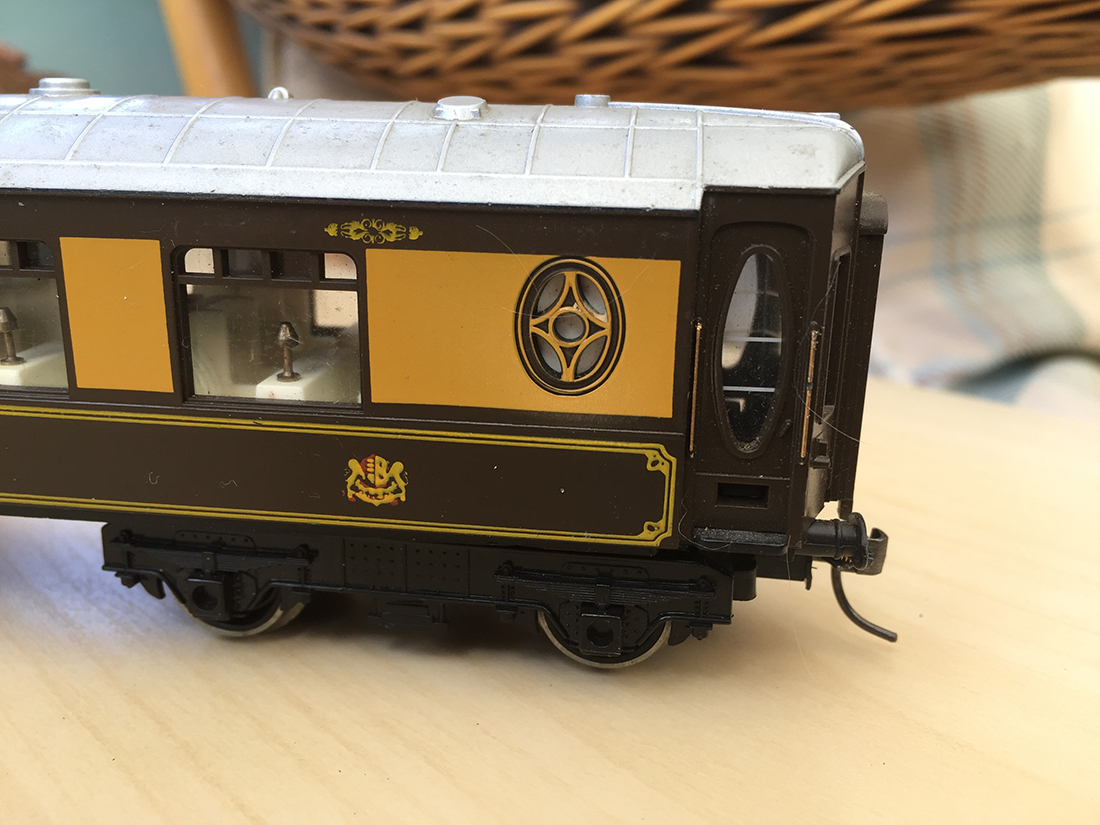
From the pictures below you can see how it looks on my older coaches. I am very pleased with the result and believe they look much more the thing than the variety of older bulkier couplers I had before.
As I said earlier this is not a cheap option, but it gives my couplers a more realistic look, but obviously not prototypical for the UK in the early 1960’s.
This gives my rolling stock a new lease of life and enhanced performance with the shunting ability, that I am currently exploring.
Cheers Peter…”
A big thanks to Peter for sharing his Kadee couplers info.
It reminded me of Dave’s post: Magnetic couplers.
Now on to Paul.
“Hi Al,
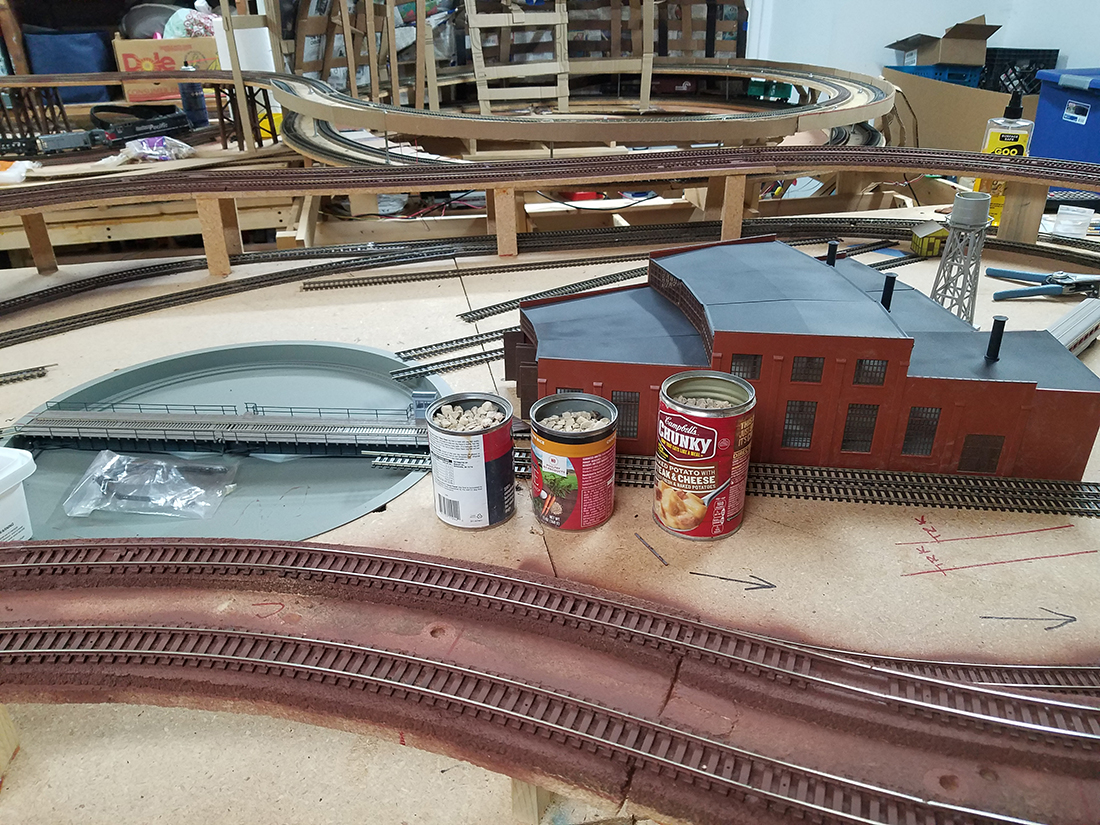
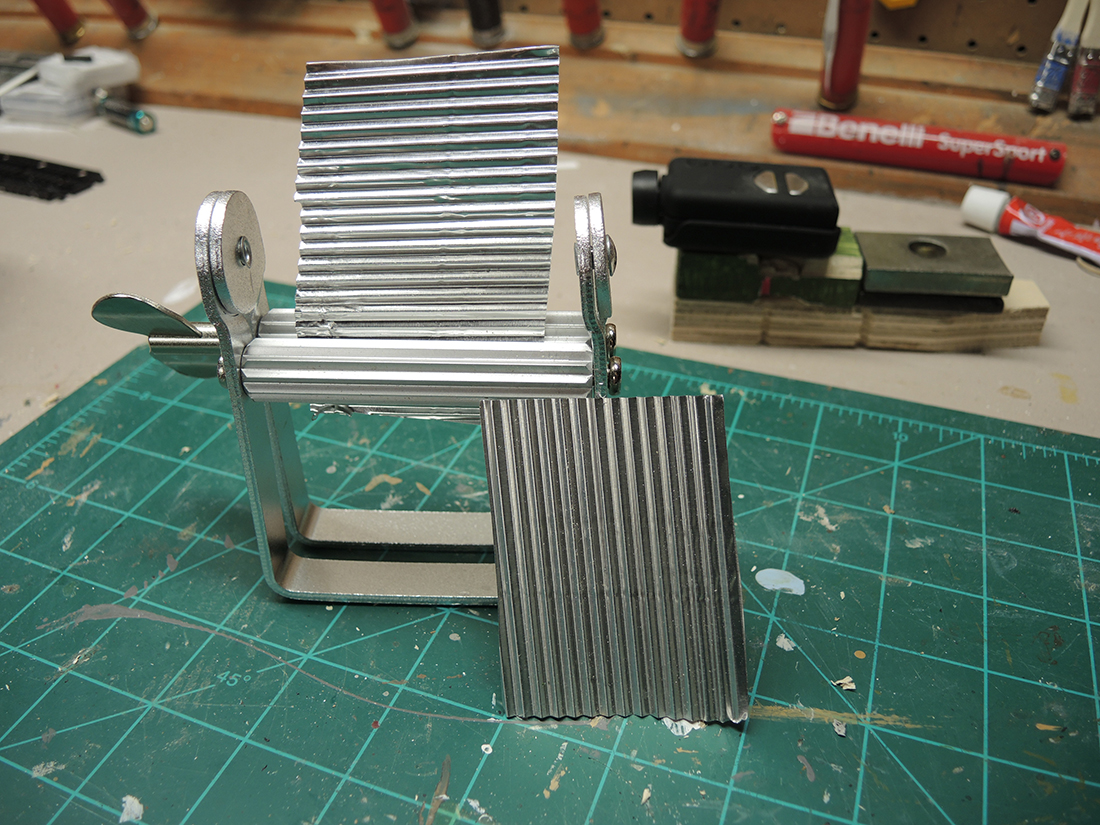
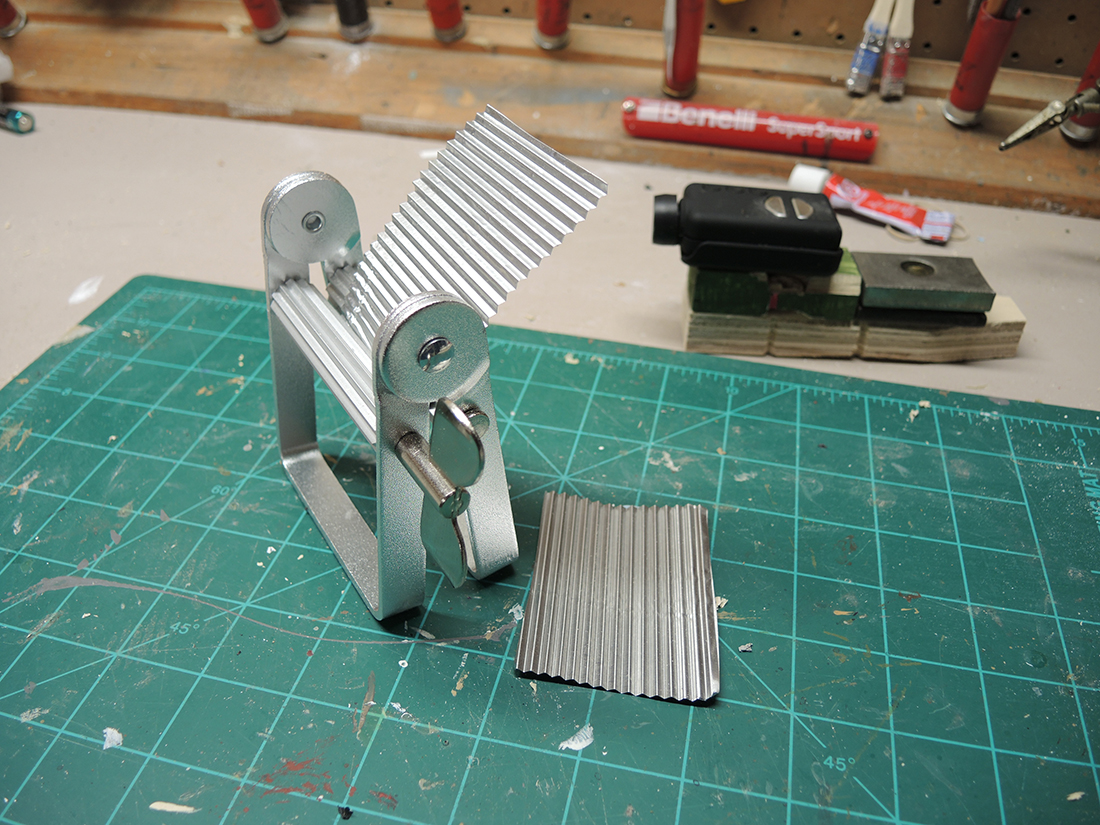
I thought I would show the other modelers an easy way to make metal roofing.
I use an Artist’s Paint Tube Squeezer which is available on Amazon for $8.
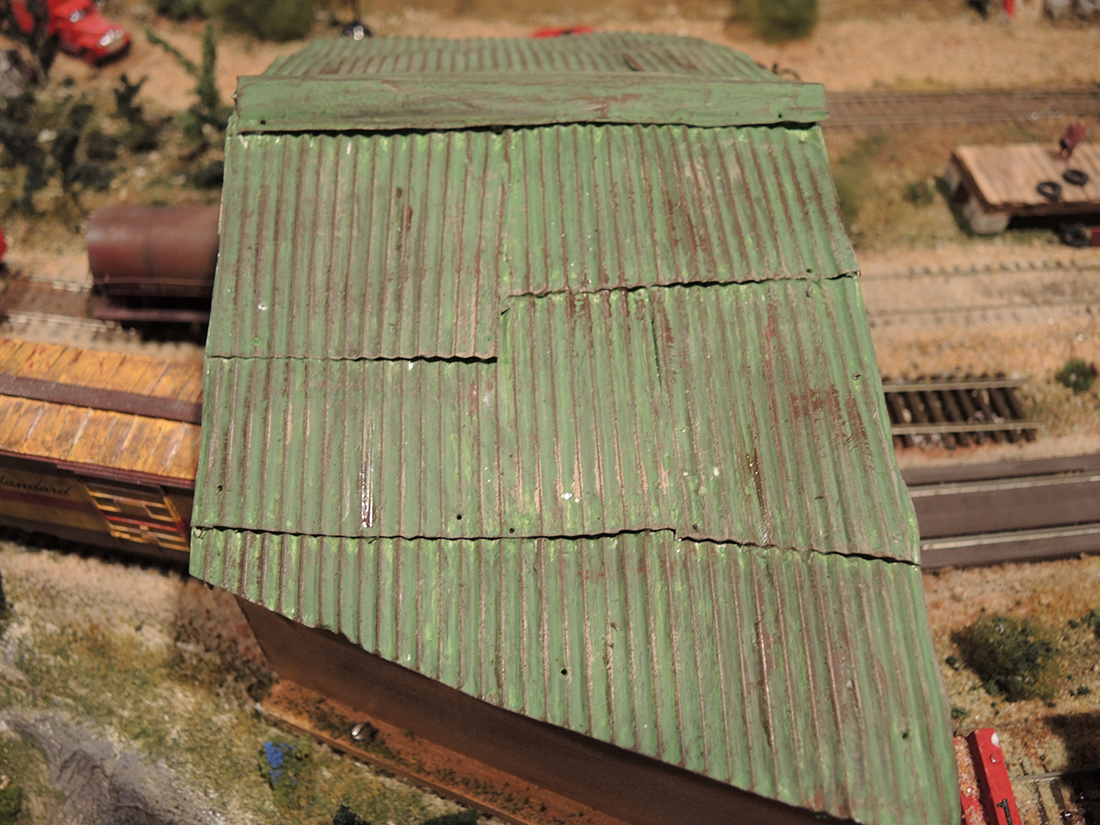
I use the metal from soda or beer cans or from disposable cooking ware. You can make pieces up to about 3″ wide. I show a photo of how I used the material on an engine shed.
Paul”
“Hi, Al.
I have been reading your emails for a while now and just decided to try my hand at sending you something to share with everyone else.
It is only one photo, and this is more of a test than anything else.
If you see fit to use it, I would be thrilled. If not, well, ok. As you can see , it is still a work in progress.
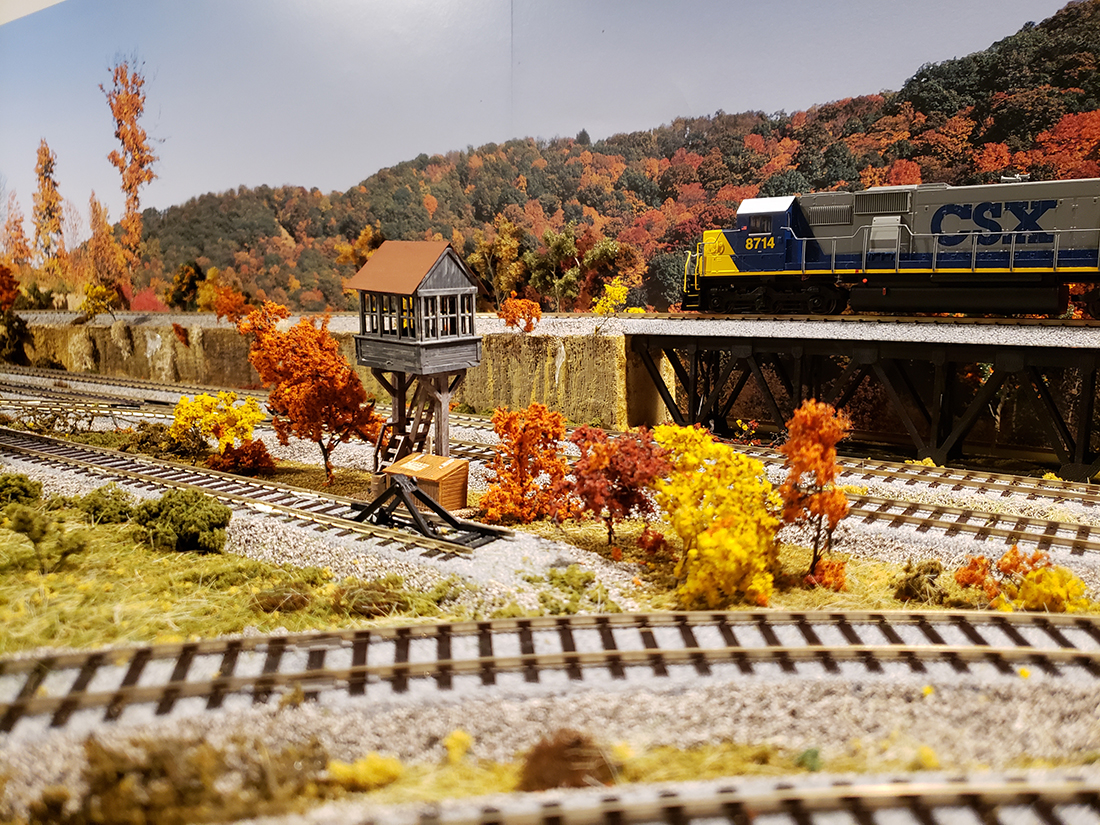
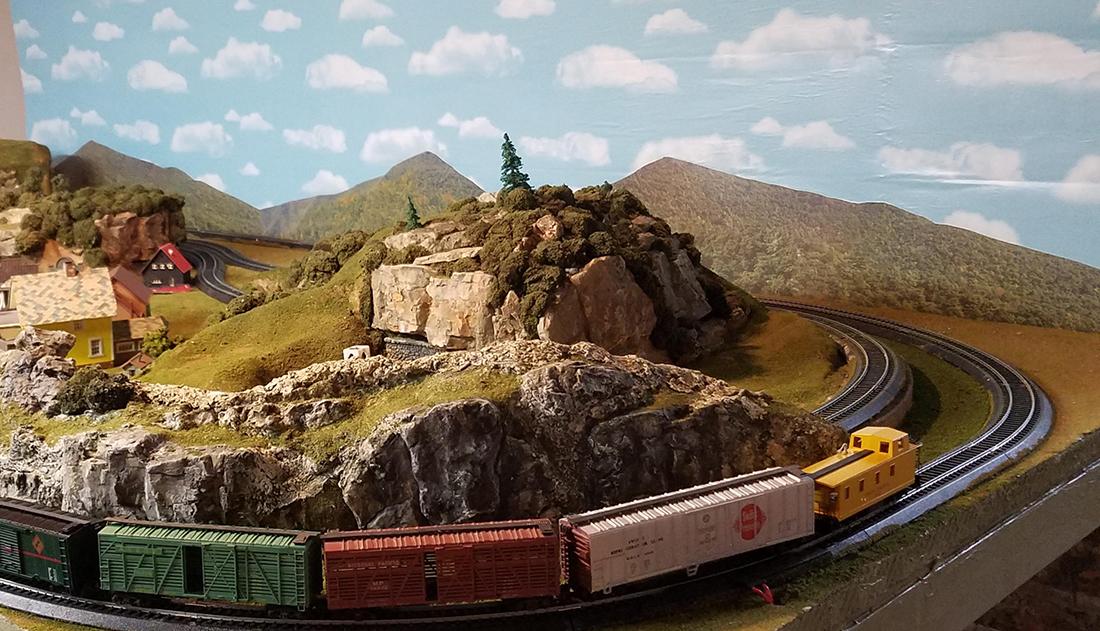
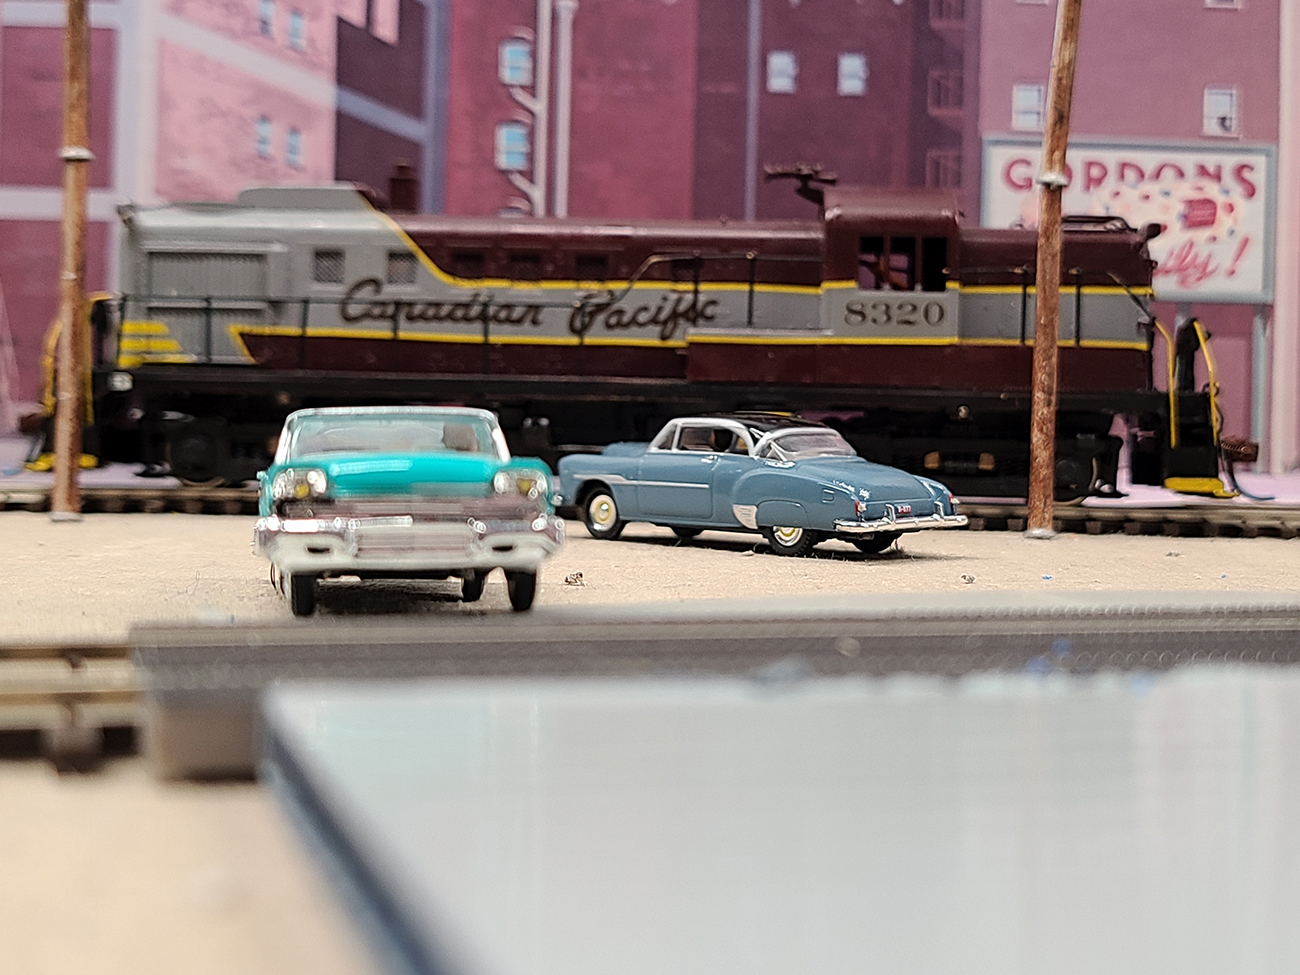
The FarSeas Connecting is owned by Railfan Businessmen who purchase older equipment and re-paint them back to their original colors and run an industrial switching railroad.
The two cars are Woodland Scenics Just Plug, but not lit up during the day.
The loco is a brass Alco Models Alco RS3 that I painted and decaled back in the ‘80’s.
The background are the Walthers scenes mounted on plywood.
If you need more info, please let me know.
Thanks for all you do.
Frank”
A big thanks to Peter, Paul and Frank.
Frank – of course we want to see more!
That’s all for today folks, please do keep ’em coming.
And if creating your own model railroad is an itch you just have to scratch, the the Beginner’s Guide is here.
Best
Al
PS Latest ebay cheat sheet is here.