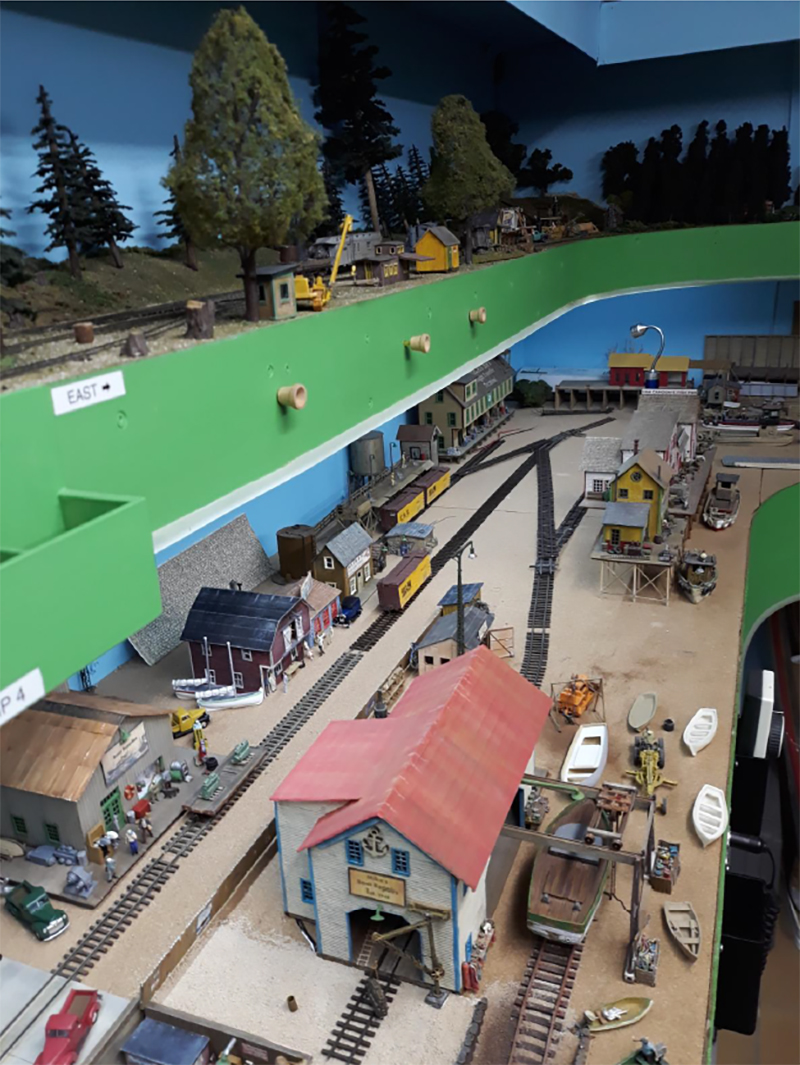
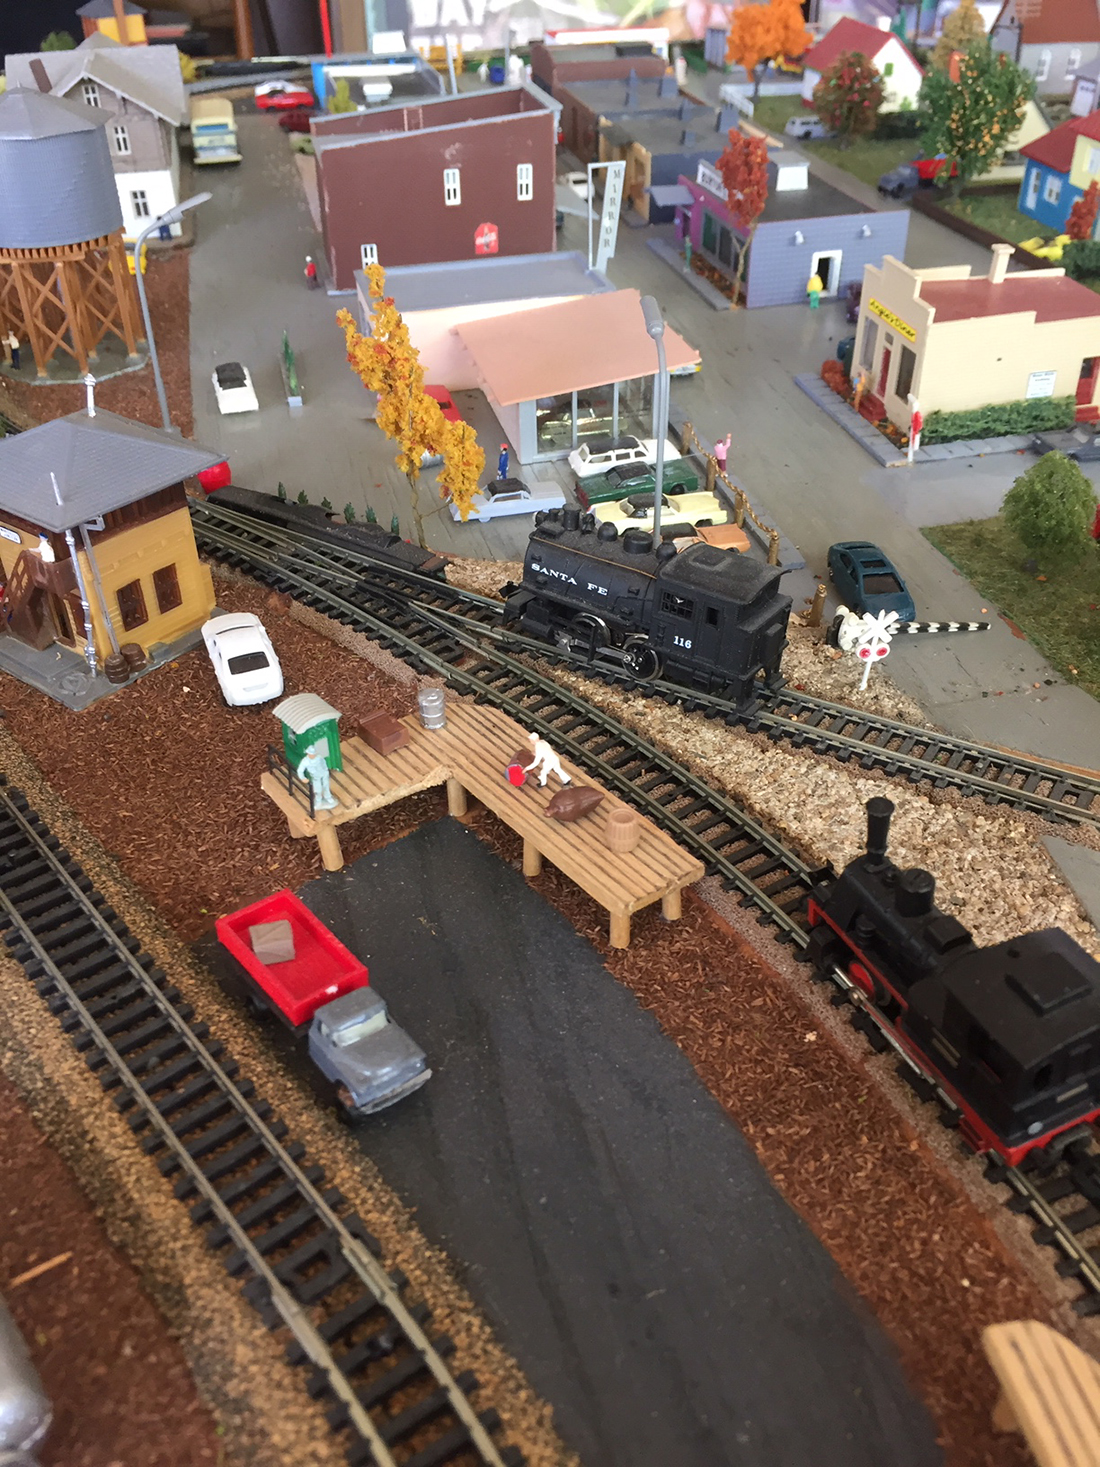
Seeing that I like waterfronts so much, I decided to use a corner for a new harbour.
It will be called Pelican Bay mainly for small freighters and fishing boats.
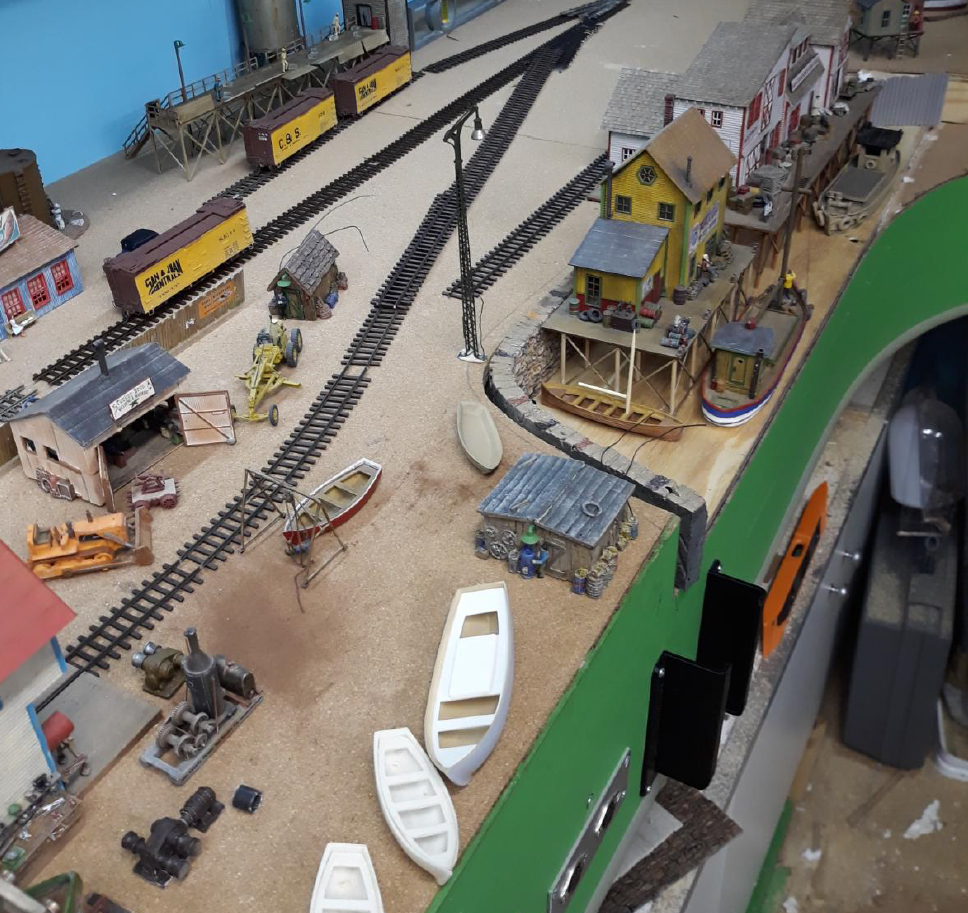
Below is the start of the planning stage (middle right) and what I had in mind. I will be utilizing buildings from my old layout that were built about 7 to 8 years ago.
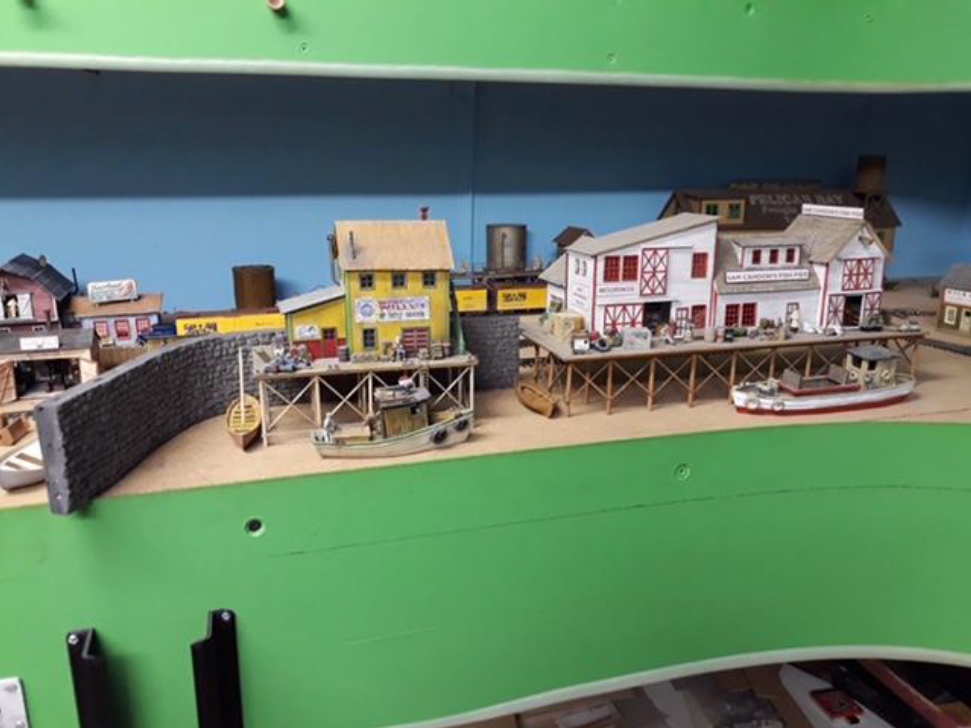
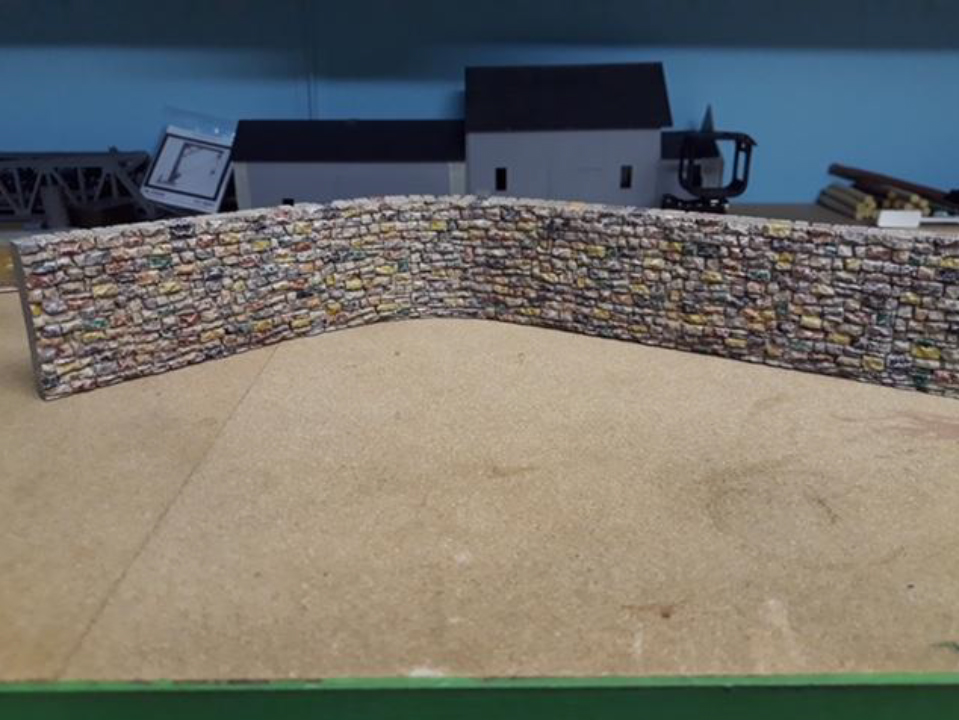
Here I used a wall section from my old layout which gave the shape that I needed.
Before placement, I had to paint the grey wall to look like this, a random stone wall.
I used the wall and buildings to mark out where the base had to be cut.
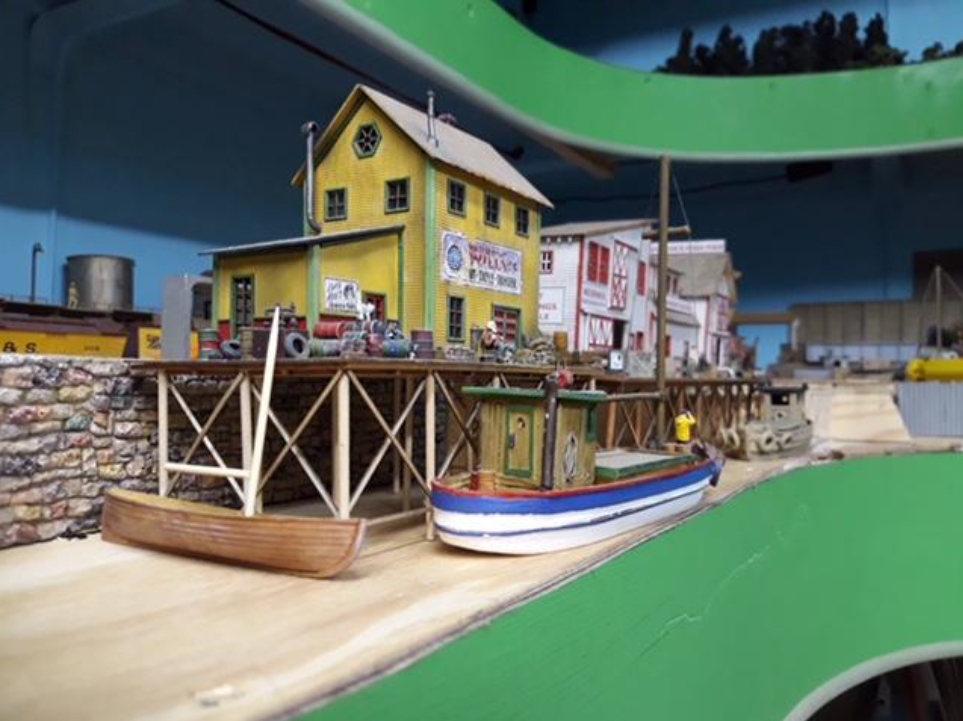
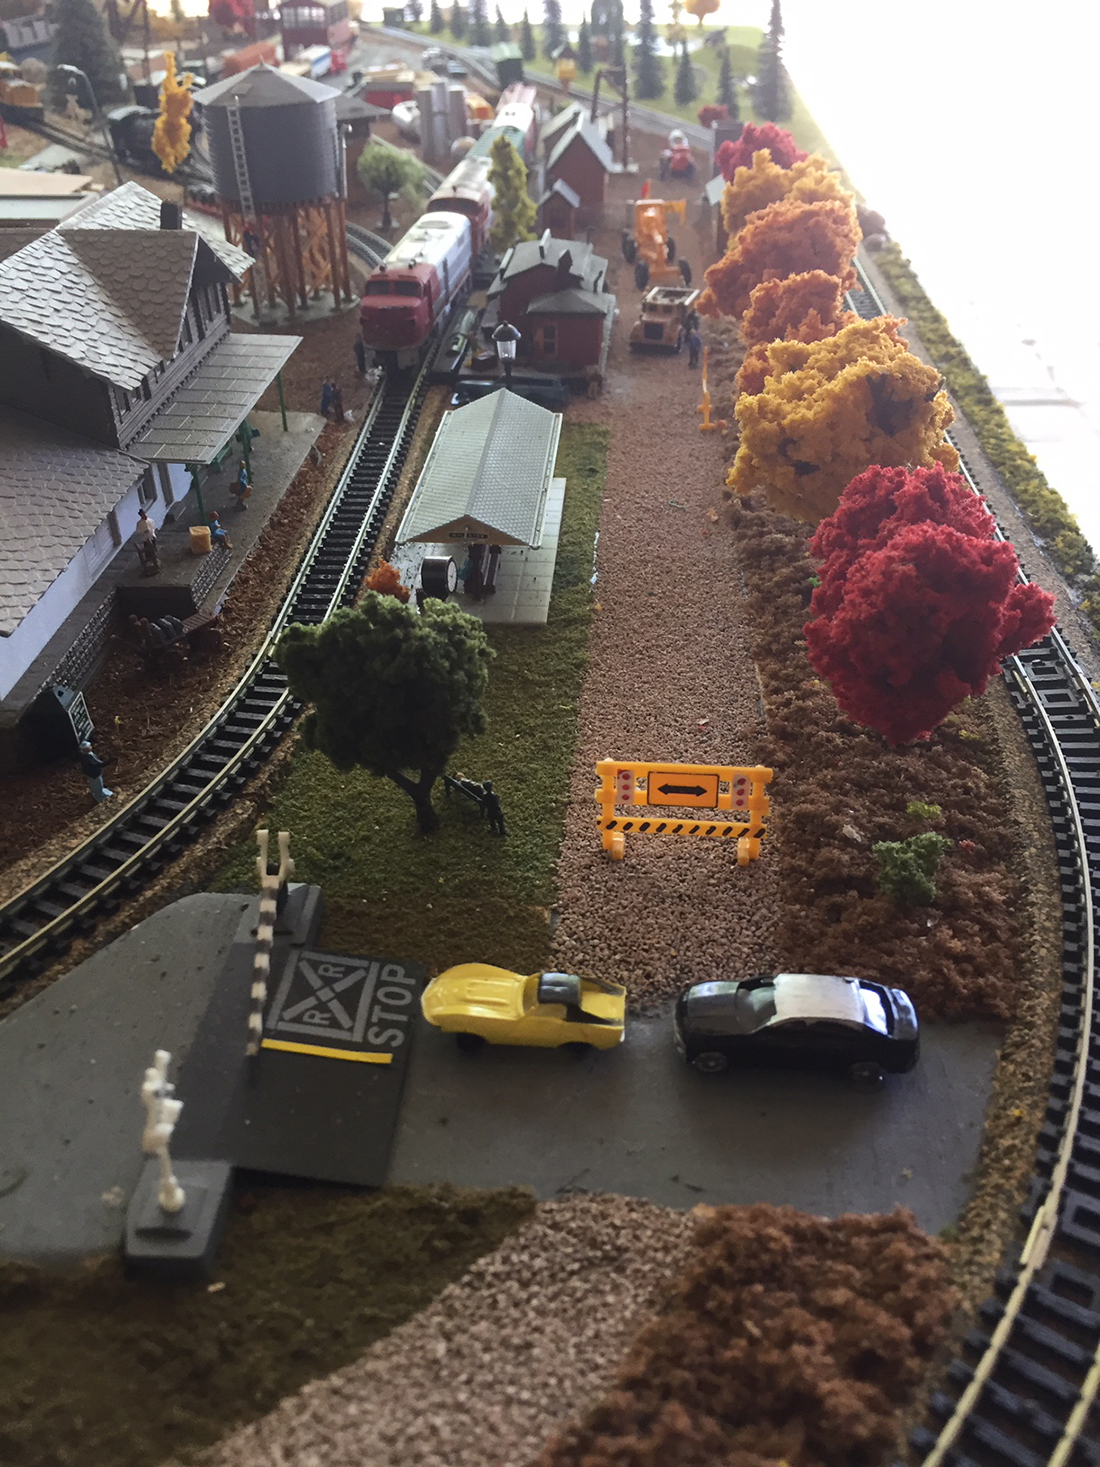
Here the base has been cut, wall in place, buildings placed and made sure there was enough room for the boats to dock or pass.
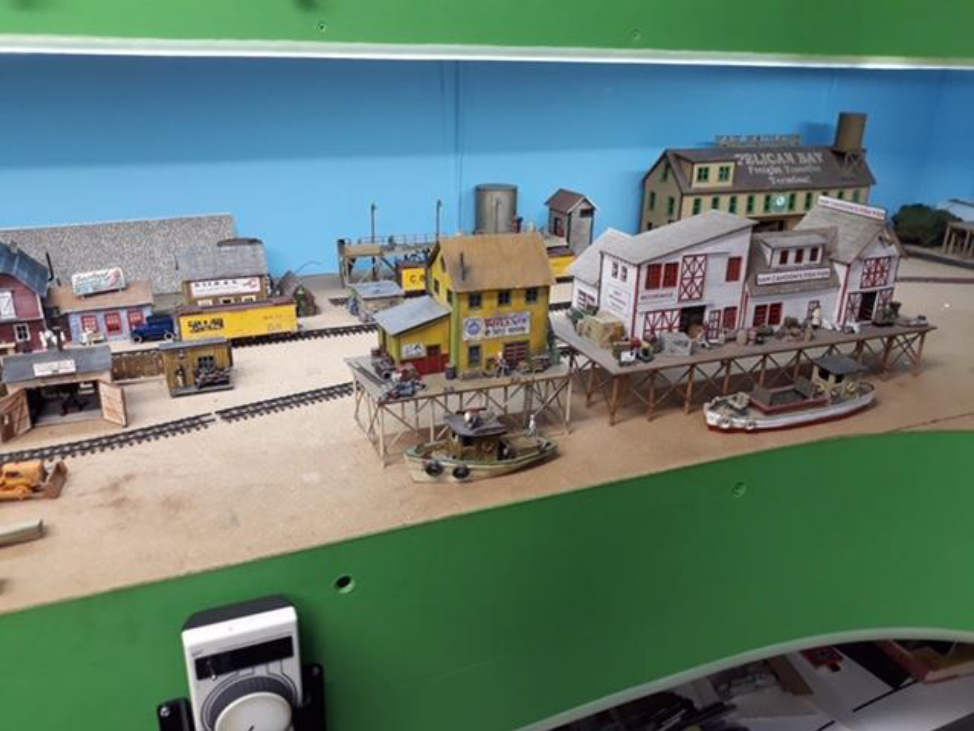
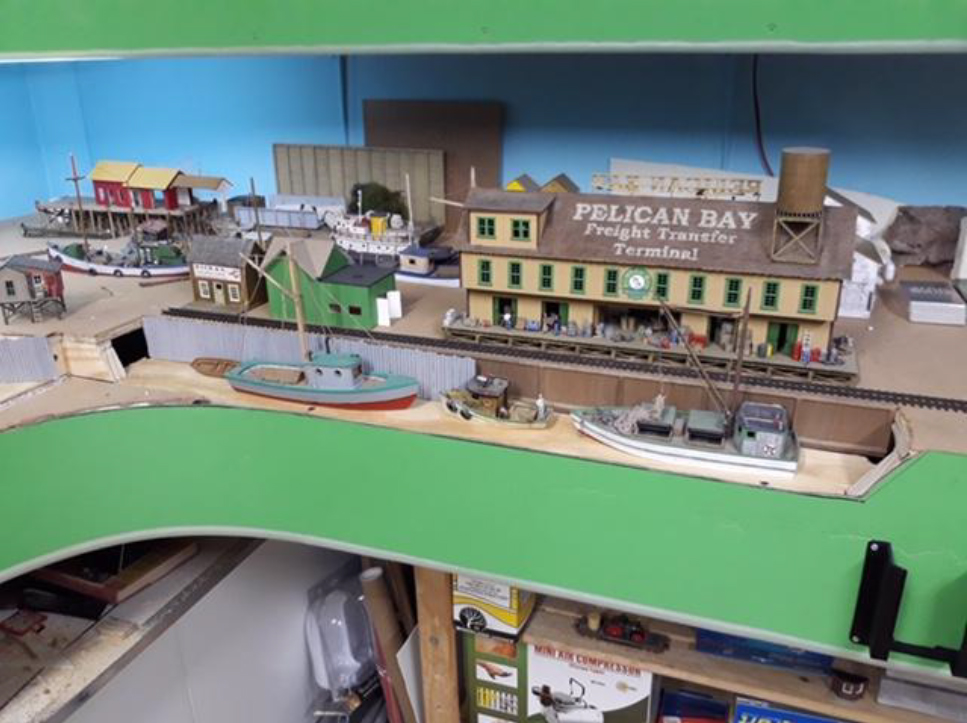
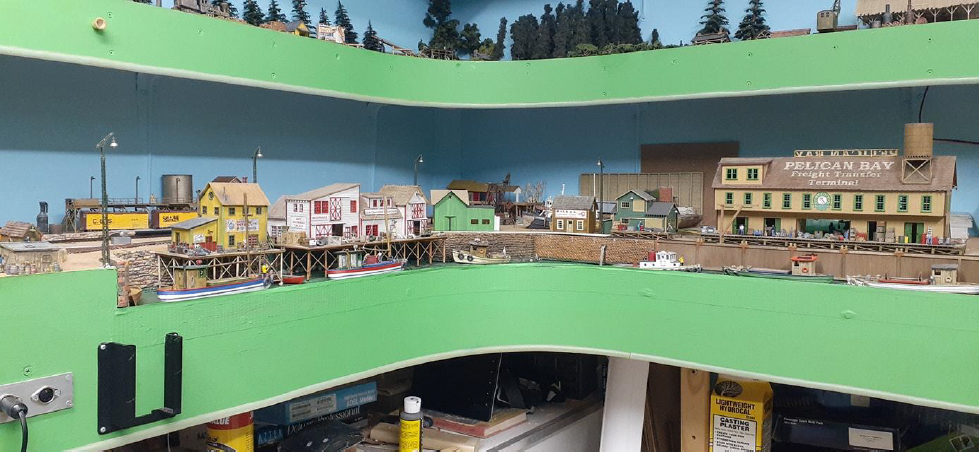
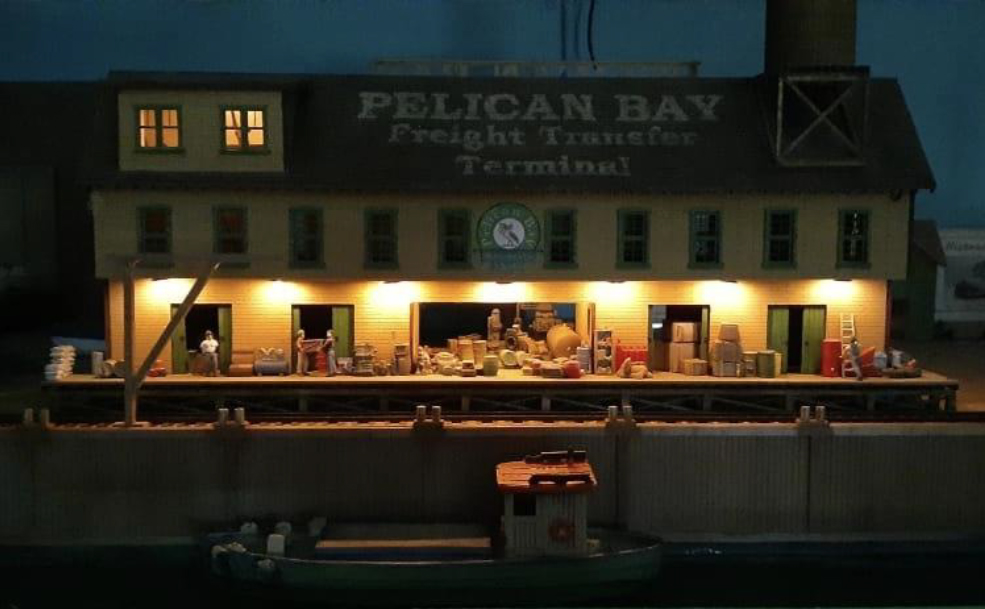
This is the continuation of the bay around the corner to the freight terminal building.
Here it is all coming together with base painted the right color, Podge was painted on in a thin layer to get the feel before pouring the WS realistic water. As I have said many times before, I only use WS water as I have always had great success with it in the past. (WS = Woodland Scenics)
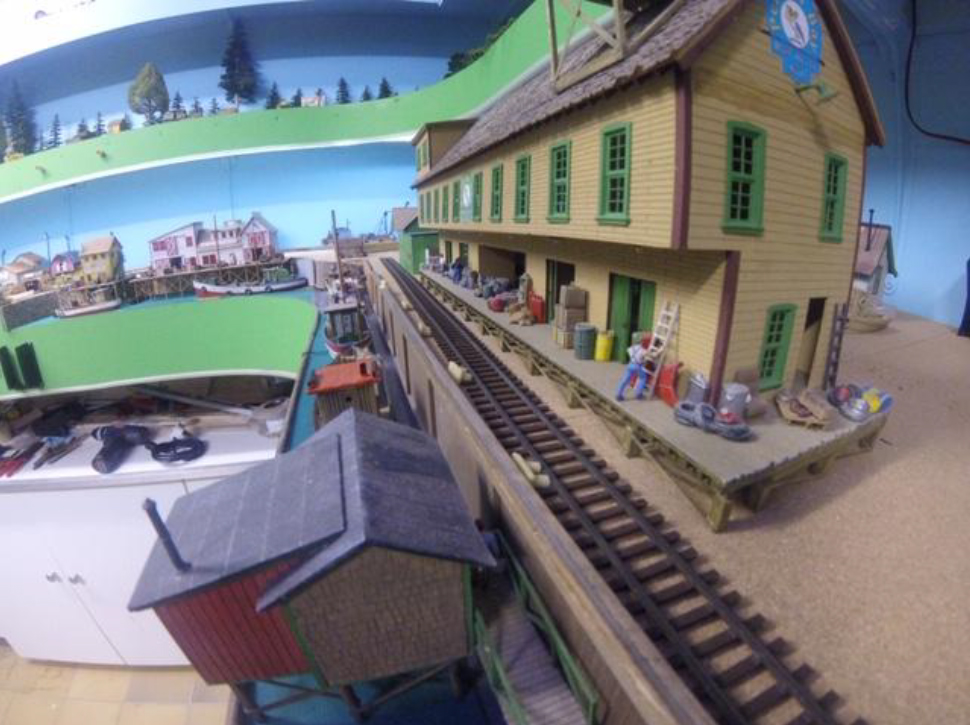
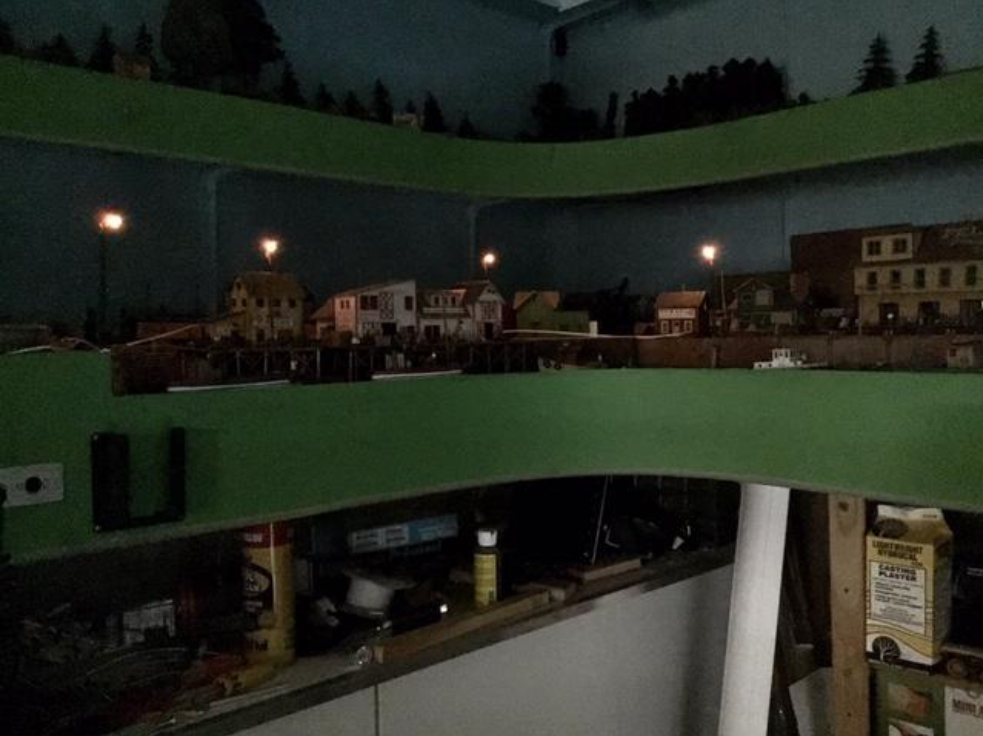
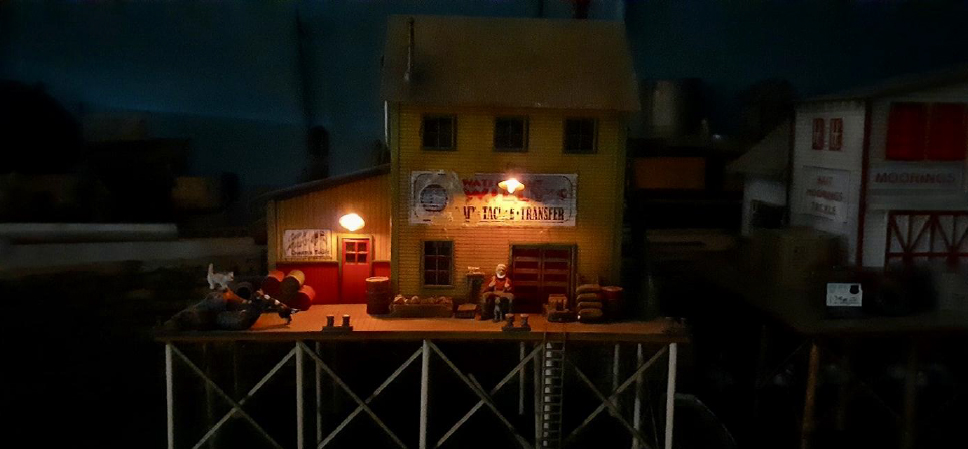
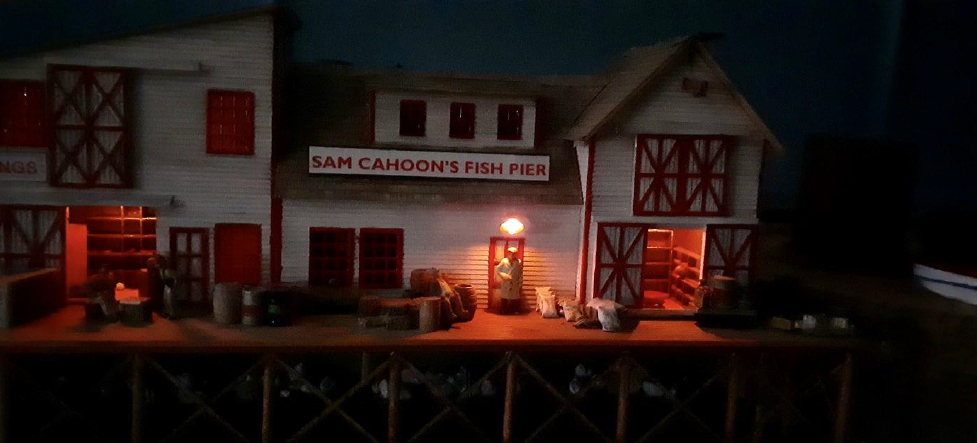
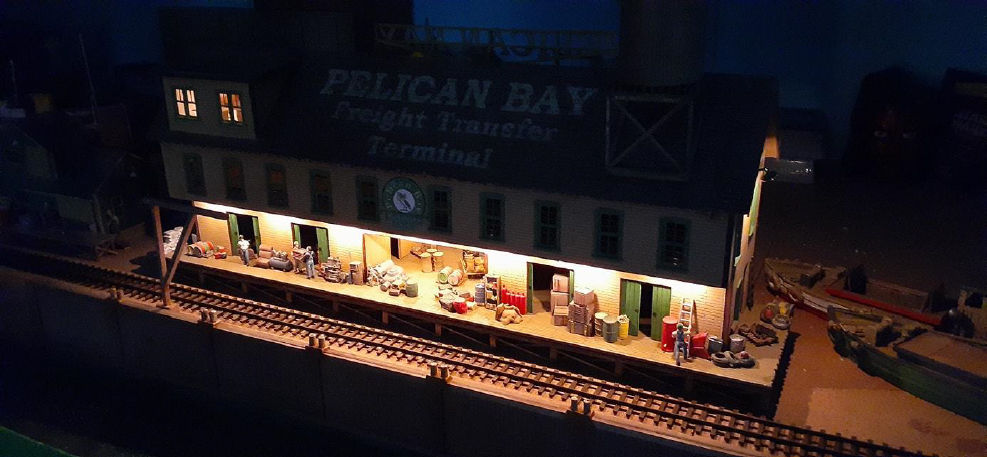
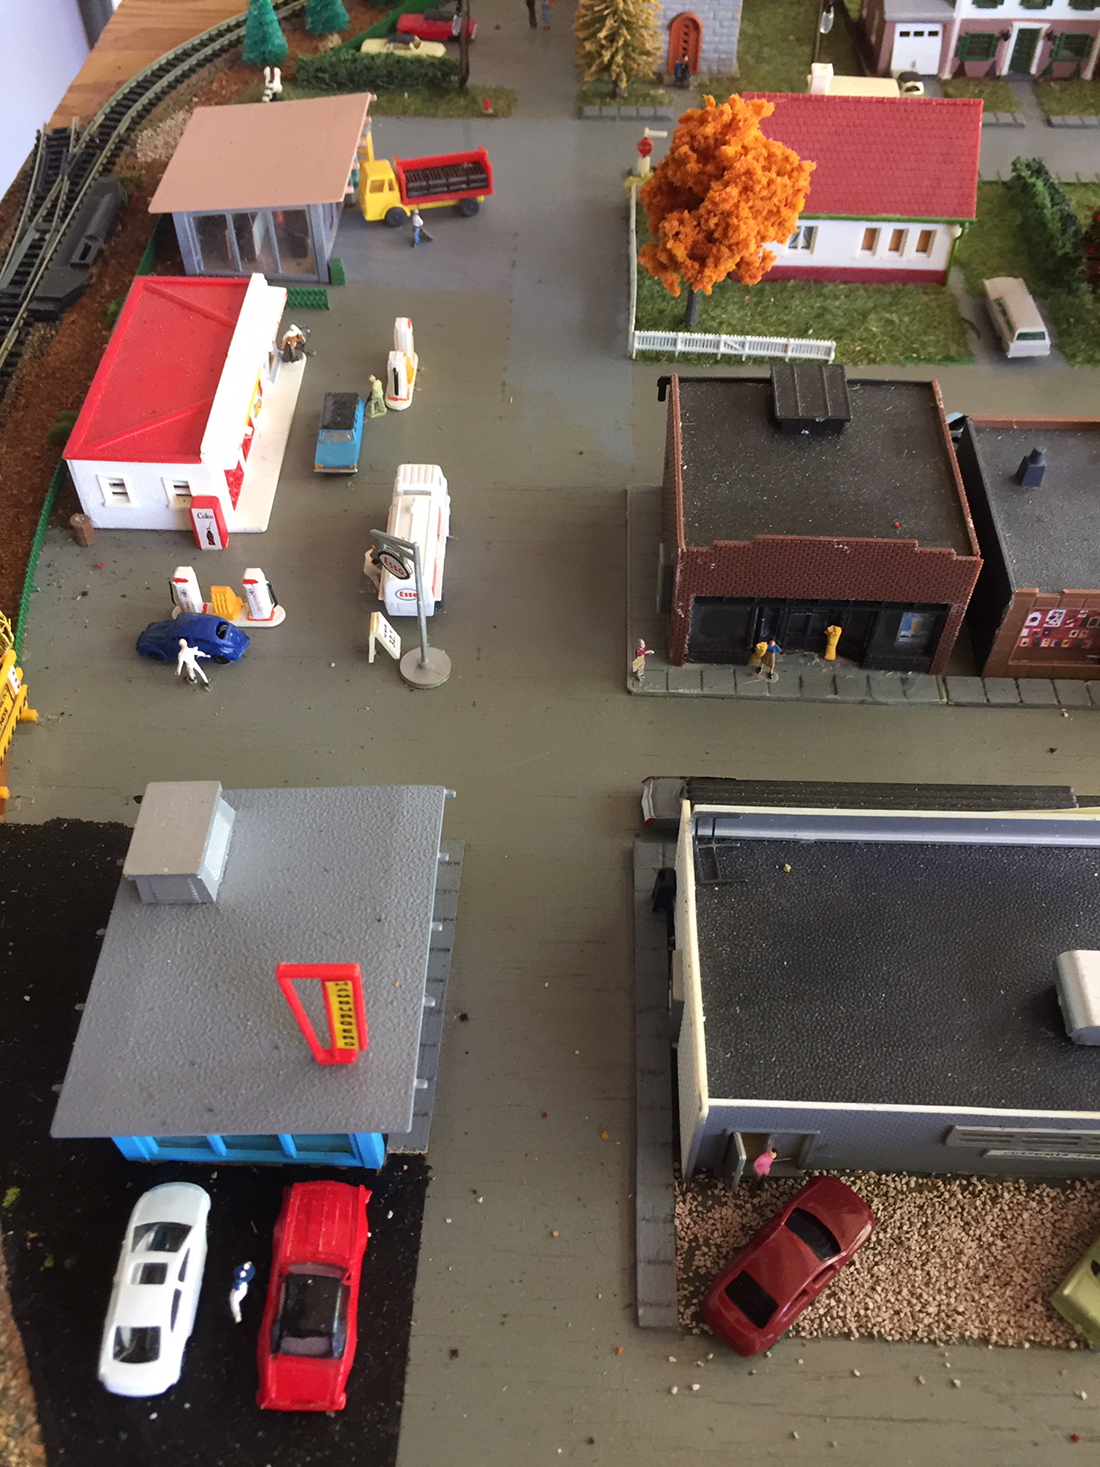
Two views of the final layout of Pelican Bay with the waterfront lights placed.
A few night shots of Pelican Bay. Not a good clear picture below as my ‘blue overhead light blew’. As said before, all the buildings on my layout have full interior and lights.
This is where I am at the moment.
I have put buss wires under the layout, droppers from all the lights, connected it all up and all is working.
I will need to buy a a load of switches for all the lights. These will be mounted on the facia front.
That’s all for now and will keep updating as I progress.
All the best
Brian – the HOn3 guy – Knysna RSA”
A huge thanks to Hall of Fame member, Brian for sharing his HO scale waterfront shelf layout.
Jim has been in touch with his Bachmann EZ track ho scale layout:
“Alastair,
Just wanted to drop a line to say that I finally made a start! It has been a little over two years since I bought the Beginner’s Guide.
My wife says that I pored over it like it was the Dead Sea Scrolls!
I also read the daily posts voraciously and viewed all the videos and photo submissions with great interest.
I purchased your print-out structures (and have already built several of them for my grandsons to use with their wooden train sets and all those “really useful” engines).
I built a 10’ X 16’ shed, initially for my grandsons to leave their train layouts set up in, but with plans to eventually “appropriate” some of the floor space for the 4’ X 8’ benchwork of an HO scale layout.
I scoured ebay and local sources for bargains in rolling stock and locomotives.
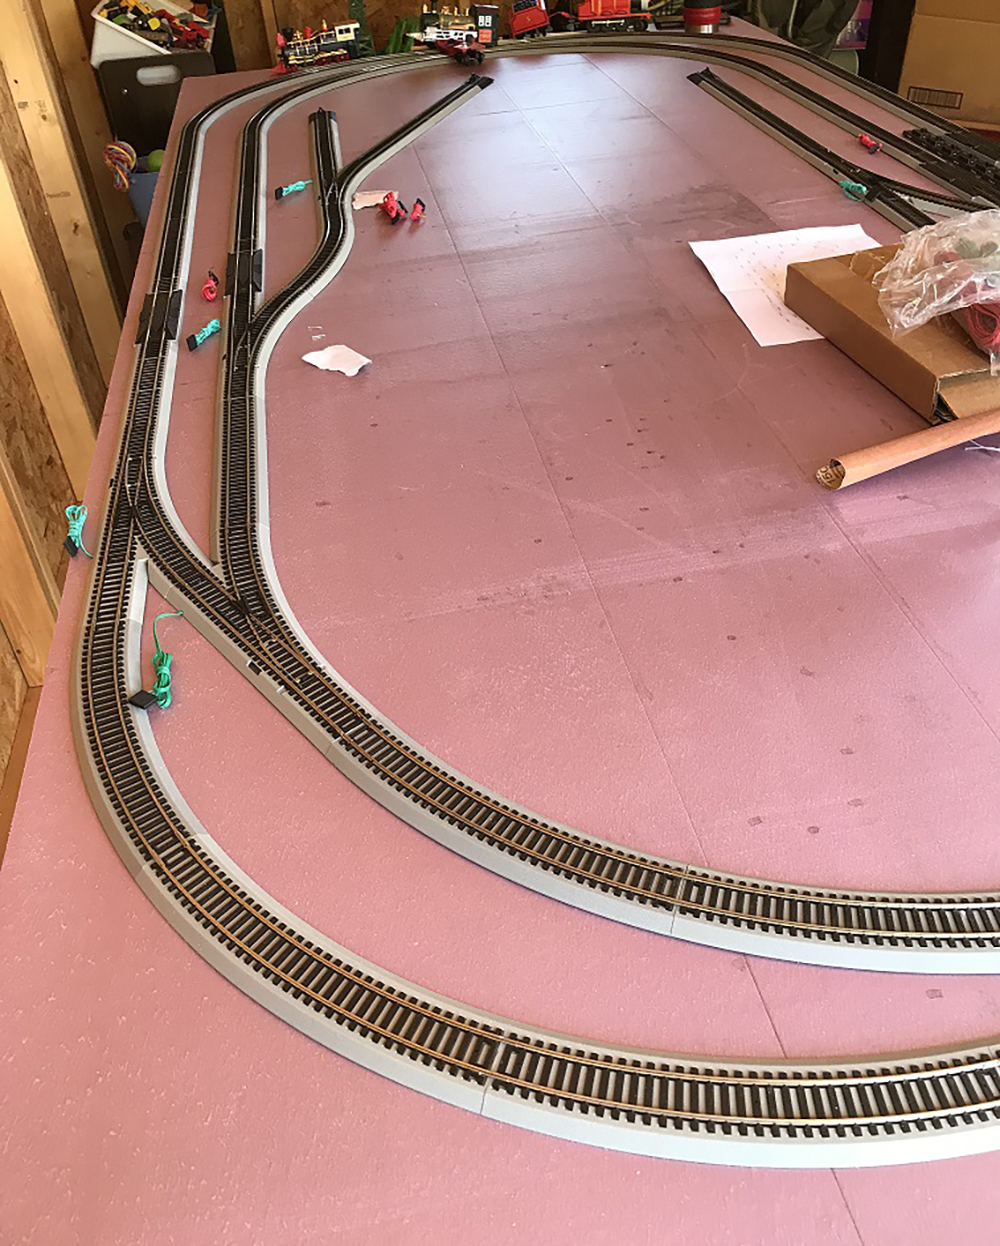
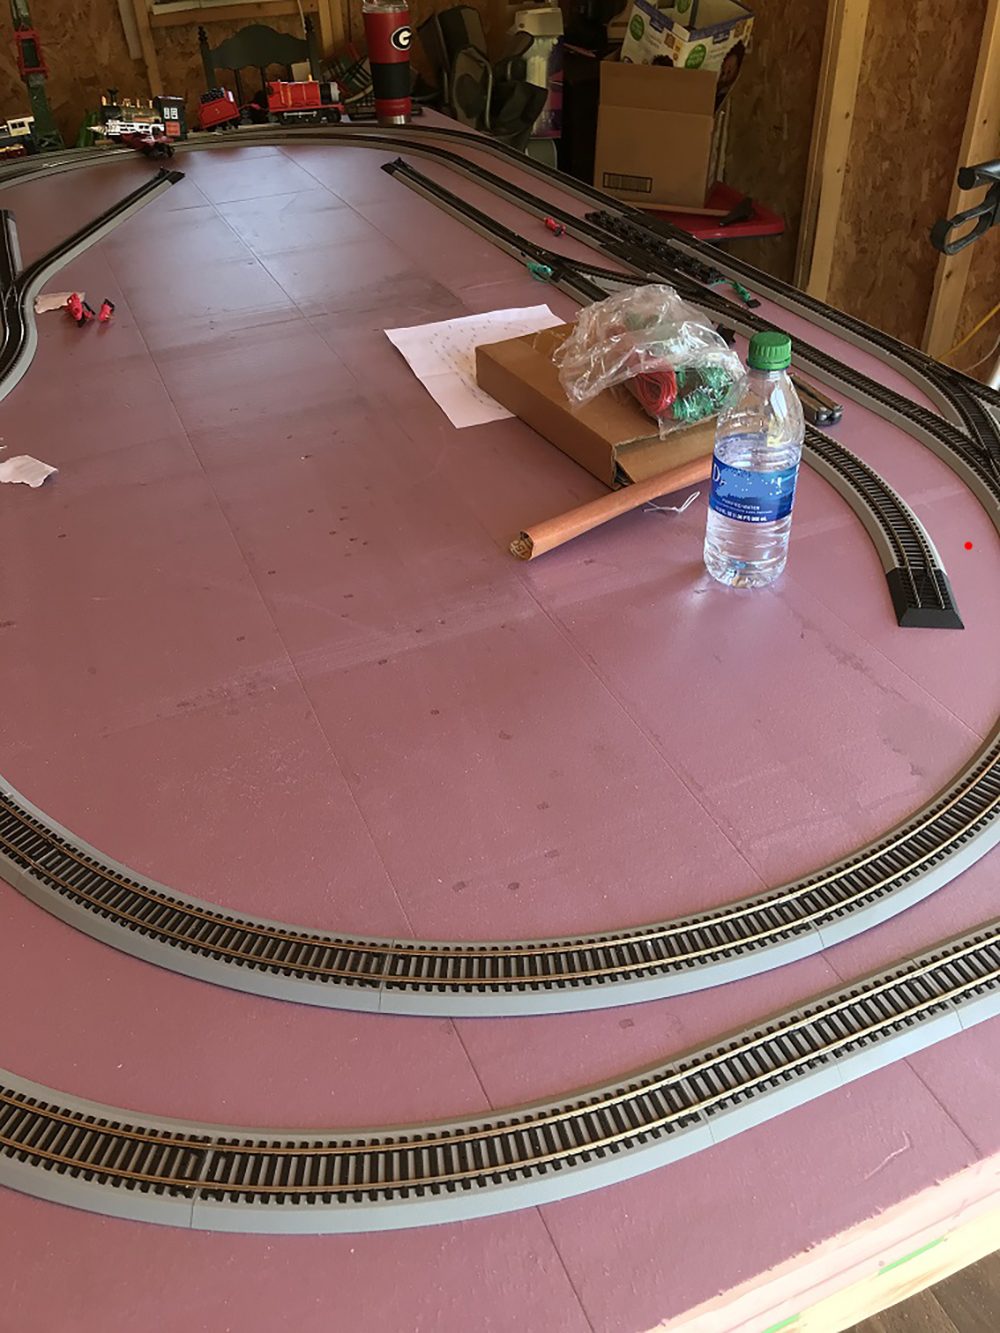
I decided to start with Bachmann EZ track ho scale layout because I got a steal on a big lot of new and barely used track at an estate sale.
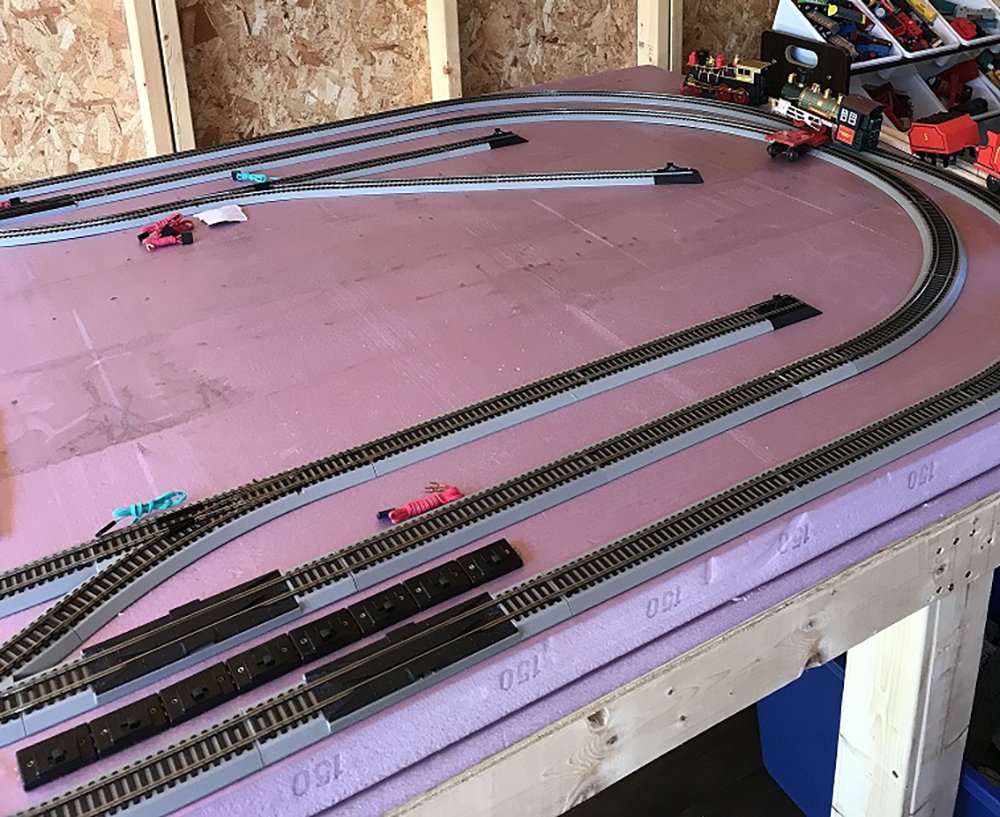
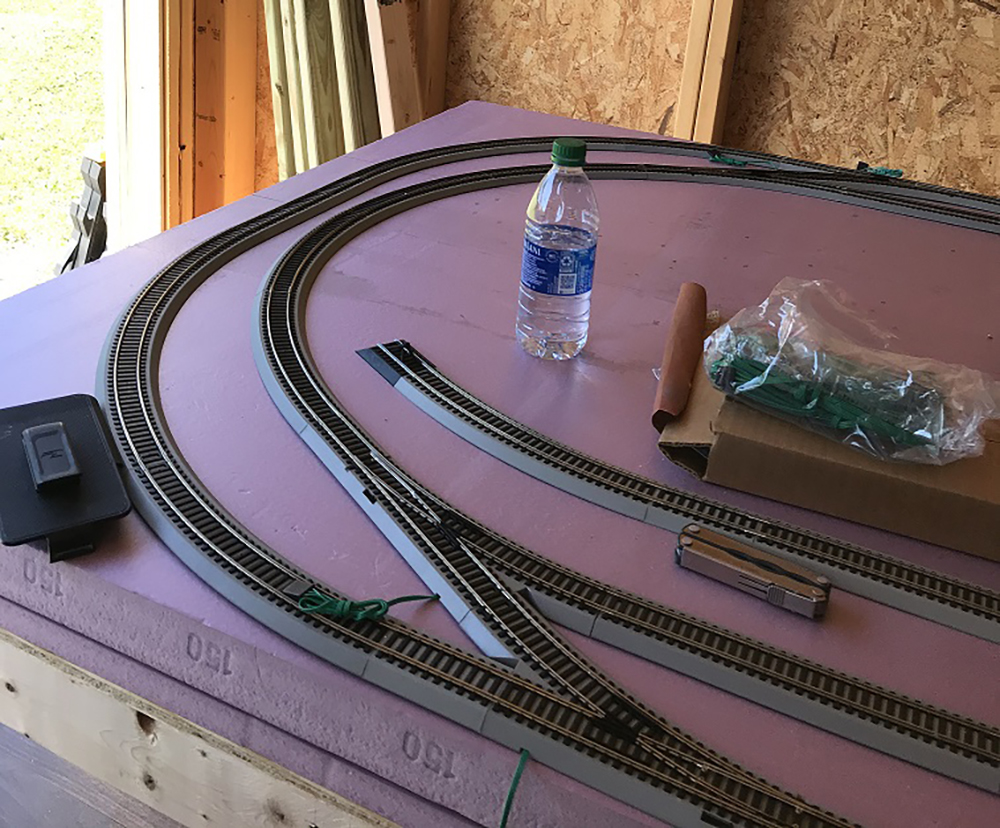
Last week I finally cleared the decks of other projects and got cracking on the benchwork and layout.
The track that is shown was just put down today.
I will be modeling the late transition era of my childhood in the 1950s and 1960s, for the Southern Railway in the southeast corner of my state, and a non-prototypical branch line called the Runharde and Tyre Short Line.
I am looking forward to getting my track wired in the next week or so and running some locomotives.
My plans include a farming community in the foreground of the first couple of pics, an industrial area in the left midground, and a ridge with train tunnels in the background.
There will be passenger and freight depots and some freight sidings. I will be modeling some actual historic railroad structures from the area. I will take some better pics when there is more detail to show.
Thanks for all you do for our hobby. Thanks as well to all the participants who share freely from their knowledge and experience.
Cheers!
Jim in Tennessee”
Thanks to Jim. And just for balance, here’s an N scale too:
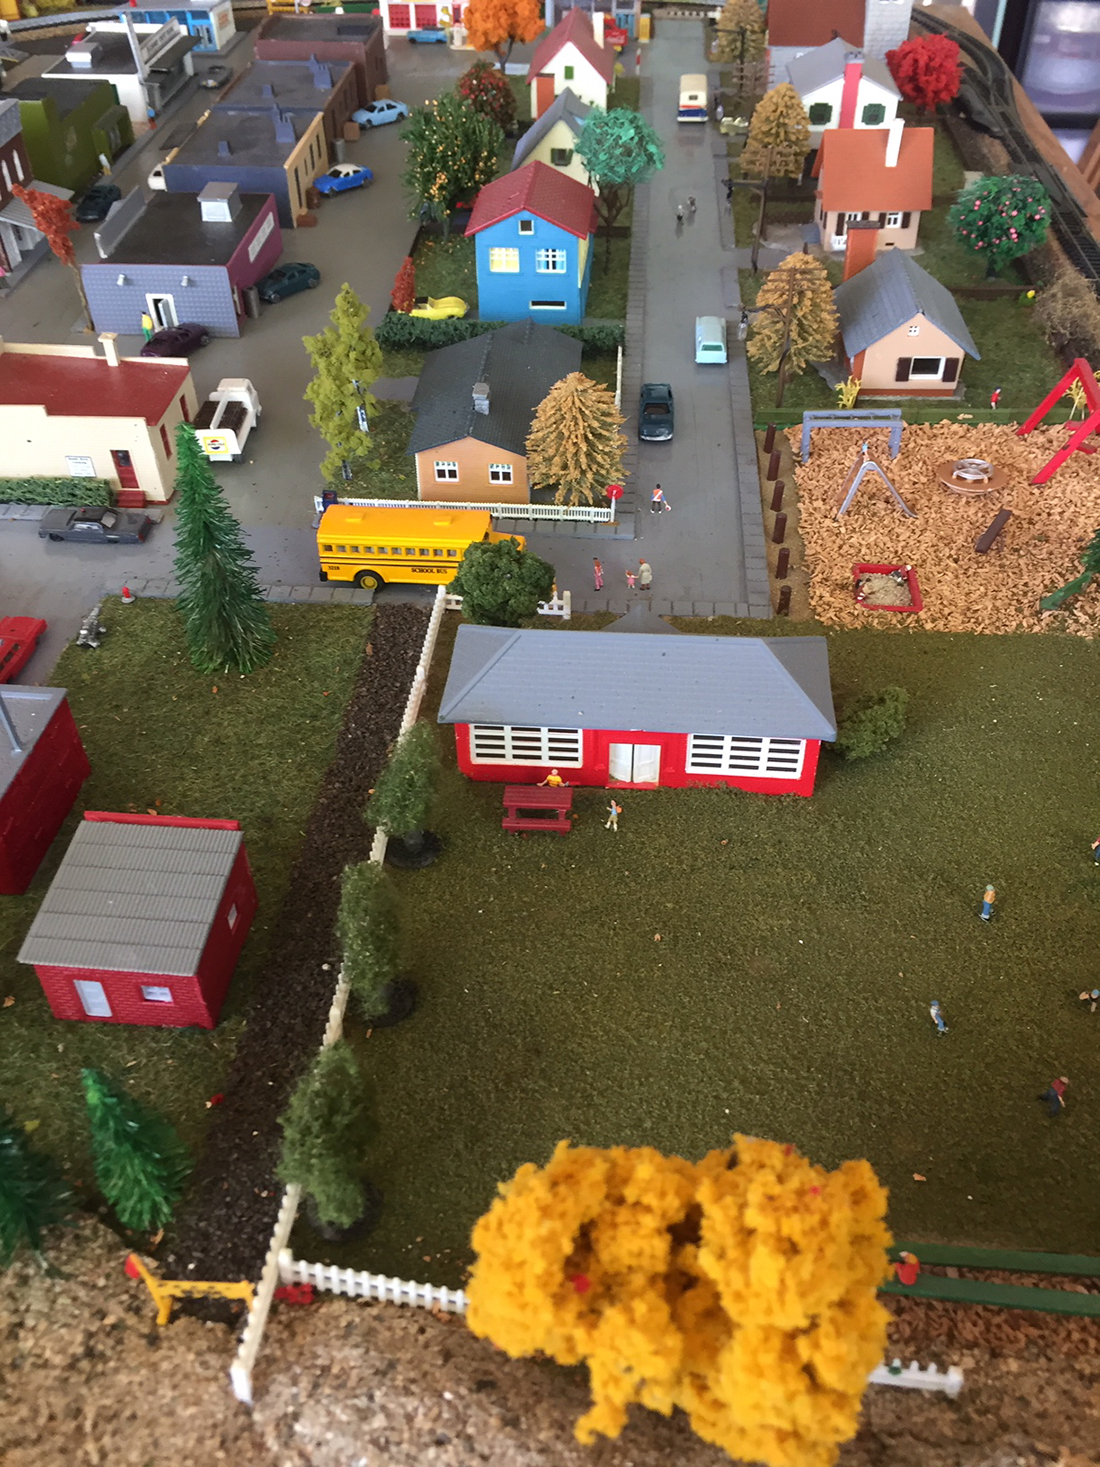
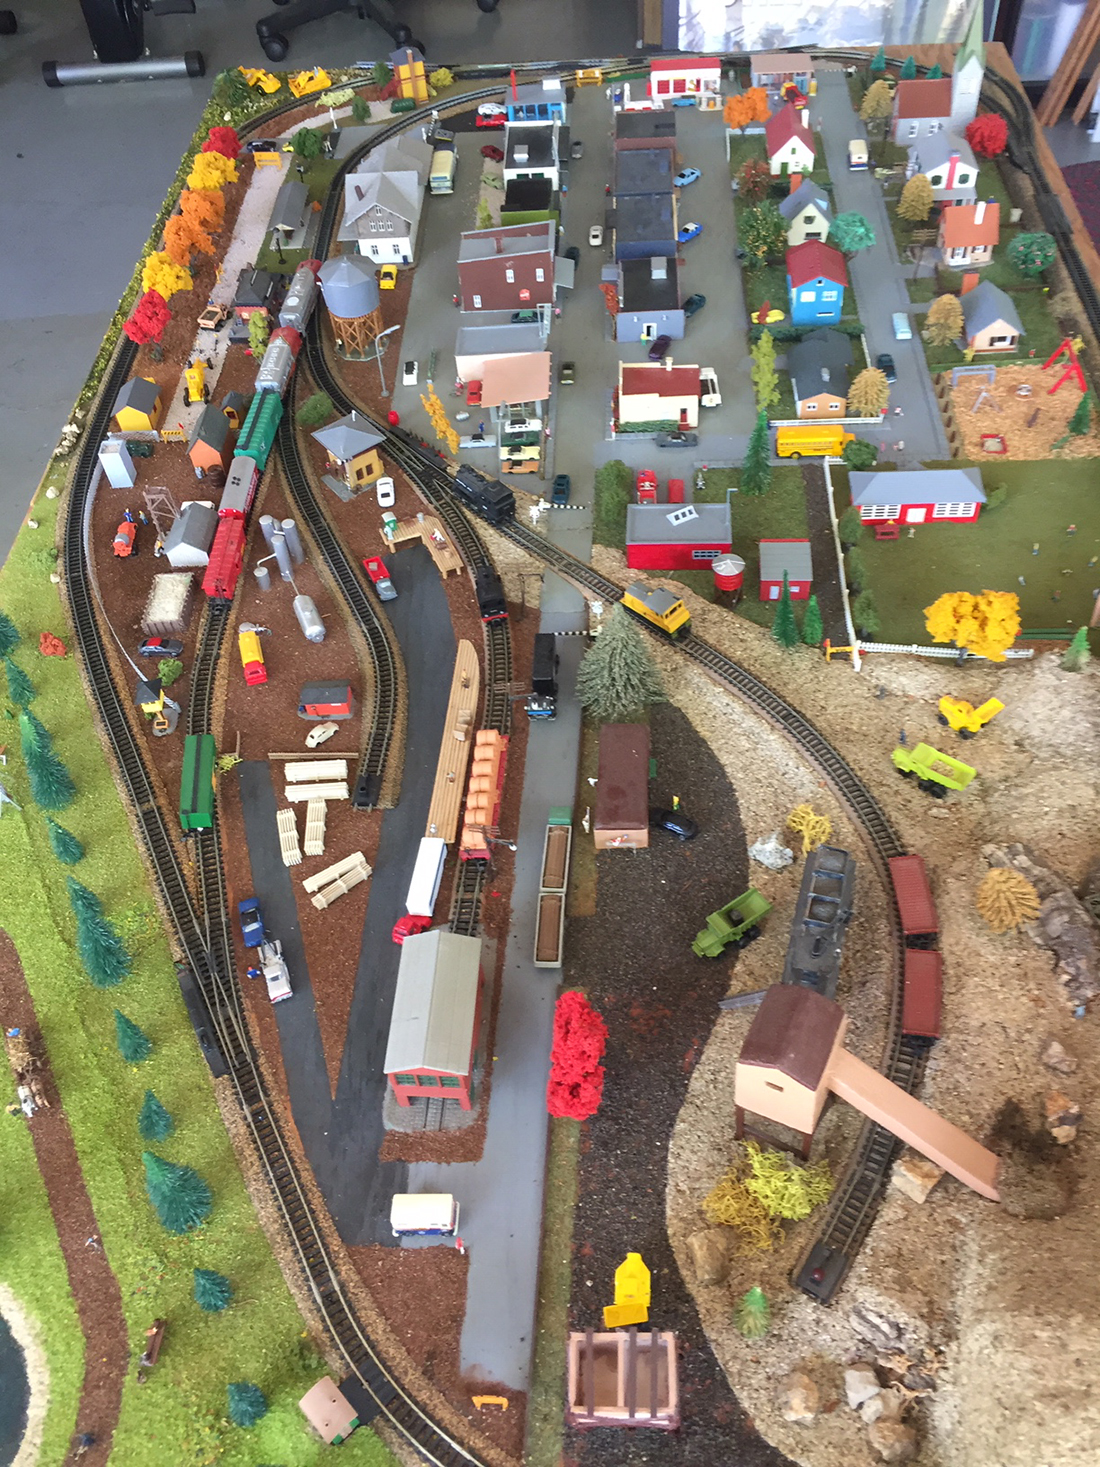
A 3′ x 5′ N Scale layout with town, mine, city park & lake, school & church.
Still working on adding more detail and fine tuning.
Lot of small detail hard to see like boy flying kite & ballon salesman in park, baseball game going on school grounds, boys skateboarding up street, etc.
N-scale needs a lot of patience and steady hands working on such small details. But well worth the effort.
My new around the wall layout is coming along slow and steady.
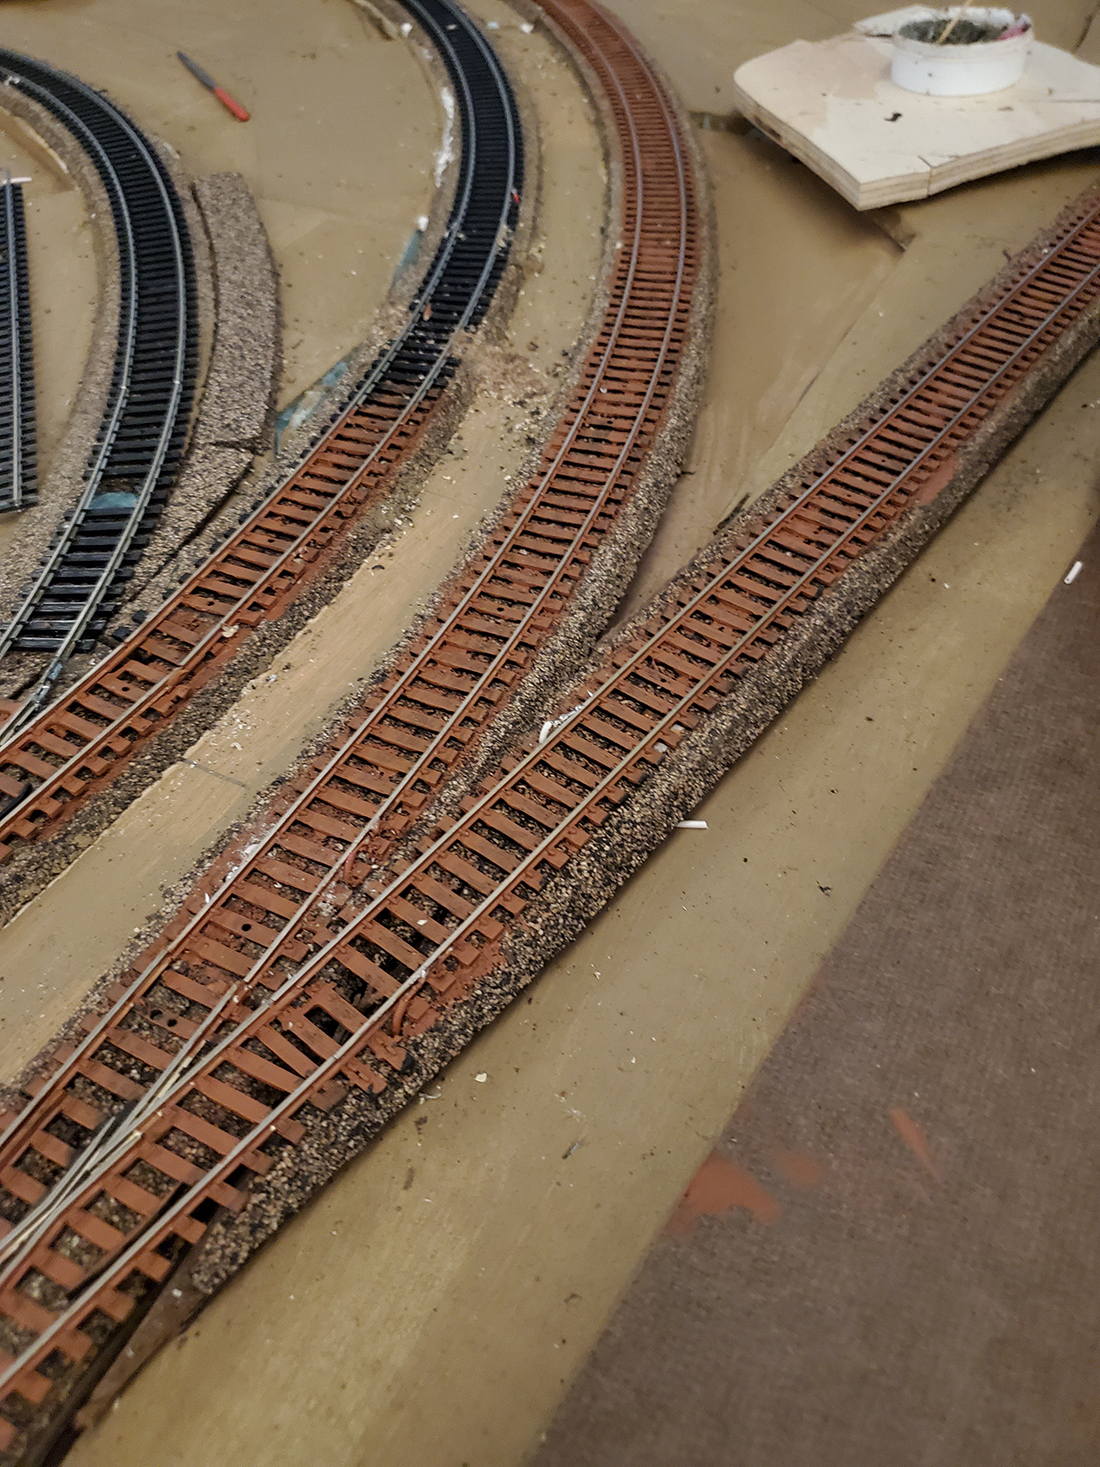
When I started laying track and dropping feeders, I realized that my old way of doing it (positive on the outside; common on the inside) could easily get messed up.
So I took my clear inspection car and put a piece of red tape on one side and a piece of white tape on the other. I roll the car along as I am dropping feeders and I can see which side to put the feeders.
When I first started the remake of my layout I bought five different quarts of flat latex paint: two blues, a green, and a brown.
The brown turned out to be closer to tan so I went back to get another quart of paint. While looking through the brown paint samples, I found one called Rusted Earth. I thought that might do what I was looking for.
When I got it home, I tried it on a scrap of wood. When the paint dried, I thought that would look great on the tracks.
The picture show the first coat on a section of track. To my old eyes it looks like a decent representation of rusty rails.
Bob Filipiak, Virginia”
A big thanks to Bob, the other Bob, and Jim for sharing his Bachmann EZ track ho scale layout.
Jim’s madse a great start, for me, having a theme is the ingredient that transforms a layout.
There are quite a lot of comments on the post about OO scale vs HO scale.
Brian has been kind enough to send in a detailed narrative with his OO scale, and he touched on the difference between to the two.
And as always, there are some some comments at the bottom from you lovely lot that shed light on it:
“Hi Al,
This letter to you has been a long time coming! I have been an avid reader of your site for the last 6 years or so and look forward to opening you email every day.
I retired some 5 years ago and in the runup to retirement, I decided that, post retirement, I would build a model railway – maybe prompted by my wife’s adage “we married for better or for worse, but not for lunch” and she definitely did not want me messing her social calendar.
However, I got a slow start. We decided to downsize shortly after retirement and we moved into a 5th floor apartment.
I had spent much time reviewing and researching what type of model I wished to build – I am a British expat living about 40 miles up the Long Island coast from New York City (moved 30 years ago expecting to stay 3 years) and wanted to model the British theme of the 1950s and “60s, ie at the end of the steam era.
The first complication was the minor difference of OO scale vs HO scale, but more of that later.
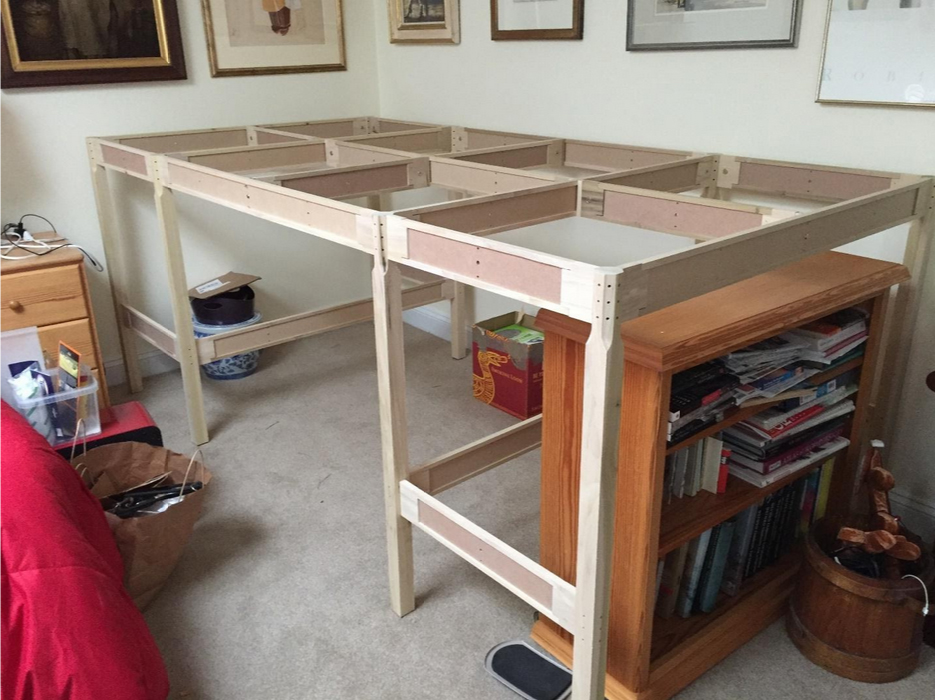
I have never lived in an apartment before, and I did not consider the challenges of woodworking 5 floors up, so the first challenge was the table.
I decided to start with an 8ft by 4ft layout as this seemed to be a standard size and it fitted our 3rd bedroom but cutting timber at ground level and carrying it up 5 floors didn’t seemed attractive – never mind the mess that would be unacceptable to the HOA – so I was delayed until I found the Mainne Benchwork website which sent one through the mail.
The mode of construction is not dissimilar to a piece of Ikea furniture! So, at last I could start.
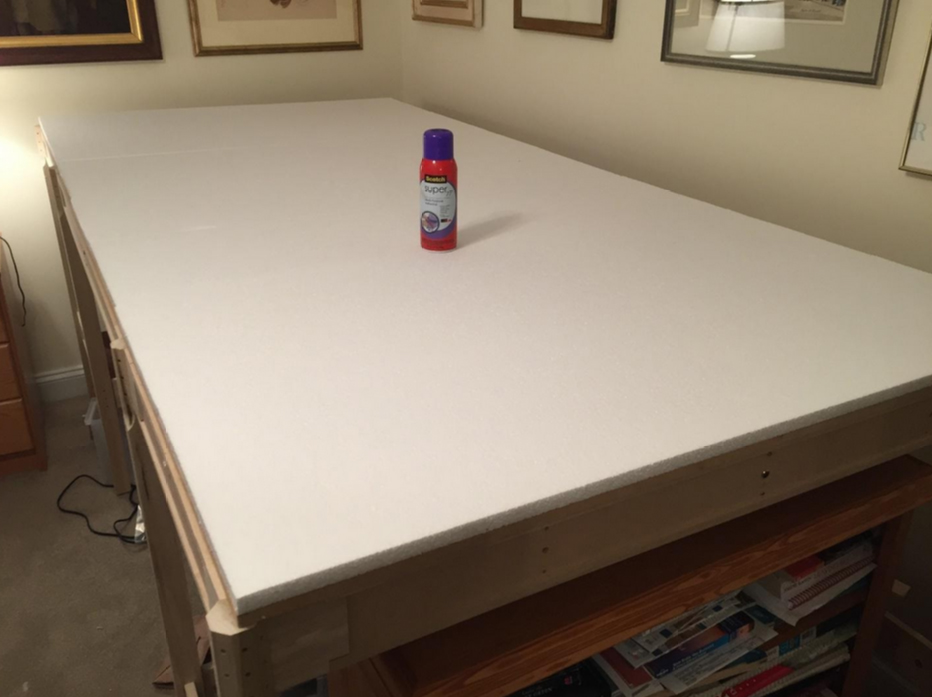
I then laid 2 4×4 sheets of fiber board on top. I had read from many of your contributors that I need a polystyrene base on which I could model.
My local Home Depot only had the white expanded polystyrene insulation which I bought – so I have been working with this ever since. Its not ideal but is easy to cut and I have loads of it to use up.
I used Any Rail software to design my layout and came up with this- and this is basically what I have today, although the bottom side of the inner track is raised. There is a station both at the bottom side and at the top side.
In early 2019, events took a major turn – my wife and I decided, after 4 years of apartment living, that we would prefer to live in our own house rather than in an association, and so the railway was put on hold again until we moved, which caused another delay of 6 months plus the time it takes to settle in and all the other stuff which goes with it.
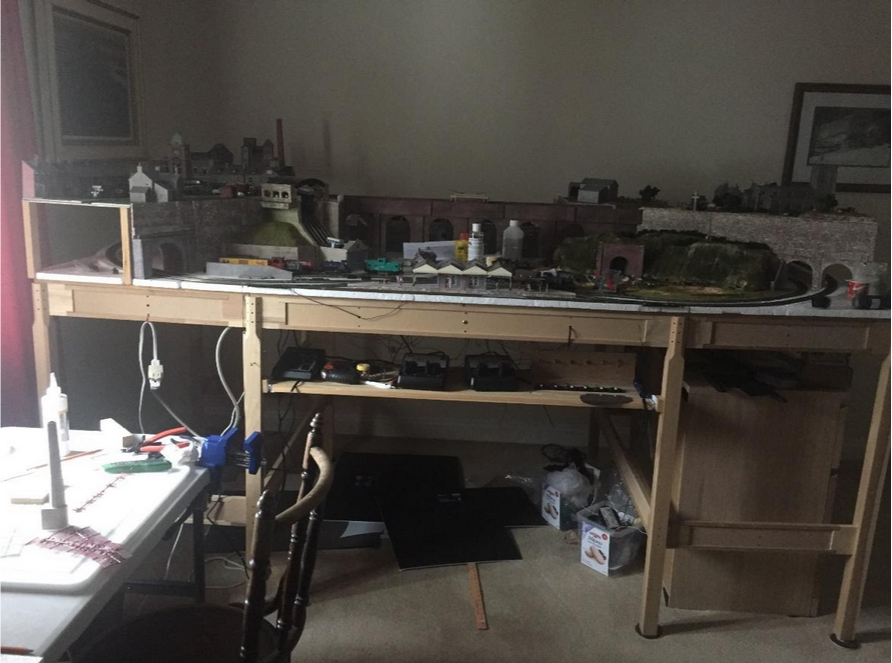
So it was not till November last year when I started to put it all together again.
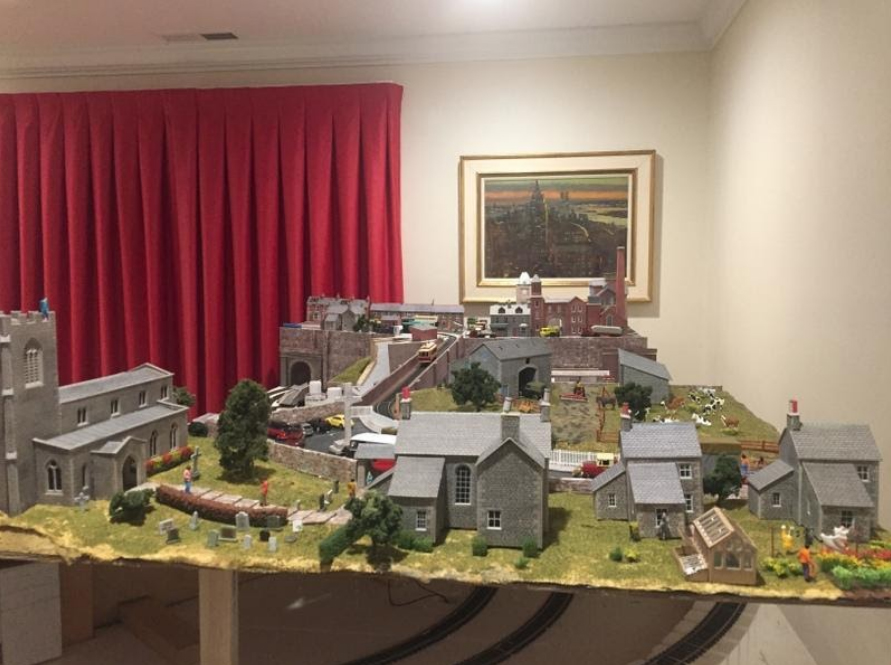
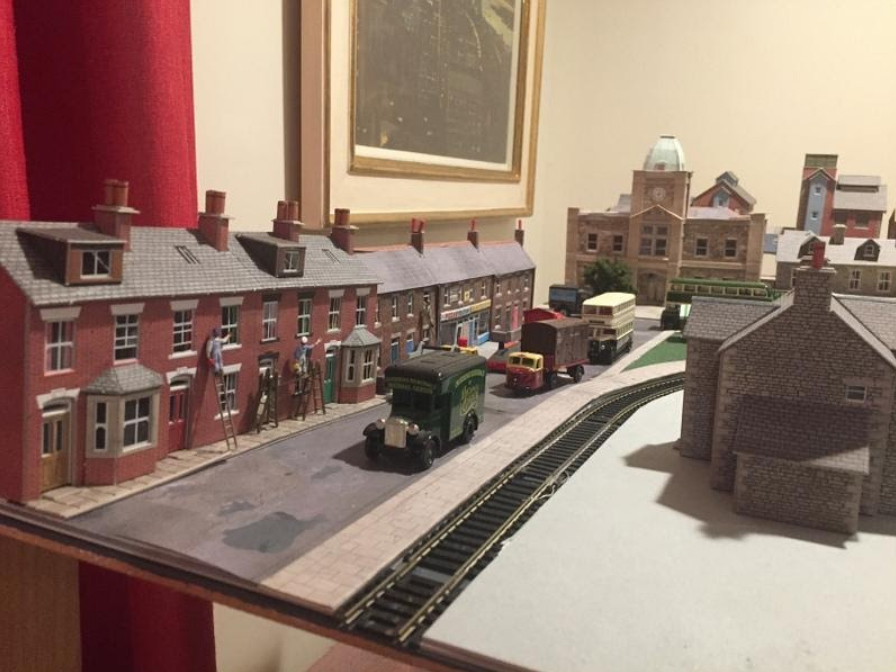
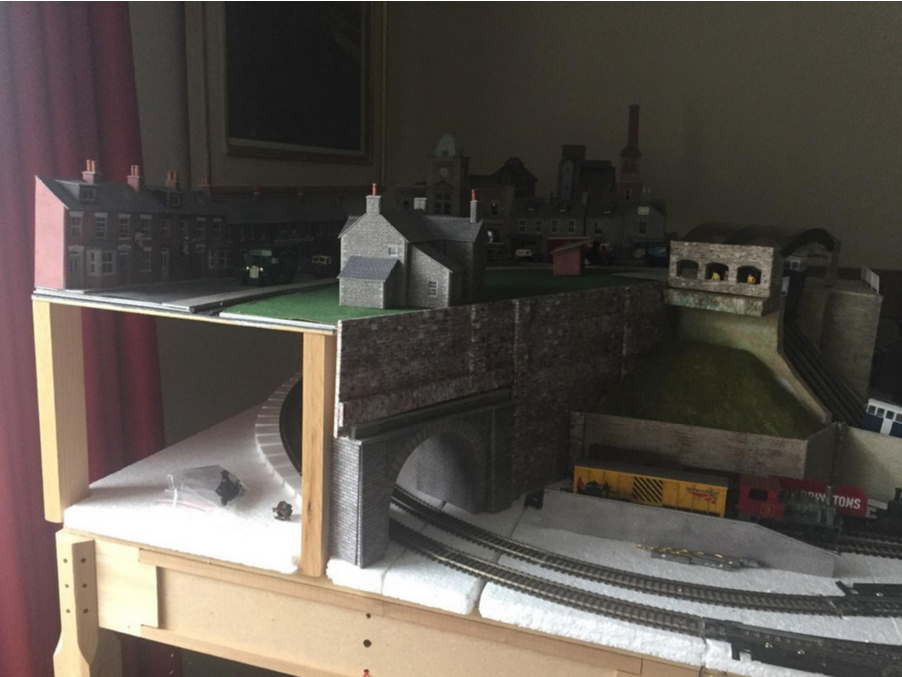
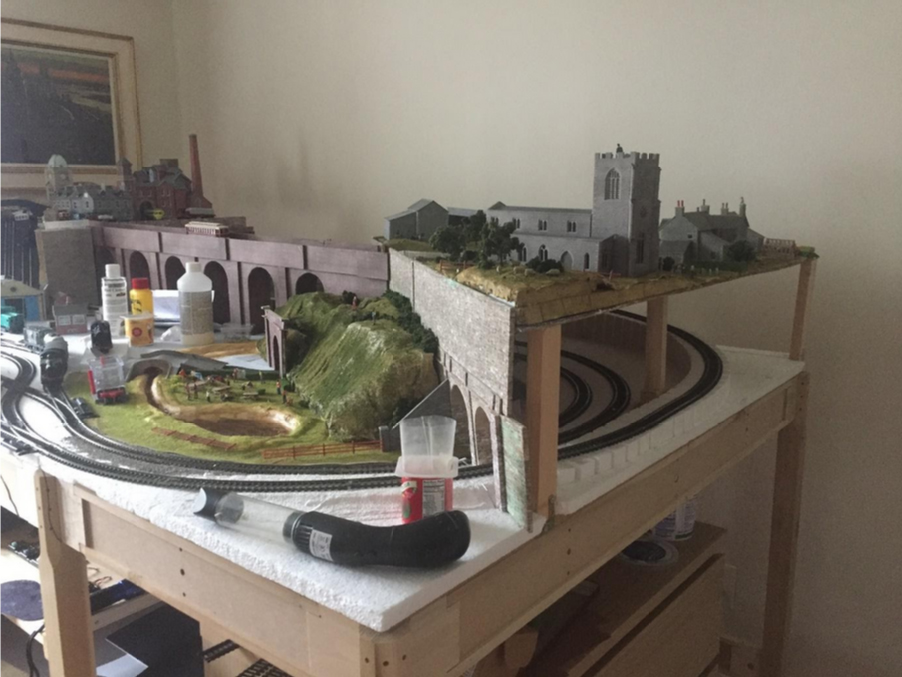
In my days of commuting into London from Sussex, I had always been very aware that the railway line is never at ground level, it is either well above suburban gardens or going through a cutting or tunnel and so I wanted mine to have cuttings and tunnels and gradients. Here is the overall view followed by specific areas.
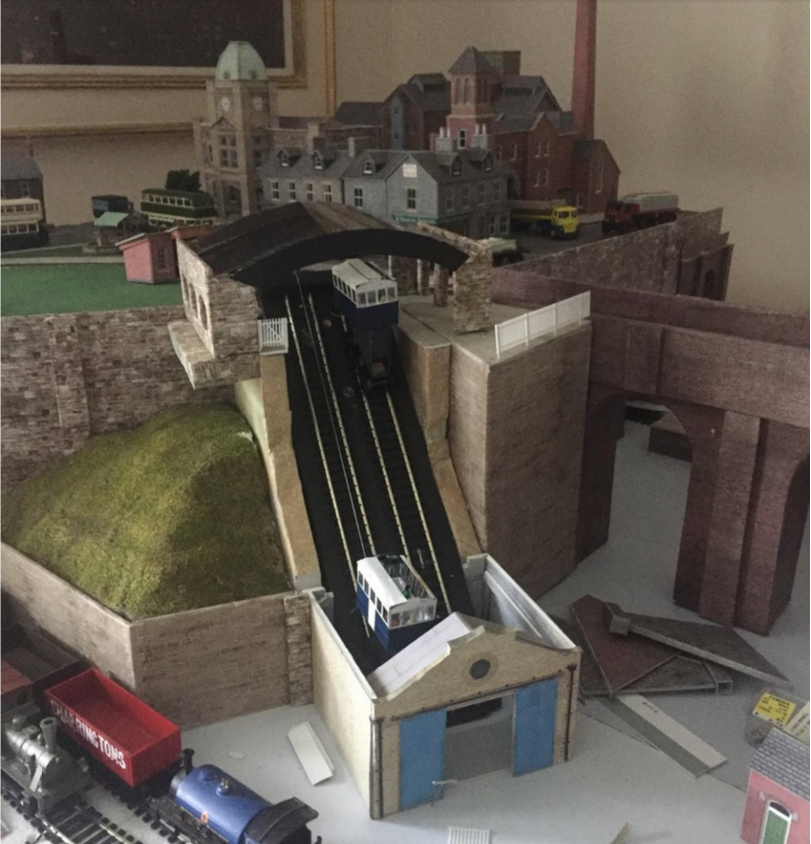
There is one major addition to the plan shown above. Many years ago, I bought a streetcar (or tram) and decided that it would be fun to add it to the plan.
In the photos, you will see the viaduct which joins to 2 higher scenes together and it is this tram which runs on this track, with an automatic stop and reverse so I can just have it running and leave it alone. Most of the buildings are either Metcalfe.
I am sure I am not the only one to have made many mistakes, some of which have been interesting to solve, and some just frustrating.
I never thought that 8×4 feet would not be big enough, for instance I can only run trains with 2 carriages.
I also built the tunnels too high, and the viaduct which connects the 2 higher levels obstructs the station which is behind it. I will have to change this at some stage.
I also wanted a way to link the lower level with the upper level, it is too high to build a road connecting them so I looked on the internet and found a funicular (cliff railway) from Langley Models in Crawley Sussex.
This has proved a bigger challenge than expected so would be interested to hear from anyone who has one on their railway and got it working properly.
Finally, on the question of OO scale vs HO scale, which is 1/76th vs 1/87th.
I have bought HO track in the US (Atlas) but bought engines and rolling stock from the UK, mainly Hornby.
I find that the front bogies of an engine come off the rails regularly and wonder if it is a function of the different scales – anyone else had the same problem? I may have to buy new track next time I am in Blighty!
As you can see, there is still much to do, especially at the lower level – ballasting and trees and…
The current pandemic has enabled me to progress much faster than I would have expected, but I have learned from reading other modelers comments that a layout is never finished.
I hope you have enjoyed my script and photos and look forward to your comments.
Brian (from CT, USA)”
A huge thanks to Brian for his wonderful pics and a superb narrative on OO scale vs HO scale.
I do love it when a layout has a theme, especially when it’s from someone’s past too.
That’s all for this time folks.
Please do keep ’em coming.
And don’t forget the Beginner’s Guide is here, if you want to take those first steps, just like Brian did.