Model train table legs

Bob’s been back in touch with a great tip on model train table legs.

He show’s how to get your table level.

(Here’s his last post.)

“In my last post I said I was going to do things right this time around.

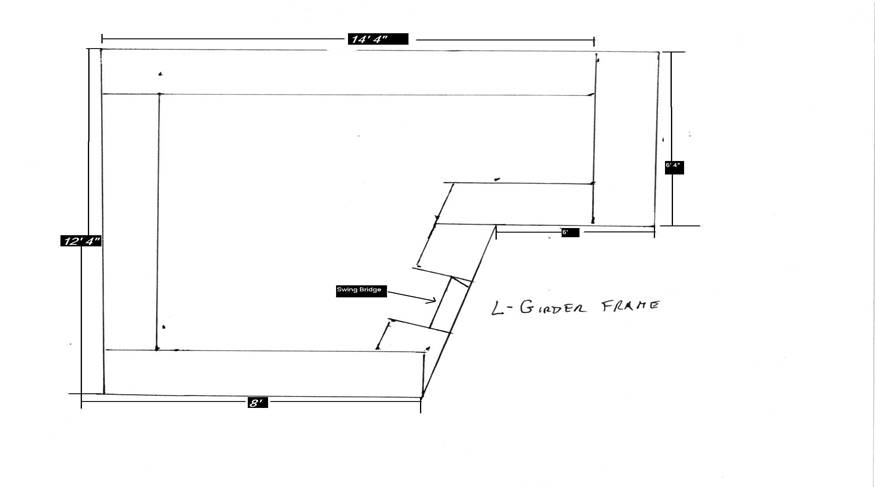
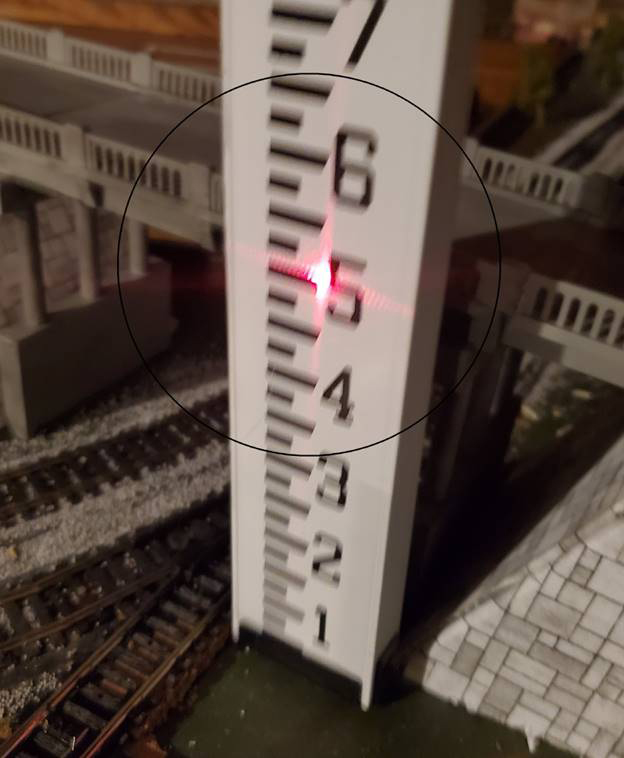
So I got out my Bosch Pro Laser Level and identified that my new L-girder framework to take into account the slope in the floor.

The room originally was going to be a screened in patio thus the slope. I tended up full-blown 16’ x 28’ addition to the house. There is a difference of ¾-in in 8’.

So I needed my model train table legs to accommodate this.

measure Model train table legs

measure Model train table legs

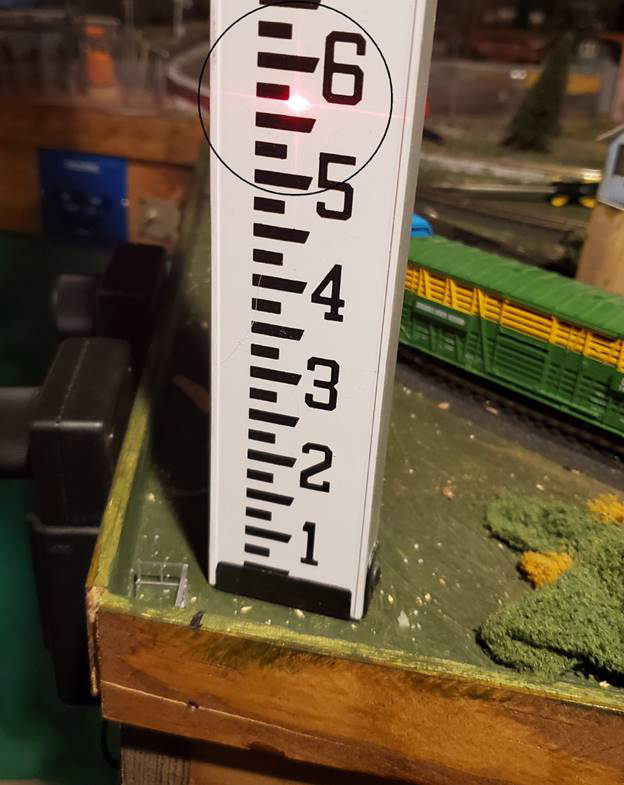
I started with building an 8’ section and a 6’ section of framework. The two sections highlighted in this picture:

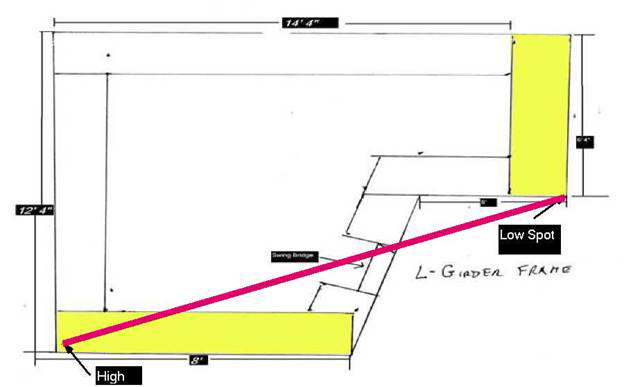
The red line represents where I used the laser. I built four sets of legs, two sets for each section, and setup the laser at the high point.

I made the first set of legs so the top of the L-girder at 42” and lined up the lase with the top of that set of legs and then swung it to make that height on the 2x2s for the other legs of that framework and built that set of legs.

In the videos I watched about L-girder framework they recommend adjustable feet for the legs so you can avoid the use of shims as much as possible.

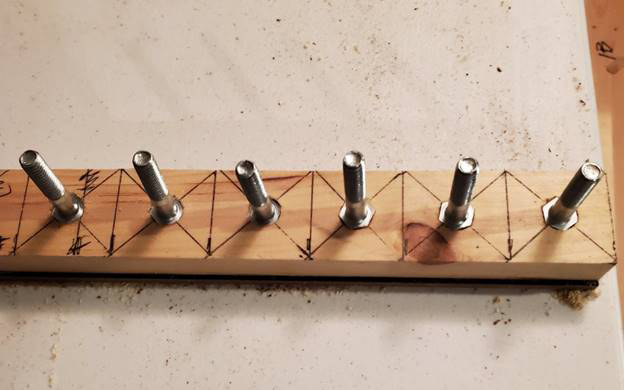
I looked up leveling feet and they are expensive to my way of thinking. One of the videos suggested tee nuts and hex bolts. I bought two 25 packs of tee nuts at $6.98 each and a box of 50 hex bolts for about $14.00. I put them on the legs:

Model train table legs

This will allow about 1-in of adjustment once the framework is put together which should be adequate since the initial height of the leg sets has been set with the laser.

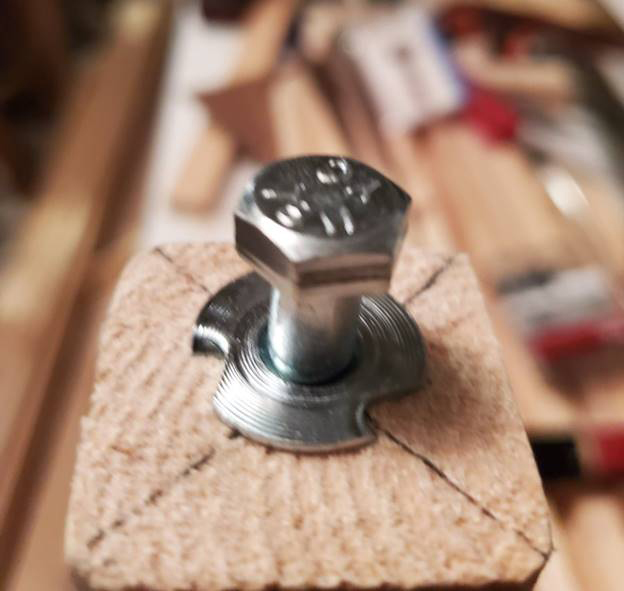
After patting myself for saving by using hex bolts and tree nuts, I looked at the legs and thought: All the weight of the frame is going to be resting on four ½-in wide hex bolts. I studied the situation and decided I need to create wider feet for the legs.

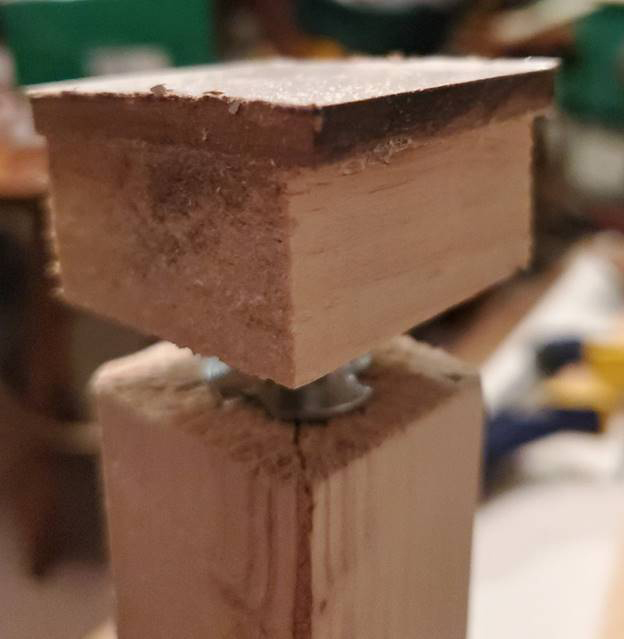
My solution was to take a piece of 1×2-in left from the cross bracing and mark off squares and then use a ½-in forstner bit to drill holes in the center of the squares. The holes were the depth of the hex nut head.

layout table

I drove the bolts into the holes with a hammer. The dark strip on the bottom is a strip of whiteboard that I glued with contact cement with the smooth side down to allow the feet to turn easy on the carpet. Next I cut each block to make individual feet.


Model train table legs

The finished product adds about 1and 1/2-in to the height of the legs.

Model train table legs

As I go along I will submit updates and discoveries.

Bob, Virginia”

A huge thanks to Bob for sharing his tip on Model train table legs.

Some of you may think this is a lot of effort to go to – but as Bob found out, getting your bench / table level is critical.

A table that is not level, uneven or wobbly table will slowly drive you insane and sap all of the enjoyment from you.

I’m with Bob: tables that aren’t level are the work of the devil.

Please do leave a comment below and share your own insights. I’d love to hear them on this.

Now on to Dave:

“Hi Al…

Well my new Loco came this week with sound fitted, the class 67 from Hornby, and what a great runner it is, well pleased with it, so just had to share my video of her.

Also showing from last week the different size of Peco Track can be used together, a small piece of transition track can be used to join the 2 types up on a layout, I have used blue tack just to hold it down so it looks a bit on the wobbly side, but this is just to show as a demonstration.

Regards

Dave”


Latest ebay cheat sheet is here.

That’s all for today folks.

Please do keep ’em coming.

And if today is the day you claim your spare room or basement in the pursuit of having fun with trains, the Beginner’s Guide is here.

Best

Al


HO scale coal mines

John’s been back in touch, he’s added to the collection of HO scale coal mines on the blog.

I know we are in for a treat when I see his name pop up in my inbox.

And today’s no different.

If you want to get up to speed, here’s John’s wiring update.

Here’s the update before the wiring.

And don’t miss this one.

Now let’s see where he’s up to:

“Hi Alastair,

John From Baltimore here.

I’ve been working on lighting, wiring and overall updates to my layout. The changes are kind of subtle but in there.

I’m still working on some spotlighting of the various places where shadows hit the scenery. The bridges and lighting them has been a real challenge.

My next layout project is replacement of the turn-table at the engine roundhouse with a more prototype in ground one. Of course there’s a wood beam directly where I need to cut into the layout base!

More when I get into that in a few weeks, I’ll try to document the whole thing, wood chips flying and all.

Thanks for all you do for the model railroad community.

John From Baltimore”

ho scale coal mines

(All images are clickable by the way.)

coal mine railroad

ho scale coal mines

ho scale coal mines

ho scale coal mines

ho scale coal mines

A huge thanks to John – as far as I’m concerned, the blog can’t have enough HO scale coal mines.

John’s post reminded me of Wayne’s coal mine too:

HO scale coal mine buildings

It’s so wonderful to see any layout spring to life. And when the fine detailing comes too – well, that’s when the real fun starts.

Can’t wait to see John’s roundhouse.

That’s all for today folks.

Please do keep ’em coming.

Don’t forget the Beginner’s Guide is here if you want to get off that armchair and have some fun.

Best

Al

PS Latest ebay cheat sheet is here.


Atlas track plan

“Below is the approximate Atlas track plan of my layout as of today.

I say approximate because I could not get the Atlas Track Planning Software to accurately display the layout. It is close enough so you can get the idea.

model train track plan

Here is what it looks like:

atlas track plan to model railroad

As the saying goes “A layout is never finished.” After all the expansions, work arounds, and problems, I am having problems just running my trains. So I have decided to scrap it all and start a new layout and this time learn from my mistakes and take my time to do it right.

I am going to start with L-Girder framework approximately 44 inches high with 30 inch joist.

Below is the general scheme for and around the wall layout with a swing bridge approximately where the lift-out is on the current layout. The picture below shows just the perimeter L-Girder framework.

Once it is in place I will plan the trackwork and see what I can fit using minimum of 30” radius curves for the dual main lines.

Atlas track plan model railroad room

It will take some time to dismantle the current layout before I can move forward. I started the current layout in January and finished the last addition of the second tunnel and the 3d clouds in October. The fun is in the doing and it is not always running the trains.

Bob, Virginia”

“Hi Al

Like I promised here are some pics of each corner of the layout with “Full Time Jobs”

1st is a resemblance very close to the Tropical Fish Hatchery were I worked in 1971.

2nd is the Shell service station were i pumped gas and then later became one of the day mechanics from 1972 till 1981. Cars in front of station are the ones I have owned over the years.

3rd is Oscar Wilson, they were a lawn mower and bike distributor for parts.

4th is the fire station not exactly the building but you all get the idea. 1981 to present.

I will throw in a few other pics and that will complete the shelf layout that runs around the ceiling.

We will continue with the lower expansion in a few days or so.

Thanks again Al

Eric the firefighter”

corner of HO scale layout

HO scale people


HO scale park

HO scale back hoe

HO scale building

HO scale building

If you missed Eric’s first post, it’s here. And apologies, I got it wrong – Eric’s not retired yet. My mistake.

Now on to Dave:

“Hi Al..

Just uploaded this video showing (or trying to show ) the different types of Track and Points.

Also how to fit the Peco side Mounted Points Motors, have shown as best I could, not great at explaining things, but think most will get the Gist of all this…

At the end my conclusion is that using the Peco Electrofrog Points with the side Mounted Points Motor is the easiest and best Path to follow.

Regards

Dave”


Latest ebay cheat sheet is here.

A big thanks to Bob for sharing his Atlas track plan, and to Eric and Dave.

Really do love what Bob wrote:

“The fun is in the doing and it is not always running the trains.”

I couldn’t agree more – if your thing is running trains, then great. If your thing is landscaping, then that’s great too. It really doesn’t matter what your ‘thing’ is – just enjoy it whatever it may be.

That’s all for today folks – but please do keep ’em coming.

And don’t forget the Beginner’s Guide is here if today is the ‘the’ day – the day you take your first step on your model railway.

Best

Al