N gauge model railway track plans

Peter’s been in touch – he’s added to the collection of N gauge model railway track plans on the blog:

“I have to say at the outset than I am no modeller and indeed for the ham fisted like me choosing N gauge has proved a real challenge.

N gauge container crane

I confess to a lifelong interest in public transport starting with a TT gauge trainset in the late 1950s.

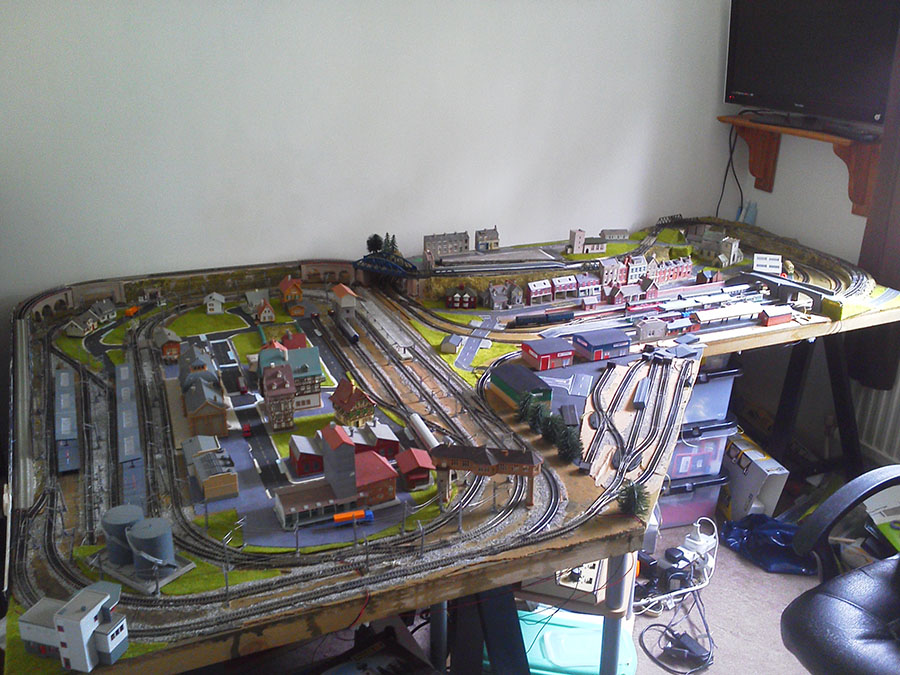
Adulthood, raising a family and work got in the way of furthering the hobby. Retirement provided an opportunity to pursue the interest and, with our three children having moved out, requisitioning the fourth bedroom for the purpose (a decision my wife, Jill, now rues!).

N gauge passenger bridge

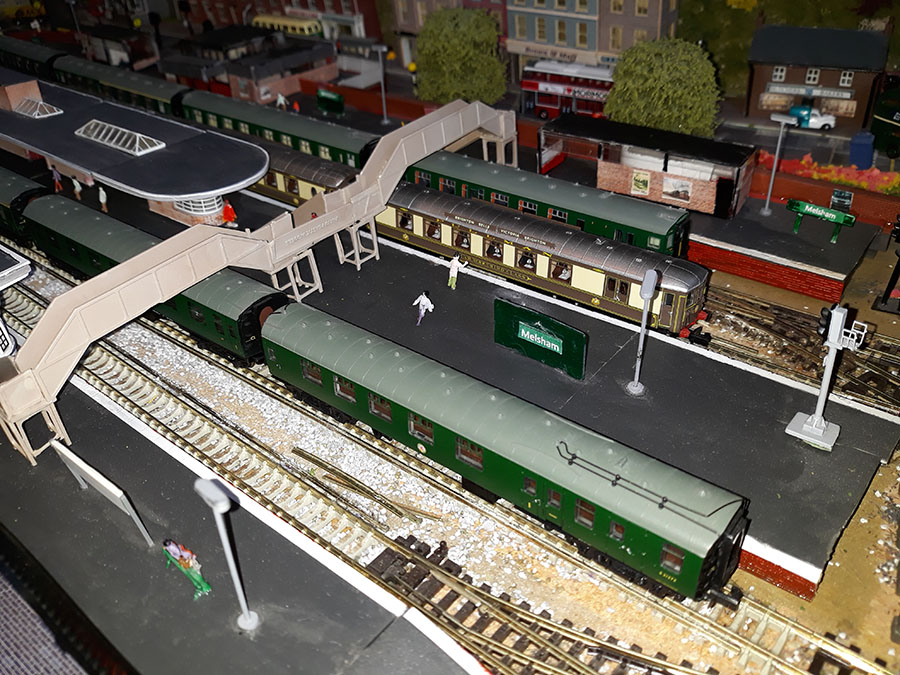
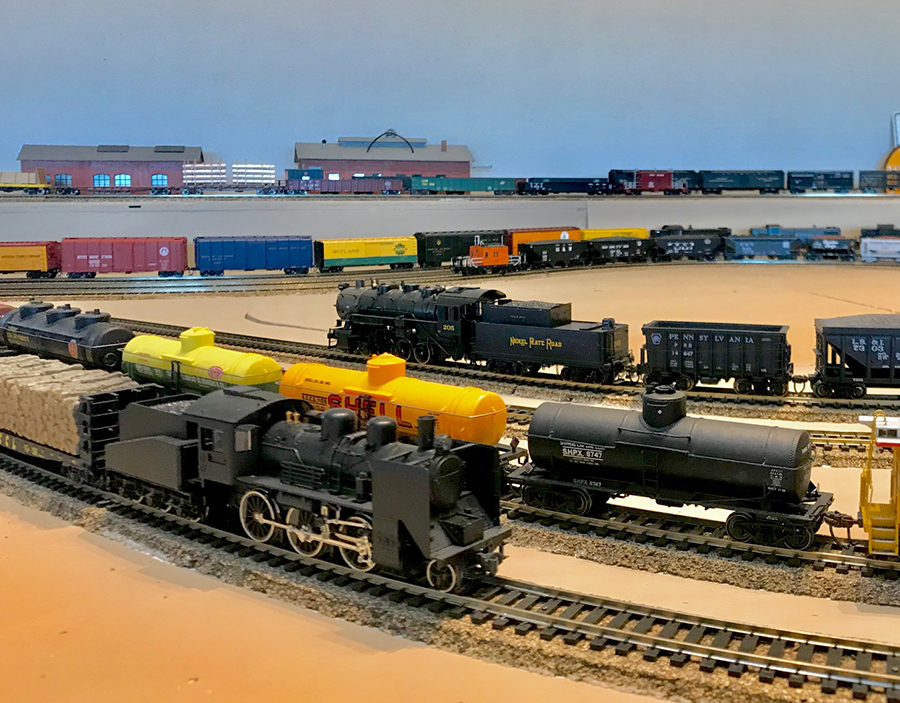
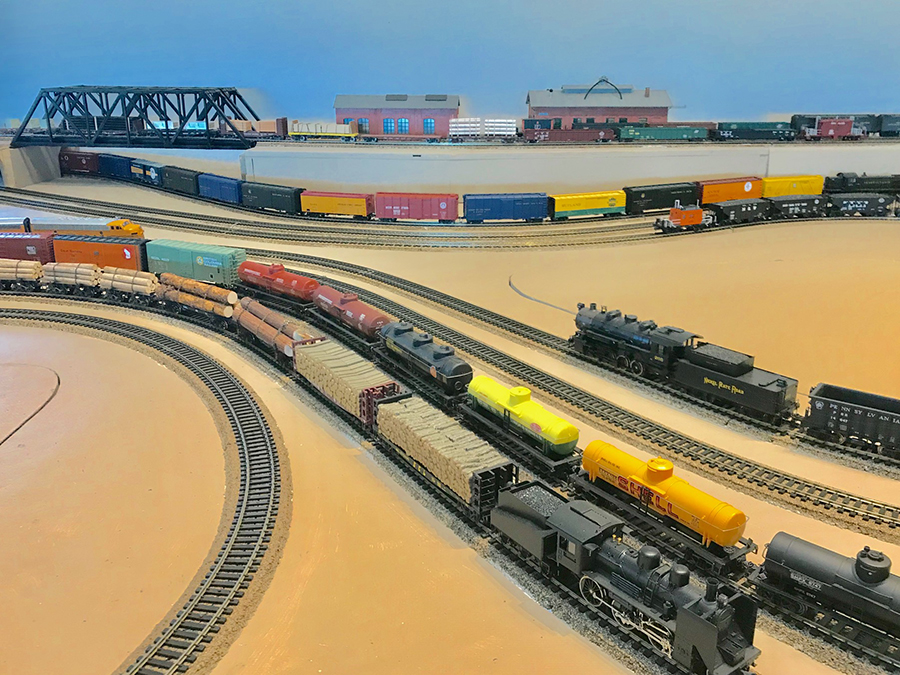
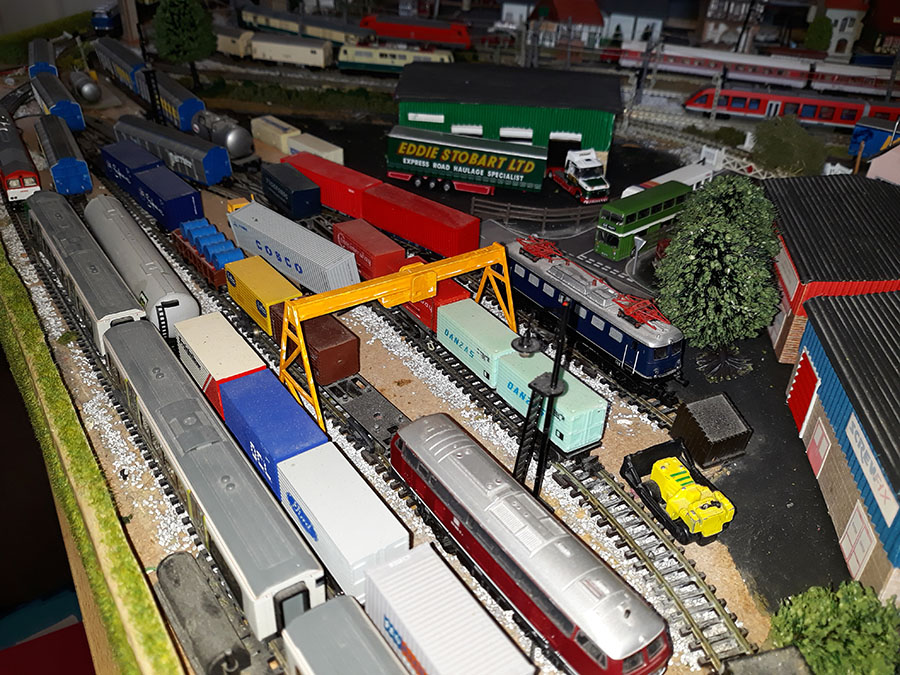
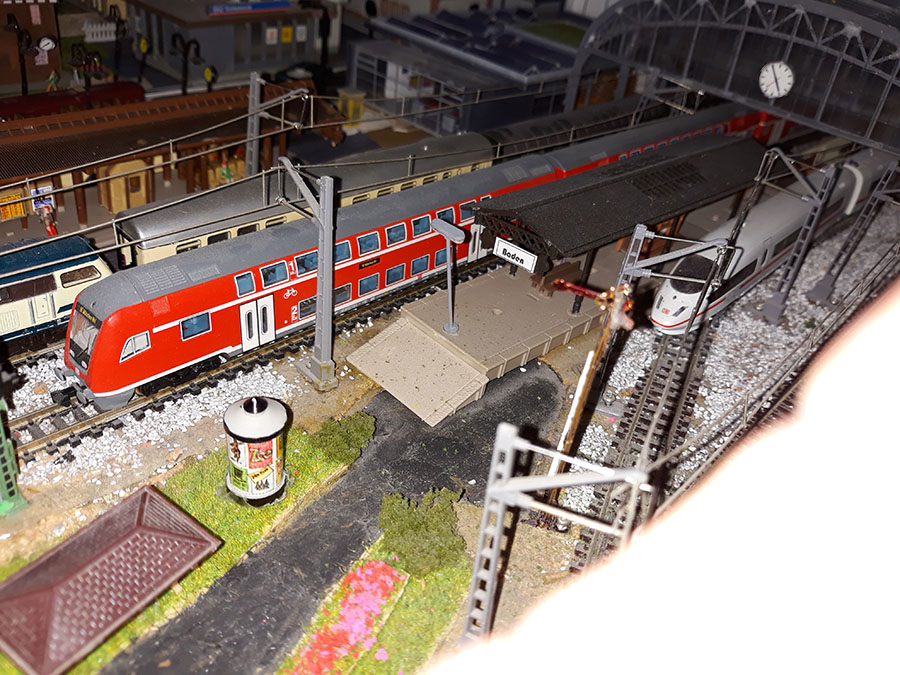
Started with the aim of building a Southern Region layout and got the ball rolling by acquiring a Merchant Navy class loco and three SR coaches plus a 4 car CEP EMU. However, having worked in Germany, I was tempted into juxtaposing the South West London environs with Bavaria. So with loads of different rolling stock I’ve ended up with a real mish mash.

N gauge model railway track plans

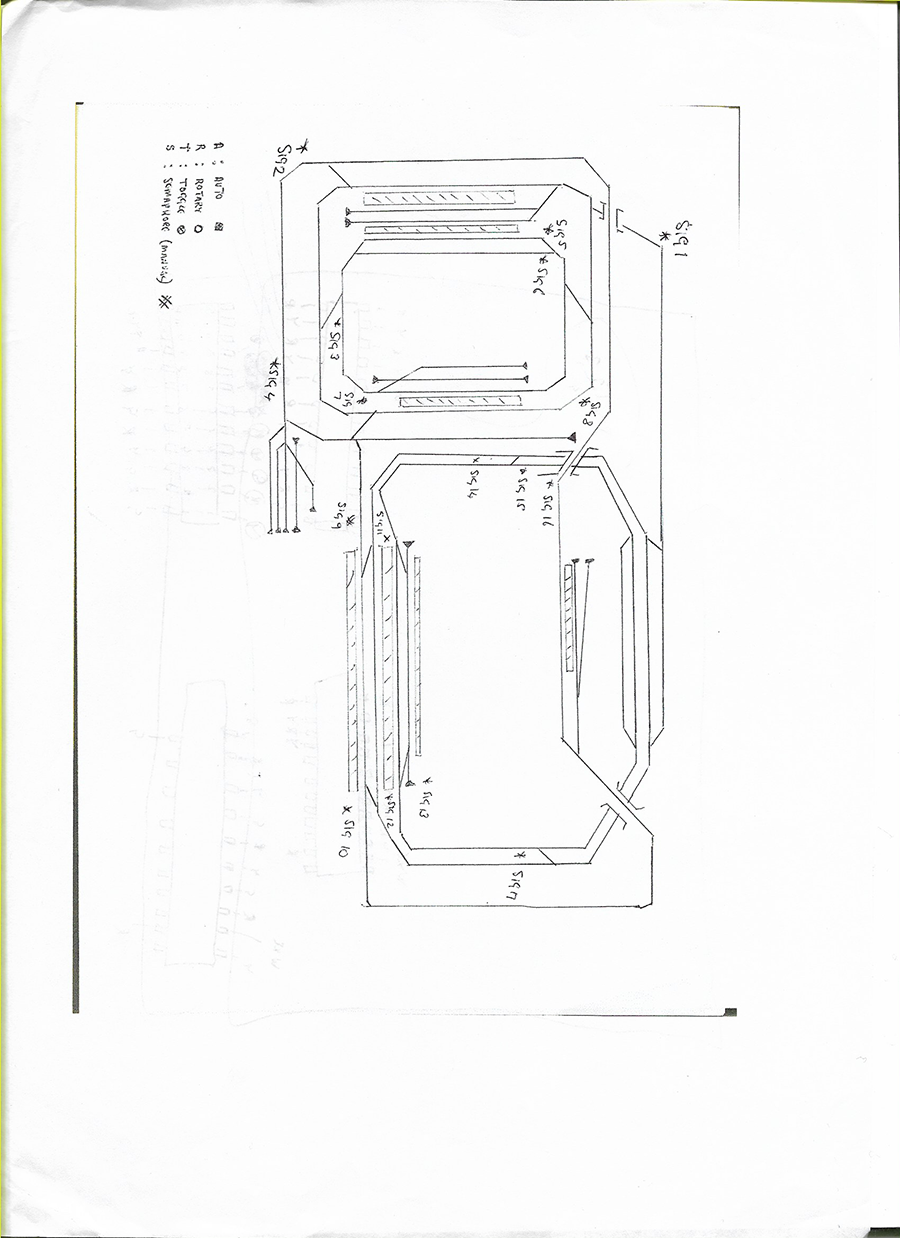
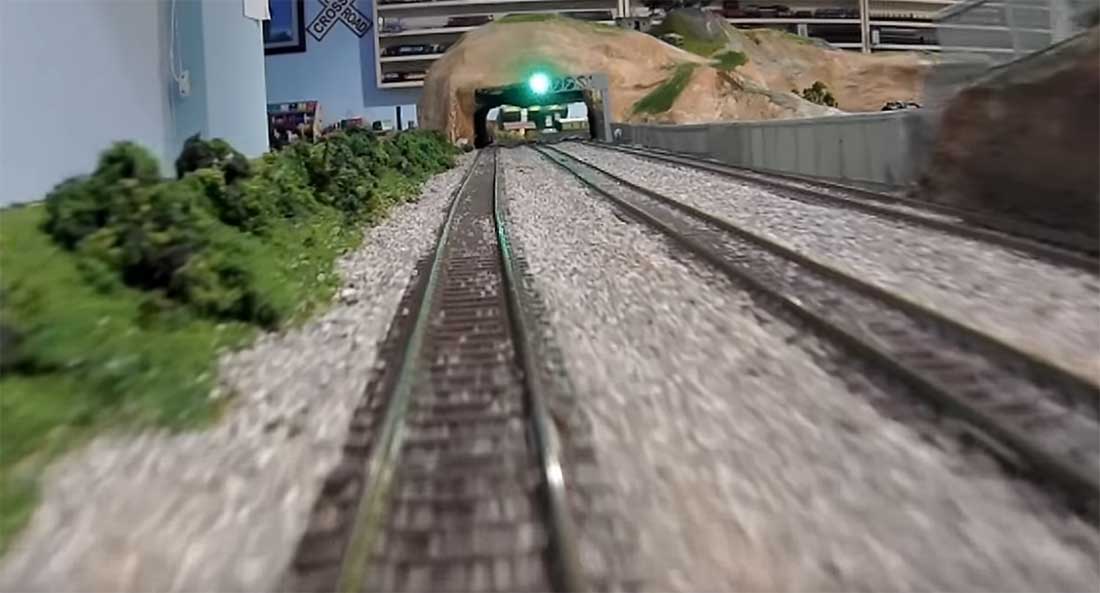
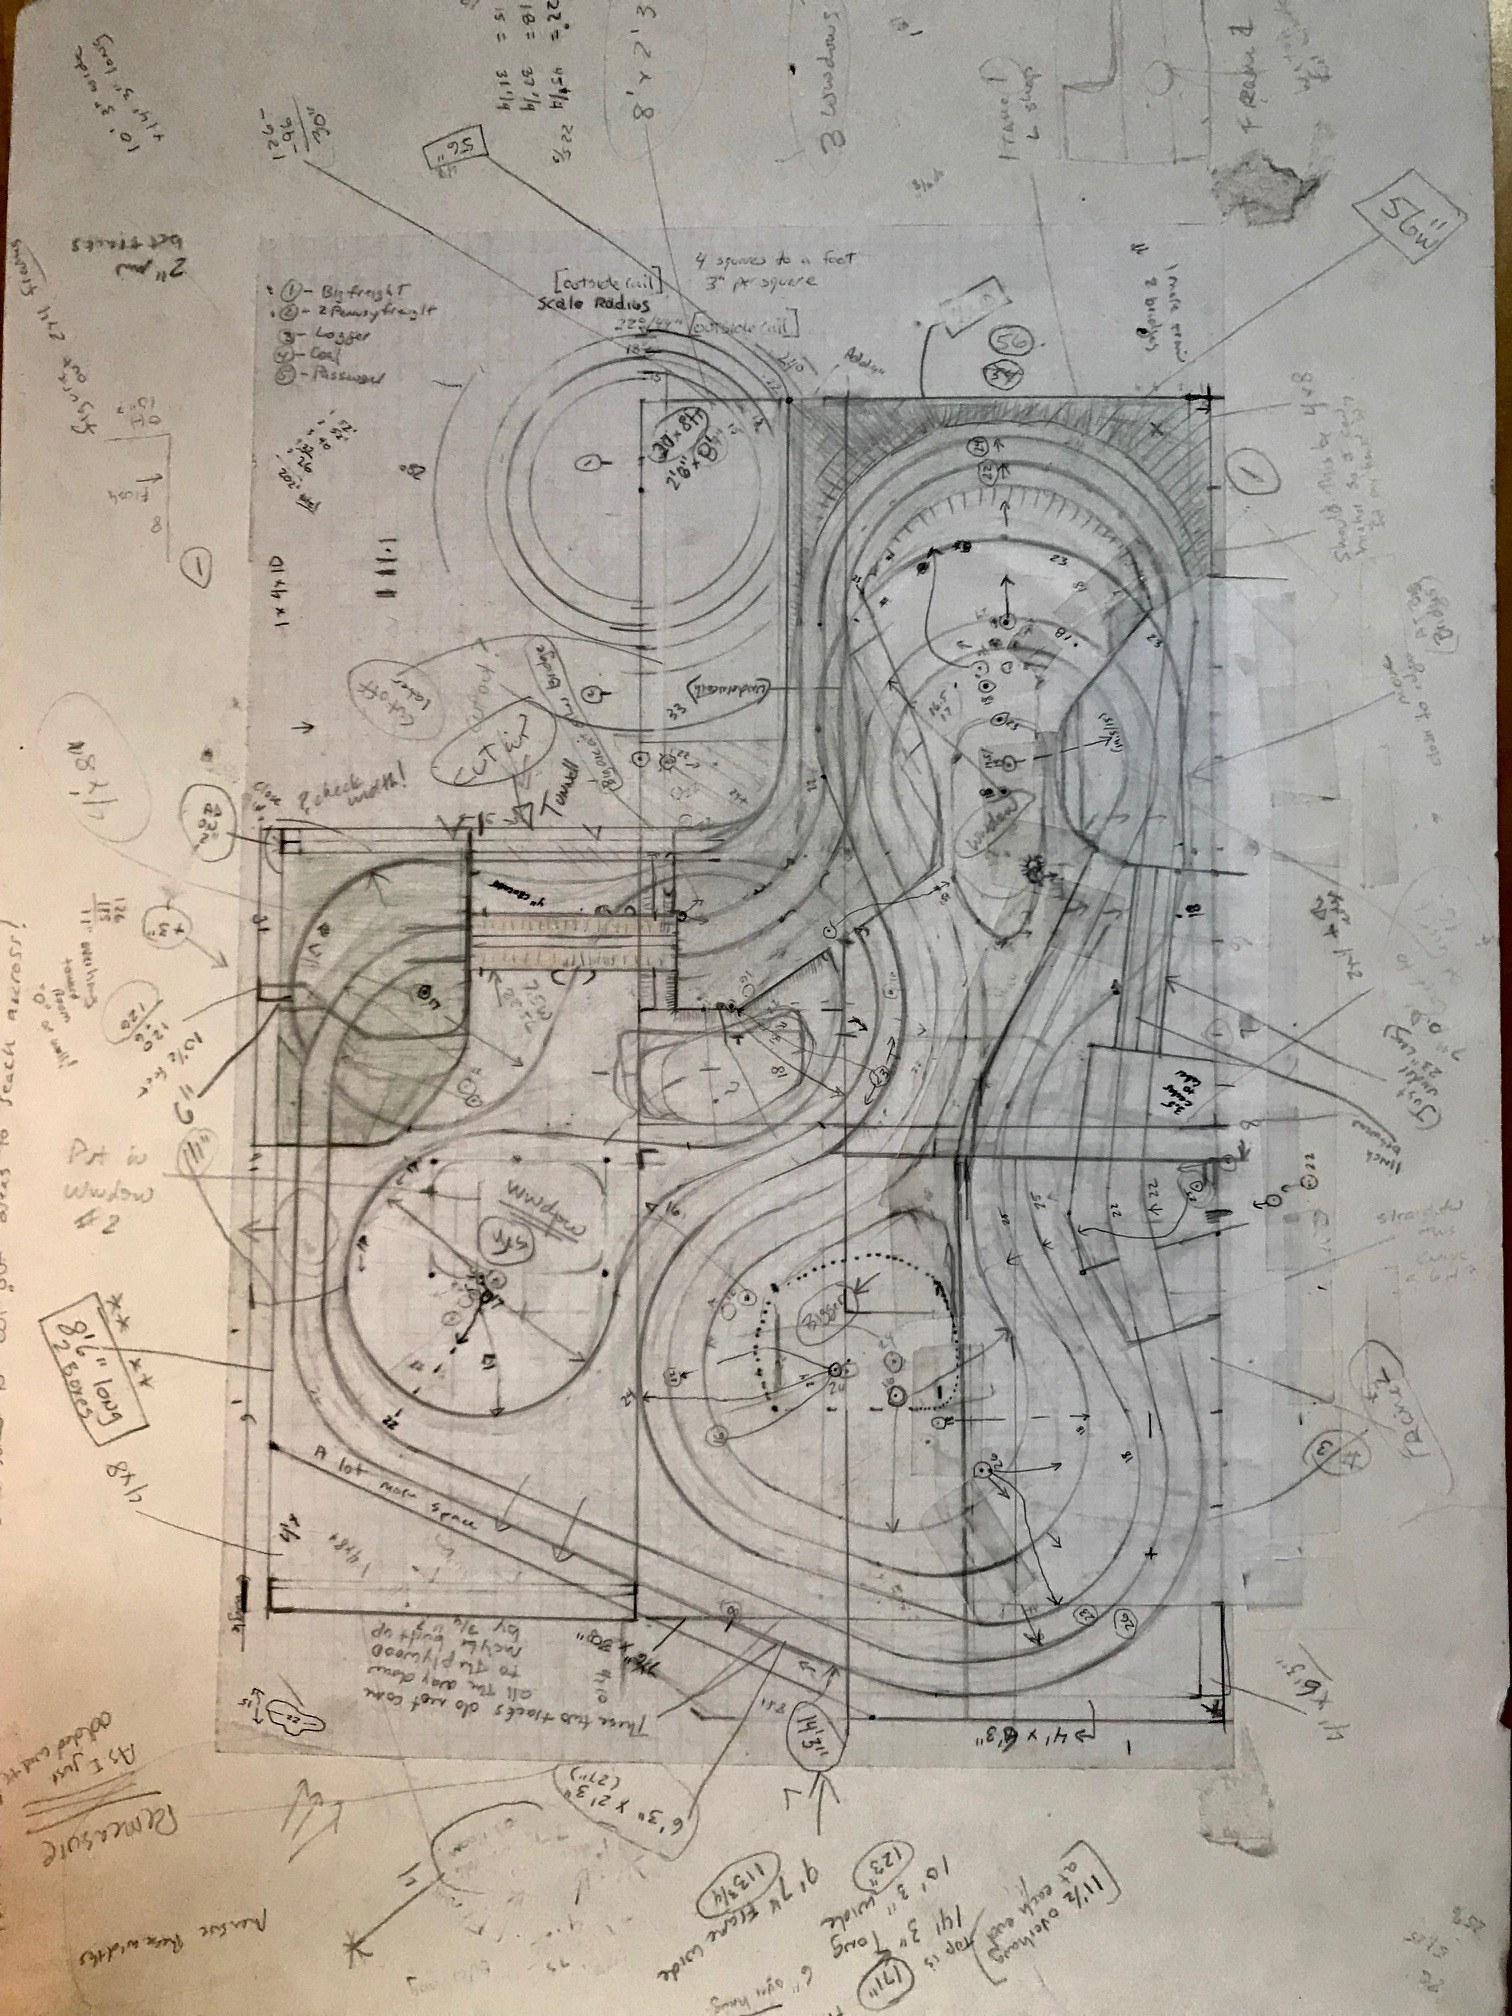
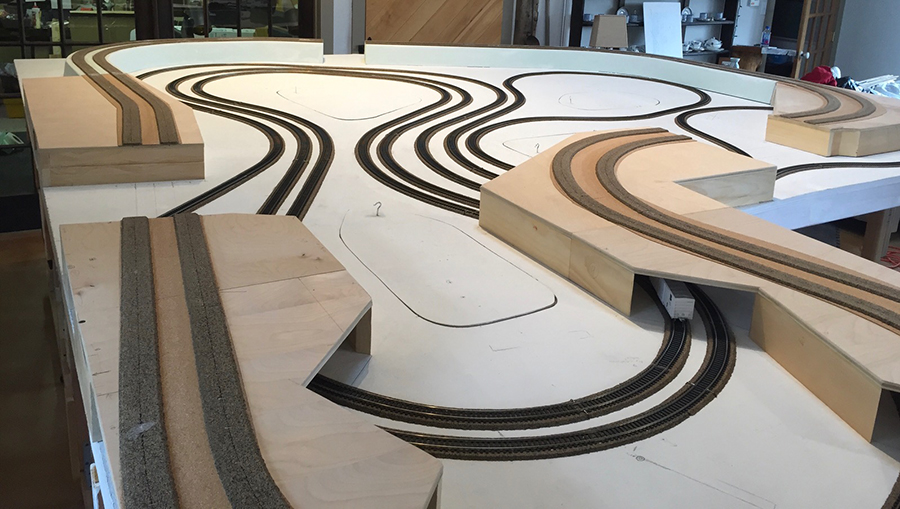
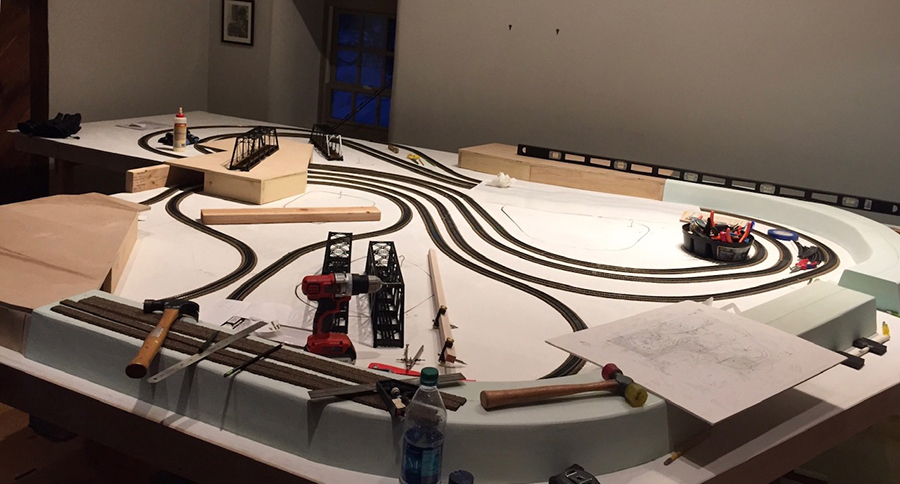
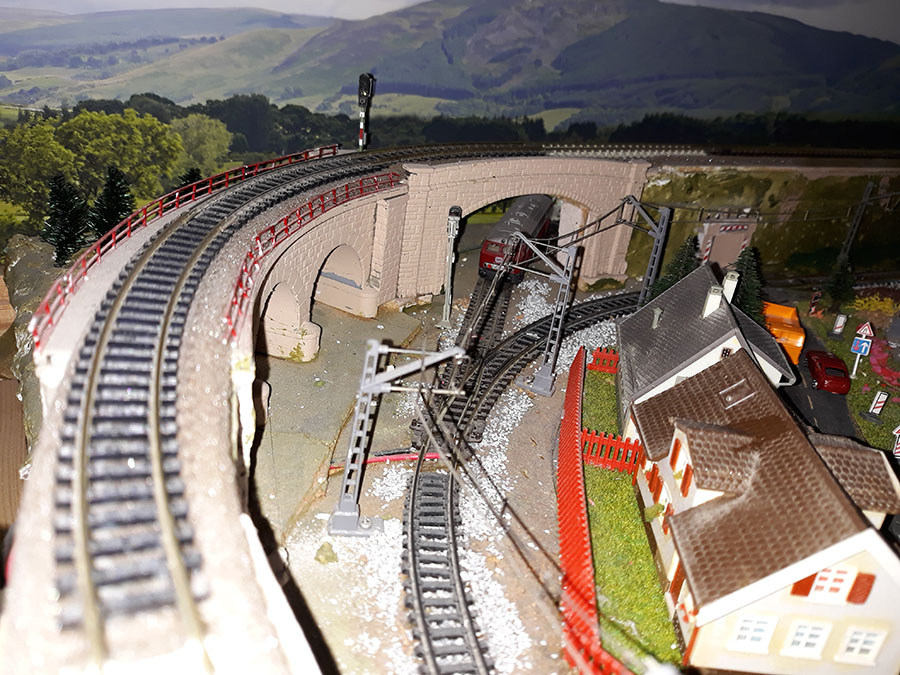
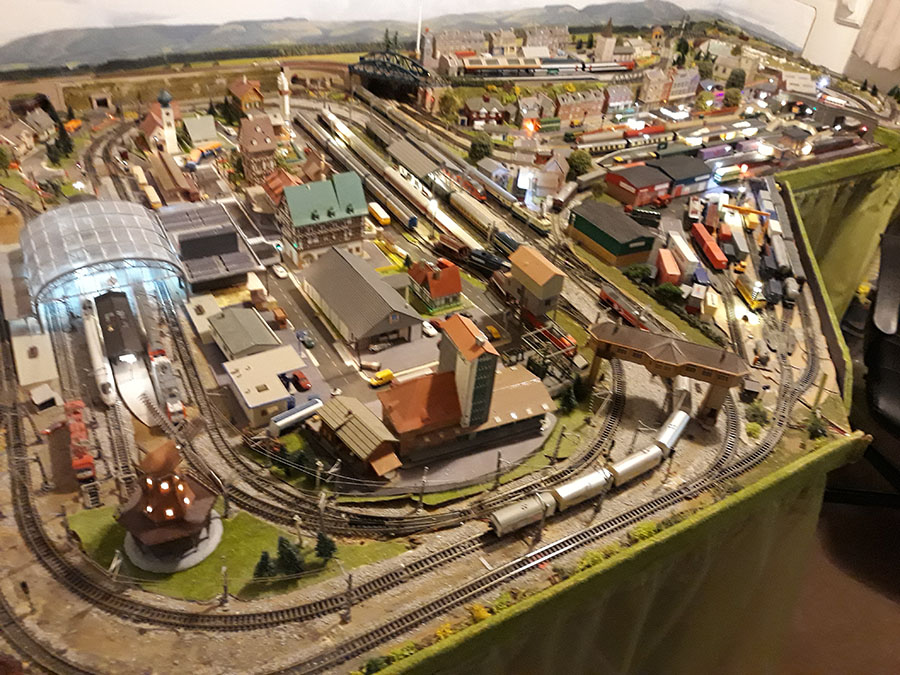
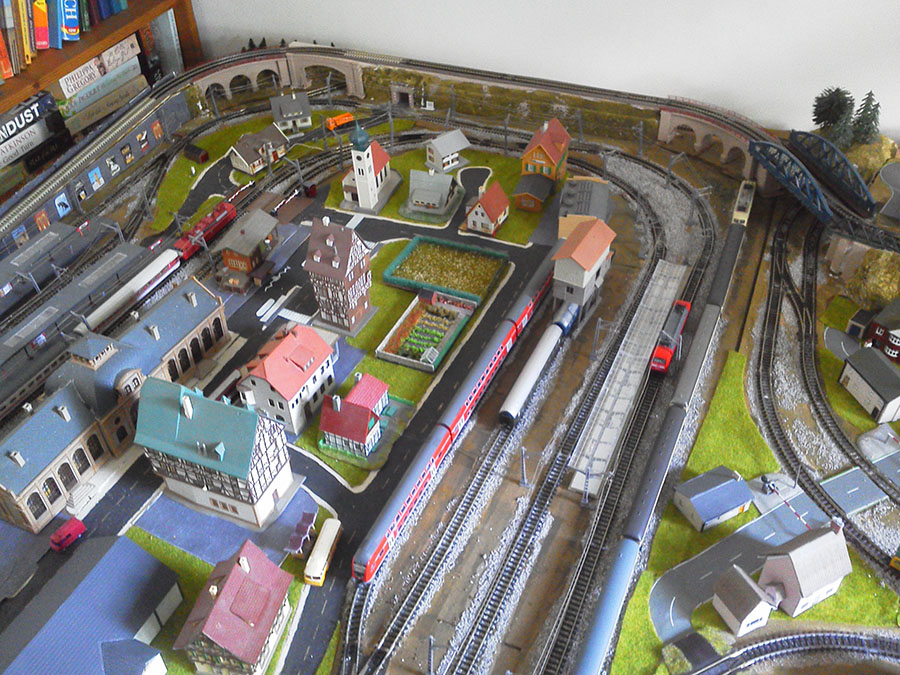
I went for a layout on two levels which would provide variety with five circuits enabling a number of trains to run simultaneously.

N gauge model railway track plans

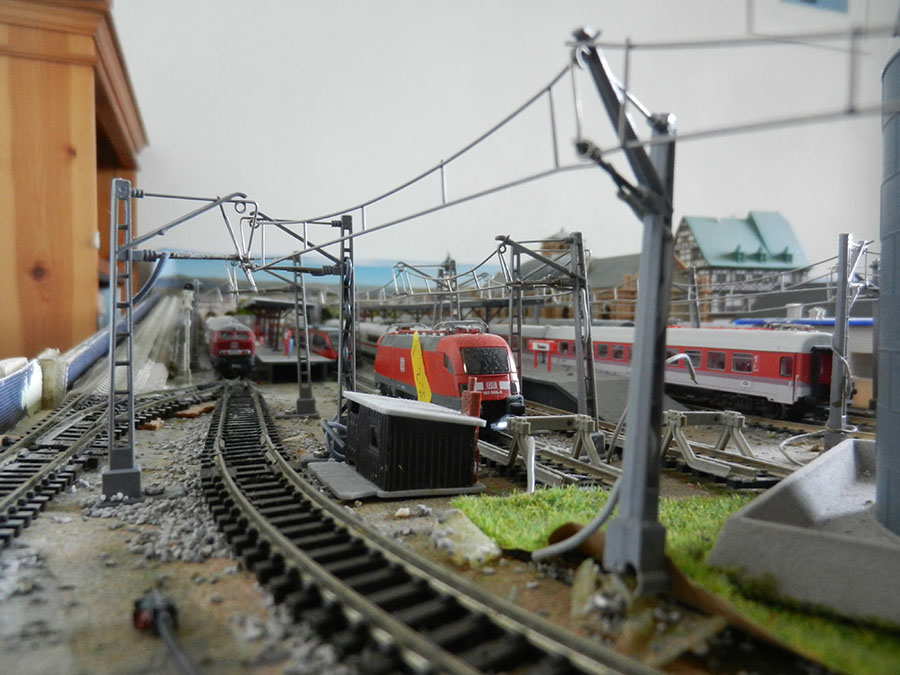
Judgement of my modelling skills I will leave to fellow members of this group but it was great fun. Oh and early on I decided to introduce non-working overhead wiring to the German section – not particularly good for the back. Laying third rail for the Southern was relatively easy by comparison.

N gauge diesel locomotives

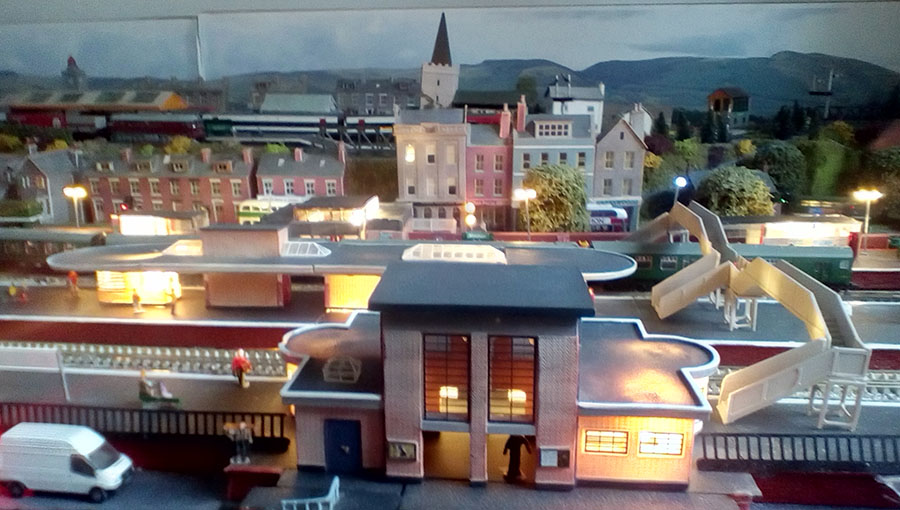
As to the electrics, starting off my knowledge was confined to the ability to change household light bulbs and fitting three pin plugs! The basics of wiring the layout were actually relatively straightforward. The decision to light buildings and streets came as a result of seeing what was possible after visiting a number of model rail exhibitions

N scale LEd lights


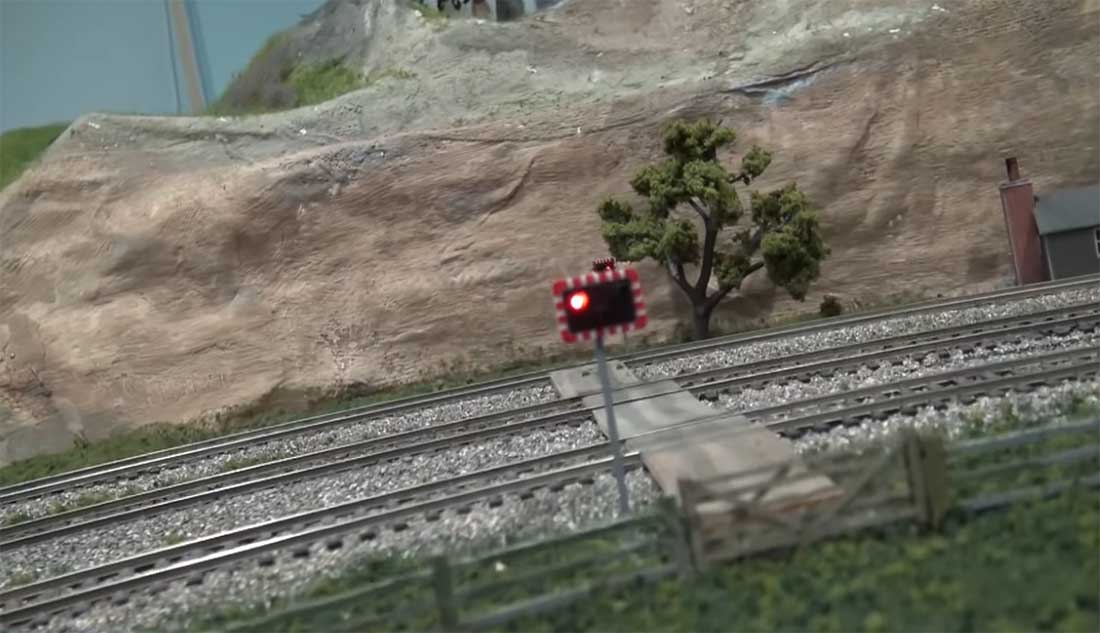
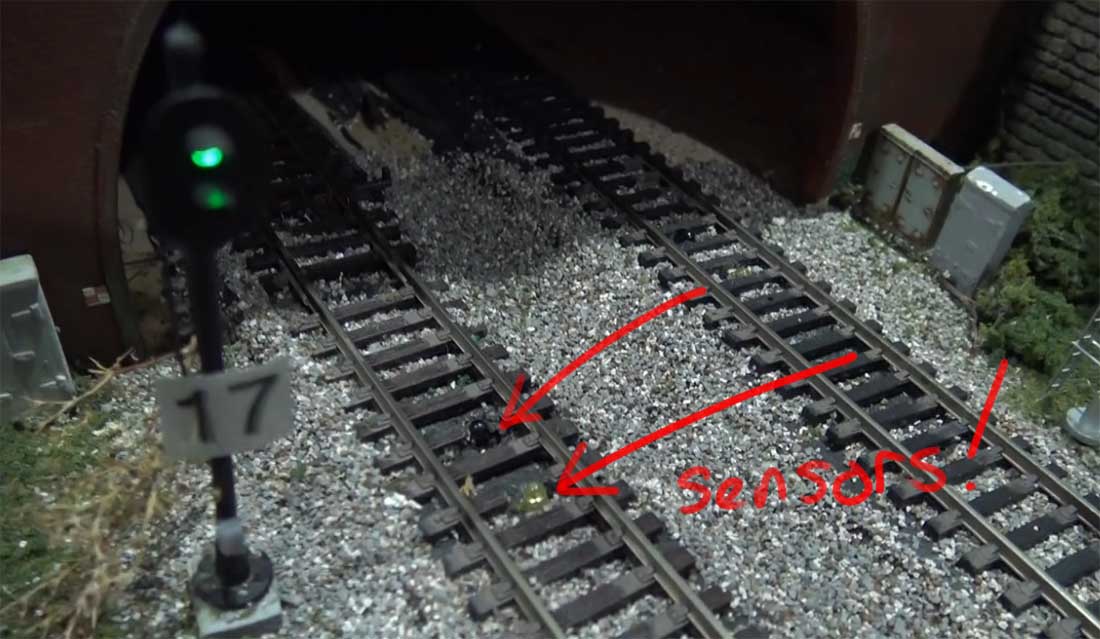
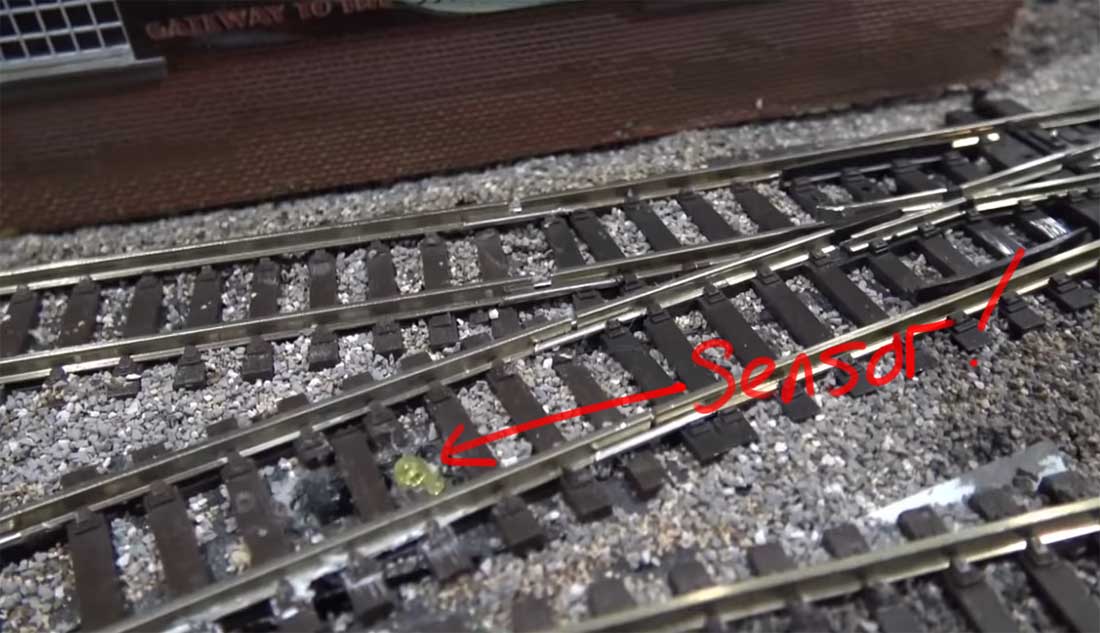
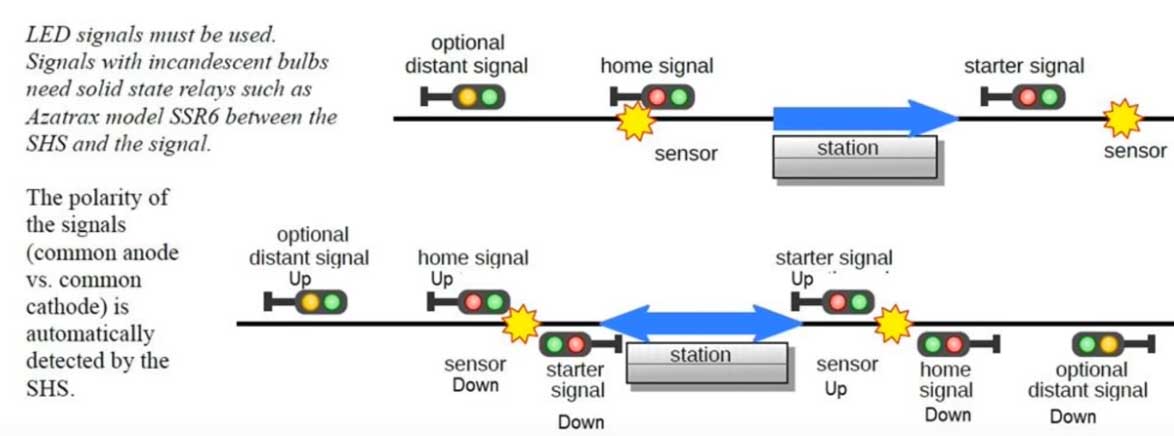
I would caution against going to the next stage of introducing working colour signals and traffic lights as I did, not least because the wiring for LEDs (cathode v anode) differs in the UK to the rest of the world (something it took me several months to discover).

Adding electric points (turnouts) for hard to reach areas followed. The other hard lesson learnt is test lighting/wiring before installing it! And I still need to get round to organising the wiring.

N gauge bridge

My local shops in Essex, John Dutfield in Chelmsford and Plus Daughters in Basildon have been incredibly helpful and I would always argue for shopping at a local stockist before opting for online.

In addition, exhibitions, Layouts 4U and Block Signalling have proved invaluable in aiding my exploits.

N gauge model railway track plans

I’m part way through writing a manual for the layout because there is so much that requires documenting which I’m happy to share if it ever gets finished!

And layout development is not over. I’ve applied my limited lifetime programme management skills to bear and been quite ruthless in making changes – buildings have gone, stations replaced and tracked uprooted.

My next project is to build a fairground on the Aldi car park site – the problem is obtaining an all singing and dancing motorised ferris wheel which is out of production … but I’m still looking.

N gauge electric train

N gauge model railway track plans

I hope that this has provided a bit of an insight into the trials and tribulations experienced over the past six years!

All the best

Peter”

A huge thank you to Peter for adding to the N gauge model railway track plans collection – a wonderful narrative too. Very much looking forward to his updates. Superb stuff.

That’s all for today folks.

Please do keep ’em coming.

And if you want to make a start, just like Peter did, the Beginner’s Guide is here.

Oh – I don’t forget the ebay cheat sheet too, it goes mad this time of year.

Best

Al

PS More N scale layouts here if that’s your thing.


Model train crossing signals

Hall of fame member, Rob, has been in touch. He’s made a video on model train crossing signals.

There’s also a wonderful cab ride at 12 minutes in to it – stunning stuff.

Before that though, he shows how the sensors detect the trains, and how he’s hidden them too.

It’s clever, but simple stuff, if that makes sense.

What’s more anyone cans see it looks fun, and for me that’s the main reason why this hobby appeals to so many.

If you’re not enjoying yourself what’s the point.

Some like to run trains. Some like scenery. Some like scratching their heads over wiring diagrams:

“Hi Al, this video is about a system that signals a station for bi-directional traffic on the line.

It was purpose designed. The instructions are clear. I installed this system on my freight line which operates as a single line. It is a great system and fun to operate.

There is nothing on the market that I know of that does what this does. I highly recommend it.

The operator can participate in dispatching trains or set it for single direction automatic operation and let it run on a small loop layout.

Rob”

model train crossing signals

model train crossing signals sensor

model train crossing signals sensor

model train LED lights

model train crossing signals wiring diagram


A big thanks to Rob for sharing his model train crossing signals.

You can see from the cab ride how much time and care Rob has put in to his layout – I absolutely loved it.

It’s also another great example of how layouts with a theme always end up well.

That’s all for today folks.

Please do keep ’em coming.

And if today is the day you stop dreraming and start doing, the Beginner’s Guide is here.

Remember, it’s the start that stops most people.

Best

Al

PS Latest ebay cheat sheet is here.

PPS More N scale layouts here if that’s your thing.


HO scale model railroad – John’s

John’s HO scale layout is really taking shape:

“Hi Al, (From a longtime follower and great admirer)!

My love for trains started about 60 years ago and some of the trains on my layout today are some of my originals as well as my wife’s.

That HO train hobby stopped when I got my drivers’ license and was rekindled when our first daughter was about five years old. That lasted for about another 10 or 12 years when my wife packed everything up and neatly put them in the attic.

When the third generation was coming for Christmas about five years ago my oldest daughter called and said “Dad why don’t you put up the trains for the kids!” Luckily the trains were still in good shape and I had about six weekends to build a 4 x 8 layout. When the kids showed up for Christmas, it became immediately obvious that it was all worthwhile.

After the holidays I realized it was time to build a much larger layout. And I will admit it was not only for the kids!

My HO layout is called the Wismer Valley Line. The following objectives informed my plans:

1) Replicate to the extent possible, very long American freight trains, pulled by multiple locomotives, up long grades.

2) Focus on the specific shape of the plan and get as many trains as possible running concurrently.

3) Incorporate the vintage trains into the plans. FYI – The major Railroads on the layout are from areas of the country where my three daughters have lived as adults.

Maybe as important as anything, make my own rules. e.g. It’s OK to have the Pennsylvania RR running alongside the Union Pacific, at least in my barn!

The first thing I did was get your beginners guide!! This is a tremendous resource even if you have previously built train layouts.

Secondly, was to find someone local willing to give me ad hoc advice. This advice began with the key suggestion to avoid grades (especially curved ones) if I wanted to pull long freight trains and avoid derailments. I opted for a bi-level layout. Overall size is approximately 17 feet long and 11 feet wide at the widest point. The shape was dictated by the interior of the space including doors on either end.

The longest freight train, on the upper level outside track is pulling about 60 cars, using four locomotives (NO dummies!) in tandem (over 30 feet in total length). The rolling stock are from the late 1950s the early 1980s and the past five years (which included additional vintage railcar purchases on EBay).

I rebuilt about 100 of the vintage cars installing (Kadee) couplers and well machined wheels, along with new trucks when necessary. The wheels are critically important for long trains in order to minimize drag.

In planning the layout, as can be seen from the plans, I spent a lot of time working on the maximum radius that could be attained by each track. I am surprised to see that more of your readers have not mentioned this issue as longer locos simply can’t make it around tighter curves. Maybe it was just the unconventional layout combined with this many trains that created the issue. My original plans turned out to be invaluable as I used them constantly to measure and adjust the radius of each curve.

The deck is, bottom to top, plywood, Homesote, cork and then the tracks. All seams taped and spackled. Total weight exceeds 600 pounds.

My biggest engineering challenge was the concrete floor in the old outbuilding on our farm. It is neither flat nor level! The solution was to overbuild and use 24 heavy-duty casters so the entire layout can be pulled out from the wall to allow for total access. There are also 4 cutout/lift-out windows (which eventually will be disguised by scenery), where I go underneath and come up out of the hole, enabling me to reach every square inch of the layout.

I spent significant time making sure everything was as level as possible, despite the uneven concrete floor. When working on it, it is pulled out from the wall about 3 feet. When running it, it’s back in the corner. With all those casters, once I get them going in the same direction, it’s not too bad to move; and they have the added benefit of finding their own version of level.

The deck is 43 inches off the ground. If I did it over again it would be a couple inches higher to allow for easier access.

I’ve included a few photos of the plan, and build out as well as a video of the six trains moving at the same time, and a short video of how I test the track.

Original plans and beginning construction:

HO scale track plan

HO benchwork

Construction continues:

HO scale bench


HO track

Laying track HO layout

Up and running:

HO scale steam locomotive

HO layout steam engine

HO track plan

Trains running:


Final notes: With all of the wiring required for the six separate train lines I wanted to make sure that the tracks were really laid down properly, before I commenced with the wiring. As you can see from the short video, I push one railcar and see if it makes it all the way around the track (approx. 40’) with no problems. I also listen carefully. Sound will tell you if there is something loose or out of alignment. Better to discover this, BEFORE you do the wiring!

Al, thanks again for this wonderful service you provide for all of us. So much of what you show is the perfect combination of sheer genius crossed with amazing creativity. Inspiring!

Jonathan

P.S. Now it’s time for the ballast, hills, sage brush, and maybe a few sidings, if I can fit them in etc. Perhaps I did this a bit out of order, but I really just love rebuilding old running stock and operating the trains!! You might ask, why not DCC? Well it is quite simple, all of my locos are DC and I don’t particularly care for new technology. Much of what I make these days is with hand tools (not electric). I have rushed for most of my life and find that making things by hand slows me down just enough to think about what I am doing…… before I do it! If that sounds like a rationalization, sobeit.”

A huge thanks to Jonathan – what a joy to see all that rolling stock running.

Lastly, I know some of you had duff links to yesterday’s mail. Sorry about that. Here it is again if you missed it:

Model train wiring tips (Sunday’s)

And the day before too:

Alan’s 6×4 N scale (Saturday’s).

That’s all for today folks.

Please do keep ’em coming.

And if today is the day you get started on your layout, the Beginner’s Guide is here.

Best

Al

PS Latest ebay cheat sheet is here.