Model train roller test stand

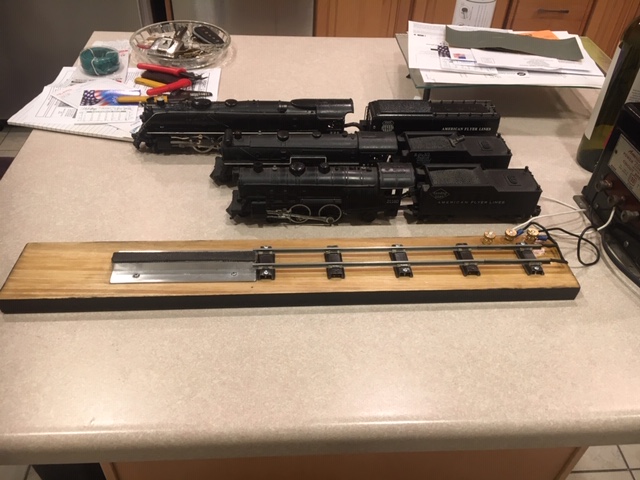
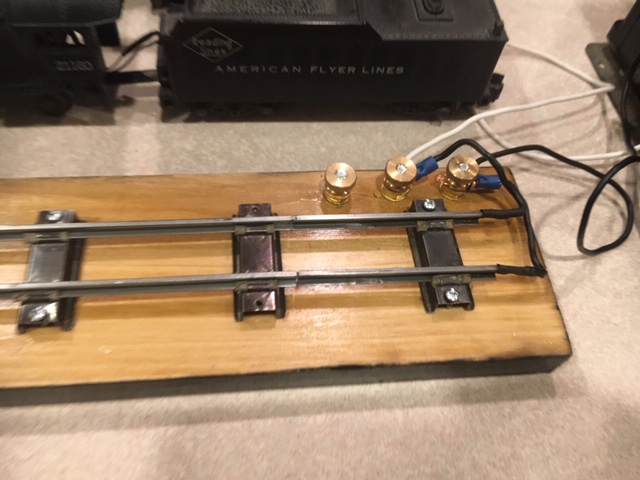
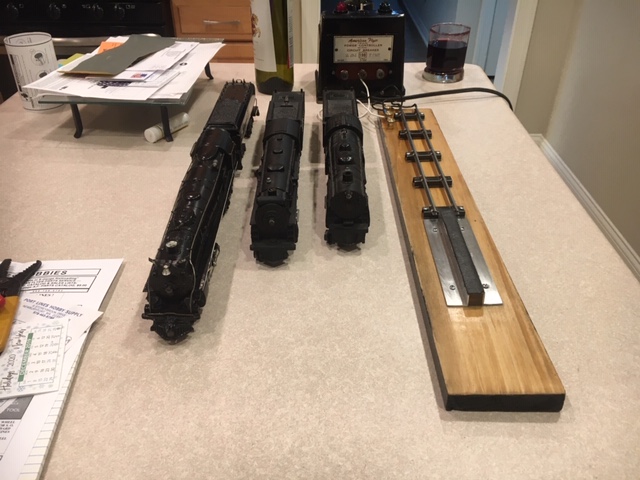
Rusty has shared the model train roller test stand he built:

“I have used several test stands and have had issues with most of them.

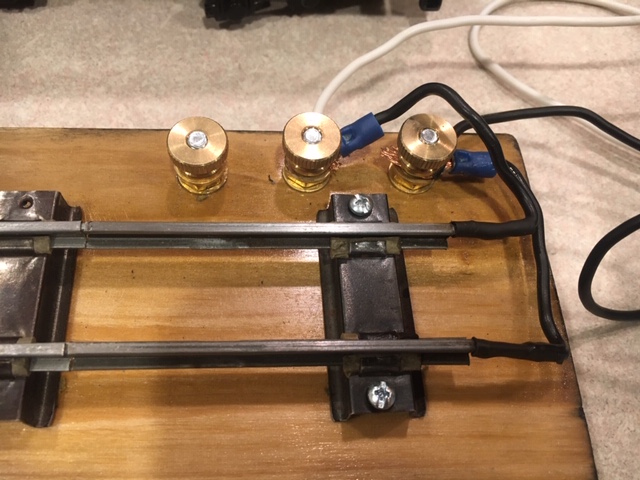
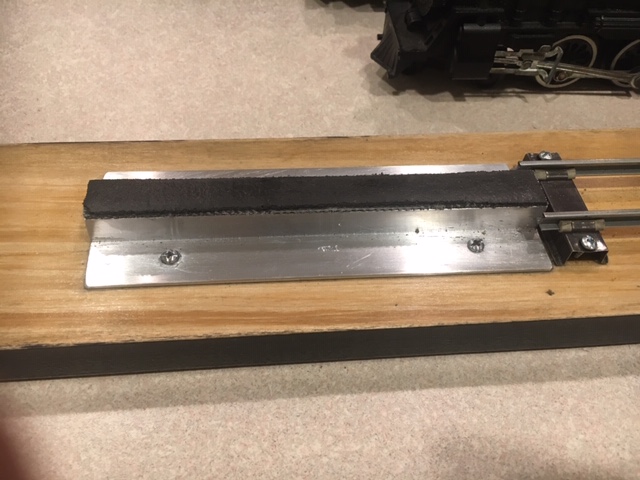
I made this in an afternoon for under $20. It has no moving parts, no adjustments needed.

It is a stable platform and works on any size locomotive.

Kind Regards

Rusty”

model train roller test stand

model train roller test stand

model train roller test stand

model train roller test stand

model train roller test stand


Latest ebay cheat sheet is here.

Now on to Gary. He’s made a fantastic contribution to blog with his posts (his last one is here).

But now, we can help him. He’s got a question:

“Hi Alastair…… I need some help with electronics…… here’s my problem:

I am trying to lower the voltage to my LEDs to dim them in my signals.

If I attach a 1K OHM resister to the positive side of the LED and connect it to a small 3 volt battery, the LED is dimmer then a LED attached to the same battery but without a resister.

One of the model railroaders who saw my engine yard layout, responded to my query about LEDs and resistors by saying to use a higher OHM resistor.

What I tried was daisy chaining a 1K OHM and a .5K OHM together. I put it on my multimeter and it registered 1.5K OHM….. great right?

When I attached the LED with the combined resistors to the same 3 volt battery…THE LED WAS BRIGHTER!!!

I do not understand that. Can anyone out there explain this to me?

Gary”

That’s all for today folks. Who can help Gary? Please leave a comment at the bottom of the page if you can.

And thanks to Rusty too for sharing his model train roller test stand. The simple ideas are always the best ones.

And don’t forget the Beginner’s Guide if you want to get going on your very own layout.

Best

Al


N scale port layout

Kaustav has been back in touch with his N scale port layout.

Have a look at his weathering – he’s done such a good job.

“Hi Al,

As promised, here is the last part of the barge project.

After weathering, I needed to bring the model to the finish line by adding some details. Of course detailing in N Scale is always difficult, but with a little bit of patience it is possible to achieve some interesting details in such a small scale as well.

The trick is to tie everything together in the end to tell a story, however short, so people can connect to the model and the scene.

I decide the broader story first and then add the details, and sometimes improvise on that broad story as I go. That way, I know exactly what details I want to add to the model – I think that’s important.

It not only gives you clarity of what exactly you want to achieve and show in your model, it also helps people connect to your work.

So, here you go with the 3rd and final episode of The Barge. Hope you and viewers like it.

Kaustav”

n scale port

n scale port

n scale port

n scale barge

n scale barge

n scale barge


Latest ebay cheat sheet is here.

A huge thanks to Kaustav for sharing his N scale port layout – I really do enjoy his stuff, and by the comments on his last few posts, you lot do too.

Weathering comes up a lot on the blog, it’s not usually on barges though, more locomotives and rolling stock, and a building or two.

(Kaustav’s last post is here)

That’s all for today folks.

Please do keep ’em coming because it’s getting a bit thin on the ground this end.

And if today is the day you get started on your layout, the Beginner’s Guide is here.

Best

Al

PS Latest ebay cheat sheet is here.

PPS More N scale layouts here if that’s your thing.


Model train coupler types

Dave has been in touch with some thoughts on model train coupler types. Clearly some are better than others.

I have to say, over the years, there is one brand that always comes up as best in the comments: Kadee.

Dave is also now in this camp as you’ll read, and best of all, he is now derailment free!

“Hi Al,

Well after the great response and comments for the advice wanted re my derailments with the Pullman coaches ( and a lot also said having same problem ) with various couplings , I have found the solution.

I followed most of the suggestions and came up with the best answer, most suggested that I change to a different type of coupling mainly to Kadees which are very popular world wide.

I tried out the Bachmann pipe connection and this proved very good, but not the best for uncoupling after, so I ordered some Kadee large size 19 with NEM pocket fittings, and near perfect, just caused the one derailment at speed in reverse, as shown in the video.

Looking closely as shown in the video the buffers where just catching due to needing longer fitting couplings, causing the derailment, and now I have ordered some of the extra long size 20 which should solve the problem completely, but running forward with these as they are on size 19 not a problem…

Thank you all again for your suggestions in helping me solve this.

Here is my video showing fitting the new couplings and the results.

Regards

Dave”


Latest ebay cheat sheet is here.

A huge thanks to Dave for sharing his thughts on model train coupler types. If you missed his original post, it’s here.

Another post you may find useful if derailments are haunting you, is Mal’s:

How to stop derailments.

That’s all for today folks.

Please do keep ’em coming though, it’s very quiet this end.

And if today is the day you get started on your layout, the Beginner’s Guide is here.

Best

Al

PS Latest ebay cheat sheet is here.