Attached are some update pictures on the expansion of Grand Junction.
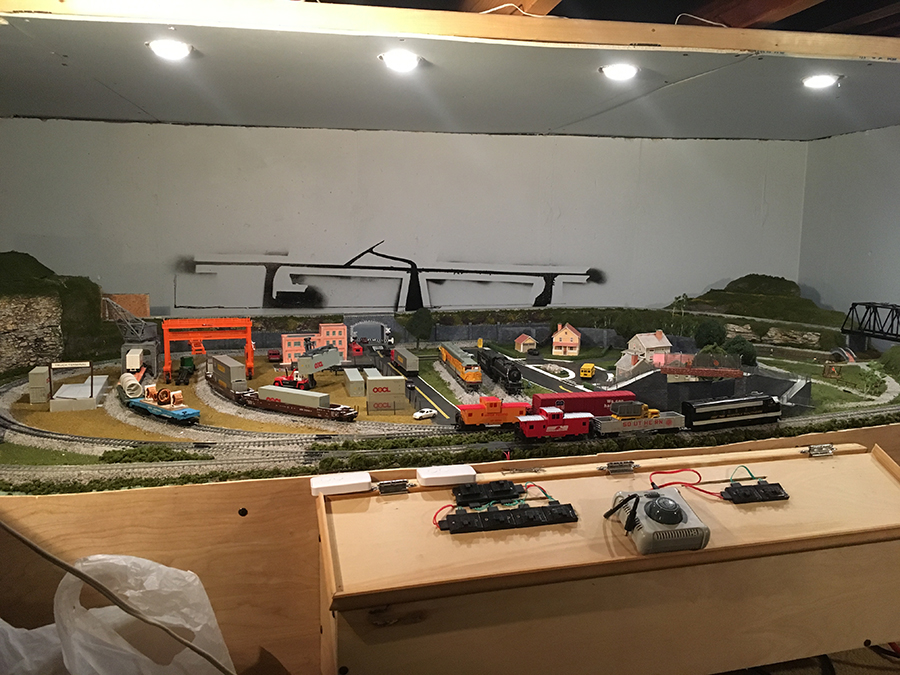
The first picture is the original 8’ x 4’ setup.
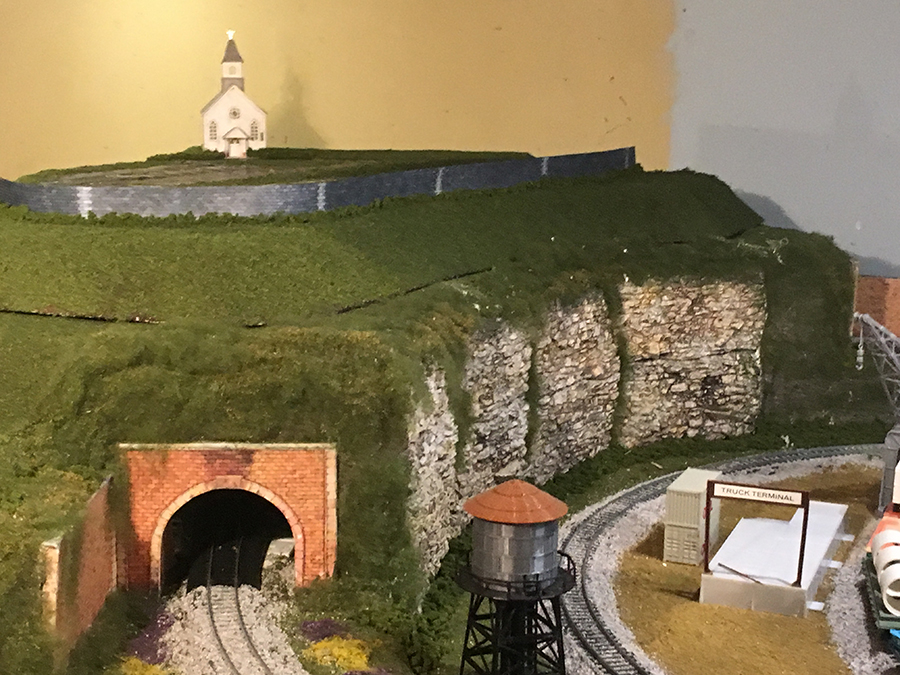
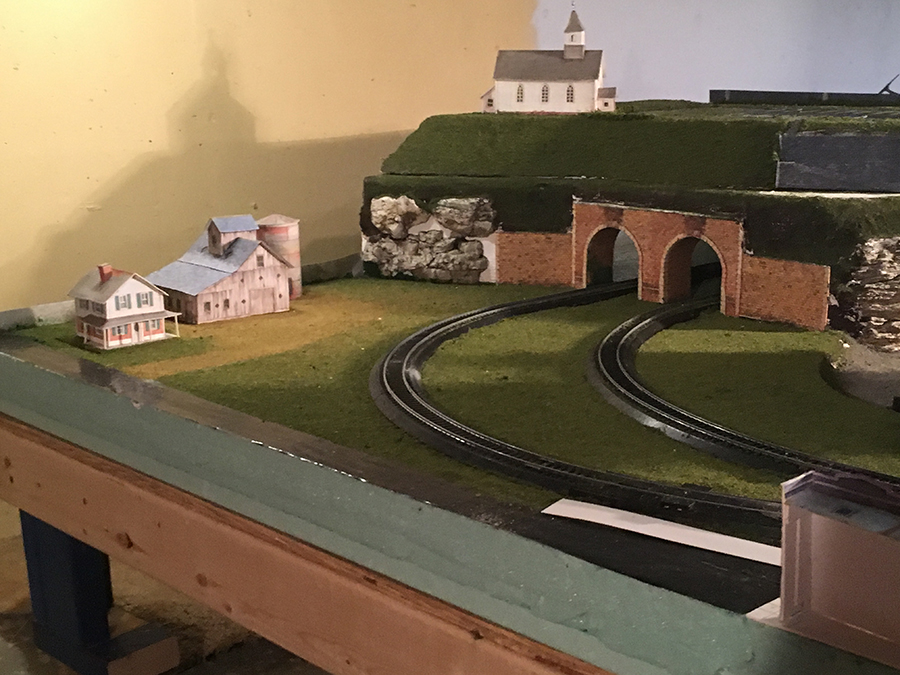
I added another 8’ x 4’ section to form an L-shaped layout in my 40” crawl space. I expanded the tunnel on the left to create a triangle of track under what is now a hillside church scene that will eventually have a wedding in progress. The entire hilltop comes off in case of train derailment.
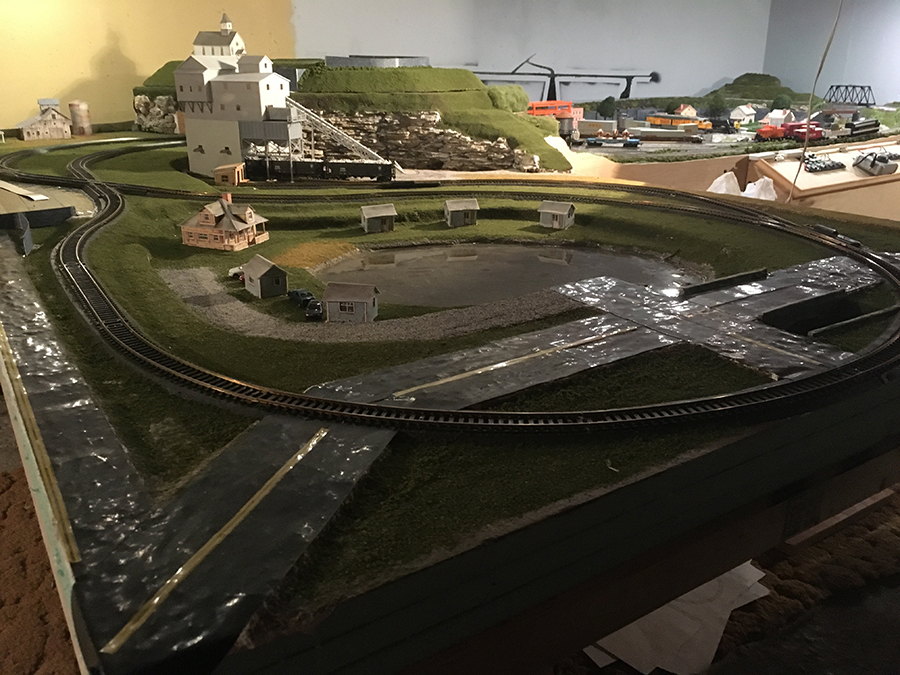
On the new expansion is a gravel construction site, a camp around a lake with several cabins for rent as well as a farm in the back behind the gravel site and the town. The entire setup is on wheels so I can get around the back of the layout for repairs and maintenance.
The landscaping (mostly trees) is next on the punch list and we still need to ballast the new track and start adding people around the lake, the town and gravel site. As you can see, other than the gravel building and the water tower on the original layout, I’ve made good use of your printout buildings.
As always, thanks for posting these updates as I look forward to what the community is up to!
A few guys were concerned/apprehensive/disillusioned by Woodland scenics realistic water. I have used this product many times on various layouts, both mine and others and have never had any problems with the product.
Read and follow the instructions to the ‘T’ and no problem. It is all about preparation to get a good end result.
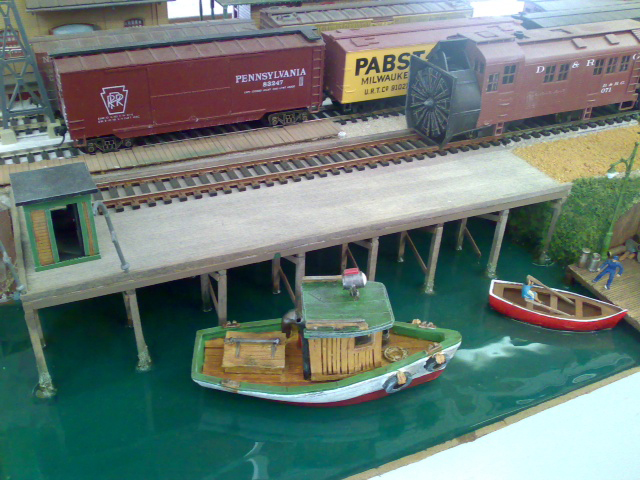
Below is a photo of the last harbor area that I built (about 14 inches by 12 inches with two layers of 3mm thick each, (Separate pours 24 hours apart). I did mix in a few drops of 100% acrylic paint to tint the clear water.
I had no air bubbles, shrinkage or any other problems.
To those who asked (in the previous post about my harbor “diorama”), it is not a diorama but a working harbor with industries that need goods delivered as well as goods collected on part of my layout. It is at the end section on my lower shelf of the layout as seen in the bottom right hand side below where the lighthouse is. This photo was taken before I started working on the harbor.
I hope this explanation helps to understand what my layout is all about.
All the best
Brian”
A huge thanks to Rick and to Brian for sharing his realistic model water.
It really is wonderful to see your layouts progress over the weeks and months.
What I love most about it, is nobody is in a particular hurry. You’re all just having fun at your own pace, and that’s what it’s all about.
Gary’s been in touch – he’s sent in this wonderful narrative of hand laying HO scale track:
“Hi Alastair:
My name is Gary (Elmont, New York, U.S.A).
I am a retired Pennsylvania Railroad Freight Conductor and I am attempting and just finished the first phase of my project which is to build a working model of the Pennsylvania Passenger Yard (Sunnyside Yards) (now Amtrak) in in Sunnyside, Queens, New York.
I am new to HO and wanted to share my experiences with the BEGINNER HO model railroader hoping that it will save them time, aggravation and money getting started and working with this hobby.
I have been following and really enjoy your emails showing different model railroad layouts and tips and information on the hobby. I want to show you what I have done and get your opinion.
This is really meant for the beginner HO Model Railroader, of which I am.
OK… Let’s get started…
I am not new to model railroading and like many people my age started off in the 1950’s with a set of O gauge Lionel trains which were given to me by my parents.
They only came out at Christmas time as we did not have that much room in our apartment.
When I got married and started our family and eventually bought our own home, I started using our unfinished basement as a place to set up the trains for my children.
By this time I had 6 sets of Lionel and many Plasticville structures, switches, crossing gates, etc.
But working as a freight conductor on the Pennsy, I wanted the layout to be somewhat realistic and I started working with switches and signals and blocks and having them work together.
My children eventually grew up and moved out living their own lives and were not really interested in the trains. So the trains were packed up and stored until November of 2017.
My niece asked me to help her son with his Lionel trains and so my wife and I went over to their home and my nephew and I spent the next 5 hours wiring under the table and building a model railroad on two Ping Pong tables put together. The bug bit me.
We came home and I got on YouTube and started looking at model railroad videos. I decided to get back into the hobby but Lionel (as much as I loved them) took up too much room so I made the decision to go with HO scale.
I did not just want to have some trains running around a 4×8 table; I wanted to do something realistic. An important piece of information you need to know is that as a freight conductor for the Pennsy and then the Penn Central and then ConRail (I retired after the creation of Conrail) I fell in love with the General Electric GG1. I actually worked on the original first built #4800 GG1, rivets and all.
I decided my layout had to feature the GG1. Before all the railroad mergers, I spent a lot of time as a freight conductor assembling the passenger trains in Sunnyside Yard and running them into Penn Station where they would eventually start their trips to either Philadelphia, Baltimore, Washington DC or Chicago.
I decided to model the Sunnyside Passenger Yard in HO scale but I did not have the room to build a complete model. SunnySide Yards had 31 passenger tracks, it had at least 10 engine yard tracks, it also had a Long Island freight yard west of the engine yard.
In the southeast corner of Sunnyside yards was a smaller freight yard which had a US Post Office Station which would load mail cars that would be attached to the front of the passenger trains and run down to one of the main cities.
I had to scale it down.
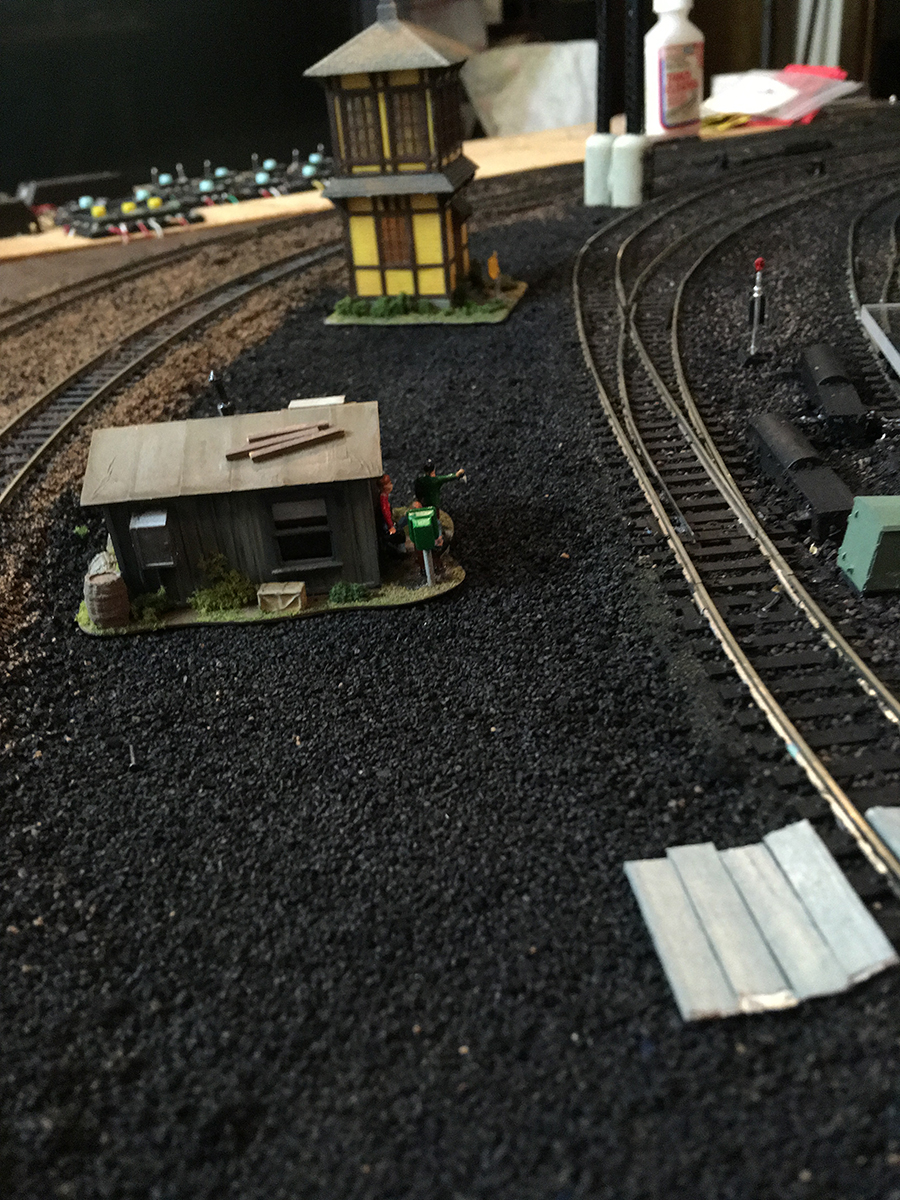
My project in HO was a 2 track main line which came from under the East River and looped around the east end of Sunnyside and into the passenger yard; 6 tracks for the passenger yard, Yard master Towers on the East end and west end, switchmen shanties throughout the yard, a large long commissary building built along track one, a few power and maintenance buildings and then on the north side of the commissary building the 10 track engine yard with a large two stall engine maintenance house and some maintenance platforms.
My layout would focus on the 2 track main line around the layout, the passenger yard, commissary building and some other buildings and the engine yard.
Little did I know how complex this was going to be. I have split the project into 4 phases:
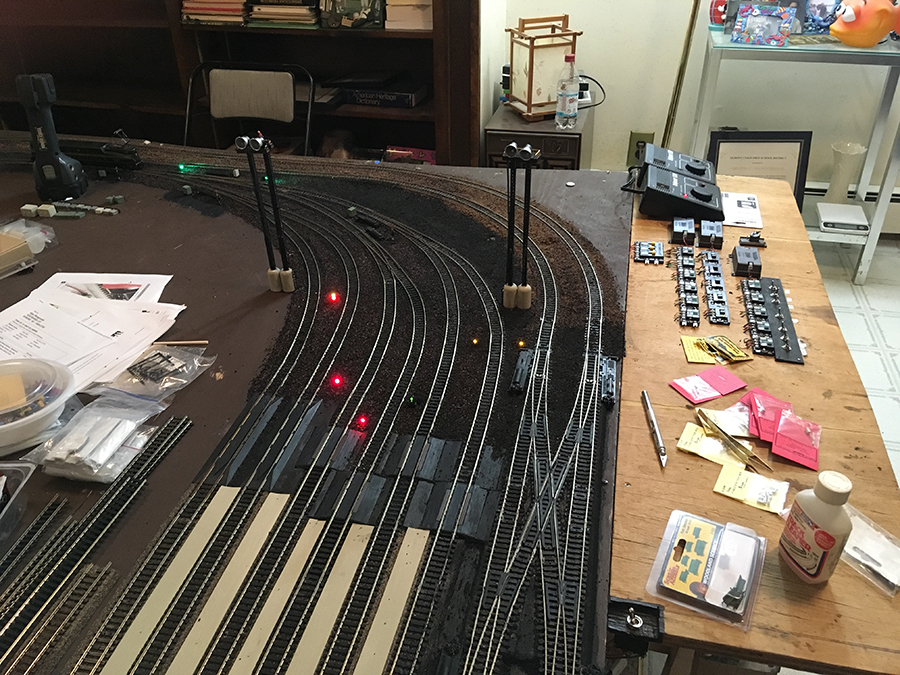
Phase 1 – Main Line and Passenger Yard (track work, switches, signals)
Phase 3 – Commissary Building area (the train crews, porters, cooks) were housed and work there preparing the passenger trains for their trips.
Phase 4 – Buildings, scenery, figures, etc.
I have just completed Phase 1 which has taken me almost 8 months mainly because of the following:
– I did not make a detail plan that included the wiring and connections
– I did not realize how precise the track work and turnouts needed to be laid out
– I had no experience with the electrical foundation that needed to be in place before I laid the first track.
After I started and during many derailments, and many electrical shorts and ripping up track work and relaying I realized that I could not do the entire project at once and I had to get experience in track work, ballasting, blocks, remote uncouplers, turnouts, road bedding, leveling, etc.
I decided to work on one section of the layout and complete my education for the above areas before I tackled the rest of the layout.
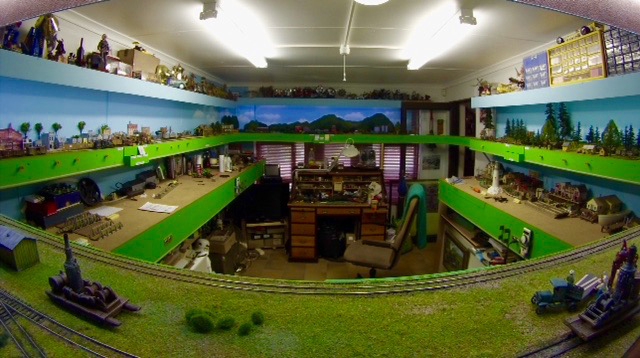
This is where I am now. Now when you look at the video and the still photos you will understand why it looks like there was not much done. But for me……… It was a lost of work; a lot of redoing and a lot of aggravation.
So with this in mind I will send you the still photos, the video and my experience and tips for the BEGINNER model railroad. I hope it helps someone.
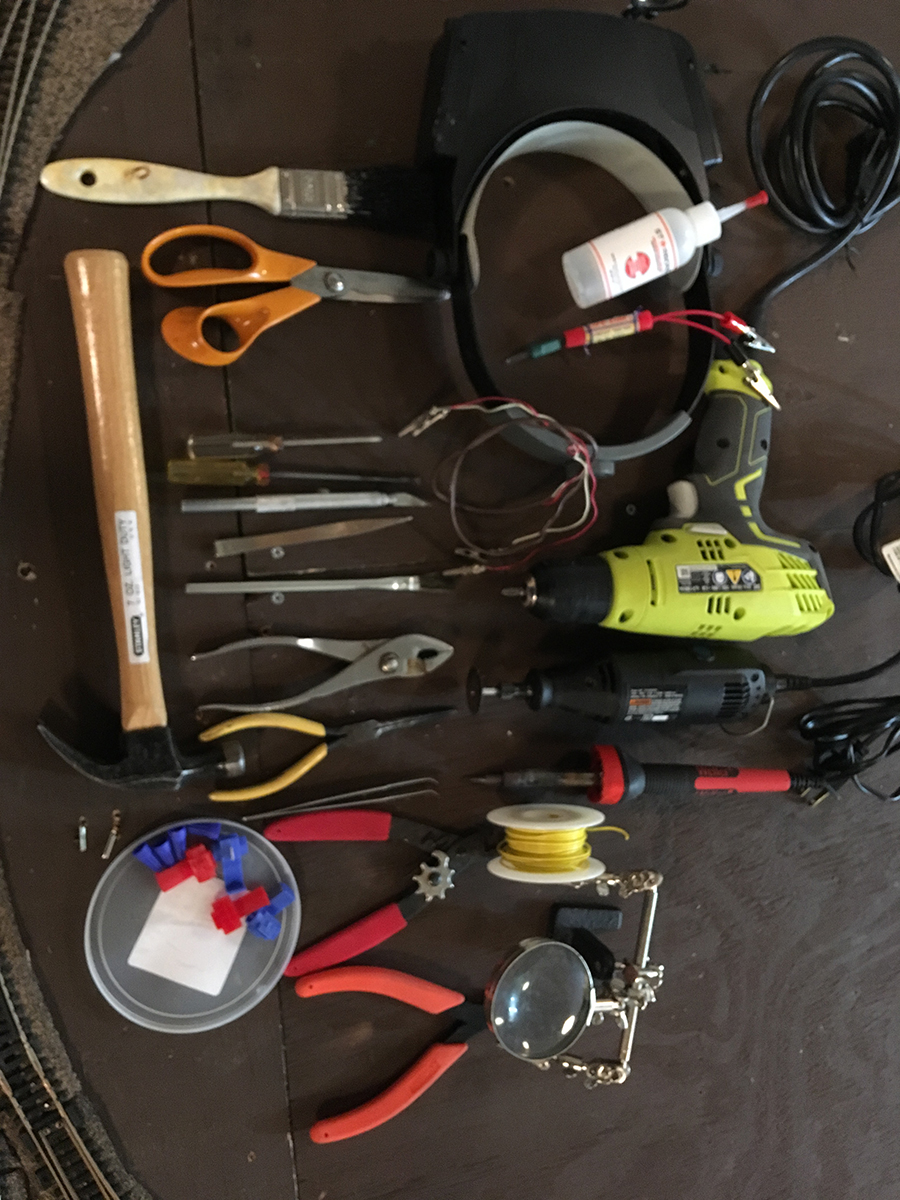
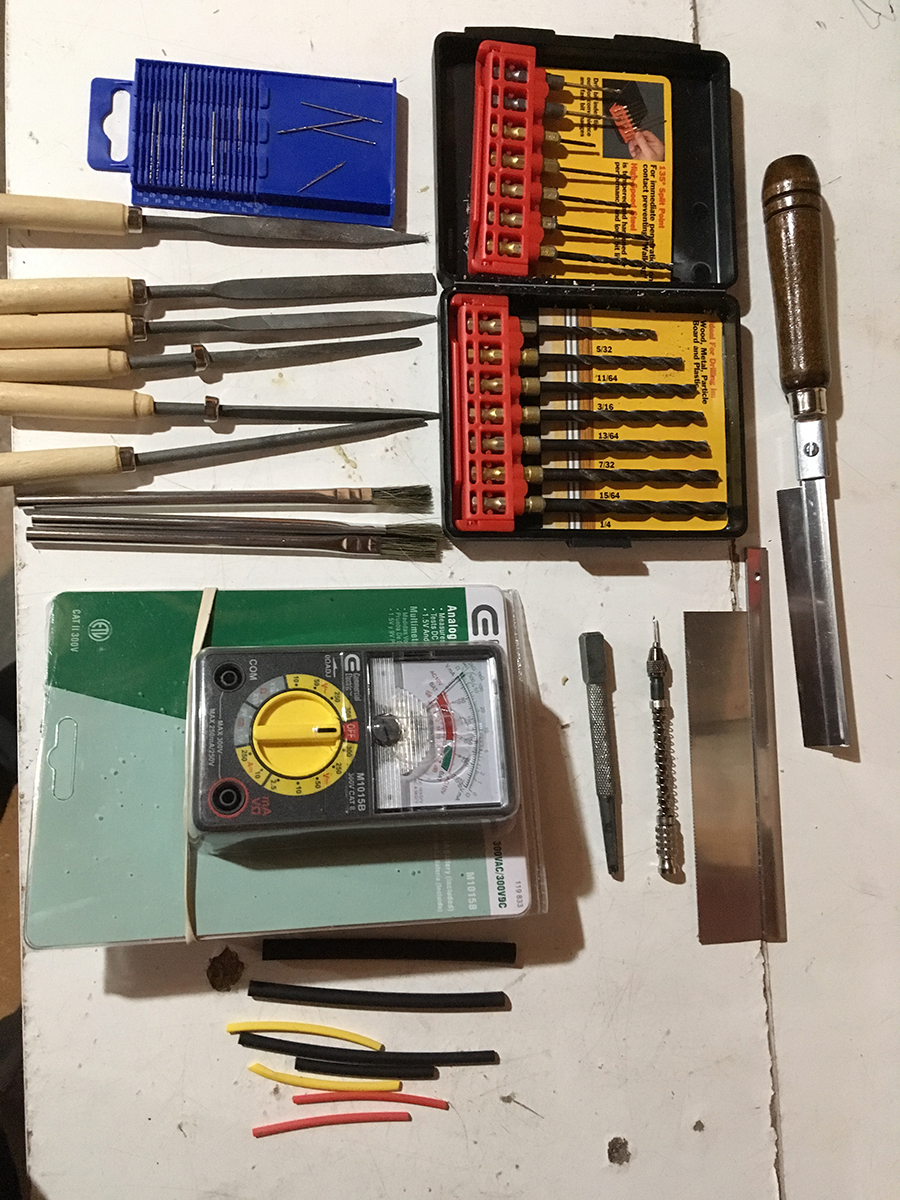
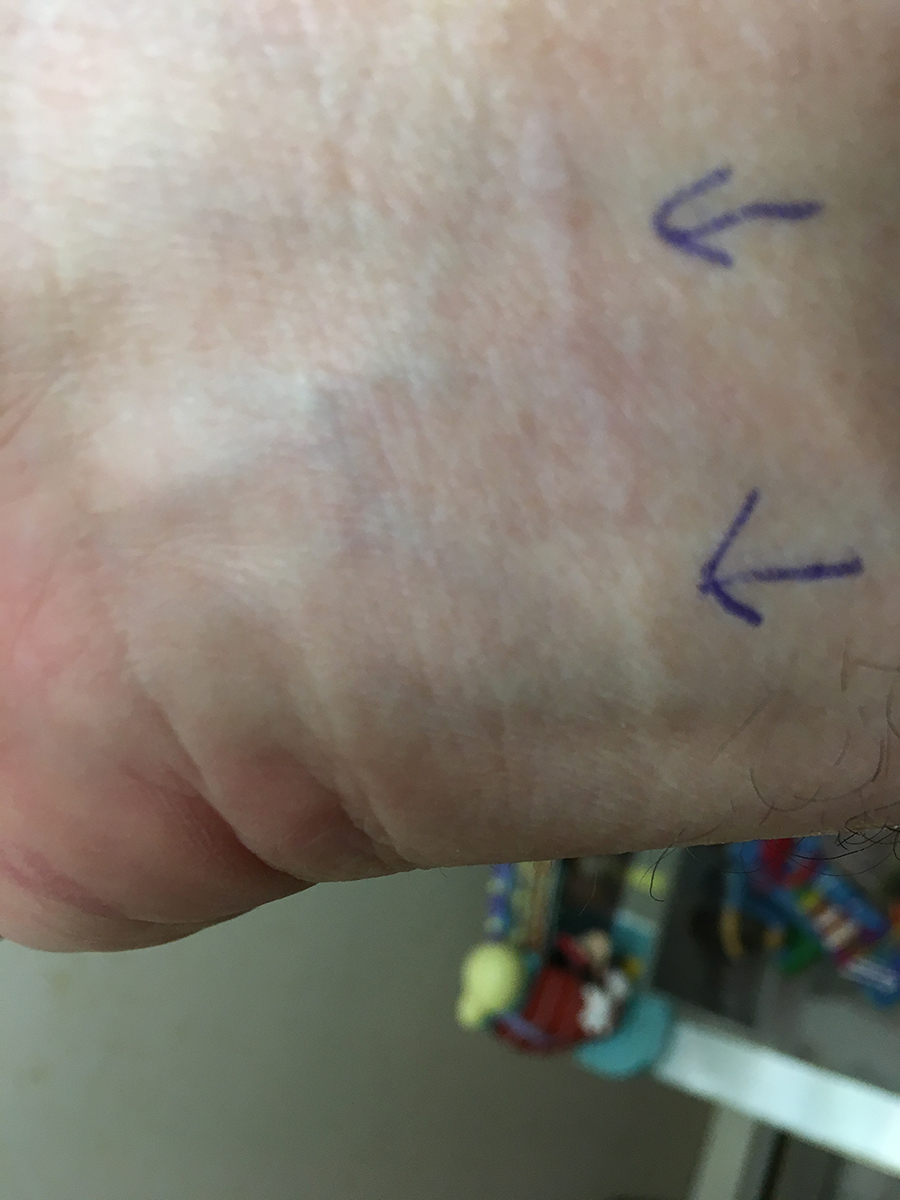
The pics: basic tools, under table wiring, layout stills, scar on wrist from hot solder from soldering under table (do not do this).
Hand laying HO scale track:
This list is the real reason I put all of this together; to help other BEGINNER HO Model Railroaders learn from my mistakes (and I made a lot and there are probably more to come). My mistakes cost me a lot of time.
When you look at my video, you say, “…what’s the big deal……he has a 2 track main line running around the layout with cross overs on each side; on the inside are 6 yard tracks with switches going into the yard and out of the yard……”.
Much of the track work and almost all of the switches were pull up at least once and re-laid. That’s why it really does pay to get your Hand laying HO scale track right the first time around.
The main 4 reasons are:
1) My project was to complex for the lack of experience I had;
2) I did not realize how different HO electrical was from O gauge;
3) I did not plan in sufficient detail
4) my track work was sloppy causing many derailments.
HERE is my list of Do’s and Dont’s: (not complete by a long shot)
DO PLAN: Before you buy your first engine or first track, make a detail plan that will include the track work, the electrical connections for switches and signals, major building and scenery components. Put in as much detail as you possibly can. Then:
– take that plan to you nearest hobby store or model railroad club that is using the same scale that you are planning and show them your plan.
– ask them what to watch out for.
– ask them the sequence that you should start building in; what to do first before you do something else.
– try using a model railroad computer package such as SCARM to draw your layout.
SCARM will tell you the size of your layout and give you an inventory of what and how many tracks you have to purchase.
– Utilize YOUTUBE and the internet. There is a mountain of information and videos tha will help you understand. Many people have posted how-to video’s such as “TOM TRAINS AND THINGS.
– call the manufacturers of products you think you want to use and question them. I have found many people that are into model railroading are more than willing to share there knowledge and experiences. IN SHORT – GET AS MUCH INFORMATION AS YOU CAN BEFORE YOU START SPENDING MONEY…….ITS FREE!!!
DO FOLLOW your plan
BE PREPARED that some things will not work the first time.
BE PREPARED for it to take longer than you planned.
BE PREPARED to work with very tiny objects.
DON’T DO SCENERY UNTIL ALL THE TRACK AND ELECTRICAL COMPONENTS ARE COMPLETED
HAND LAYING HO SCALE TRACK:
– MAKE SURE YOUR TRACK WORK IS 125% PERFECT!!!!
– MAKE SURE YOUR TRACK WORK IS 150% PERFECT!!!!
99% IS NOT GOOD ENOUGH
this is one of the main reasons why it has take me so long.
– MAKE SURE YOU LAYOUT TABLE IS LEVEL…..REPEAT……
MAKE SURE YOUR LAYOUT TABLE IS LEVEL
– MAKE SURE YOU TRACK WORK IS LEVEL
Above statements are not typos
– there is nothing more aggravating that derailments and having to walk around your layout to re-rail an engine or car that has derailed because of a track imperfection.
– Lay your track work out on a temporary basis to make sure it fits; it is what you intended it to be.
ELECTRICAL
– BEFORE YOU LAY ANY TRACK…….. run AC and DC buses under your layout so that you can use them as feeders of electricity when needed and you don’t have to run lines all the way back to you transformers.
DO work over your table. Everything is small. A screw falls off the table and you could spend a lot of time looking for it.
DO magnetize some of your screw drivers and small pliers.
DO get the right tools. I have supplied a couple of pictures of what I feel are the basic tools you will need. You will eventually wind up with more than these. A company called Micro Mark has a good supply for small tools.
DO as much work as possible on top of the layout table before you work under the table. Minimize the amount of time you must spend under the table.
NEVER NEVER solder under the table. I have supplied a picture of the scar on my wrist which I got from hot solder dripping down my wrist. I consider myself very lucky that the solder did not get close to a vein.
DO TEST………………..THEN RETEST WHEN YOU ADD SOMETHING
AND MOST OF ALL………….DO ENJOY IT.
As I work on my next section which will be the engine yard, I will give you an update and add any more DOs and DON’Ts that I find worth while.
If anyone has any DOs and DON’Ts they want to add, please let me know.
Eric’s added to the collection of N gauge model railways on the blog:
“Hi all modellers.
Welcome to my rather unusual contribution today. Normally we see people starting their layouts and giving progress reports as they go.
However this time the video is a striptease of my N gauge layout ‘The Smeedle Valley Railway’.
This took quite a while for me to construct but I think you will see why as I strip away the scenery to reveal my tracks below and how I build in accessibility as I go.
A layout is all very well but if you can’t get to the tracks below the scenery you will have problems, guaranteed.
You will also see my hands and twisted fingers that make building a layout a challenge and are one of the reasons I keep starting new layouts, to keep them working.
A lot of my present layout is made up of plaster panels that have been made to be removed as well as the boarded areas like the town and lake areas that lift away.
One funny bit occurs in the third section of the video when I try to remove a board that I had put a screw through and not realised it was there. The boards used are Sundeala compressed newspaper.
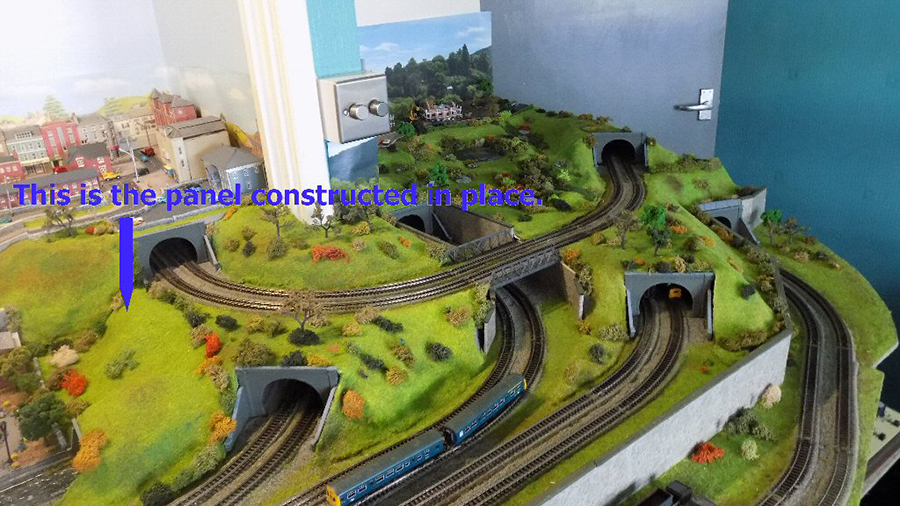
I hope this helps give an insight into what goes into construction and how I construct the plaster panels to be removable as seen in the four pictures below.
I make the panels as shown then paint with poster paint followed by adding various blends of grass, joins can be easily disguised with foliage, bushes and lichen.
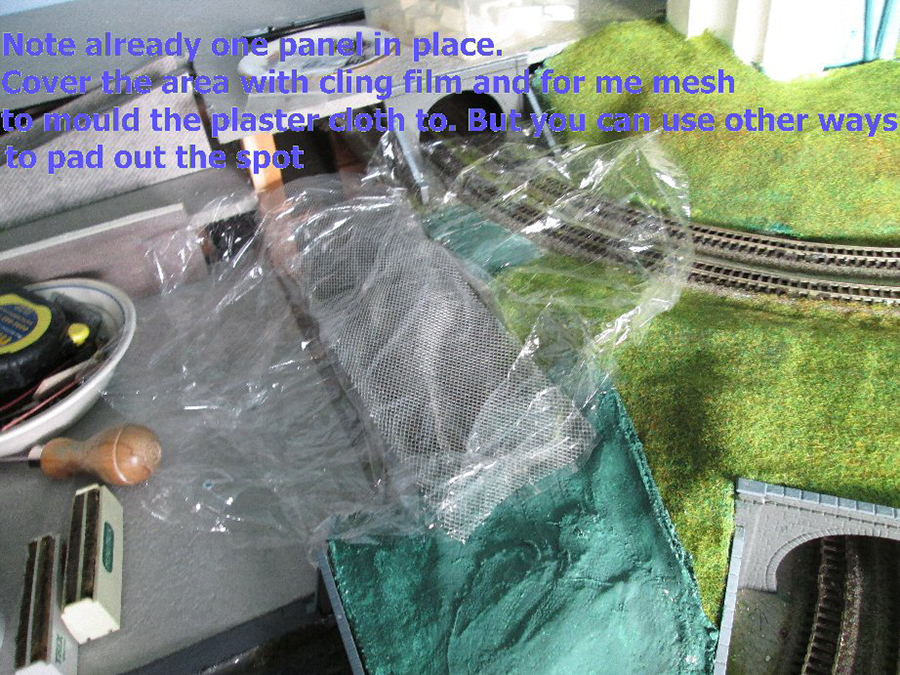
Note already one panel in place. Cover the area with cling film and mesh to mould the plaster cloth to. But you can use other ways to pad out the spot.
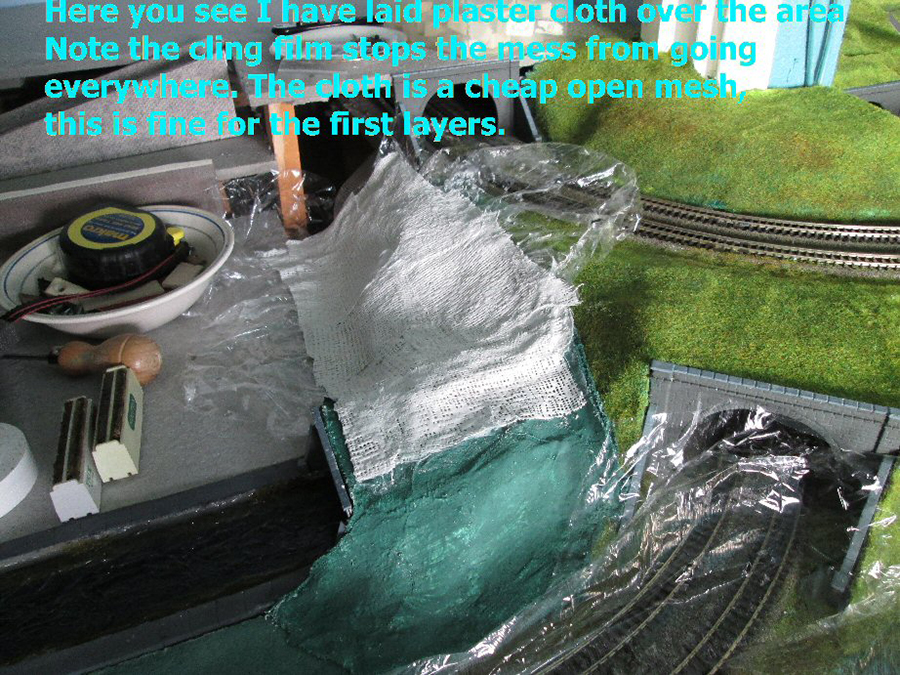
Here you see i have laid plaster cloth over the area. Note the cling film stops the mess from going everywhere. The cloth is a cheap open mesh, this fine for the first layers
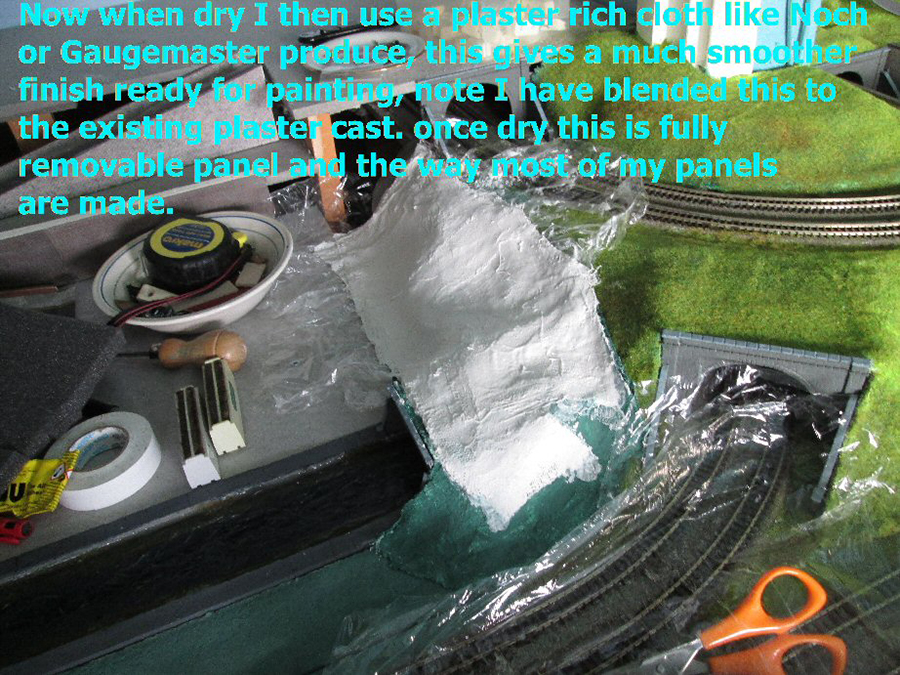
Now when dry i then use a plaster rich cloth like Noch or Gaugemaster produce, this gives a much smoother finish ready for painting. Note i have blended this to the existing plaster cast. Once dry this is a full removeable panel and the way most of my panels are made.
Hopefully this will give people a few ideas and get them started on their own layouts.