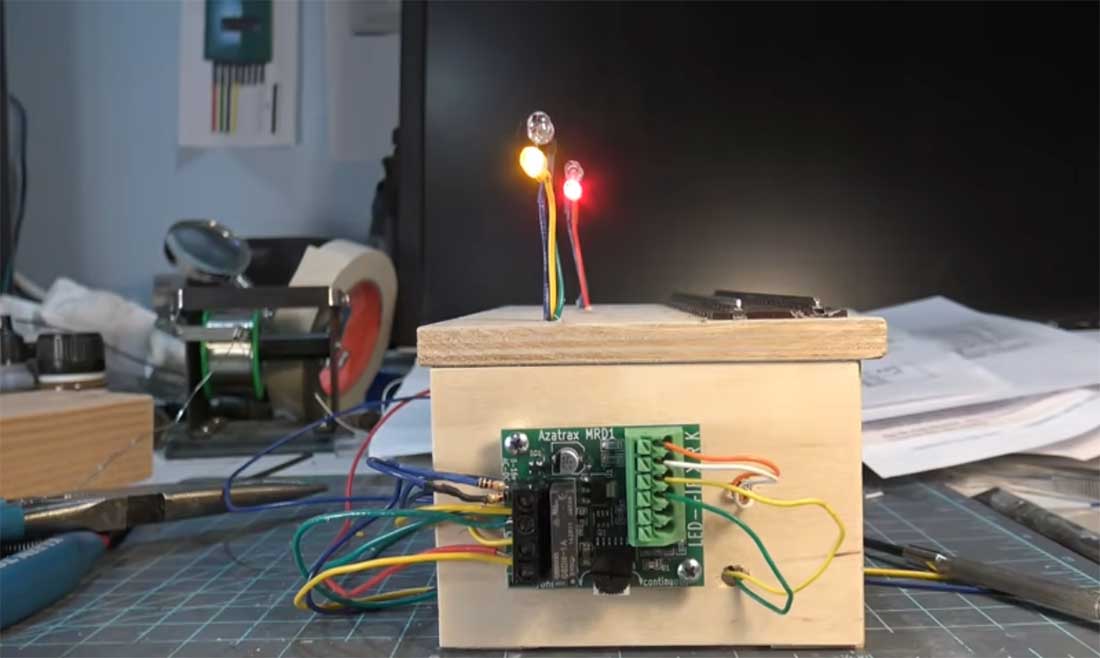
Rob’s been in touch with a simple model train signal circuit:
“Hi Al,
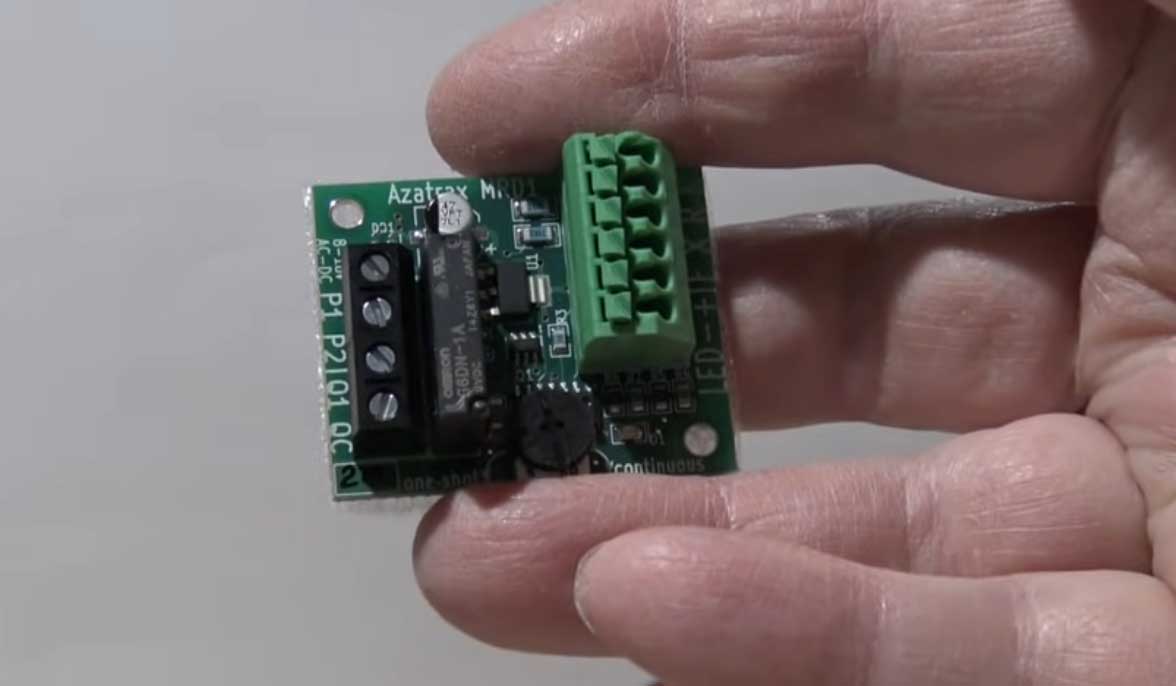
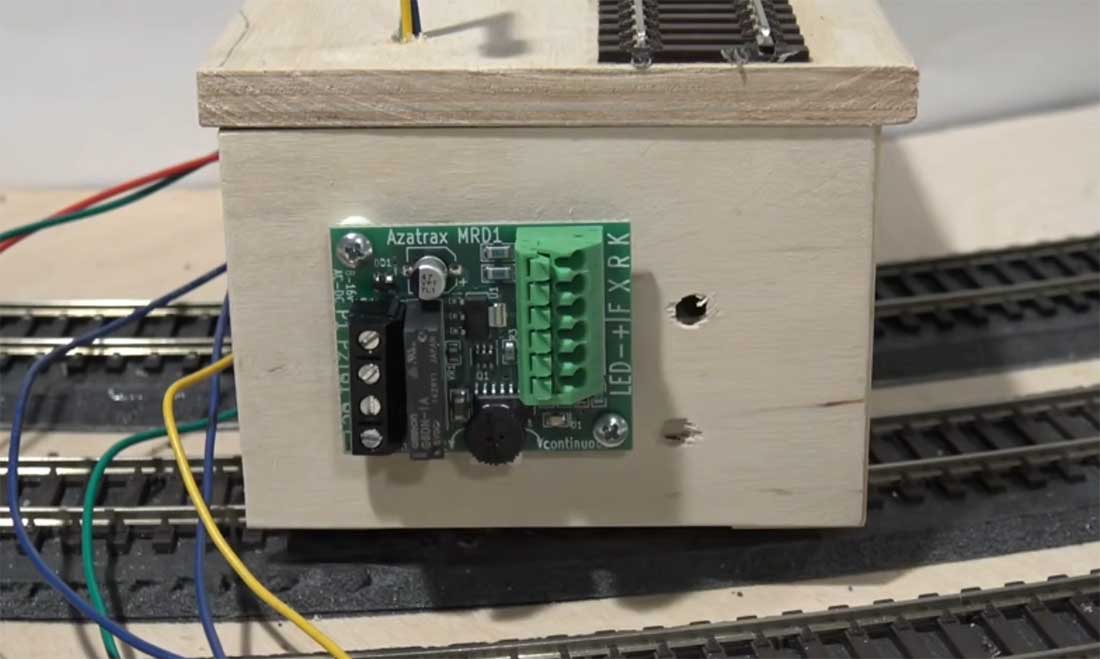
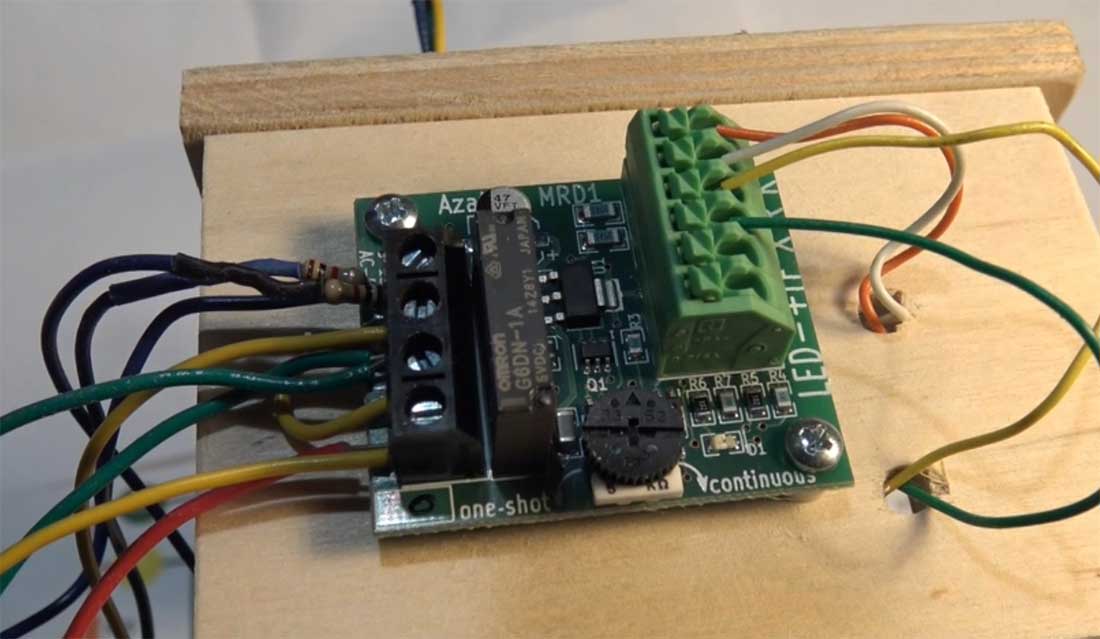
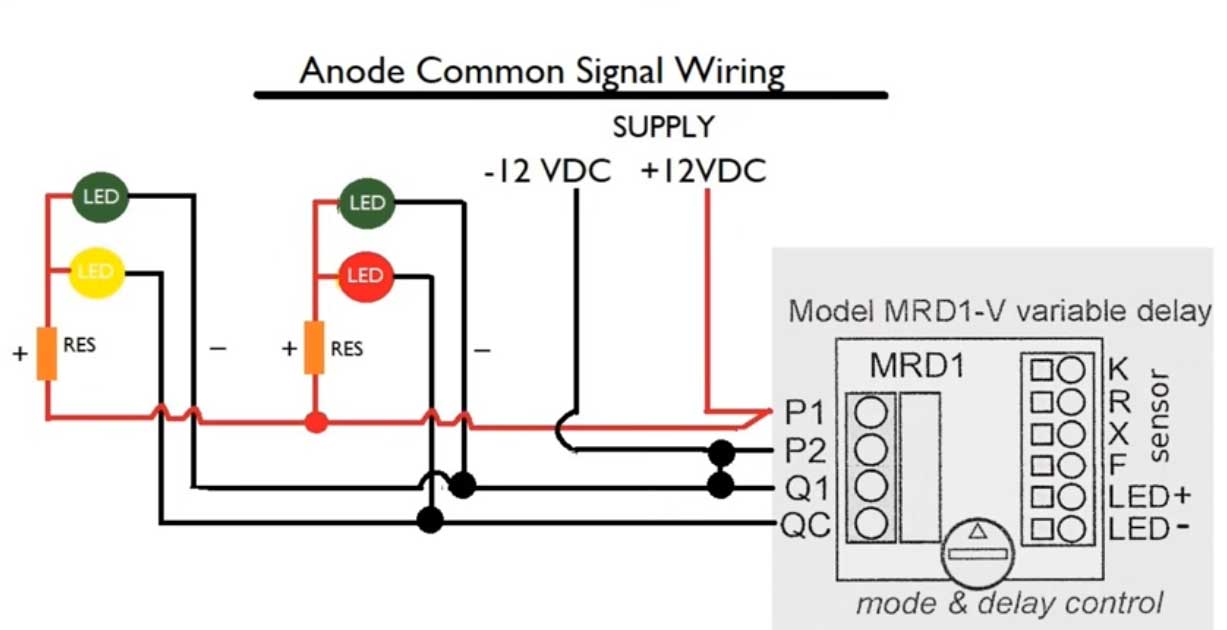
I thought you might be interested in this video. I’ve gotten a good response with it on my channel I demonstrate how to add very cost effective signals to any layout.
The first few scenes are just me having a play with my new DCC controlled coaches/passenger cars. It is fun to be able to operate the lighting remotely.
I have heard from many that these easy to understand videos have started them to add signals and railway crossings to their layouts.
It is fun, not hard and very rewarding building automated signals. There are many suppliers that will provide kits, but they are expensive. This method is not.
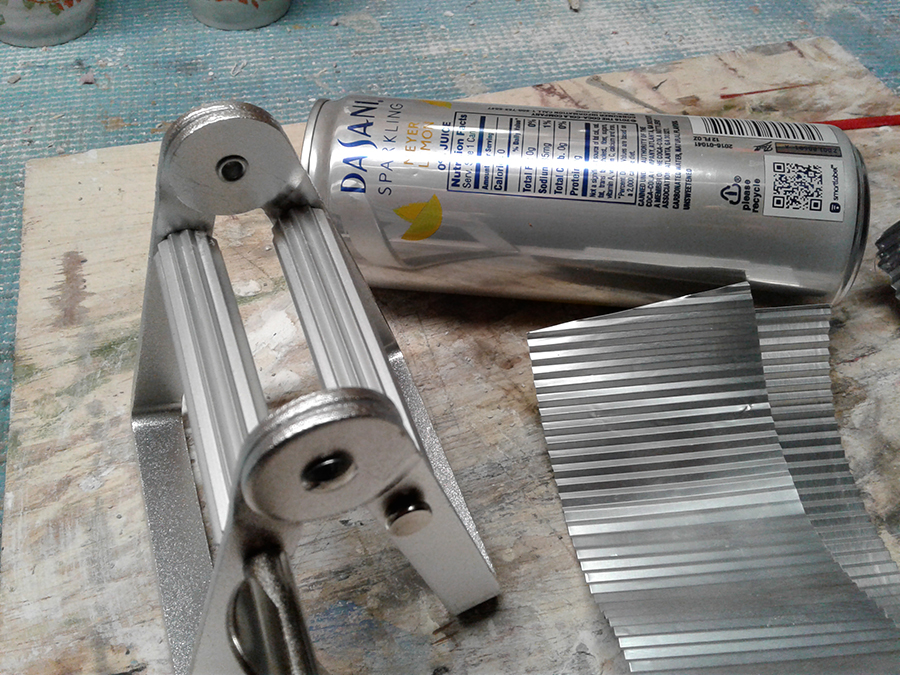
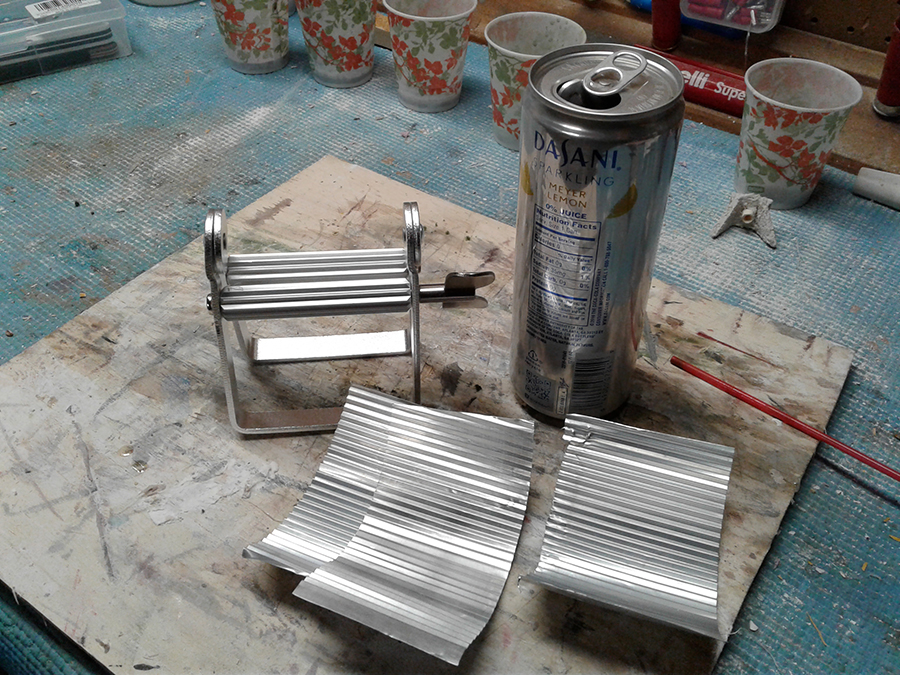
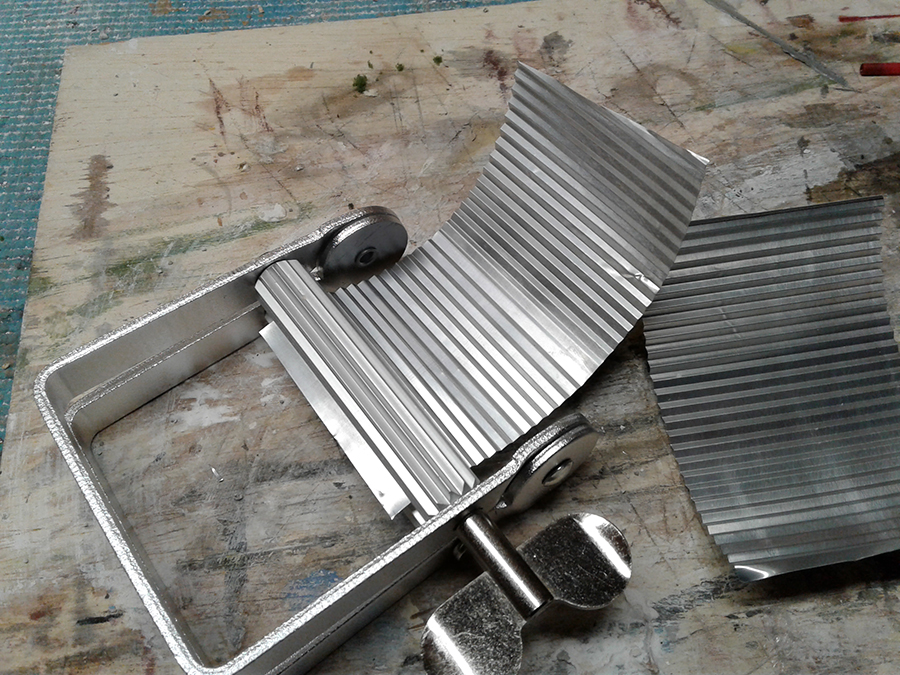
I thought I would send you some photos of how to easily and quickly make tin or corrugated roofing.
I used a artist’s paint tube squeezer that I got on Amazon for less that $6. You can salvage the metal stock from aluminum drink cans as I show in the photo.
Paul”
A huge thanks to Paul – as usual, it’s always the simple ideas that work best.
A big thanks to Hall of Fame member, Rob for sharing his simple model train signal circuit.
It’s another great example of you don’t have to spend a fortune to enjoy this hobby.
I do enjoy Rob’s videos – especially one that helps save on expensive signals.
That’s all for today folks.
Please do keep ’em coming because it’s getting a bit thin on the ground this end.
“I’ve been really working on the landscaping this last year and here is where I am.
By no means done (are we ever?) but all the big stuff is finished.
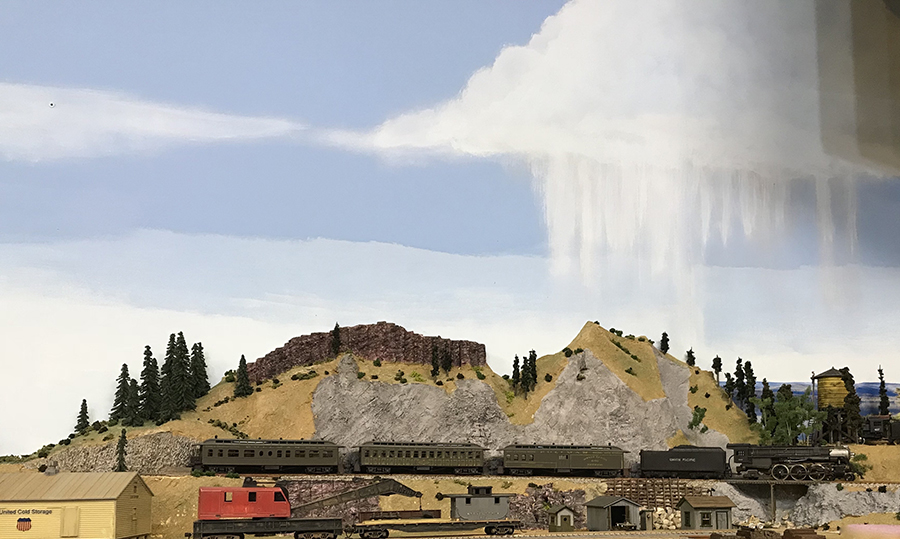
My HO scale mountain and construction on the West end of the layout.
One of the challenges was blending the already completed scenery smoothly with the new section.
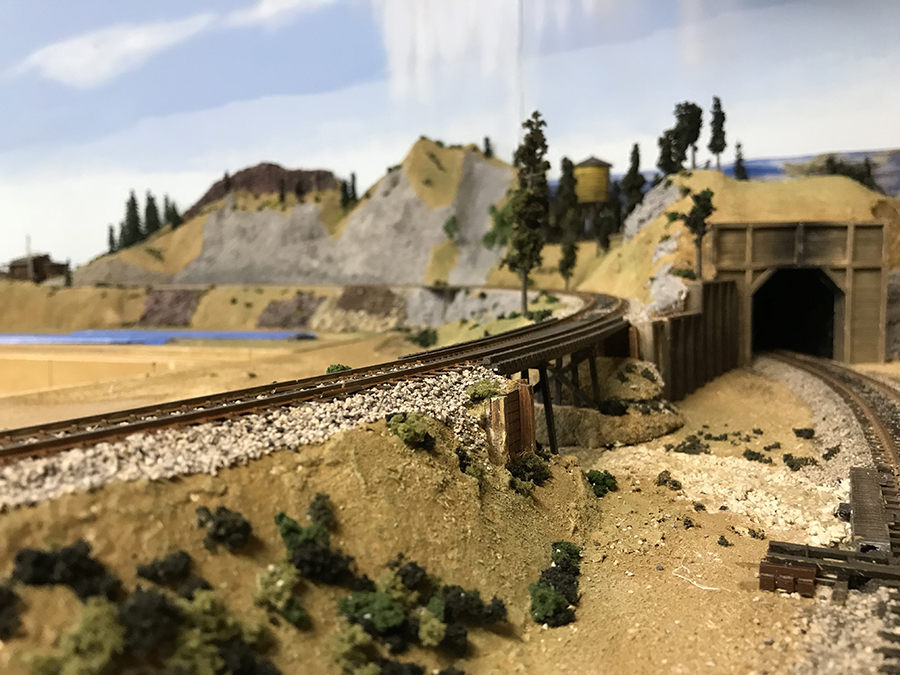
I added a lot of rock outcroppings here below the HO scale mountain.
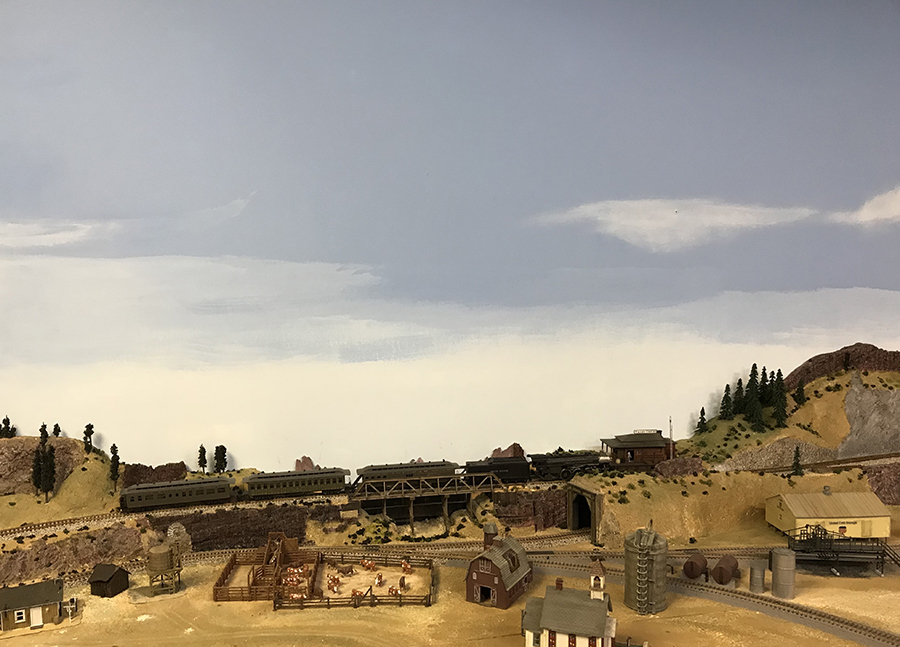
Here is the west end completed. The logging operation’s water tower can be seen in the background.
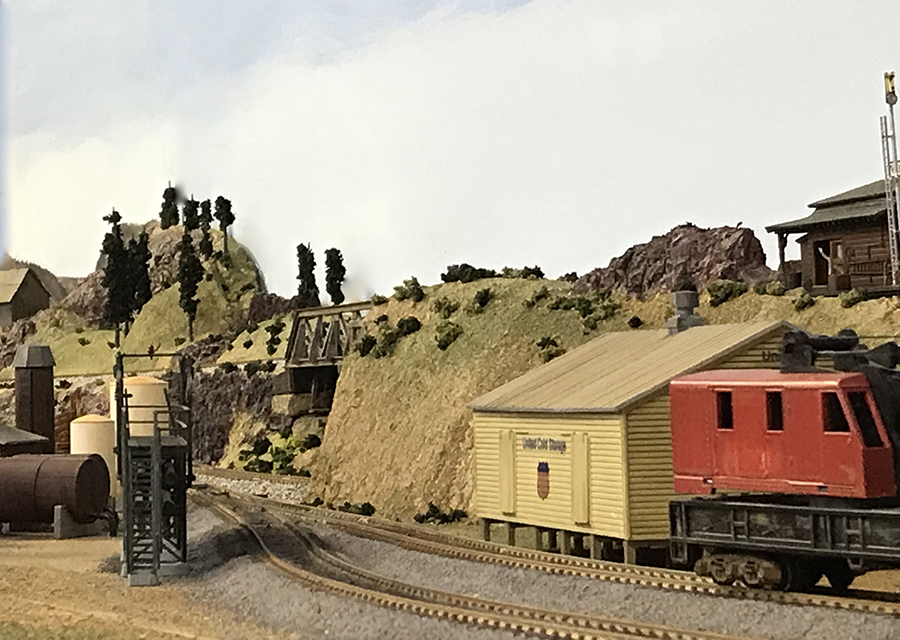
Looking “east”. Cold storage and oil distribution platform. M.O.W. crane car to the right.
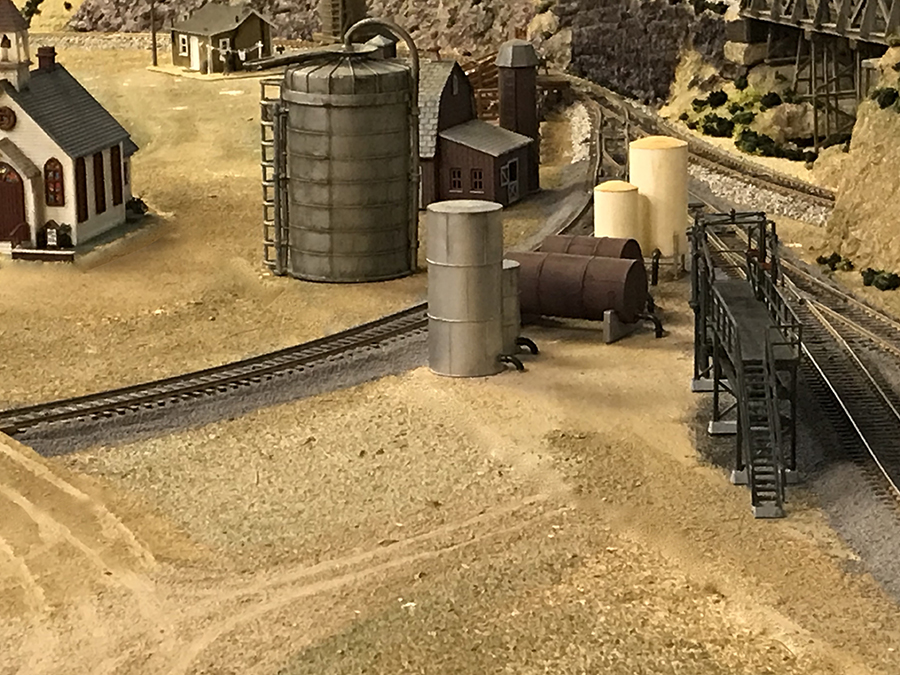
Oil distribution tank farm in the foreground.
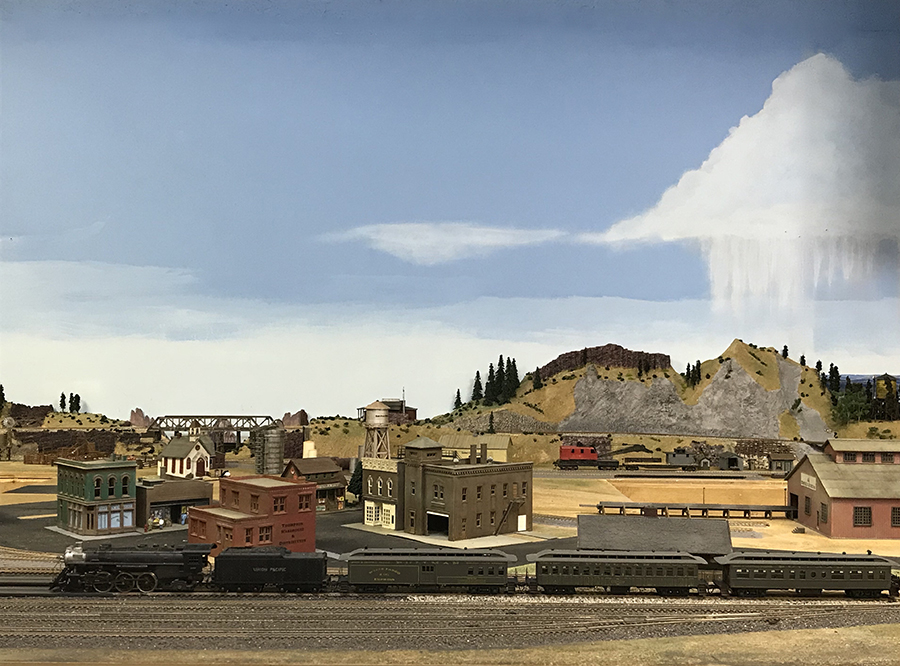
Most of the buildings in place. 4-6-0 passenger train checking all clearances. (For the last time!!!)
There will be more as I progress.
Enjoying the hobby!
Joe”
A huge thanks to Joseph for sharing his HO scale mountain build. It’s just fantastic to see your layouts emerge from nothing more than a table and come to life.
There are lots of ‘mountain’ step by steps on the blog – here are a few more few you:
All of the above examples (and there are lots more) show in spades that there isn’t ‘one correct way’ for a HO scale mountain build, or any scale come to that.
Every part of this hobby can be attacked in a different way – what feels right for one person, may not be right for you. Just enjoy it!
Joseph has been in touch. He’s added to the collection of model train mountain layouts on the blog:
“Hi Al; it has been quite some time since I sent any pix.
As a reminder, this is a freelanced late steam era HO railroad (12’ x 8’) set roughly in Northern New Mexico.
The town is “San Juan Creek”. The main industries are logging/lumber, coal mining and oil distribution.
The local short line is the “San Juan & Central”. Short line locomotives are: 0-6-0 saddle tank switcher and a 2-8-0 freight engine.
The coal mining operation has a 4-6-0 “San Juan Coal” #34. The logging operation has an 0-6-0 with a slope back tender “San Juan Lumber Co.” # 0687.
Back when I began the layout I looked at lots of model train mountain layouts. I built it as a modular design because I knew we would be moving at some point. I didn’t think that would be 6 years later.
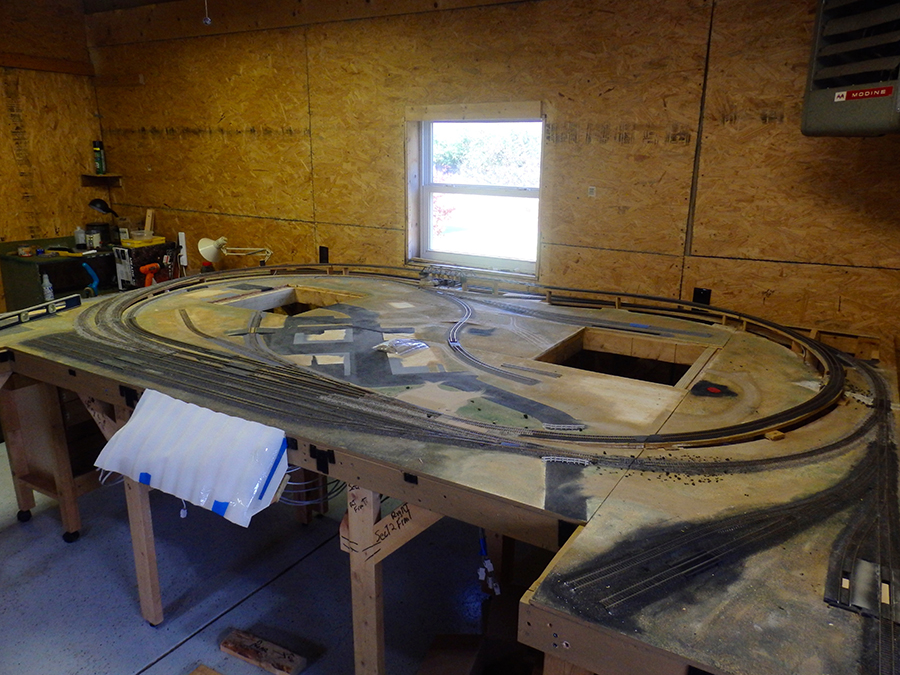
The layout was built in 4 modules and carefully taken apart for the move in April. Here are some pix of the layout during the process of reassembly of the four modules.
Thankfully, I put leveling screw feet on all the legs as the new shop floor is angled. The former owner was smart to do this as he used to hose out the shop. I won’t be doing that but it was quite a job lining up the 4 modules and getting them all leveled.
I started with the rear 4×8 module leveling it out first. Then I brought in aligned and leveled the two side modules and finally the front module.
Here they are reassembled.
Level!
And here is the new backdrop. It was my first try and I really like it!
After I went to all the work of assembly and leveling, I took it all apart so I had better access to parts of the rear of the layout. I started with the rear center module.
Some of the prep work and tools.
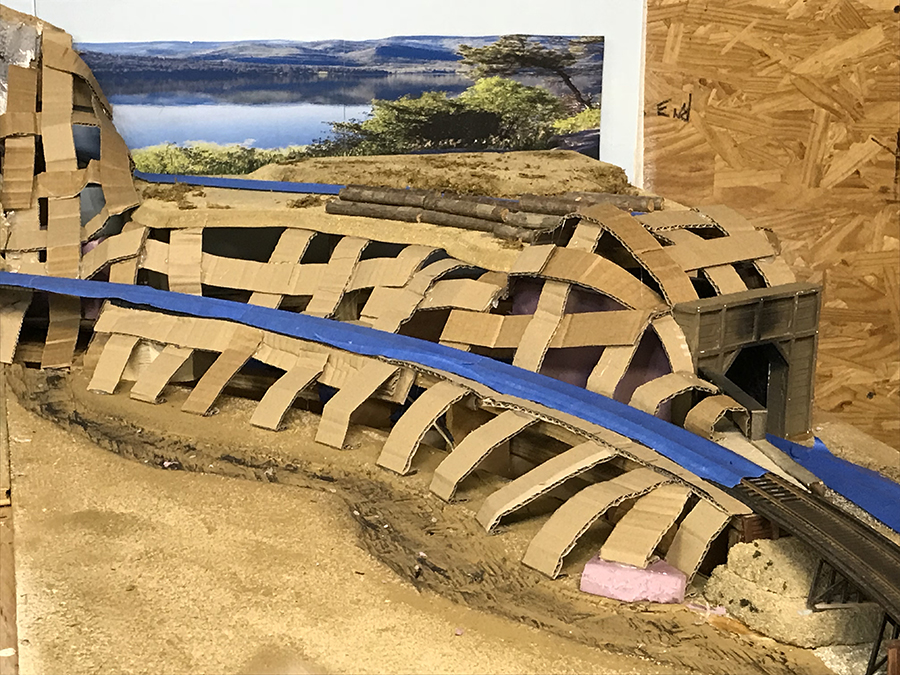
This is the west end of the rear center module. I thought I was going to use 1/2″ foam board until I realized it would take forever!
So I switched to the ‘old school’ hard shell construction. I placed printouts of actual pictures I had taken along the “Cumbres & Toltec” in New Mexico and Colorado as “mock-ups”.
Model train mountain layouts:
The pink foam board, however was a good base color for the exposed rock, it came out perfect with a little painting.
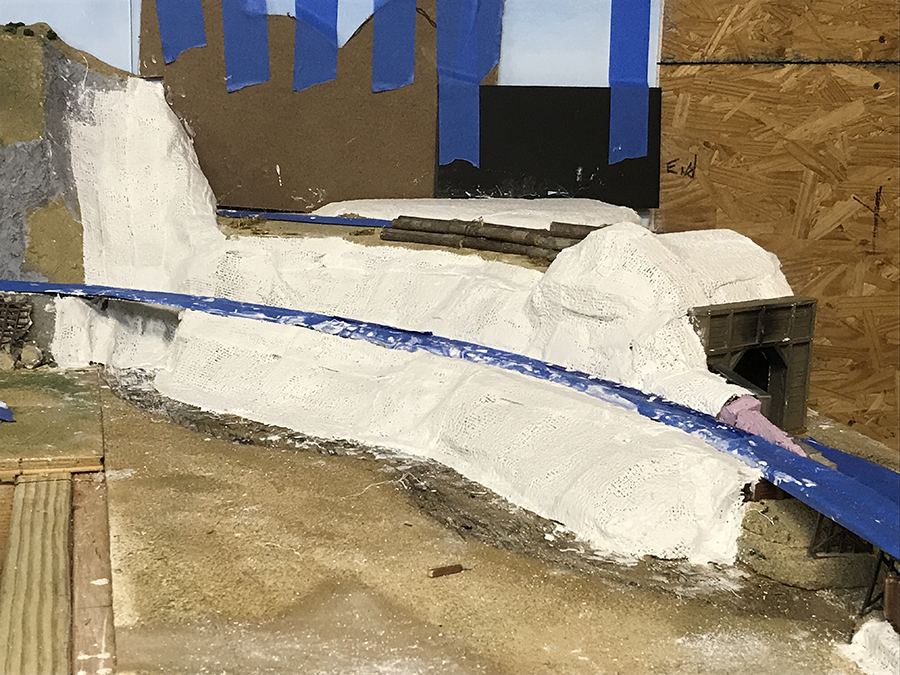
Plaster cloth applied and I am checking clearances with the 2-8-4 loco.
Other end (east end) of the center section.
Plaster cloth applied.
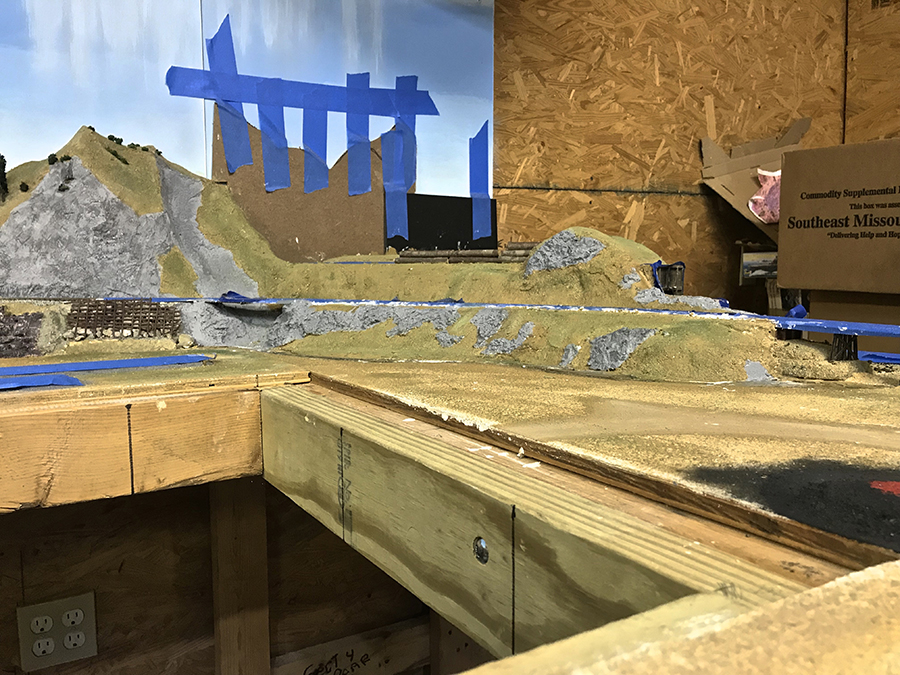
DONE with this module. I accidentally discovered a technique for making these sculptamold rocks. As the sculptamold dried, i noticed it looked like an outcropping of rocks so I scrapped it out of the mixing bowl and just “slapped” it on the plaster cloth! With some paint and shading, they look real.
I then moved this module back against the wall and attached the two side modules and front center module.
Landscaping in the next installment.
Jospeh”
Next, on to Dave:
“Hi Al, started ( the main thing) about 12 months ago by cutting my garage in half and giving myself a work station then built a baseboard approx 14×9. All was well till I rediscovered some American N gauge I bought on various trips to the US.
Ahh I thought can make a layout for my young grandson. My layout has now been idle for 5 months but the video shows it was all worthwhile and I can’t wait to see his face Christmas Day. It’s 4 ft by 2 ft 6 Ins and a double loop.
Keep up the blog. Will post some pics of my layout when I get it back to reasonably tidy.