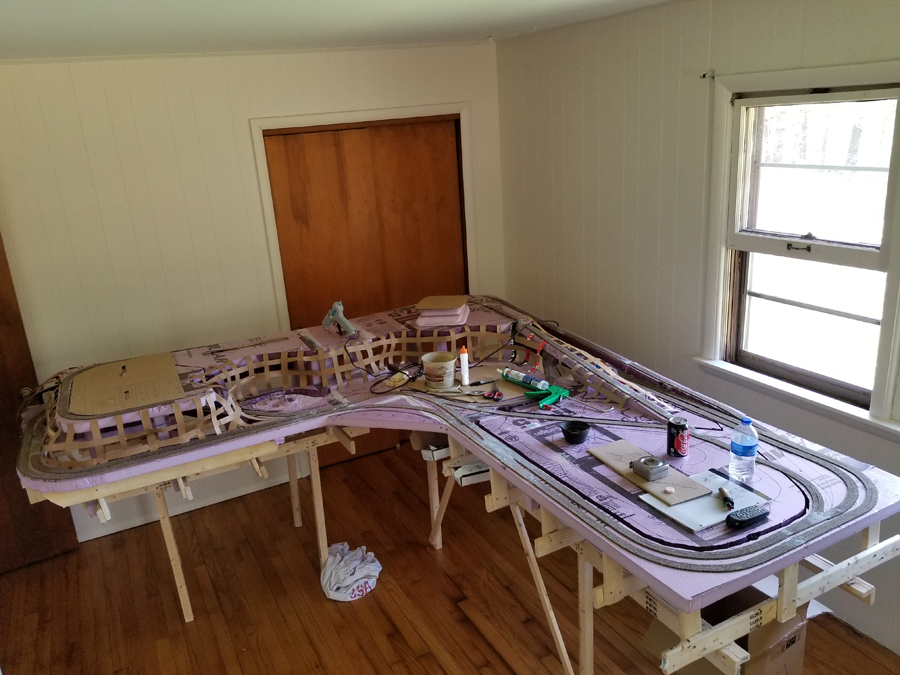
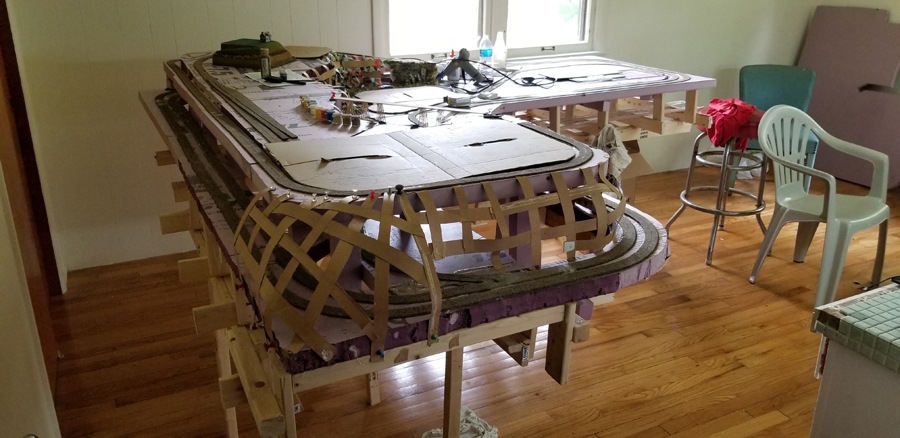
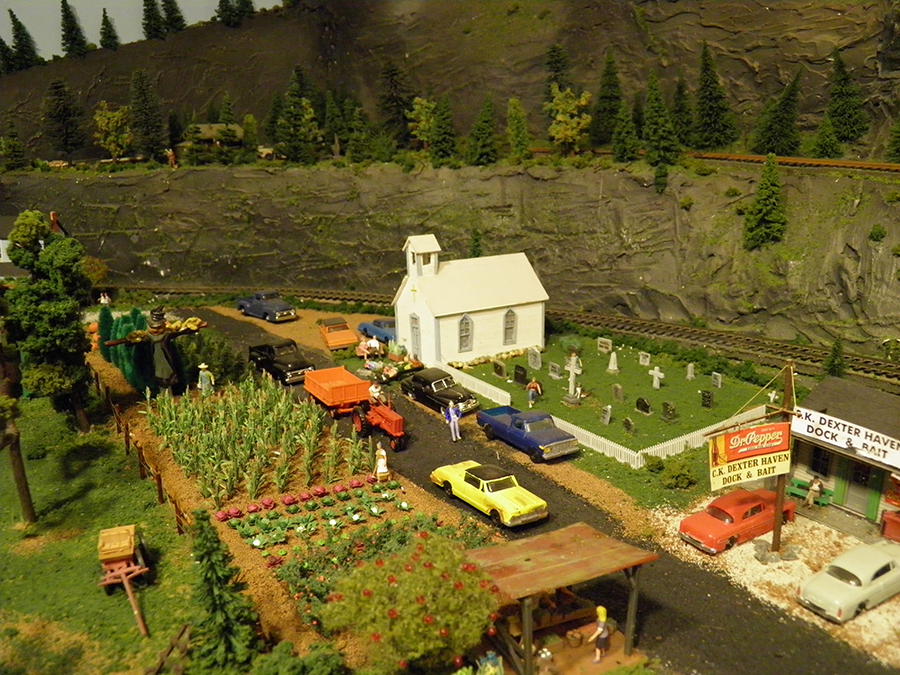
Bill’s been in touch with his track layout for N gauge:
“I started this custom n gauge layout about four months ago.
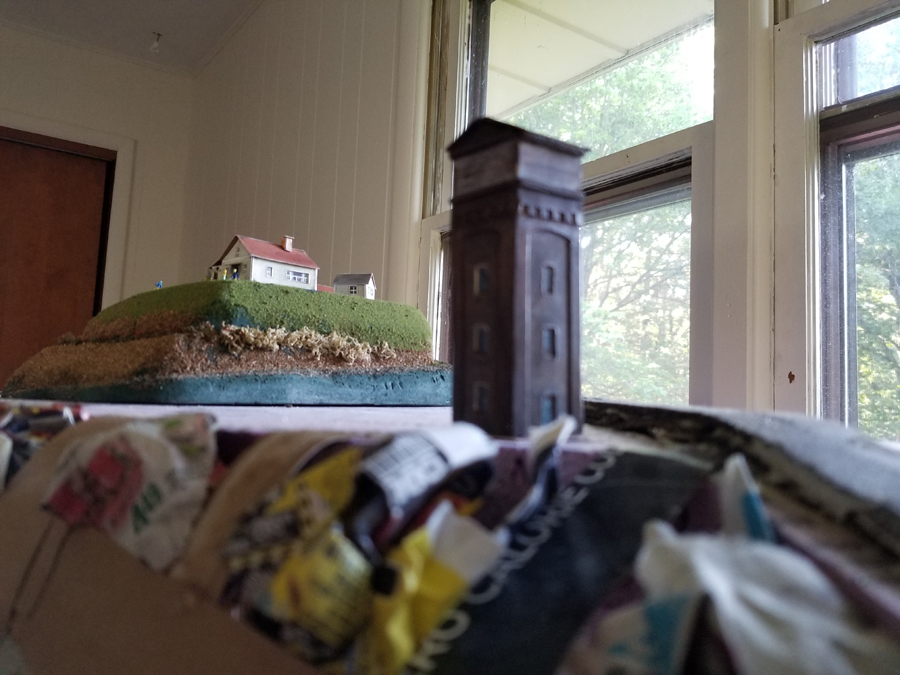
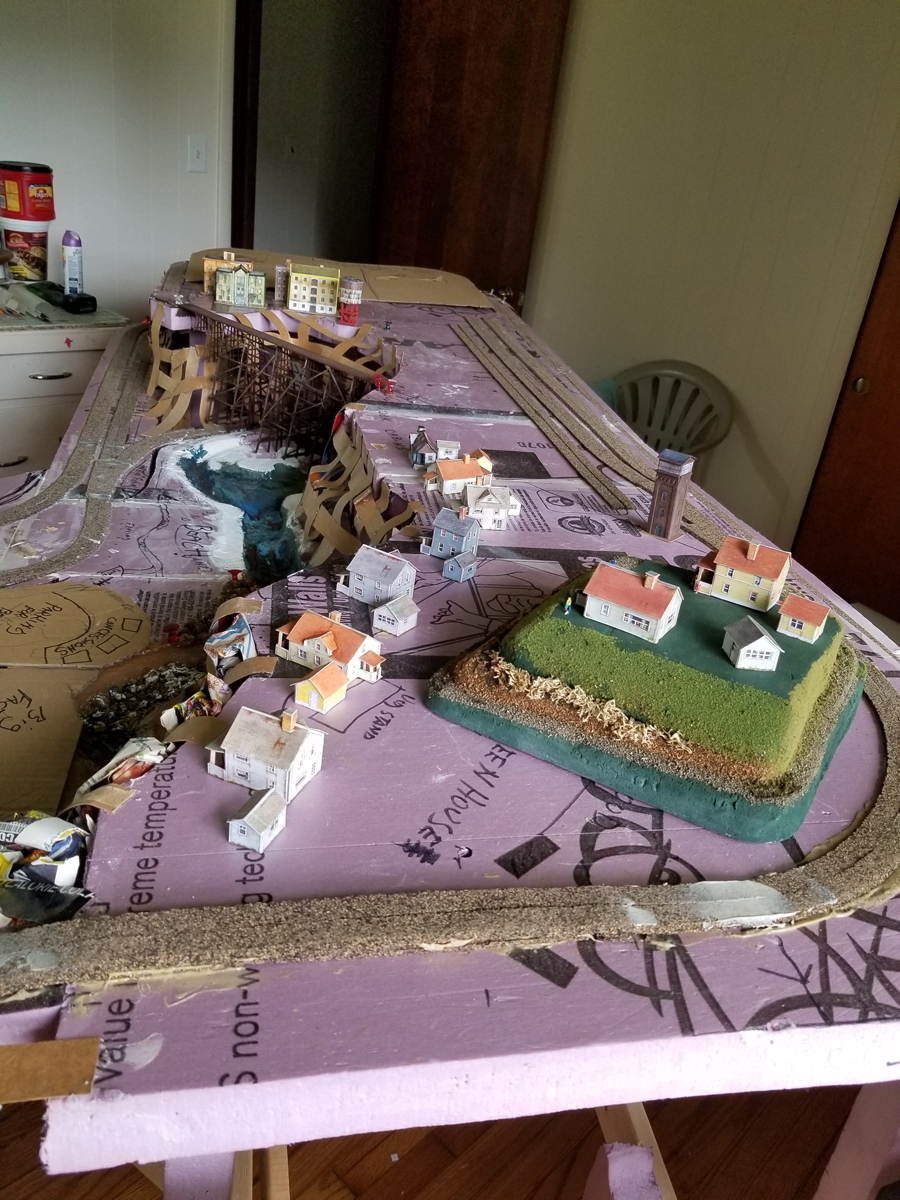
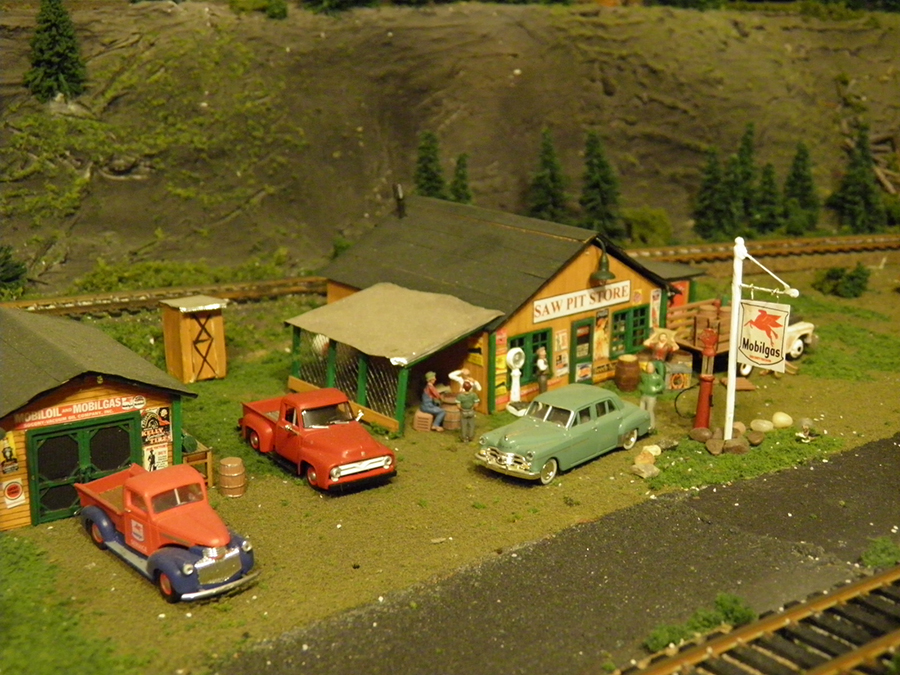
Eventually it will have a town on top level and on the lower level there is a beach a lake will have piers and fishing boats also there will be a power station and factories below the falls.
In the big open area on main level will have a complete zoo surrounded by high priced homes also will be a drive in theater and amusement park.
(All images are clickable.)
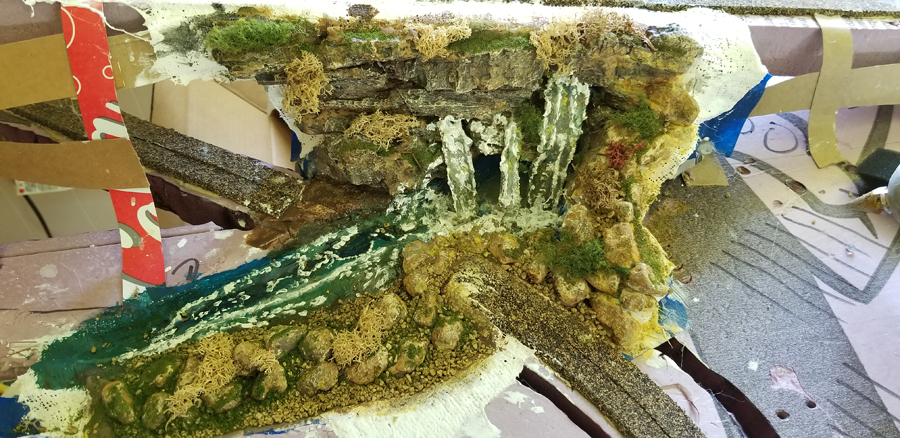
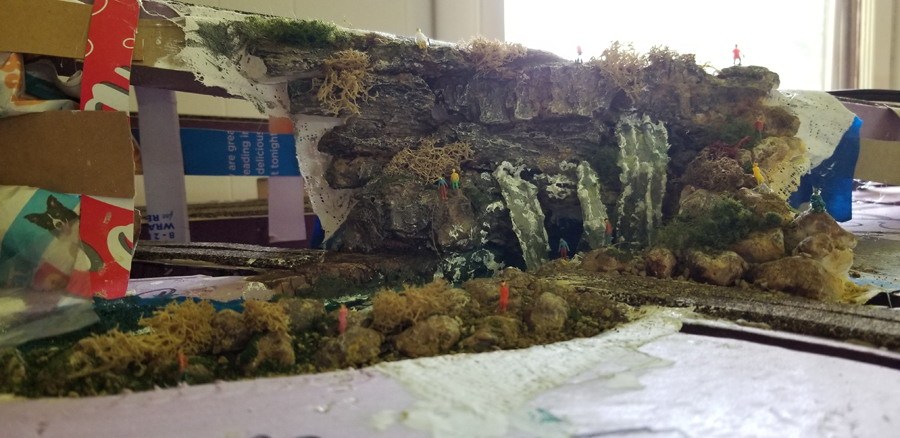
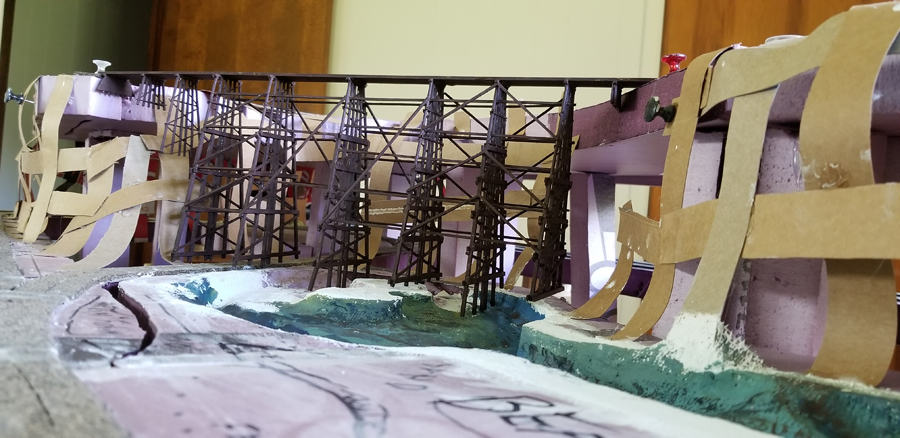
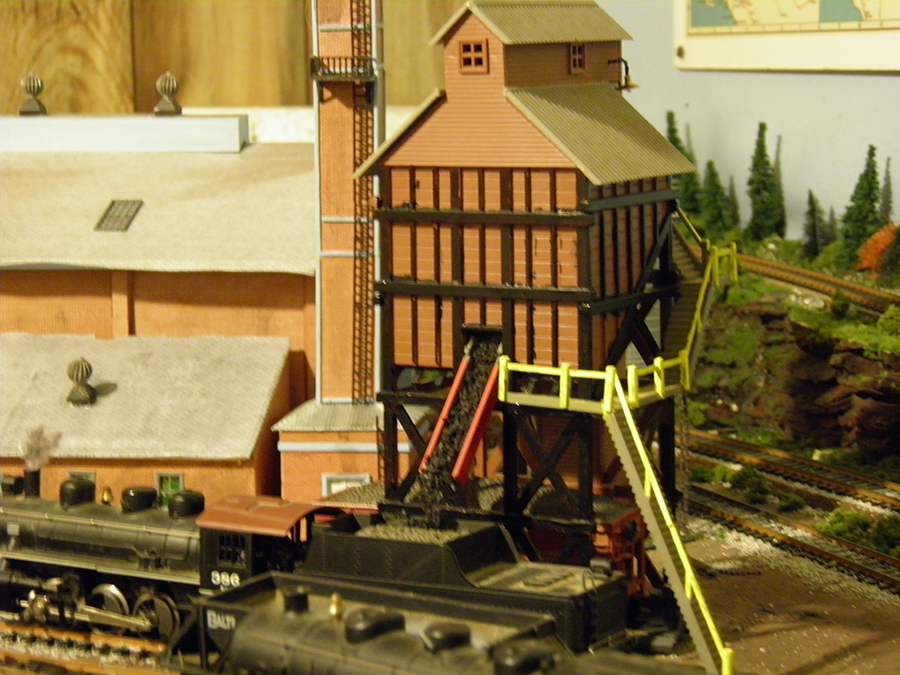
Beginning of waterfall and river:
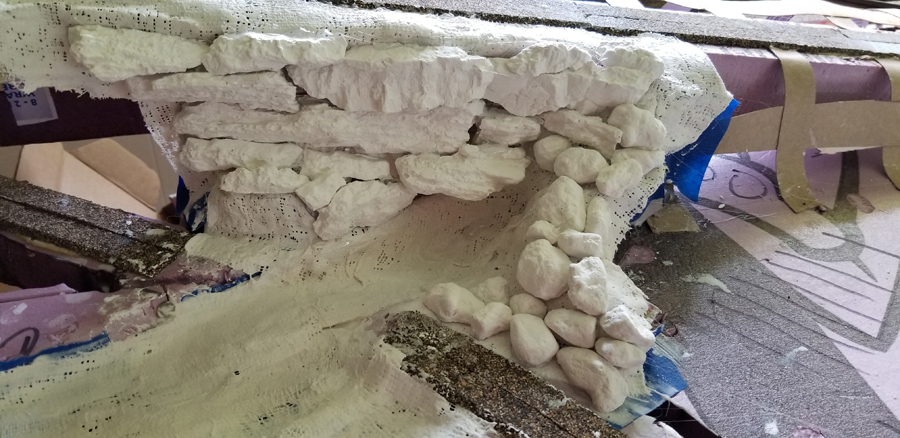
Ground levels at the falls:
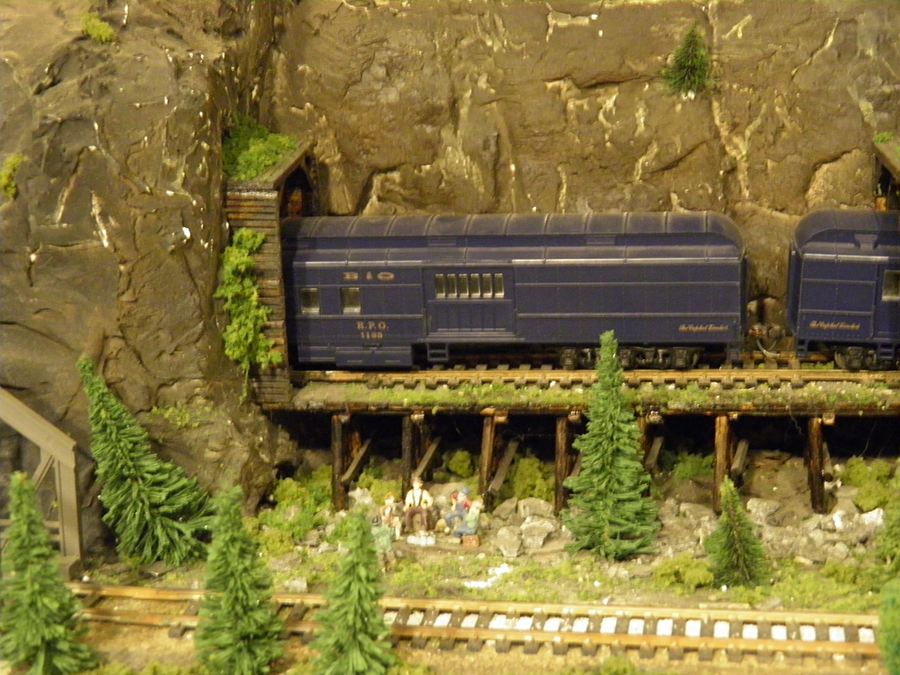
The falls:
Hope you enjoy the pics of my first layout.
Bill”
A huge thanks to Bill for sharing his Track layout for N gauge. He’s storming along with his layout – loved the waterfall scene.
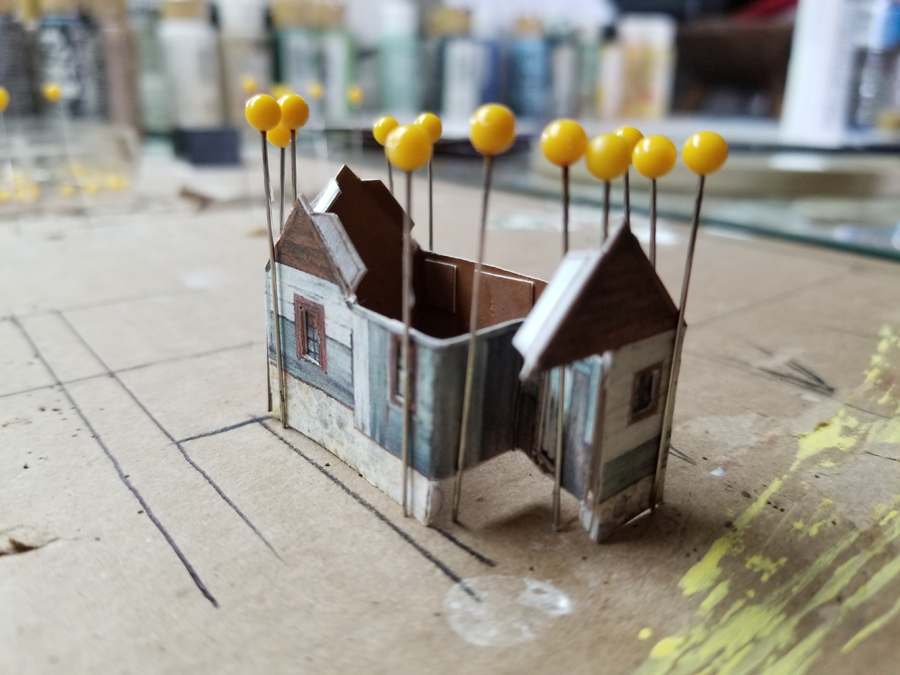
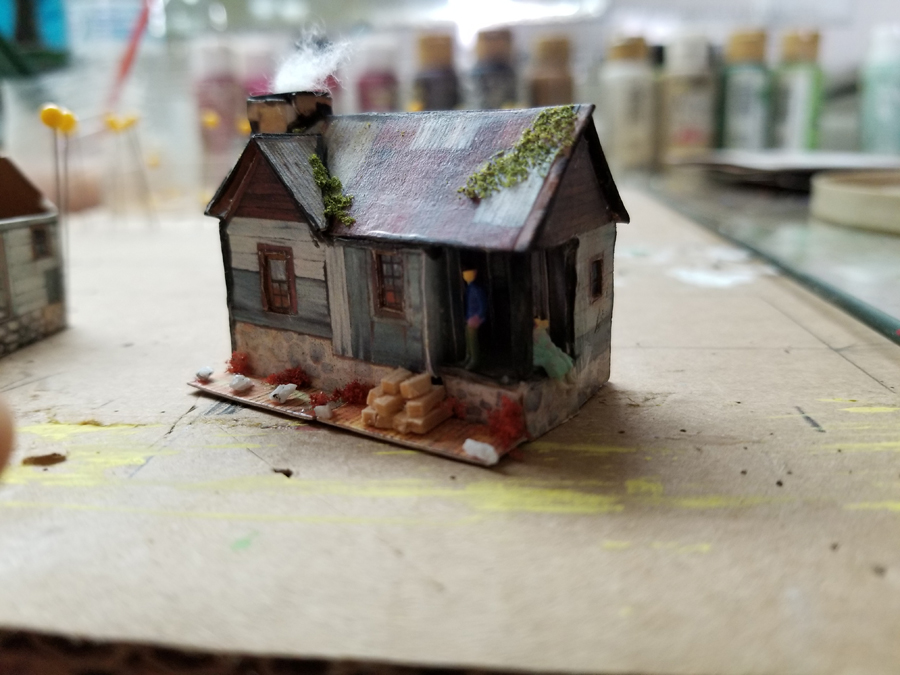
I do love seeing a layout when it’s still in the early stages. Great to see some of the printable buildings on a layout too.
That’s all for today folks.
And don’t forget the Beginner’s Guide if you are fed up with everyone else having all the fun – take the first step here.
My first train set was given to me in 1949 when I was 5 years old.
It was a Marx 027 oval layout with steam engine, tender three cars, and a caboose. It had the red lever throttle. You changed direction by operating the lever quickly on and off.
When I was about twelve I graduated to an American Flyer S gauge Sante Fe Chief passenger set. Had that until high school when we moved into an apartment so no room.
I was away from model trains until 1974 when my mother bought my son a Tyco set for Christmas. Use to set that up ever Christmas until about the mid 80’s. Again I have been away from model trains until this past January. I have been receiving you emails for a while and decided to take the plunge again.
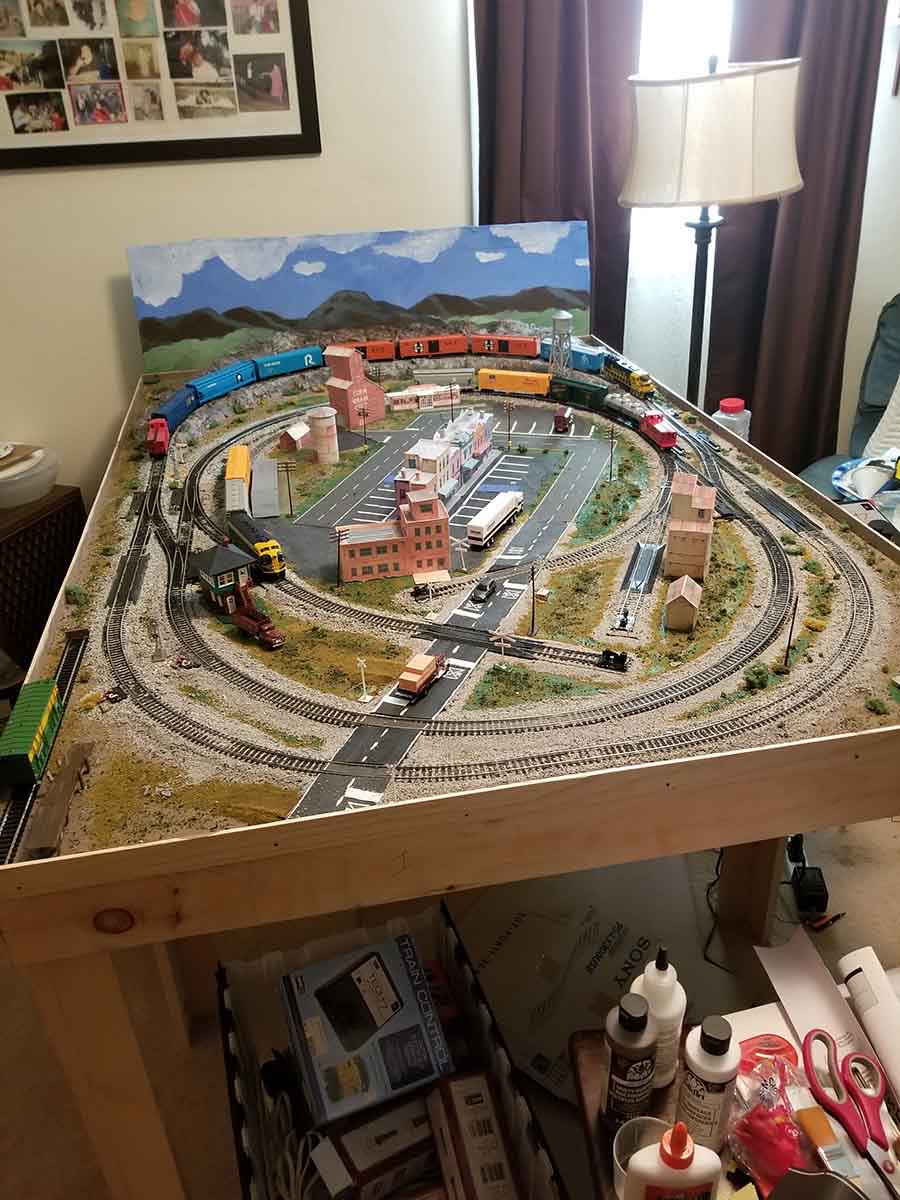
I have an 10.5 by 11.5 spare room that I decide to use for a 4×6 layout.
I bought a Bachman DCC starter set with EZ-track and bought some expansion packs for the EZ-track. I setup a double 0val with cross overs.
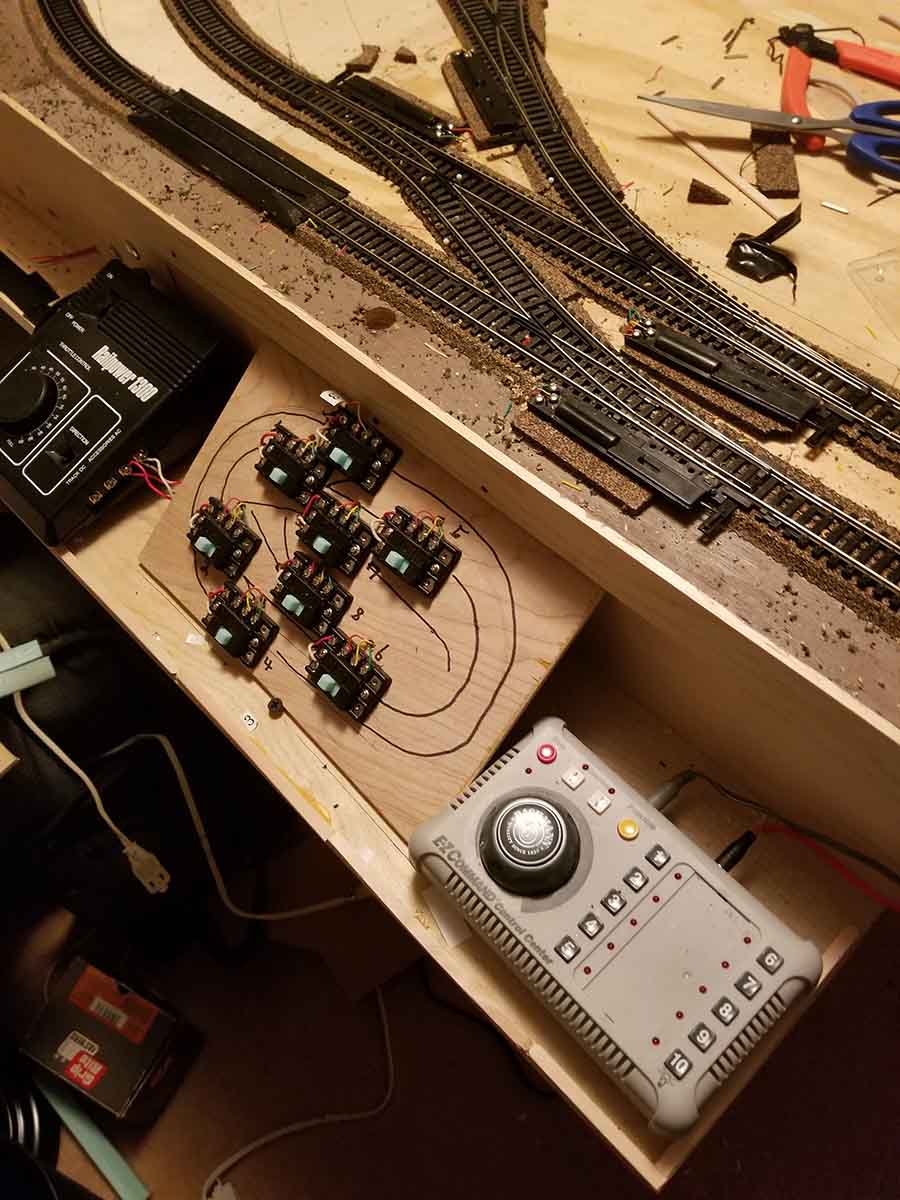
I also bought a second DCC Diesel Locomotive and some in expensive ( $5.00) cars. I had trouble getting the switches (points) to work in both directions when using the cross overs. After trying everything I found online, I gave up on the EZ-track and decided to go with Atlas Code 100.
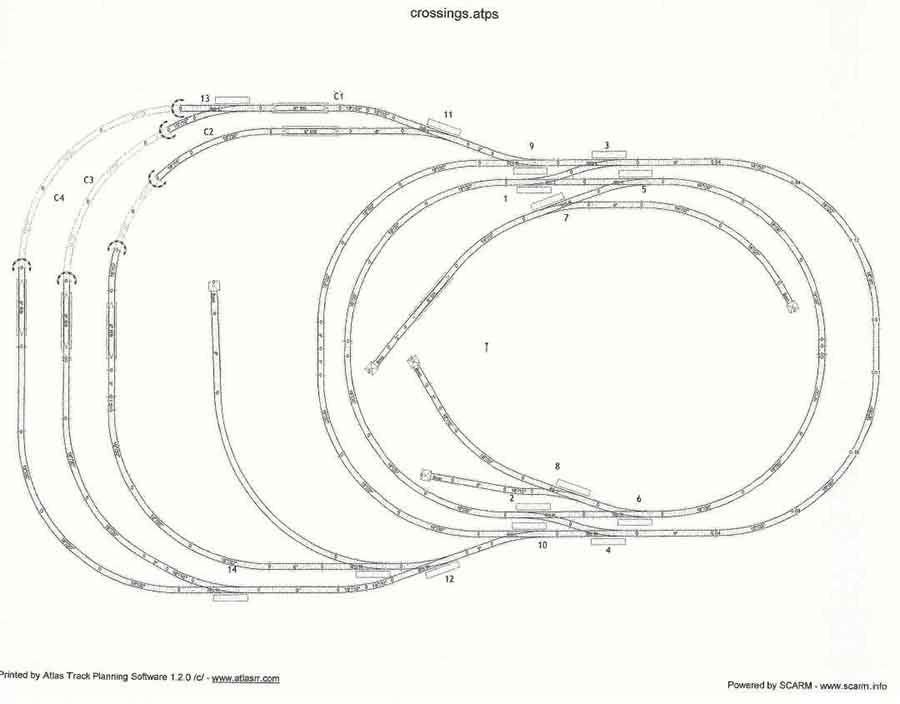
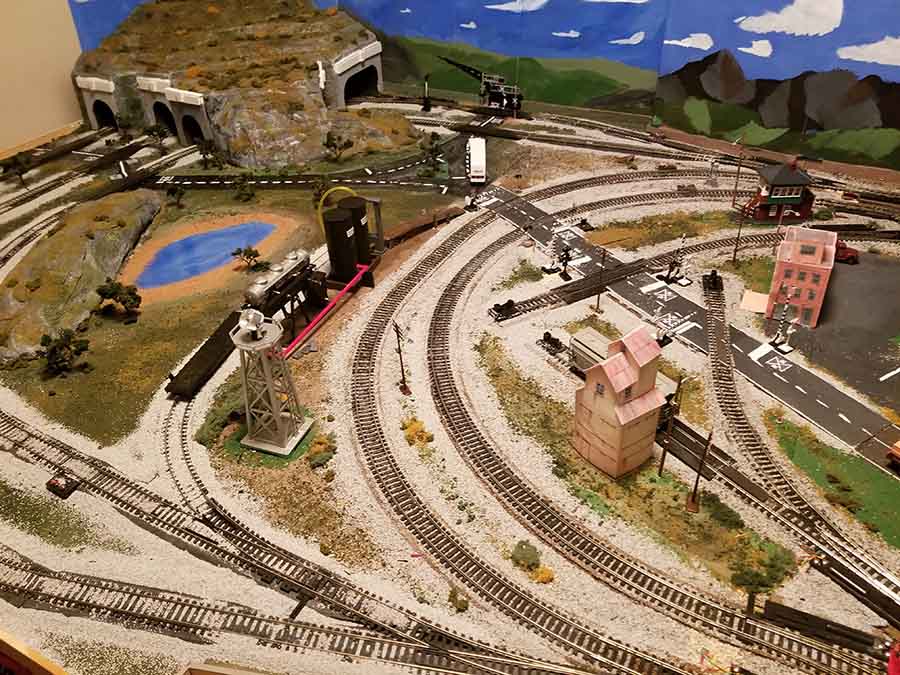
I had no theme or period in mind just a general plan in my head. I used Atlas Track planning software to come up with my first plan.
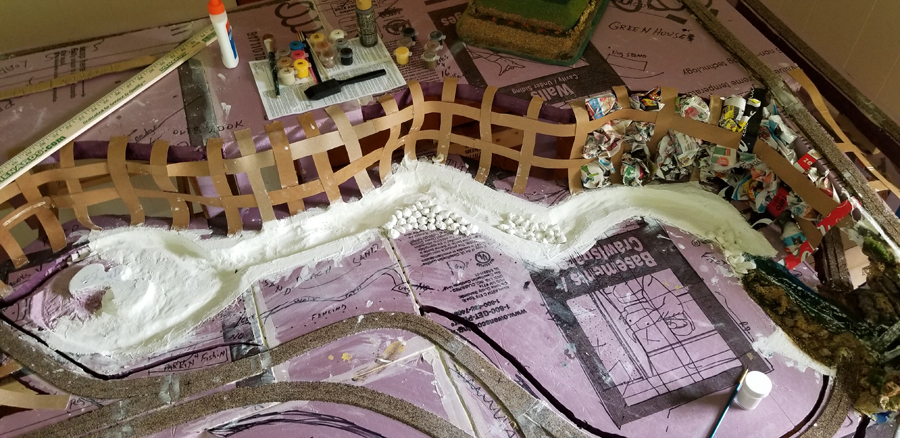
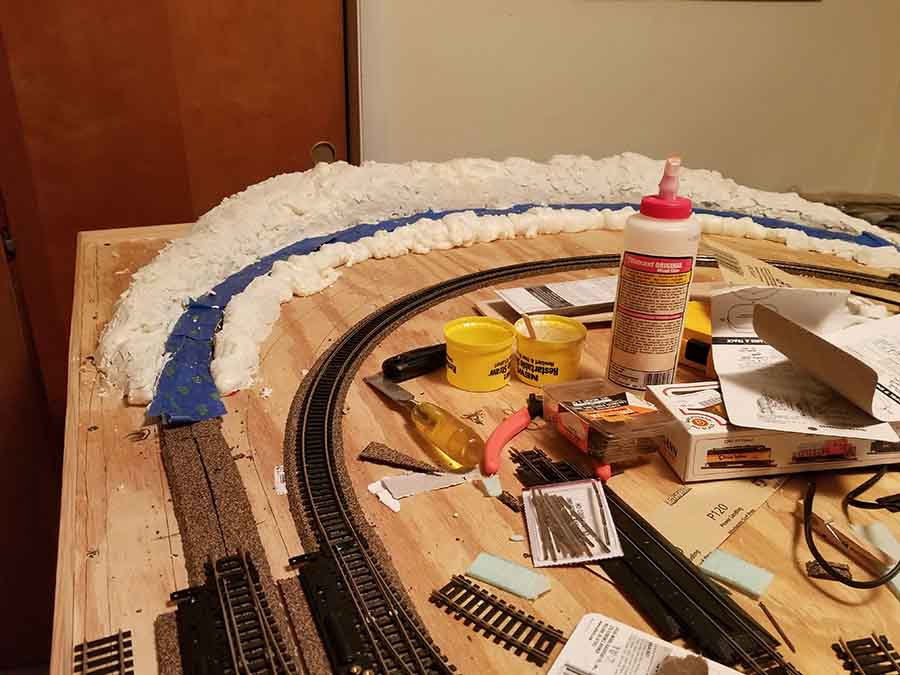
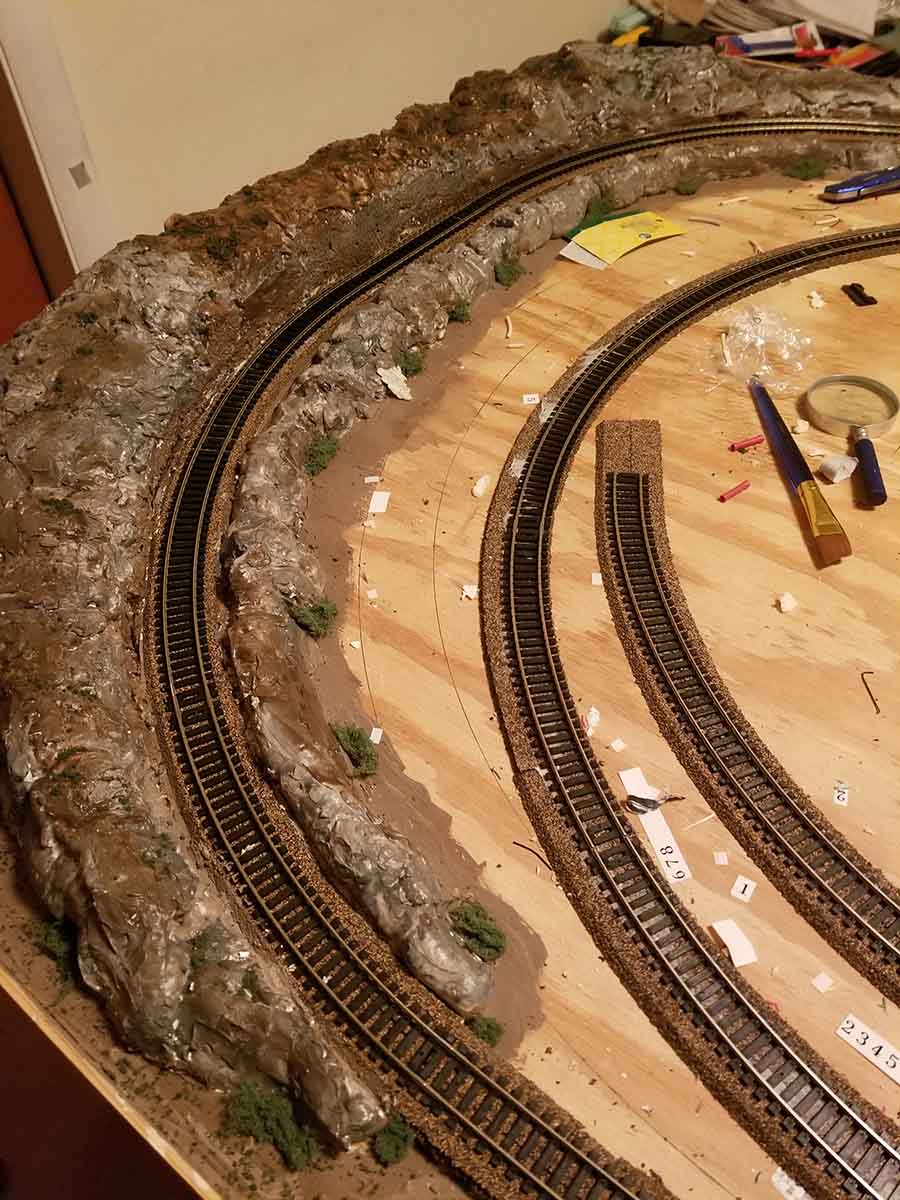
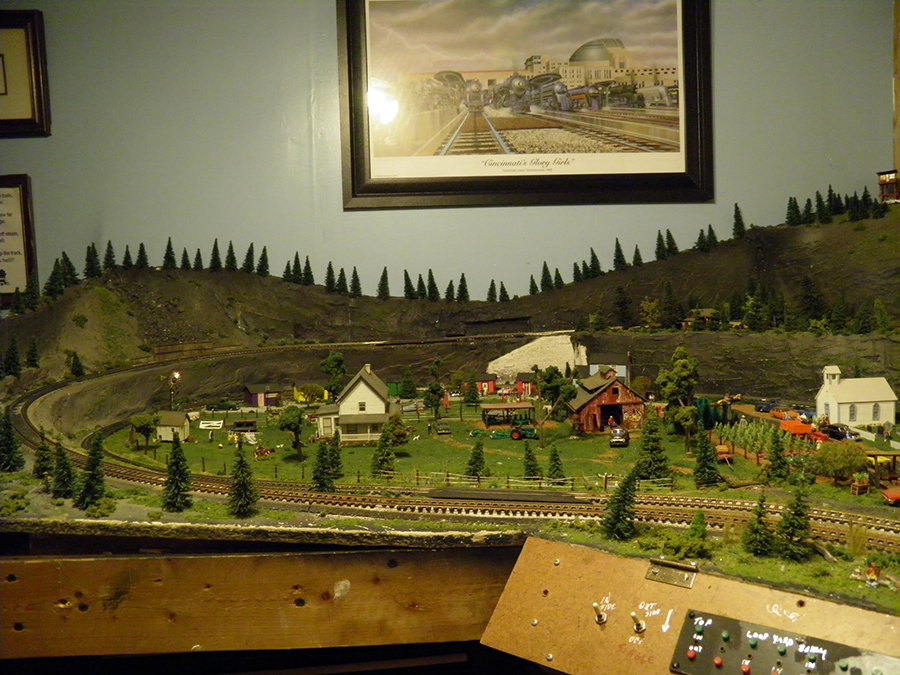
I also wanted to have an incline. So I cut the base for the incline from ¼ in plywood and used blocks cut from 1×3 lumber to support the base. Once in place, I used spray insulation and spackling compound to form the basic rock structure. Then I used black, white, green, and brown all surface water based paint to get the effect I want and added some greenery.
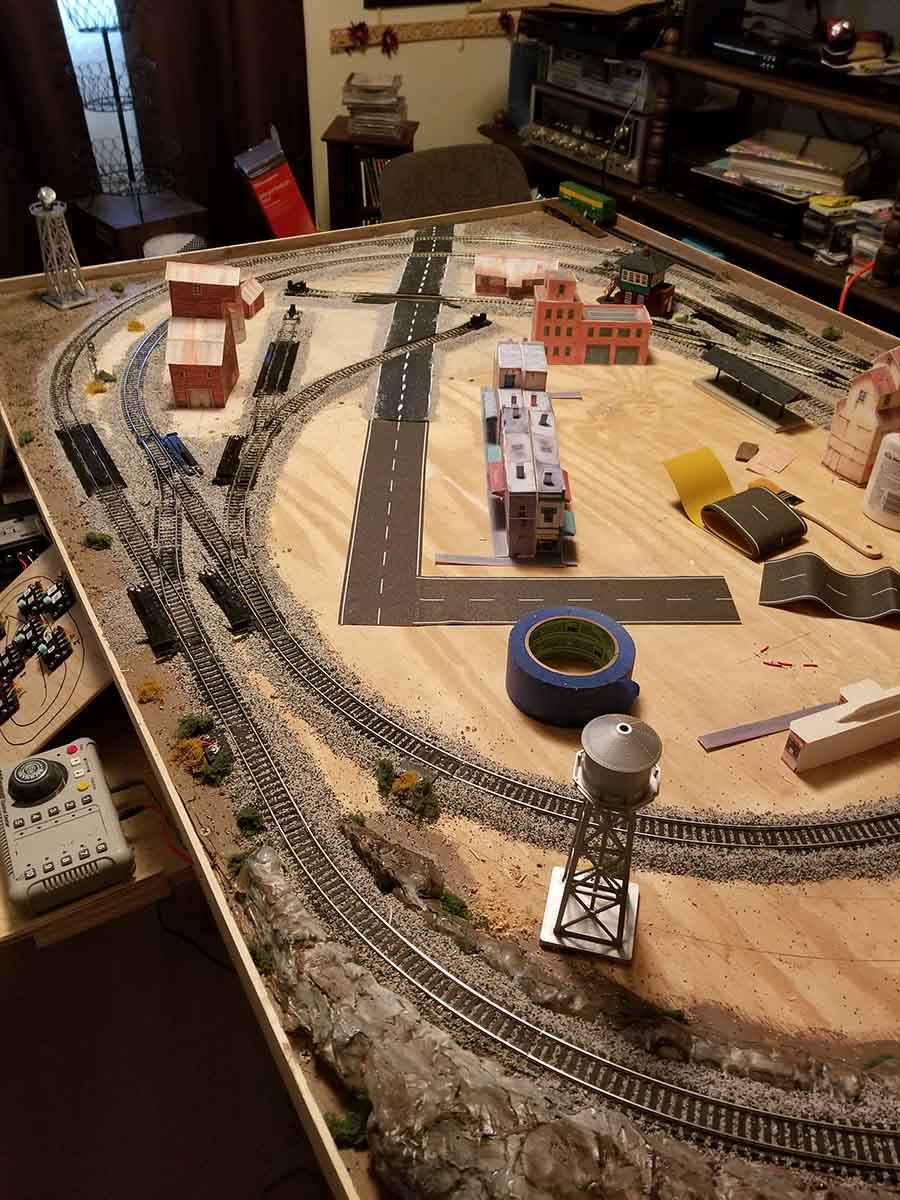
Next I created the initial panel for the switches. I made test runs and then had to decide what scenery to add. About that time I decided to buy the big kahuna package of printable buildings.
I started assembling some buildings and still didn’t have a real plan. I built the diner, the storefront with the Antique Store, Barber Shop, etc., the grain elevator, and the corn storage. Then I tried to figure where to put them on the layout. I built a second storefront to use back-to-back. I will send another email with the next phase of the build.
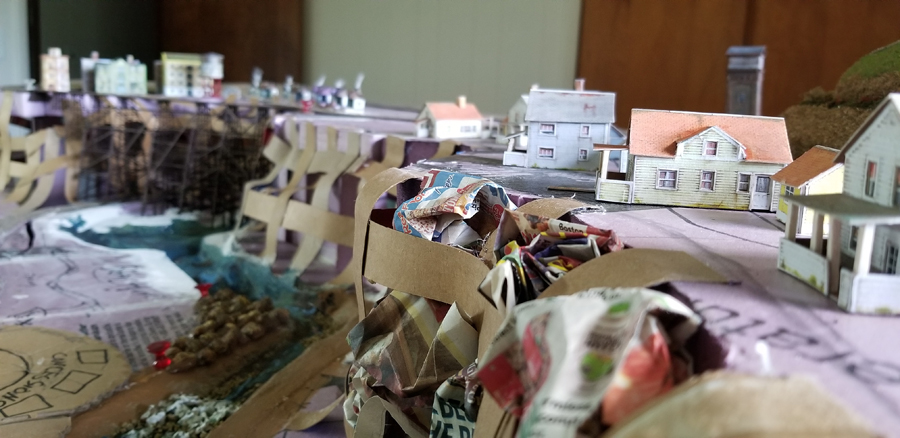
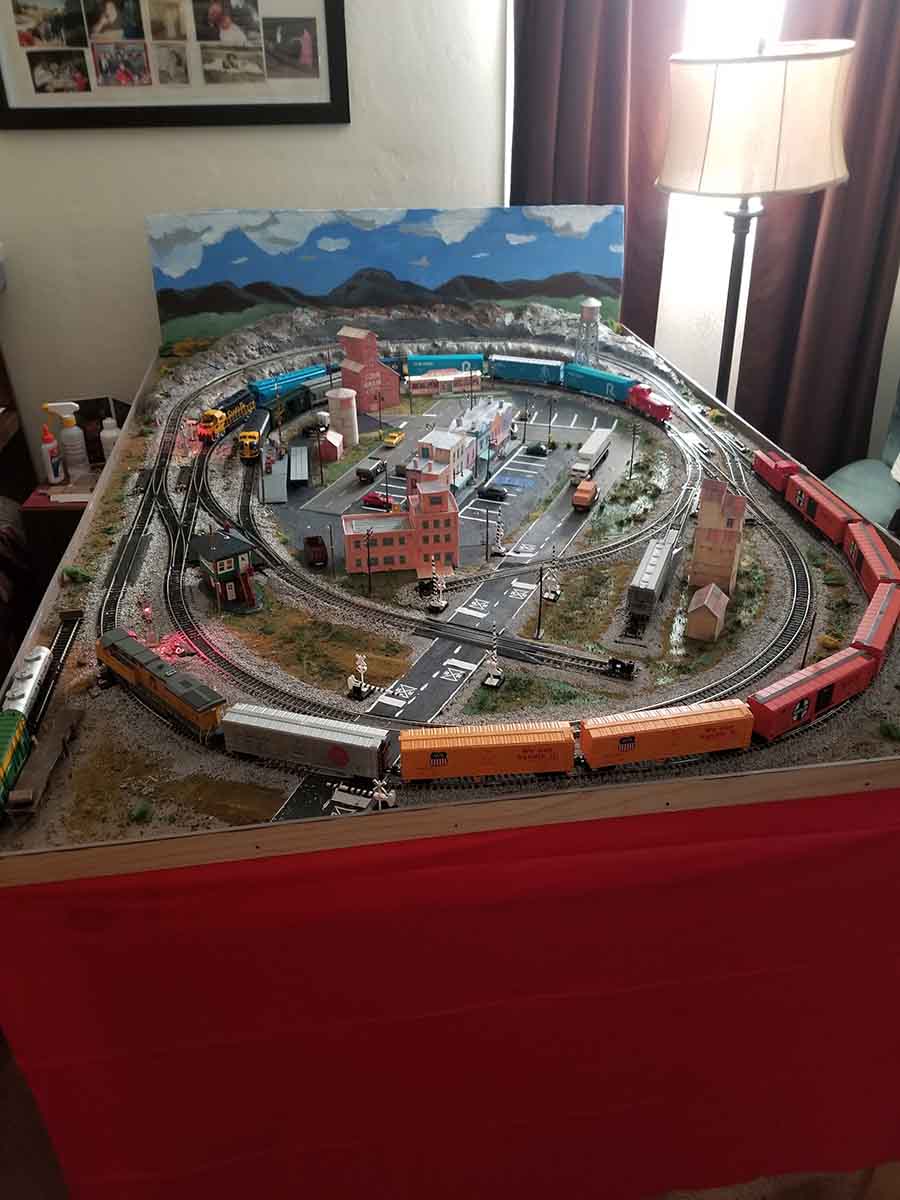
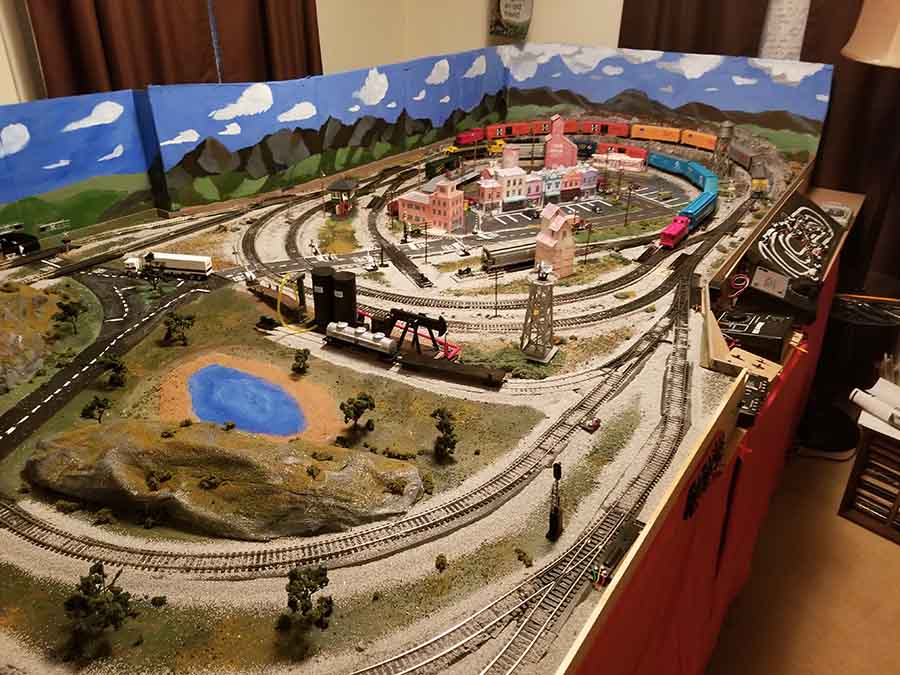
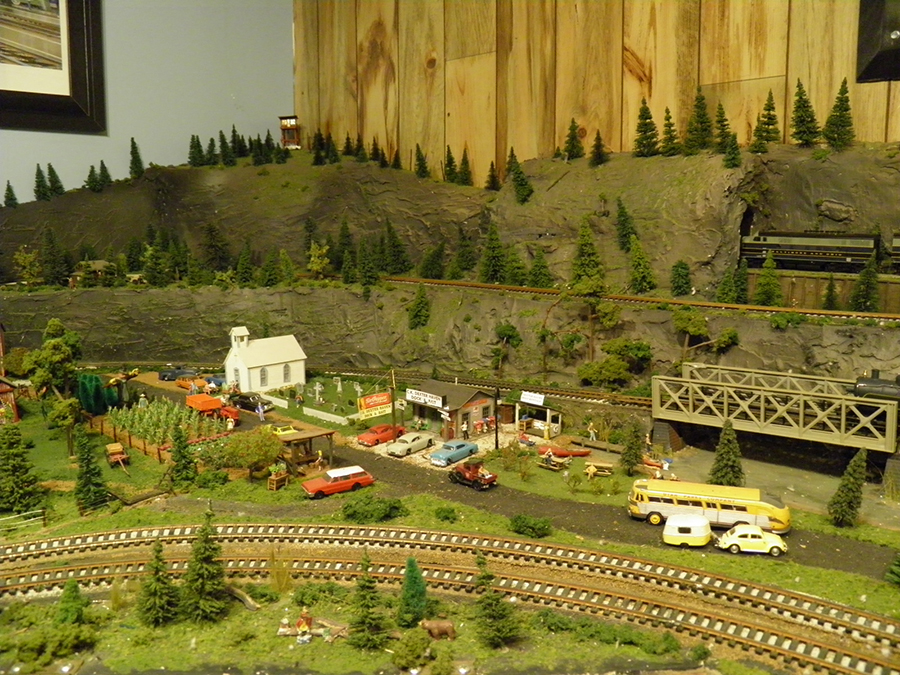
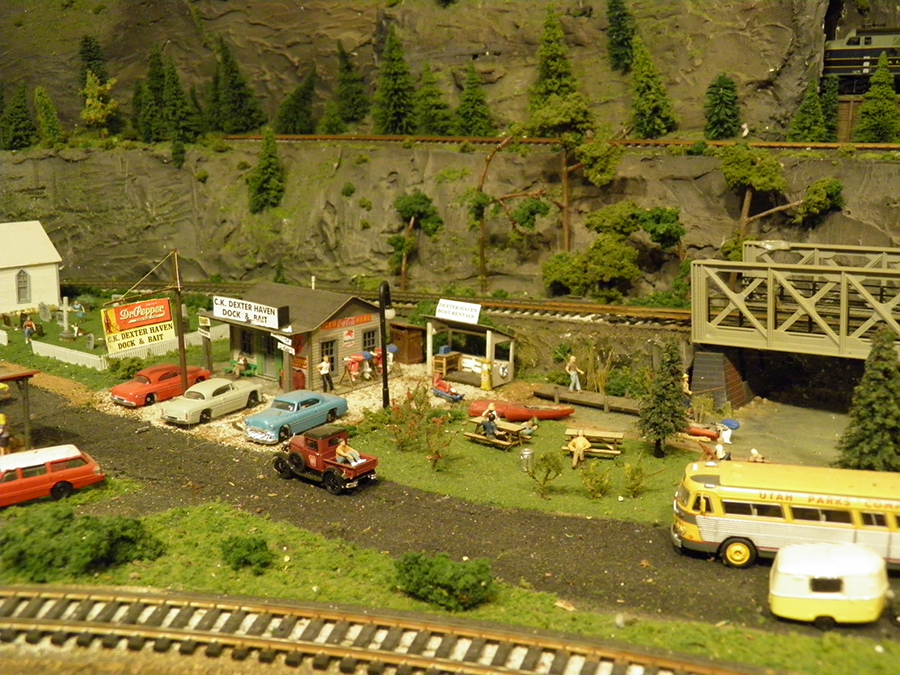
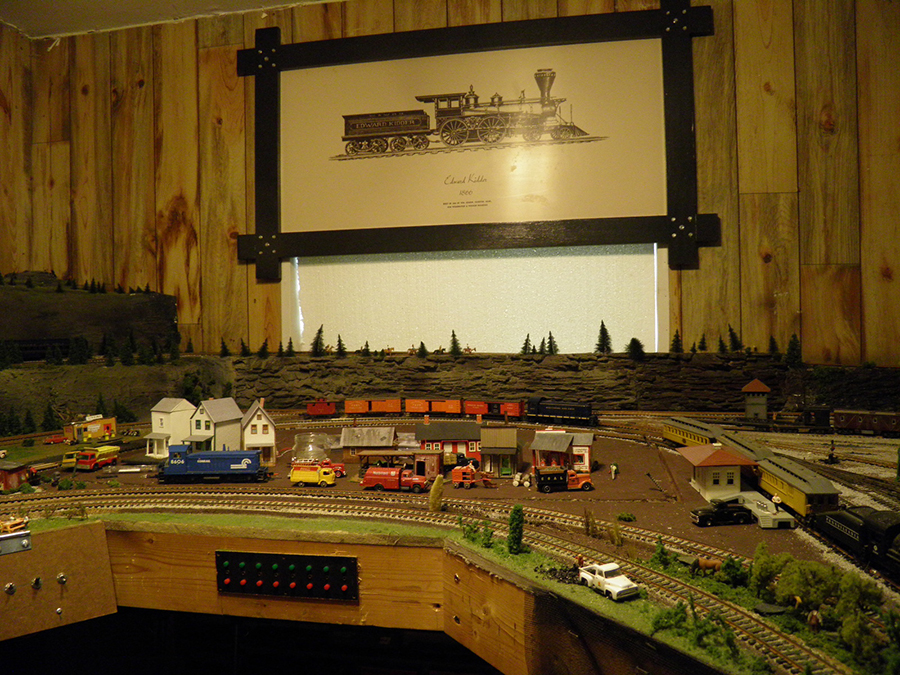
I decided to create a town center in the middle of the layout. I also build the printed factory and an Atlas switch tower. I put the store fronts in the center and started laying out the roadway. After painting the base, ballasting, and adding power poles, I freehand painted a background.
In the next phase I add another locomotive and some lighting.
I felt limited in how I could operate so I acquired another DCC locomotive, a Union Pacific GE EVO and some more cars. This allowed me to run two trains and have one loco to fiddle the hoppers and the box car.
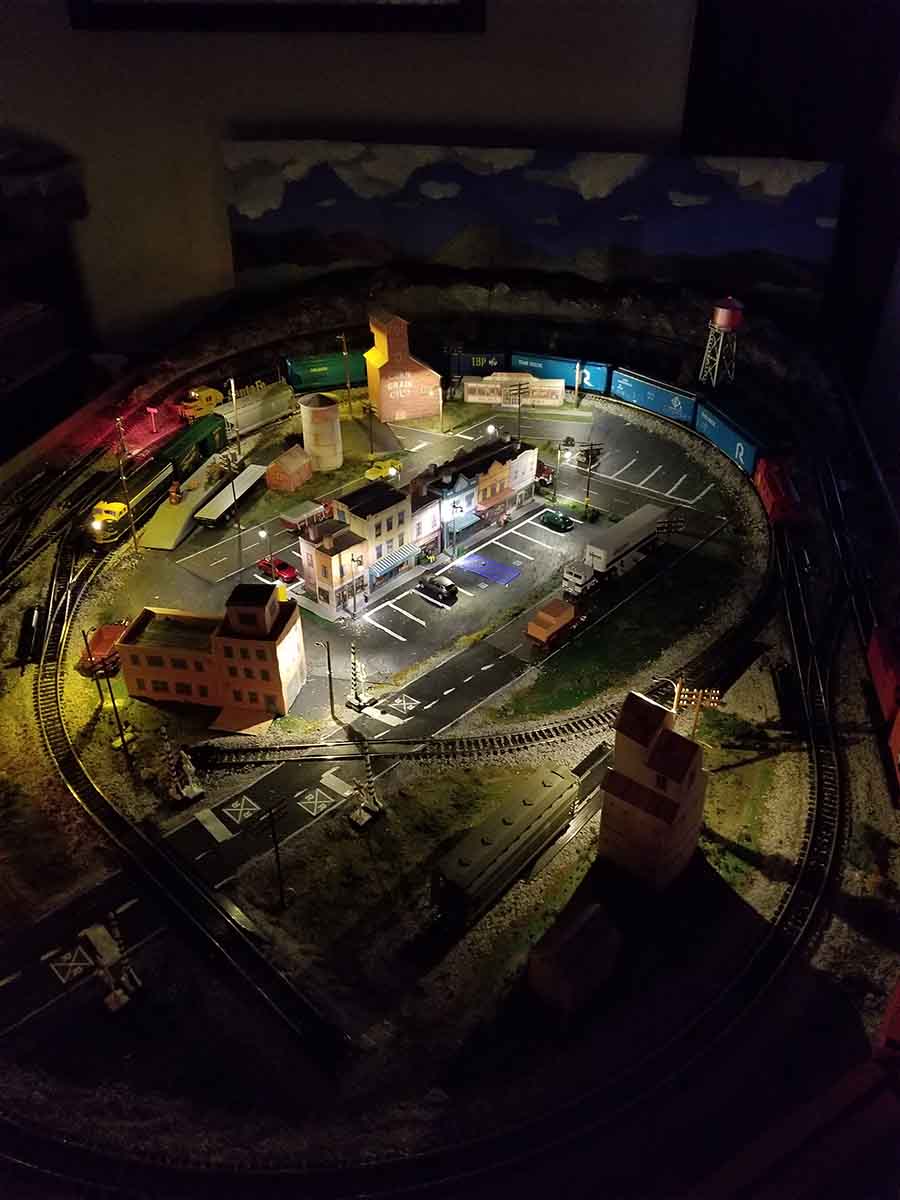
My next project was to add some lighting. So I added some Just Plug lights. I placed light with extensions at the switch tower, the two grain buildings, and the loading platform. The other light are standard height.
Continuing on my expansion, I added two sets of flashing crossing signals with two controllers. I will provide pics in the next installment. Since the grade crossings for both ovals are close I installed the flashing signals to cover both ovals at the same time. The only problem with the signaling is that the Walther’s Controllers use light sensors and they don’t work in the dark but I still am satisfied with what I had accomplished.
I enjoyed my 4×6 layout for about a month and then I guess I caught the Dangerous Dave bug and decide to expand my layout.
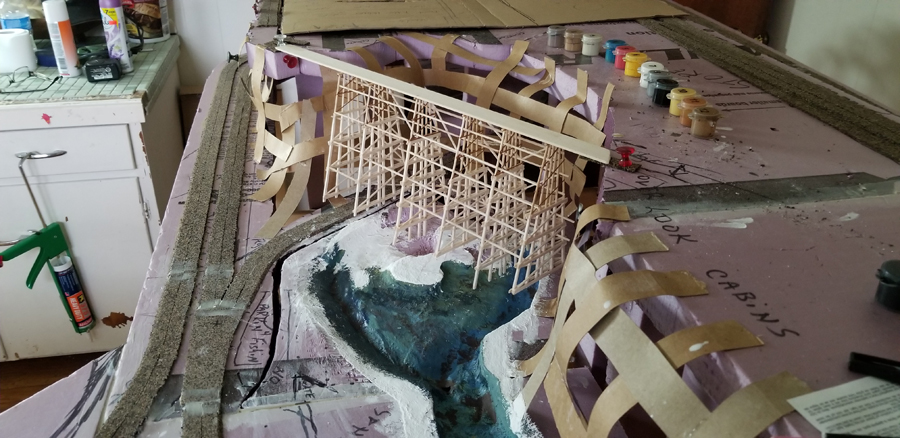
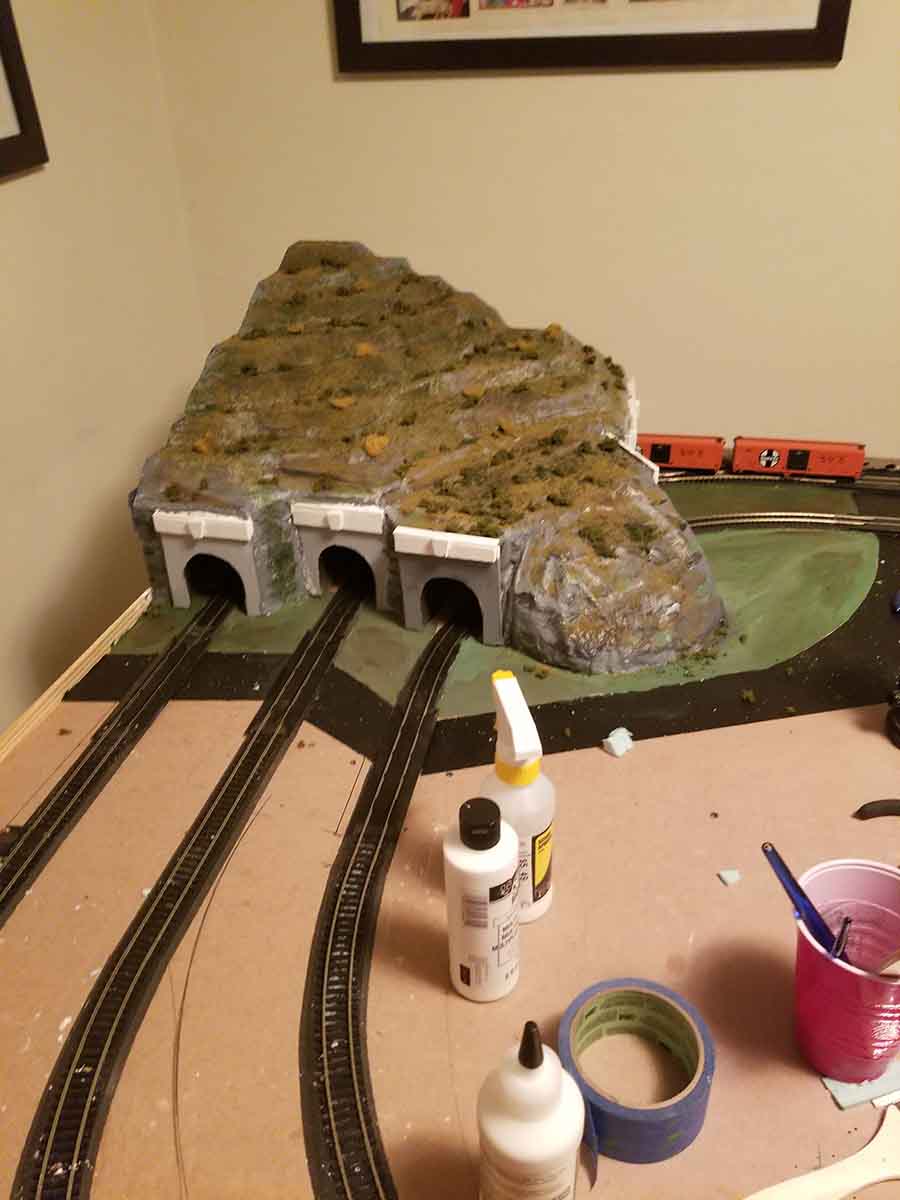
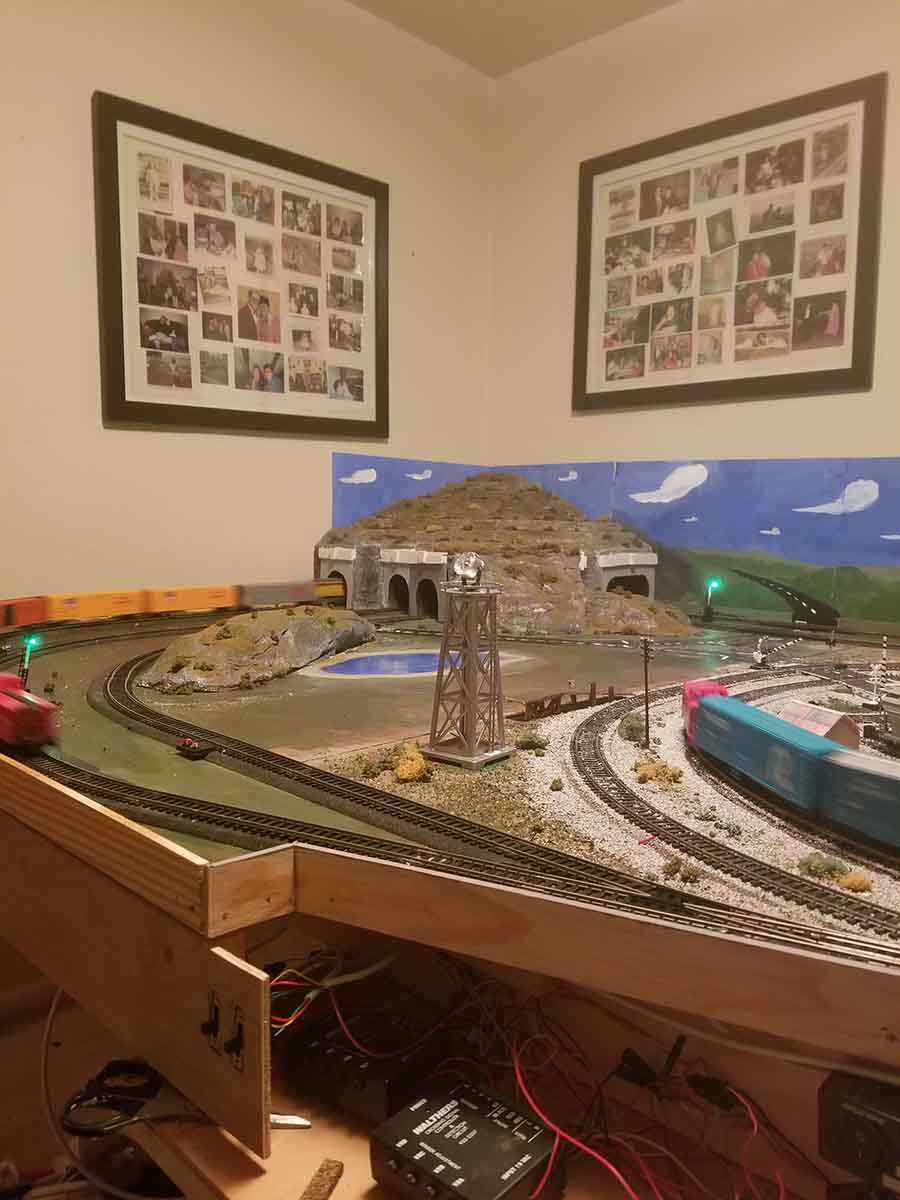
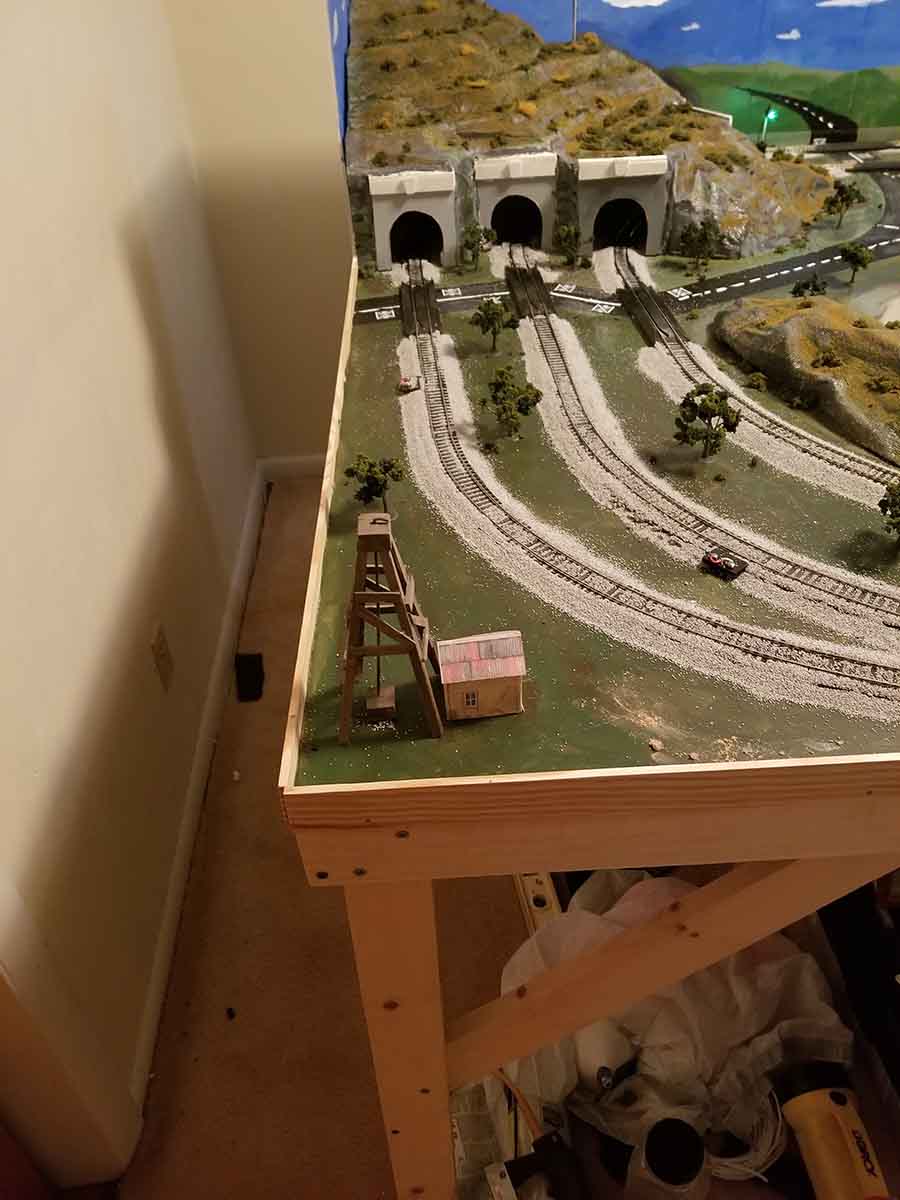
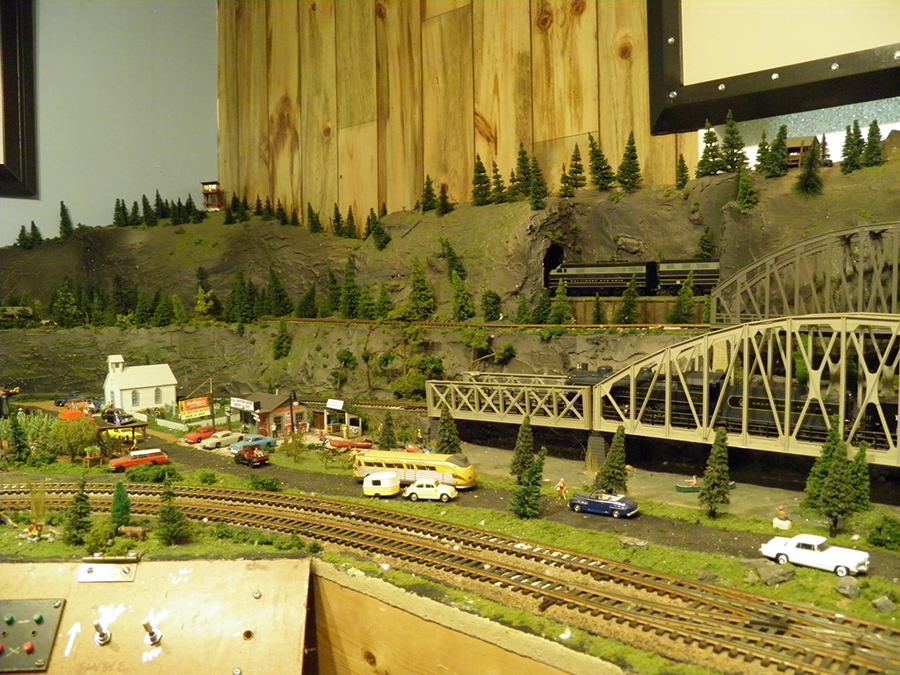
I came up with an expanded track plan and I turned the layout 90 degrees to accommodate the 4×5 addition. In addition to expanded run lengths I wanted to try my hand at tunnels. Note: the C1, C2, C3, C4 indicate controllers for the Cantilever crossing signals that will eventually be added.
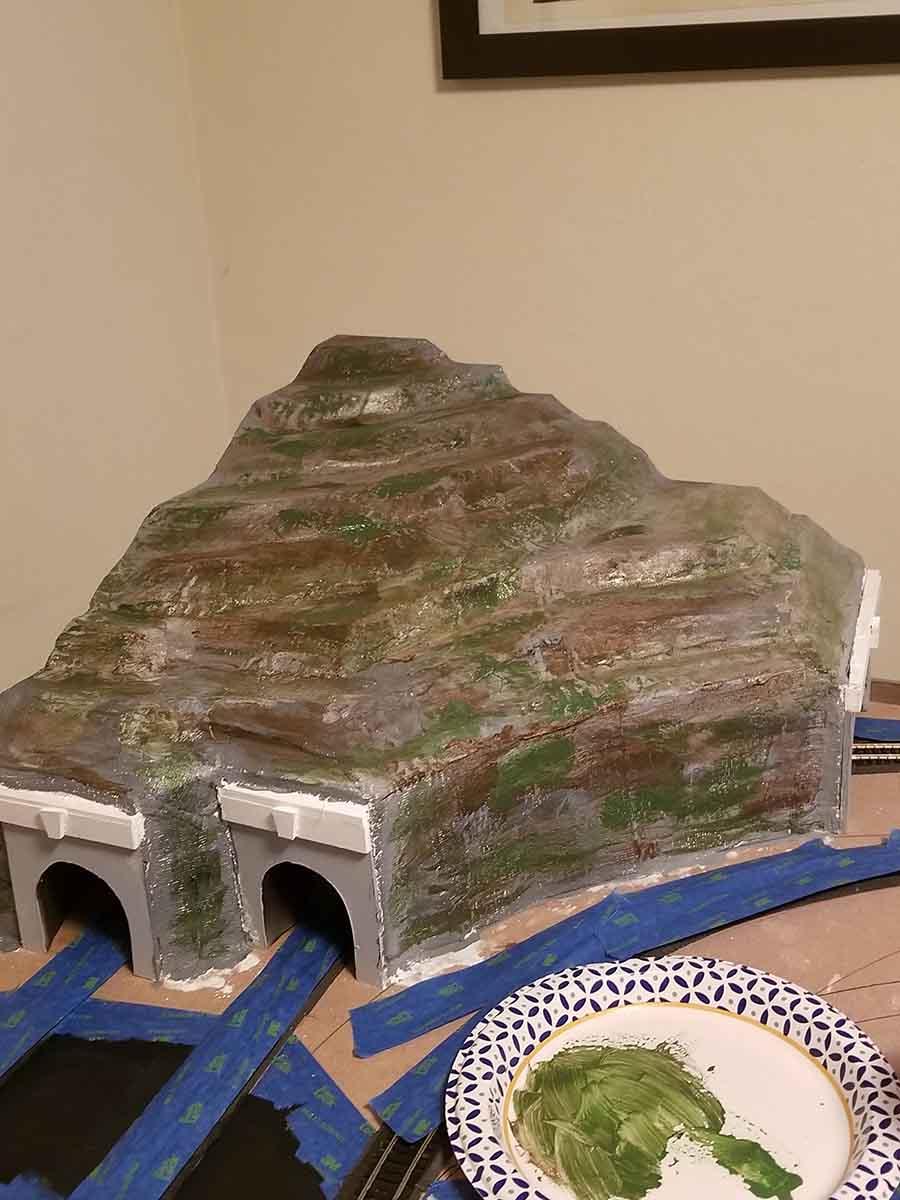
I made some portals from ¼ in plywood and used 2×2 1 in foam to created the mountain. I started with two tunnels but they just didn’t look right so I added a third tunnel. This time used plaster cloth over foam supports for the portion in front of the added tunnel.
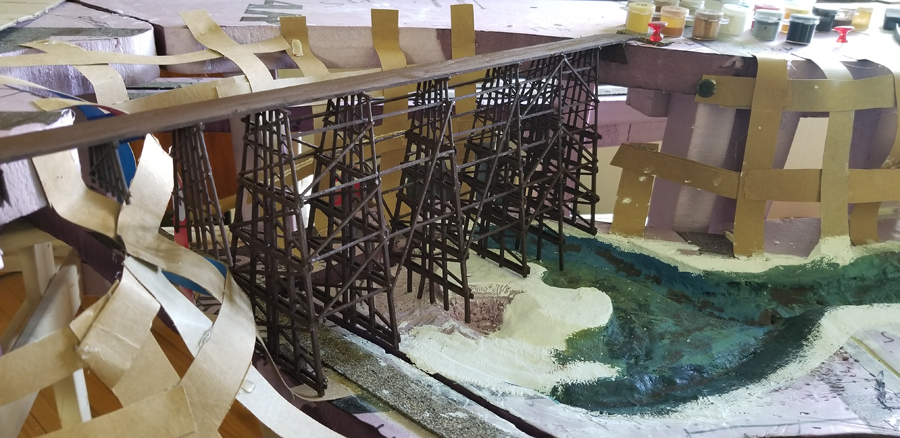
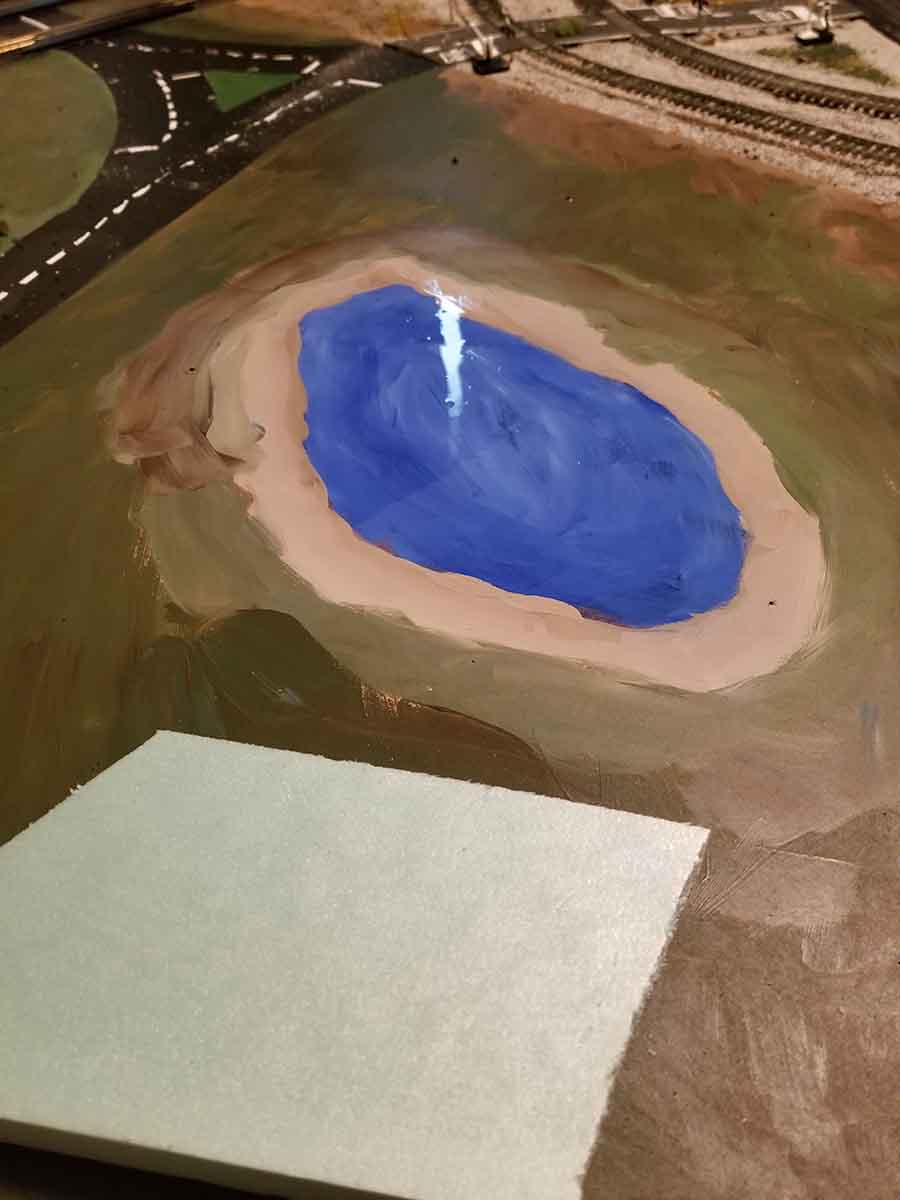
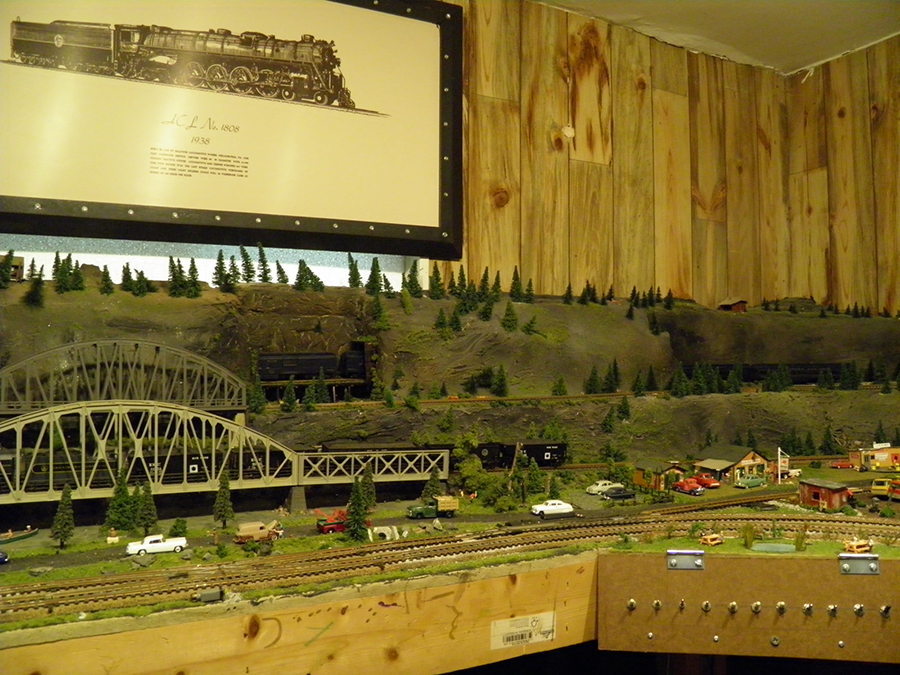
I still didn’t know what scenery I was going to add to the expansion so I decided to try a water feature. I painted the layout with shades of blues with tan around the edge and then used high gloss clear polyurethane in several coats. I am happy with the results. Because the mountain appeared to just stick out of nowhere, I decided to add an outcropping between the water and the inner track.
I still didn’t know what I would put in the rest of the expanded space on the 4×6 layout. I decided to try my hand at scratch building. In my next submission I will provide pics of my attempt at an oil well and a oil pump with storage tanks.
The crude oil well was made with stir stick, balsa, and a piece of hanger. The pump is made of balsa and some hanger wire. The storage tanks are made with empty paper rolls, 1.4 in dowels, balsa, and some fuel line tubing.
These last two pictures show the status as of now. I expanded the background and that was fun painting from behind which made me paint upside down. You will also notice one set of cantilever crossing signals where the road goes into the background. I still have to get three more controllers and eight cantilever signals to finish.
That is all for now. Not as good as a lot of what gets posted but I am happy with it and enjoy it. I hope it will convince people to start regardless of what skill they think they have or don’t have. The fun is in the doing and trying.
Thanks again for a great site.
Bob, VA USA”
A huge thanks to Bob for sharing his 4×6 layout – a wonderful narrative and great pics too.
Hope you enjoyed it as much as me. it reminded me of Jim’s: 4×6 train layout.