Lawrence has been in touch, adding to the HO scale train layouts 16 x 8. He’s been a busy man, and he has some sage advice too.
“AL
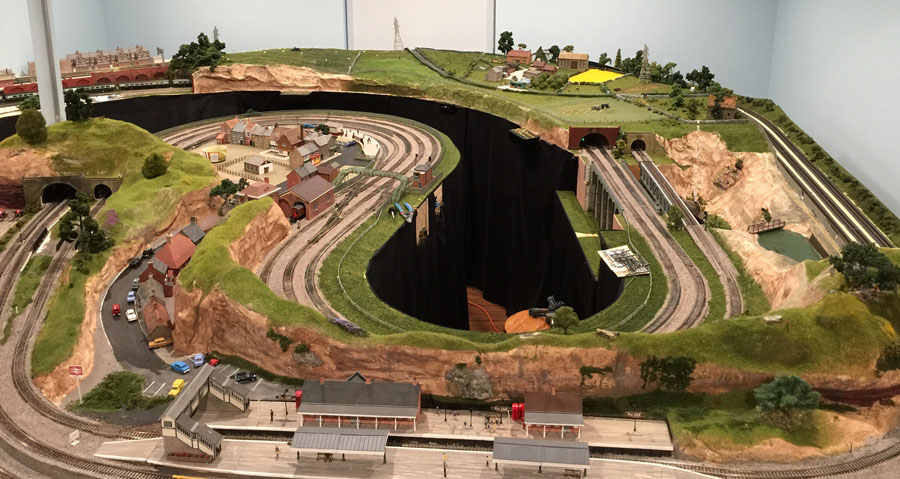
An update to my layout.
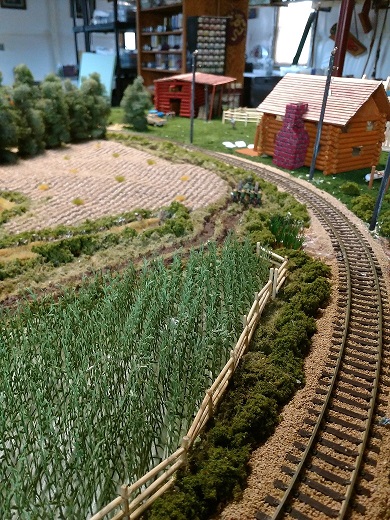
I started last summer a complete novice. And now I am paying for that lack of knowledge. I did not know to solder all the track joints. So now I am going back and soldering them, and in most cases, means repositioning the track itself a little bit.
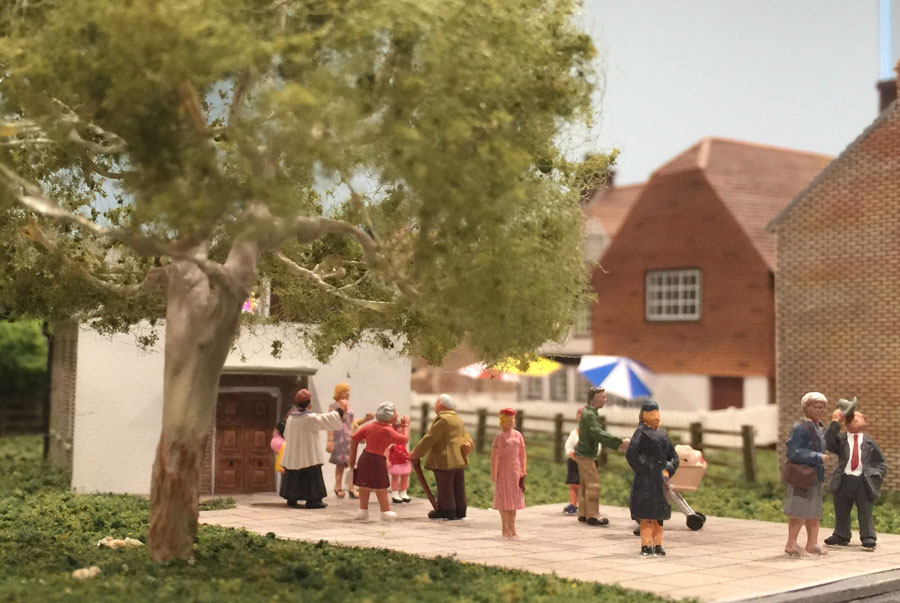
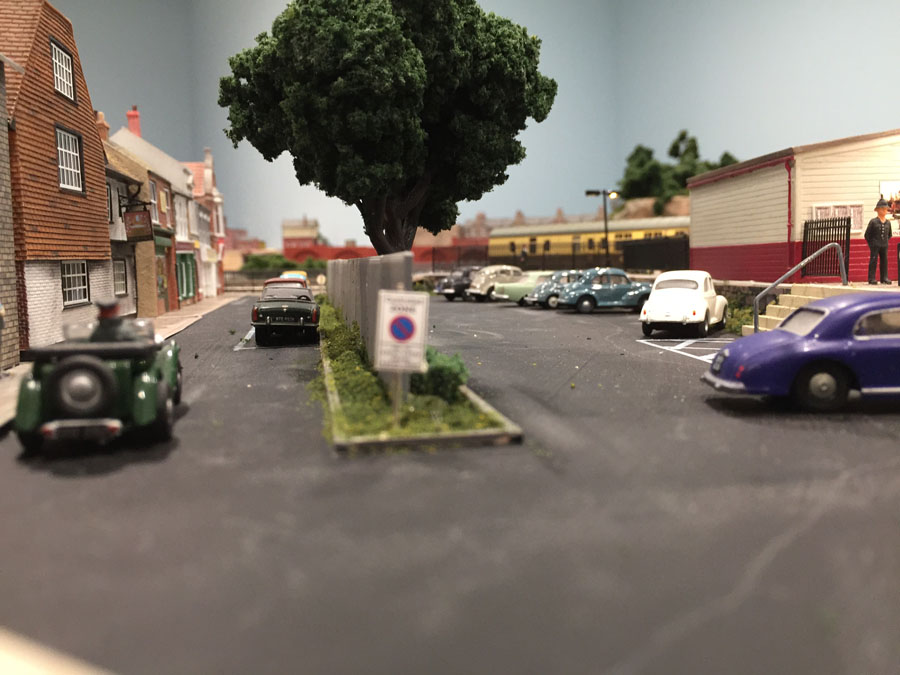
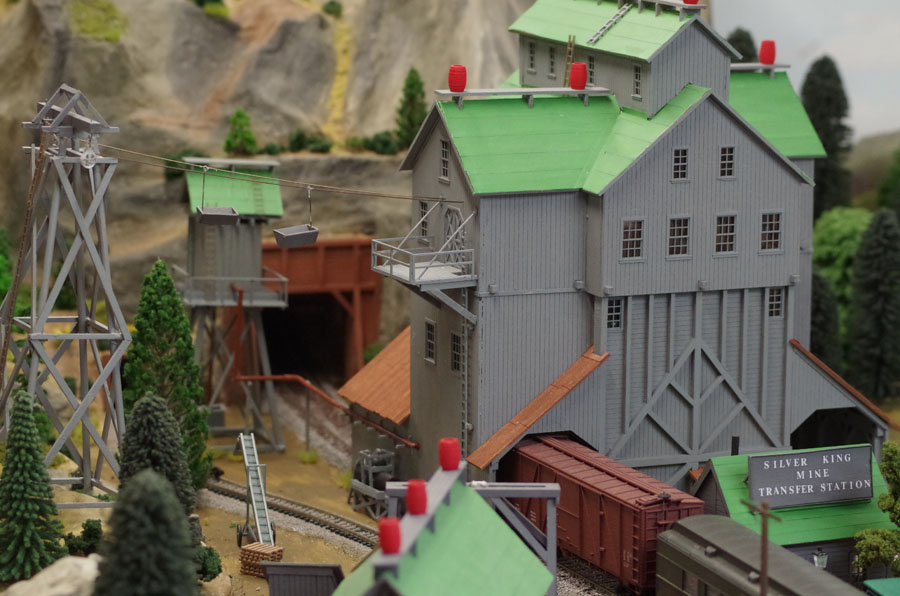
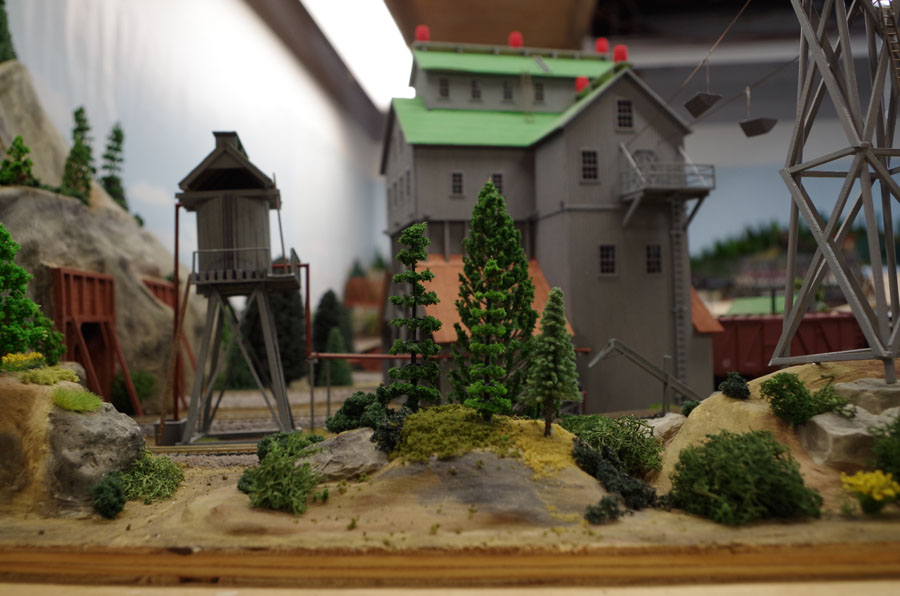
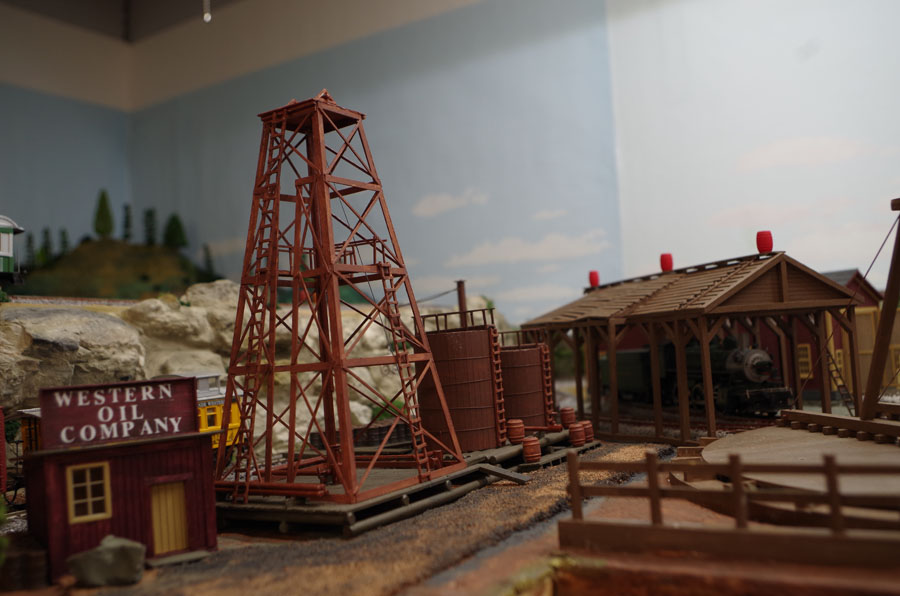
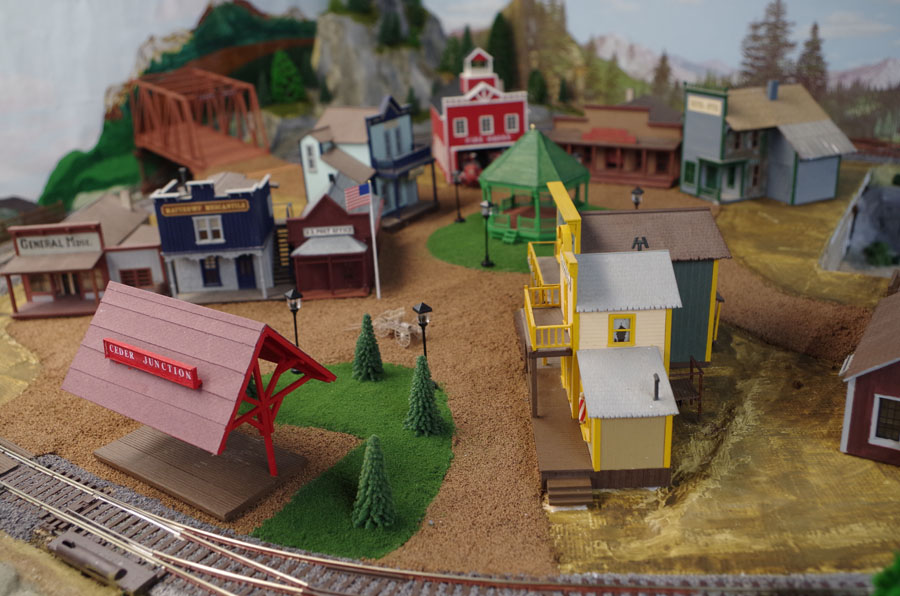
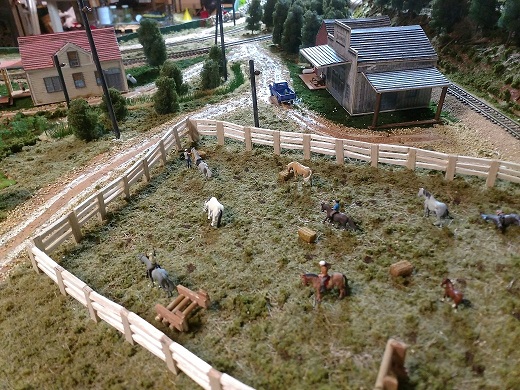
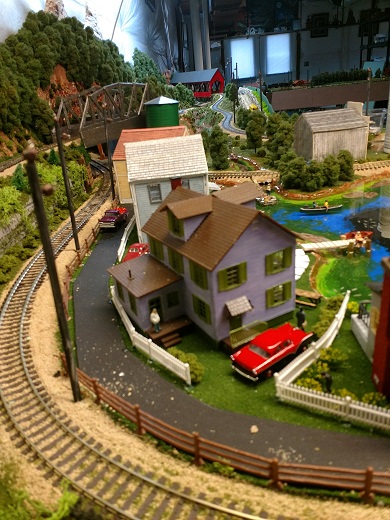
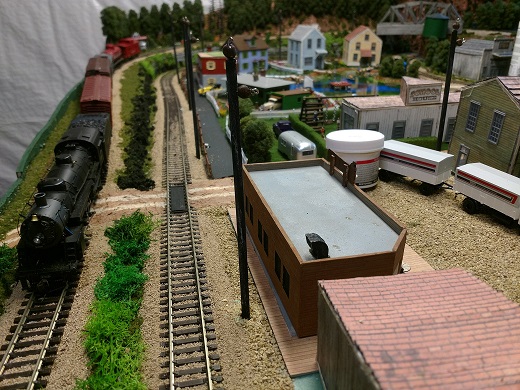
Slowly as I can afford it I am getting autos, people, and animals. I have made all the trees, about 400 of them. If a lot of the buildings look familiar, yup they are from Al’s gallery. I used 0.04 styrene sheet for all of them. Including dividing the inside of the buildings for future lighting.
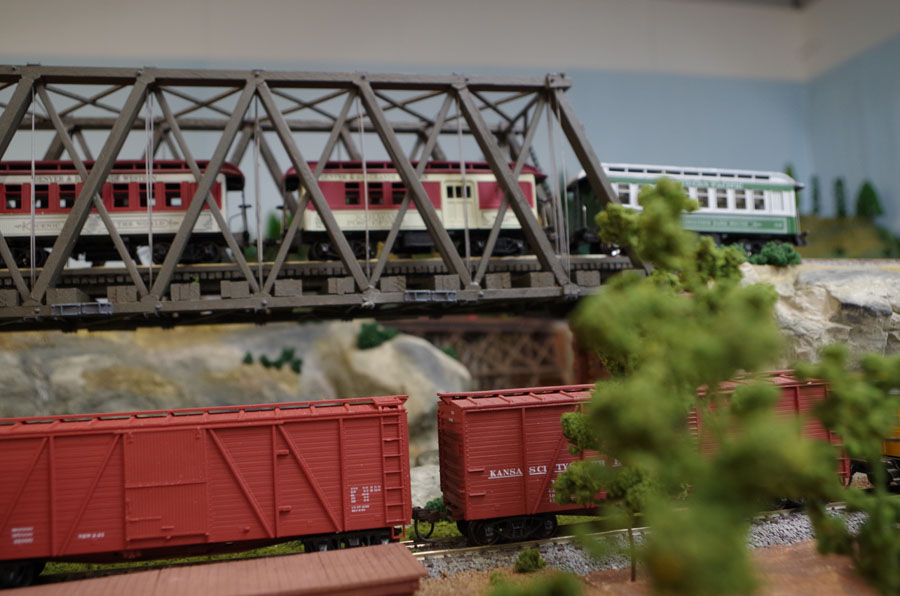
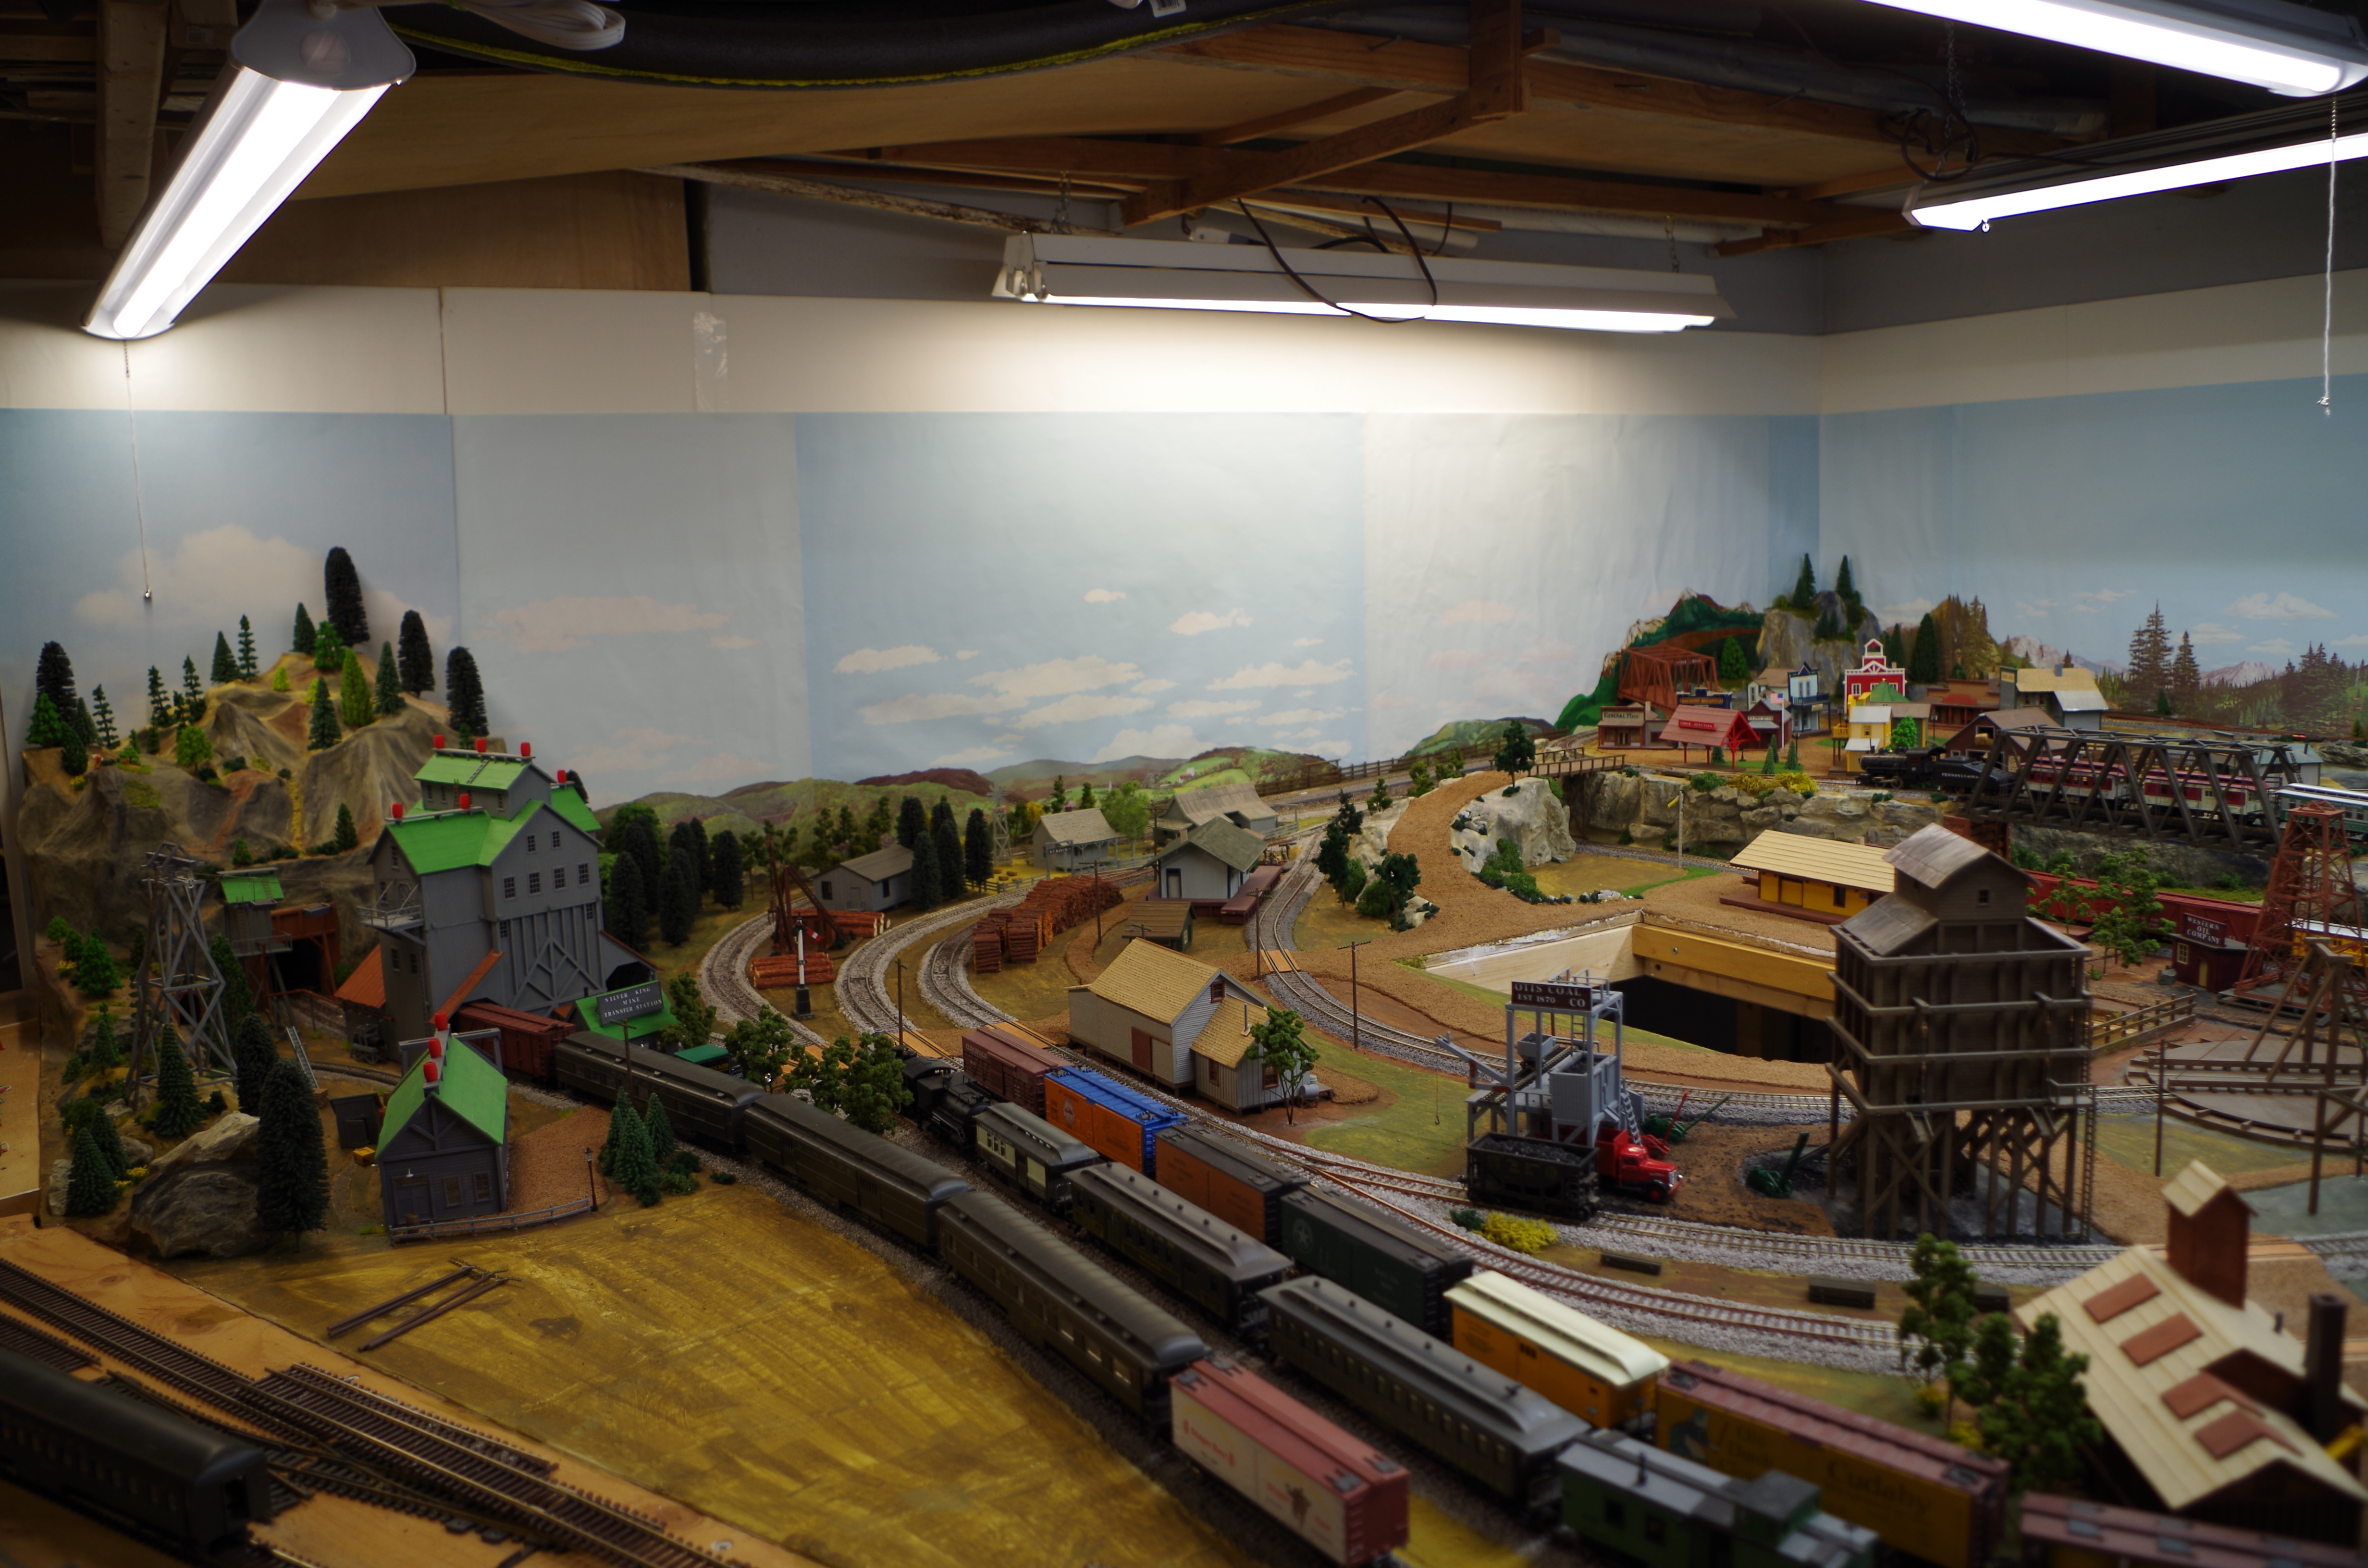
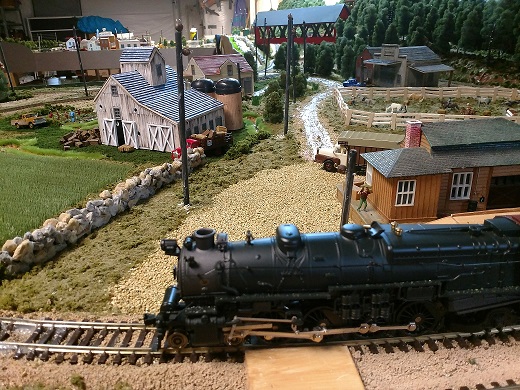
In my previous set of pictures, I had put the track down and then redid a lot of the track to work with steam engines. Well until two weeks ago I only had one steam engine. It was a passenger engine and coal car. I had both tracks working 100% both ways.
Two weeks ago, I got my second steam, freight engine and coal car. The new one is four inches longer, so guess what! Sixty percent of the curves are marginal off for the new engine. As you can see with one of the pictures I lifted one full curve and realigned it to allow my new engine to run.
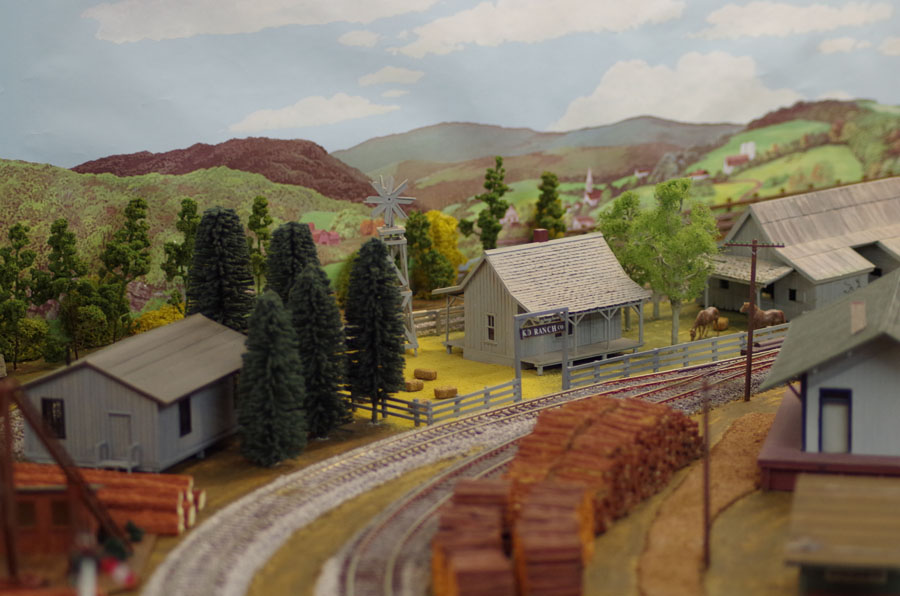
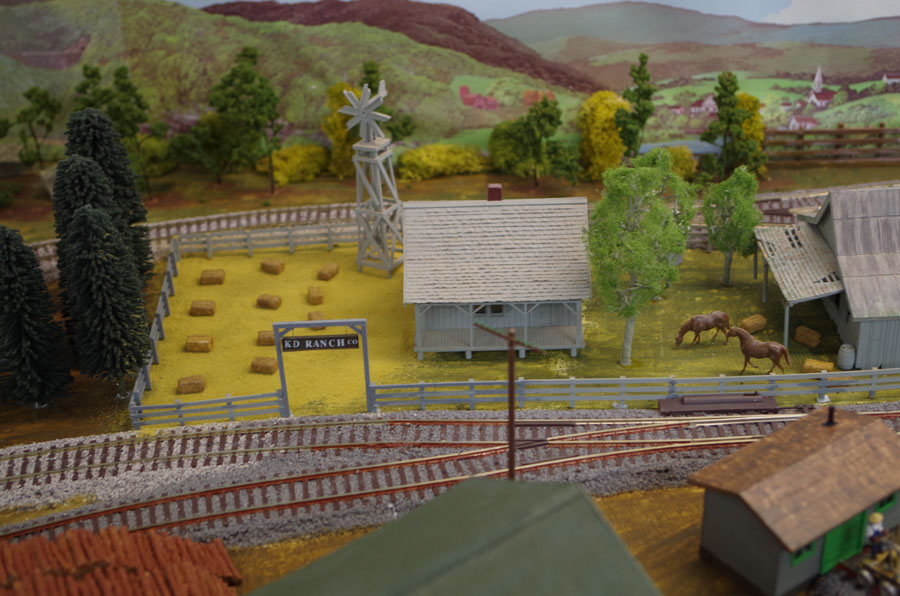
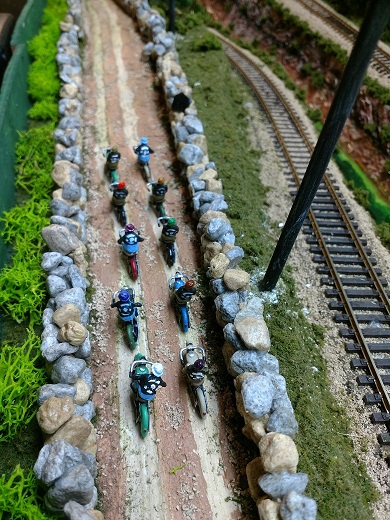
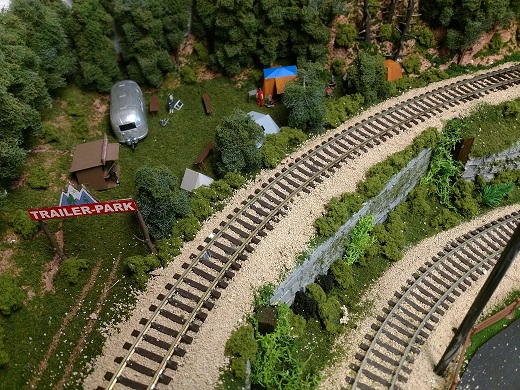
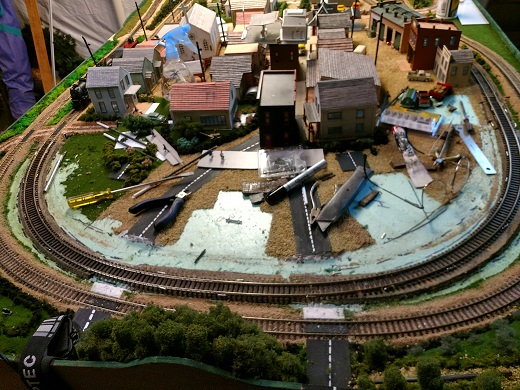
Most of the scenery is pretty much done (ya sure thing?). The farm layout has wheat, and corn fields, cattle and horse grazing. The mountain pass has a motorcycle club riding in. The group fits the time era of this layout as the are the Boozefighters MC which is the first motorcycle club established, in 1946. Have included an area for camping and hunting. Unhappy the hunters I could get only used guns as I hunt with a longbow.
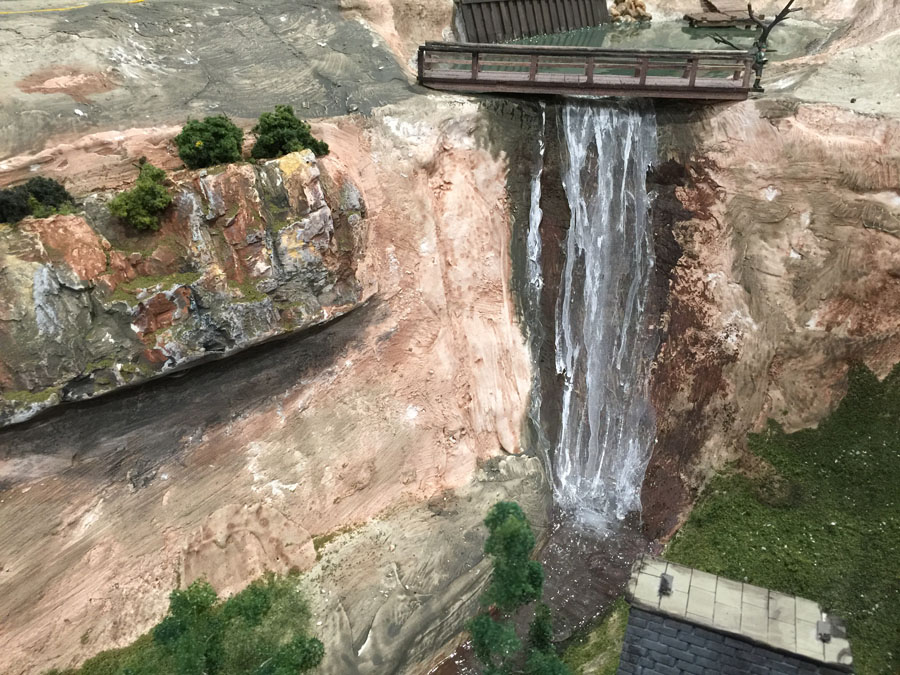
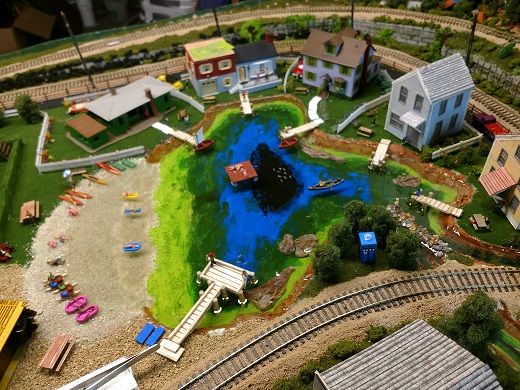
The lake is two layers of about five eight inches deep of deep water. I did it that way so I could use a trick I learned on here. After the first layer of deep water had hardened I added the rice for the fish, glued in. then added the second layer of deep water. The fish are inside the water and with the light they have a shadow on the bottom. The boat also has its shadow. And for those that watch Doctor Who you will find a Tardis.
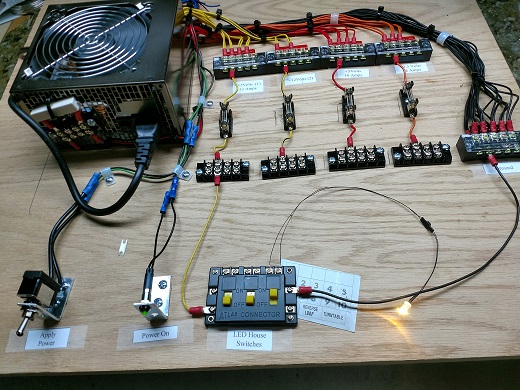
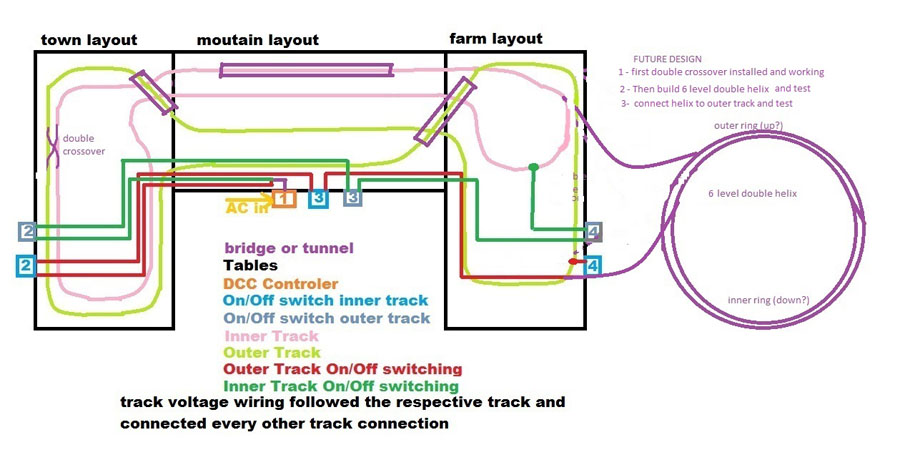
I added the basic drawing of the layout. A couple of future plans to add this coming summer. I did not add the electrical design for the lights. I have a long way to go before I get there. But the power supply has been build from a computer power supply. From left to right is 12V at 32 Amps, 12 V at 0.5 Amps, 5V at 18 Amps, 3.3 V at 18 Amps and ground. Then there is the power on switch, and power light. The three-position switch if for front of buildings, sides or back of buildings, and street lights respectively.
I learned a LOT both by doing and reading all the stuff sent out by Al. I want to thank Al and all the rest of you for passing on the great layouts and knowledge.
Lawrence”
ho scale train layouts 16 x 8:

A huge thank you to Lawrence for adding to the HO scale train layouts 16 x 8 on the site. It’s wonderful to see a layout come to life, and even better when we all get to learn from the odd mistake too.
That’s all for today folks.
Please do keep ’em coming.
And if today is the day you stop dreaming and start doing, the Beginner’s Guide is here.
Remember, Lawrence was a complete beginner – look at him now!
Best
Al
PS Latest ebay cheat sheet is here.
PPS More HO scale train layouts here if that’s your thing.

")