Another missive of model railroad tips and tricks

Here’s a simple tip from Hall of Fame member, Brian:

“Hi Al

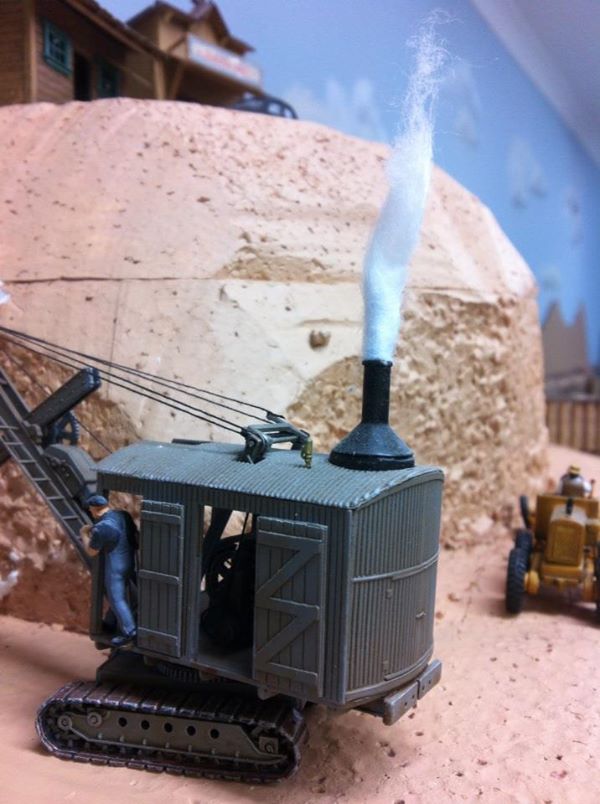
An easy way to make smoke for steam powered machinery.

I used a cotton bud. Hold the stem in one hand and with a pair of tweezers in the other, gently pulling at the cotton wool end to form a tail.

Next cut the stem to the length required and insert it in the smoke stack of your machine.

All that’s need now is to fire up my airbrush with some black paint and apply to look a bit dirty.

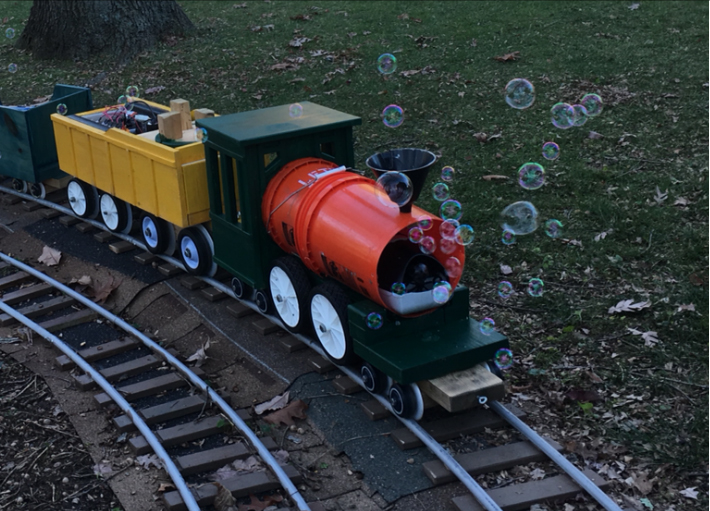
This can be done in any scale. In the photo is an HO scale Erie B-2 steam powered shovel (a Jordan Highway miniatures kit) busy removing earth from a collapsed tunnel.

IMG_3877

Thought that I would send this video to you of an arc welding module that I use in quite a few industrial buildings on my layout including my two stall engine house that you posted.

This one is in a small repair shop (woodland scenics) where the guy is welding a part on the floor next to the workbench.

I model in HO scale – narrow gauge – HOn3 as I get quite a few requests as to what scale is it.

All the best

Brian”


And, here’s more from another Hall of fame, member – Dangerous Dave:


That’s all for today, folks. Please do keep ’em coming – I enjoy them as much as you!

Don’t forget the Beginner’s Guide if you’re still sitting on the fence about whether to get started or not.

Best

Al

PS Latest ebay cheat sheet is here. Lots of engines around at the mo, have a look.

N gauge code 80 track layout

Mike’s been in touch with his N gauge code 80 track layout:

“Mikes place is anywhere you want it to be. I am using a 6ft by 10ft table top board. I am starting my last set. I am now 70 and this is it. I haven’t done any scenery yet just layed the track. I use code N gauge code 80 track and have double slip switches from Kato industries.

I have found that they will go well with the code 80 rails with a little riser on the code 80 side of the rail. I am also using Tomy Tec 22inch bridges. You can see the river and some of the rocks in the river area.

As you can see it is a “major” work in progress will all of the parts still laying around.

This is only two tracks running with two more starting with the inclines. (the long white things in backround).The bridges are a tommy tec units and are 22 inches long. Real long for N gage. I wanted a large area for the river and falls. I hope you can see the falls in the background.

The tomy tec bridges are made only in Japan. All of the info on the box is only in japanese, and since I only read and speak US English I have no Idea what kind of info might be available.

The picture shows the end of the bridges and to use them with atlas code 80 rail you have to cut them off.

I also had to trim off the base of both ends because they are so tall and cant put that many shims under the track.

The track on the bridge works well with N gauge code 80 track.

You can find this item on the walthers web site under bridges, N gauge.

It comes in two colors, red and blue. I have painted the bridges a lite steel color and let the red show through in parts to make it look like its is rusted.

Hope you enjoy this start of Mikes Place N gage rail road.

As I said I am not even close to start the scenery yet. I am not a Pro at this but I do the best I can. Hope you find this interesting.

thx

Mike”

N gauge code 80 track layout

N gauge code 80 track layout

N gauge code 80 track layout


N gauge code 80 track layout

N scale model train

n scale model train

n scale model train


“Hi Alistair

Well I’ve started to do my scenery this is part of the work yard and coal yard more to follow as I complete it, I’ve used sand and Earth to make the track which will go around toward the station.

The pine trees are twisted wire and hemp from hemp rope and then shaped and painted cost per tree 0.10p, the layout is not of any specific place or site it my own design.

Thank you

Andrew”

model train

model train

Do you know what I love about these two layouts? It shows in spades two really important points, that the Hall of Fame members are always saying:

Firstly – just start. It’s that simple – but so many shy away from taking the very first step.

And secondly, don’t worry about what your layout looks like when it’s being built. A God awful mess is absolutely fine – that’s pretty much how they all take shape…

A big thanks to Andrew and Mike for sharing. If they’ve got you chomping at the bit to start, don’t forget the Beginner’s Guide is here.

That’s all this time folks. Please do keep ’em coming.

Best

Al

PS More HO scale train layouts here if that’s your thing.


Need buildings for your layout? Have a look at the Silly Discount bundle.

Ride on train with track: Larry’s

Larry sent this in and I just had to post. He’s made his own ride on train with track for a shoe string budget. Genius!

“The key to the ride on railroad I constructed is using pvc track.

It is inexpensive, and easy to assemble.

I used 8 inch spacing between rails, and 6 inch spacing between wooden ties.

ride on train with track

PVC track component and total costs

Electrical gray ½ inch pvc pipe 10 foot= $1.60
1 by 2 by 8 pressure treated wood x 8 feet=$2
misc: screws, pipe glue, ¾ inch pvc track tie

Cost per 10 foot of track (7.5 inch wide rail spacing on 1 foot long ties spaced every 6 inches)=$8.20 plus cost of misc or no more than $10 per 10 feet

PVC track is 1/10th the cost of steel track, and easy to assemble and make curves.

ride on train track

The track is assembled by screwing through the underside of the ties into the pvc using screws long enough to catch 1 side wall of the pvc pipe (3/4 inch long, but depends on thickness of your ties).

Assemble by predrilling 4 through holes at 8 inch spacing in each tie, then use a jig to hold rails in place with proper spacing upside down. Then, screw in to secure.

pvc track

Another method is to router a groove at the 8 inch rail spacing distance, and then simply assemble the track without need for the jig.

Two screws per tie are sufficient, instead of 4, to hold the track together.

ride on pvc track

The last step is to fill the track with play sand to make it more rigid. It can support my weight (200 lbs).

The drive systems for the crank car and engine are shown in the photos below.

I cut down a 16 inch kids bike to make the crank.

I used tricycle gear conversion sprocket on the axel.

crank for ride on train

Wheels are made using lawnmover replacement wheels, with a circle of polypropylene to create the flang, all screwed together with a 4 inch zinc pulley wheel which can set screw onto a ½ inch steel axel.

The pulley serves as a wheel hub, and driver for the second axel. The primary axel is 25 chain driven by the scooter motor (35 or 50 watts).

ride on train wheels

If you want more details on my ride on train with track construction, please let me know.

Larry”

Ride on train with track:


I can’t thank Larry enough for sharing his ride on train and track ‘how to’.

I read his ‘how to’ and watched his vids, and found myself thinking, “That’s my summer project!”

Well, we’ll see.

Anyhow, hope you enjoyed it as much as me.

Have a look at John’s ‘minimal gauge‘ post to – it’s a monster project.

That’s it for today peeps.

Please do keep ’em coming.

And if today is the day you get started on your layout, the Beginner’s Guide is here.

Best

Al

PS Latest ebay cheat sheet is here.